Indulge in the Ultimate Brown Butter Cookie Dough Cake: A Layered Masterpiece
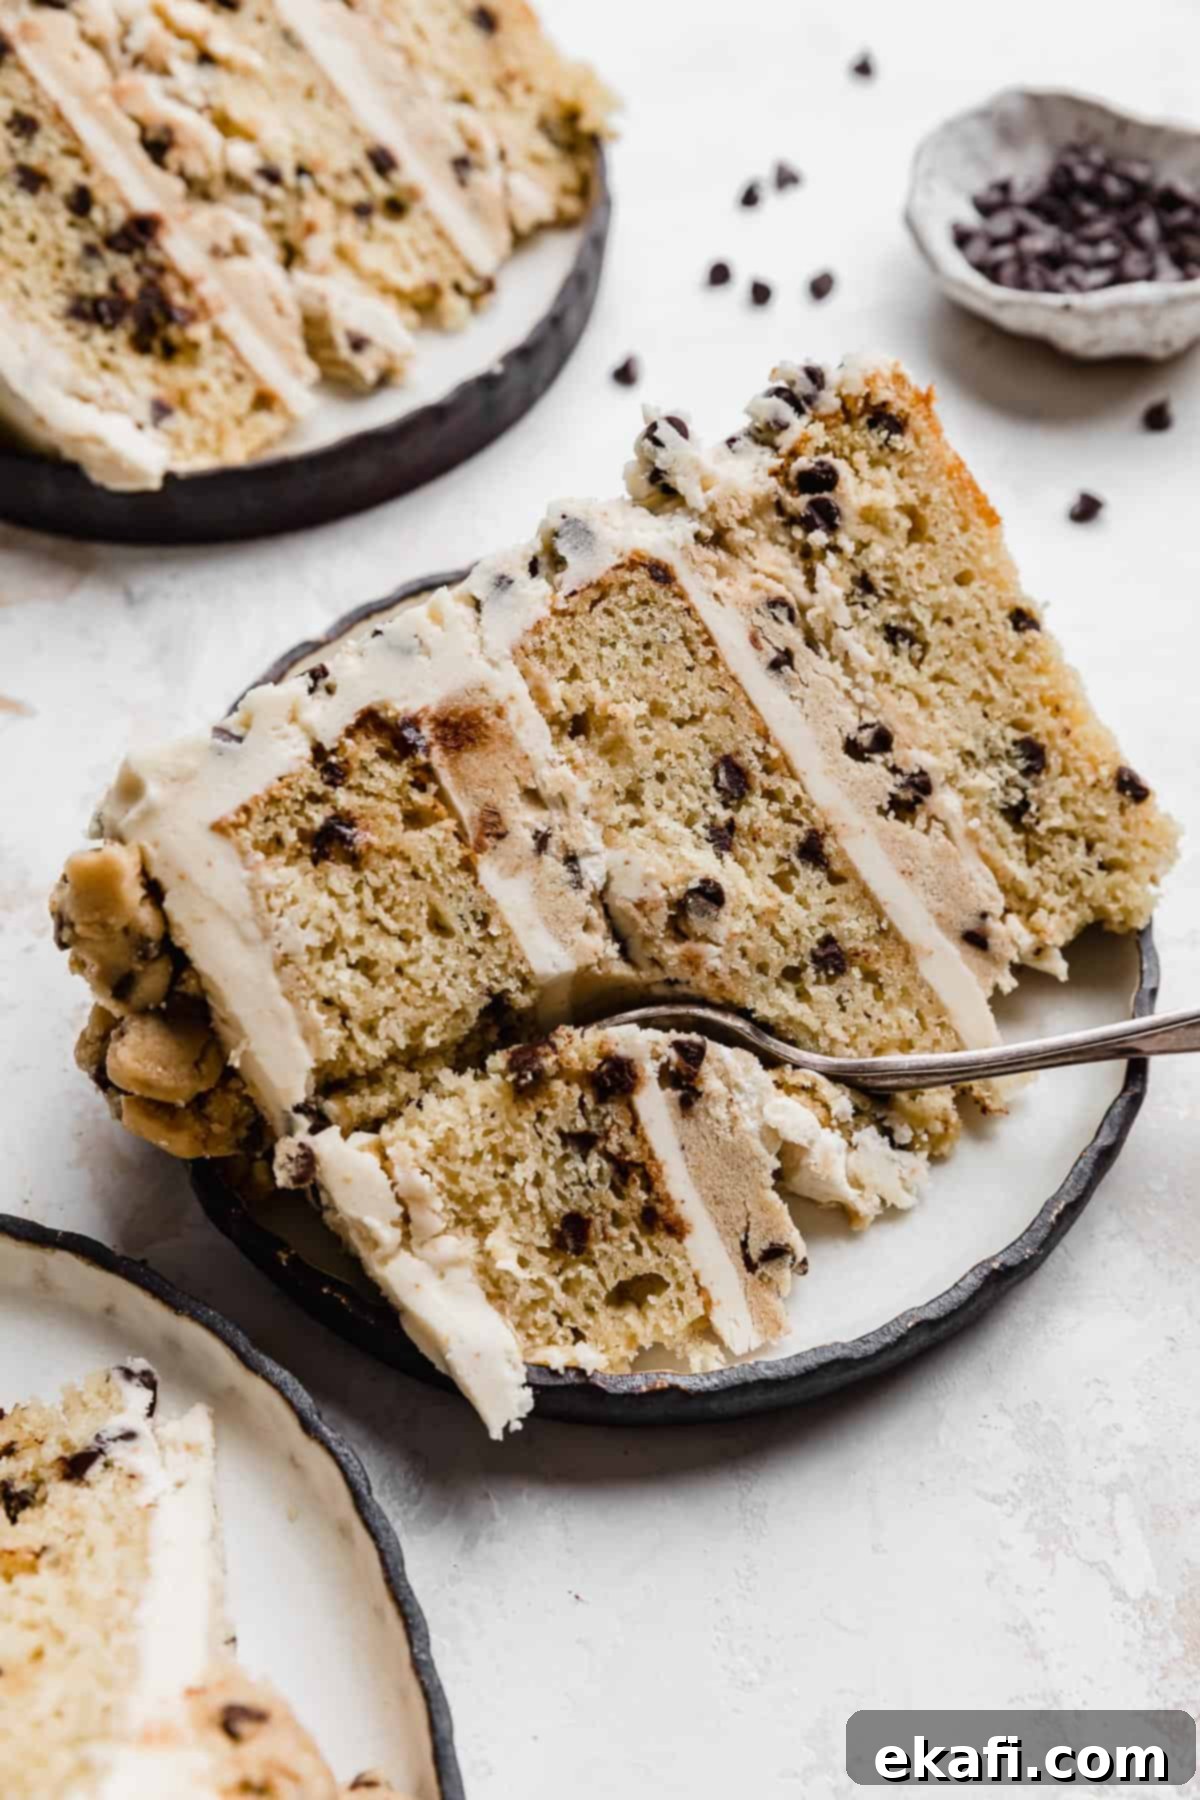
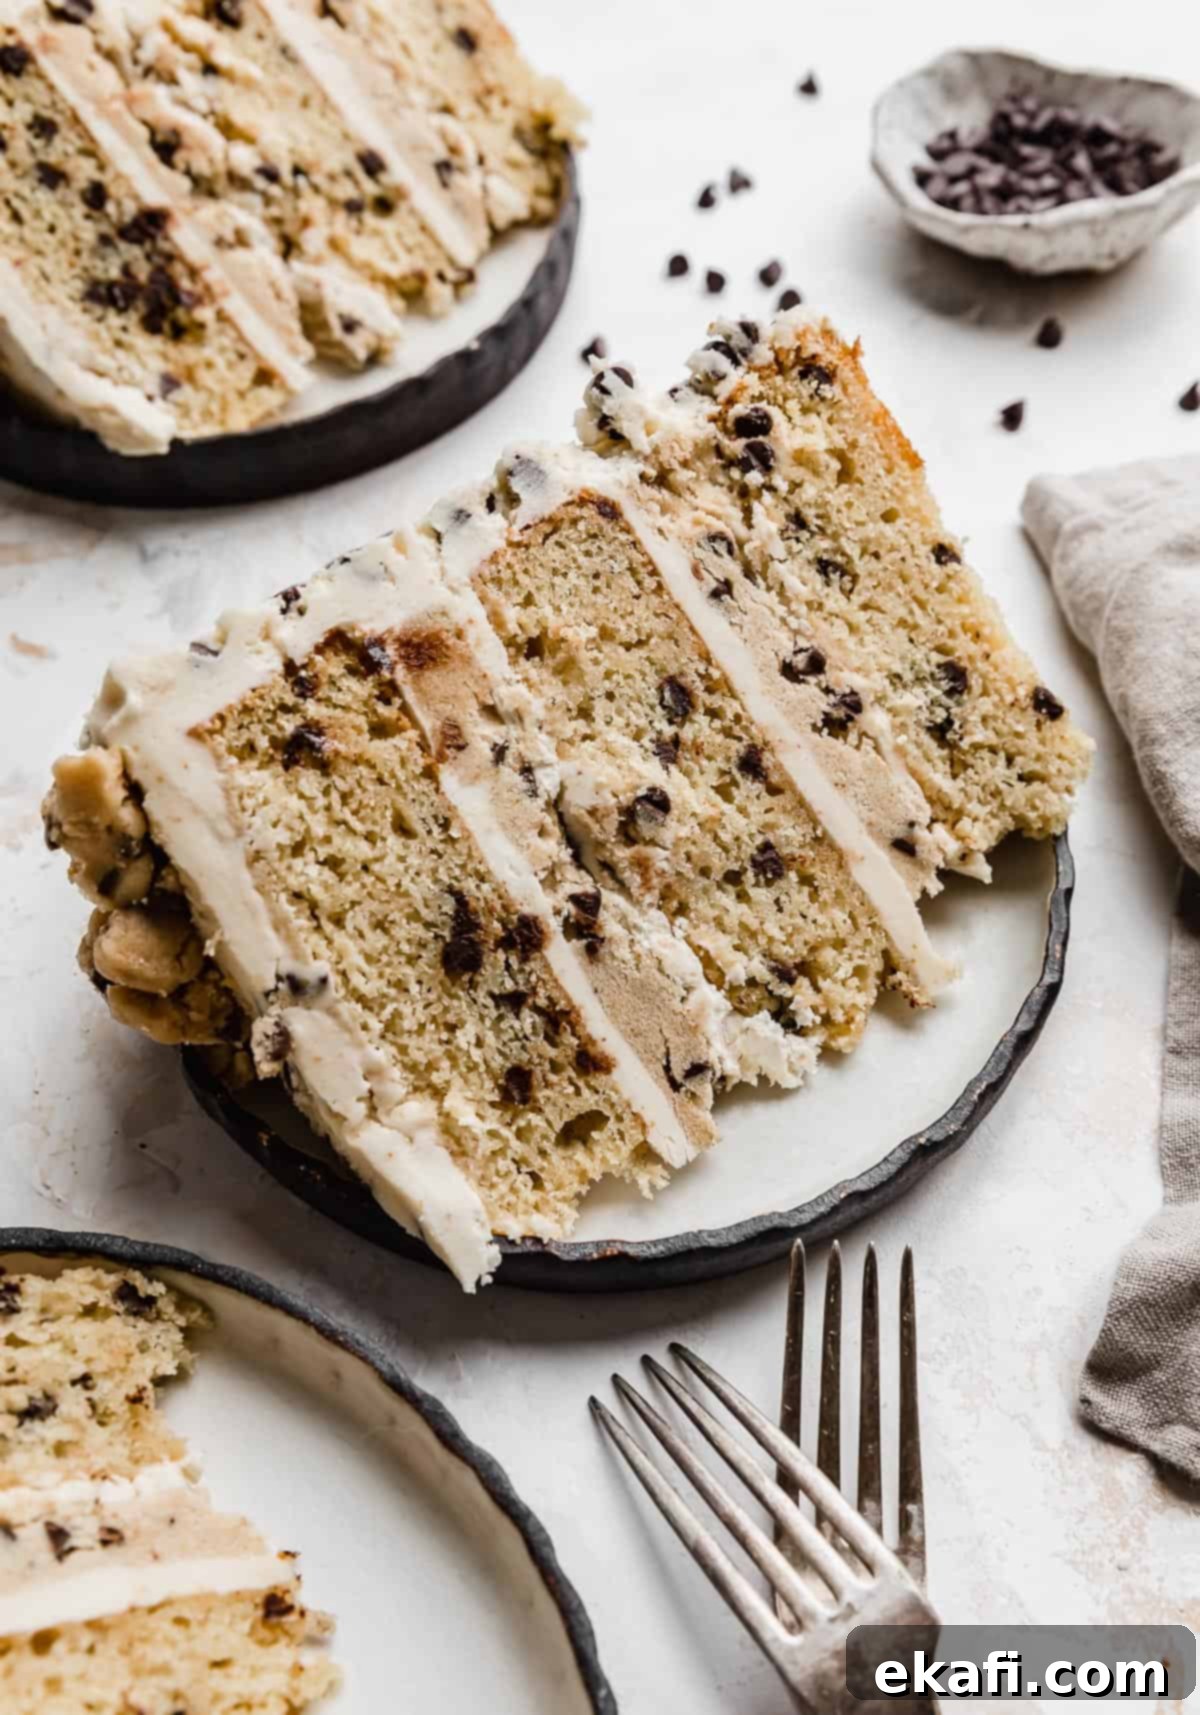
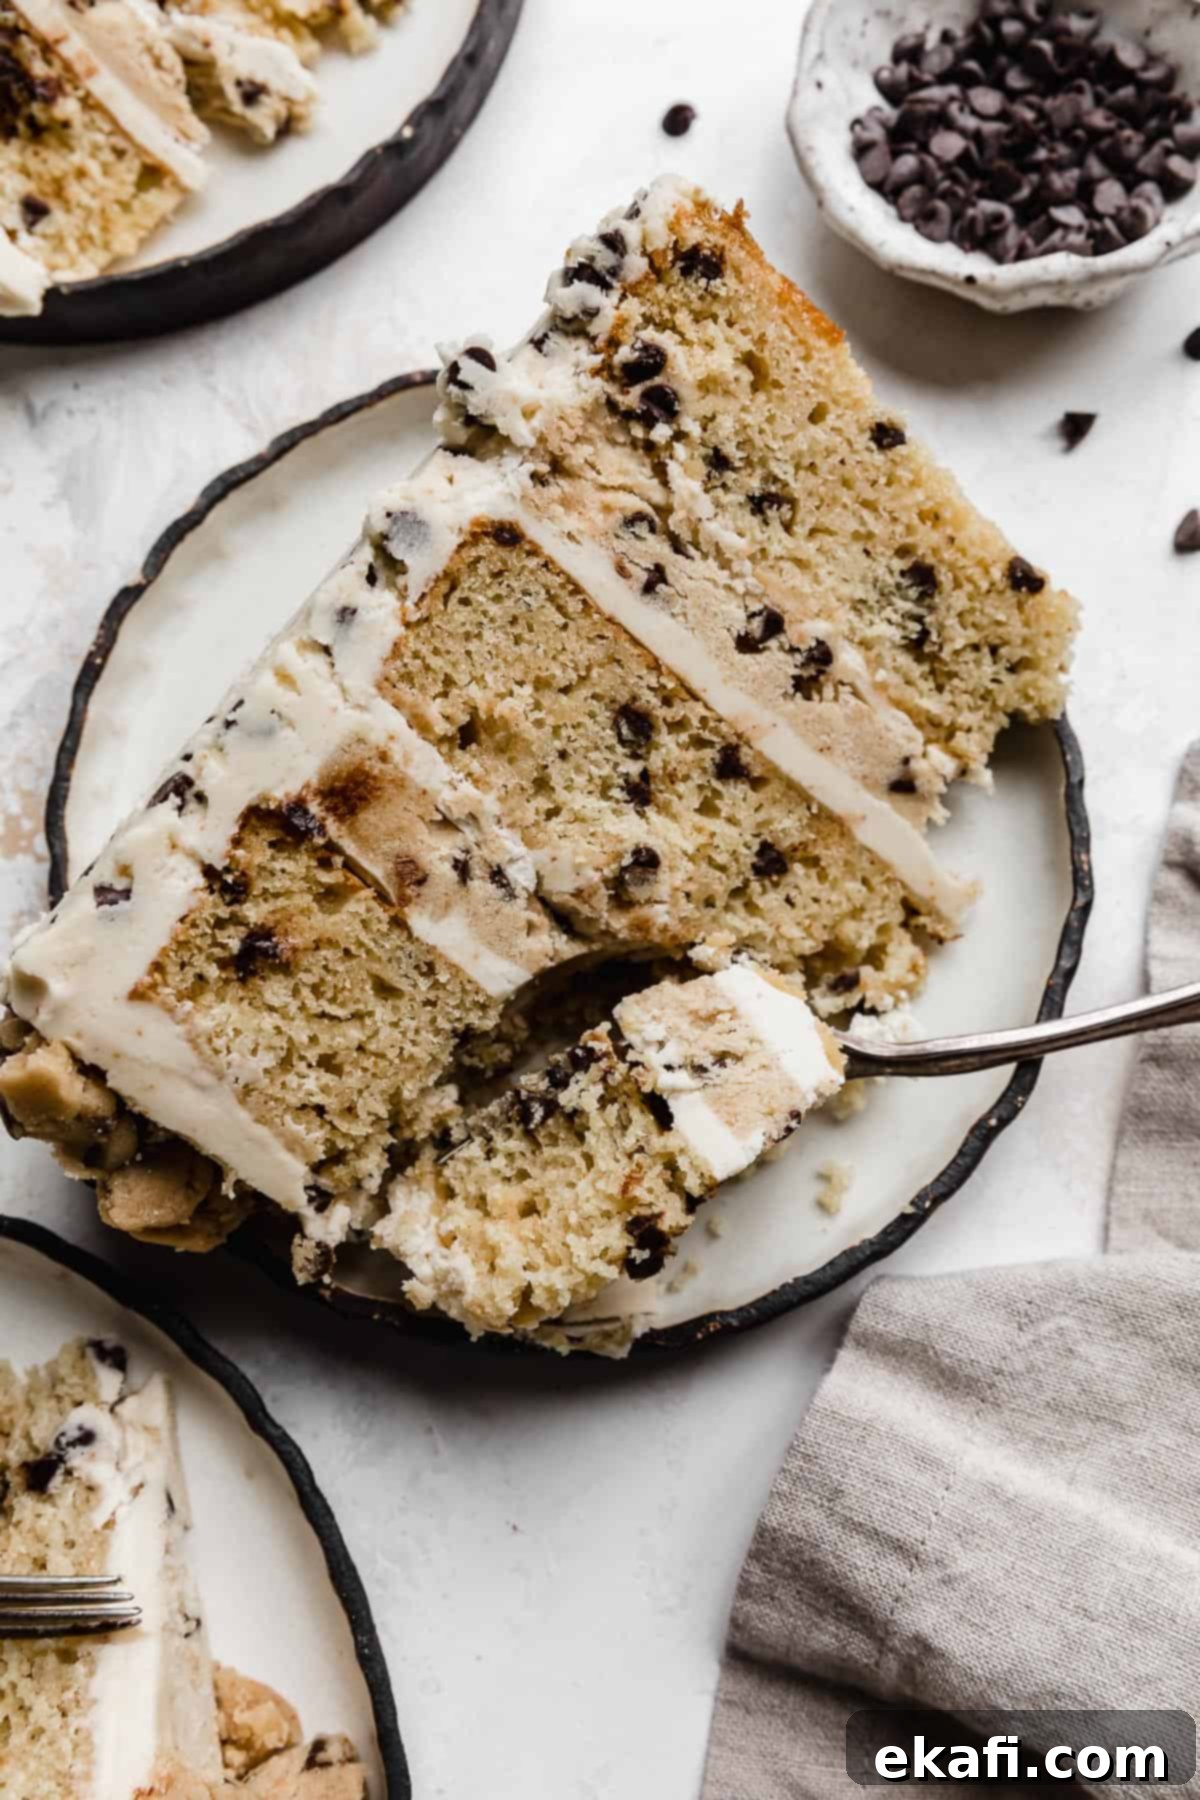
Prepare to elevate your dessert game with this truly irresistible Brown Butter Cookie Dough Cake. This isn’t just any cake; it’s a meticulously crafted layer cake featuring rich, moist brown sugar chocolate chip cake layers, generously filled with luscious edible cookie dough, and enveloped in a creamy brown butter cookie dough buttercream. What makes this cake truly exceptional is the strategic use of browned butter in every single component, infusing each bite with an unparalleled depth of nutty, caramelized flavor.
If you’re a connoisseur of all things brown butter, you’re in for a treat. The unique richness of browned butter transforms a simple cake into a gourmet experience. For a comprehensive guide on mastering this technique, be sure to check out my Browned Butter post. It addresses common questions and provides expert tips to ensure perfectly browned butter every time. Once you fall in love with this flavor, you’ll want to explore my Brown Butter Chocolate Chip Cookies – the delicious inspiration behind this very cake! And for those who adore the classics, my Chocolate Chip Cookie Cake is another must-try.
Why This Brown Butter Cookie Dough Cake Is a Must-Bake
This recipe isn’t just good; it’s a triumph of flavor and texture. Here’s a closer look at what makes this Brown Butter Cookie Dough Cake truly stand out:
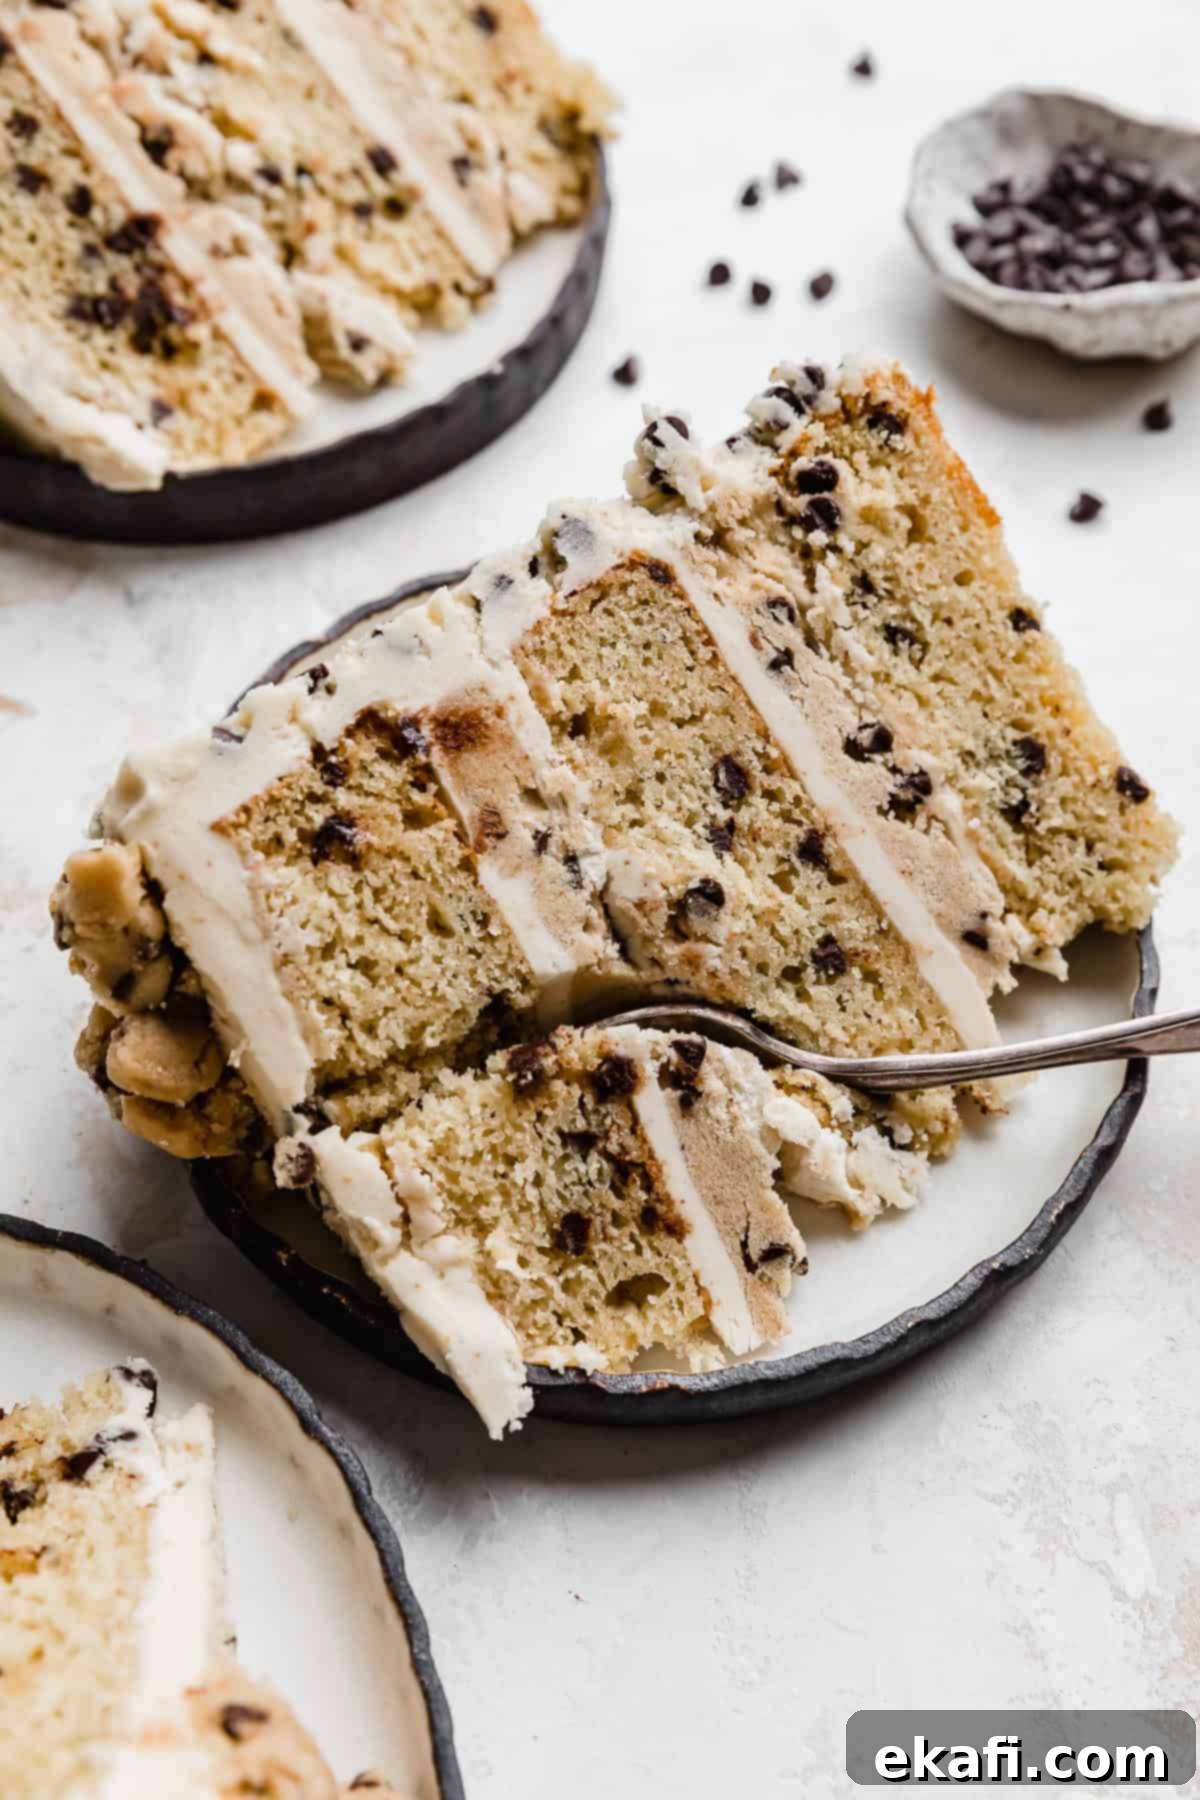
- Irresistible Edible Cookie Dough Between Each Layer: When you’re dreaming of a cookie dough cake, the edible cookie dough is non-negotiable! This recipe delivers a generous, thick disk of safe-to-eat brown butter cookie dough tucked between each tender cake layer. It’s the perfect textural contrast and a dream come true for cookie dough lovers.
- Browned Butter Elevates Every Flavor Element: The secret weapon in this recipe is browned butter. By browning the butter for the cake layers, the edible cookie dough, and the buttercream, we unlock a nutty, complex, and deeply aromatic flavor profile that plain butter simply can’t achieve. This simple step makes a monumental difference, taking the entire cake from delicious to absolutely extraordinary. Learn all my best tips for browning butter for perfect results every time. If you love the browned butter flavor, you’ll also adore my Brown Butter Cake!
- Incredibly Moist Cookie Dough Cake Layers: Achieving a moist, tender crumb is paramount for any layer cake. Our recipe uses a brilliant combination of browned butter and oil in the cake batter. The oil ensures a consistently soft and moist texture, as it remains liquid at room temperature, while the browned butter provides that incredible, deep flavor. Paired with delicate mini chocolate chips, these cake layers are perfectly balanced and serve as the ideal foundation for the decadent cookie dough and frosting. It’s truly the cake version of our beloved Brown Butter Chocolate Chip Cookies!
Essential Ingredient Breakdown for Success
Understanding each ingredient’s role is key to baking success. Here’s what you’ll need and why each component is crucial for this glorious Cookie Dough Cake:
- Light Brown Sugar: This is our preferred sugar for both the cake layers and the buttercream. It imparts a delightful molasses flavor and contributes to the cake’s moist texture. While dark brown sugar can be used for a more intense flavor and darker color, light brown sugar offers a perfect balance here. Remember to pack it when measuring!
- Unsalted Butter: The star of the show! Every element of this cake features browned butter. You have the option to brown butter separately for each component or brown it all at once. Keep in mind that butter loses some volume during browning due to water evaporation. Our detailed instructions provide precise measurements for browning all the butter at once to save you time.
- Oil (Vegetable or Canola): Incorporating oil into the cake layers is a secret to achieving an incredibly soft and moist crumb. Unlike butter, oil remains liquid at room temperature, ensuring the cake stays tender and delicious long after baking.
- All-Purpose Flour: This versatile flour is essential for both the cake layers and the edible cookie dough. For the cookie dough, the flour will be heat-treated to ensure it’s safe for consumption.
- Baking Powder & Baking Soda: These are our leavening agents. Baking powder reacts with liquid, while baking soda requires an acid to activate. In this recipe, buttermilk provides the necessary acid, ensuring a perfect rise and light texture for our cake layers.
- Buttermilk: Use room temperature buttermilk (along with room temperature eggs) for optimal results. Room temperature wet ingredients emulsify better with fats, leading to a smoother batter and a more even, tender bake.
- Mini Chocolate Chips: These are ideal for the brown sugar cake layers, edible cookie dough, and buttercream. Their smaller size makes them easier to incorporate and distribute evenly throughout, creating delightful chocolate flecks in every bite without being overwhelming.
- Heavy Cream: A crucial ingredient for both the luscious buttercream and the creamy edible cookie dough. Heavy cream (not half & half) provides the richness and body needed for these components.
- Powdered Sugar: Always sift your powdered sugar for the buttercream! This crucial step prevents lumps and ensures a silky-smooth, spreadable frosting consistency.
- Vanilla Extract: A flavor enhancer that complements the brown butter and chocolate notes beautifully. Use good quality pure vanilla extract for the best taste.
- Kosher Salt: Balances the sweetness and enhances all the other flavors, making them pop.
Step-by-Step Guide to Crafting Your Cookie Dough Cake
Creating this magnificent Brown Butter Cookie Dough Cake involves several distinct elements, each contributing to its overall spectacular flavor. While the recipe card details individual browning for each element, we’ve done the calculations to make things easier:
Brown All Butter at Once (Time-Saving Hack!):
For convenience, you can brown all the butter required for the cake layers, edible cookie dough, and buttercream at the same time. You will need to start with 2 ½ cups + 7 tablespoons of unsalted butter. Once this entire quantity is browned, transfer it to a separate heat-safe container or bowl. Allow it to solidify in the fridge. As it begins to harden but is still somewhat pliable, give it a good stir to evenly distribute all the delicious browned butter flecks throughout. This ensures consistent flavor when you measure it out for each element.
Once browned and re-solidified, you will portion it as follows:
- 10 tablespoons + 1 teaspoon of browned butter for the cake layers
- 1 cup of browned butter for the edible cookie dough
- ½ cup + 5 ½ tablespoons of browned butter for the buttercream
This method streamlines the process, but if you prefer, you can brown the butter for each component separately as directed in the individual sections below. Just be mindful of the butter reduction during browning.
Creating the Brown Butter Brown Sugar Cake Layers
These moist, flavorful cake layers are the foundation of our cookie dough masterpiece. Follow these steps carefully for the best results:
- Brown the Butter: If browning butter separately for this element, melt 3/4 cup unsalted butter in a small saucepan over medium-low heat. Cook, stirring constantly, until the milk solids at the bottom turn golden brown and smell nutty. This happens quickly, so watch closely to prevent burning! Immediately pour into a heat-safe container and refrigerate until solid.
- Prepare Pans & Dry Ingredients: Preheat your oven to 325°F (160°C). Grease and flour three 8-inch round cake pans, then line the bottoms with parchment paper circles. In a medium bowl, sift together the all-purpose flour, baking powder, baking soda, and kosher salt. Whisk briefly to combine and set aside.
- Cream Wet Ingredients: In the bowl of a stand mixer fitted with the paddle attachment, cream together the solidified (but softened) browned butter and light brown sugar until light and fluffy. Add the vegetable or canola oil and mix well. Incorporate the large eggs, one at a time, beating thoroughly after each addition until fully combined. Ensure eggs are at room temperature.
- Combine Wet and Dry: With the mixer on low speed, gradually add half of the sifted flour mixture to the wet ingredients. Mix until just combined. Then, add all of the room temperature buttermilk and vanilla extract, mixing until nearly incorporated. Finally, add the remaining flour mixture and mix until just combined, being careful not to overmix. Overmixing can lead to a tough cake. Gently fold in the mini chocolate chips by hand.
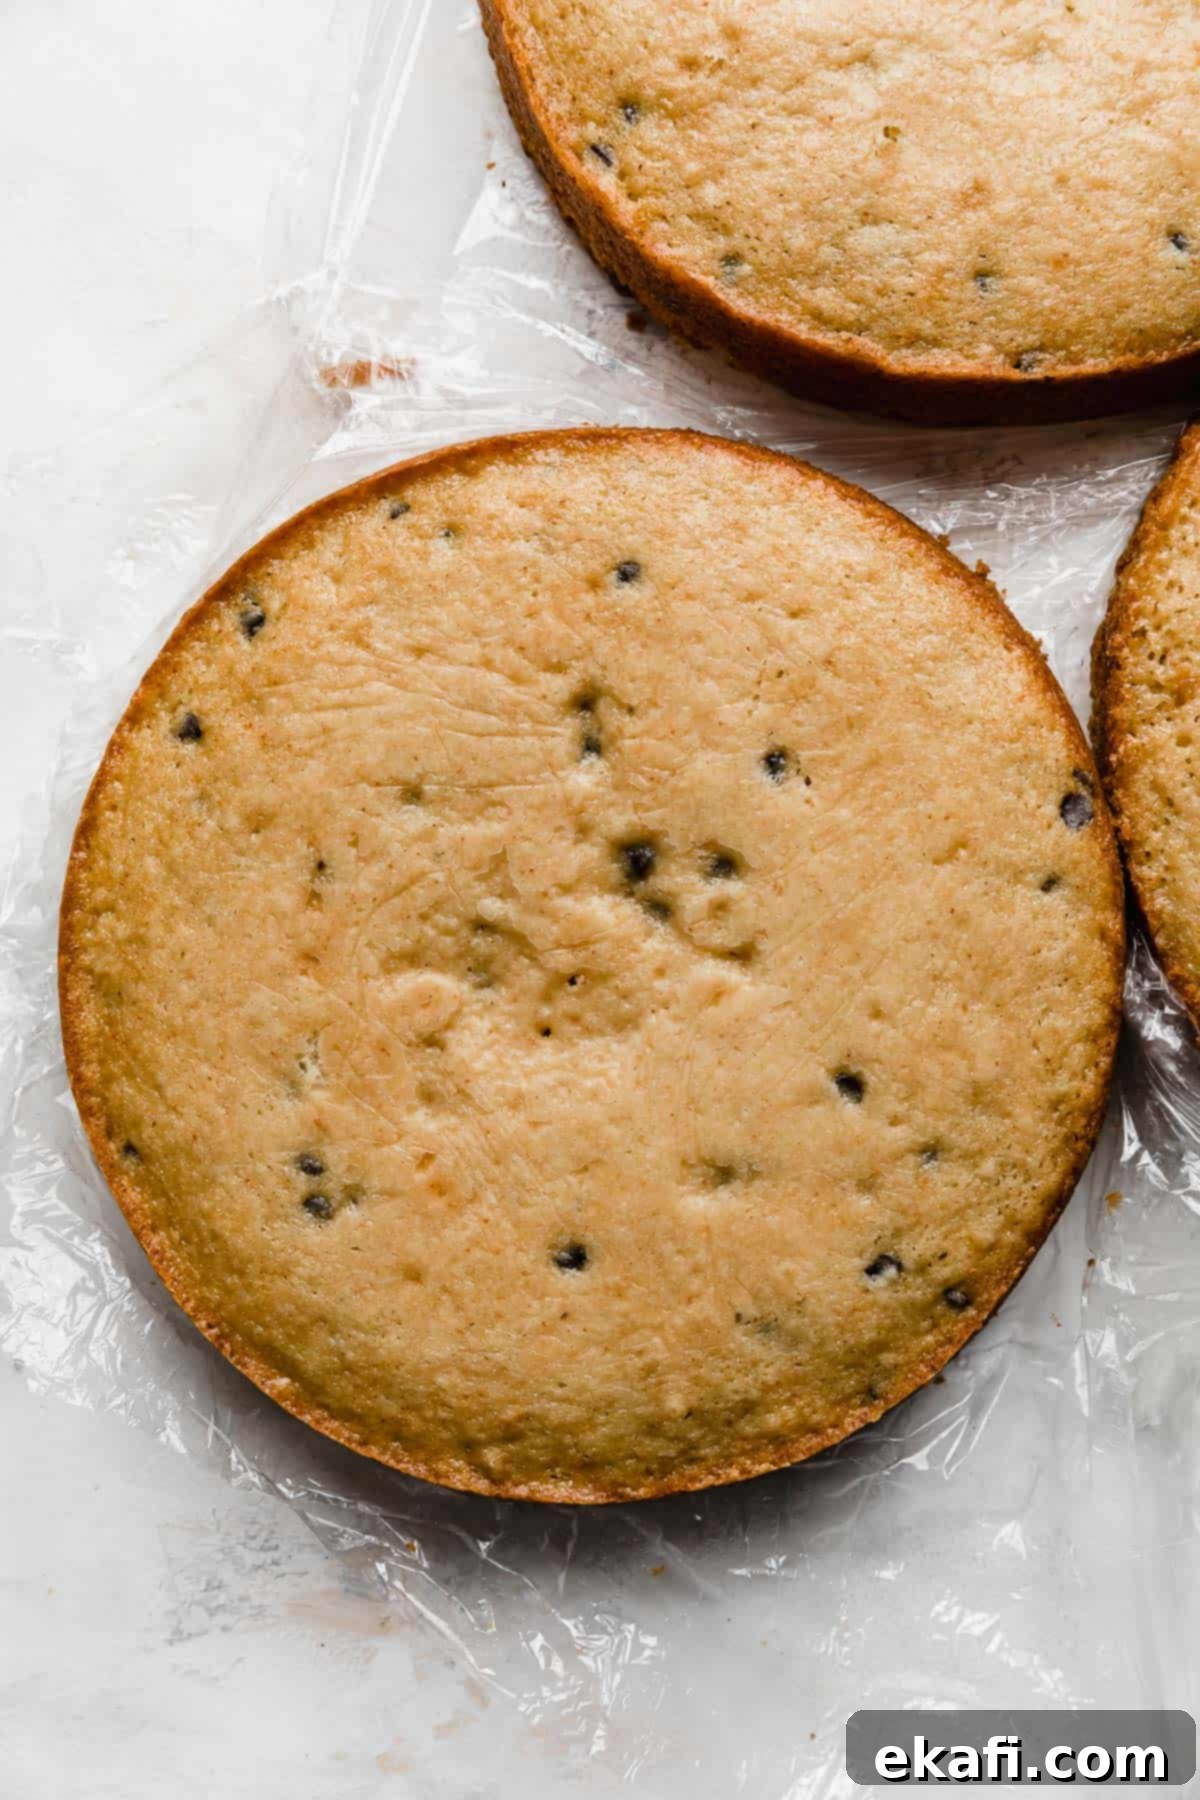
- Bake to Perfection: Divide the cake batter evenly among the three prepared 8-inch cake pans. Bake for 28-33 minutes, or until a wooden skewer or toothpick inserted into the center of a cake layer comes out with only a few moist crumbs attached.
- Cooling the Layers: Let the cake layers cool in their pans for 10-15 minutes on a wire rack. Then, carefully invert them onto the wire rack to cool completely. Fully cooled cakes are easier to handle and frost.
Preparing the Safe and Delicious Edible Cookie Dough Layers
This cookie dough is egg-free and uses heat-treated flour, making it completely safe to eat raw! It’s the star of our cake layers.
- Brown the Butter (if browning separately): If browning separately, melt 19 tablespoons (1 cup + 3 tablespoons) of unsalted butter following the browning instructions above. Allow it to cool and soften to room temperature before proceeding. If using the “all at once” method, ensure your pre-browned butter is softened to room temperature.
- Heat Treat the Flour: This step is crucial for food safety. Place 2 cups of all-purpose flour in a microwave-safe bowl. Microwave on high heat in 30-second intervals, stirring thoroughly between each, until the flour reaches an internal temperature of 165°F (74°C). This usually takes about 45-60 seconds. Alternatively, you can bake it on a baking sheet at 300°F (150°C) for 5-7 minutes, stirring halfway, until it reaches the same temperature. Let it cool completely.
- Cream Butter and Sugar: In the bowl of a stand mixer with the paddle attachment, cream together the softened browned butter and 2 cups packed light brown sugar until light and fluffy, about 2-3 minutes.
- Add Liquids and Dry: Beat in the vanilla extract, 1/4 cup heavy cream, and kosher salt until combined. Scrape down the sides of the bowl. Gradually add the cooled, heat-treated flour and mix on low speed until just combined. Fold in 1 cup of mini chocolate chips.
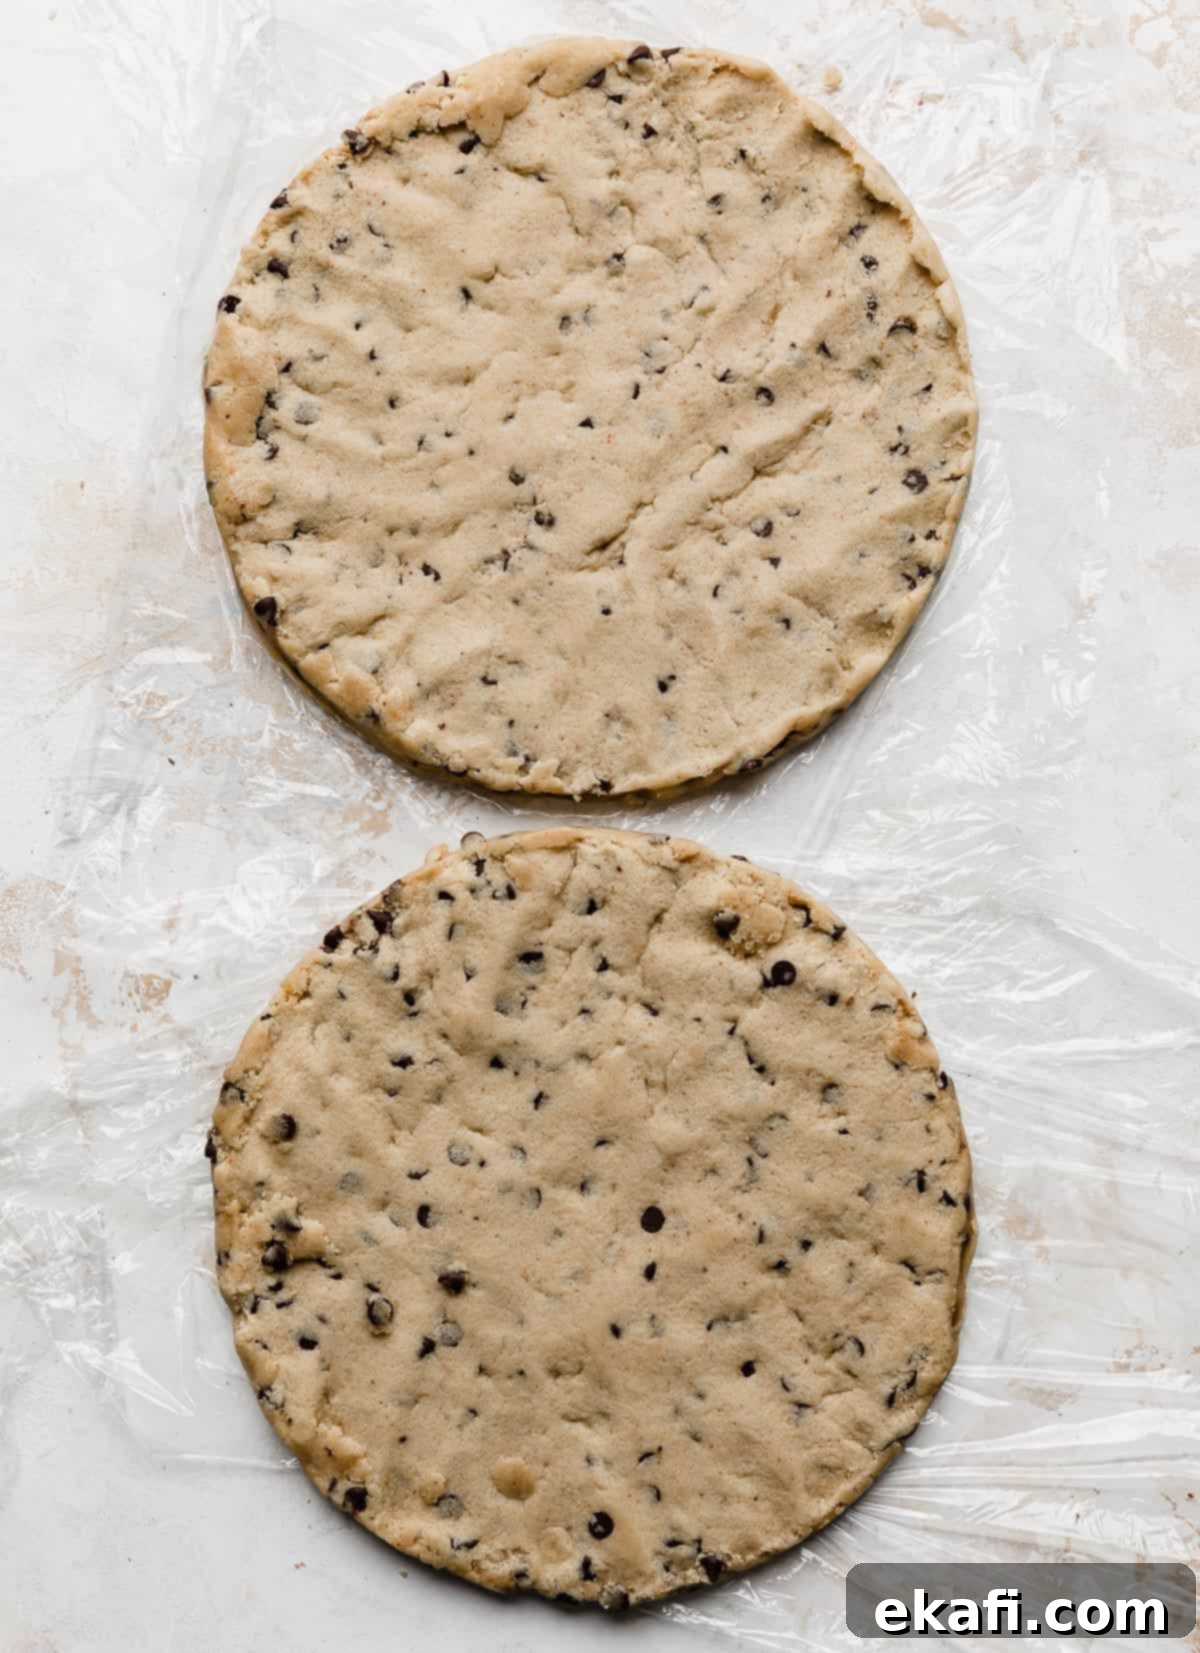
- Shape and Chill: Reserve 1-1 ½ cups of this delicious cookie dough for decorating the top of your finished cake. Line two 8-inch round cake pans with plastic wrap, leaving an overhang on the sides. Divide the remaining cookie dough evenly between the two pans and press firmly into disks. Chill in the refrigerator until firm, typically at least 1-2 hours. Once firm, use the plastic overhang to carefully lift the cookie dough disks from the pans. Wrap them completely in plastic wrap and store in the fridge for up to 1 week.
Crafting the Decadent Brown Butter Cookie Dough Buttercream
This creamy, dreamy buttercream ties all the elements together with its rich brown butter flavor and tender texture.
- Brown the Butter (if browning separately): If browning separately, brown 1 cup of unsalted butter following the instructions outlined in step 1 of the “Make the Cake Layers” section. Once browned, pour it into a heat-safe container and refrigerate until it solidifies but is still slightly cold and pliable. If using the “all at once” method, use the adjusted browned butter measurement for the buttercream, ensuring it’s slightly softened but still cold.
- Cook Brown Sugar & Heavy Cream: In a small saucepan over medium-low heat, combine 1 cup light brown sugar and 1/3 cup heavy cream. Stir constantly until the sugar completely dissolves into the cream and the mixture is smooth. Remove from heat and allow to cool completely to room temperature.
- Heat Treat the Flour: Just like with the edible cookie dough, heat treat 2 cups of all-purpose flour until it reaches 165°F (74°C) using the microwave method (30-second intervals, stirring) or oven method. Let it cool completely before using.
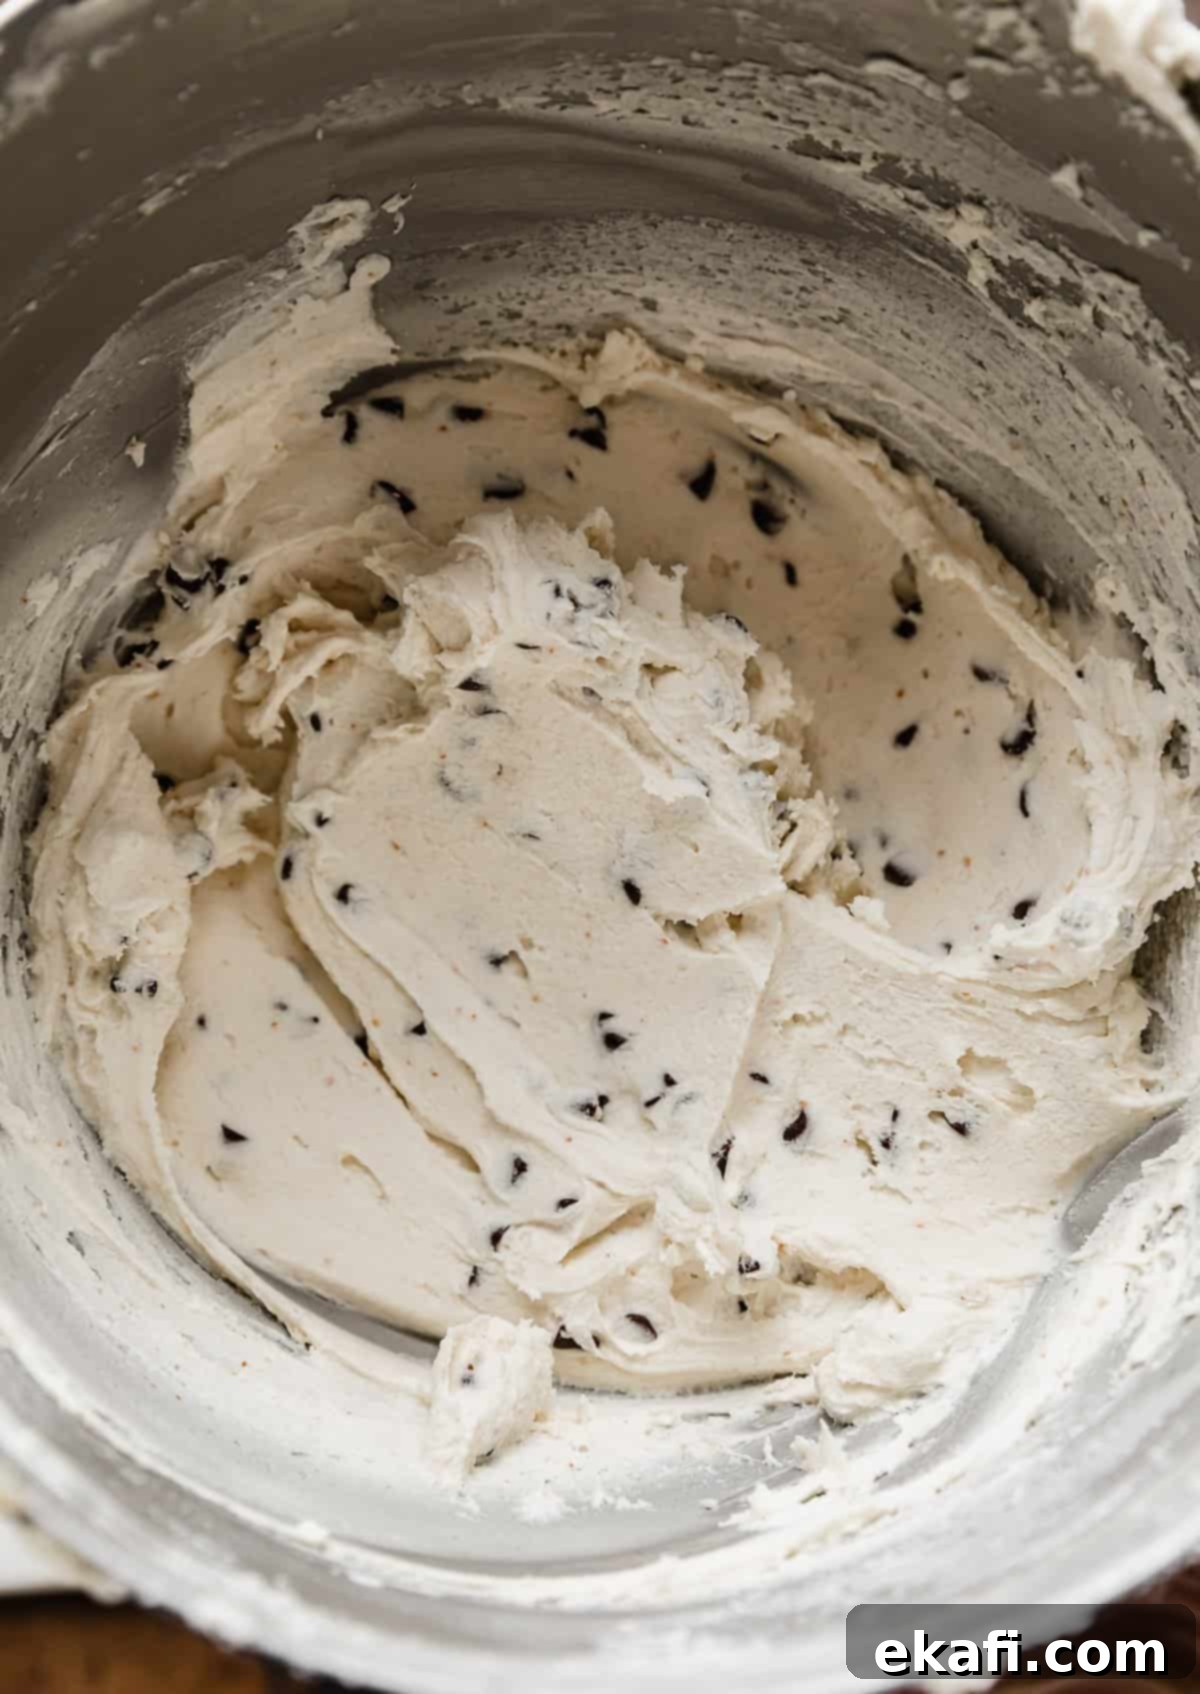
- Beat the Butters: In the bowl of a stand mixer fitted with the paddle attachment, beat the 2 cups of regular unsalted butter (slightly softened but still cold) together with the prepared brown butter and a pinch of salt on medium-high speed. Continue beating for several minutes until the mixture is incredibly smooth, pale in color, and fluffy. Don’t worry about the small, delicious brown flecks from the browned butter—they’re normal!
- Add Sweet & Flavorful Elements: Reduce the mixer speed to low. Gradually add the completely cooled brown sugar and heavy cream mixture, along with 1 tablespoon of vanilla extract. Beat until thoroughly combined.
- Incorporate Dry Ingredients: With the mixer still on low speed, gradually add the sifted powdered sugar (7 cups) and the cooled, heat-treated flour, one cup at a time. Mix until just combined after each addition. If the frosting appears too stiff or thick, add additional heavy cream, one tablespoon at a time, until a smooth, spreadable consistency is achieved. Ensure it’s not too thin, as it needs to hold the cake layers.
Assembling Your Masterpiece: The Layered Cookie Dough Cake
Now for the exciting part – bringing all the components together to form your incredible Brown Butter Cookie Dough Cake!
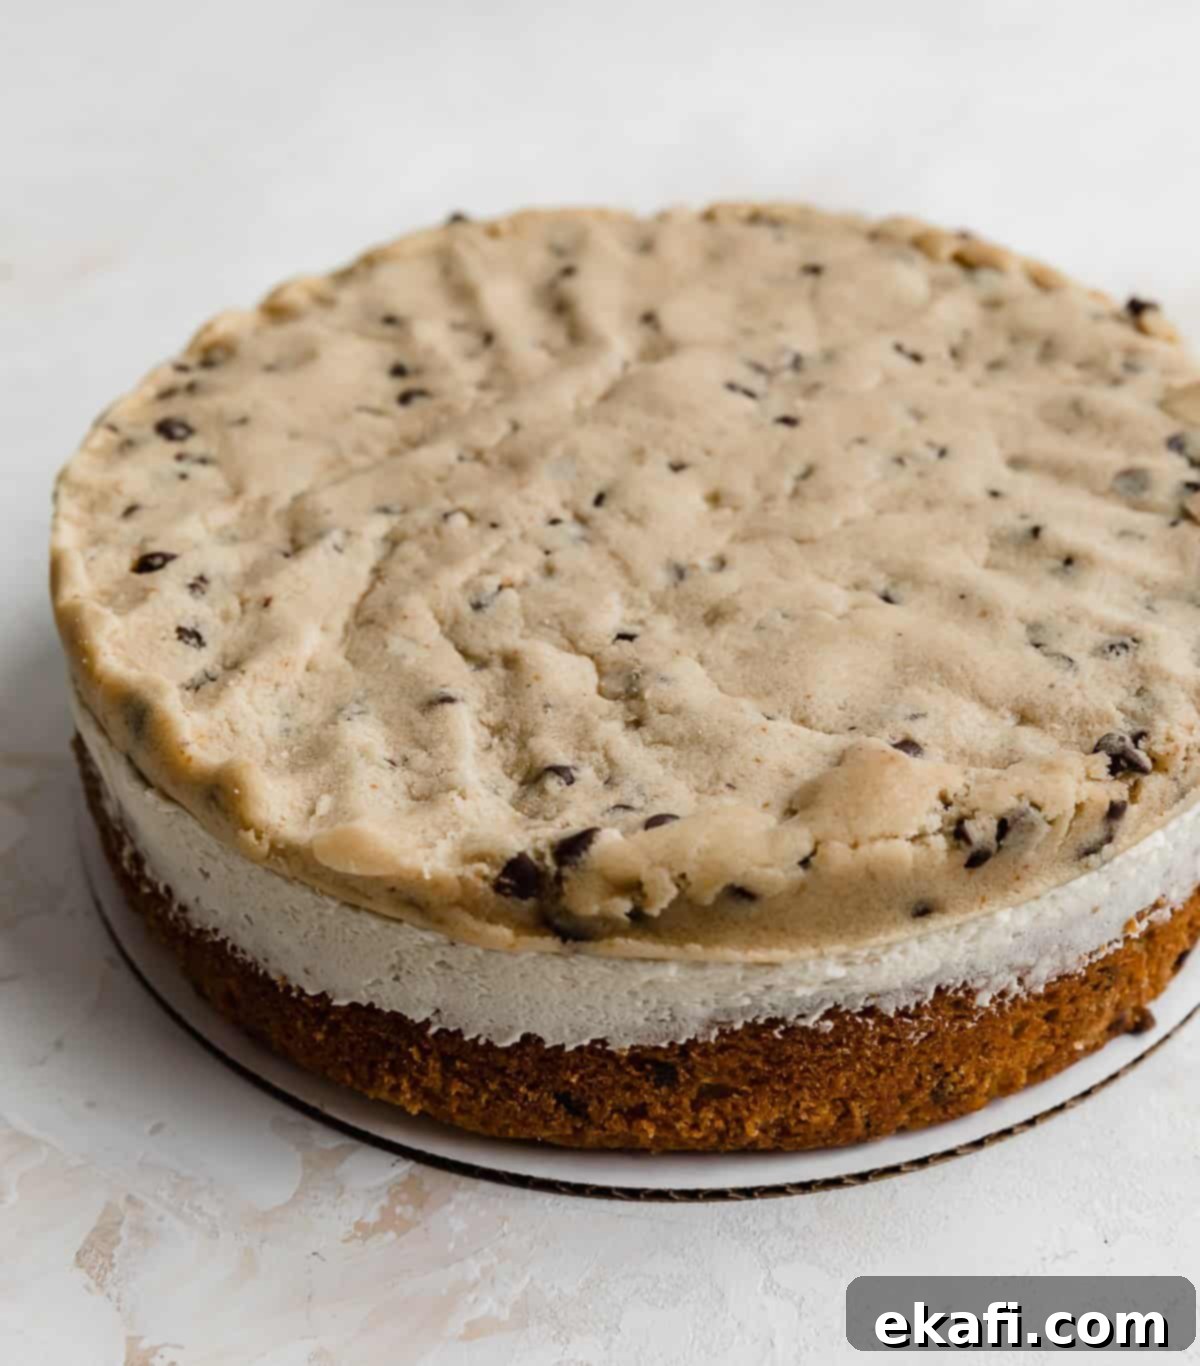
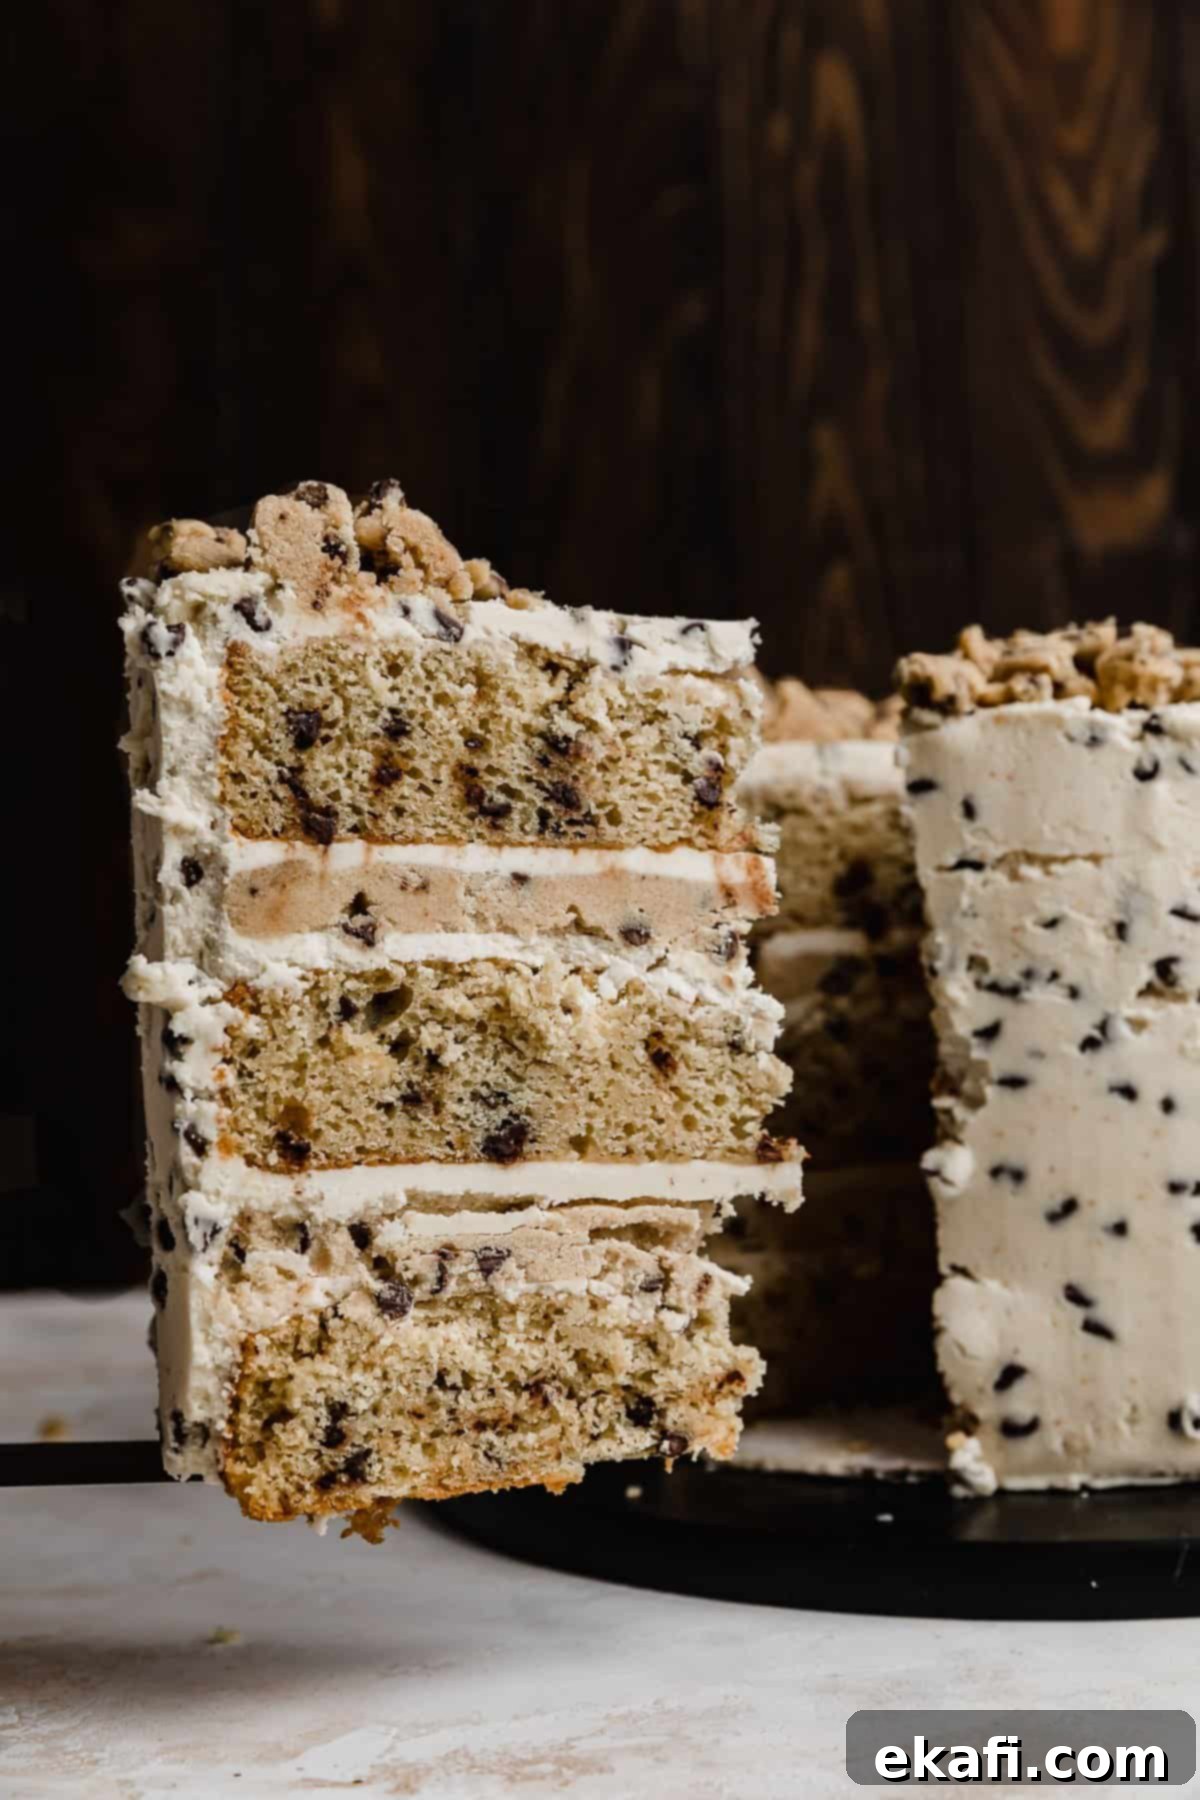
- First Layer: Secure the Base: Place a dollop of buttercream in the center of your cake board or serving stand. This acts as “glue” to prevent your cake from sliding. Carefully center your first cake layer on top. Spread a thin, even layer of the brown butter cookie dough buttercream over the top of this cake layer.
- Add the First Edible Dough Layer: Gently place one of the chilled edible cookie dough disks on top of the buttercream. Add another thin layer of buttercream over the cookie dough. This extra layer of frosting will help the next cake layer adhere securely and prevent it from shifting.
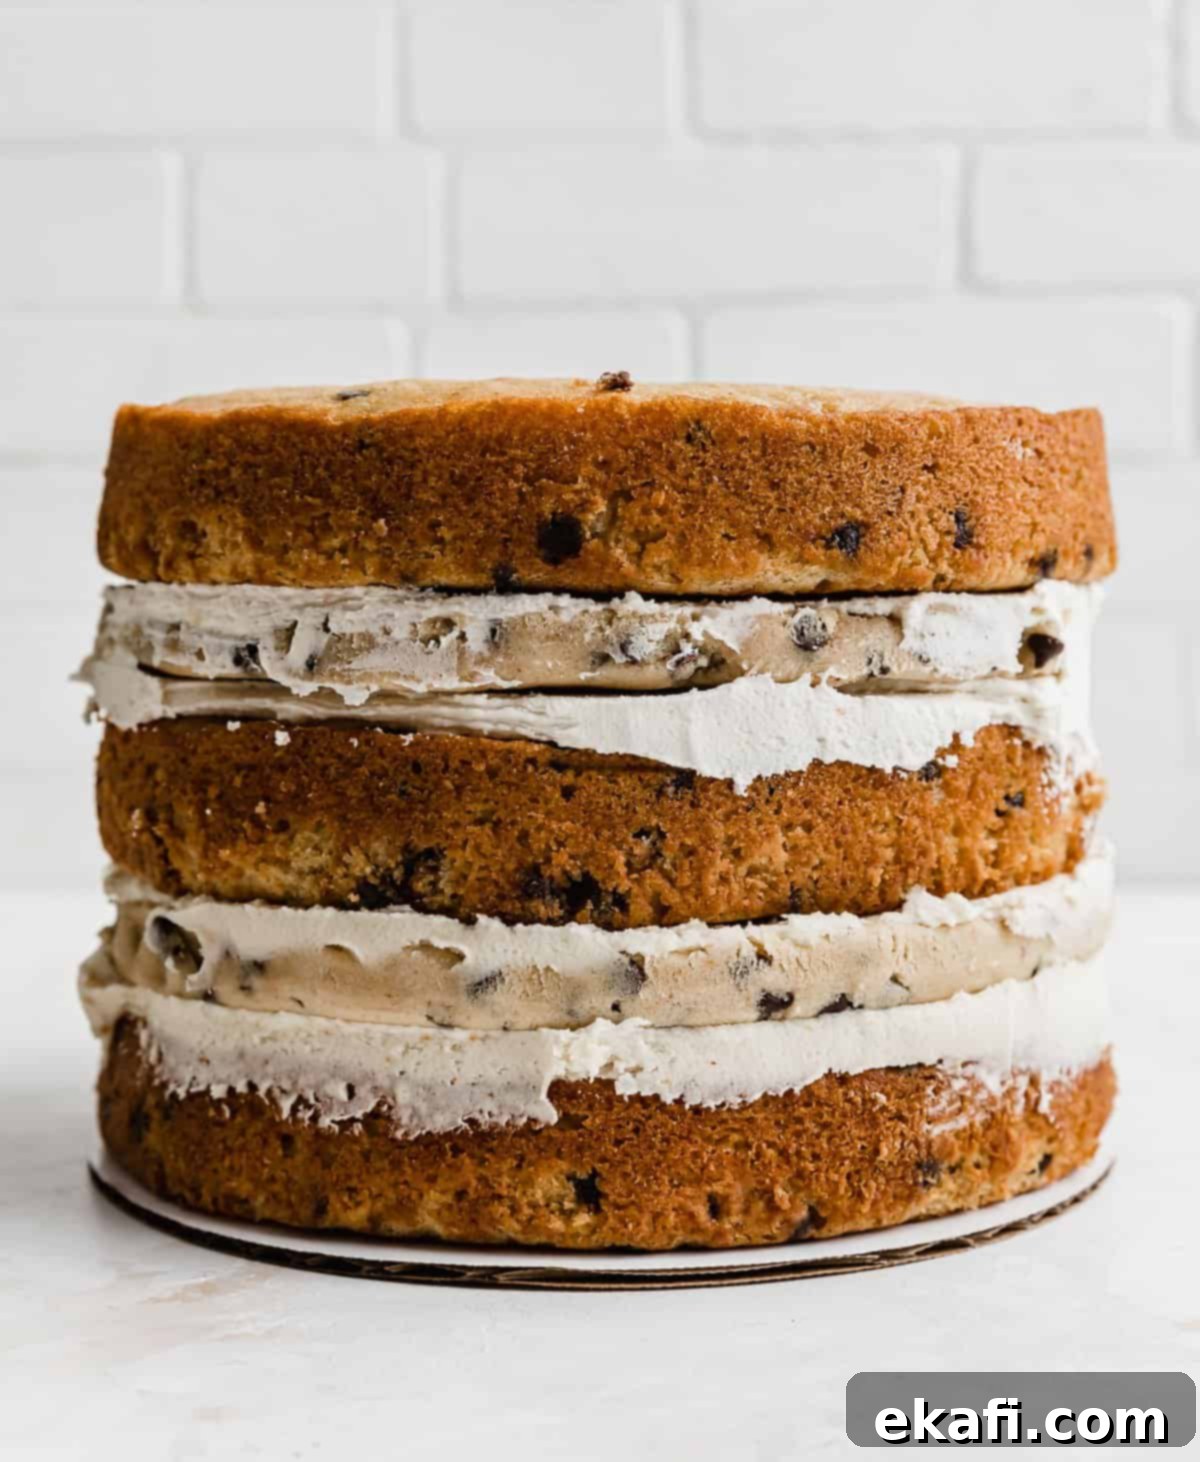
- Continue Layering: Carefully place the second cake layer on top, aligning it. Repeat steps 1 and 2: spread a thin layer of buttercream, add the second edible cookie dough disk, and then another thin layer of buttercream.
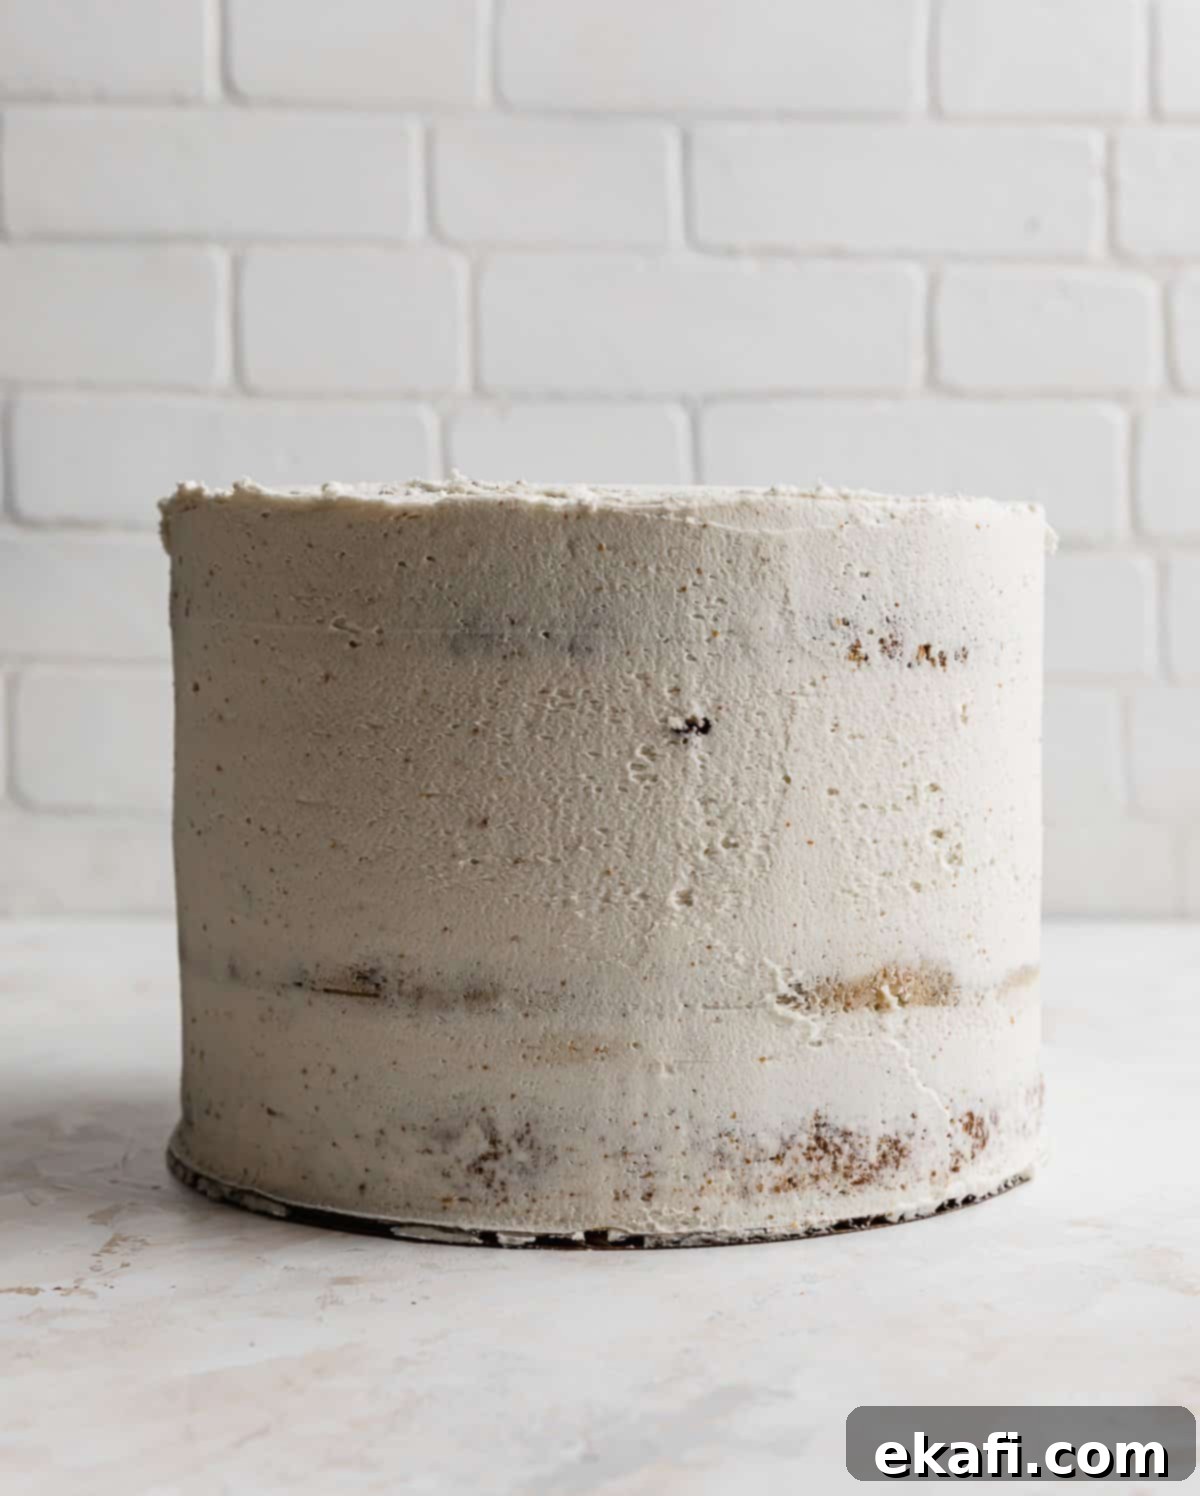
- Final Cake Layer & Crumb Coat: Place the third and final cake layer on top. Now, apply a thin, even layer of buttercream around the entire cake – this is your “crumb coat.” Its purpose is to trap any loose crumbs, ensuring a smooth finish for your final frosting layer. Refrigerate or freeze the cake for 15-20 minutes, or until the crumb coat is firm to the touch.
- Prepare Final Buttercream & Decorate: While the cake chills, add ½ to ¾ cup of mini chocolate chips to the remaining buttercream and mix well. The chocolate chips will give the final frosting a delightful texture and a charming, rustic appearance (it won’t be perfectly smooth, which is part of its charm!).
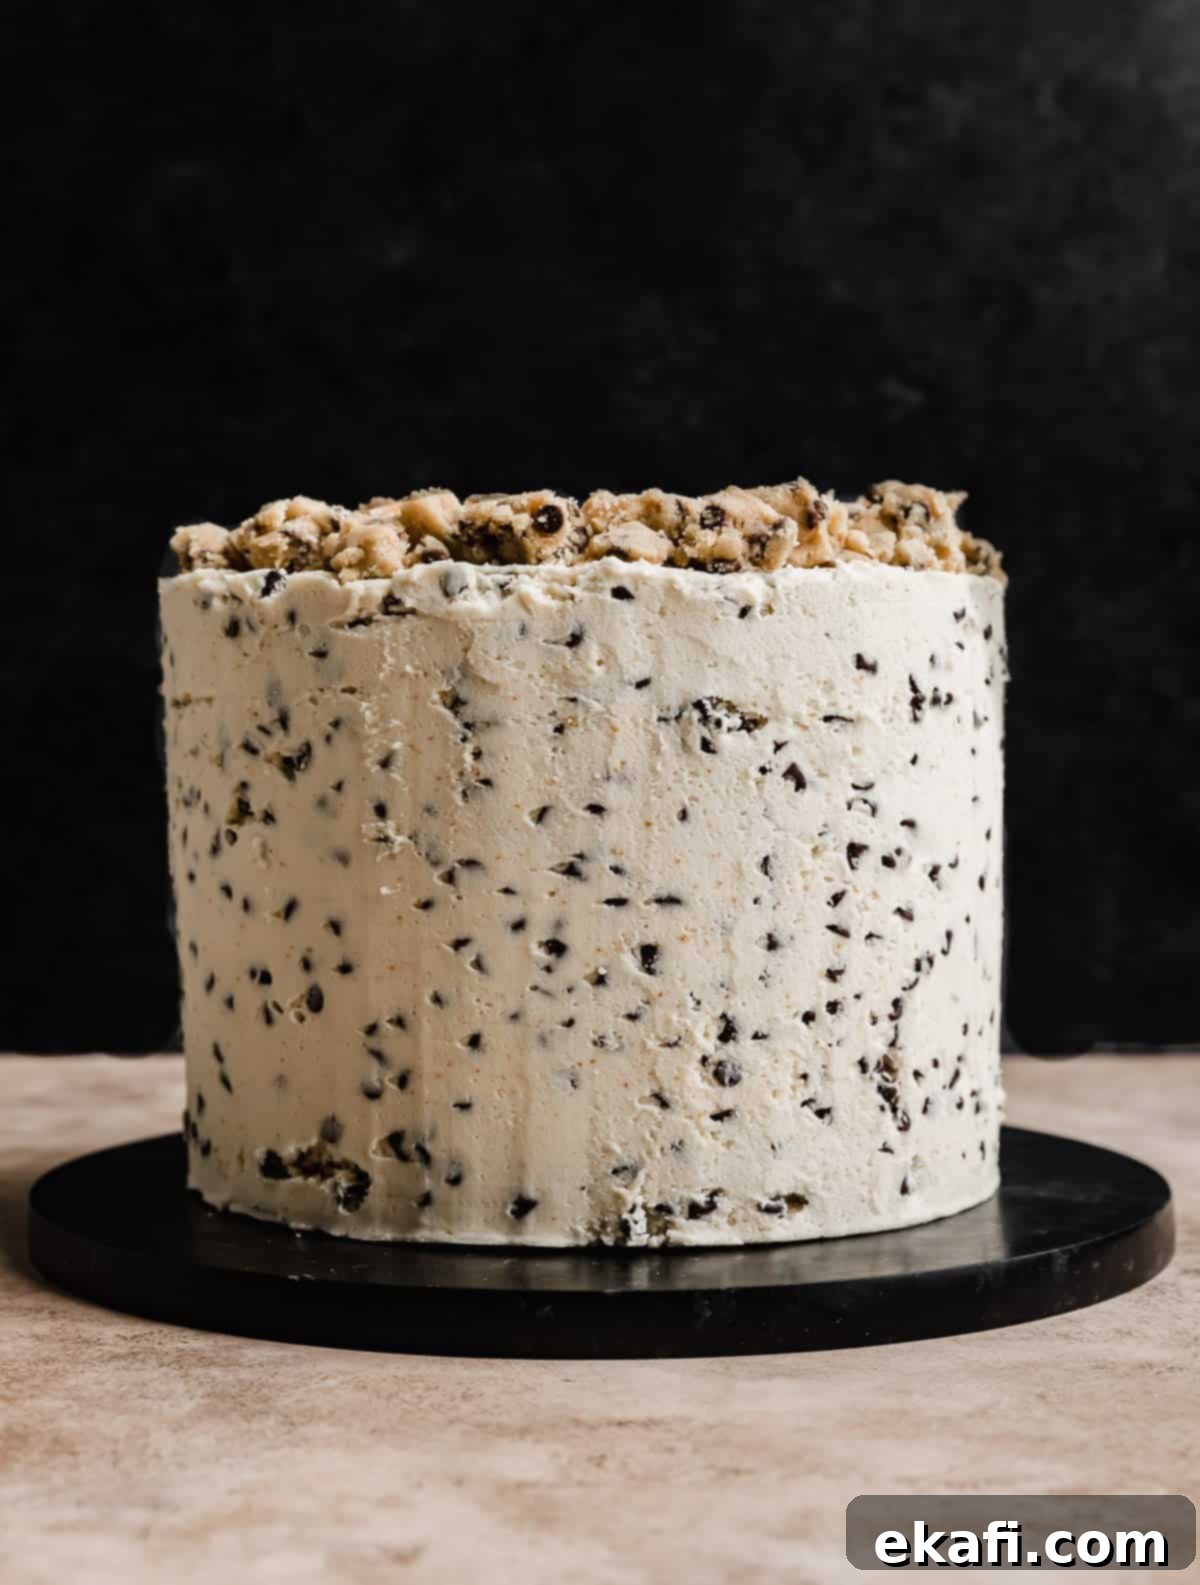
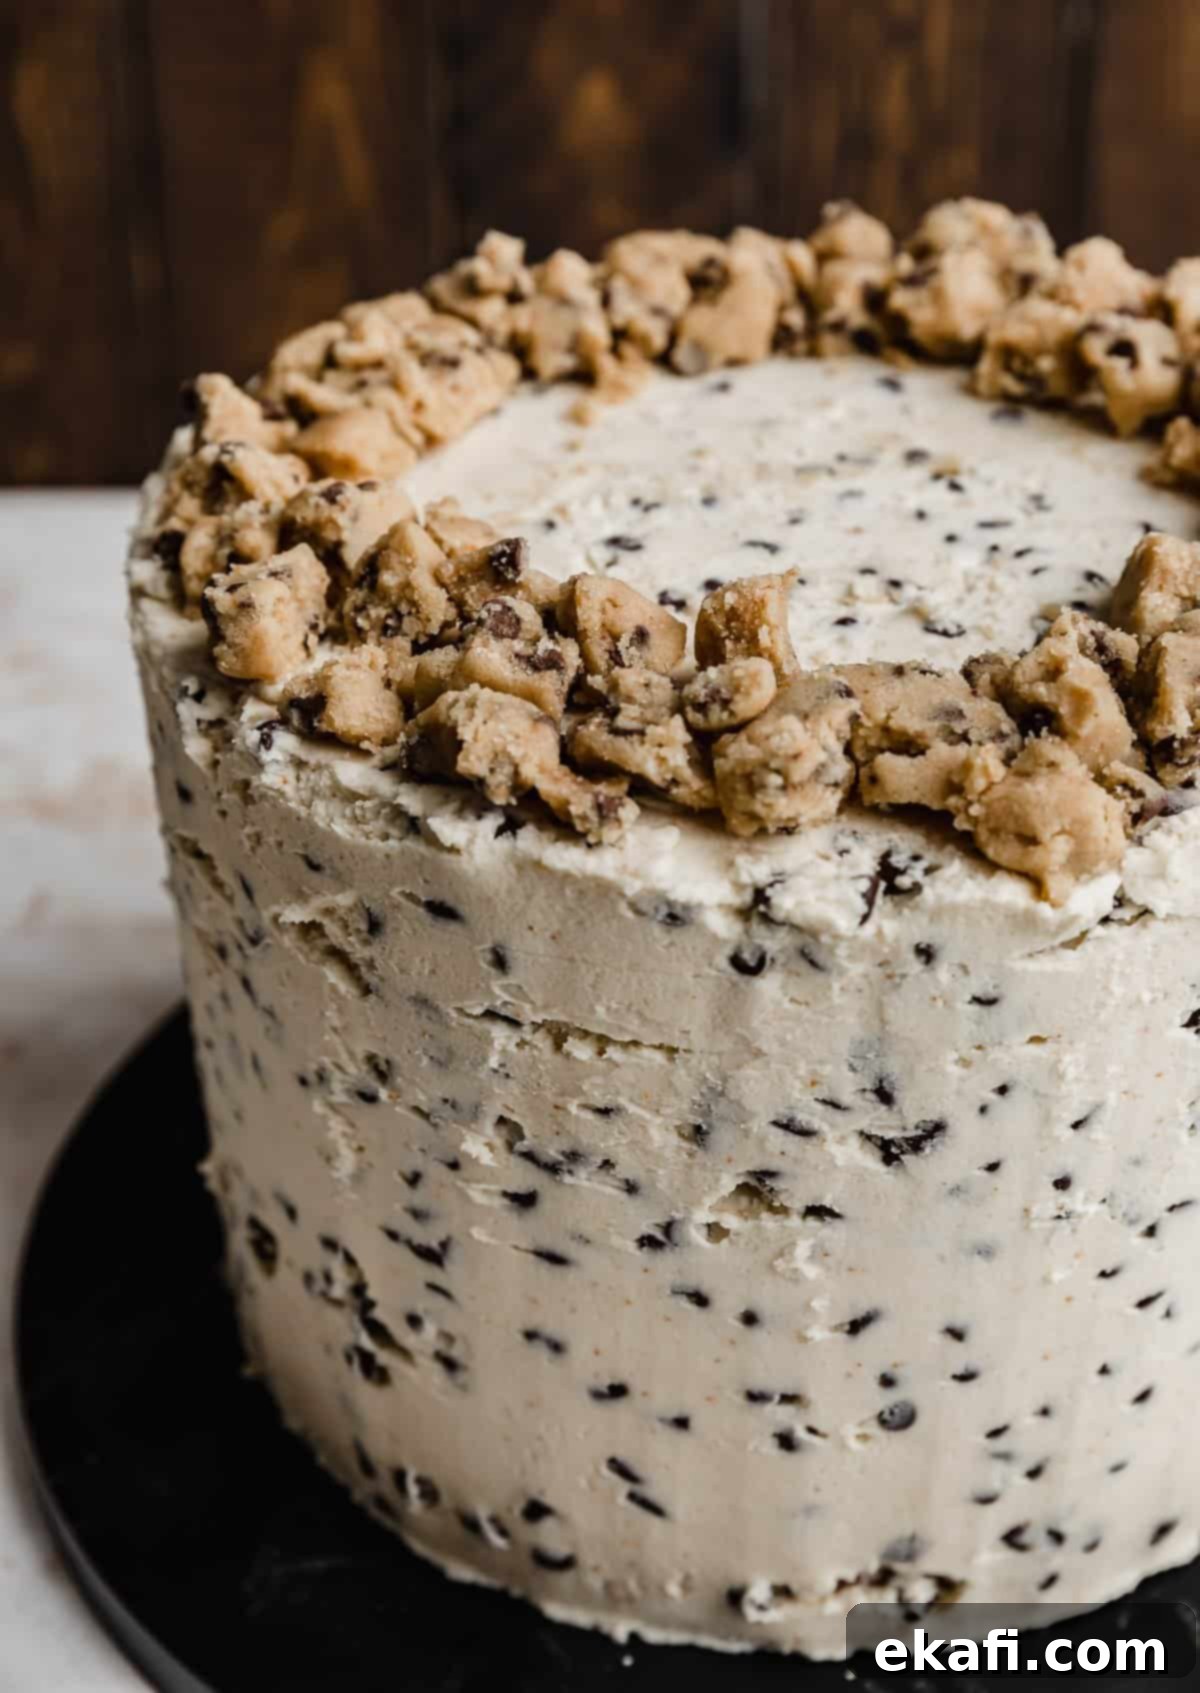
- Final Frosting & Embellishments: Remove the chilled cake from the fridge or freezer. Apply the remaining chocolate chip-studded buttercream, covering the entire cake. Use an offset spatula or bench scraper to smooth the sides and top as much as possible, embracing its rustic charm. Finally, crumble the reserved 1-1 ½ cups of edible cookie dough around the top edge of the cake for a beautiful and delicious garnish. Serve immediately or chill until ready to serve!
Expert Tips for a Flawless Cookie Dough Cake
Achieving bakery-worthy results with your Brown Butter Cookie Dough Cake is easier with these expert tips:
- Stabilize Your Cake: Always use a dollop of buttercream in the center of your cake board or stand before placing the first cake layer. This simple trick prevents the cake from sliding around, making assembly and decoration much easier and less stressful.
- Room Temperature Ingredients for Cake: For the cake layers, ensure all wet ingredients like eggs and buttermilk are at room temperature. This allows them to emulsify properly with the fats, creating a smoother batter and a consistently tender, even crumb.
- Avoid Overmixing Cake Batter: Once you start adding the dry ingredients to the wet, mix only until just combined. Overmixing develops gluten, which can lead to a tough, dry cake. A few small lumps are better than a dense cake.
- Mastering Brown Butter: Browned butter is the signature flavor here. For an in-depth guide with all my tips, tricks, and FAQs on browning butter perfectly every time, check out my dedicated How to Brown Butter post. It’s truly a game-changer!
- The “Brown All Butter at Once” Hack: Remember the hack mentioned at the top of the “Step-by-Step Instructions” section. Browning all the butter together can save significant time. Just be sure to follow my precise measurements, as butter volume reduces during browning. If you’re new to browning, browning each portion separately as called for in the recipe card is a perfectly fine and accurate method.
- Chilling is Your Friend: Don’t rush the chilling steps. A firm crumb coat makes applying the final layer of frosting much cleaner. Chilled cookie dough layers are also easier to handle and won’t squish when assembling.
- Level Your Cake Layers: For a perfectly straight, professional-looking cake, ensure your cake layers are level. You can use a serrated knife or a cake leveler to trim off any domes.
- Serving Temperature: This cake is best served at room temperature or slightly chilled. If it’s been in the fridge, let it sit out for 30-60 minutes before serving to allow the cake and buttercream to soften slightly, ensuring the best flavor and texture.
Make Ahead, Storing, and Freezing Instructions
This elaborate cake can easily be broken down into manageable steps, making it perfect for preparing ahead of time. Here’s how to store each component:
- Cake Layers: Baked cake layers can be made 1-2 days in advance. Once completely cooled, double-wrap each layer tightly in plastic wrap and store them at room temperature for up to 2 days, or in the refrigerator for up to 4 days. For longer storage, wrap them securely in plastic wrap and then aluminum foil, and freeze for up to 2-3 months. Thaw overnight in the refrigerator before using. For more detailed instructions, see my Storing and Freezing Cakes post.
- Edible Cookie Dough: The prepared cookie dough disks, wrapped tightly in plastic wrap, can be stored in the refrigerator for up to 1 week. They can also be frozen for up to 1 month. Thaw in the refrigerator before using.
- Brown Butter Cookie Dough Buttercream: This frosting can be made up to 5 days in advance and stored in an airtight container in the refrigerator. Before using, let the frosting come to room temperature (this can take 2-3 hours). Then, re-whip it with a stand mixer or hand mixer until it’s smooth and fluffy again. If it seems too thick, add heavy cream, one tablespoon at a time, until it reaches a spreadable consistency.
- Assembled & Frosted Cake: A fully assembled and frosted cake can be stored in an airtight cake carrier at room temperature for up to 1 day, or in the refrigerator for 3-5 days. Always bring it to room temperature before serving for the best texture and flavor.
For even more detailed guidance on properly storing and freezing all types of cakes and their components, including cake layers, buttercream, and fully decorated cakes, consult my comprehensive How to Store and Freeze Cakes guide!
Frequently Asked Questions About This Recipe
Yes, absolutely! We’ve provided detailed instructions on how to brown all the butter at once right under the “Step-by-Step Instructions” heading in this post. This is a great time-saving hack. Remember that butter loses some volume during the browning process, so the starting quantity of unbrowned butter is more than the final quantity of browned butter you’ll measure out for each element. Our calculated measurements account for this, ensuring you have the right amount for each part of the cake. If you’re concerned or prefer to be super precise, you can brown the butter for each element separately as listed in the recipe card.
Yes, it is completely edible and safe to eat! The cookie dough layers between our moist brown butter cake are made without eggs and utilize heat-treated flour, removing any safety concerns associated with raw flour. So, go ahead and enjoy every delightful bite of that raw cookie dough goodness!
Most definitely, and we highly recommend it! This Cookie Dough Cake is a bit of an involved baking project, so breaking it down and preparing individual components on separate days can make the process much more enjoyable and less daunting. Please refer to our “Make Ahead, Storing, and Freezing” section above for comprehensive details and instructions on how to store each element and the assembled cake.
Explore More Decadent Cake Recipes
If you’re a cake enthusiast, don’t stop here! Be sure to explore some of our other fan-favorite cake recipes:
- Twix Cake
- Oreo Red Velvet Cake
- Ferrero Rocher Cake
- Coconut Cookies and Cream Cake
- Scotcharoo Cake
Did you bake this incredible Brown Butter Cookie Dough Cake? We’d absolutely love to hear about your experience! Leave a rating and review below, or simply scroll to the comments section and share your thoughts.
Stay connected and up-to-date with all our latest recipes and baking adventures by following us on Instagram, TikTok, Facebook, and Pinterest. Don’t forget to tag us in your creations!
Print
SaveSaved!
Review
Cookie Dough Cake
Ingredients
Brown Butter Brown Sugar Cake Layers
- 1 3/4 cups light brown sugar – packed
- 3/4 cup unsalted butter – softened
- 1/4 cup oil – vegetable or canola oil
- 1 teaspoon kosher salt
- 3 large eggs – at room temperature
- 3 cups all purpose flour
- 2 teaspoons baking powder
- 1/2 teaspoon baking soda
- 1 3/4 cups buttermilk – at room temperature
- 2 teaspoons vanilla extract
- 1 cup mini chocolate chips
Edible Brown Butter Cookie Dough
- 2 cups all purpose flour
- 19 tablespoons unsalted butter – softened to room temperature (1 cup butter + 3 tablespoons)
- 2 cups light brown sugar – packed
- 2 teaspoons vanilla extract
- 1/4 cup heavy cream
- 1 teaspoon kosher salt
- 1 cup mini chocolate chips
Brown Butter Cookie Dough Buttercream
- 1 cup unsalted butter – slightly softened but still cold (we will brown this 1 cup of butter)… see step #1 under “brown butter cookie dough buttercream” instructions.
- 2 cups unsalted butter – slightly softened but still cold
- 1 cup light brown sugar – packed
- 1/3 cup heavy cream – plus more if needed (I added a few extra tablespoons to my frosting to get it more spreadable).
- 2 cups all purpose flour
- 7 cups powdered sugar
- 1 tablespoon vanilla extract
- 1/2 – 3/4 cup mini chocolate chips
Equipment
-
Ateco cake stand
-
8″ inch round cake pans
-
8 inch cake boards
-
offset spatula
Instructions
Brown Butter Brown Sugar Cake Layers
-
In a small saucepan over medium-low heat, melt the butter. Continue to cook, stirring frequently, until the little white specks at the bottom of the melted butter turn golden brown. Watch closely because it will go from nicely toasted to burnt very quickly! Remove heat and pour into a heat-safe container and refrigerate until it becomes solid again.
-
Preheat oven to 325° F. Prepare three 8-inch cake pans by spraying with non-stick spray and lining the bottoms with parchment paper.
-
In a medium bowl, sift together the baking powder, baking soda, salt, and flour. Set aside.
-
In the bowl of a stand mixture fitted with a paddle attachment, cream together the brown butter and brown sugar. Add the oil and mix. Add the eggs, one at a time, mixing well after each addition.
-
With the mixture on low speed, add half of the flour mixture, all of the buttermilk and vanilla extract, then the rest of the flour mixture. Mix until partially combined, then fold in the mini chocolate chips. Be careful not to overmix.
-
Divide the batter evenly between the pans and bake for 28-33 minutes, or until a toothpick inserted into the middle of the layer comes out clean or with a couple crumbs stuck to it.
-
Let cool in pans for 10-15 minutes, then turn out onto cooling racks until completely cool. If making ahead of time, wrap with plastic and freeze.
Edible Cookie Dough
-
Line two 8-inch round cake pans with plastic. Make sure it overlaps the edge by about 3 inches on two of the sides.
-
Brown the 19 tablespoons of butter. ( Which is equivalent to 2-cubes of butter plus 3 tablespoons). In a small saucepan over medium-low heat, melt the butter. Continue to cook, stirring frequently, until the little white specks at the bottom of the melted butter turn golden brown. Watch closely because it will go from nicely toasted to burnt very quickly! Remove heat and pour into a heat-safe container and refrigerate until it turns from a liquid to a soft solid.
-
Place the flour in a microwave safe bowl and heat on high in 30 second intervals, stirring between each, until the temperature of the flour reaches 165°F. (About 45-60 seconds typically.)
-
In the bowl of an electric mixer (Fitted with paddle attachment) cream the butter and sugar until light and fluffy, about 2-3 minutes.
-
Add the vanilla, cream, and salt. Beat until combined. Scrape down the sides of the bowl. Add the heated flour and mix to combine. Fold in the chocolate chips.
-
Set aside 1-1½ cups of the cookie dough to save for decorating the cake. Divide the remaining dough in half and press evenly into the two plastic-lined pans. Refrigerate until firm and remove from the pans by carefully lifting the overhanging plastic. Wrap completely with plastic and store in the refrigerator for up to one week.
Brown Butter Cookie Dough Buttercream
-
Brown 1 cup of butter. In a small saucepan over medium-low heat, melt the butter. Continue to cook, stirring frequently, until the little white specks at the bottom of the melted butter turn golden brown. Watch closely because it will go from nicely toasted to burnt very quickly! Remove heat and pour into a heat-safe container and refrigerate until it becomes solid again.
-
In a small saucepan over medium-low heat, mix together brown sugar and heavy cream. Cook, stirring constantly, until sugar has dissolved into the cream. Set aside to cool.
-
Heat treat the flour. Place the flour in a microwave safe bowl and heat on high in 30 second intervals, stirring between each interval. Continue heating until flour reads 165°F on an instant read thermometer. This will take about 45 seconds to 1 minute.
-
In the bowl of a stand fitted with a paddle attachment, beat the 2 cups butter, brown butter, and a pinch of salt on medium high speed until it’s smooth and light in texture and color (there will be little golden brown flecks from the brown butter). Add the brown sugar/cream mixture and vanilla and beat well. With the mixer on low speed slowly add the powdered sugar and flour. If the frosting is too stiff or hard to mix, add heavy cream, one tablespoon at a time, beating well after each addition until a spreadable texture has been achieved.
-
This frosting can be made in advance and stored in the refrigerator. Let the frosting sit out at room temperature for about 3 hours and then beat it until it’s smooth again before using. If it is at room temperature and seems too thick to spread, add heavy cream, a tablespoon at a time until it becomes spreadable.
Assembly
-
Spread a dollop of buttercream in the center of a clean cake board or stand. Place a cake layer on top of it. This will help keep the cake from sliding around while you assemble and decorate it.
-
Spread a thin layer of buttercream evenly over the top of the cake layer.
-
Place an edible cookie dough layer on top of the buttercream and then add another thin layer of buttercream to the top of it to act as glue to keep the next cake layer from sliding around.
-
Repeat steps 2-3 with the second layers of cake and edible cookie dough.
-
Place the third cake layer on top and crumb coat the entire cake in a thin layer of buttercream. Refrigerate or freeze for a few minutes, until the buttercream is cold and firm.
-
While the cake is in the refrigerator, add ½ cup mini chocolate chips to the remaining buttercream and mix. You can add more mini chocolate chips if you’d like more in the final layer of frosting.
-
Spread the final layer of frosting around the entire cake. It’s a little tricky with the chocolate chips in the frosting, so this cake will end up looking a little more rustic. We finished decorating the cake by crumbling the set-aside edible cookie dough around the top of the cake.
Notes
You will need to brown 2 1/2 cups + 7 tablespoons of butter. Once all that butter is browned, transfer it to a separate container or bowl and let solidify in the fridge. Once it starts hardening, give it a stir to incorporate all the browned butter flecks throughout the butter (since you’ll be measuring it out for each element).
Of the browned butter you’ll need
- 10 tablespoons + 1 teaspoon of browned butter for the cake layers
- 1 cup browned butter for the edible cookie dough
- 1/2 cup + 5 1/2 tablespoons of browned butter for the buttercream
Nutrition
