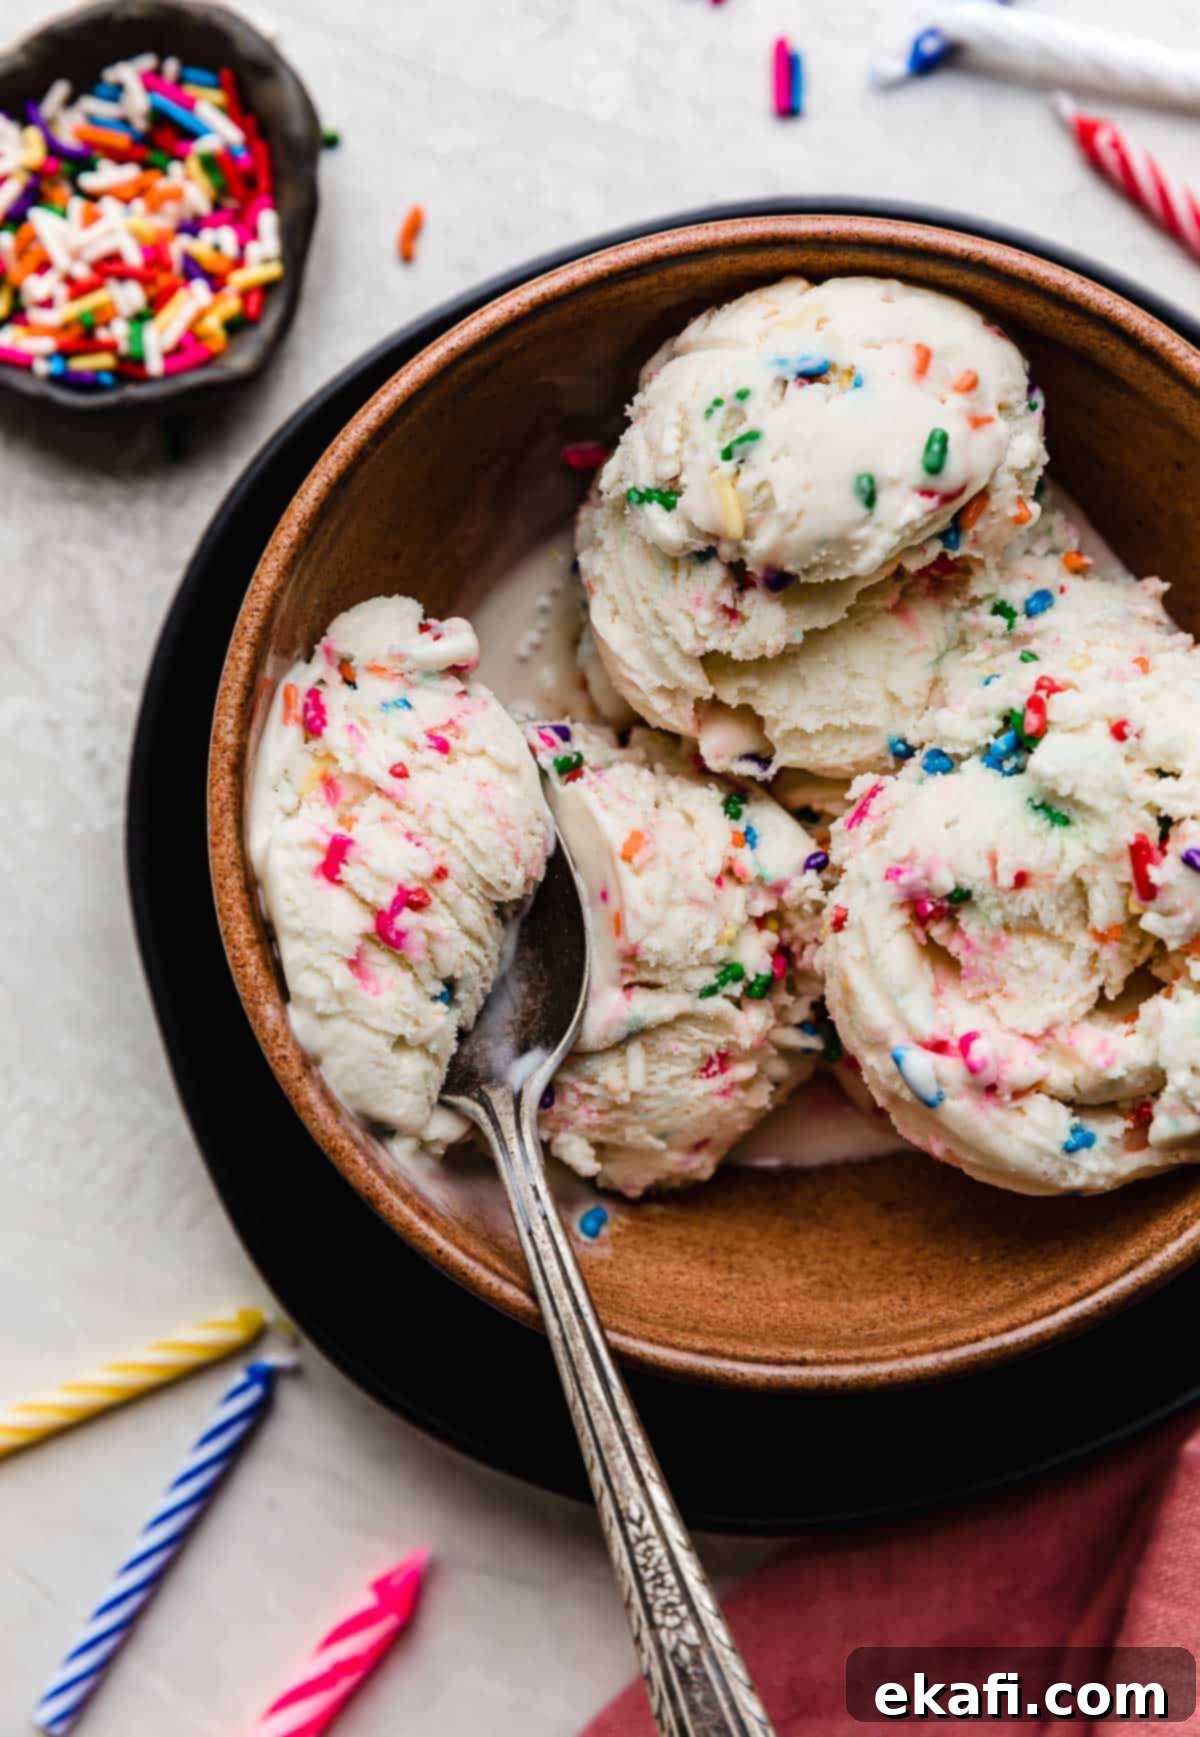
The Ultimate Homemade Birthday Cake Ice Cream: Easy Recipe for a Festive Treat
Imagine indulging in your favorite birthday cake, but in the dreamy, creamy form of ice cream. This homemade birthday cake ice cream recipe delivers exactly that – an absolutely amazing, nostalgic flavor that captures the essence of a celebration in every scoop! My family, especially the kids, absolutely devours this vibrant dessert, and it’s always a huge hit when I share a batch with extended family and friends. What’s the secret to this irresistible treat? It’s a clever combination of readily available store-bought cake mix, an abundance of colorful sprinkles for that signature festive look and delightful crunch, and our special secret ingredient for authentic cake batter flavor: cake batter extract.
This delightful dessert is perfect served on its own, but it also makes a fantastic companion to classic birthday cakes. Picture a scoop alongside a slice of a timeless Yellow Cake with Chocolate Frosting, a playful Funfetti Cake, or even a magical Harry Potter Birthday Cake. If you’re a true ice cream aficionado like me, you’ll love exploring my other homemade ice cream creations. Beyond beloved classics like creamy vanilla and rich dark chocolate, I also offer a variety of fun and unique flavors, such as the whimsical Cosmic Brownie Ice Cream and the refreshing Raspberry Ice Cream. It’s safe to say, my love for homemade ice cream knows no bounds!
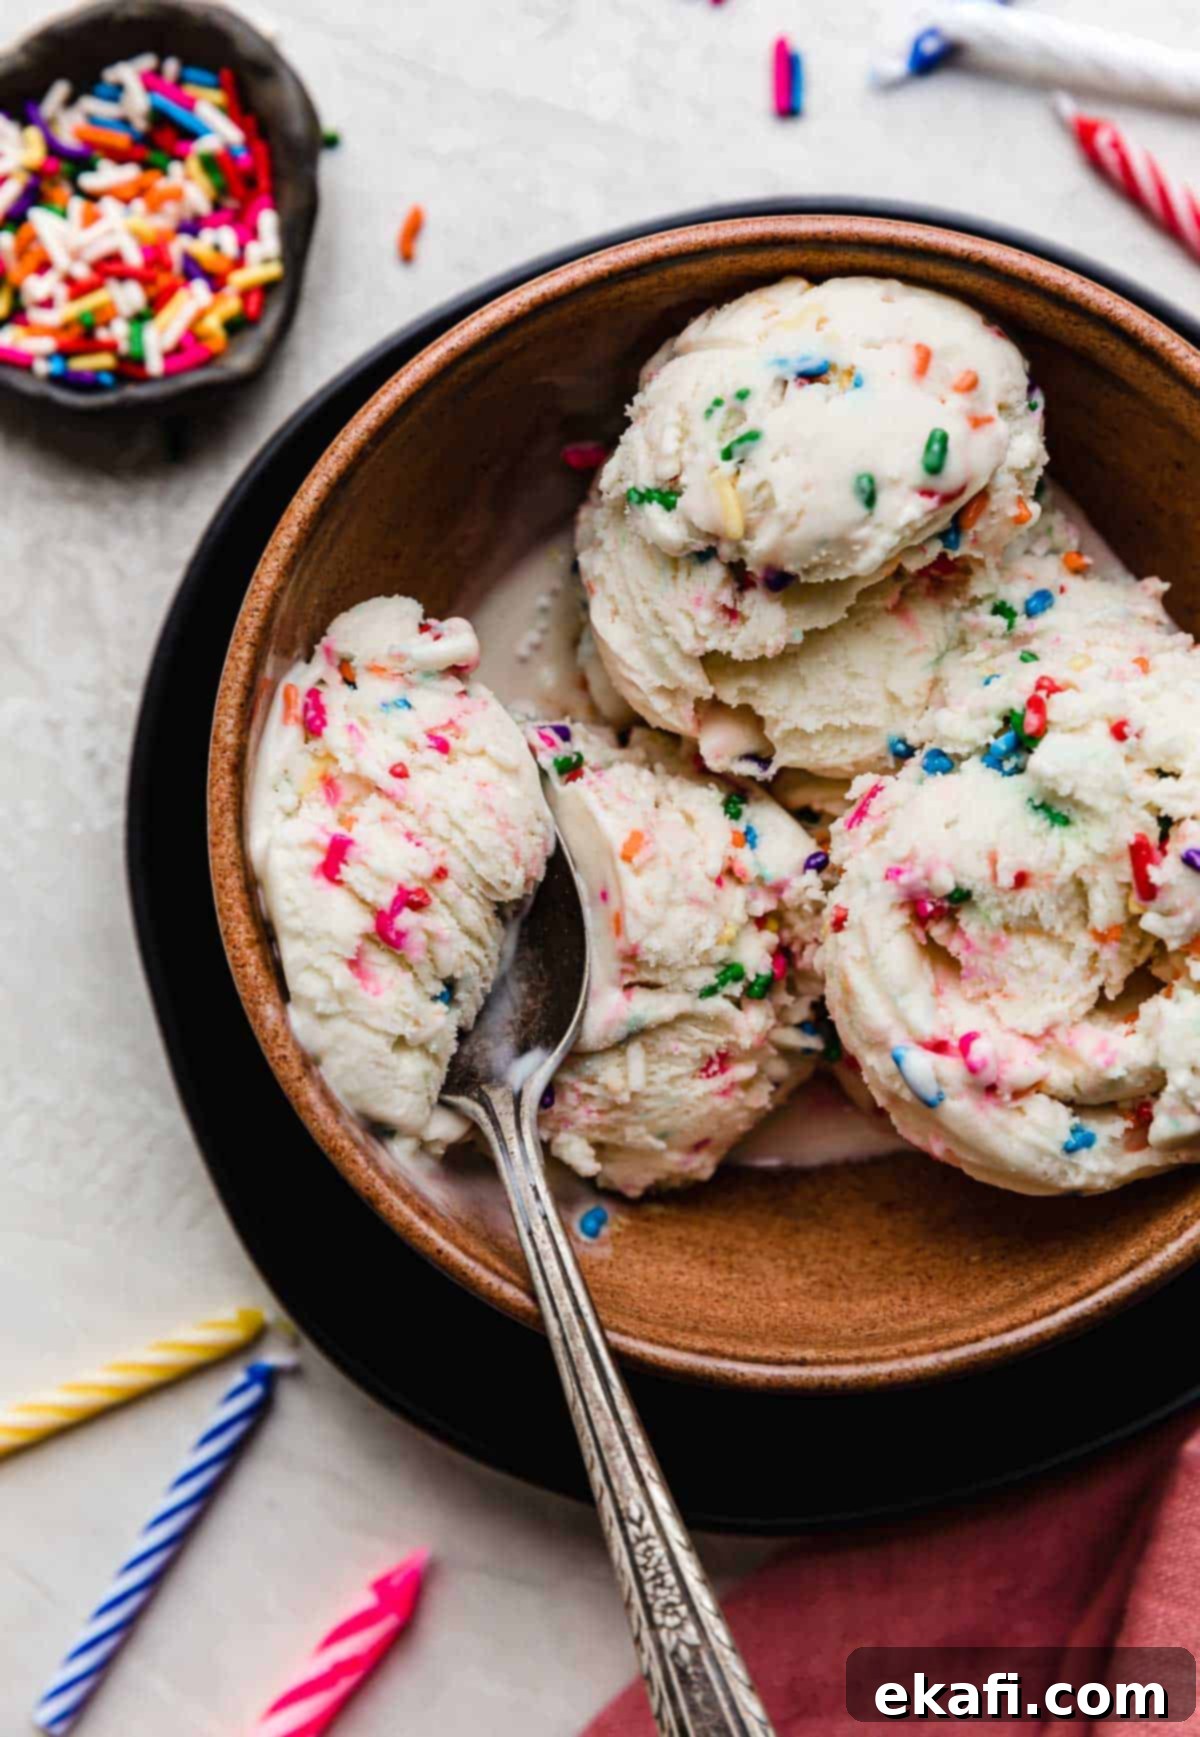
Why This Homemade Birthday Cake Ice Cream Recipe is a Must-Try
Making your own ice cream might seem intimidating, but this recipe proves it can be incredibly straightforward and rewarding. Here’s why this particular birthday cake ice cream stands out:
- Unrivaled Birthday Cake Flavor: This recipe truly excels at capturing that quintessential birthday cake taste. We don’t just hint at it; we embrace it fully! The ingenious combination of a boxed white cake mix and a touch of specialized cake batter extract creates an incredibly authentic and deeply satisfying flavor profile. The cake mix provides that underlying sweetness and subtle “baked good” essence, while the extract amplifies the distinct cake batter notes, making every spoonful taste like a celebration.
- Surprisingly Easy Homemade Ice Cream: Forget complicated techniques – making your own ice cream doesn’t have to be hard. In fact, it’s often much simpler than you think, and the resulting flavor and creamy texture far surpass most store-bought options. For this birthday cake ice cream recipe, the steps are minimal and clearly defined: sift the cake mix to ensure smoothness, gently cook a simple custard base on the stovetop, strain it for a silky texture, chill thoroughly, and then churn it in your ice cream maker. That’s it! With just a few basic steps, you’ll be enjoying the freshest, most delicious homemade ice cream you’ve ever tasted.
Essential Ingredients for Perfect Cake Batter Ice Cream
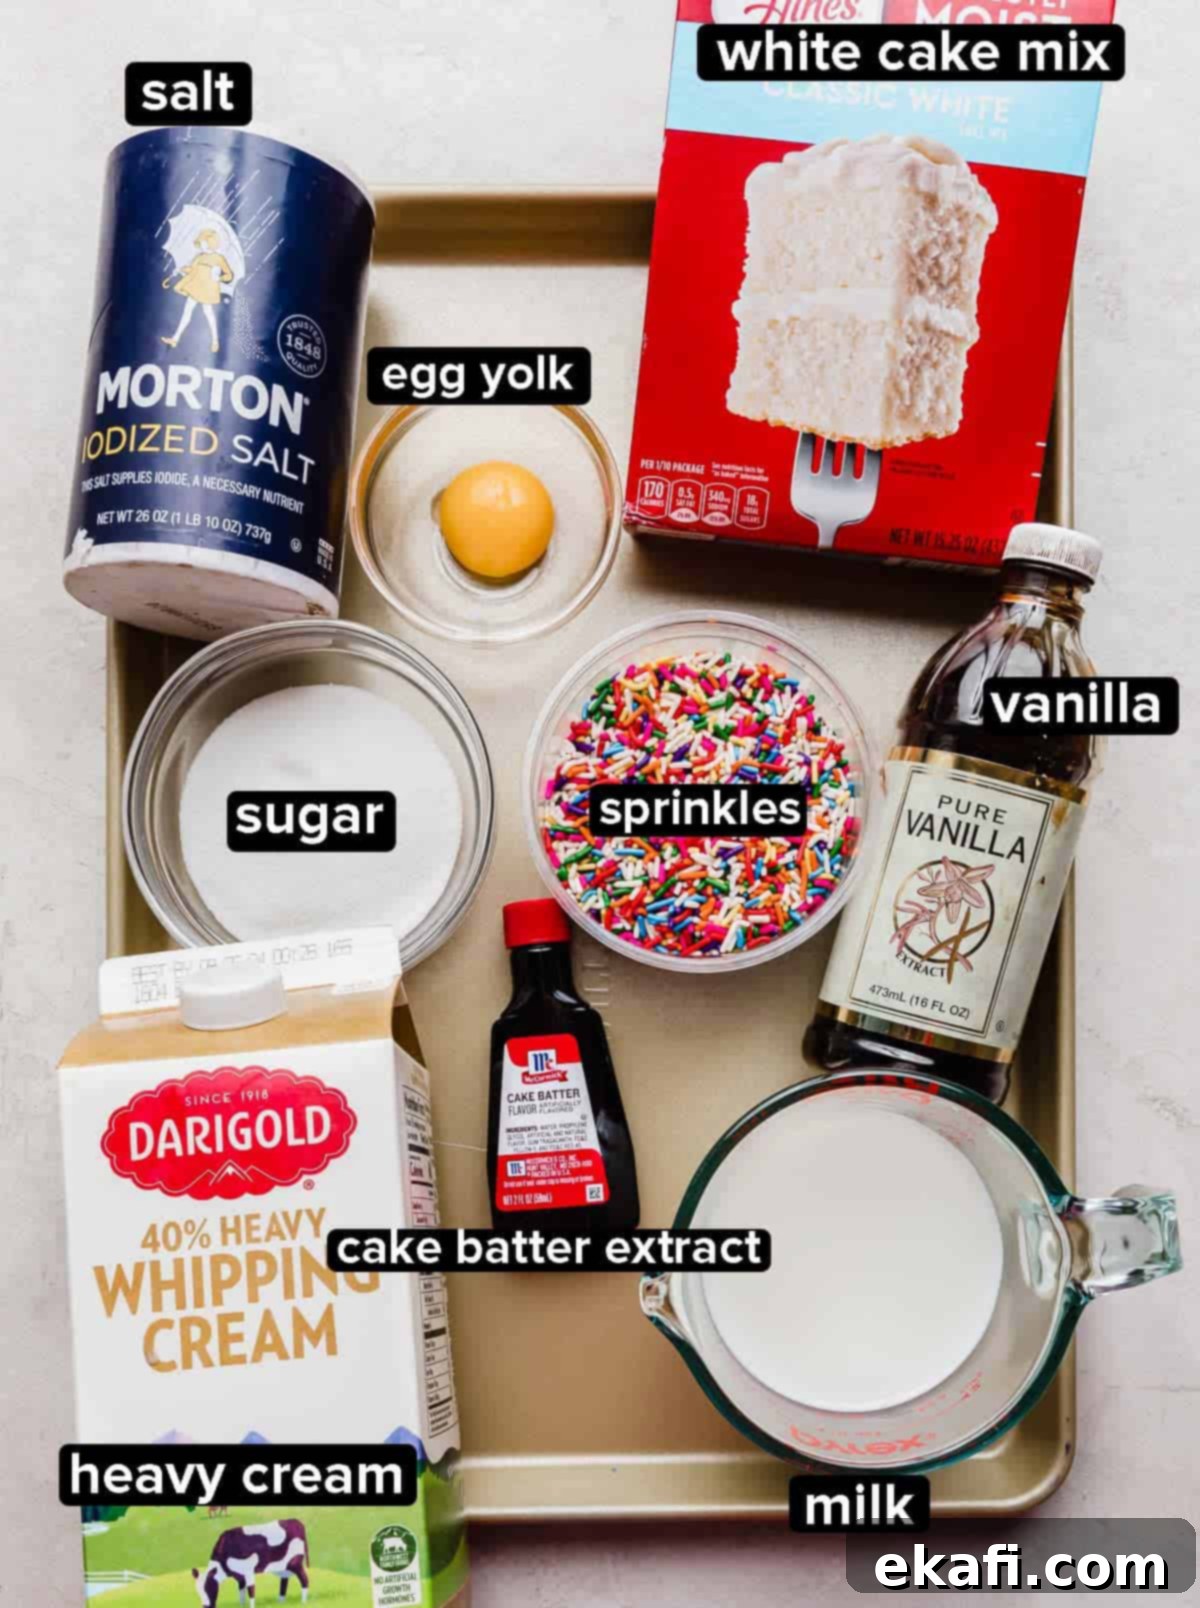
Each ingredient plays a crucial role in achieving the perfect flavor and texture for this homemade birthday cake ice cream. Here’s a closer look at what you’ll need and why:
- White Cake Mix: This is the foundational ingredient that gives our ice cream its signature “cake batter” flavor. Using a boxed white cake mix not only simplifies the process but also provides that distinct, sweet, and slightly vanilla-perfumed taste reminiscent of unbaked cake batter. While white cake mix is recommended for the classic birthday cake profile, don’t hesitate to experiment! A yellow cake mix would lend a richer, buttery hue and flavor, while a chocolate cake mix could create a delightful chocolate birthday cake ice cream. Remember to use *unprepared* cake mix and sift it well to avoid any powdery texture in your custard.
- Heavy Whipping Cream: The cornerstone of any truly luxurious ice cream, heavy whipping cream provides the high fat content essential for a rich, ultra-creamy texture. Fat molecules prevent the formation of large ice crystals, ensuring your ice cream remains smooth and velvety, not icy. It also contributes significantly to the indulgent mouthfeel and deep flavor.
- Milk (Whole or 2%): Paired with the heavy cream, milk helps to balance the richness and achieve the ideal consistency for churning. Whole milk will yield a slightly creamier result, while 2% milk is a good lighter alternative that still maintains a delightful texture.
- Granulated Sugar: Beyond simply sweetening the ice cream, sugar plays a vital role in its structure. It acts as a natural antifreeze, lowering the freezing point of the mixture and further inhibiting the formation of large, crunchy ice crystals. This chemical reaction is key to achieving that perfectly scoopable, creamy consistency.
- Egg Yolk: We use just one large egg yolk to create a beautifully thick and smooth custard base. Egg yolks are fantastic emulsifiers, meaning they help to bind the fat and water molecules together, resulting in an incredibly stable and rich ice cream base. They contribute to a luxurious mouthfeel and a velvety texture that melts delightfully in your mouth. Be sure to beat it thoroughly before adding to the mixture to ensure it incorporates smoothly.
- Vanilla Extract: An indispensable flavor in almost all classic baked goods, vanilla extract is absolutely essential for recreating the authentic taste of birthday cake in ice cream form. It provides a warm, sweet, and aromatic base that perfectly complements the other cake-inspired flavors.
- Cake Batter Extract: This is truly the “secret weapon” for achieving the most authentic homemade cake batter ice cream flavor! This unique extract has a complex profile that sits wonderfully between vanilla and a rich, buttery note, perfectly mimicking the taste of unbaked cake batter. You can often find it online or in specialty baking stores. If you can’t get your hands on it, don’t worry – butter extract or almond extract can serve as good substitutes, offering a similar depth, though the final flavor will be slightly different. If all else fails, simply omit it; your ice cream will still be delicious, just perhaps less intensely “cakey.”
- Rainbow Sprinkles: What’s a birthday cake without sprinkles? These vibrant little bursts of color are crucial for the aesthetic appeal and add a delightful, subtle texture variation. They infuse a playful, festive spirit into every scoop, making this ice cream truly feel like a party in a bowl. Use plenty for maximum visual impact and crunch!
Step-by-Step Guide: How to Make Irresistible Birthday Cake Ice Cream
Creating this delicious homemade birthday cake ice cream is a straightforward process. Follow these simple steps for a perfect batch:
- Sift Cake Mix: Begin by measuring out 1 cup of white cake mix. Pour it through a fine mesh sieve directly into a medium saucepan. This crucial step removes any potential lumps in the cake mix, ensuring your final ice cream custard is perfectly smooth and velvety, free from any powdery pockets.
- Beat Egg Yolk: Separate one large egg yolk from its white and place the yolk in a small bowl. Use a fork to vigorously whisk the egg yolk until it is thoroughly broken up and smooth. This prepares it to seamlessly incorporate into the custard base, preventing scrambled egg bits.
- Mix and Cook Custard Ingredients: To the sifted cake mix in the saucepan, add 1½ cups of heavy cream, 1½ cups of milk (either whole milk or 2% works well), ½ cup of granulated sugar, the beaten egg yolk, and a pinch of salt. Whisk all the ingredients together until they are well combined and smooth. Place the saucepan over medium heat and cook, stirring frequently, until the mixture reaches a temperature of 160°F (71°C). This temperature is important for dissolving the sugar, thickening the custard, and safely cooking the egg yolk.
- Add Extracts: Once the custard has reached 160°F, immediately remove it from the heat. Stir in 1 teaspoon of vanilla extract and ½ teaspoon of cake batter extract. Adding the extracts off the heat helps preserve their delicate flavors, preventing them from evaporating during cooking.
- Chill Custard: Pour the warm custard through the fine mesh sieve once more, this time into a large heat-proof container (such as a glass bowl or an airtight food storage container). This second straining ensures an exceptionally smooth texture. Allow the custard to cool slightly at room temperature, then cover it tightly and transfer it to the refrigerator. Chill for at least 4 hours, or ideally overnight (up to 24 hours). Thoroughly chilling the custard is critical; it ensures the fat solidifies properly and the mixture is cold enough for optimal churning, leading to a creamier ice cream with fewer ice crystals.
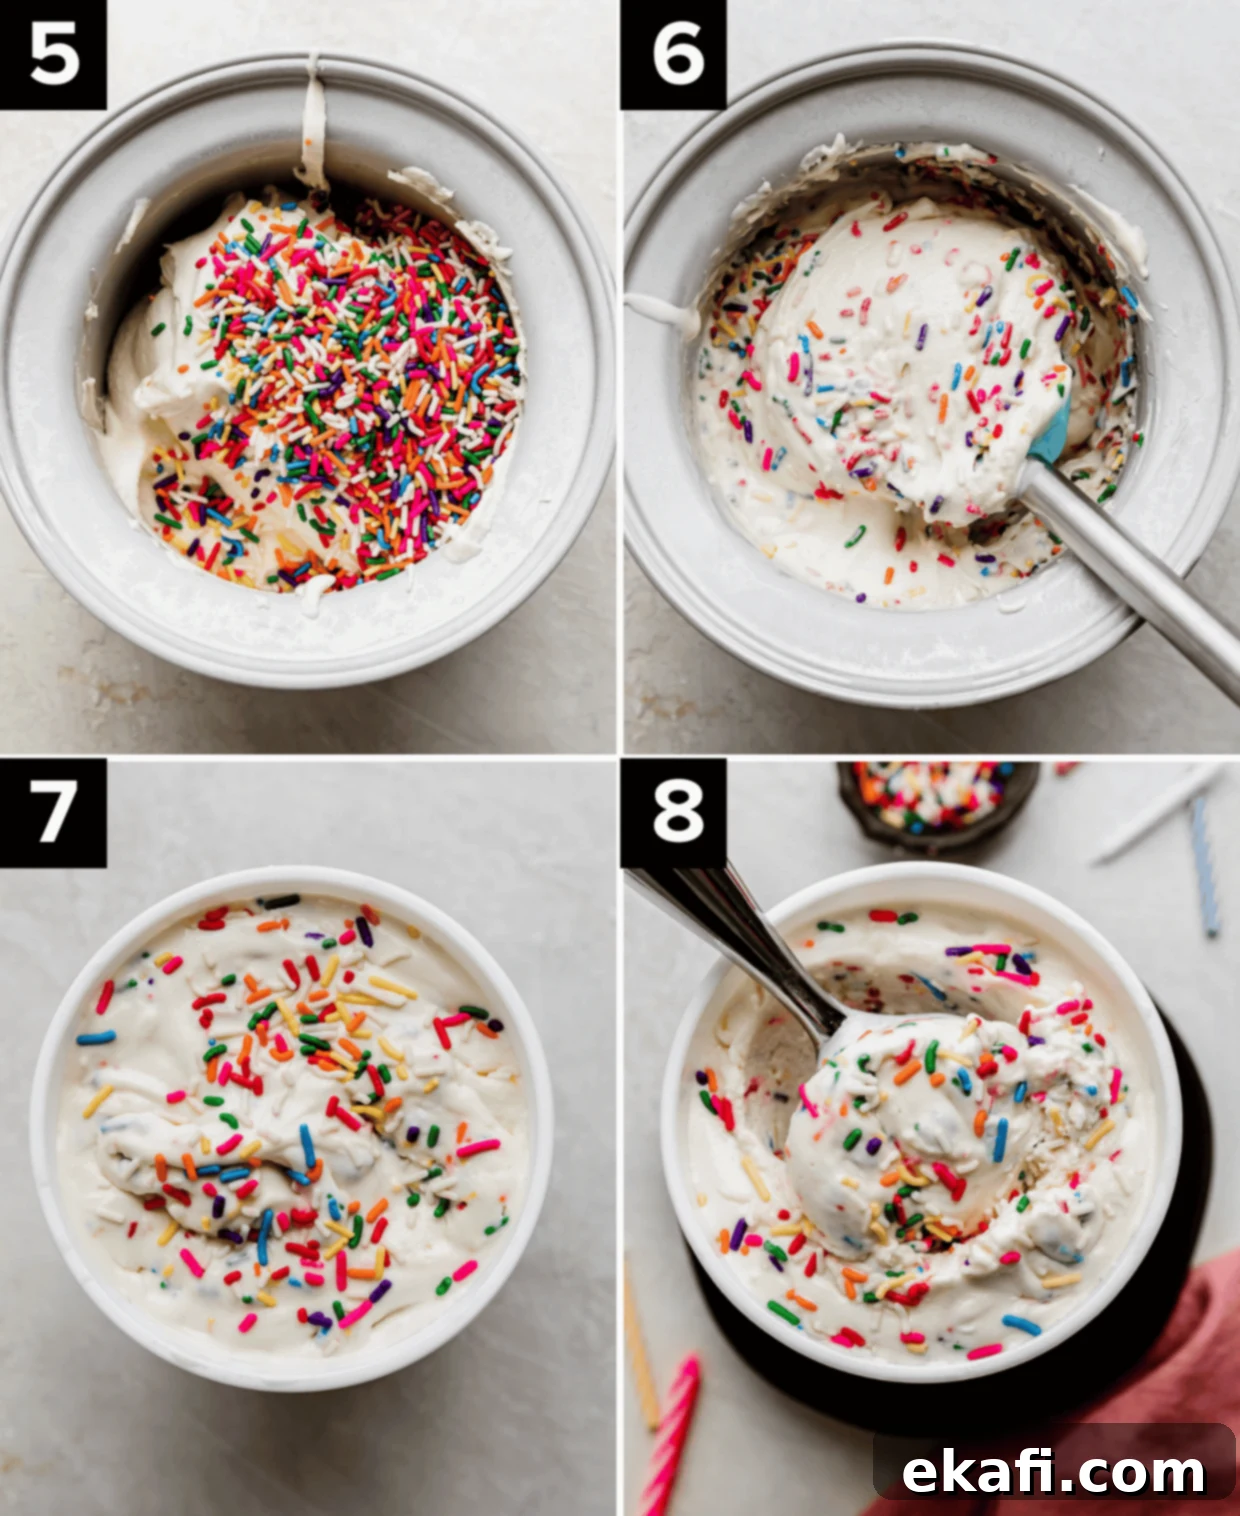
- Churn Ice Cream: Once the custard is completely chilled, follow the instructions provided with your specific ice cream machine. Pour the chilled custard into the freezer bowl and churn according to the manufacturer’s directions, typically until it reaches the consistency of soft-serve ice cream. The churning process aerates the mixture and continues to break down ice crystals, creating a light and smooth texture.
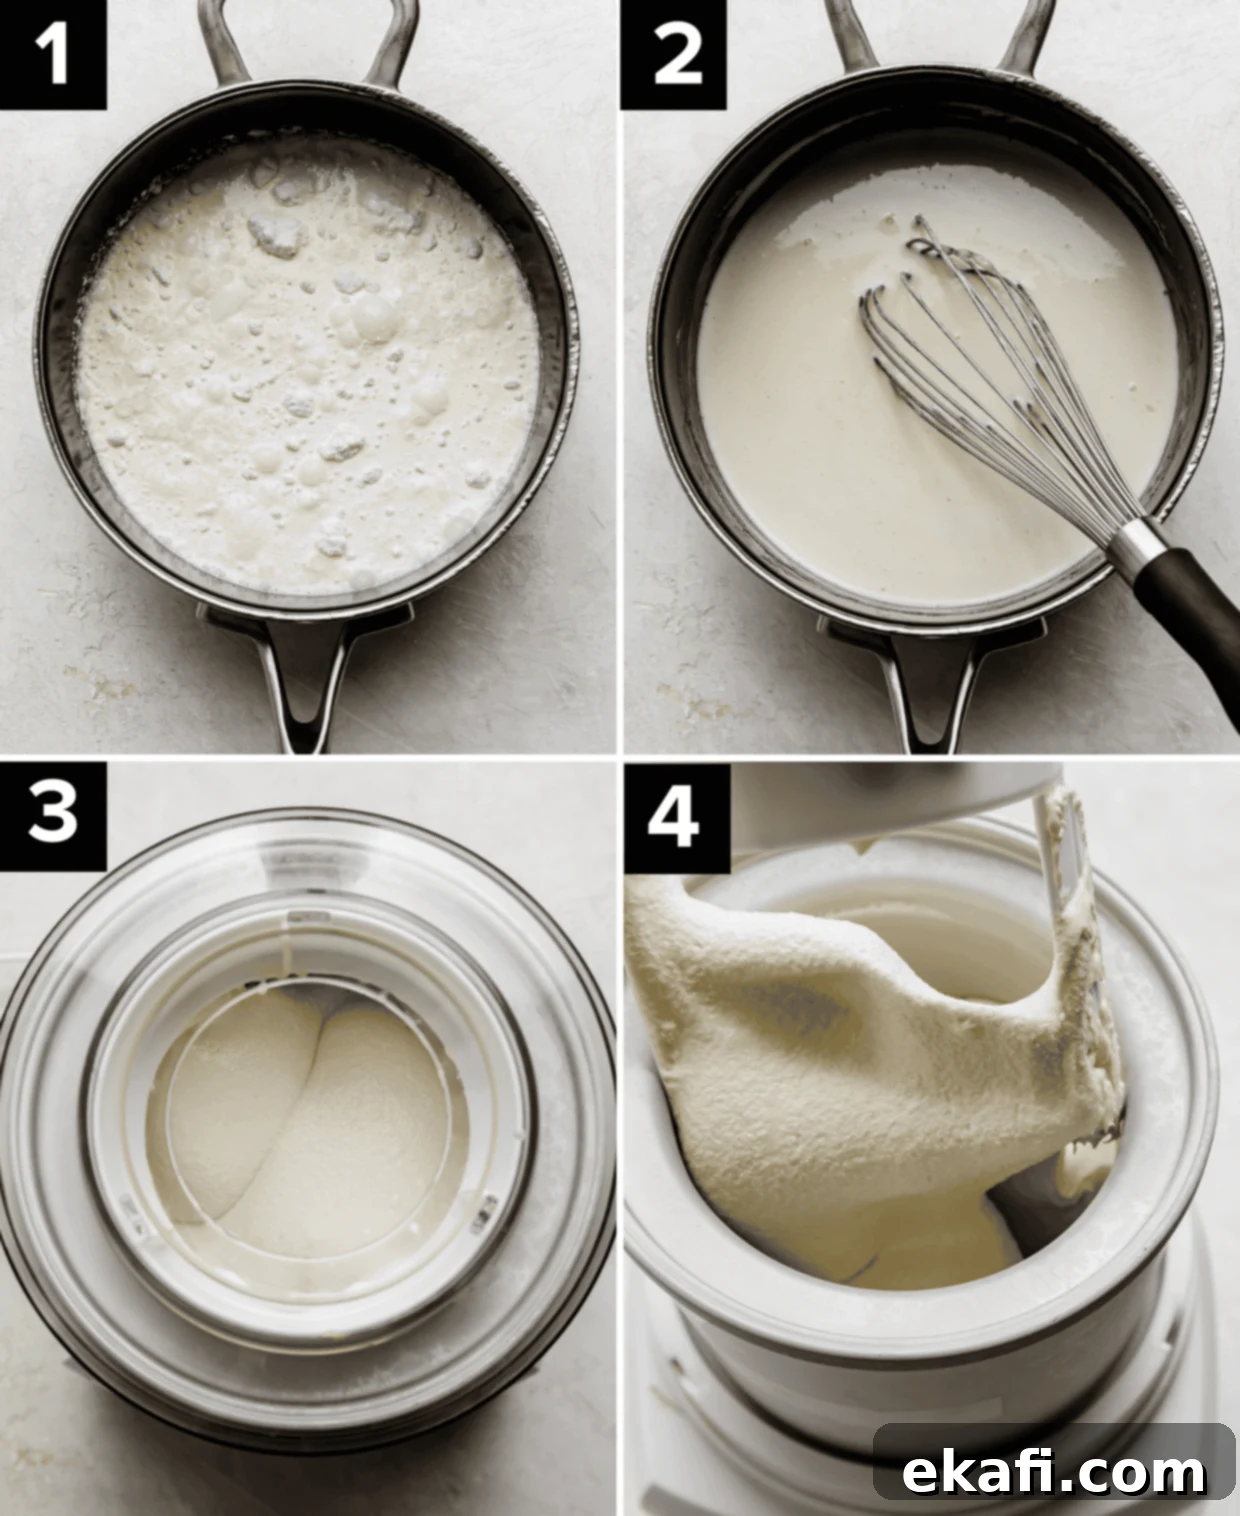
- Add Sprinkles: Once your ice cream has reached the desired soft-serve consistency after churning, gently fold in ½ cup of vibrant rainbow sprinkles. Use a spatula to incorporate them evenly without overmixing, which can cause them to lose their color. This is also the perfect moment to add any other desired mix-ins, such as cake pieces or cookie dough.
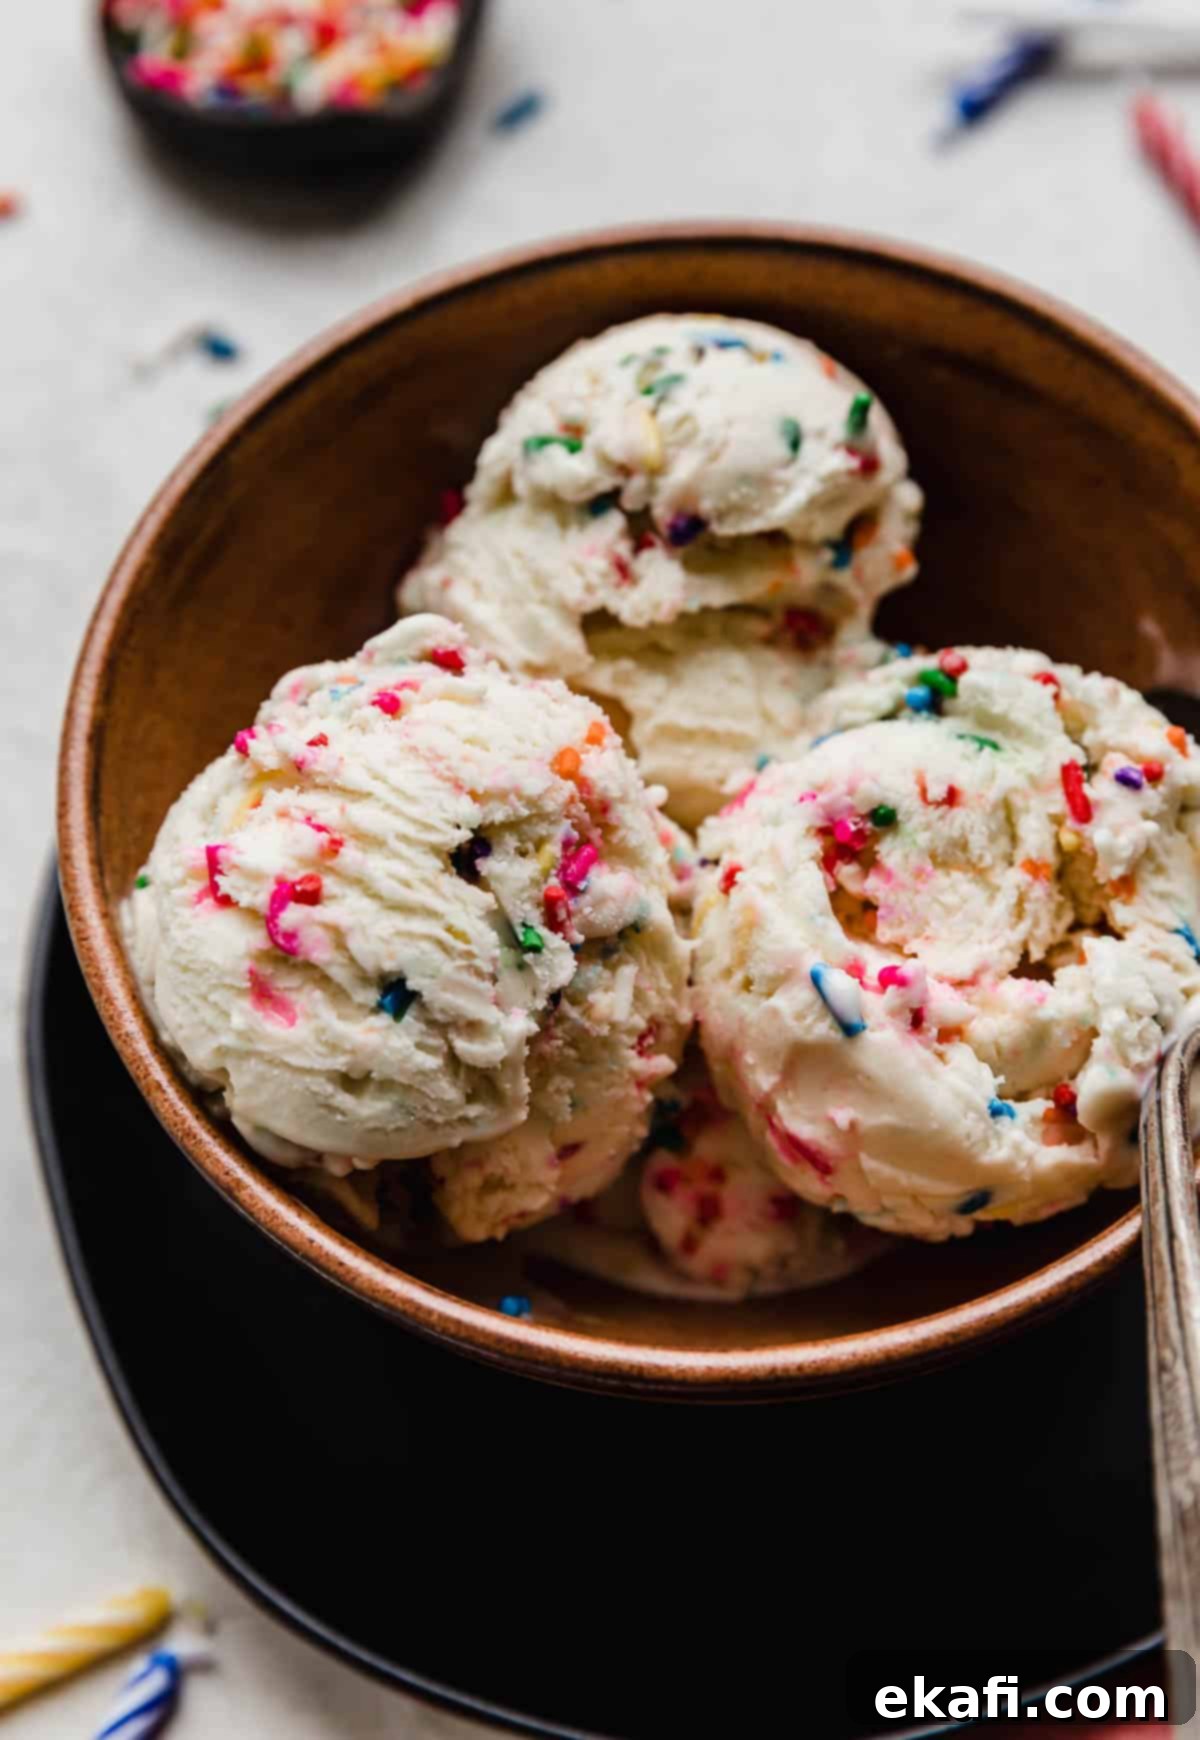
- Freeze Ice Cream Before Serving: Transfer the freshly churned, soft ice cream to a freezer-safe, airtight container. Press a piece of parchment paper directly onto the surface of the ice cream to prevent freezer burn, then seal the container. Place it in the freezer for an additional 2-4 hours (or longer, if you prefer a very firm scoop) to allow it to fully harden and develop its ultimate creamy texture. Once firm, scoop and enjoy your delightful homemade birthday cake ice cream!
Expert Tips for the Best Birthday Cake Ice Cream
Elevate your homemade birthday cake ice cream with these helpful tips and creative variations:
- Don’t Skip Sifting: As mentioned in the steps, using a fine mesh sieve to sift your cup of cake mix is paramount. This simple action ensures that every single lump is removed, leading to an incredibly smooth, melt-in-your-mouth custard base without any grainy or powdery texture.
- Chill for Longer for Ultimate Creaminess: While 4 hours of chilling is sufficient, many experienced ice cream makers swear that letting your custard chill in the fridge for a full 24 hours makes a noticeable difference. The prolonged chilling period allows the fat molecules to fully solidify and the flavors to meld, resulting in an even smoother, richer, and more luxurious ice cream. Make sure it’s covered tightly to prevent a skin from forming and keep it fresh.
- Add Cake Pieces for Extra Fun: If you adore the idea of chunks of actual cake in your ice cream, you absolutely can! Simply bake a small cake (or use leftovers), allow it to cool completely to prevent it from melting the ice cream, and then break it up into small, bite-sized pieces. Fold these cake pieces into the churned ice cream base at the same time you add the sprinkles. For a truly classic birthday cake flavor experience, I highly recommend using pieces from my yellow cake recipe or the festive Funfetti cake.
- Swirl in Frosting: Take your birthday cake ice cream to the next level by swirling in some buttercream frosting! Once the ice cream is churned and you’ve added your sprinkles (and cake pieces, if using), dollop small amounts of your favorite buttercream frosting into the ice cream and gently swirl it with a knife or spoon. My classic buttercream recipe would be perfect for this. Or, get creative and use up any leftover cupcakes you might have on hand – a rare occurrence in my house, but perhaps a delightful possibility in yours!
- Endless Flavor Variations: This base recipe is incredibly versatile! You can easily customize the flavor by experimenting with different types of cake mix:
- Strawberry Cake Mix: For a delightful strawberry cake batter ice cream.
- Red Velvet Cake Mix: To create a decadent red velvet birthday cake ice cream.
- Other Mix-Ins: Beyond cake pieces and frosting, consider adding crushed-up Oreos (or even golden Oreos!) for a “birthday cake Oreo ice cream.” Imagine the deliciousness of cake batter cookie dough ice cream by folding in homemade cookie dough bites. The possibilities are truly endless!
- No Thermometer? No Problem!: If you don’t have a kitchen thermometer to check when your custard reaches 160°F, there’s a traditional method you can use. The custard is properly cooked when it thickens enough to coat the back of a spoon. When you run your finger across the spoon through the custard, it should leave a clear line that holds without the custard running back together. This indicates it’s safely cooked and ready for chilling. Be careful not to overcook, as this can lead to a grainy texture or scrambled eggs!
Make Ahead, Storing, and Freezing Your Homemade Ice Cream
Homemade ice cream is an ideal make-ahead dessert, perfect for planning parties or ensuring you always have a sweet treat on hand. Here’s how to best manage this birthday cake ice cream:
- Make Ahead: You can prepare the custard base for this ice cream up to 24 hours in advance. After cooking and straining, simply cover it tightly and let it chill in the refrigerator until you’re ready to churn. The longer chilling period can even enhance the creaminess! Once churned, the ice cream keeps beautifully in the freezer for an extended period, making it a fantastic prep-ahead option for any occasion.
- Storing: To preserve the incredible creamy texture and vibrant flavor of your leftover birthday cake ice cream, always store it in a freezer-safe, airtight container. This prevents the formation of ice crystals and protects it from absorbing odors from your freezer, which can lead to freezer burn. I personally recommend using durable, specialized ice cream containers like these containers for optimal freshness. Stored properly, your delicious homemade ice cream will maintain its quality for up to two months.
- Freezing: After churning, it’s absolutely essential to freeze this birthday cake ice cream for at least 2-4 hours before serving. Freshly churned ice cream has a soft-serve consistency and needs time in the freezer to firm up properly. Without this crucial freezing step, it would be a delightful, but ultimately soupy, mess! The freezing process allows the ice cream to harden to a scoopable texture while retaining its luxurious creaminess.
Frequently Asked Questions About Birthday Cake Ice Cream
This particular homemade birthday cake ice cream recipe, as written with standard white cake mix, is NOT gluten-free. However, it can very easily be adapted to be gluten-free! Simply substitute the regular white cake mix with your favorite gluten-free cake mix. Ensure all other ingredients, like sprinkles and extracts, are also certified gluten-free if you need to adhere to strict dietary requirements. The preparation method remains exactly the same.
Classic cake batter ice cream, especially this birthday cake version, offers a delightful flavor profile dominated by sweet vanilla and rich, buttery notes. The special cake batter extract enhances this, often adding a subtle, nutty, or almost almond-like undertone that perfectly mimics the taste of raw cake batter. The added sprinkles contribute a sugary crunch and a hint of their own subtle sweetness. By using different flavors of cake mix (like strawberry or chocolate) or experimenting with other extracts (like almond or butter), you can easily customize this base to create a wide array of delicious cake batter-inspired ice cream flavors.
You can absolutely enjoy this specific homemade birthday cake ice cream recipe while pregnant! It’s generally advised that pregnant individuals avoid consuming uncooked eggs or raw flour due to potential food safety risks. While raw cake mix from a box contains uncooked flour, and our recipe calls for an egg yolk, we proactively cook both the cake mix (which contains flour) and the single egg yolk within our custard base to a safe temperature of 160°F (71°C). This pasteurizes the egg and cooks the flour, rendering the ingredients safe for consumption. Therefore, once the custard has been cooked and subsequently churned, this ice cream is perfectly safe for pregnant people to enjoy.
While the concept of cake-flavored desserts has existed for ages, the specific “cake batter ice cream” flavor is often attributed to Cold Stone Creamery, who claims to have invented it in 2003. Since then, numerous other ice cream companies and artisanal creameries have introduced their own versions of cake batter and birthday cake-flavored ice creams due to its immense popularity. Now, with this easy and delicious recipe, you no longer need to visit a scoop shop to enjoy this festive flavor – you can effortlessly make it right at home!
Explore More Delicious Ice Cream Recipes
If you’ve loved making this festive birthday cake ice cream, be sure to explore my other irresistible homemade ice cream recipes:
- German Chocolate Ice Cream
- Cookie Monster Ice Cream
- Ice Cream Cake Roll
- Butterscotch Ice Cream
- No Churn Oreo Ice Cream
- Cinnamon Ice Cream
Did you make this recipe? I’d absolutely love to hear about your experience! Please leave a star rating and review right here on the blog post, or simply scroll below the recipe card to share your thoughts. Your feedback helps me create even more delicious recipes for you to enjoy.
Stay up-to-date with all my latest culinary adventures by following us on Instagram, TikTok, YouTube, Facebook, and Pinterest. I can’t wait to see your creations!
Print
SaveSaved!
Review
Birthday Cake Ice Cream
Ingredients
- 1 cup white cake mix – unprepared and SIFTED for a smooth custard
- 1 1/2 cups heavy cream – for rich, creamy texture
- 1 1/2 cups milk – whole or 2% for balance
- 1/2 cup granulated sugar – sweetens and prevents ice crystals
- 1 large egg yolk – beaten with a fork to break it up, for thickening
- pinch salt – enhances flavors
- 1 teaspoon vanilla extract – essential for classic cake flavor
- 1/2 teaspoon cake batter extract – secret ingredient for authentic cake batter taste
- 1/2 cup rainbow sprinkles – for festive color and a fun crunch
Equipment
-
Ice Cream Maker
Instructions
-
In a medium saucepan, add the sifted cake mix, granulated sugar, heavy cream, milk, beaten egg yolk, and a pinch of salt. Whisk all ingredients together until the mixture is smooth and well combined. Cook this custard base over medium heat, stirring frequently, until it reaches an internal temperature of 160°F (71°C). Immediately remove the saucepan from the heat and stir in the vanilla extract and the cake batter extract, ensuring they are fully incorporated. Pour the warm mixture through a fine mesh sieve into a clean, heat-proof container to ensure an extra-smooth texture. Cover the container and place it in the fridge to chill thoroughly for at least 4 hours, or ideally overnight (up to 24 hours). This chilling step is crucial for the best ice cream consistency.
-
Once the custard mixture is completely chilled, pour it into your ice cream maker. Churn the mixture according to your manufacturer’s directions until it reaches a soft-serve consistency. This usually takes about 20-30 minutes, depending on your machine. When the churning is complete, gently fold in the rainbow sprinkles using a spatula. If adding other mix-ins like cake pieces or cookie dough, now is the time to incorporate them.
-
Transfer the freshly churned ice cream to a freezer-safe, airtight container. To prevent freezer burn, you can press a piece of parchment paper directly onto the surface of the ice cream before sealing the container. Store the container in the freezer for an additional 2-4 hours to allow the ice cream to firm up completely before serving. Once firm, scoop generously and enjoy your delicious homemade birthday cake ice cream!
Notes
For the best possible texture and flavor, allow the ice cream custard to chill in the refrigerator for at least 4 hours, or preferably up to 24 hours. This extended chilling time helps the ingredients fully meld and results in a significantly creamier final product.
Store your delicious homemade ice cream in a freezer-safe, airtight container. This will protect it from freezer burn and preserve its fresh taste and creamy consistency for up to two months.
Nutrition
