The Ultimate Guide to Freezing Cookie Dough: Bake Fresh Cookies Anytime!
Imagine the delightful aroma of warm, freshly baked cookies filling your home, ready in minutes, even on the busiest days. Sounds like a dream, right? With the simple magic of freezing cookie dough, this dream becomes your delicious reality! Whether you’re celebrating a new neighbor, welcoming a baby, hosting an impromptu gathering, or simply craving a sweet treat, having a stash of homemade frozen cookie dough is your ultimate culinary secret weapon.
Freezing cookie dough is incredibly straightforward and remarkably efficient, transforming how you approach baking. It’s the perfect solution for preparing ahead, ensuring you always have a comforting dessert at your fingertips. No more last-minute grocery runs or complicated baking sessions when a cookie craving strikes or unexpected guests arrive. Just reach into your freezer, and you’re moments away from warm, gooey perfection!
Just like mastering freezing cakes can save you precious time and effort, freezing cookie dough offers similar benefits, simplifying your baking routine and bringing joy to your kitchen. Soon, we’ll also delve into everything you need to know about freezing already-baked cookies for even more convenience!
How to Freeze Drop Cookie Dough
Drop cookies are arguably the most popular and easiest type of cookie to freeze. This category includes many beloved recipes where you simply scoop or roll the dough into balls and then bake them. Think classic favorites like Chocolate Chip Cookies, Sugar Cookies, Peanut Butter Cookies, Snickerdoodle Cookies, Oatmeal Chocolate Chip Cookies, and Oatmeal Raisin Cookies. Freezing these allows you to bake a single cookie or a whole batch on a whim!
- Prepare the Cookie Dough: Start by following your chosen recipe precisely to create your delicious cookie dough. Ensure all ingredients are well combined.
- Chill the Cookie Dough (If Required): Many recipes benefit from chilling the dough. If your recipe calls for chilling, transfer the dough to an airtight, freezer-safe container and place it in the refrigerator. Chilling allows the butter to firm up, which reduces spreading during baking and helps develop a richer flavor and chewier texture.
- Portion into Balls: Once the dough is properly chilled (or if chilling wasn’t required), remove it from the fridge. Use a cookie scoop or your hands to roll the dough into individual balls. For larger cookies, like those from Crumbl cookie recipes, a 1/4 cup scoop works well. For traditional sized cookies, a 2-tablespoon scoop is ideal. Aim for consistent sizes to ensure even baking.
- Gently Flatten into Disks: For many cookie types, gently pressing down on each dough ball with the palm of your hand to create a thick disk can improve their shape when baked. This isn’t mandatory for all recipes, but it often helps cookies spread more evenly and prevents them from becoming too puffy.
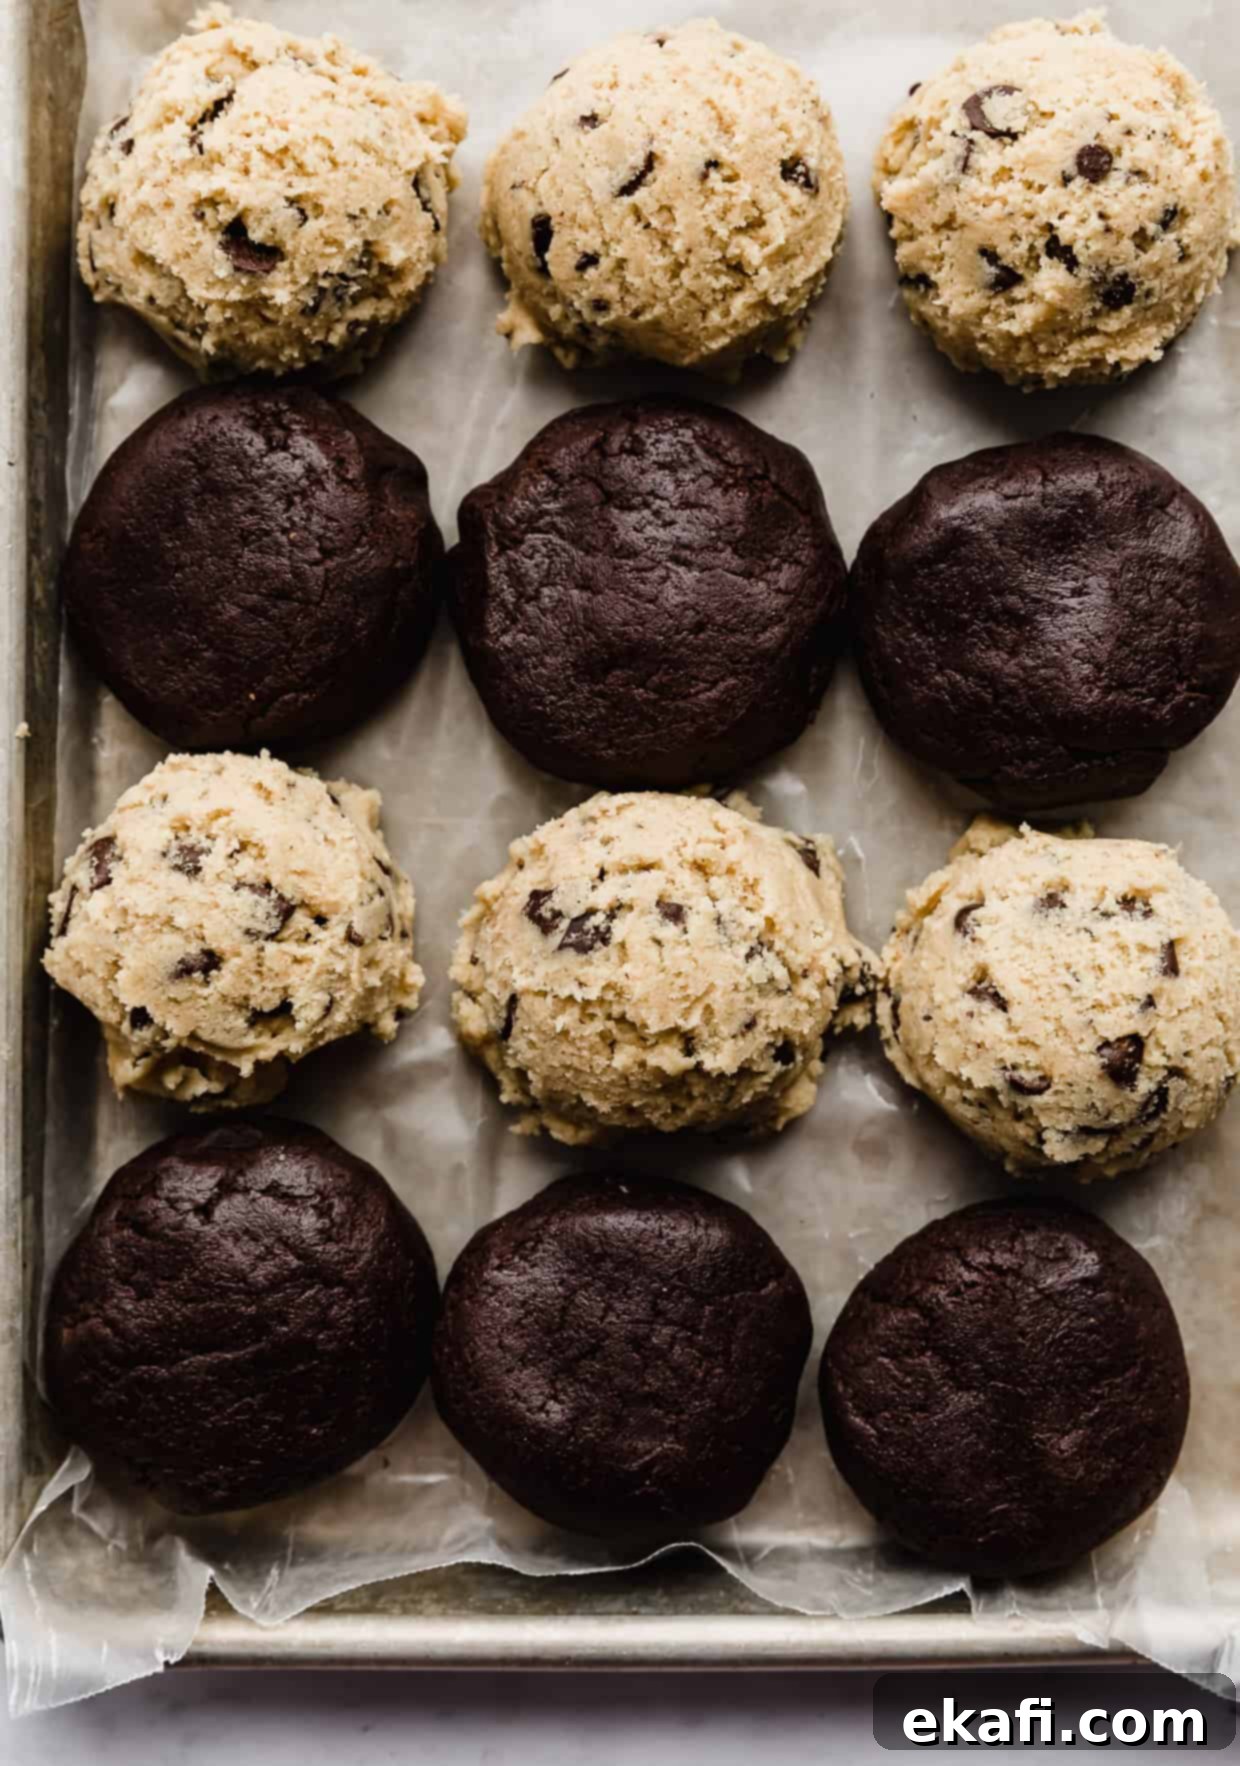
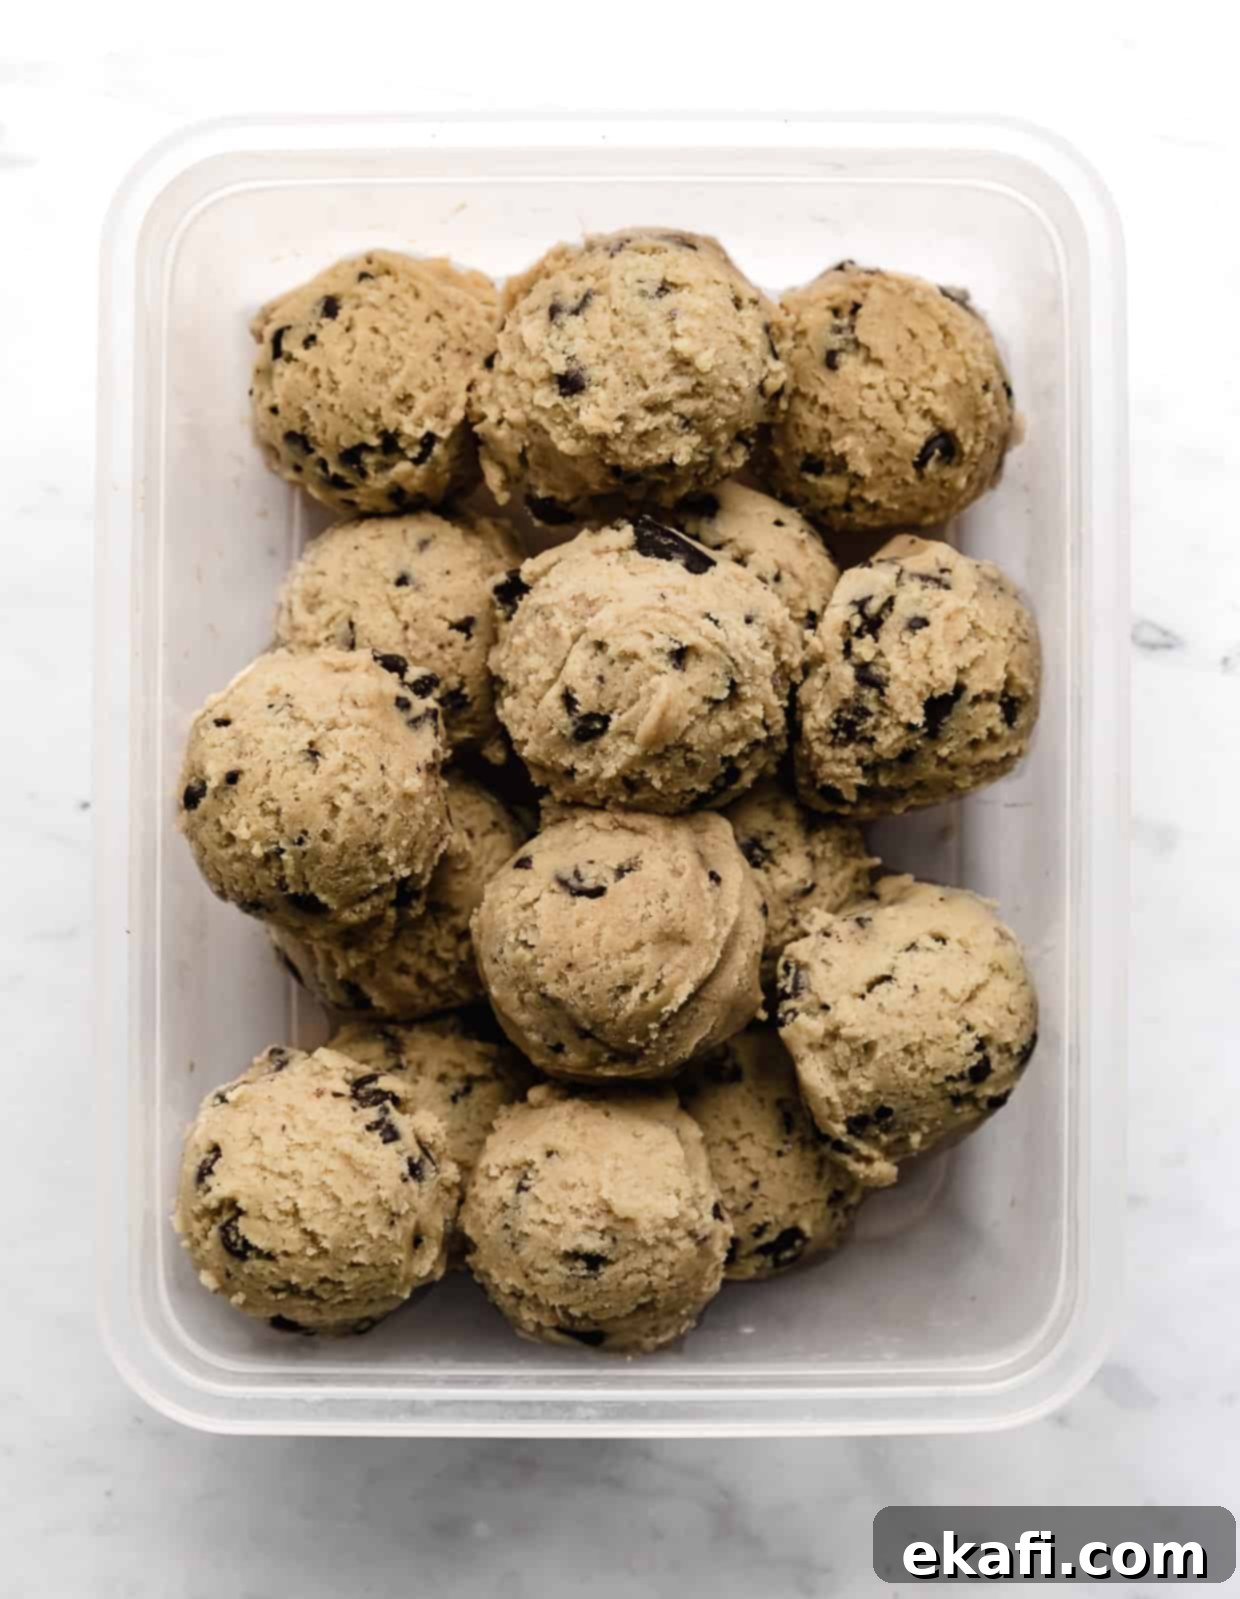
- Flash Freeze the Dough Balls: Arrange the portioned dough balls on a baking sheet or tray lined with parchment paper, ensuring they don’t touch each other. Place the sheet in the freezer for about 10-15 minutes, or in the refrigerator for 60 minutes, until the dough balls are firm to the touch. This “flash freezing” step is crucial as it prevents the dough balls from sticking together when you transfer them to a freezer bag, making it easy to grab just a few at a time later.
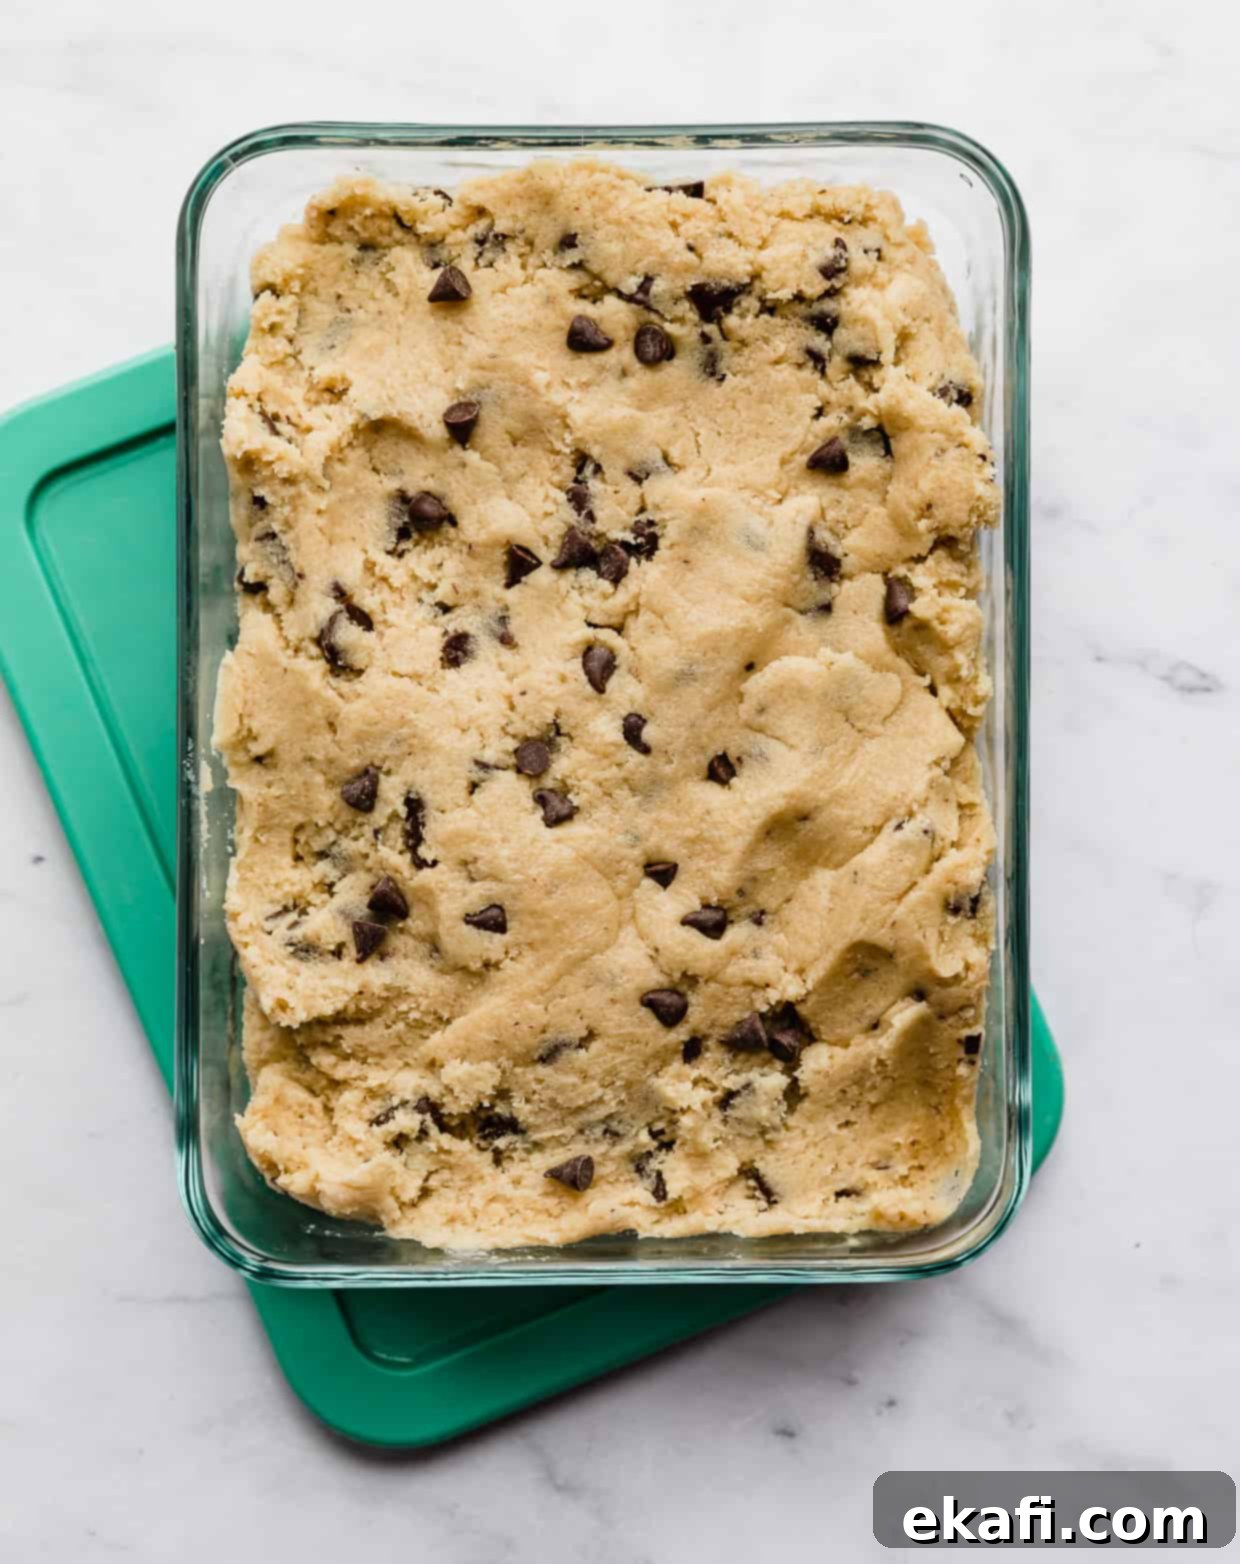
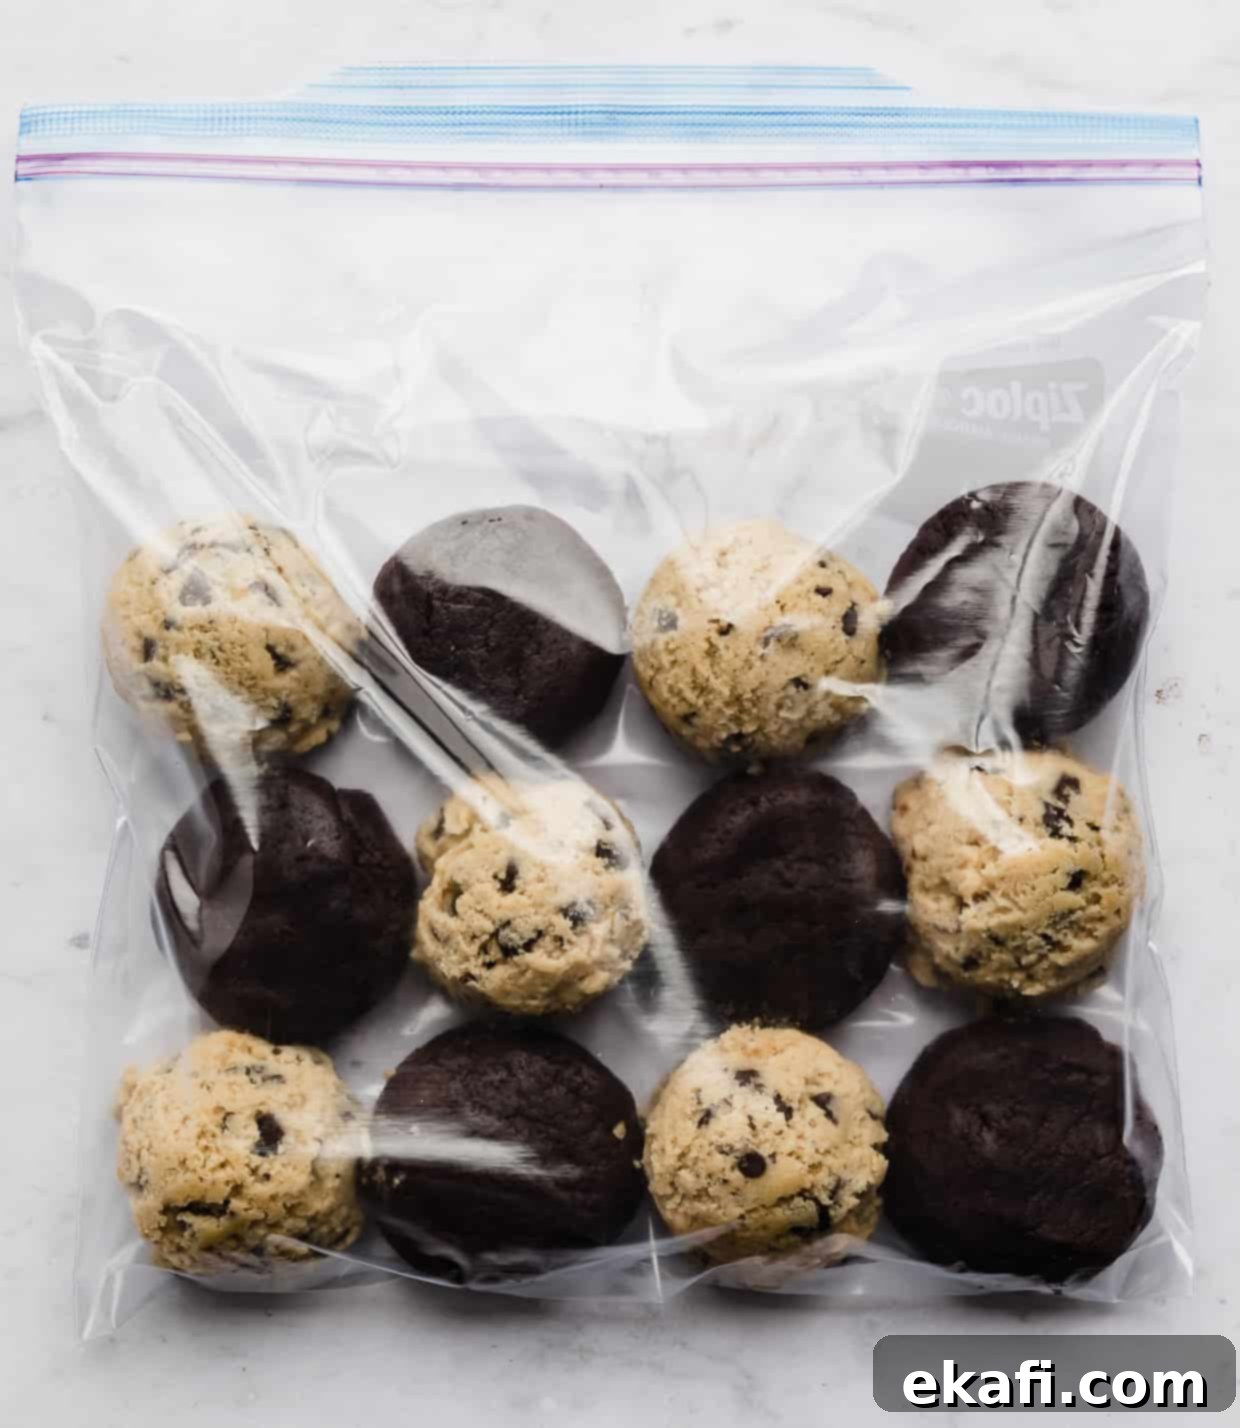
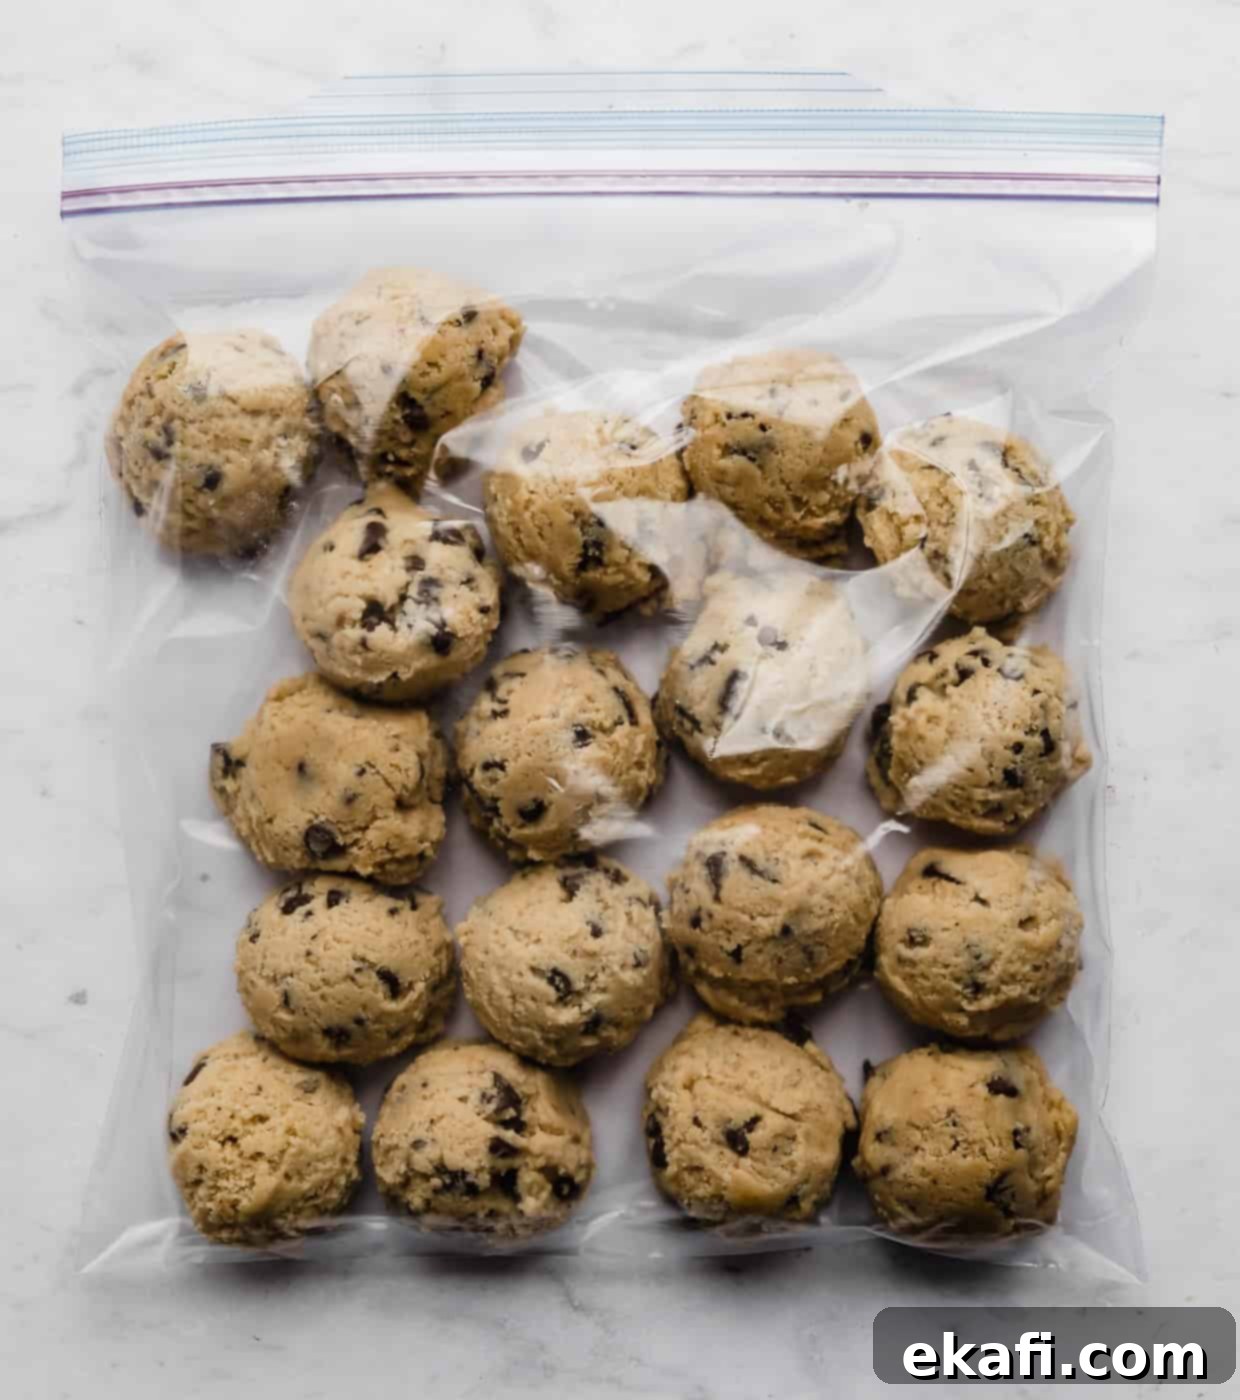
- Proper Storage for Freezing: Once flash-frozen, transfer the firm cookie dough balls into a heavy-duty freezer-safe Ziplock bag or an airtight container. Labeling is key! Clearly write the cookie recipe name, the baking temperature, the baking time (plus the additional time for frozen dough), and the date it was frozen. This information will be invaluable when you’re ready to bake. Properly stored, your cookie dough can last in the freezer for up to 3 months.
- Baking Frozen Drop Cookie Dough: When a craving hits, preheat your oven to the temperature noted on your labeled bag. There’s no need to thaw these dough balls! Once the oven is preheated, remove the desired number of frozen dough balls from the freezer and place them about 2 inches apart on a parchment paper-lined baking sheet. Bake according to the time written on the bag, adding an extra 1-2 minutes to account for the dough being frozen. Always use the regular bake setting, not convection, for best results with frozen dough.
- Return Unbaked Dough to the Freezer: If you’re not baking the entire batch, immediately return any remaining frozen cookie dough balls to the freezer to maintain their quality.
How to Freeze Icebox Cookie Dough
Icebox cookies, also known as slice-and-bake cookies, are another fantastic candidate for freezing. These doughs are typically formed into a log, chilled, and then sliced into thick disks before baking. Recipes like my Cinnamon Roll Cookies are perfect examples of this convenient method. Freezing them in a log means you can have perfectly uniform cookies with minimal effort whenever you desire.
- Make the Cookie Dough: Prepare your icebox cookie dough recipe as directed.
- Form into a Log: On a clean surface or sheet of parchment paper, shape the prepared dough into a compact log. Aim for an even thickness throughout the log, which will ensure consistent slice sizes.
- Chill the Dough Log: Wrap the dough log tightly in plastic wrap. Place it in the refrigerator for 20-30 minutes, or in the freezer for 10-15 minutes, until it is firm enough to handle without losing its shape. This initial chill helps the log maintain its structure for storage.
- Wrap and Store Properly: For long-term freezing, tightly re-wrap the chilled dough log in another layer of plastic wrap or aluminum foil to prevent freezer burn. Then, place the wrapped log inside a heavy-duty plastic freezer bag or an airtight container. Don’t forget to label it with the cookie type, baking instructions, and date. Store in the freezer for up to 3 months.
- Thaw Before Baking: When you’re ready to bake, remove the dough log from the freezer and transfer it to the refrigerator to thaw overnight. Thawing in the fridge helps minimize condensation and keeps the dough at an ideal temperature for slicing.
- Slice and Bake: Once the dough is thawed, unwrap it, cut it into uniform slices (typically 1/4 to 1/2 inch thick), and place them on a parchment-lined baking sheet. Bake according to your recipe’s instructions.
How to Freeze Cut-Out Cookie Dough
For those special occasions or just for fun, cut-out cookies offer endless creative possibilities. Doughs like my Soft Gingerbread Cookies and my No Fail Sugar Cookies are perfect examples. Freezing this type of dough allows you to prep ahead for holiday baking or simply enjoy crafting beautifully shaped cookies without the immediate pressure of baking them all at once.
- Make the Cookie Dough: Begin by preparing your cut-out cookie dough recipe as per the instructions.
- Prepare for Storage: Divide the dough into manageable portions (usually 1 or 2 discs, depending on the total amount). Shape each portion into a thick, flat disk. This flat shape will make it easier to thaw and roll out later. Wrap each disk tightly in plastic wrap, ensuring no air pockets.
- Store and Freeze: Place the tightly wrapped dough disks into a heavy-duty Ziplock bag or an airtight freezer container. Label with the cookie type, date, and any specific baking instructions. Freeze for up to 3 months.
- Thaw and Temper: When you’re ready to bake, remove the dough disk(s) from the freezer and let them thaw slowly in the refrigerator overnight. Once thawed, take the dough out of the fridge and allow it to come to room temperature for about 15-30 minutes. This step is crucial, as attempting to roll cold dough can cause it to crack and crumble.
- Roll Out, Cut, and Bake: On a lightly floured surface, roll out the dough to your desired thickness as specified in your recipe. Use your favorite cookie cutters to create shapes, then transfer them to a parchment-lined baking sheet and bake according to the recipe’s instructions.
How to Bake Frozen Cookie Dough: A Comprehensive Guide
Baking cookies from frozen dough is incredibly convenient, but the method varies slightly depending on the type of cookie dough you’ve prepared. Follow these simple steps for perfectly baked treats every time:
- Identify Your Dough Type: Before you begin, confirm what kind of frozen cookie dough you’re working with: individual dough balls (drop cookies), a frozen log (icebox/slice-and-bake cookies), or a flat disk (cut-out cookie dough).
- Baking Frozen Drop Cookie Dough Balls: This is the simplest method! For individual cookie dough balls, you can bake them directly from frozen.
- Preheat your oven to the temperature specified in your recipe.
- Remove the desired number of frozen dough balls from the freezer and place them approximately 2 inches apart on a parchment paper-lined baking sheet.
- Bake for the time recommended in your recipe, adding an extra 1-3 minutes to compensate for the frozen state of the dough. Keep a close eye on them to prevent over-baking.
- Always use your oven’s regular bake setting, not convection, as convection can cause uneven baking with frozen dough, leading to crispy edges before the center is done.
- Baking Frozen Slice-and-Bake (Icebox) Cookie Dough: Dough frozen in a log requires thawing before slicing and baking.
- Remove the dough log from the freezer and transfer it to the refrigerator. Allow it to thaw slowly overnight (typically 8-12 hours). This gradual thawing helps reduce condensation.
- Once thawed, remove the plastic wrap, slice the dough into your desired thickness (as per recipe instructions), and arrange the slices on a parchment paper-lined baking sheet.
- Bake according to your recipe’s original instructions.
- Baking Frozen Cut-Out Cookie Dough: Flat disks of cut-out cookie dough also need to thaw and come to temperature for easy handling.
- Transfer the frozen dough disk from the freezer to the refrigerator and let it thaw overnight.
- Once thawed, remove it from the fridge and allow it to sit at room temperature for about 15-30 minutes. This softens the dough just enough to make it pliable and easy to roll without cracking.
- Lightly flour your work surface and rolling pin, then roll out the dough to the thickness specified in your recipe. Cut out your shapes with cookie cutters, place them on a parchment-lined baking sheet, and bake as directed by your recipe.
Knowing When Cookies Are Done: For most cookies, you want the edges to be lightly golden and set, while the centers appear no longer shiny or wet, but still slightly soft or “underdone.” Cookies continue to cook on the hot baking sheet even after they are removed from the oven. Allow them to cool on the baking sheet for 5-10 minutes before transferring them to a wire rack. This critical step helps them set up perfectly, resulting in a chewy, delicious texture.
Essential Cookie Dough Storage and Freezing Tips
Maximizing the life and quality of your cookie dough requires a few key practices. Here are some essential tips to ensure your frozen stash is always ready for baking perfection:
- Label Everything Clearly: Always label your freezer bags or containers with critical information: the type of cookie dough, the date it was frozen, the recommended baking temperature, and the baking time (including any extra minutes for frozen dough). This prevents guesswork and ensures optimal results.
- Understand Fresh Dough Shelf Life: Unbaked cookie dough can typically last at room temperature for 2-4 hours before bacterial growth becomes a concern. In the refrigerator, most cookie doughs are good for 3-4 days before they need to be baked or frozen.
- Avoid Convection for Frozen Dough: When baking frozen cookie dough, stick to your oven’s regular (conventional) bake setting. Convection heat circulates rapidly, which can cause the edges of frozen cookies to brown and crisp too quickly, leaving the centers undercooked.
- Prevent Freezer Burn: Tight wrapping is your best defense against freezer burn, which can dry out and alter the texture of your dough. For cookie dough logs, consider wrapping them first in wax paper (tucking in the ends), then in plastic wrap, and finally placing them in a freezer-safe bag or container. This multi-layer protection is ideal.
- Troubleshooting Uneven Baking: If you find that the edges of your frozen cookies are over-baking before the centers are done, try these adjustments:
- Ensure you are using the regular bake setting, not convection.
- Reduce your oven temperature by 10-20 degrees Fahrenheit when baking frozen dough, and then extend the baking time by a few minutes. This allows the heat to penetrate the frozen dough more evenly.
- Consider Toppings Separately: For cookie doughs that are rolled in cinnamon sugar, sprinkles, or other toppings before baking (like Snickerdoodle Cookies or Lemon Crinkle Cookies), it’s often best to freeze the dough plain. Thaw the dough for about 30 minutes before rolling it in your desired topping and then baking. If you roll them in toppings before freezing, there’s a chance the topping might fall off or become soggy once frozen and thawed.
Frequently Asked Questions About Freezing Cookie Dough
Chilling cookie dough allows the butter to firm up, which is crucial for reducing how much the cookies spread in the oven. This leads to a thicker, chewier cookie with a more developed and richer flavor. It also helps hydrate the flour more fully, contributing to a better texture.
Yes, you can practically freeze almost all types of cookie dough! The most common and easiest to freeze are drop cookie doughs (rolled into balls like chocolate chip or sugar cookies). You can also successfully freeze icebox cookie dough (formed into a log and sliced, like Cinnamon Roll Cookies) and cut-out cookie dough. However, it’s generally not recommended to freeze doughs for very delicate or soft cookies such as Macarons, as their texture might be compromised.
Absolutely! Freezing cookie dough is a perfectly safe and recommended method for preservation. When stored correctly, it helps keep the dough fresh and ready for baking for up to 3 months.
Yes, it can! The extended chilling period that occurs during freezing can significantly enhance the flavors of your cookie dough, allowing the ingredients to meld together more thoroughly. Additionally, baking from cold or frozen dough often results in thicker cookies with a more desirable texture, as the butter takes longer to melt and spread.
No, freezing any type of food, including cookie dough, does not kill bacteria like salmonella or E. coli. While freezing inhibits bacterial growth, it does not destroy existing pathogens. Raw eggs, a common ingredient in cookie dough, can sometimes carry these foodborne illnesses. Always ensure cookies are baked thoroughly to a safe internal temperature.
No, freezing cookie dough does not negatively change its taste. In fact, the chilling process, which includes freezing, can often enhance the flavors by allowing them to develop and deepen. Your cookies will taste just as delicious, if not more so!
Yes, absolutely! The presence of eggs in your cookie dough will not negatively affect the freezing or baking process. Most standard cookie dough recipes contain eggs and freeze beautifully.
For optimal storage and to prevent freezer burn, you can freeze cookie dough in heavy-duty freezer-safe Ziplock bags or sturdy airtight containers. Always ensure the dough is wrapped tightly to eliminate as much air as possible, and remember to label clearly with the dough type, date, and baking instructions.
For frozen cookie dough balls (drop cookies), you can typically bake them directly from the freezer. Simply place them on a parchment-lined baking sheet and add 1-3 minutes to the usual baking time. For frozen dough logs or cut-out dough disks, it’s best to thaw them in the refrigerator overnight before slicing or rolling and baking according to the recipe’s instructions.
While you can, it’s generally best to freeze doughs like Snickerdoodle Cookies or Lemon Crinkle Cookies without their outer coatings. Freeze the plain dough as instructed. When you’re ready to bake, thaw the dough for about 30 minutes, then roll it in the cinnamon sugar or other topping before baking. If you roll it before freezing, the topping might fall off or become soggy during thawing. If you do freeze with the topping, be prepared to re-roll if needed.
Unbaked homemade cookie dough can be safely stored in the refrigerator for about 3-4 days before it should be baked or frozen. Always store it in an airtight container to maintain freshness.
When properly stored in an airtight container or freezer bag, homemade cookie dough can last in the freezer for up to 3 months without a significant loss in quality or flavor. Beyond this, it might still be safe to eat but could start to develop freezer burn or altered textures.
Absolutely! Sugar cookie dough freezes wonderfully. If it’s a “drop” style sugar cookie (scooped into balls), follow the instructions for freezing drop cookie dough. If it’s a cut-out sugar cookie dough, follow the instructions for freezing cut-out cookie dough disks. For sugar cookie dough rolled into a log (slice-and-bake style), refer to the “How to Freeze Icebox Cookie Dough” section above for detailed steps.
The defrosting method depends on how your cookie dough was frozen. For individually frozen dough balls (drop cookies), no defrosting is needed; bake them directly from frozen, adding a minute or two to the bake time. For dough frozen in larger blocks or logs, always thaw in the refrigerator overnight. This slow thawing process helps prevent excessive condensation and ensures the dough remains pliable for scooping, slicing, or rolling. Never defrost cookie dough in the microwave, as it can cause uneven heating and alter the dough’s texture.
Proper storage helps maximize the shelf life of both homemade and store-bought cookie dough. For store-bought, always adhere to the “best by” date. For homemade dough, expect up to 3 months in the freezer. You’ll know if cookie dough has gone bad if you observe significant changes in its appearance, texture, or smell. Look for signs of mold, discoloration, or a sour/rancid odor. If any of these are present, it’s best to discard the dough to ensure food safety.

Elevate Your Baking: More Expert Tips
We hope this comprehensive guide empowers you to master freezing cookie dough and brings countless moments of fresh-baked joy to your life! We love sharing these informational posts to help you become a more confident and efficient baker. Be sure to save this guide for future reference, and explore our other helpful baking resources:
- Choosing the Best Cocoa Powder for Baking
- Your Guide to Black Cocoa Powder
- How to Perfectly Brown Butter
Did you try any of the cookie recipes mentioned or linked in this post using our freezing tips? We’d absolutely love to hear about your experience! Please leave a star rating and review on the respective recipe post, or simply scroll down and share your thoughts below the recipe card.
Stay sweet and up-to-date with all our latest recipes and baking wisdom by following us on Instagram, TikTok, Facebook, and Pinterest. Happy baking!
