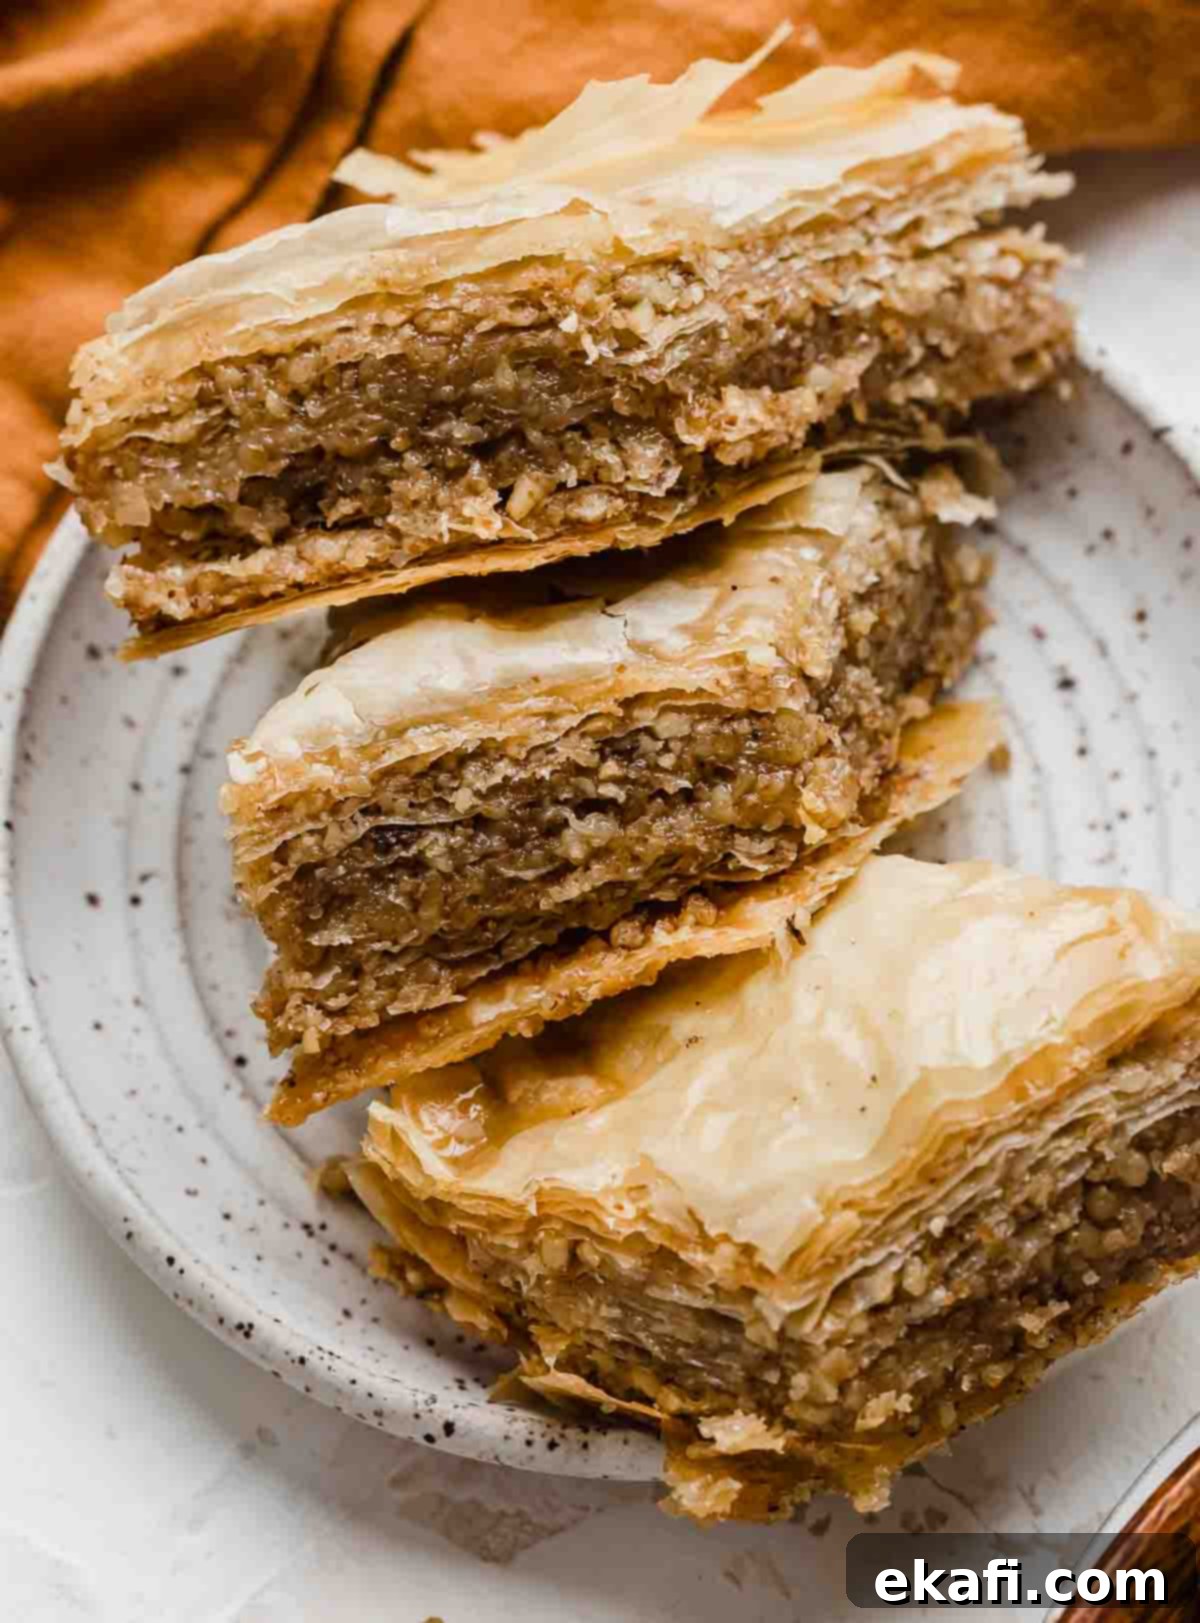
The Best Homemade Greek Baklava Recipe: Flaky Phyllo, Honey-Walnut Perfection
Embark on a culinary journey to the heart of the Mediterranean with this exquisite homemade Greek Baklava recipe. This timeless dessert is a symphony of textures and flavors, combining delicate, crispy layers of phyllo dough with a rich, aromatic walnut and cinnamon filling, all drenched in a luscious, fragrant honey-orange syrup. Often perceived as a complex pastry, you’ll be delighted to discover how surprisingly straightforward it is to master this classic in your own kitchen!
As an ardent admirer of Baklava, I can attest that using readily available store-bought phyllo dough transforms this seemingly intricate recipe into an absolute breeze. Perfect for both seasoned bakers and curious beginners, this recipe guarantees a show-stopping dessert. If you love creating delectable pastries, be sure to explore my other cherished recipes like Homemade Triple Berry Toaster Strudels, a delightful Blueberry Danish, and delightful Puff Pastry Apple Turnovers.
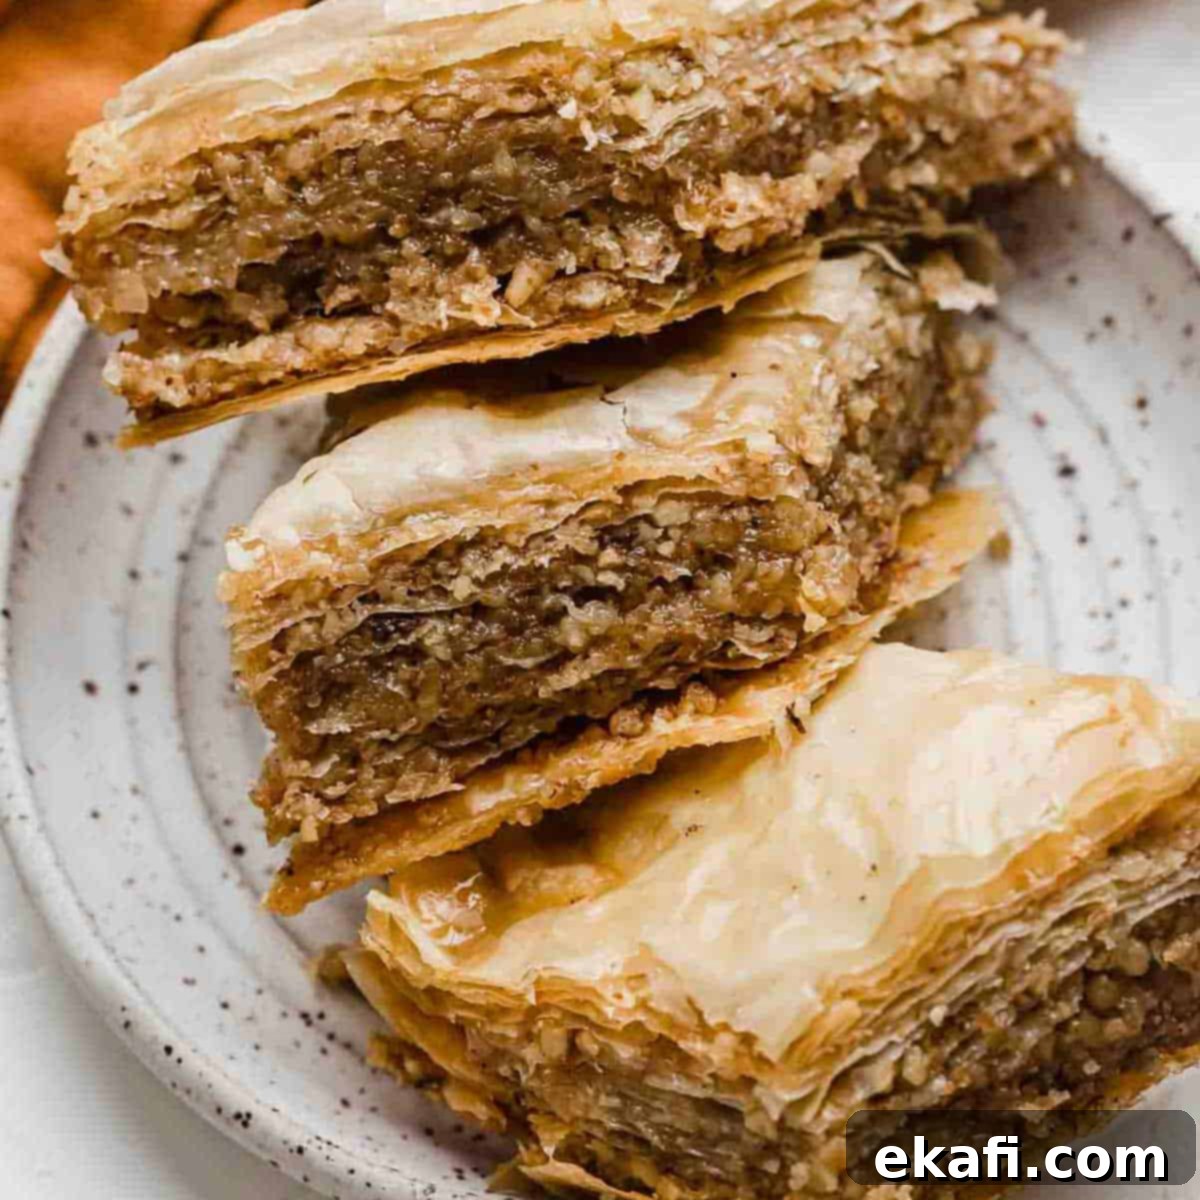
Why This Homemade Baklava Recipe is a Must-Try
- Incredibly Flavorful. This Greek Baklava stands out with its intensely flavorful profile. The magic lies in the aromatic honey syrup, generously infused with the bright zest of fresh orange peel and a warm cinnamon stick, creating a complex and irresistible taste that perfectly complements the nutty filling.
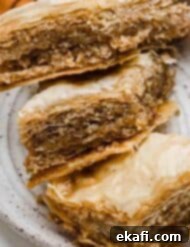
- Crispy, Golden Perfection. Achieving that signature crispy, golden-brown finish is key to authentic baklava. This recipe provides meticulous, easy-to-follow instructions on how to perfectly layer and butter your delicate phyllo dough, ensuring every bite of your homemade baklava is gloriously flaky and beautifully golden.
- The Ultimate Make-Ahead Dessert. Planning for a party or a special family meal? This Greek Baklava is your ideal solution. It’s designed to be prepared in advance, allowing it to soak in the delicious syrup for several hours or even overnight. This means less stress on the day of your event, making it a perfectly convenient and impressive dessert for any gathering.
- A Cherished Holiday Season Favorite. Year after year, this easy Greek Baklava recipe earns its place on our holiday dessert tables. Its rich flavors and comforting aroma make it a delightful treat and a cherished traditional recipe, perfect for celebrating special occasions, especially during the festive Christmas season, or truly any time you crave a taste of tradition.
Essential Ingredient Notes for Perfect Baklava
Crafting the perfect baklava begins with understanding each ingredient’s role. Here’s a detailed look at what you’ll need and why:
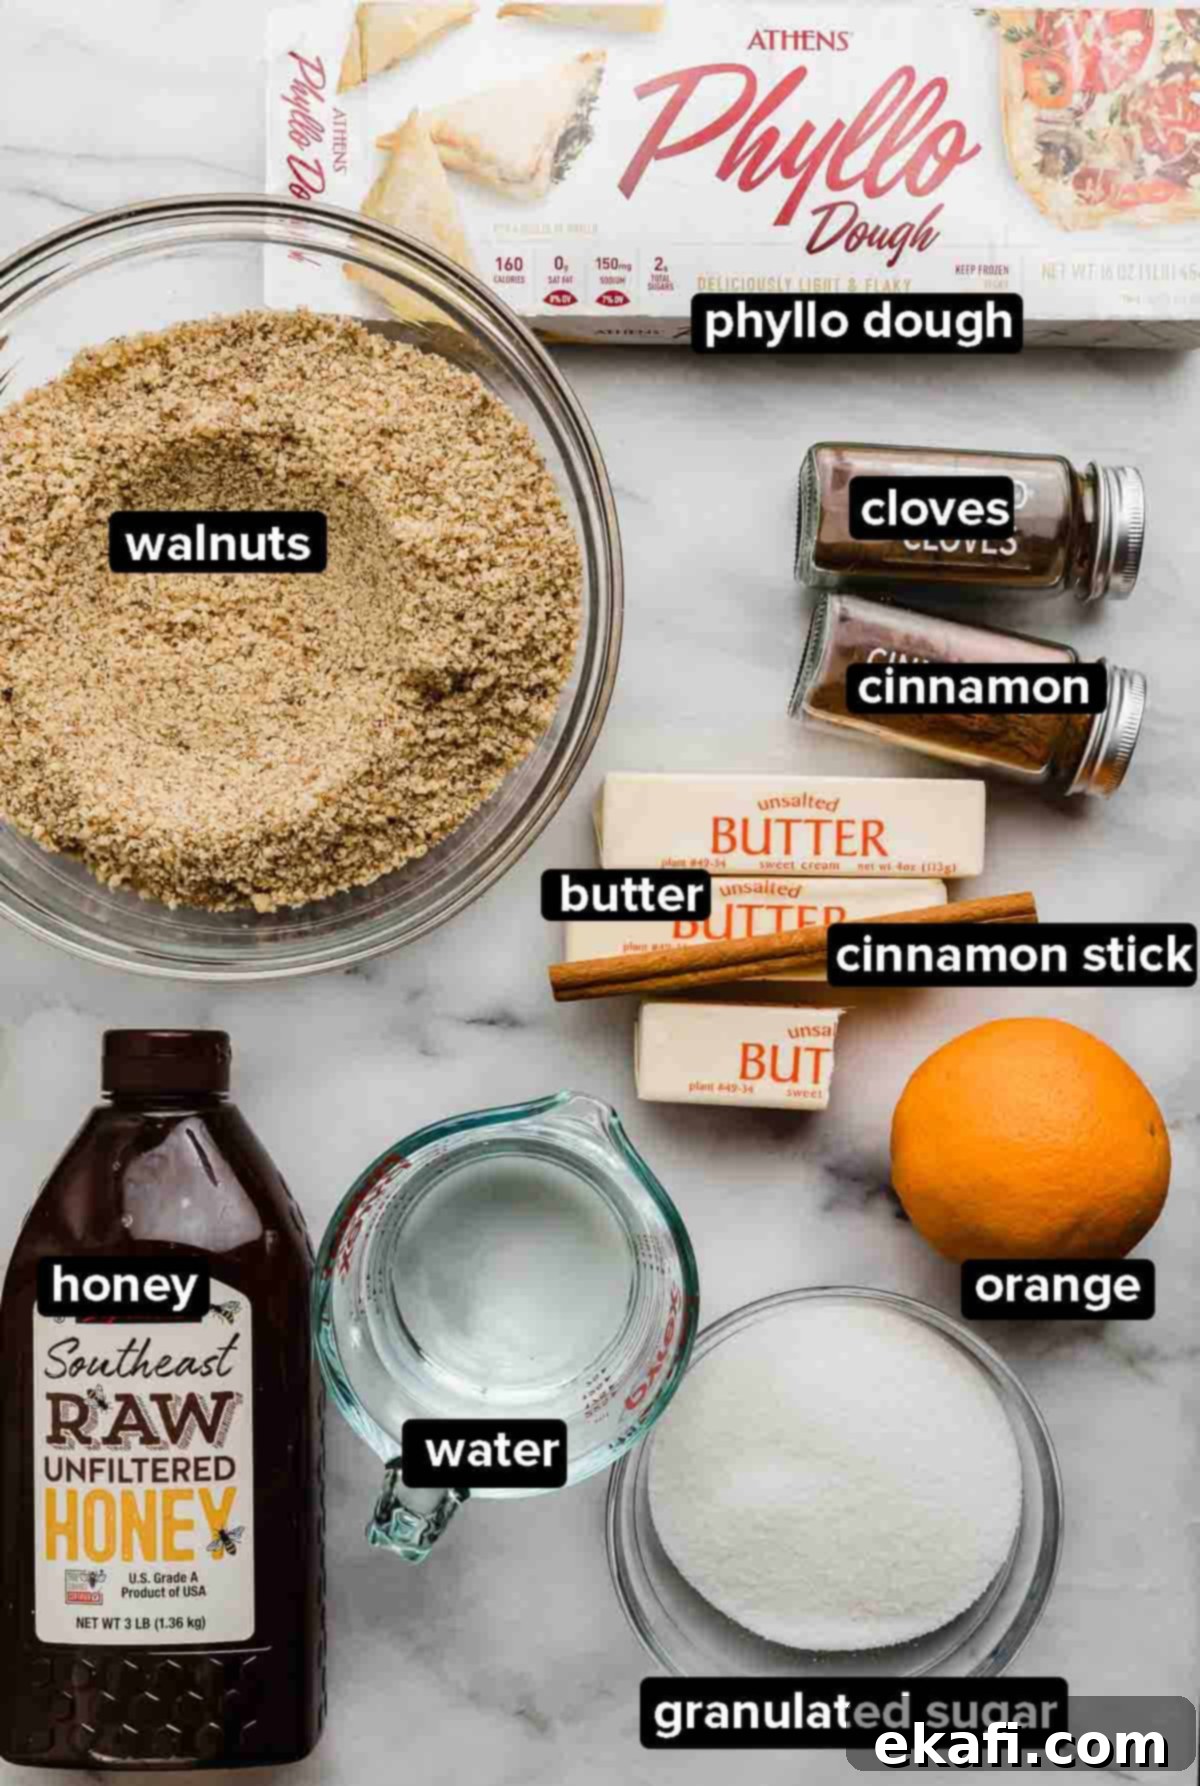
- Water: This forms the foundational base of your honey syrup mixture. It helps dissolve the sugar and honey, creating a pourable liquid that beautifully saturates the baklava layers.
- Granulated Sugar: Essential for sweetness and achieving the desired thick, luscious consistency of the syrup. The sugar caramelizes slightly during cooking, deepening the syrup’s flavor.
- Honey: The star of the syrup! High-quality honey imparts that signature, authentic honey flavor that is so intrinsically linked with delicious baklava. Feel free to use your favorite variety; a local wildflower honey often adds a wonderful, unique note.
- Cinnamon Stick: Using a whole cinnamon stick is a game-changer for infusing the syrup with a pure, warm cinnamon aroma and taste. Unlike ground cinnamon, it provides flavor without leaving any powdery flecks in your crystal-clear syrup.
- Fresh Orange Peel: Just a strip of fresh orange peel introduces a subtle, bright citrus note to the baklava syrup. It’s not overpowering but adds a wonderful layer of complexity that beautifully balances the sweetness of the honey. Ensure you only use the colored zest, avoiding the bitter white pith.
- Walnuts: The heart of the filling! For the best flavor and texture, it’s crucial to toast your walnuts lightly before finely grinding them. Toasting enhances their natural nuttiness, adding depth to the baklava’s core. While walnuts are traditional, feel free to experiment with other finely ground nuts like pistachios or almonds for delicious variations.
- Butter: Melted butter is gently brushed between the delicate layers of phyllo dough. The key here is to brush *lightly*. Over-buttering can lead to a greasy, soggy baklava, while too little butter will prevent those coveted flaky layers. Clarified butter (ghee) is often preferred in traditional recipes for its pure flavor and lack of milk solids, which can burn, but regular melted salted or unsalted butter works perfectly here. Just ensure it’s melted and slightly cooled, not hot.
- Package Phyllo Dough: This delicate pastry dough is the backbone of baklava. Always handle phyllo sheets with extreme care and gentle fingers to prevent tearing. It’s imperative that your phyllo dough is completely thawed, not frozen, before you begin. Place the unopened package in the refrigerator overnight or on the countertop for a few hours until pliable. Keep the unused sheets covered with a damp paper towel to prevent them from drying out, as they are very prone to cracking.
Step-by-Step Guide to Making Flawless Greek Baklava
Follow these detailed steps to create a beautiful and delicious baklava:
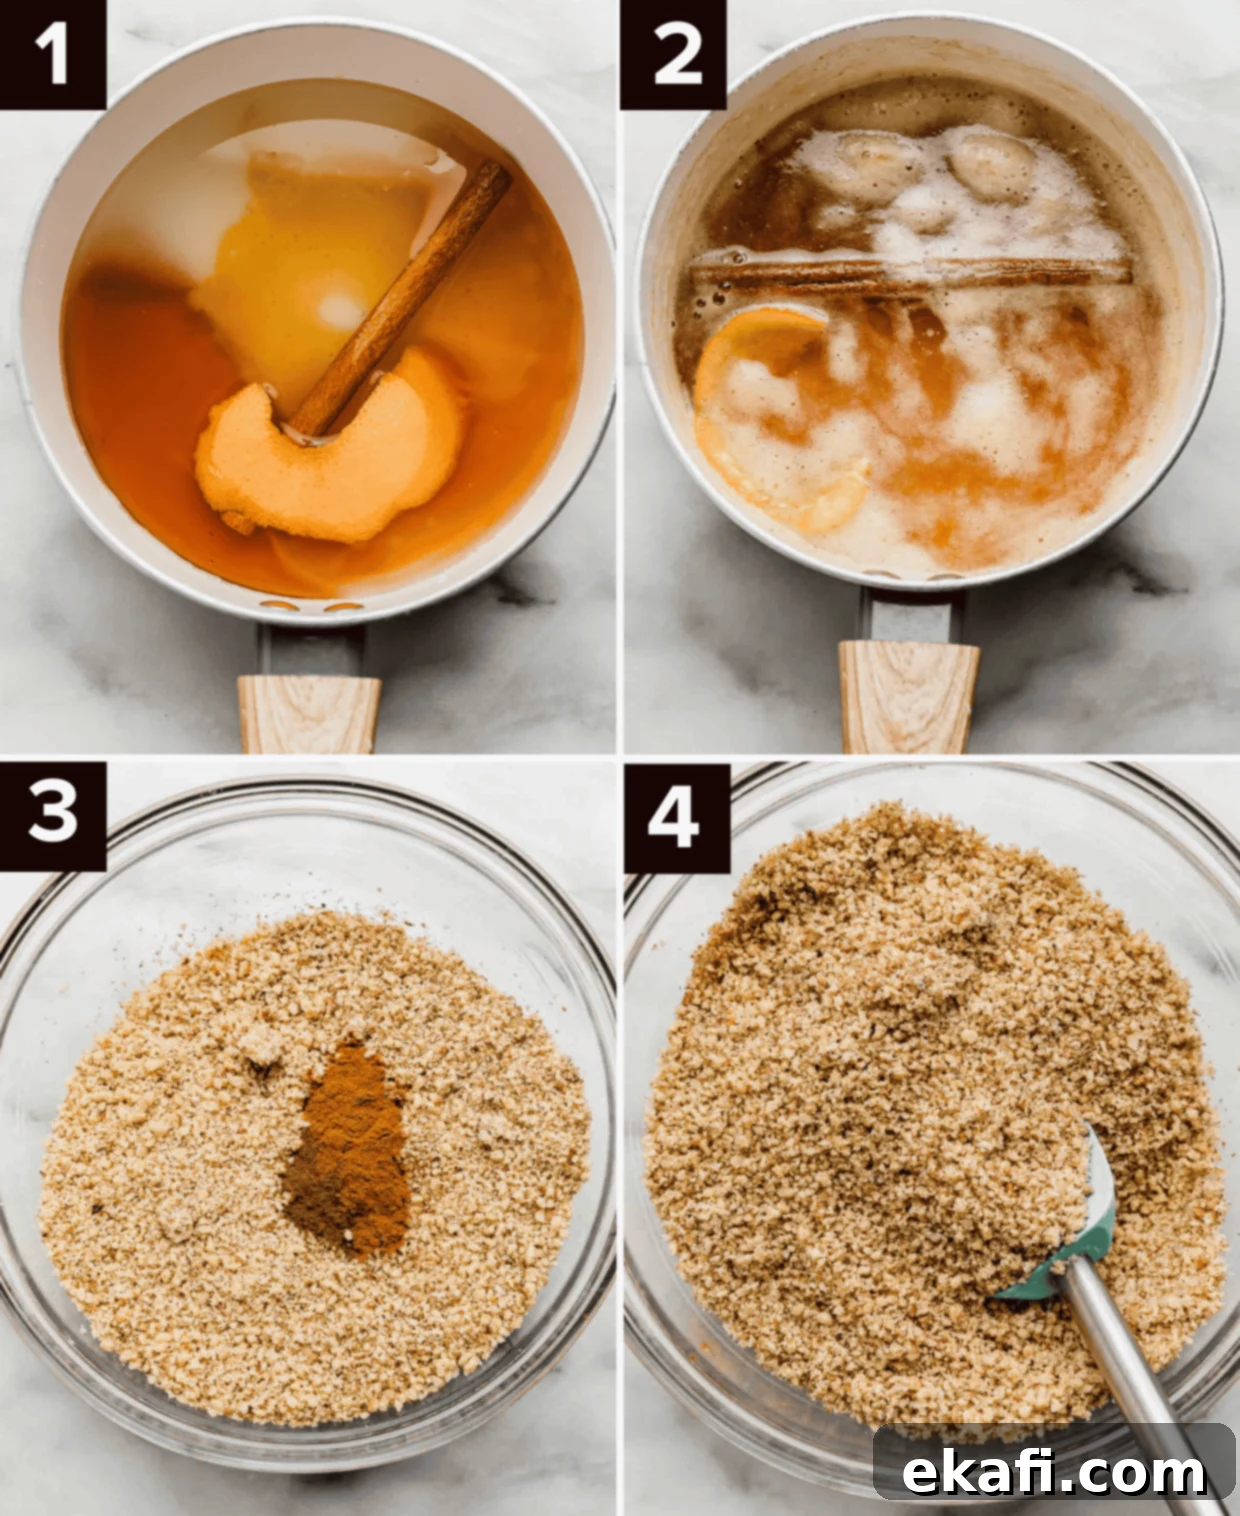
- Make the Baklava Syrup: In a small saucepan, combine 1 cup of water, 1 cup of granulated sugar, 3/4 cup of honey, 1 cinnamon stick, and 1 strip of orange peel. Bring the mixture to a gentle boil over medium heat, stirring occasionally to dissolve the sugar. Once boiling, reduce the heat to low and allow it to simmer for exactly 15 minutes. This simmering time infuses the syrup with wonderful flavors. Remove the sweet syrup from the heat and set it aside to cool completely to room temperature. It’s crucial that the syrup is cool when it’s poured over the hot baklava.
- Prepare the Walnut Mixture: Preheat your oven to 350ºF (175ºC). In a medium bowl, combine 1 pound of finely ground toasted walnuts with 1 1/2 teaspoons of ground cinnamon and 1/4 teaspoon of ground cloves. Use a fork or spoon to mix these ingredients thoroughly until the spices are evenly distributed throughout the ground nuts. The cloves add a subtle, warm depth that complements the cinnamon beautifully.
- Prepare the Pan: Using a pastry brush, generously brush melted butter onto the bottom and up the sides of a 9×13-inch baking pan. This prevents sticking and helps the bottom layers crisp up beautifully. Carefully unroll your thawed phyllo dough. If the sheets are wider or longer than your pan, gently trim them to fit. Immediately cover the stack of unused phyllo dough with a lightly damp paper towel or clean cloth to prevent it from drying out, which happens very quickly.
- Begin Layering the Greek Baklava Base: Place one single sheet of phyllo dough on the bottom of the buttered pan. Using your pastry brush, lightly brush the entire surface of this sheet with melted butter. Repeat this process, carefully layering and lightly buttering each sheet, until you have accumulated a base of 8 phyllo layers. Remember, a light touch with the butter is key for flaky results.
- Add Walnut Mixture and Continue Layering: Once your 8-layer base is complete, evenly sprinkle 3 generous tablespoons of your prepared walnut mixture over the top phyllo sheet. Now, carefully place two new sheets of phyllo dough directly on top of the nuts *without buttering between these two specific sheets*. Lightly brush the top of the second sheet with melted butter, then sprinkle another 3 tablespoons of the walnut mixture. Continue this pattern: two phyllo sheets (no butter between them), a light butter brush on the top sheet, then 3 tablespoons of walnut mixture. Repeat this until you have approximately 8 layers of phyllo dough remaining in your stack for the top.
- Top with Remaining Buttered Phyllo: For the final top section of your Greek baklava, layer the remaining 8 sheets of phyllo dough, making sure to lightly brush melted butter between *each* of these 8 layers. This ensures a wonderfully crisp and golden top crust. Once all 8 sheets are down, brush the very top layer with a slightly more generous, thin coating of melted butter to encourage deep golden-brown perfection.
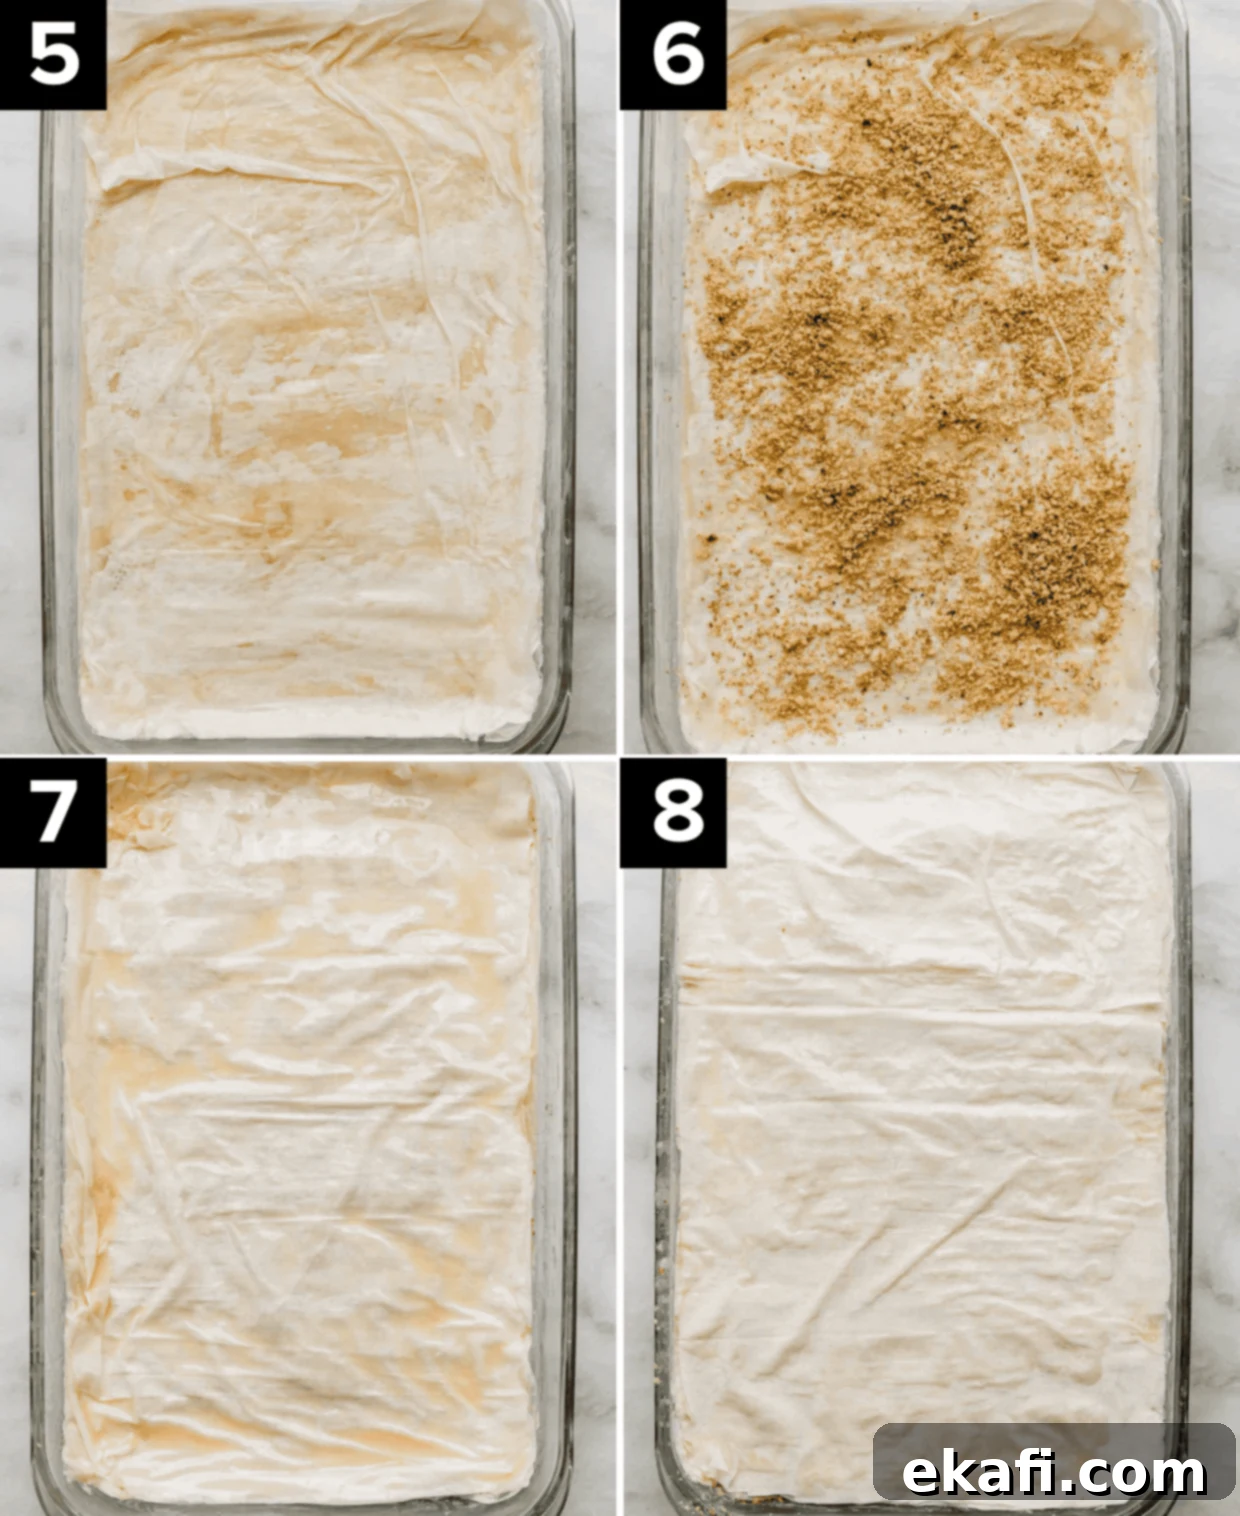
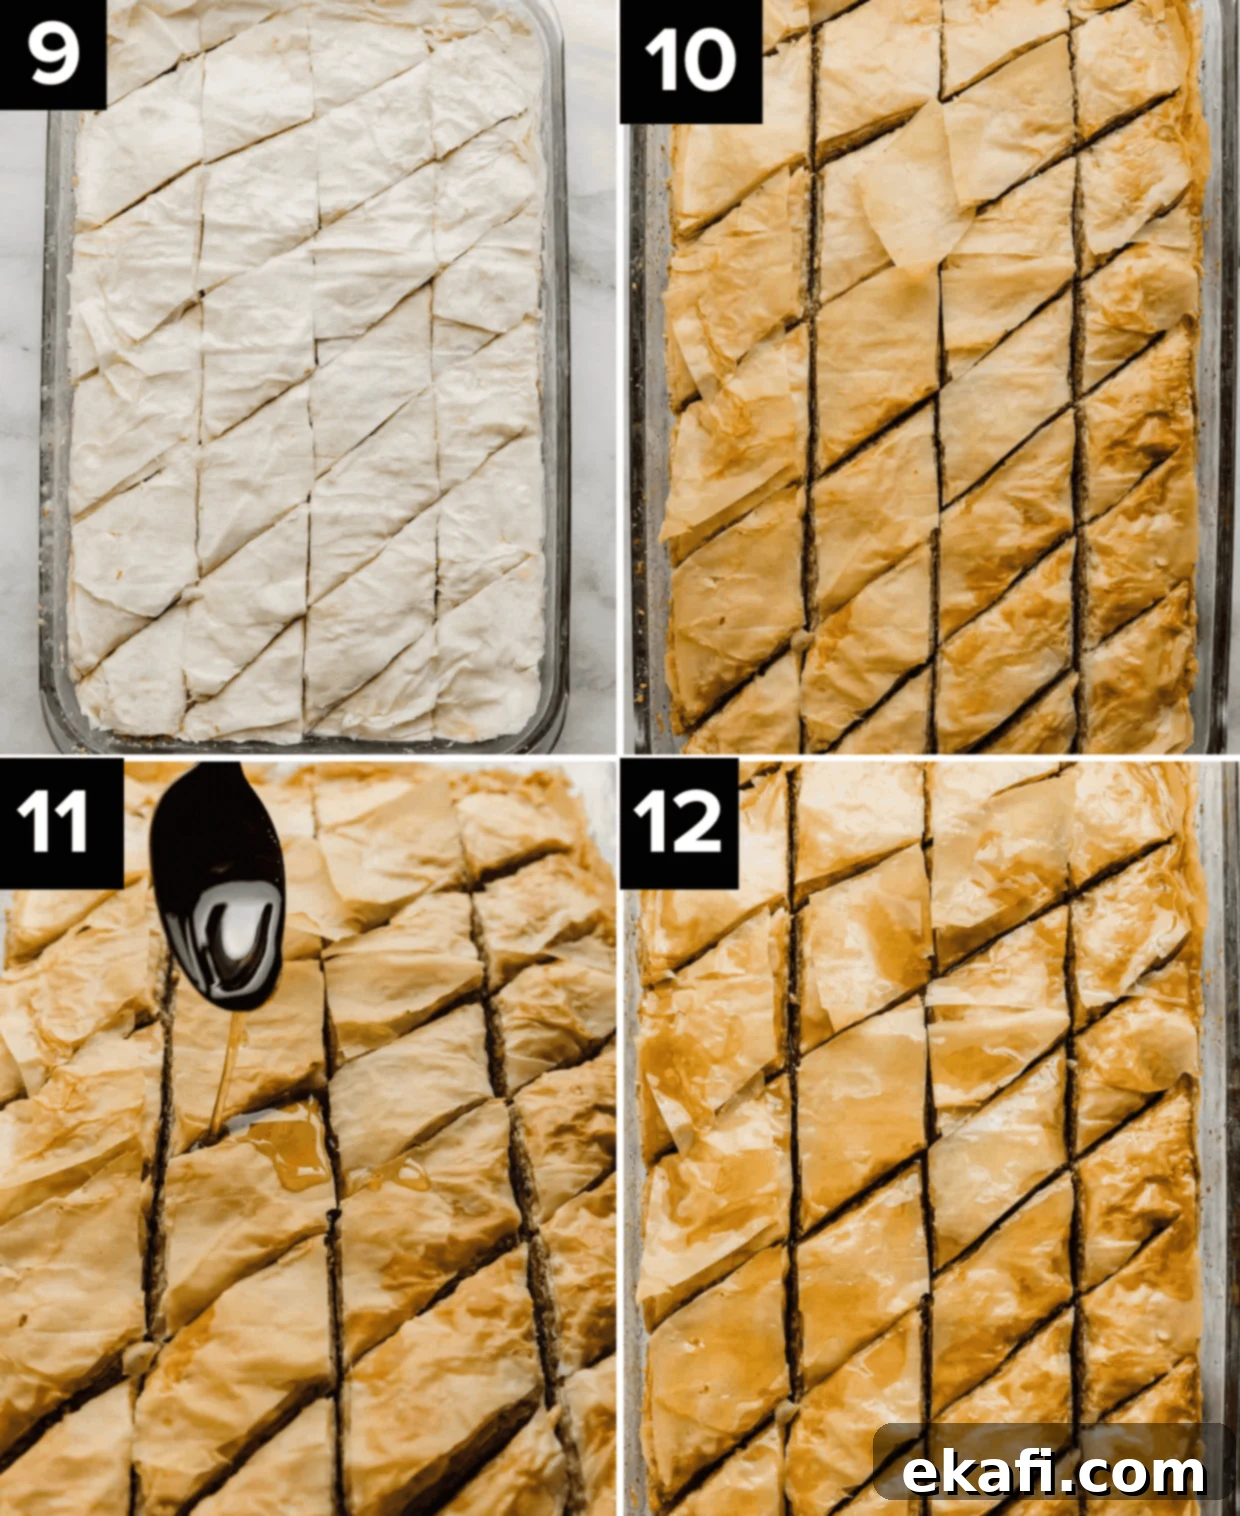
- Pre-Cut the Baklava: Before baking, use a very sharp knife to carefully trim any small pieces of phyllo dough that might be hanging over the edges of the pan, ensuring a neat finish. Then, gently score the entire baklava into your desired diamond or triangle shapes. The critical step here is to *not* cut all the way down to the bottom of the pan—leave about a half-inch uncut. This deliberate partial cut is essential: it creates channels for the syrup to penetrate evenly into each piece without pooling excessively at the very bottom, ensuring every bite is perfectly moist and crisp.
- Bake the Baklava: Place the pan into your preheated 350ºF (175ºC) oven and bake for approximately 50 minutes. The baklava is perfectly done when its top layers are a rich, crispy golden brown, and the edges are beautifully caramelized. Keep an eye on it to prevent over-browning.
- Strain the Syrup: While your baklava is baking and filling your kitchen with an intoxicating aroma, take a moment to strain your cooled syrup mixture. Pass it through a fine-mesh sieve to remove the cinnamon stick and orange peel, leaving you with a perfectly smooth, fragrant sweet syrup.
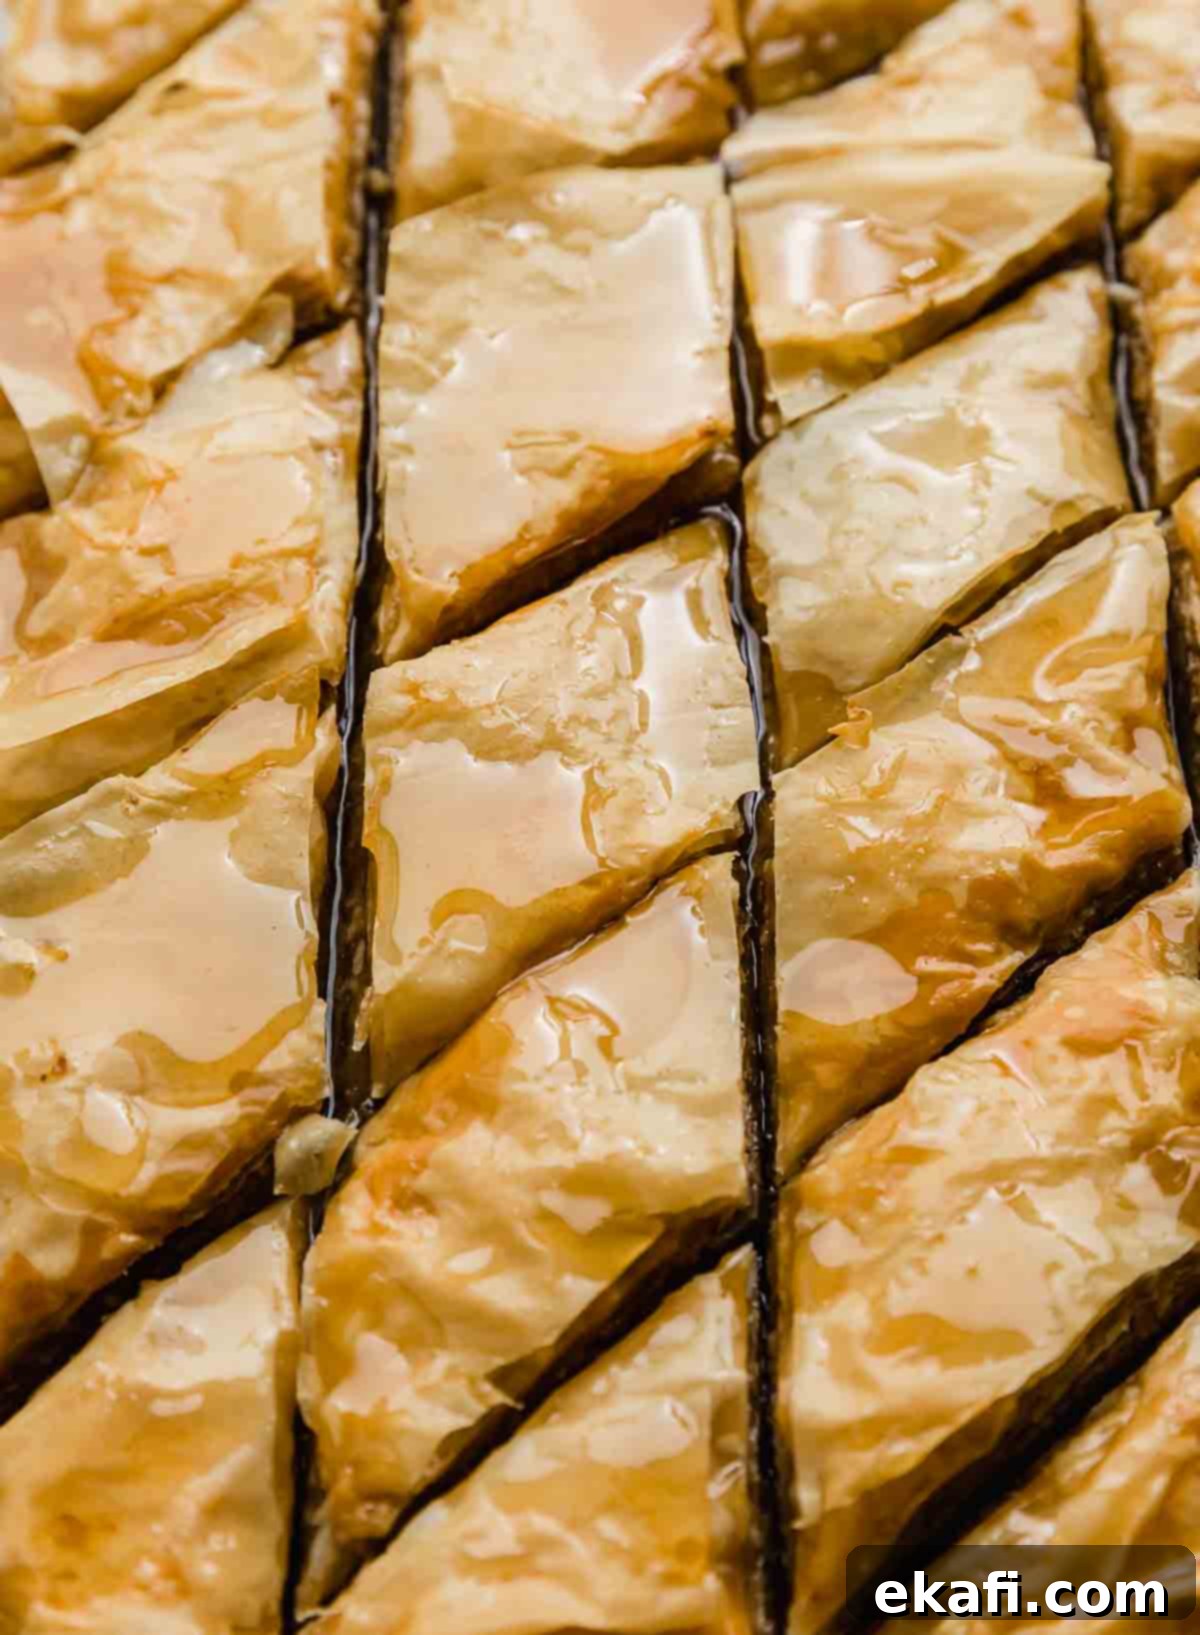
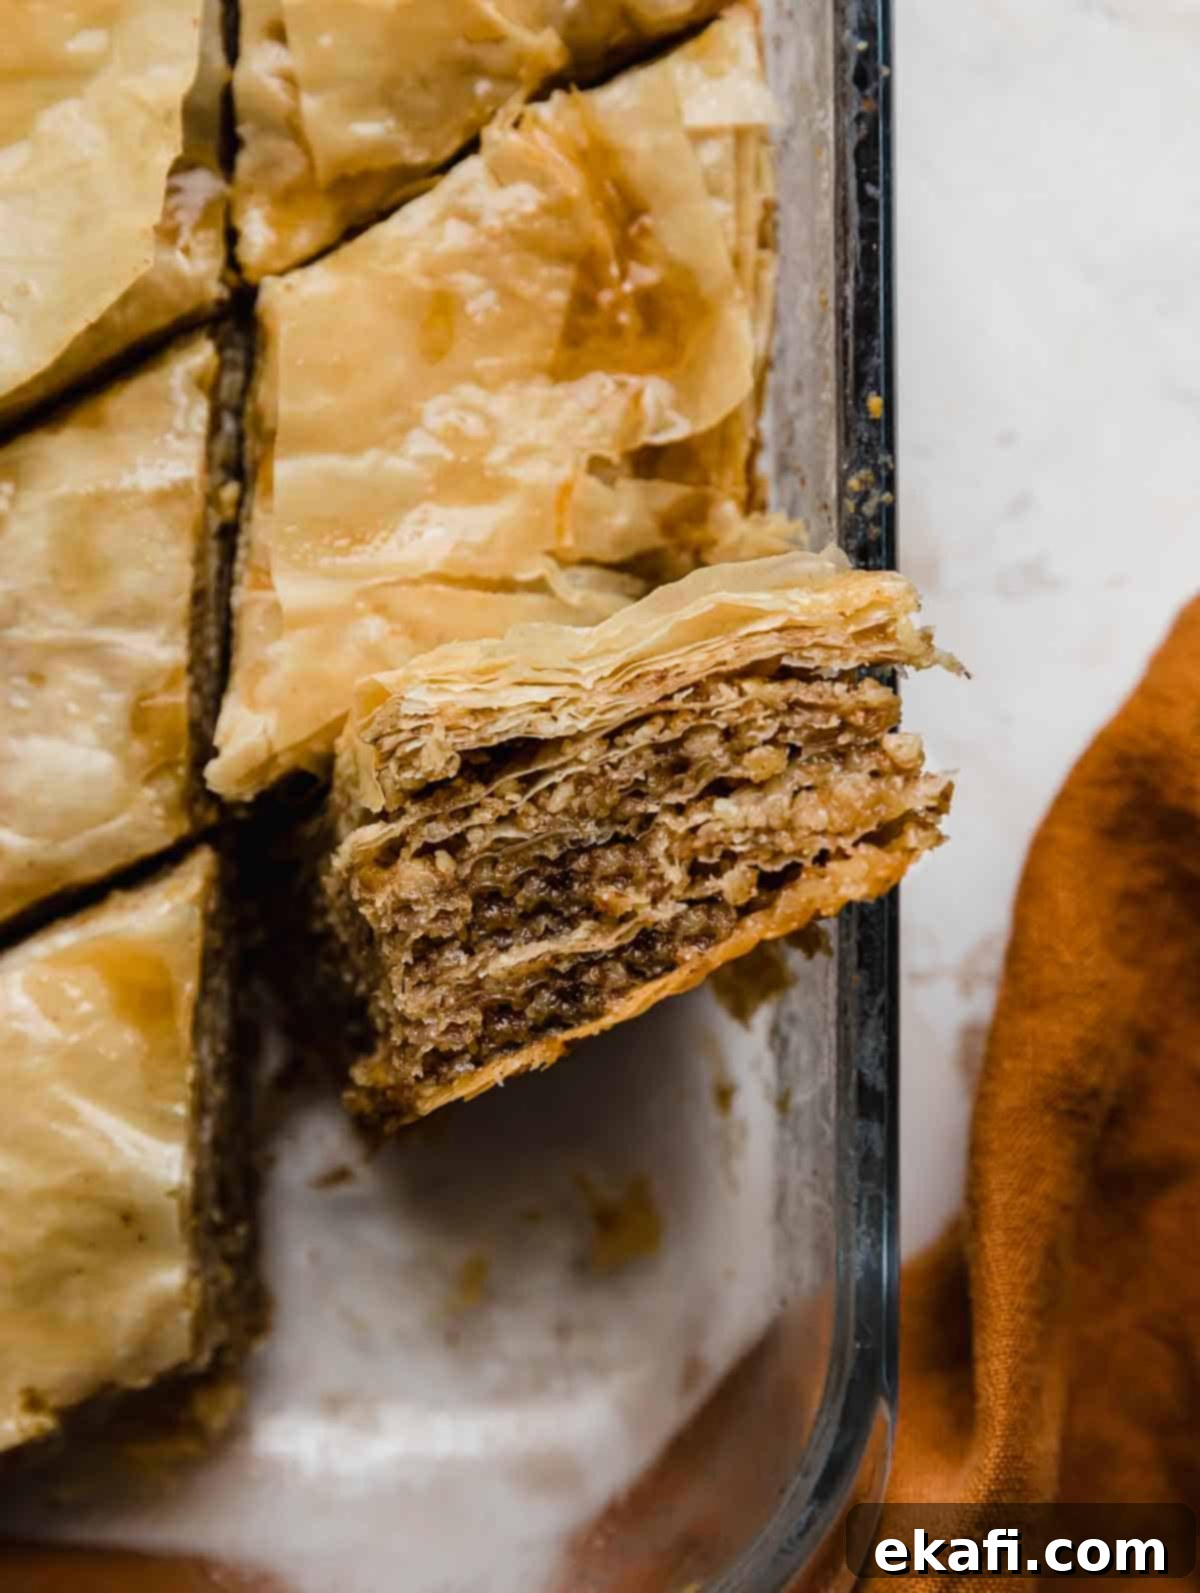
- Top with Syrup and Soak: As soon as the baklava finishes baking, remove it from the oven and immediately—while it’s still piping hot—pour the *cooled* syrup evenly over the entire baked pastry. The contrasting temperatures (hot baklava, cool syrup) are key to achieving that ideal crispy-yet-moist texture. Ensure the syrup cascades into all the cuts, cracks, and crevices, saturating every layer. Now, the most challenging part: patience! Let the baklava sit undisturbed to absorb the syrup for at least 4 hours, or ideally, overnight. This prolonged soaking ensures maximum flavor penetration and perfect tenderness. Just before serving, use a sharp knife to cut all the way through the pre-scored lines to the bottom of the pan, creating individual pieces. Enjoy this utterly delicious masterpiece!
Top Tips for Perfect Homemade Greek Baklava
Achieving baklava perfection is all about technique. Here are some invaluable tips to ensure your dessert turns out flawless:
- Work Quickly and Keep Phyllo Moist: Phyllo dough is incredibly delicate and dries out very rapidly. To prevent this, always have a lightly damp paper towel or a clean, moist cloth covering the stack of phyllo sheets you’re not actively working with. This prevents the edges from becoming brittle and cracking, making them much easier to handle.
- Brush Butter Lightly, Not Heavily: The goal is to lightly moisten each phyllo layer with butter, not saturate it. A very thin, even coating is sufficient to create those beautiful, distinct flaky layers. Too much butter will weigh down the dough, resulting in a greasy, soggy baklava rather than the desired crispness.
- The Importance of Partial Cuts Before Baking: This is a crucial step! Scoring the baklava into shapes *before* baking, but not cutting all the way through, prevents the syrup from simply pooling at the bottom of the pan. The partial cuts create pathways for the syrup to seep into the various layers of each piece, ensuring uniform moistness and flavor throughout the entire dessert.
- Allow Ample Soaking Time: Patience is truly a virtue when it comes to baklava. Do not rush the soaking process. Letting the Greek baklava sit for a minimum of 4 hours, or ideally overnight, allows the cool syrup to be fully absorbed by the hot phyllo dough. This long rest is essential for developing the characteristic tenderness, flavor, and moisture that defines perfect baklava. It transforms the crunchy pastry into a succulent, honey-infused delight.
- Hot Baklava, Cold Syrup: This temperature contrast is critical for the ideal texture. Pouring cool or room-temperature syrup over hot, freshly baked baklava creates a delightful sizzle and allows the phyllo to absorb the syrup more efficiently without becoming mushy. This helps maintain the crispy integrity of the layers while ensuring deep saturation.
Make Ahead, Storing, and Freezing Your Greek Baklava
One of the many charms of Greek baklava is its adaptability as a make-ahead dessert, with its flavors actually improving as it sits.
- Make Ahead: This dessert is an ideal candidate for preparing in advance. You can bake it the day before your event, allowing it to soak in the syrup overnight. This gives the flavors ample time to meld and develop, resulting in an even more delicious and deeply flavored baklava.
- Storing Leftovers: For best results and to maintain its delightful crispy texture, store leftover baklava at room temperature. Simply cover the pan loosely with a paper towel or foil to protect it from dust while allowing some air circulation. Stored this way, baklava will retain its quality for up to 1 week. If you prefer to extend its shelf life, you can store it in an airtight container in the refrigerator for up to 3 weeks, though it may lose a little of its crispness when chilled.
- Freezing for Long-Term Storage: To freeze baklava, allow it to cool completely and soak in the syrup as usual. Then, wrap individual pieces tightly in plastic wrap, ensuring no air exposure. Place these wrapped pieces in an airtight freezer-safe container or a heavy-duty freezer bag. Baklava can be frozen for up to 3 months without significant loss of quality. When ready to serve, thaw the frozen baklava in the refrigerator overnight. You can briefly warm it in a low oven (around 250°F / 120°C) for 10-15 minutes to revive some of its crispness, if desired, before serving at room temperature.
Frequently Asked Questions About Greek Baklava
Absolutely! While walnuts are traditional for Greek baklava, you can certainly customize the filling to your preference. Almonds or pistachios are exceptionally popular and create equally delicious variations of baklava. A mix of nuts can also add a delightful complexity. Just ensure they are finely ground and, ideally, lightly toasted for the best flavor.
Phyllo dough is typically found in the freezer section of most well-stocked supermarkets, often near frozen pie crusts or puff pastry. If you’re having trouble locating it there, try checking specialty grocery stores, Mediterranean food markets, or even large international food sections, as they are very likely to carry it.
Yes, you absolutely can! If you’re not feeding a crowd or simply want a smaller treat, you can halve all the ingredient quantities in the recipe. For a smaller batch, I recommend using an 8×8-inch baking dish instead of the 9×13-inch pan. Adjust baking time accordingly, usually a bit less, until golden and crisp.
The secret to maintaining crispy phyllo is the temperature contrast: always pour cool or room-temperature syrup over hot, freshly baked baklava. Do not let the baklava cool down before adding the syrup. This immediate contact causes a gentle sizzle, allowing the phyllo to absorb the syrup quickly and efficiently, while still retaining its delightful crispy texture. If both are hot, or both are cold, the texture can become less ideal.
Phyllo dough (also spelled “filo”) is a very thin, unleavened dough used in various pastries in Middle Eastern and Balkan cuisines. It’s made from flour, water, and a small amount of oil, and stretched to paper-thin sheets. While it can seem intimidating due to its delicate nature, it’s not difficult to work with once you get the hang of it. The key is to keep it covered with a damp cloth to prevent drying, and to handle it gently but confidently.
You can certainly adjust the sweetness of the syrup to your preference. For a slightly less sweet baklava, you can reduce the amount of granulated sugar or honey by 1/4 cup each in the syrup recipe. However, be mindful that honey and sugar also contribute to the syrup’s texture and preserving qualities, so don’t reduce it too drastically.
More Irresistible Dessert Recipes to Try
- Grandma’s Classic Shortbread Cookies
- Kouign-Amann: The Ultimate Buttery Pastry
- Decadent Turtle Cookies
- Chewy Walnut Brownie Cookies
Did you make this delightful Greek Baklava recipe? I’d absolutely love to hear about your experience! Please leave a star rating and review right here on the blog, or scroll down below the recipe card to share your thoughts there. Your feedback helps others discover and enjoy this delicious treat!
Stay up-to-date with all our latest culinary creations and behind-the-scenes fun by following us on Instagram, TikTok, YouTube, Facebook, and Pinterest. Don’t miss out on more deliciousness!
Print
SaveSaved!
Review
Greek Baklava
Ingredients
Syrup
- 1 cup water
- 1 cup granulated sugar
- 3/4 cup honey
- 1 cinnamon stick
- 1 strip orange peel
Pastry
- 1 pound walnuts – toasted and finely ground for best flavor
- 1 1/2 teaspoon ground cinnamon
- 1/4 teaspoon ground cloves
- 16 oz package phyllo dough – completely thawed for easy handling
- 1 1/4 cups butter – melted (salted or unsalted butter, or clarified butter, is fine)
Instructions
Syrup
-
Make the Syrup: In a small saucepan, combine 1 cup of water, 1 cup of granulated sugar, 3/4 cup of honey, 1 cinnamon stick, and 1 strip of orange peel. Bring this mixture to a boil over medium heat, stirring occasionally. Once it reaches a boil, reduce the heat to low and allow it to gently simmer for 15 minutes to infuse all the wonderful flavors. Remove the saucepan from the heat and set the syrup aside to cool completely to room temperature. This is crucial for the perfect baklava texture later.
Pastry
-
Preheat your oven to 350°F (175°C). In a medium bowl, combine the 1 pound of finely ground toasted walnuts, 1 1/2 teaspoons of ground cinnamon, and 1/4 teaspoon of ground cloves. Mix thoroughly to ensure the spices are evenly distributed.
-
Using a pastry brush, generously brush melted butter along the bottom and up the sides of a 9″x13” baking pan to prevent sticking and aid in browning.
-
Carefully unroll the thawed phyllo dough. If necessary, gently trim the edges of the phyllo sheets to fit your pan. Immediately cover the stack of unused phyllo dough with a lightly dampened cloth or paper towel to prevent it from drying out, which happens very quickly.
-
Place the first sheet of phyllo dough in the prepared pan. Using your pastry brush, lightly brush the entire surface with melted butter. Repeat this process until you have a base of 8 phyllo sheets layered, ensuring a very light brushing of butter between each. Avoid oversaturating with butter to maintain flakiness.
-
Evenly sprinkle 3 tablespoons of the prepared nut mixture over the top phyllo sheet. Now, carefully place two new sheets of phyllo dough on top of the nuts (do *not* butter between these two sheets). Lightly brush the top of the second sheet with butter, then add another 3 tablespoons of the nut mixture. Continue this layering pattern – two phyllo sheets, light butter, then nuts – until you have about 8 sheets of phyllo remaining for the very top layer. For the final top section, layer the remaining 8 sheets, lightly brushing butter between each. Brush the very top layer of phyllo with a slightly more generous, thin layer of butter.
-
Using a very sharp knife, carefully trim any small pieces of phyllo dough that may have crept up the sides of the pan. Then, gently score the baklava into diamond or triangular shapes. When cutting, make sure to cut within a HALF inch of the bottom of the pan; do NOT cut all the way through at this stage. This partial cut is essential, as it creates channels for the syrup to seep into the layers without pooling excessively at the bottom once poured. You will cut completely through after the baklava has cooled and soaked.
-
Place the pan of baklava into the preheated oven and bake for approximately 50 minutes, or until the top layers are beautifully golden brown and crispy. Keep an eye on it to prevent over-browning.
-
While the baklava is baking, strain your cooled syrup mixture through a fine-mesh sieve to remove the cinnamon stick and orange peel, ensuring a perfectly smooth syrup.
-
As soon as the baklava is done baking, remove it from the oven. Immediately and evenly pour the *cooled* syrup over the top of the hot baklava, making sure to get the syrup into all the cuts, cracks, and crevices, as well as over the entire top surface. This temperature contrast is key for the perfect texture. Let the baklava sit undisturbed to absorb the syrup for at least 4 hours, or ideally, overnight, at room temperature. Before serving, use a sharp knife to cut all the way through the pre-scored lines to the bottom of the pan to separate the individual pieces.
-
Baklava can be stored at room temperature, loosely covered with a paper towel, for up to 1 week. For longer term storage, please refer to the “Make Ahead, Storing, and Freezing” section above. Enjoy your homemade Greek Baklava!
Video
Notes
Tips for Success: Always work quickly with phyllo dough as it tends to dry out very fast. Keep a damp paper towel or cloth over any unused phyllo sheets to maintain their moisture and pliability. This simple step is key to preventing tears and ensuring perfect flaky layers in your baklava.
Nutrition
