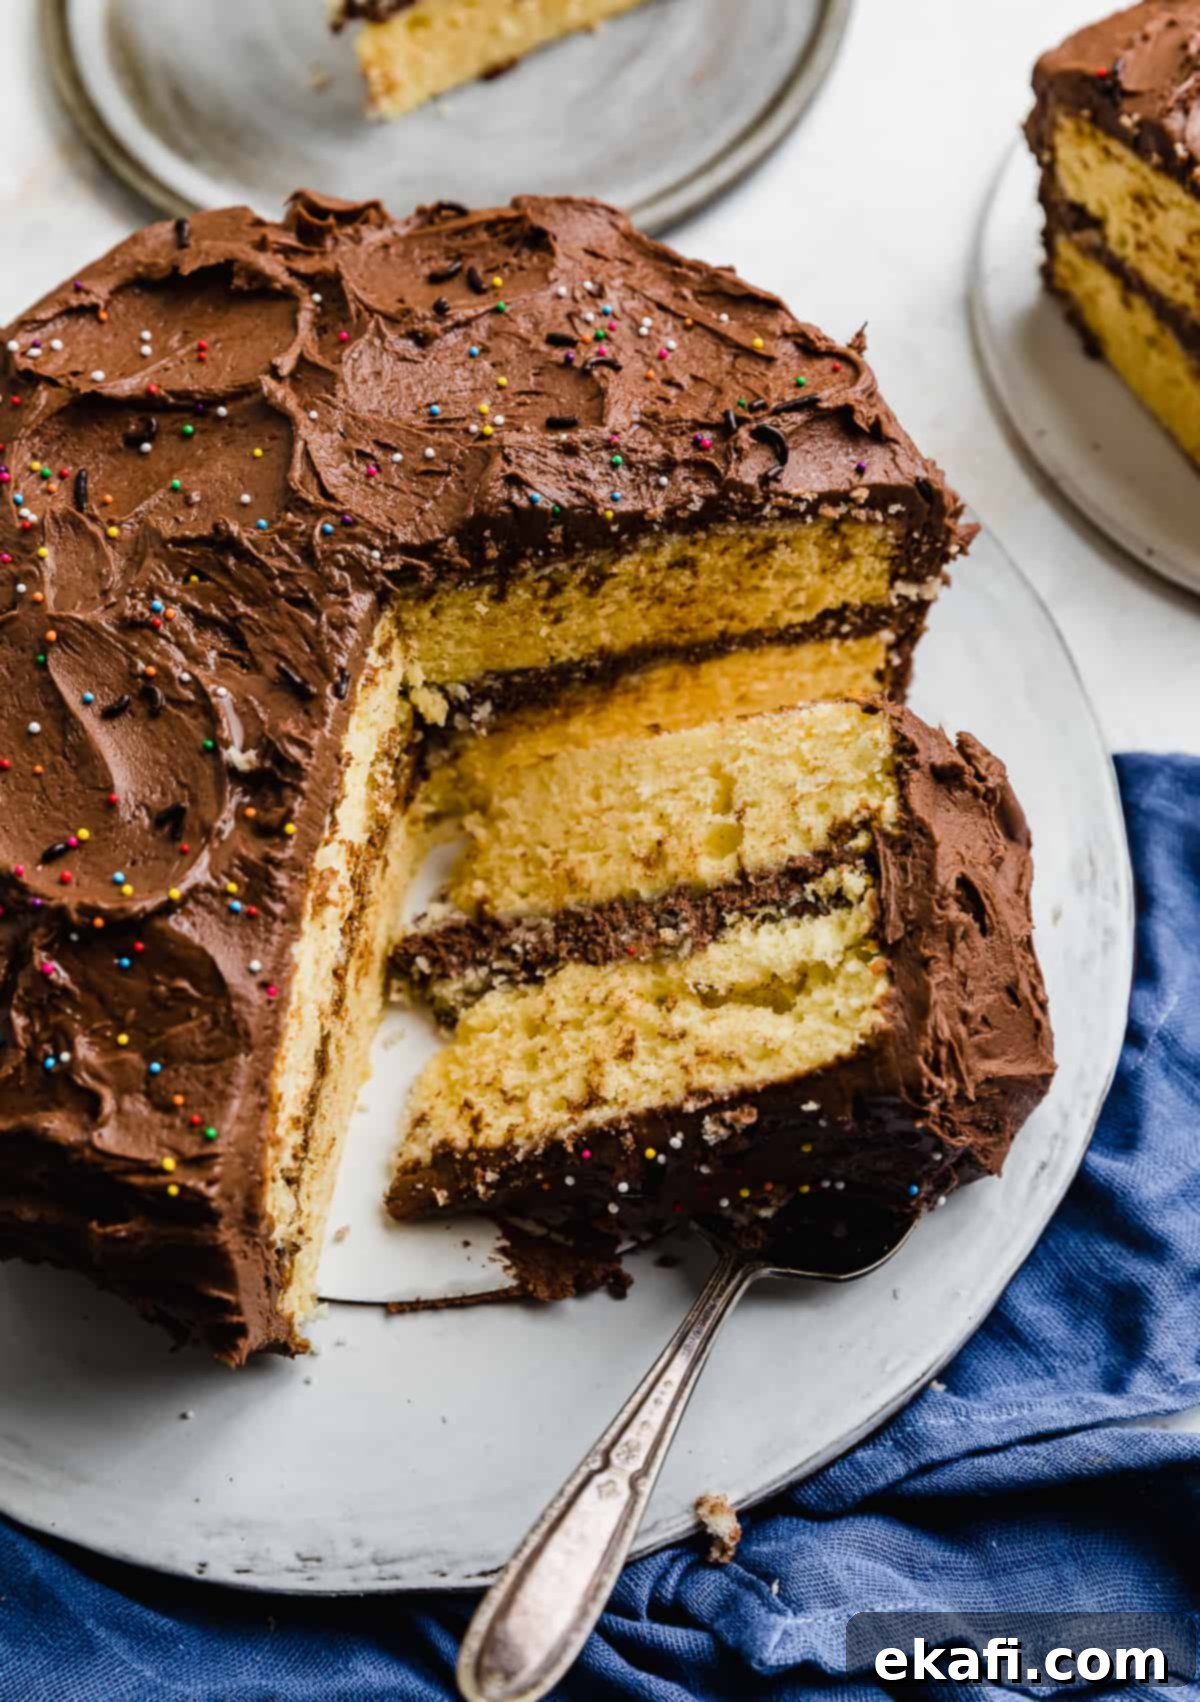
Classic Homemade Yellow Cake with Chocolate Frosting: Your Ultimate Recipe Guide
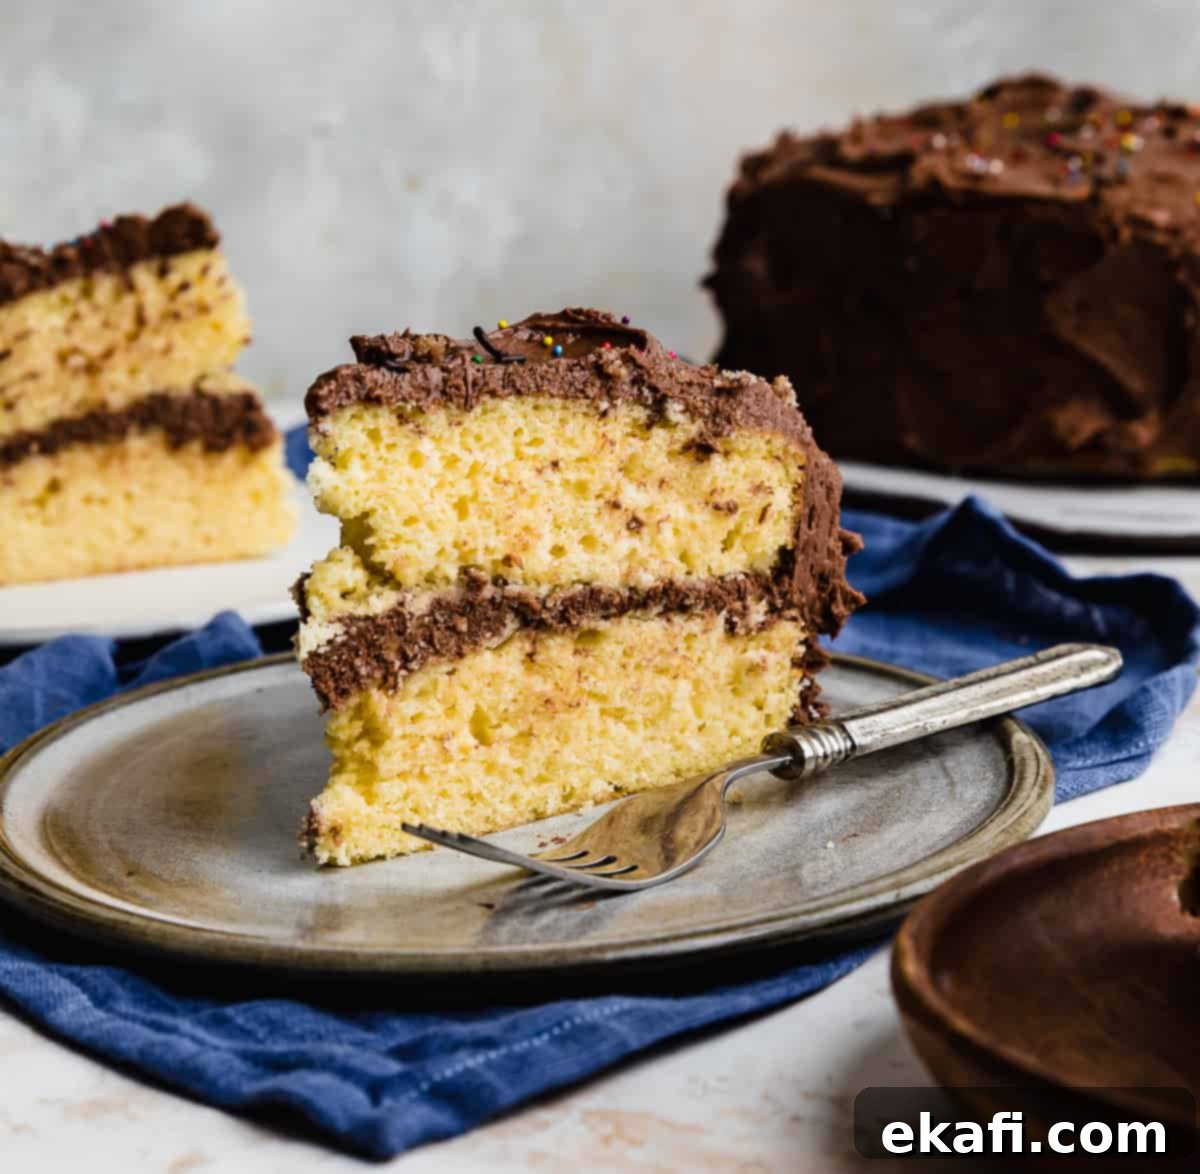
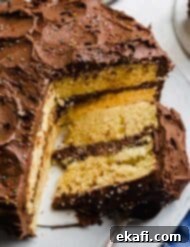
There’s an undeniable charm and comforting nostalgia associated with a classic yellow cake generously adorned with rich chocolate frosting. This isn’t just a dessert; it’s a trip down memory lane, a bite into childhood happiness. My homemade yellow cake with chocolate frosting recipe is carefully crafted to evoke those cherished memories, delivering a taste experience that is both familiar and exquisitely delicious. Forget dense, heavy cakes; this recipe yields a cake with a crumb that is perfectly balanced – not too open, not too tight – resulting in a texture that can only be described as supremely tender and moist. When paired with my decadent Chocolate Buttercream Frosting, you’ll discover why this truly is the best yellow cake you’ve ever had, guaranteed to become a family favorite.
If you’re eager to continue your baking journey with more nostalgic and crowd-pleasing cakes, be sure to explore my popular Funfetti Cake, a burst of color and joy, or the timeless elegance of my Old Fashioned Red Velvet Cake. For those who appreciate simple yet impactful flavors, my robust Texas Sheet Cake or the nuanced richness of my Brown Butter Cake are fantastic choices. Each recipe is designed to bring warmth and deliciousness to your kitchen. Happy baking!
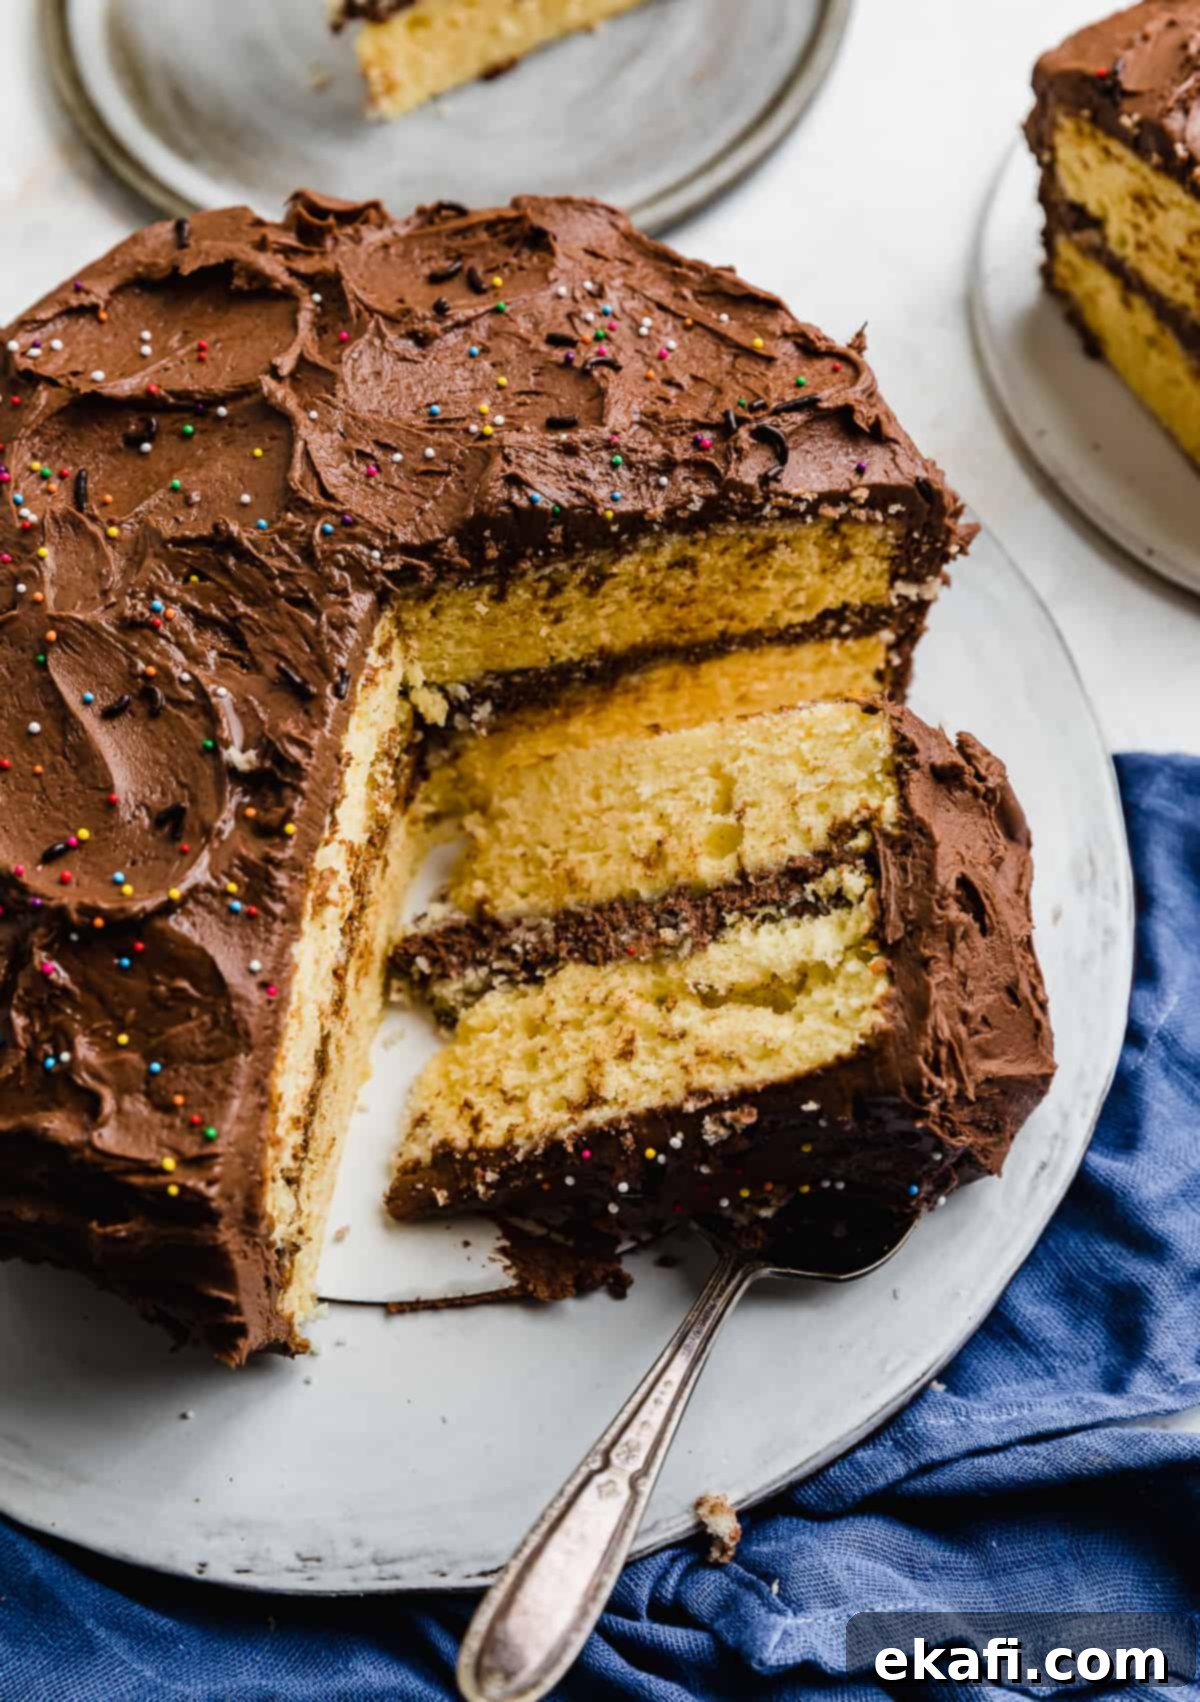
Why This Classic Yellow Cake Recipe Works So Well
Crafting the perfect yellow cake with chocolate frosting involves a few key techniques and ingredient choices that elevate it from good to absolutely unforgettable. This recipe incorporates specific strategies that guarantee a moist, flavorful, and beautifully textured cake every single time.
- Chiffon Cake Technique for Ultimate Lightness: One of the secrets to this cake’s incredibly light and airy texture lies in adapting a chiffon cake technique. We carefully separate our eggs, whipping the egg whites into stiff, voluminous peaks. These aerated whites are then gently folded into the batter, introducing a significant amount of air. This process creates a delicate internal structure that expands beautifully during baking, resulting in a cake that is exceptionally soft and tender, never heavy or dense. It’s this meticulous step that gives our yellow cake its signature melt-in-your-mouth quality.
- The Perfect Moisture and Flavor Balance: Butter AND Oil: Many home bakers wonder how to achieve a genuinely moist yellow cake without sacrificing rich flavor. The answer is simple yet ingenious: use both butter and oil. Butter is indispensable for its unparalleled flavor, lending that classic, deep, rich taste we all crave in a yellow cake. However, a cake made solely with butter can sometimes turn out a bit dry due to butter’s lower fat content and higher water content compared to oil. By incorporating vegetable oil, we introduce pure fat that significantly boosts moisture retention, keeping the cake tender and moist for days. This dynamic duo ensures our cake is both incredibly flavorful and wonderfully soft.
- Simplicity Reigns Supreme: While I adore experimenting with elaborate cake creations featuring multiple fun and tasty elements, there’s an undeniable beauty in simplicity. Sometimes, straightforward, unpretentious flavors are exactly what the heart desires. The pairing of a buttery yellow cake with a classic chocolate buttercream frosting is a testament to this principle. It’s a delightful combination that doesn’t need complex additions to shine, offering pure, unadulterated comfort and joy in every slice. This recipe celebrates the timeless appeal of a well-executed classic.
Essential Ingredient Notes for Your Perfect Yellow Cake
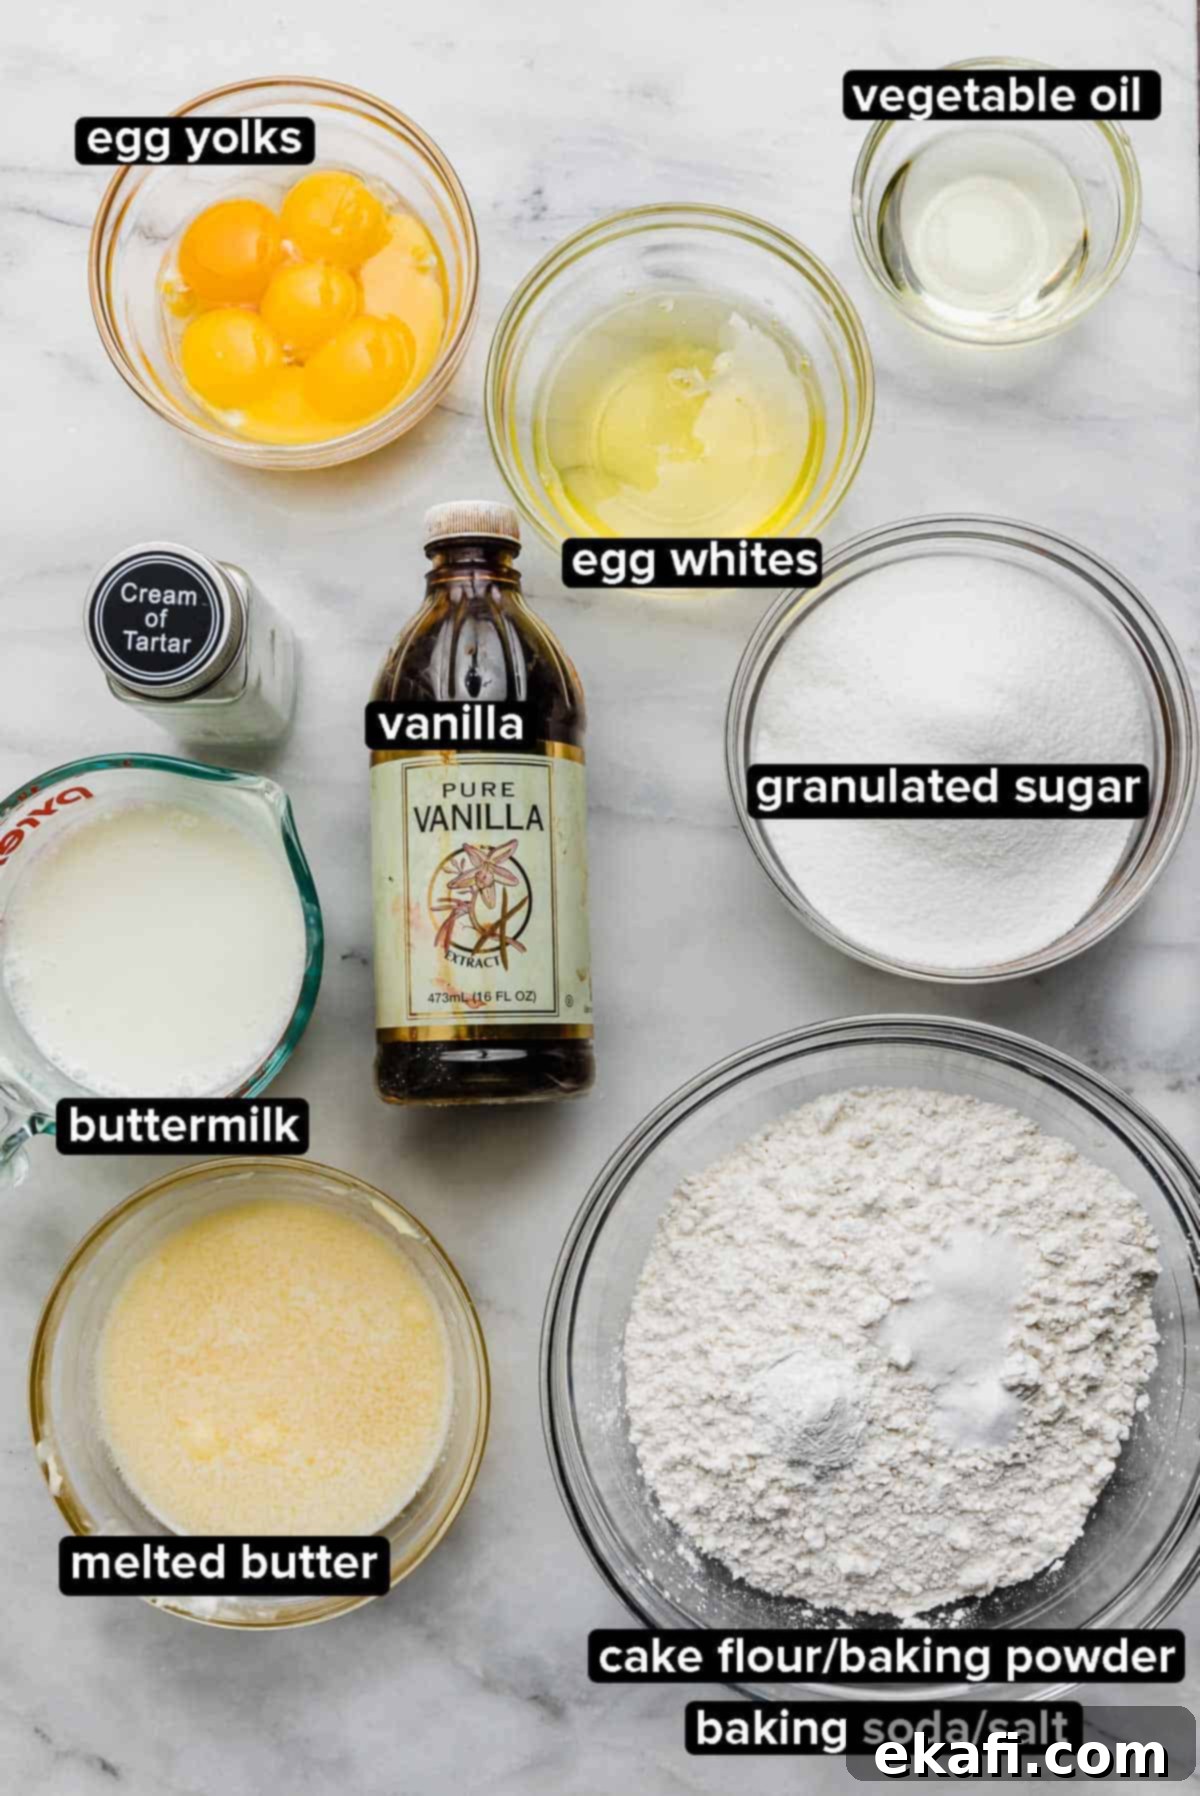
Understanding the role of each ingredient is crucial for baking success. Here’s a breakdown of the key components in this yellow cake recipe and why they matter, along with some helpful tips for substitutions.
- Cake Flour: This specialized flour is a game-changer for tender cakes. It has a significantly lower protein content (around 7-8%) compared to all-purpose flour (10-12%), which means less gluten development. The result is a cake with an exceptionally fine, delicate, and tender crumb that practically melts in your mouth. While using cake flour is highly recommended for the best texture, you can substitute it with all-purpose flour. To do so, for every cup of cake flour, use 1 cup of all-purpose flour minus 2 tablespoons, and then add back 2 tablespoons of cornstarch. Just be aware that the cake’s crumb will be slightly coarser, but still undeniably delicious.
- Eggs: The Foundation of Structure and Rise: Eggs play multiple vital roles in this yellow cake recipe. The three whole eggs provide essential structure and stability to the cake, helping it hold its shape, and contribute to the overall richness. The additional three egg yolks are specifically added for their intense color and extra richness, giving the cake its beautiful, vibrant yellow hue and a more luxurious flavor profile. By separating the egg whites and whipping them into stiff peaks, we are able to incorporate a considerable amount of air into the batter. This air acts as a natural leavening agent, creating a remarkably spongy, light, and delicate texture in the finished cake. It’s a technique borrowed from chiffon cakes that truly sets this recipe apart. Ensure your eggs are at room temperature for optimal emulsification and meringue volume.
- Buttermilk: Tang, Tenderness, and Leavening: Buttermilk is a magical ingredient in baking, especially for cakes. Beyond contributing a delightful, subtle tang that perfectly complements the sweetness of the cake and frosting, its natural acidity is key to the cake’s rise. When buttermilk reacts with baking soda (another leavening agent in our recipe), it produces carbon dioxide bubbles that help the cake ascend in the oven, leading to a lighter, softer crumb. Furthermore, buttermilk helps to break down gluten, ensuring a more tender cake. If you don’t have buttermilk on hand, you can easily make your own by adding 1 tablespoon of lemon juice or white vinegar to a 1-cup measuring cup, then filling the rest with milk and letting it sit for 5-10 minutes until it slightly curdles. Alternatively, thin ¾ cup of sour cream with ¼ cup of water or milk.
- Cream of Tartar: The Meringue Stabilizer: Often found in recipes like my Snickerdoodle Cookies for a hint of tang, cream of tartar serves an even more critical purpose here. In this yellow cake recipe, it acts as a stabilizer for the egg whites as they are whipped into meringue. Cream of tartar helps the egg whites achieve greater volume and, more importantly, prevents them from collapsing, ensuring they maintain their stiff peaks and incorporate air effectively into the batter. This stabilization is vital for the cake’s light, airy texture and prevents it from falling flat.
- Butter and Oil: As mentioned, butter provides unparalleled flavor and richness, while vegetable oil (a neutral-flavored oil like canola or sunflower) ensures the cake stays incredibly moist. Both should be at room temperature (except the melted butter) for best results.
- Baking Powder & Baking Soda: These are our chemical leavening agents. Baking powder provides initial lift, while baking soda reacts with the buttermilk’s acidity to create additional gas, contributing to the cake’s tender crumb and airy structure.
- Granulated Sugar: Not just for sweetness, sugar also contributes to moisture and tenderness, helps with browning, and stabilizes whipped egg whites.
- Salt: A pinch of salt balances the sweetness and enhances all the other flavors in the cake.
- Vanilla Extract: Essential for that classic, warm yellow cake flavor. Use a good quality pure vanilla extract for the best taste.
Step-by-Step Instructions: Baking Your Perfect Yellow Cake
Follow these detailed steps carefully to ensure a flawless and delicious yellow cake with chocolate frosting. Precision and technique are key to achieving that perfect tender crumb.
- Prepare Your Oven and Pans: Begin by positioning an oven rack in the middle of your oven, then preheat it to 350℉ (175°C). This ensures even baking. Next, meticulously prepare two 9-inch round cake pans. You can either use a nonstick cooking spray that contains flour, or grease them thoroughly with softened butter and then dust with flour, tapping out any excess. For an extra layer of protection against sticking and easier cake removal, line the bottoms of your pans with parchment paper circles. Once the parchment is in place, spray or grease and flour the paper again, along with the sides of the pan. Proper pan preparation is crucial for clean cake release.
- Mix Dry Ingredients: In a large mixing bowl, combine 2½ cups of cake flour, 1¼ teaspoon of baking powder, ¼ teaspoon of baking soda, ¾ teaspoon of salt, and 1½ cups of granulated sugar. Whisk these ingredients together thoroughly for about 30 seconds to a minute. This step is vital to ensure that the leavening agents (baking powder and baking soda) and salt are evenly distributed throughout the flour, preventing pockets of unmixed ingredients and ensuring a uniform rise.
- Separate Your Eggs: Carefully separate the yolks from the whites of 3 large eggs. You will use the yolks in the wet ingredients mixture and the whites for whipping into a meringue. A good tip for separating eggs is to do it while they are cold, as the yolks are firmer and less likely to break. However, for the recipe, ensure all eggs and yolks are at room temperature before mixing for better emulsification.
- Mix Wet Ingredients: In a separate, medium-sized bowl, whisk together 1 cup of room-temperature buttermilk, 10 tablespoons of melted unsalted butter (allowed to cool slightly so it doesn’t cook the eggs), the 3 whole room-temperature eggs, the 3 additional room-temperature egg yolks, 3 tablespoons of vegetable oil, and 2 teaspoons of pure vanilla extract. Whisk until the mixture is completely smooth and well combined. Room temperature ingredients are essential here, as they emulsify better, leading to a smoother, more uniform batter.
- Whip Egg Whites into Meringue: Using a stand mixer fitted with a whisk attachment, begin whipping the 3 egg whites and a pinch of cream of tartar on medium speed. Continue mixing for about one minute, or until the egg whites become foamy and opaque. Increase the speed to medium-high and continue whipping until the egg whites form soft, billowy mounds – these are ‘soft peaks.’ Reduce the mixer speed to low, and gradually add ¼ cup of granulated sugar, allowing it to incorporate slowly. Once all the sugar is added, increase the mixer speed back to medium-high and whip for another 2-3 minutes, or until you achieve stiff, glossy peaks of meringue. The meringue should hold its shape firmly. Gently transfer these whipped egg whites into a third, clean bowl.
- Combine Dry and Wet Ingredients: Now, swap your stand mixer’s whisk attachment for the paddle attachment. Add the previously whisked dry ingredients to the stand mixer bowl. With the mixer set to low speed, slowly pour in the wet ingredients mixture. Mix until just incorporated, being careful not to overmix. Stop the mixer halfway through to scrape down the sides and bottom of the bowl with a rubber spatula, ensuring all ingredients are fully combined into a smooth batter. Overmixing at this stage can lead to a tough cake due to excessive gluten development.
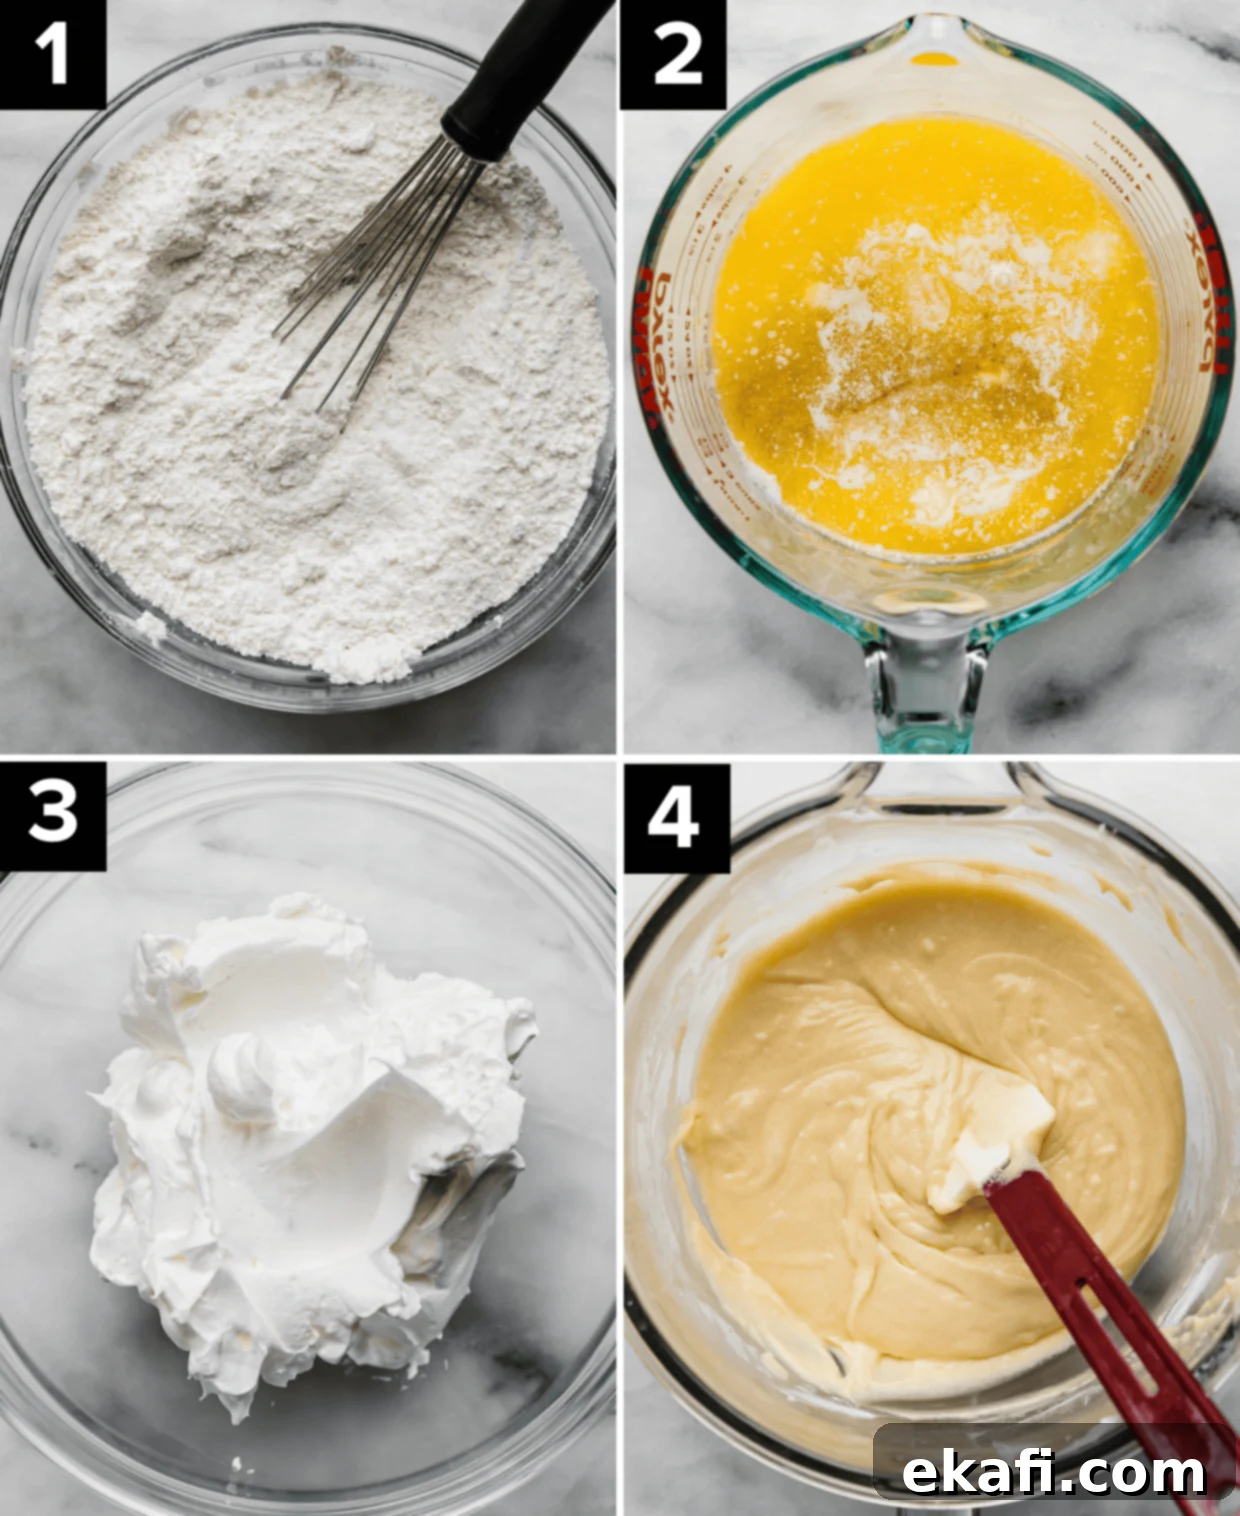
- Gently Fold in Your Egg Whites: This is a delicate and crucial step for the cake’s texture. Remove the stand mixer bowl from its base. Using a large rubber spatula, gently fold about one-third of the whipped egg whites into the cake batter. The goal here is to lighten the batter, making it easier to incorporate the remaining meringue. Once this first portion is fully incorporated, add the rest of the egg whites. Continue to fold gently, using a ‘cut and fold’ motion, until no white streaks of meringue remain. Do not rush this step, and avoid overmixing or deflating the egg whites, as this will knock the air out of the meringue, potentially resulting in a flat, dense cake instead of a light, spongy one.
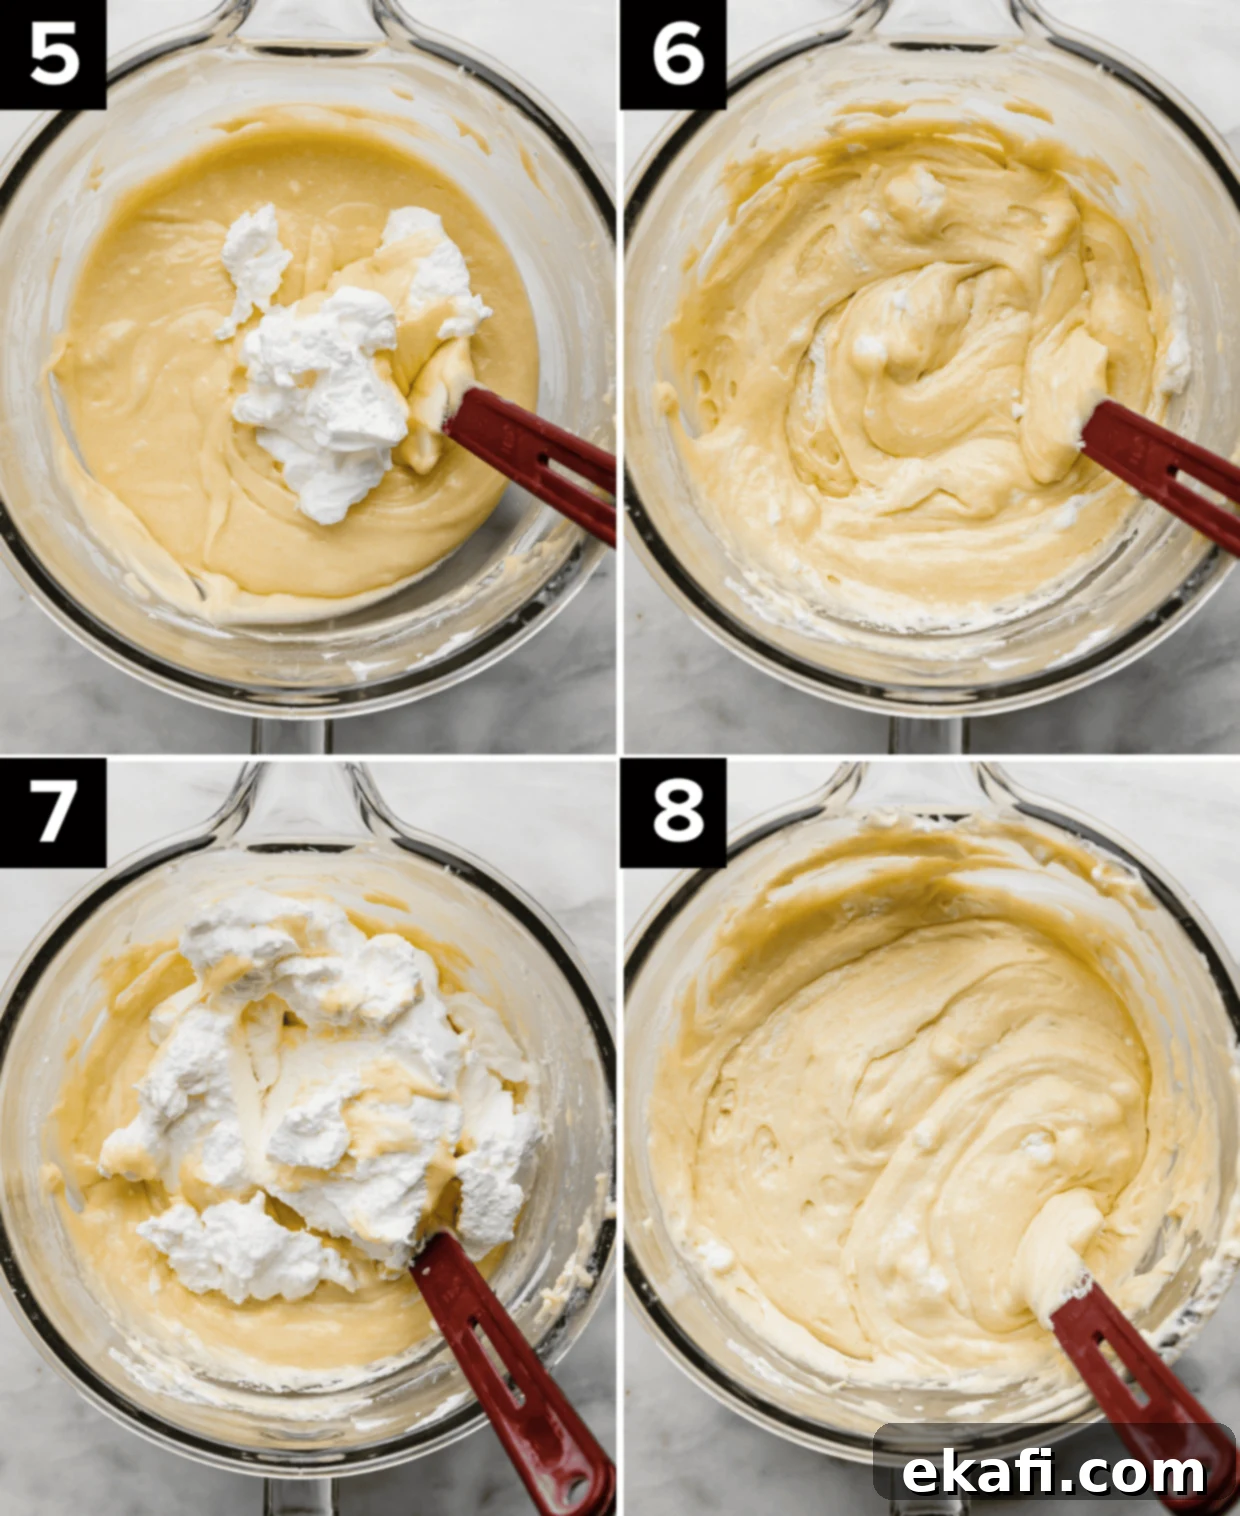
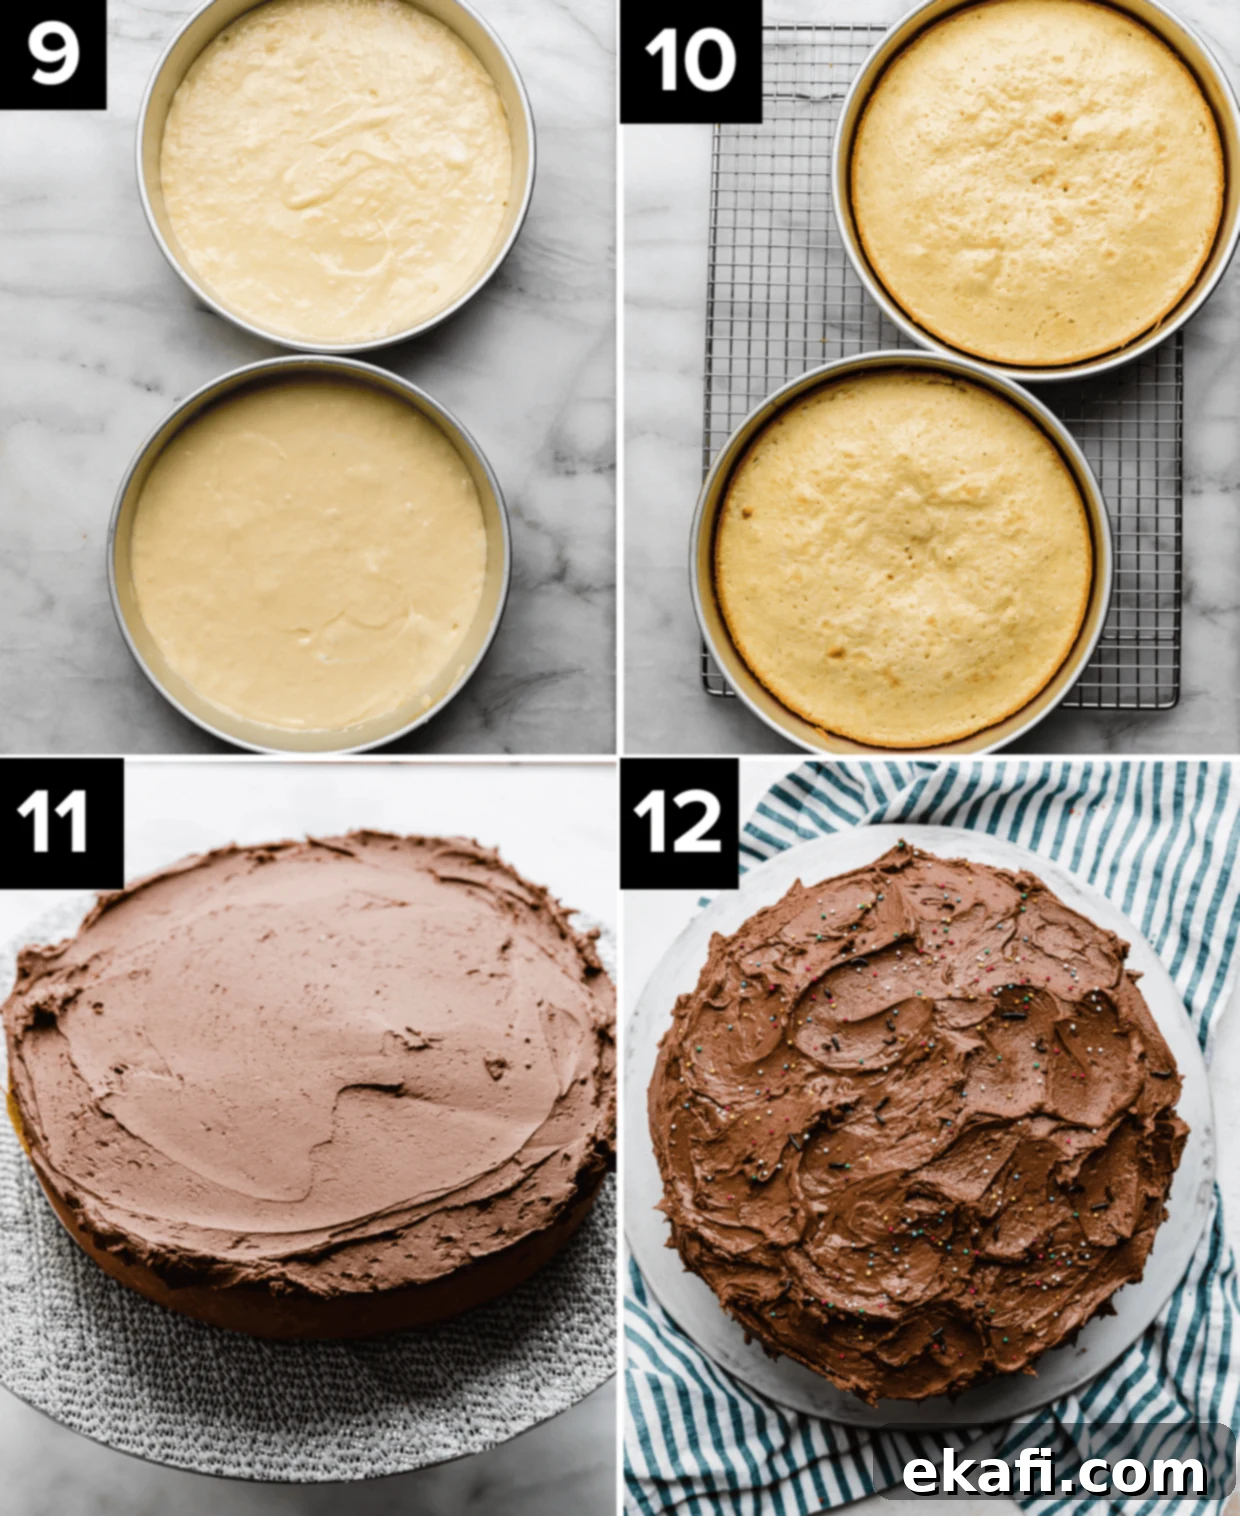
- Bake to Perfection: Divide the prepared cake batter evenly between your two greased and floured 9-inch cake pans. Use an offset spatula to gently level the tops of the batter in each pan. Then, carefully tap each cake pan once or twice against the counter. This helps to release any large air bubbles trapped in the batter and allows it to settle evenly, which contributes to a flat top and uniform texture. Bake in your preheated oven for approximately 20-22 minutes. The cakes are done when a wooden skewer or toothpick inserted into the very center comes out with just a few moist crumbs clinging to it, or cleanly. Avoid overbaking, as this is the primary cause of dry cake.
- Allow Cakes to Cool Properly: Once baked, remove your glorious cakes from the oven. Allow them to cool in their pans on a wire rack for precisely 10 minutes. This brief cooling period helps the cakes firm up structurally. After 10 minutes, carefully invert the cakes onto the wire rack, remove the pans and parchment paper, and allow them to cool completely. This could take 1.5 to 2 hours. Do not attempt to frost warm cakes, as the frosting will simply melt and slide off.
- Prepare Your Dreamy Chocolate Frosting: While the cakes cool, it’s time to make the rich chocolate frosting. In a microwave-safe bowl, melt 6 ounces of finely chopped bittersweet chocolate. Use half power on your microwave and stir every 30 seconds until the chocolate is smooth and fully melted. Crucially, allow the melted chocolate to cool for at least 5 minutes before proceeding. Adding hot chocolate to butter will melt your butter, compromising the frosting’s texture. In the clean bowl of a stand mixer fitted with the paddle attachment, whip 1½ cups of room-temperature unsalted butter on medium-high speed for 2-3 minutes until it’s light and fluffy. Reduce the speed to low and gradually add 4 cups of powdered sugar, mixing until fully incorporated. Stir in 1 teaspoon of vanilla extract. Finally, pour in the cooled melted chocolate and beat on medium-high speed for 2 minutes, or until the frosting is incredibly light, fluffy, and perfectly smooth. Scrape down the sides of the bowl as needed to ensure everything is combined. If your frosting seems too thick, you can add 1 tablespoon of heavy cream and mix for another minute to achieve the desired consistency.
- Assemble Your Masterpiece: Once both cake layers are completely cool, it’s time for assembly! Place your first cooled cake layer on your chosen cake plate or stand. Spread approximately 1½ cups of the rich chocolate frosting evenly over the top of this layer, extending it all the way to the edges. You don’t need to measure precisely; an eyeball estimate works fine. Carefully place the second cake layer on top. Now, use the remaining frosting to generously cover the top and sides of the entire cake, smoothing it with an offset spatula for a clean finish or creating decorative swirls.
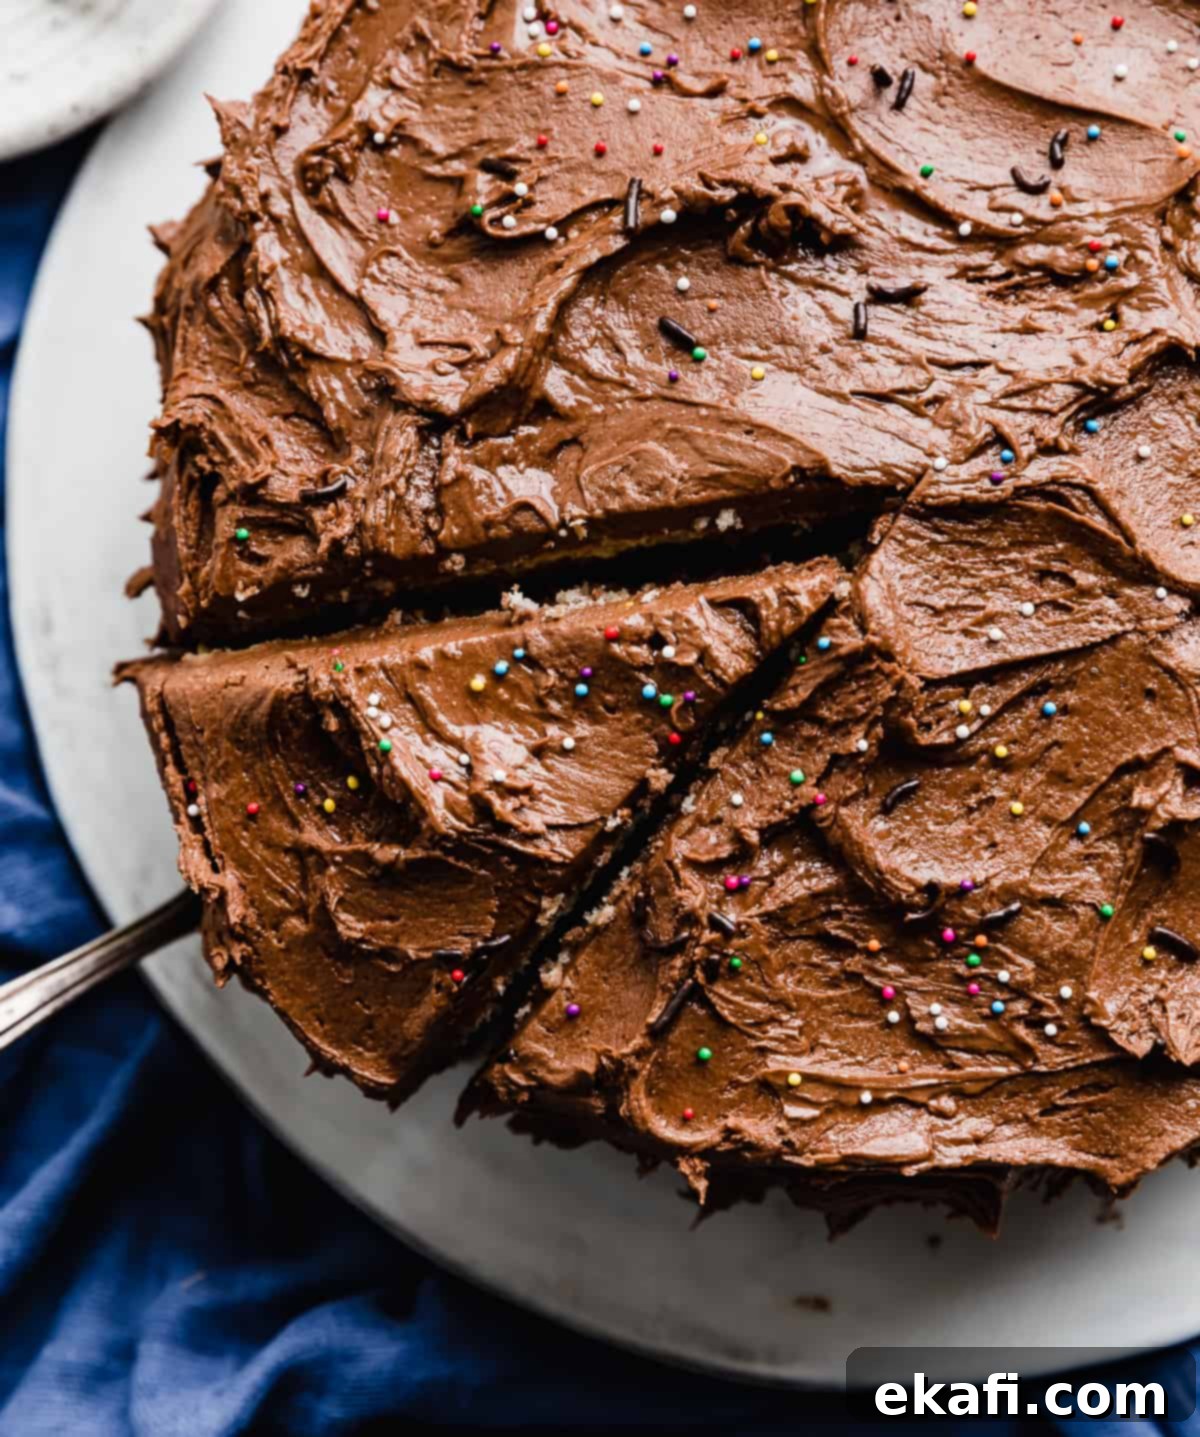
- Serve and Enjoy! Your magnificent homemade yellow cake with chocolate frosting is now ready! Feel free to add any additional decorations you desire, such as colorful sprinkles, chocolate shavings, or fresh berries, to make it even more festive. Slice into generous portions and savor every delicious, nostalgic bite. This cake is truly a labor of love that tastes like pure joy!
Expert Baking Tips for Your Yellow Cake with Chocolate Frosting
Achieving a truly outstanding yellow cake is easy with these simple yet effective tips and tricks:
- Enhance the Yellow Hue: For a strikingly vibrant yellow cake that truly lives up to its name, consider using organic or farm-fresh eggs if you have access to them. The yolks from these eggs often have a richer, deeper orange color compared to conventional eggs, which will naturally enhance the yellow tint of your cake. Of course, regular eggs work perfectly fine and will still yield a beautiful and delicious cake!
- Deepen Your Chocolate Frosting Color and Flavor: If you desire a more intensely dark brown chocolate frosting, an easy trick is to incorporate a few additional tablespoons of unsweetened cocoa powder. Add 2 to 3 tablespoons of good quality cocoa powder along with the powdered sugar when making the frosting. This simple addition will significantly deepen the color without drastically altering the texture or flavor profile of the frosting, though it might add a subtle hint of rich chocolate bitterness, which is often a welcome addition.
- Explore Frosting Variations: While classic chocolate buttercream is a timeless choice, feel free to get creative with your frosting! This versatile yellow cake pairs beautifully with many flavors. For another classic chocolate option, my Chocolate Cream Cheese Frosting offers a delightful tang that complements the sweet cake perfectly. If you’re looking for something lighter and less sweet, my Cream Cheese Whipped Cream Frosting could be a wonderful alternative. And remember, there’s absolutely no shame in reaching for your favorite high-quality store-bought chocolate frosting when time is short. Your secret is safe with me! 😉
- Level Cake Layers for Perfect Stacking: To ensure your cake layers stack beautifully and evenly, you can use a serrated knife or a cake leveler to trim any domed tops after the cakes have cooled completely. This creates flat surfaces that are easier to frost and result in a more professional-looking finished cake.
- Accurate Measurements are Key: Baking is a science, so precise measurements are crucial. Always use a kitchen scale for flour and sugar if possible, or use the “spoon and level” method for flour (spoon flour into a measuring cup, then level off with a straight edge) to avoid compacting it and using too much.
Make Ahead, Storing, and Freezing Your Yellow Cake
Thoughtful preparation and storage can ensure your delicious yellow cake stays fresh and enjoyable for longer.
Make Ahead: If you’re planning to bake this cake in advance, I highly recommend preparing and storing the cake layers unfrosted. Allow the baked cake layers to cool completely on a wire rack. Once cooled, individually wrap each cake layer tightly in several layers of plastic wrap. You can then store them at room temperature for up to 24 hours, refrigerate them for up to 3 days, or freeze them for up to a month. Freezing cake layers is an excellent way to break down your baking process and save time on the day of your event.
Storing: For any leftover frosted cake, the best way to maintain its freshness and moisture is to cover it properly. Use a sturdy cake cover to protect it from air exposure. If you don’t have a cake cover, loosely wrap the entire cake in aluminum foil or plastic wrap. Ensure the wrap doesn’t stick to the frosting too much. The cake will keep beautifully at room temperature for 4-5 days – though it’s so delicious, it rarely lasts that long!
Freezing: Unfrosted cake layers freeze exceptionally well. Wrap each cooled cake layer individually and tightly in plastic wrap, then place them in an airtight freezer bag or container. They can be stored in the freezer for up to a month. When you’re ready to enjoy them, simply transfer the frozen cake layers to your countertop and allow them to thaw at room temperature for 2-3 hours before unwrapping and frosting. For more in-depth information and expert tips on extending the life of your baked goods, check out my comprehensive guide on How to Store and Freeze Cakes.
Yellow Cake & Chocolate Frosting: Frequently Asked Questions
Here are answers to some common questions you might have while baking this delightful classic.
The primary difference lies in the eggs used. Yellow cake, like this recipe, gets its signature golden hue and rich flavor from the inclusion of egg yolks. White cake, on the other hand, is typically made exclusively with egg whites to ensure a pure white color and a slightly lighter flavor profile. Vanilla cake is a broader term that can refer to either a yellow cake or a white cake, simply indicating that vanilla is the predominant flavor. Often, yellow cakes are richer due to the fat from the yolks, while white cakes are usually fluffier and lighter.
No buttermilk? No problem! You can easily make a homemade substitute. Simply add a tablespoon of lemon juice or white vinegar to a 1-cup liquid measuring cup. Then, fill the rest of the cup with regular milk (any fat content will do). Stir it gently and let it stand for 5-10 minutes until it slightly curdles. The acidity of the lemon juice or vinegar will react with the milk, mimicking buttermilk’s properties. Another option is to take ¾ cup of sour cream and thin it with ¼ cup of water or milk until it reaches a pourable consistency. While store-bought buttermilk is ideal, these substitutes work very well in a pinch.
Absolutely! This versatile yellow cake batter is perfect for making cupcakes. The recipe should yield approximately 24 delightful yellow cupcakes with chocolate frosting. When baking cupcakes, maintain the same oven temperature (350℉/175°C) but significantly reduce the baking time. Start checking for doneness around 15 minutes, as cupcakes bake much faster than full cake layers. A toothpick inserted into the center of a cupcake should come out clean. You might even find yourself with a little extra frosting, which is never a bad thing for extra swirls or taste tests!
Yes, you can certainly adapt this yellow cake recipe for a 9×13-inch pan. The batter quantity should fit perfectly into a standard 9×13-inch baking dish. However, you will need to increase the baking time considerably. Start checking for doneness around the 30-minute mark, and continue baking until a toothpick inserted into the center comes out with moist crumbs. If you still want to achieve a layered effect with your yellow cake and chocolate frosting, you can simply cut the baked 9×13-inch rectangular cake down the middle lengthwise, creating two equal halves, and then stack them on top of each other before frosting. This creates a charming rectangular layer cake!
Several factors can cause a cake to sink. Common culprits include opening the oven door too early (before the cake’s structure is set), using too much leavening agent, or, most commonly with this recipe, deflating the egg whites during the folding process. It’s crucial to fold the whipped egg whites gently and thoroughly to retain as much air as possible. Also, ensure your baking powder and soda are fresh, as old leavening agents won’t provide enough lift.
The butter and oil combination in this recipe is already designed for maximum moisture. To further guarantee a moist cake, avoid overbaking at all costs. Overbaking is the leading cause of dry cakes. Always start checking for doneness at the minimum recommended baking time. The toothpick test is your best friend: it should come out with a few moist crumbs, not completely clean. Additionally, ensuring all your wet ingredients are at room temperature helps create a well-emulsified batter, which contributes to moisture retention.
Explore More Delicious Layer Cake Recipes
If you’ve enjoyed baking and indulging in this classic yellow cake, you’re sure to love these other spectacular layer cake creations from my kitchen:
- 7 Layer Bar Cake: A stunning cake interpretation of the beloved magic bar.
- Oreo Cake: For the ultimate cookie and cream enthusiast, a rich and decadent treat.
- Scotcheroo Cake: A sweet and crunchy sensation inspired by the classic bar dessert.
- Biscoff Caramel Cake: Layers of spiced cookie goodness and luscious caramel for a unique flavor.
Did you make this delightful yellow cake with chocolate frosting? I’d absolutely love to hear about your experience! Please leave a star rating and review right here on the blog or scroll down to the recipe card below and share your thoughts there. Your feedback helps other bakers, and it makes my day!
Stay up-to-date with all my latest recipes and baking adventures by following us on Instagram, TikTok, YouTube, Facebook, and Pinterest. Let’s bake something amazing together!
Print
Save
Saved!
Review
Yellow Cake with Chocolate Frosting
40 minutes
22 minutes
1 hour
2 minutes
12
servings
Prevent your screen from going dark
Ingredients
Yellow Cake
-
2 1/2
cups
cake flour
-
1 1/4
teaspoon
baking powder -
1/4
teaspoon
baking soda -
3/4
teaspoon
salt -
1 3/4
cups
granulated sugar -
1
cup
buttermilk –
room temperature -
10
tablespoons
unsalted butter
–
melted -
3
large
eggs, whole –
room temperature -
3
large
eggs, eggs and whites separated –
room temperature -
3
tablespoons
vegetable oil -
2
teaspoons
vanilla extract
-
pinch
cream of tartar
Chocolate Frosting
-
1 1/2
cups
unsalted butter
–
room temperature -
4
cups
powdered sugar -
1
teaspoon
vanilla extract
-
6
oz
bittersweet chocolate –
finely chopped -
1
tablespoon
heavy cream –
if needed
Equipment
-
Ateco cake stand
Instructions
Yellow Cake
-
Adjust oven rack to middle position and preheat oven to 350°F (175°C). Spray two 9-inch round cake pans with nonstick cooking spray, then line the bottoms of each pan with parchment paper. Spray the parchment paper and sides of the pan again with nonstick cooking spray (that contains flour) or grease thoroughly with butter and dust with flour, tapping out excess.
-
In a large bowl, thoroughly whisk together the cake flour, baking powder, baking soda, salt, and 1 ½ cups of granulated sugar until well combined and lump-free.
-
In a second bowl, whisk together the room-temperature buttermilk, melted and cooled butter, 3 whole room-temperature eggs, 3 room-temperature egg yolks, vegetable oil, and vanilla extract until the mixture is smooth and fully emulsified.
-
In the bowl of a stand mixer fitted with a whisk attachment, combine the 3 egg whites and a pinch of cream of tartar. Mix on medium speed for 1 minute, or until the mixture becomes foamy. Increase the speed to medium-high and whip until the egg whites form soft, billowy mounds (soft peaks). With the mixer still on low speed, gradually add the remaining ¼ cup of granulated sugar. Once all sugar is added, turn the speed up to medium-high and whip until stiff, glossy peaks form, which should take 2-3 minutes. Carefully transfer the whipped egg whites (meringue) to a third separate bowl.
-
In the now empty stand mixer bowl, add the dry flour mixture. Swap to the paddle attachment. With the mixer on low speed, slowly pour in the buttermilk mixture and mix until just incorporated, approximately 30 seconds. Stop halfway through mixing to scrape down the sides of the bowl with a rubber spatula to ensure all ingredients are evenly combined. Avoid overmixing.
-
Using a rubber spatula, gently fold in one-third of the whipped egg whites into the cake batter until just incorporated. This lightens the batter. Once incorporated, add the remaining egg whites and continue to fold gently until no white streaks of meringue remain. Be careful not to deflate the mixture.
-
Divide the cake batter evenly between the two prepared cake pans. Use an offset spatula to level the tops of the batter. Gently tap each cake pan once or twice on the counter to release any large air bubbles and help the batter settle. Bake in the preheated oven for 20-22 minutes, or until a wooden skewer or toothpick inserted into the center comes out with just a few moist crumbs clinging to it. Remove the cakes from the oven and let them cool in their pans on a wire rack for 10 minutes. After 10 minutes, invert the cakes onto the wire rack to cool completely (this typically takes 1.5-2 hours).
Chocolate Frosting
-
Melt the finely chopped bittersweet chocolate in a microwave-safe bowl at half power, stirring every 30 seconds until completely smooth. Set aside to cool for at least 5 minutes. (It is crucial that the chocolate is not hot when added to the butter, as this will melt the butter and ruin the frosting’s consistency). In the bowl of a stand mixer fitted with the paddle attachment, whip the room-temperature unsalted butter on medium-high speed for 2-3 minutes until it is light and fluffy. Reduce the speed to low and slowly add the powdered sugar. Once the powdered sugar is incorporated, add the vanilla extract and beat for 30 seconds.
-
Pour in the cooled melted chocolate and beat on medium-high speed for 2 minutes, or until the frosting becomes wonderfully light and fluffy. Make sure to scrape down the sides of the bowl periodically to ensure all ingredients are evenly incorporated. If the frosting appears too thick, add 1 tablespoon of heavy cream and beat for another minute to achieve a smooth, spreadable consistency.
Assembly
-
Once your cake layers are completely cool, place one layer on a cake plate or cake stand. Spread approximately 1 ½ cups of chocolate frosting evenly over the top of this cake layer, extending it to the very edges. Place the second cake layer on top. Now, use the remaining frosting to generously cover the top and sides of the entire cake, smoothing it out for a neat finish or creating decorative swirls. Your classic yellow cake with chocolate frosting is now ready to be enjoyed!
Notes
- If you want the frosting to be a deeper brown color, add 2-3 tablespoons of unsweetened cocoa powder when adding the powdered sugar. I added 3 tablespoons to my frosting to achieve a darker brown color. No need to adjust anything else in the recipe if you choose to add the cocoa powder, as it won’t significantly impact the texture or flavor.
- To freeze cake layers for later use, do not make the frosting ahead of time. Allow the baked cake layers to cool completely, then wrap them tightly in plastic wrap and freeze for up to a month. When ready to frost, allow the frozen cakes to thaw at room temperature for 2-3 hours before proceeding with the frosting step.
- This yellow cake recipe is incredibly versatile. It will also make approximately 24 cupcakes or one beautiful 9×13-inch sheet cake. Remember to adjust your baking time accordingly: for cupcakes, start checking for doneness at 15 minutes; for a 9×13-inch cake, begin checking around 30 minutes.
Nutrition
Calories:
813
kcal
(41%)
Carbohydrates:
97
g
(32%)
Protein:
7
g
(14%)
Fat:
45
g
(69%)
Saturated Fat:
26
g
(130%)
Polyunsaturated Fat:
4
g
Monounsaturated Fat:
12
g
Trans Fat:
1
g
Cholesterol:
183
mg
(61%)
Sodium:
217
mg
(9%)
Potassium:
211
mg
(6%)
Fiber:
2
g
(8%)
Sugar:
75
g
(83%)
Vitamin A:
1188
IU
(24%)
Vitamin C:
0.01
mg
Calcium:
78
mg
(8%)
Iron:
2
mg
(11%)
Whitney Wright
Dessert
American
Did you make this recipe?
Please leave a star rating and review on the blog post letting me know how you liked this recipe! Take a picture and tag @saltandbaker on Tik Tok, Instagram, and Facebook so I can see what you’re making!
This Yellow Cake recipe has been lovingly adapted and perfected from the excellent foundational techniques provided by America’s Test Kitchen, ensuring a reliably delicious result every time.
