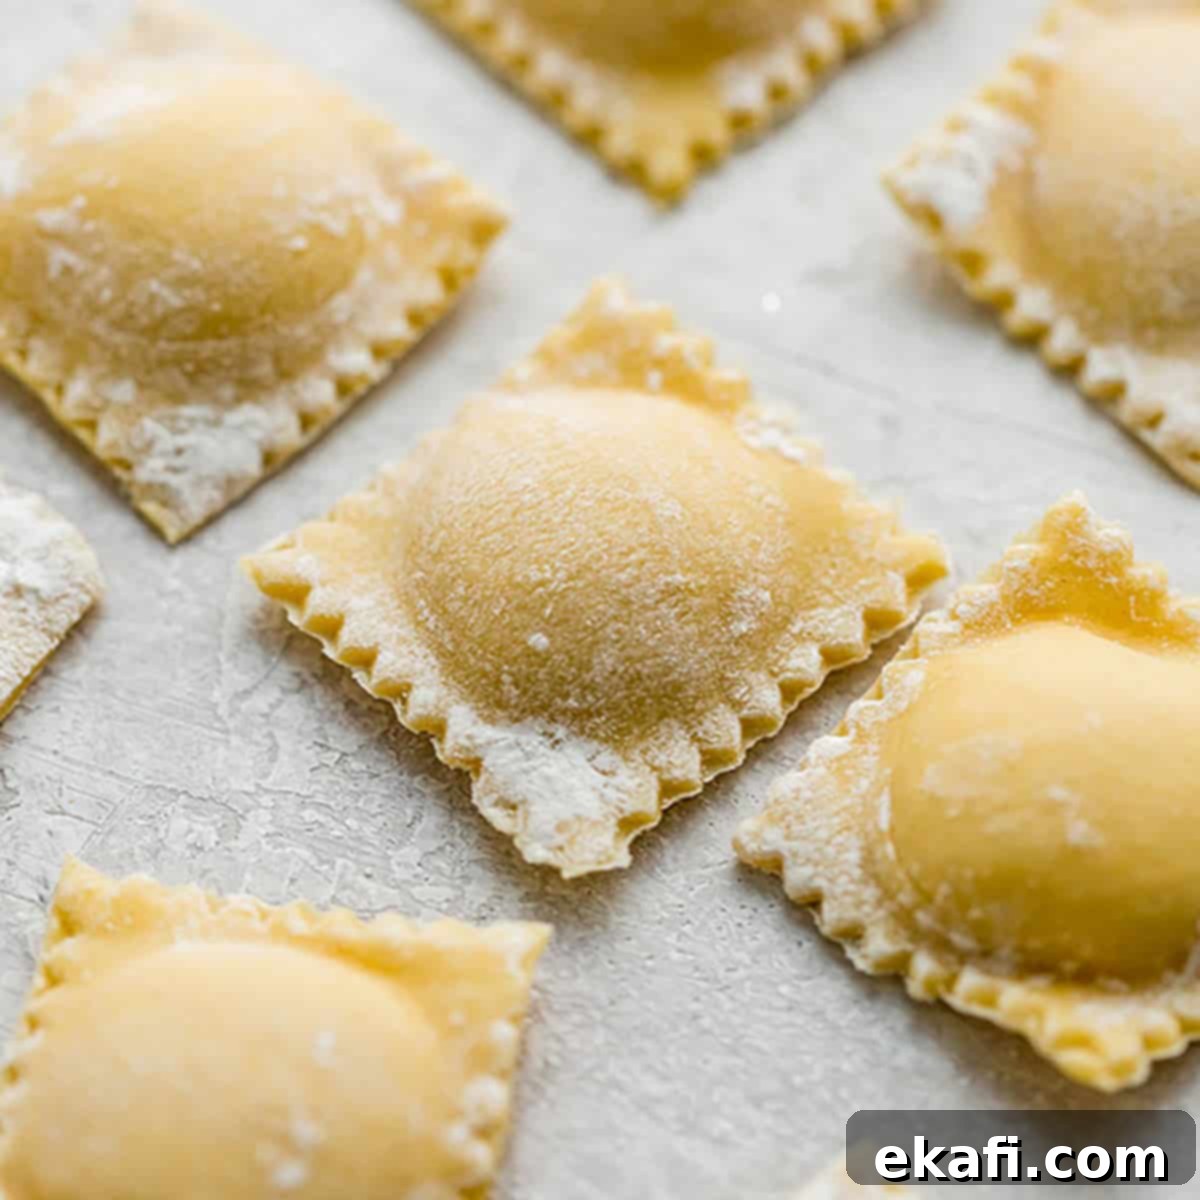
Mastering Homemade Ravioli: Your Easy Guide to Crafting Perfect Fresh Pasta
There’s an undeniable charm and satisfaction in making homemade pasta, and ravioli stands out as a true labor of love that rewards you tenfold. While store-bought ravioli offers convenience, it simply cannot compare to the vibrant flavors, superior texture, and endless customization possibilities of a fresh, homemade batch. With the right step-by-step instructions and a few helpful tools, learning how to make ravioli is surprisingly achievable and immensely fun.
One of the greatest joys of making ravioli from scratch is the freedom to choose your fillings. My personal favorite is a rich and savory butternut squash filling, which delivers a delightful sweetness balanced by aromatic spices. However, the world of ravioli fillings is vast and exciting! Imagine creating a robust sausage-stuffed ravioli served with a classic red sauce, or a delicate thyme, ricotta, and parmesan blend nestled on a bed of fresh cherry tomatoes. You’re the chef, and your culinary imagination is the only limit.
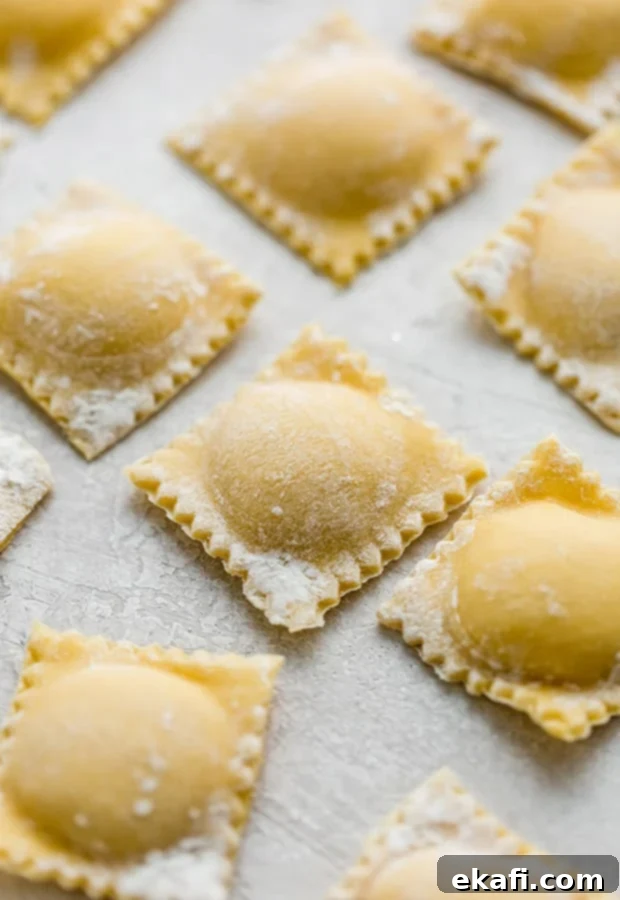
Why This Homemade Ravioli Recipe Works Wonders
This recipe is designed to simplify the art of homemade ravioli, making it accessible even for beginners while ensuring a delicious outcome. Here’s why this guide will quickly become your go-to for fresh pasta:
- Time-Saving Tools: Leveraging a KitchenAid pasta attachment significantly streamlines the dough-rolling process, transforming what can be a tedious task into a quick and efficient step. While not essential, it’s a game-changer for speed and consistency.
- Perfect for Beginners: For those new to pasta making, starting with a half batch of dough is highly recommended. It’s less time-consuming and still yields a generous amount of ravioli, allowing you to learn the techniques without feeling overwhelmed. You’ll build confidence with each successful batch.
- Unmatched Customization & Quality: Homemade ravioli truly surpasses store-bought options. You gain complete control over every ingredient, ensuring freshness and allowing for endless creative fillings. This also means you can easily cater to various dietary preferences or allergies by preparing different fillings simultaneously – imagine a batch with a rich meat filling and another with a creamy cheese or vegetable blend.
- Clear, Step-by-Step Guidance: This recipe breaks down the entire process into easy-to-follow steps, from preparing the dough to forming and cooking the ravioli. You’ll be guided through each stage with detailed explanations, ensuring you feel confident and in control throughout your pasta-making journey.
Essential Ingredients for Your Ravioli Dough
The beauty of homemade pasta lies in its simplicity. You only need a few high-quality ingredients to create a wonderfully pliable and delicious dough. Here’s a closer look at what you’ll need and why each component is vital:
- Eggs: This recipe calls for both whole eggs and extra egg yolks. Whole eggs provide structure and moisture, while the added yolks contribute richness, a beautiful golden color, and enhance the dough’s elasticity, making it smoother and easier to work with.
- Flour: All-purpose flour is readily available and works well. For an even silkier and more traditional Italian pasta, consider using “00” flour, which is finely milled and has a lower protein content, resulting in a tender pasta. We’ll be creating a classic “flour well” technique to mix the dough by hand, which I’ll detail below.
- Salt: A pinch of kosher salt is crucial for seasoning the dough itself, enhancing the overall flavor of your ravioli. It’s a small addition that makes a big difference.
(Refer to the recipe card below for exact quantities for both full and half batches.)
Step-by-Step Instructions for Homemade Ravioli
Crafting the Perfect Ravioli Dough
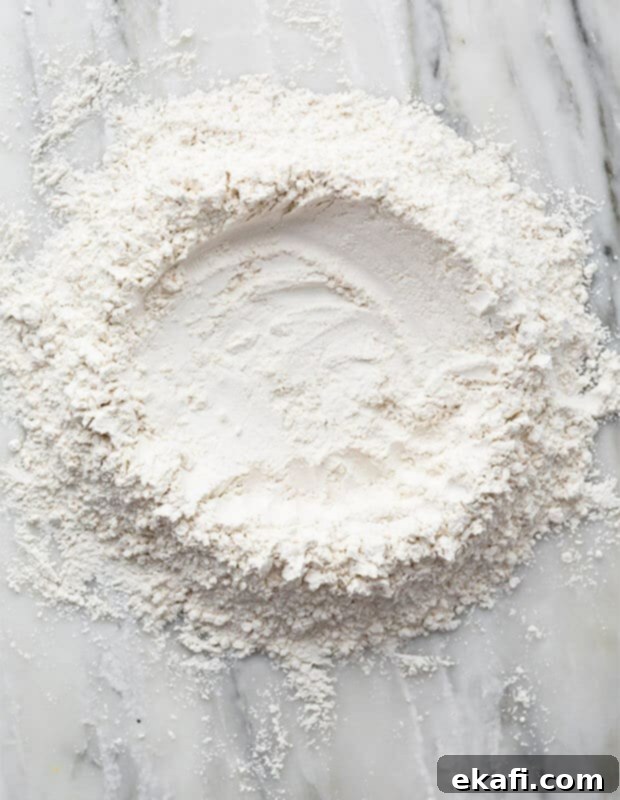
- Combine Flour and Salt: On a clean, flat work surface (a large wooden board or a clean countertop works best), mix the flour and salt thoroughly. Gather the mixture into a neat mound, about 10-12 inches in diameter.
- Form the Flour Well: Using your hands, create a deep, wide well in the center of the flour mound. Think of it like a volcano crater – its walls need to be sturdy enough to contain the liquid ingredients without collapsing.
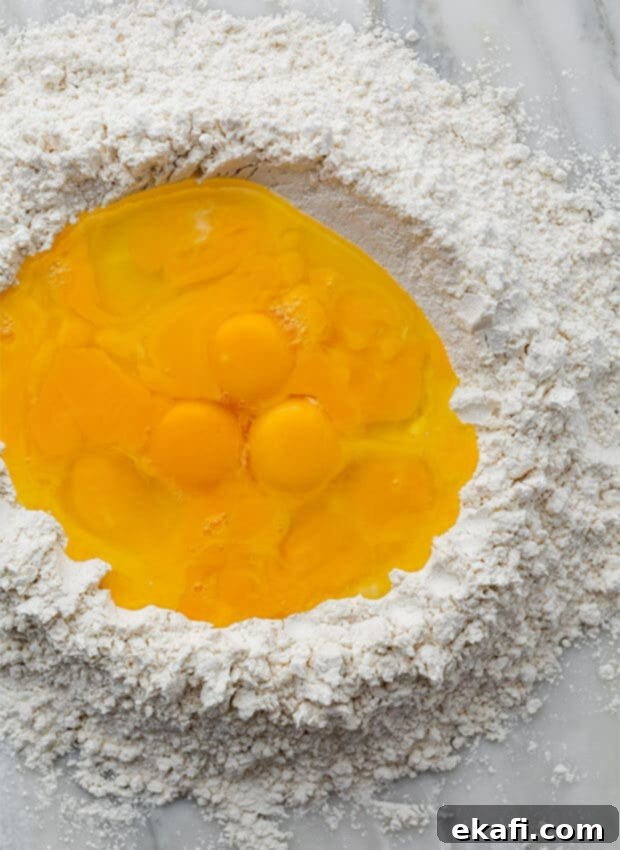
- Add Eggs to the Well: Carefully pour the whole eggs and egg yolks into the center of the well. Take your time to ensure none overflow the flour walls.
- Gently Incorporate Flour: Using a fork, gently beat the eggs and yolks within the well until they are smooth and combined. Once smooth, slowly begin to incorporate small amounts of flour from the inner edges of the well into the egg mixture. Do this gradually and methodically. This slow integration is crucial; you want to prevent the “flour wall” from collapsing and causing the eggs to spill out, which can create a sticky mess. Continue until the mixture starts to thicken into a shaggy dough.
- Bring the Dough Together: Once most of the flour has been incorporated by the fork, use your hands to gather the remaining flour and egg mixture. Press and squeeze it together to form a cohesive mass. The dough might feel a bit rough and sticky at first; don’t worry, it will smooth out with kneading.
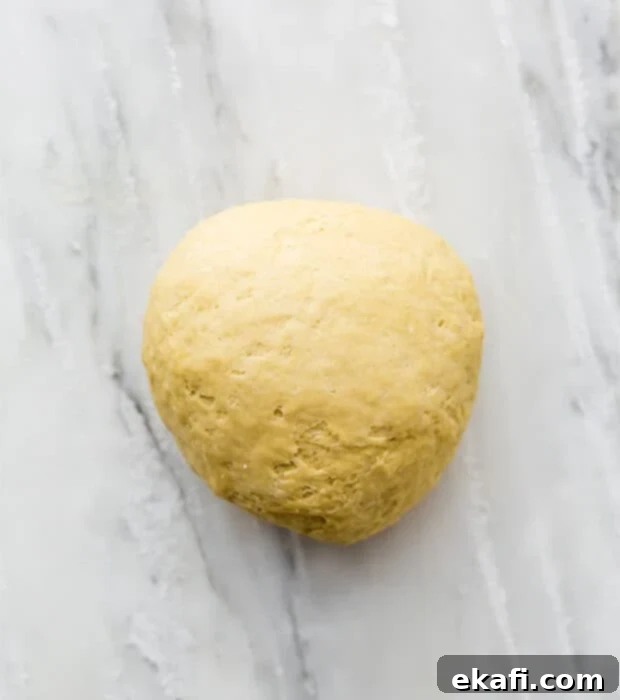
- Form a Ball: Shape the dough into a rough ball.
- Knead the Dough: This is where the magic happens! Knead the dough vigorously for about 10 minutes. Use the heel of your hand to push the dough away from you, fold it over, rotate it a quarter turn, and repeat. This action develops the gluten, giving the pasta its characteristic chewiness and elasticity.
- Test for Readiness: You’ll know the dough is perfectly kneaded when it feels smooth, elastic, and springs back slowly when you press a finger into it. It should no longer feel sticky to the touch.
- Rest the Dough: Wrap the dough tightly in plastic wrap to prevent it from drying out, and let it rest at room temperature for at least 30 minutes. This resting period allows the gluten to relax, making the dough much easier to roll out thinly.
- Storage (if not using immediately): If you’re not making ravioli right away, place the plastic-wrapped dough in the refrigerator. When you’re ready to use it, remove it from the fridge and allow it to come back to room temperature before rolling.
Rolling Your Ravioli Dough to Perfection
Achieving the right thickness for your pasta sheets is key to delicious ravioli. While a pasta machine offers consistency, a rolling pin can also get the job done with a little patience.
- Prepare Dough Portions: Divide the dough into manageable sections. For a full batch, aim for 8 pieces; for a half batch, 4-6 pieces. This makes rolling easier. Flatten each portion into a rough rectangular shape. Lightly dust both sides of each piece with flour to prevent sticking.
- Using a Stand Mixer Pasta Attachment:
- Attach the pasta sheet roller to your stand mixer and set it to the widest setting, typically #1.
- Turn the stand mixer to speed setting 1 or 2. Run one flattened dough portion through the #1 setting.
- Fold and Repeat: Once it passes through, fold the dough in half (short ends together) and run it through the #1 setting again. Repeat this folding and rolling process at least 4 more times. This action further kneads the dough, making it incredibly smooth and elastic.
- Gradually Thin the Dough: After multiple passes on setting #1, lightly flour both sides of the dough sheet. Change the pasta sheet roller to setting #2 and run the dough through twice.
- Next, change the setting to #3 and run it through once.
- Finally, change the setting to #4 and run it through once. If you prefer thicker ravioli, you can stop here. For a truly delicate, thinner pasta dough, proceed to setting #5 and run it through one last time.
- Alternative (Hand Rolling): If you don’t have a pasta attachment, a long, sturdy rolling pin will work. Lightly flour your work surface and the dough. Roll the dough from the center outwards, rotating it frequently and flipping it over to ensure even thickness. Continue rolling until the dough is about 1/16″ thick, or thin enough to almost see your hand through it. Patience is key here!
Forming and Filling Your Delicious Ravioli
Now for the fun part – turning your beautiful pasta sheets into individual pockets of flavor!
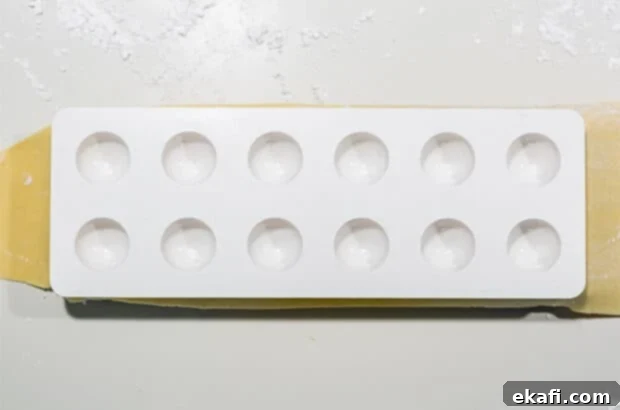
- Prepare the Ravioli Mold: If using a ravioli mold (like the one pictured), it is absolutely crucial to flour it generously. Create a small pile of flour on your counter and firmly press the metal ravioli frame into it, ensuring every crevice is thoroughly coated. This heavy flouring is essential for the ravioli to release cleanly from the mold.
- Choose Your Filling: Prepare your favorite ravioli filling. As mentioned, my butternut squash ravioli recipe is a fantastic choice, but feel free to explore other options like ricotta and spinach, or a savory meat blend.
- Place Dough on Mold: Carefully lay one sheet of rolled pasta dough over the floured ravioli mold, ensuring it covers all the openings evenly.
- Create Indents: If your mold comes with a white pressing portion, place it over the dough and gently press down to create small divots in the dough. If not, use your fingers to carefully create shallow depressions in each ravioli pocket, being extremely careful not to tear the delicate pasta sheet.
- Fill Each Pocket: Using a small spoon or a cookie scoop (approximately 1 tablespoon), fill each divot with your chosen filling. Be mindful not to overfill, as this can make sealing difficult and may cause the ravioli to burst during cooking.
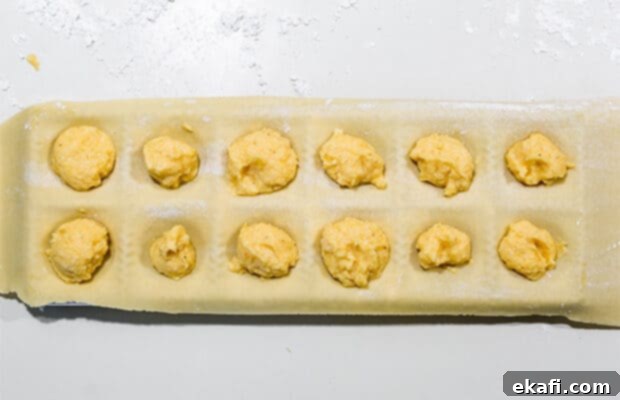
- Cover with Second Dough Sheet: Carefully place another sheet of pasta dough over the filled ravioli mold, covering all the filling pockets. Gently press down around the edges of the filling to remove any air pockets.
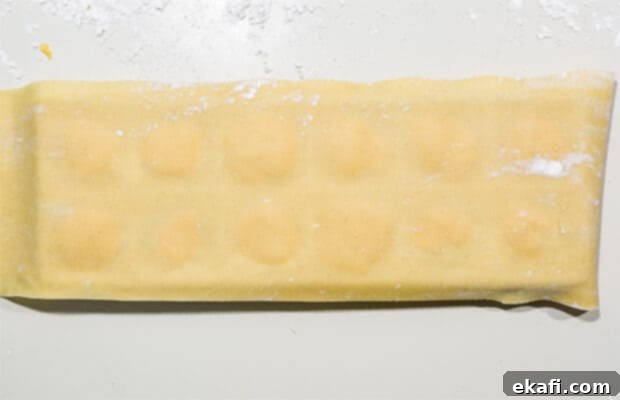
- Seal the Ravioli: Use a rolling pin to roll firmly over the top of the dough, directly above the mold. This action will seal the edges of the ravioli and cut them into individual pieces. You should see the outlines of the ravioli clearly defined.
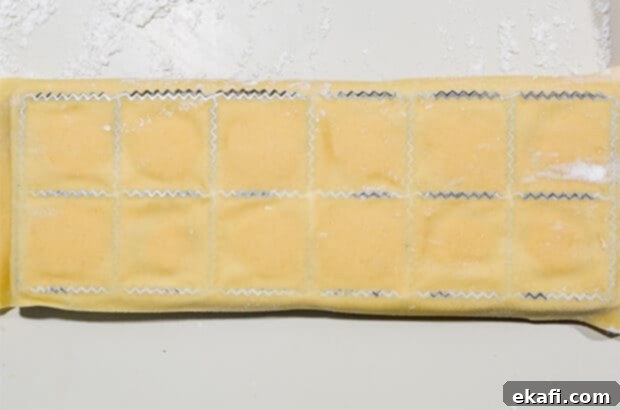
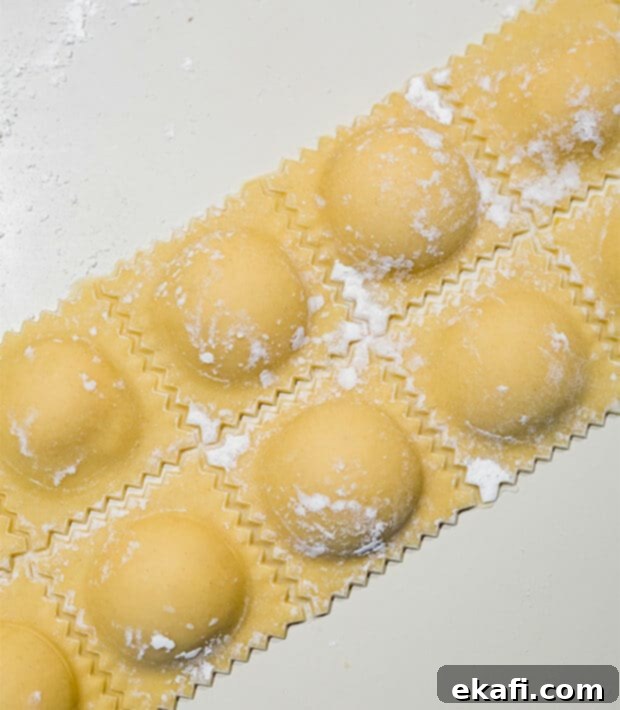
- Release and Separate: Carefully turn the mold over and gently tap it on the counter to release the ravioli. If any ravioli remain stuck together, use a knife or a pastry wheel to separate them cleanly.
- Store Uncooked Ravioli: Place the freshly made ravioli on a baking sheet lined with parchment paper and generously dusted with flour. This prevents them from sticking to each other or the tray. Continue making ravioli until all your dough and filling are used up.
Cooking Your Delicious Homemade Ravioli
Cooking fresh ravioli is quick and simple, but a few tips will ensure they turn out perfectly al dente and flavorful.
- Boil Water: Fill a large pot with water and place it over medium-high heat. You need ample water to allow the ravioli to move freely and cook evenly without sticking.
- Season the Water: Once the water comes to a rolling boil, add a generous tablespoon of salt. This seasons the pasta from within and enhances its flavor.
- Cook in Batches: Carefully add about 8-10 ravioli into the boiling water at a time. It’s crucial not to overcrowd the pot, as this lowers the water temperature and can make the ravioli stick together. Cook them in batches to maintain a steady boil.
- Cooking Time: Fresh ravioli cooks very quickly, typically in just 3-4 minutes. You’ll know they’re perfectly cooked when they float to the top of the water.
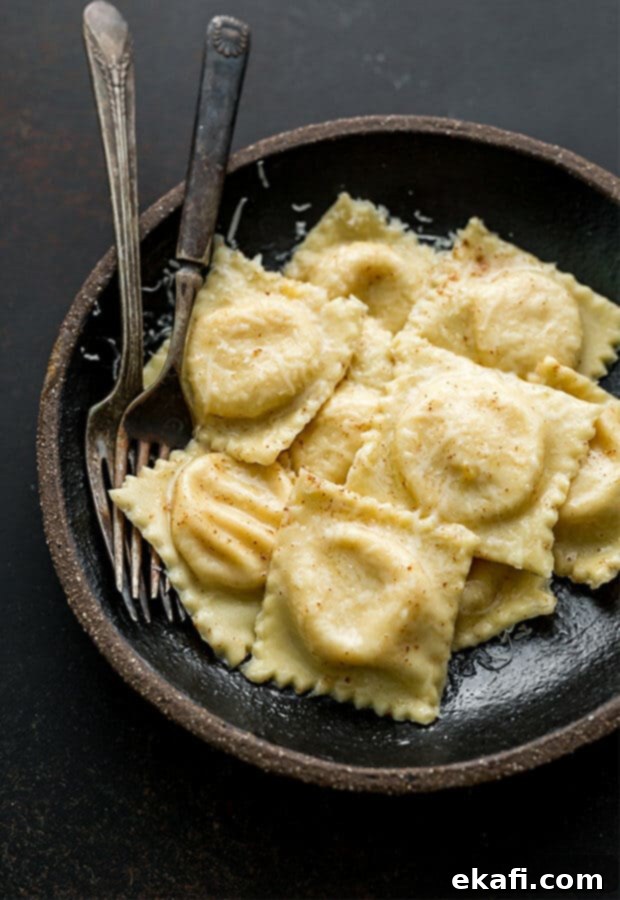
- Serve Immediately: Using a slotted spoon, gently transfer the cooked ravioli to a lightly oiled plate to prevent sticking, or directly into a skillet with your chosen sauce. Serve hot and enjoy the fruits of your labor!
Expert Tips for Ravioli Success
Making ravioli by hand is a cherished culinary tradition. While a stand mixer can assist with dough kneading, many purists (including my husband, who lived in Italy!) prefer the hands-on approach for a truly authentic pasta experience. Here are additional insights to perfect your homemade ravioli:
Recommended Tools for Effortless Ravioli Making
While some tools are optional, they can significantly ease the process and improve consistency:
- Ravioli Maker/Mold: (This is what I primarily use and recommend!) There are various methods for stuffing and forming ravioli. A ravioli maker simplifies the process, ensuring uniform shapes and seals.
- Ravioli Press: Similar to a mold, a ravioli press allows you to make square or circular ravioli with clean edges.
- Hand Stamp Ravioli Cutter: For a more artisanal feel, a hand stamp cuts and seals individual ravioli.
- Ravioli Roller: This specialized tool can help cut and seal multiple ravioli simultaneously from a sheet of pasta.
- Pasta Sheet Attachment: For a stand mixer, a pasta sheet attachment is invaluable for achieving consistently thin and even pasta sheets with minimal effort. While a rolling pin works, this attachment saves considerable time and ensures uniformity.
- Free-Hand Method: Don’t have any fancy tools? No problem! You can always cut your own squares or circles and crimp the edges together firmly using the tines of a fork to seal them. This method requires a bit more practice but is incredibly rewarding.
Refining Your Homemade Ravioli Dough Technique
The dough is the foundation of your ravioli. Here are crucial tips for its preparation:
- The Flour Well: Make your flour well significantly bigger than you think you need! You’ll be adding 5 eggs and 3 egg yolks (for the full batch), and a small well can quickly lead to an eggy overflow. I learned this the hard way with eggs cascading over the flour wall!
- Beating Eggs: You can beat the eggs with a fork in a separate bowl before pouring them into the flour well, or you can gently beat them once they are in the well. The order doesn’t impact the final dough quality.
- Dough Consistency Adjustments:
- If your dough is too wet and sticky after incorporating the eggs and kneading, add a very small amount of flour (a tablespoon at a time) and continue kneading until it reaches the desired smooth, elastic consistency.
- Conversely, if the dough feels too dry or stiff, add a tiny spritz of water (or a few drops of olive oil for added richness and pliability) and knead it in until the dough becomes more workable.
- Rolling Dough Thickness: Whether using a pasta roller attachment or a traditional rolling pin, aim for a thickness of about 1/16″ (or setting #4 to #5 on most attachments). The goal is a pasta sheet that is thin enough to cook quickly and not overpower the filling, but not so thin that it tears easily or bursts during cooking. If using a rolling pin, roll until you can almost see the outline of your hand through the dough.
- Sectioning for Rolling: For a full batch, divide the dough into 8 equal sections. For a half batch, divide it into 4-6 sections. This makes each portion easier to handle and feed through a pasta machine.
- Flouring for Pasta Rollers: Always dust your dough liberally with flour before running it through a pasta sheet roller. This prevents sticking and ensures smooth passage. You can run the dough through settings multiple times, especially setting #3, if you feel it needs further smoothing or thinning. Trust your tactile judgment – the dough should feel pliable and not sticky.
- Flouring the Ravioli Mold: As mentioned, this is critical. I find the best method is to have a generous pile of flour on the counter and then literally dip and press the metal ravioli frame into the flour, ensuring it’s completely coated before placing your pasta sheet.
- Efficient Filling: For consistent filling amounts and speed, a very small cookie scoop (about 1 tablespoon capacity) is incredibly helpful. Alternatively, a piping bag can also make filling neat and quick.
Storing Your Homemade Ravioli
Proper storage ensures your effort doesn’t go to waste!
Ravioli Dough: Unused pasta dough, tightly wrapped in plastic wrap, will keep fresh in the refrigerator for several days. Bring it to room temperature before rolling.
Cooked Homemade Ravioli: Leftover cooked ravioli can be stored in an airtight container in the refrigerator for 3-4 days. Reheat gently with your preferred sauce.
Freezing Uncooked Ravioli: This is a fantastic way to prepare ahead!
- Arrange the uncooked, filled ravioli in a single layer on a baking sheet lined with parchment paper and lightly dusted with flour.
- Flash freeze them for approximately 1 hour, or until they are firm to the touch. This prevents them from sticking together.
- Once frozen solid, transfer the ravioli to a freezer-safe ziplock bag or airtight container.
- Store in the freezer for up to 3 months.
- To cook, simply boil them straight from the freezer, adding an extra minute or two to the cooking time if needed.
Frequently Asked Questions About Making Ravioli
If using a ravioli maker, the rolling pin action over the mold typically creases and seals the edges automatically. For ravioli stamps, the stamp itself creates the seal. If you’re making ravioli by hand without specialized tools, gently pressing the edges together with your fingers, then using the tines of a fork to crimp and secure the seal is a common and effective method. You can also use a small amount of water on the edges of one dough sheet before laying the second on top, acting as a “glue.”
Not at all! One of the advantages of fresh homemade pasta is that it cooks very quickly. Once all your ravioli are formed and placed on a floured baking sheet, you can proceed directly to cooking them. Drying is generally done for long-term storage of cut pasta shapes, not for fresh ravioli intended for immediate consumption.
Bring a large pot of generously salted water to a rolling boil. Carefully add about 8-10 ravioli at a time, ensuring not to overcrowd the pot. They will cook for approximately 3-4 minutes. You’ll know they are done when they float to the surface. Use a slotted spoon to gently remove them and transfer them directly to your preferred sauce or a lightly oiled plate.
While traditionally made by hand, you can absolutely use a food processor for a quicker dough preparation. Simply pulse the flour and salt together, then add the eggs and egg yolks through the feed tube while the processor is running until a shaggy dough forms. Transfer the dough to a floured surface and knead by hand for 5-7 minutes until smooth. This method still requires some hand kneading to achieve the perfect texture.
The best sauce depends heavily on your ravioli filling! For rich fillings like butternut squash, a simple brown butter and sage sauce is divine. Cheese fillings often pair well with a light tomato sauce, a creamy Alfredo, or a simple garlic and olive oil drizzle. Meat-filled ravioli can stand up to heartier marinara or bolognese sauces. Don’t be afraid to experiment!
More Italian Recipe Favorites to Explore
If you’ve enjoyed the process of making homemade ravioli, you’re sure to love these other classic Italian dishes:
- Best Bolognese Sauce
- Classic Fettuccine Alfredo
- Authentic Bucatini Cacio e Pepe
- Simple Baked Ziti
Did you make this homemade ravioli recipe? I would absolutely love to hear about your experience! Click here to leave a rating and review, or scroll down to the recipe card below and share your thoughts. Your feedback helps other home cooks on their pasta-making journey!
Stay up-to-date with more delicious recipes and kitchen tips by following us on Instagram, Facebook, and Pinterest.
How to Make Ravioli
Ingredients
Full Batch
- 4 cup all purpose flour
- 1 teaspoon kosher salt
- 5 large eggs
- 3 large egg yolks
For half the recipe:
- 2 cups all purpose flour
- 1/2 teaspoon kosher salt
- 3 large eggs
- 2 large egg yolks
Equipment
- ravioli maker
- ravioli cutting set
Instructions
- To make the ravioli dough, mix the flour and salt together on a clean work surface. Form into a 10-12 inch diameter mound.
- Using your hands, make a well in the flour and salt mixture. Pour the eggs and egg yolks into the well. Using a fork, gently beat the eggs and yolks. Once you’ve done that, slowly incorporate the flour into the eggs.
- If the dough is too wet and it’s sticking to your work surface, add a little bit of flour to the dough. If the dough is too dry, add a spritz of water to the dough.
- Form the dough into a ball. Begin kneading it for 10 minutes. (Pushing the dough with the heel of your hand, and then rotating it). You’ll know the dough is ready when you press into it and it springs back. The dough should have a nice smooth appearance to it.
- Wrap the dough with plastic wrap and let it sit for 30 minutes at room temp. (If you aren’t using the dough right away, place it in the refrigerator).
- Roll out the ravioli (I use my kitchen aid pasta roller attachment). Roll out to about 1/8” to 1/16″ thick. (Depending on how thin/thick you want your pasta to be).
- Using a ravioli mold, place the sheet of dough over the ravioli mold (following instructions for the ravioli mold), gently create a small divot in the dough. Fill each cube with 1 tablespoon of filling. Cover with dough. Use a rolling pin and roll overtop the dough so that it seals. Turn the mold over and tap it on the counter to release the ravioli. Use a knife to separate any ravioli that didn’t separate.
- Transfer the ravioli to a baking sheet lined with parchment paper that has been dusted with flour. Continue rolling out the pasta dough and filling the ravioli until all of the dough and filling has been used.
Cooking the Ravioli
- Bring pot of water to boil. Once boiling add 1 tablespoon of salt to the water. Add some of the ravioli to the water. Don’t overcrowd. You’ll want to do this in batches. Cook for 3-4 minutes or until they float to the top. Using a slotted spoon, transfer them to a lightly oiled plate or add them to whatever sauce you plan on serving with them.
Notes
- Ravioli maker (this is what I have and use) There are different methods people use for stuffing and making the ravioli. I use a ravioli maker. You can also use a hand stamp ravioli or feel free to free-hand it by cutting your own squares and then cinch the edges together using the tines of a fork.
- Ravioli press: You can do square or circular ravioli
- Ravioli roller
- Pasta sheet attachment
Nutrition
This recipe was originally published on Nov. 3, 2019. It was republished on Aug. 17, 2021, to include additional information and/or photos, and further updated on [Current Date/Year] for enhanced clarity, SEO optimization, and expanded content.
