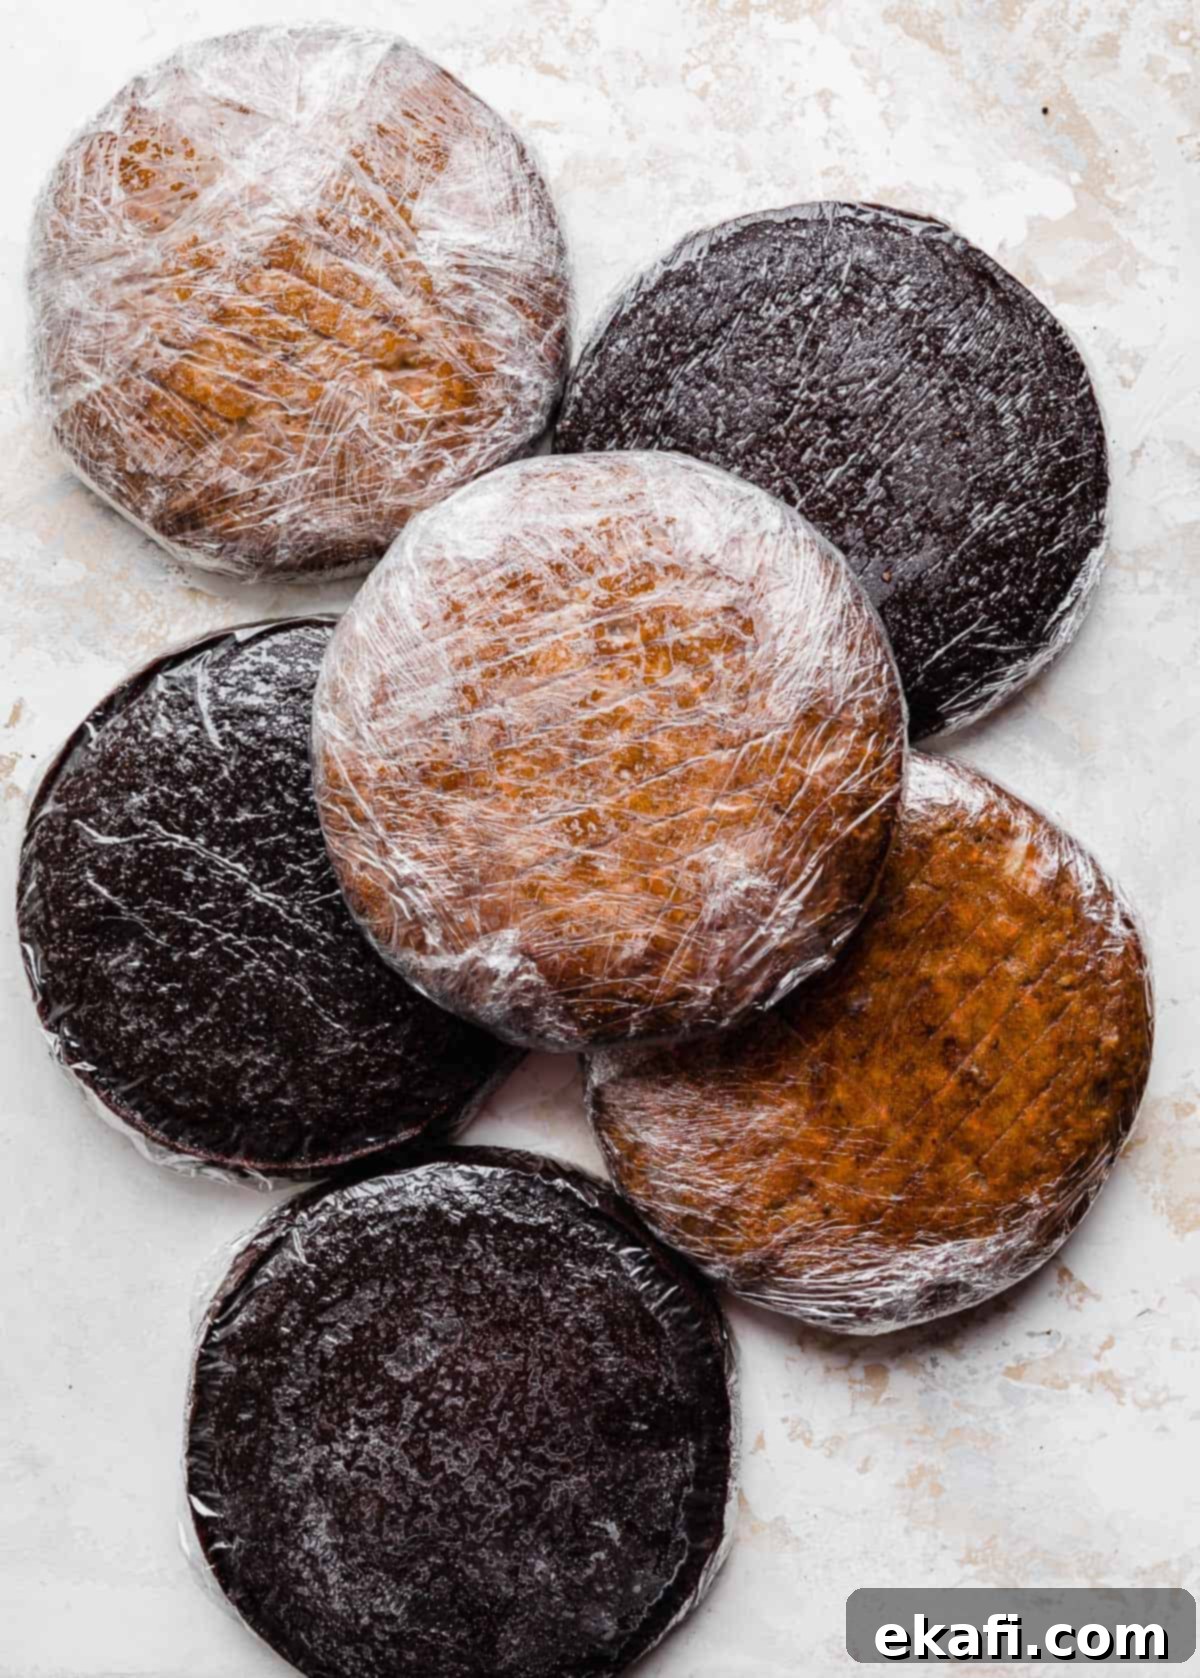
Mastering Cake Storage: The Ultimate Guide to Freezing and Refrigerating Cakes Like a Pro
Preparing delicious cakes for special occasions or simply to enjoy at home often involves multiple steps and significant time. Wouldn’t it be wonderful to spread that effort out, making the baking process more enjoyable and less rushed? Knowing how to properly store and freeze cakes is an absolute game-changer, offering immense flexibility and ensuring your culinary creations remain fresh and delightful until serving.
Consider a complex recipe like the Biscoff Caramel Cake. This intricate dessert features a crunchy Biscoff cookie crust, tender cream cheese cake layers, a luscious caramel filling, and a rich Biscoff buttercream. Imagine trying to tackle every single one of these elements in a single day! It’s a daunting task. By mastering cake storage techniques, you can transform this marathon into a series of manageable sprints, preparing components days or even weeks in advance.
Why These Cake Storage Methods Are Essential for Every Baker
Utilizing proper storage techniques for your cakes and cake components offers a multitude of benefits, transforming your baking experience and ensuring optimal results.
- Prepare Cakes Ahead of Time: Crafting a multi-layered cake with intricate fillings and luscious frostings is a labor of love that demands time and precision. By learning how to store individual cake layers, or even how to freeze a fully decorated cake, you gain the invaluable advantage of preparing ahead. This eliminates the frantic rush on the day of an event, allowing you to focus on the finer details or simply enjoy a more relaxed schedule. This foresight is especially beneficial for large gatherings, holiday baking, or custom cake orders, significantly reducing stress and improving efficiency.
- Break Up the Baking Process: Many ambitious desserts, particularly elaborate cakes, involve several distinct elements: the cake layers themselves, various fillings, and different types of frosting. Attempting to create all these components in a single session can be exhausting and overwhelming. Breaking the process down into stages – perhaps baking the cake layers one day, preparing the filling the next, and then assembling and frosting on the final day – makes the entire endeavor much more manageable and enjoyable. This phased approach not only reduces mental fatigue but also often leads to a higher quality finished product, as you can dedicate focused attention to each step.
- Ensure Peak Freshness: Proper storage isn’t just about convenience; it’s crucial for preserving the cake’s taste and texture. By sealing cake layers correctly, you lock in moisture and flavor, preventing them from drying out or absorbing unwanted odors from your refrigerator or freezer. This means that a cake baked a week ago can taste just as fresh and delicious as one baked hours before, a testament to effective storage.
- Minimize Waste: Don’t let leftover cake go stale! These methods are also perfect for preserving extra slices or an entire cake that wasn’t fully consumed. Freezing individual slices means you can enjoy a perfect piece of cake whenever a craving strikes, without the pressure of eating a whole cake before it loses its freshness.
Essential Supplies for Storing and Freezing Cakes
Having the right tools is key to successful cake storage. These basic supplies will protect your cakes and keep them tasting fresh, whether for a day or several months.
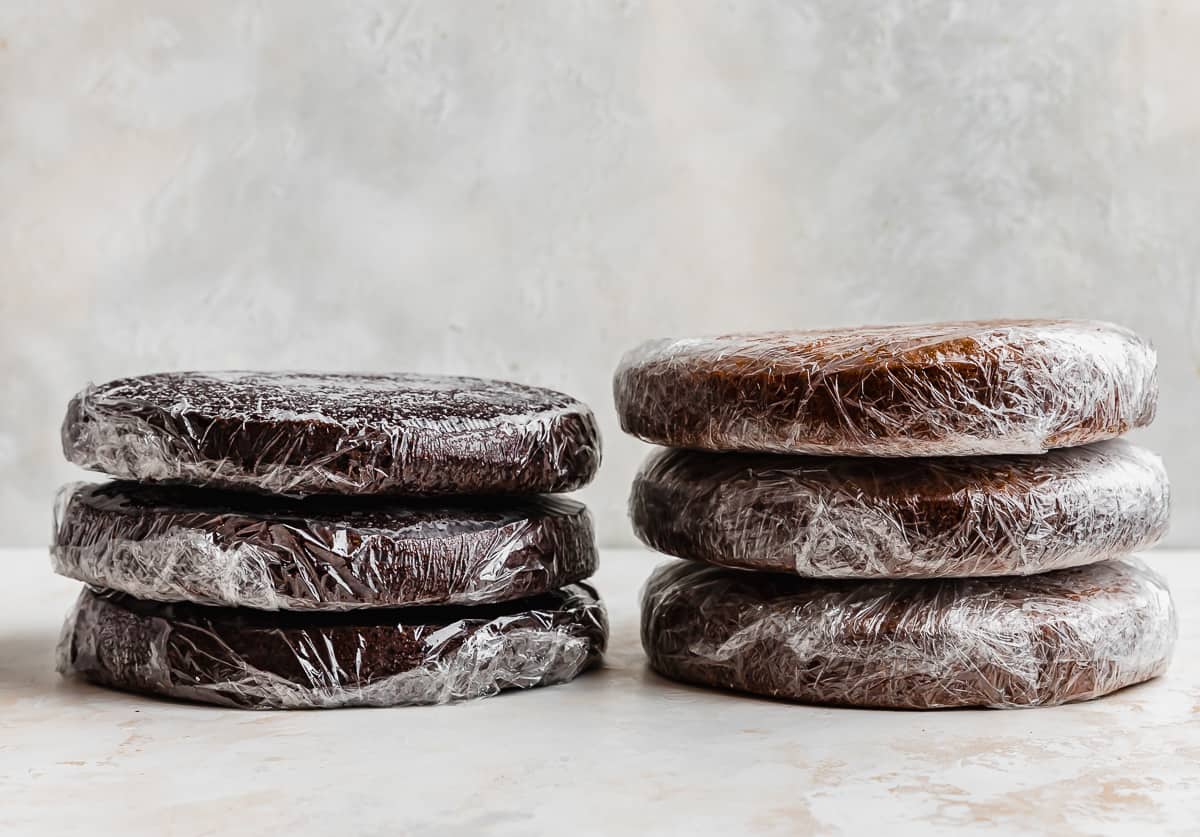
- Plastic Wrap: This is your first line of defense. High-quality plastic wrap creates an airtight seal around your cake layers, locking in moisture and preventing them from drying out. It also acts as a barrier against condensation, which can make cakes soggy, and prevents them from absorbing ambient odors from your fridge or freezer. Double-wrapping is highly recommended for maximum protection.
- Aluminum Foil: For extended freezer storage (typically beyond 7 days), aluminum foil provides an additional, robust layer of protection. It acts as an extra barrier against freezer burn, which can dehydrate and alter the texture of your cake, and further insulates against temperature fluctuations.
- Cool Cake Layers: This isn’t a supply, but a crucial prerequisite. Ensure your cake layers are completely and utterly cool before any wrapping or storing. Warm cake layers will create steam, leading to condensation inside the wrap, which is detrimental to texture and can encourage spoilage.
- Fridge/Freezer: Your choice of appliance depends on your storage duration. The refrigerator is suitable for short-term storage (1-2 days), while the freezer is indispensable for longer-term preservation (weeks to months).
- Flat Surface: Whether it’s a sturdy cutting board, a baking sheet, or a designated shelf, a flat surface is essential for storing wrapped cake layers. This prevents indentations, bending, or structural damage to the soft cake while it’s chilling or freezing.
- Airtight Containers/Freezer Bags: For ultimate protection, especially for delicate cakes or very long-term freezer storage, consider placing your plastic-wrapped and foil-wrapped cake layers into an airtight, freezer-safe container or heavy-duty Ziplock freezer bag. This adds another layer of defense against freezer burn and odor absorption.
- Permanent Marker: Essential for labeling your frozen items with the date and contents. This helps you keep track of freshness and ensures you use items within their optimal timeframe.
Step-by-Step Guide: How to Store and Freeze Cake Layers
Properly preparing your cake layers for storage is paramount to maintaining their freshness and texture. Follow these steps meticulously for the best results:
- Allow Cake Layers to Cool Completely: This is arguably the most critical step. After baking, transfer your cake layers to a wire rack and let them cool at room temperature for an extended period, typically 1-2 hours, or until they are completely cool to the touch. Any residual warmth will create steam when wrapped, which will condense into moisture, making your cake soggy and potentially altering its texture negatively. Patience here pays off immensely.
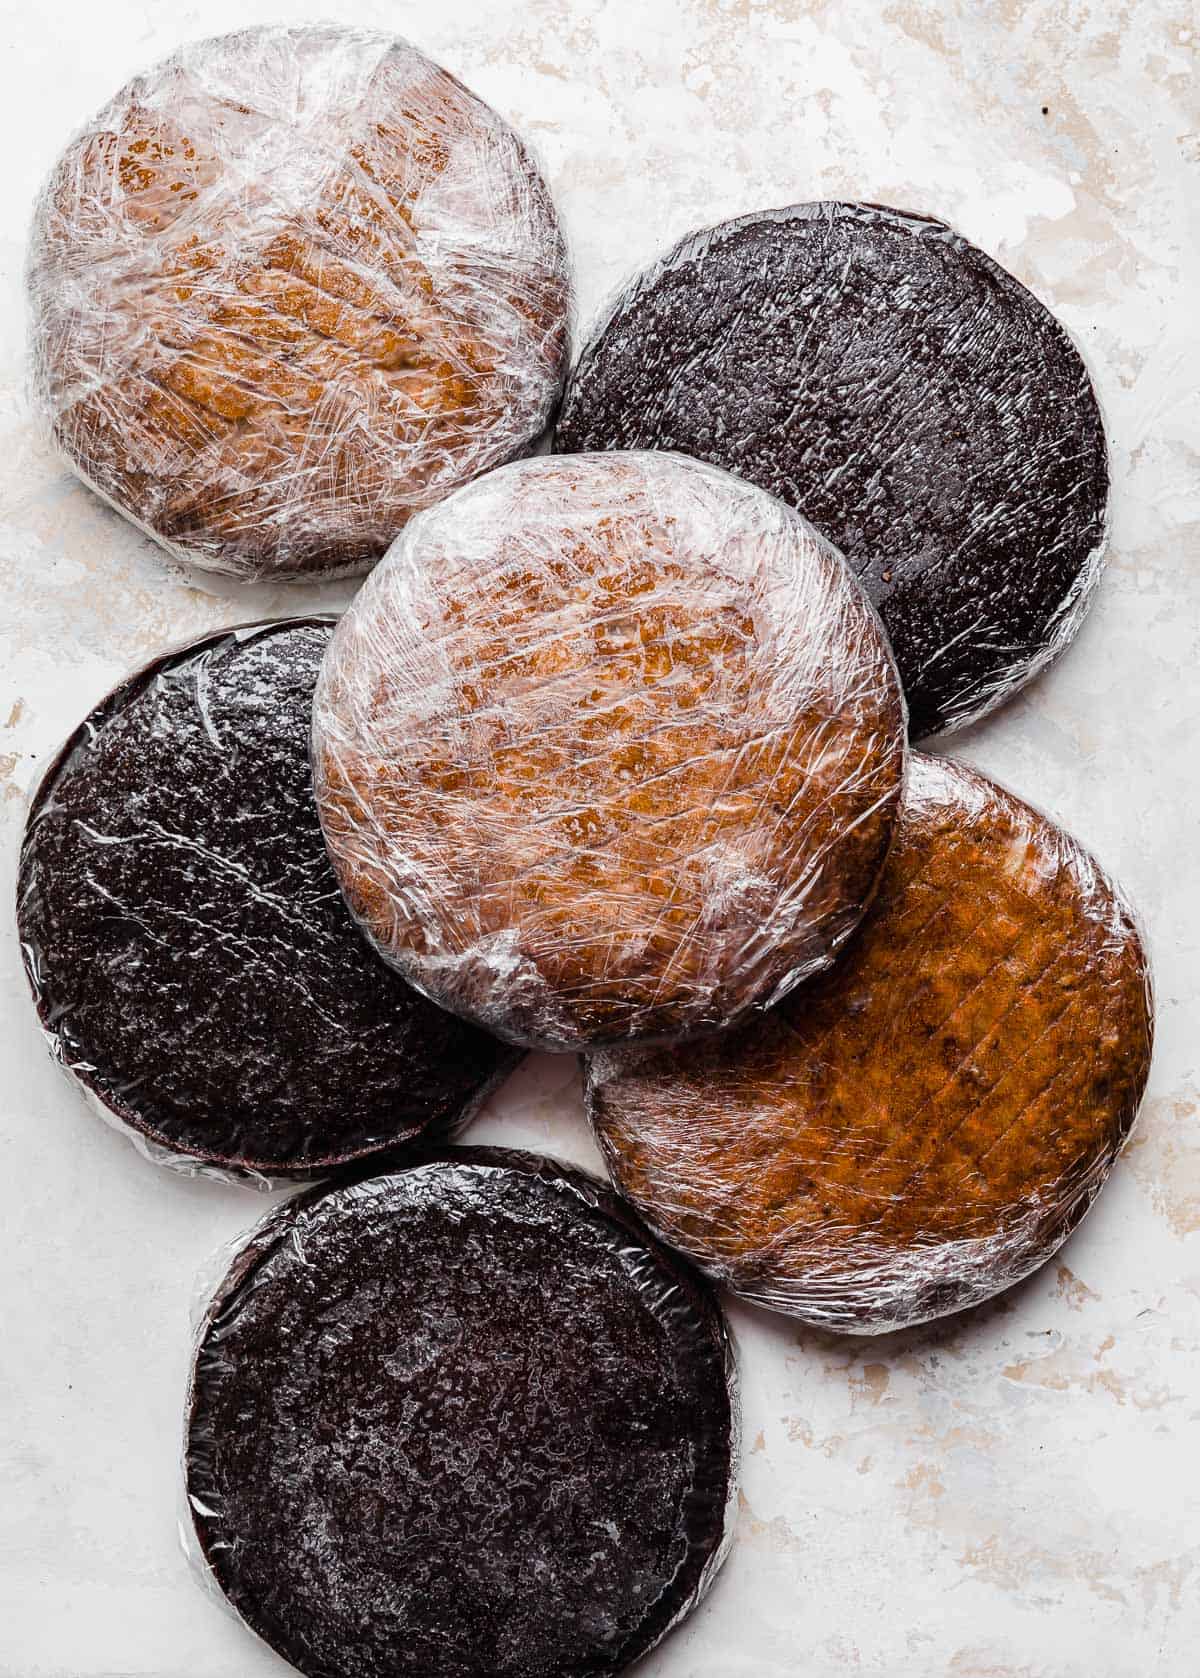
- Wrap Each Layer Individually and Securely: Once your cake layers are thoroughly cooled, it’s time to protect them. Take a generous amount of plastic wrap and tightly wrap each individual cake layer. I recommend at least two layers of plastic wrap to ensure a complete and impenetrable seal. The goal is to prevent any air exposure, which is the primary cause of dryness and staleness. (Optional: You can level your cake layers with a serrated knife before wrapping them for storage, or you can wait until just before stacking and decorating. Doing it beforehand can save a step later, but it’s purely a matter of preference.)
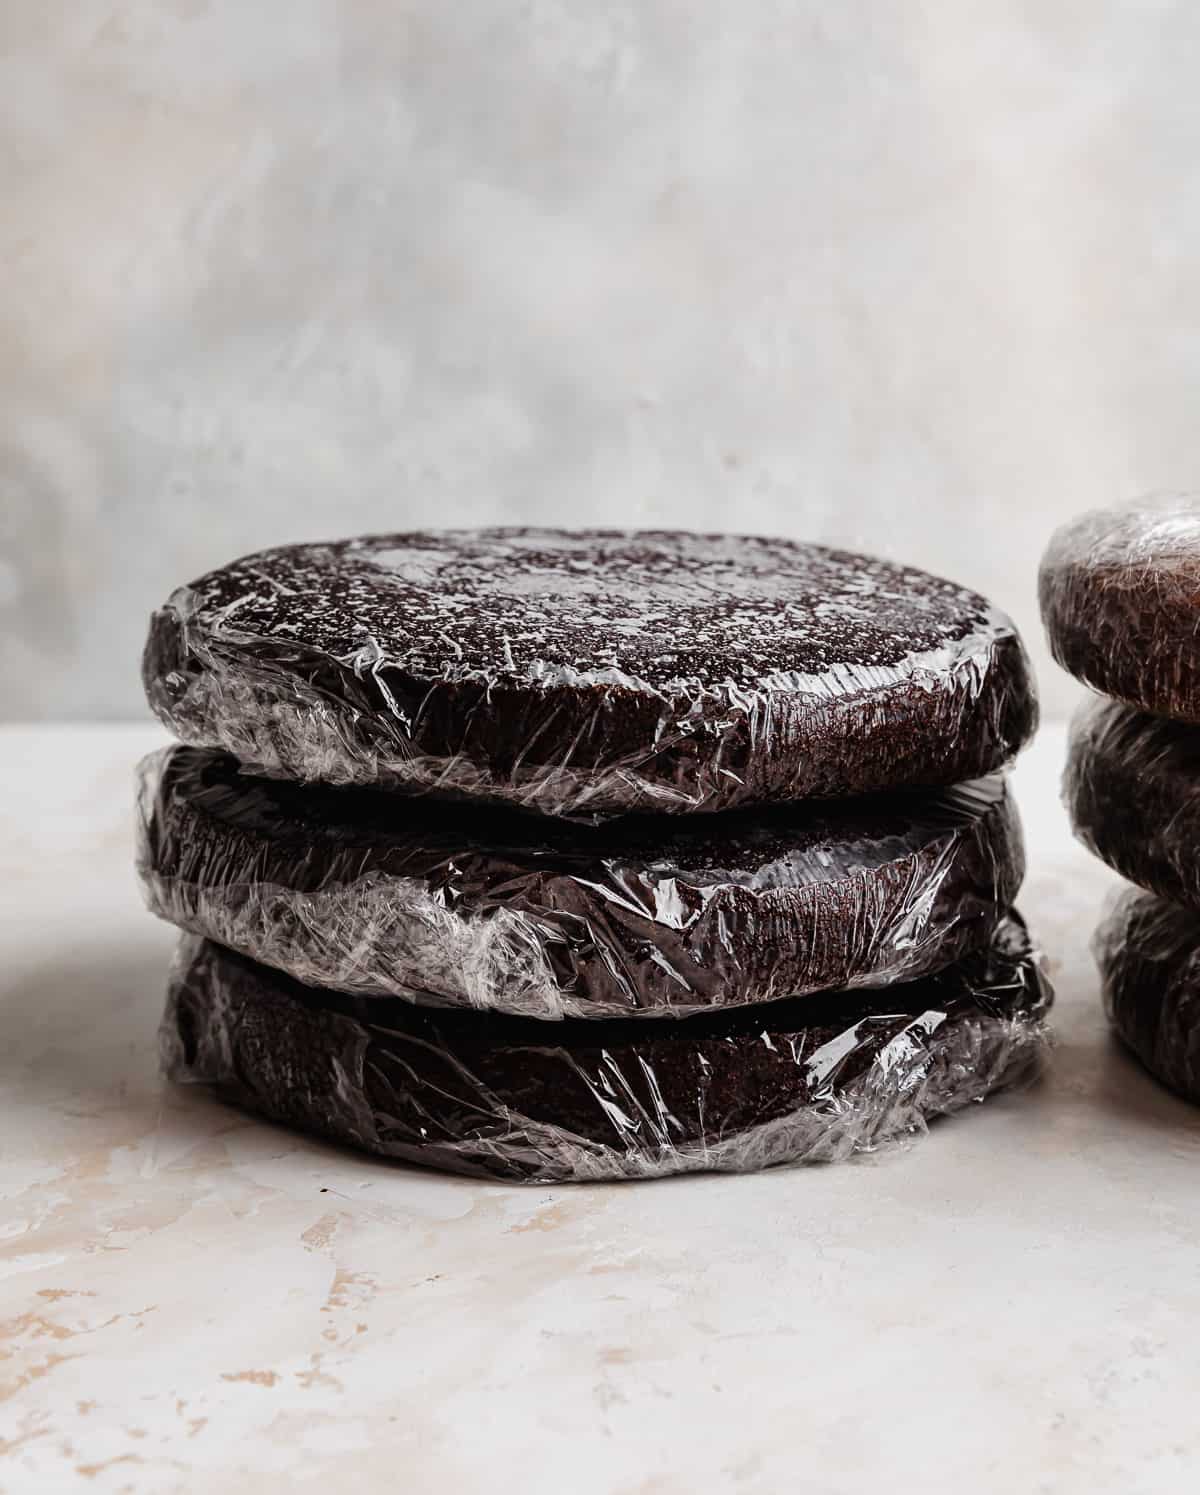
- Store on a Flat Surface: Whether heading to the fridge or freezer, place your tightly wrapped cake layers on a flat, sturdy surface. This could be a baking sheet, a cutting board, or a designated shelf in your appliance. This prevents the soft cake from deforming, bending, or developing indentations as it chills or freezes.
Tips for Storing Cake Layers in the Refrigerator
Refrigeration is ideal for short-term storage, keeping your cake layers fresh for a couple of days while you prepare other components or get ready for assembly.
- Always Use a Flat Surface: As mentioned, this is crucial. A soft cake layer can easily take on the shape of an uneven surface when chilled. Placing them on a sturdy baking sheet or cutting board ensures they remain perfectly flat and ready for stacking.
- Ensure Tight, Double Wrapping with Plastic Wrap: This cannot be stressed enough. Air is the enemy of freshness. Double-wrapping each cake layer in plastic wrap creates a formidable barrier that significantly reduces the risk of the cake drying out. It also minimizes the formation of condensation on the cake surface itself, which can lead to a sticky or gummy texture. For fridge storage of 1-2 days, aluminum foil is generally not necessary, as plastic wrap provides sufficient protection.
- Adhere to a 1-2 Day Storage Limit: Cake layers stored in the fridge will remain fresh and moist for approximately 1 to 2 days. While they might technically be edible for a bit longer, their texture and flavor begin to degrade after this period. If your baking schedule requires you to prepare cake layers further in advance, it’s best to opt for freezing them instead. Refrigerated cakes are perfect for breaking up a two-day baking project.
- Consider Cake Type: While most plain cake layers store well in the fridge, cakes with very delicate textures or strong aromas (like certain spice cakes) might absorb fridge odors if not wrapped perfectly. Generally, this method works well for sponge, butter, and cream cheese-based cake layers.
Expert Tips for Freezing Cake Layers for Longer Freshness
Freezing is your secret weapon for making cakes weeks or months in advance, preserving their quality and flavor remarkably well. Mastering this technique offers unparalleled flexibility.
- Maintain a Flat Surface During Freezing: Just like with refrigeration, it’s vital to freeze cake layers on a flat, stable surface. As cakes freeze, their structure becomes firm. If they freeze on an uneven surface, they will retain that distorted shape, which can make stacking and decorating challenging later on. Use a sturdy baking tray or a dedicated freezer shelf.
-
Properly Wrap for Freezer Longevity:
- Short-Term Freezing (Under 7 Days): Double-wrap each cake layer tightly in plastic wrap. This is usually sufficient for keeping them fresh for up to a week.
- Long-Term Freezing (Over 7 Days, up to 3 Months): For extended storage, after double-wrapping in plastic, add an additional, snug layer of heavy-duty aluminum foil around each cake. This extra layer is crucial. It provides superior protection against freezer burn, which causes dry, discolored patches, and acts as an additional barrier against odor absorption from other freezer contents. The more layers of protection, the better the cake’s texture and flavor will be preserved.
- Utilize Within an Appropriate Time Frame: For the absolute best results in terms of taste and texture, aim to use your frozen cake layers within 2 to 3 months. While cakes can technically remain safe to eat for longer (up to 6 months), their quality, especially moisture content, may start to diminish after the 3-month mark. Always label your wrapped cake layers with the date they were frozen and the recommended “use by” date. A permanent marker on the outer foil layer or freezer bag works perfectly.
- Enhance Freshness with Freezer-Safe Containers: For an extra layer of protection, particularly for delicate cake layers or if you plan on storing them for several months, consider placing the plastic-wrapped and foil-wrapped cake layers into an airtight, freezer-safe container or heavy-duty Ziplock freezer bag. Choose a container that fits snugly without squishing the cake layers, as this creates an additional barrier against air and freezer odors, further safeguarding your cake’s integrity.
Storing and Freezing Buttercream Frosting
Just like cake layers, buttercream can be prepared in advance, saving valuable time on your decorating day. Proper storage ensures it maintains its creamy texture and delicious flavor.
- Preparation and Storage: Once your buttercream is made, transfer it to an airtight container. Press a piece of plastic wrap directly onto the surface of the buttercream before sealing the container with its lid. This prevents a crust from forming and minimizes air exposure. Store the buttercream in the refrigerator for 5-7 days, or in the freezer for up to 1 month. Some buttercreams, especially those with high butter content (like American buttercream), can last even longer in the freezer, up to 2-3 months.
- Thawing and Re-Whipping: When you’re ready to use your stored buttercream, remove it from the freezer (if applicable) and let it thaw gradually in the refrigerator overnight. Once thawed and brought to room temperature (this might take a few hours on the counter), transfer the buttercream to the bowl of a stand mixer fitted with the paddle attachment. Begin beating it on low speed to gradually reincorporate any separated liquids and soften its consistency. Gradually increase the speed to medium-high and beat until the buttercream is light, fluffy, and smooth again, reaching its original consistency. If it appears too stiff, you can add a tablespoon of milk or cream at a time while beating until it reaches your desired consistency.
How to Freeze a Fully Decorated Cake
Yes, you can freeze an entire decorated cake! This is a fantastic option for wedding cake tiers, elaborate birthday cakes, or to simply enjoy a celebratory cake at a later date. This method protects delicate decorations and ensures freshness.
- Flash Freeze the Decorated Cake: Once your cake is completely decorated and all frostings and decorations are in place, carefully place the entire cake in the freezer. Allow it to “flash freeze” for at least 30 minutes, or until the buttercream (or other frosting) is firm to the touch. This step is crucial because it hardens the exterior, protecting all the delicate decorations from being smudged or damaged during the wrapping process.
- Wrap the Cake Securely: Once the buttercream is completely set and no longer tacky or soft (you should be able to lightly touch it without leaving an impression), remove the cake from the freezer. Wrap the entire cake tightly in several layers of plastic wrap. Be gentle but firm, ensuring every part of the cake is covered to prevent air exposure. If you intend to store the cake for longer than 7 days, add an additional layer of heavy-duty aluminum foil over the plastic wrap for enhanced protection against freezer burn.
- Store in the Freezer or Fridge: A flash-frozen and securely wrapped decorated cake can be stored in the refrigerator for 1-2 days, or in the freezer for up to 1 month for optimal freshness. For longer freezer storage (up to 2 months), ensure the double-wrap (plastic and foil) is perfect.
- Properly Thaw for Serving: This is a critical step to prevent condensation from ruining your beautiful cake. Remove the wrapped cake from the freezer and immediately transfer it to the refrigerator to thaw overnight. It is essential to keep the plastic wrap on during this thawing period. You may remove the outer aluminum foil layer if used, but keep the plastic wrap intact. The plastic wrap acts as a shield, ensuring any condensation forms on the wrapping rather than directly on the cake or its delicate frosting. The next morning, remove the cake from the fridge, unwrap it, and allow it to come to room temperature on your counter, ideally within a cake box or an airtight cake container to protect it from drying out. This gradual thawing ensures the best texture and appearance.
How to Thaw Frozen Cake Layers Safely and Effectively
Thawing frozen cake layers correctly is just as important as freezing them. A slow, controlled thaw ensures the cake retains its moisture, texture, and flavor, resulting in a cake that tastes freshly baked.
- Transfer from Freezer to Fridge: The golden rule for thawing cake layers is to always move them from the freezer directly to the refrigerator. This allows for a slow and gradual thawing process, which is far superior to thawing at room temperature. A slow thaw minimizes the risk of shocking the cake’s structure, preventing a gummy or crumbly texture. I typically recommend transferring cakes to the fridge overnight, about 8-12 hours, for a complete thaw.
- Thaw While Still Wrapped: It is absolutely crucial to keep the cake layers completely wrapped in their plastic (and foil, if used) during the entire thawing process. As the cake thaws, temperature differences will naturally cause condensation to form. By keeping the cake wrapped, this condensation will collect on the outer surface of the wrapping instead of directly on the cake itself. If condensation were to form on the cake, it could make the surface sticky, soggy, or even dissolve delicate frosting details (if thawing a decorated cake).
- Allow Appropriate Thawing Time: Most cake layers will require approximately 8 hours to fully thaw in the refrigerator. This is why an overnight thaw is the most convenient and effective method. Once thawed, the cake layers will be chilled but pliable, making them much easier to handle, level (if not already done), and stack without fear of crumbling. Working with chilled cake layers during assembly and frosting can also make the decorating process smoother, especially when dealing with softer frostings.
How to Store Leftover Cake for Extended Enjoyment
You’ve baked a magnificent cake, and it was a huge hit! But inevitably, there might be a few slices left over. Don’t let them go to waste or dry out. Here’s the best strategy for preserving leftover cake to enjoy later:
- Cut into Individual Slices: Rather than trying to preserve a large, partially eaten cake, which exposes a lot of surface area to air, it’s best to cut the remaining cake into individual slices. This allows for more targeted protection and easy portioning later.
- Wrap Each Slice Securely: For optimal freshness, wrap each individual cake slice tightly in plastic wrap. Ensure the entire surface, especially the exposed cut edges, is completely covered. This locks in moisture and prevents staleness.
-
Store in the Fridge or Freezer:
- Refrigerator Storage: Place the individually wrapped cake slices into an airtight container. This container provides an additional layer of protection against fridge odors and accidental damage. Store in the fridge for 3-4 days.
- Freezer Storage: If you want to keep the slices for longer, after wrapping them in plastic wrap, add an additional layer of aluminum foil around each slice. Then, place them in a freezer-safe bag or airtight container. Freeze for up to 1 month for best quality.
- Thawing Leftover Slices: When you’re ready to enjoy a frozen slice, remove it from the freezer and let it thaw in the refrigerator overnight while still wrapped. Alternatively, you can unwrap a frozen slice and microwave it for 15-30 seconds (depending on slice size and microwave power) for a quick, warm treat. For best texture, a gradual fridge thaw is recommended.
Cake Freezing and Storing FAQs
Yes, absolutely! Freezing cake is an excellent method for preparing desserts ahead of time, reducing stress, and extending shelf life. You can freeze individual unfrosted cake layers, fully decorated cakes, and even leftover cake slices. With the right wrapping techniques (plastic wrap, aluminum foil, and airtight containers or freezer bags), along with a refrigerator or freezer, you can ensure your cakes remain delicious and fresh. Refer to the detailed tips above for the best practices for each type of cake item!
To freeze cake layers, first ensure they are completely cool to prevent condensation. Once cooled, wrap each cake layer individually and very tightly in at least two layers of plastic wrap, creating an airtight seal. For short-term freezer storage (up to 7 days), this is usually sufficient. For longer storage (up to 3 months), add an additional snug layer of heavy-duty aluminum foil over the plastic wrap to prevent freezer burn. Always freeze on a flat surface and label with the date for best results.
When it’s time to use your frozen cake layers, transfer them from the freezer to the refrigerator to thaw slowly overnight, typically for about 8-12 hours. It is crucial to keep the cake layers wrapped in their plastic (and foil, if applicable) during this entire thawing process. This ensures that any condensation that forms collects on the wrapping instead of directly on the cake, preserving its texture and preventing a soggy surface. Once thawed, you can unwrap them and allow them to come to room temperature, or work with them while still slightly chilled for easier handling during decorating.
Yes, you absolutely can freeze an entire decorated cake! First, flash freeze the finished cake in the freezer for 30-60 minutes, or until the buttercream or frosting is completely firm. This hardens the exterior and protects the decorations. Once firm, remove the cake and wrap it tightly in several layers of plastic wrap. For storage longer than 7 days, add an extra layer of aluminum foil. A decorated cake can be stored in the freezer for up to 1-2 months. To thaw, transfer the wrapped cake to the refrigerator overnight. Keep the wrapping on until it’s fully thawed. The next morning, unwrap the cake and let it come to room temperature, ideally in a cake box or airtight cake container to prevent drying out before serving.
Definitely! Buttercream frosting freezes very well. To freeze, transfer the buttercream to an airtight container, pressing a layer of plastic wrap directly onto the surface before sealing with the lid. Store in the freezer for up to 1-2 months. When ready to use, thaw the buttercream in the refrigerator overnight. Once thawed and at room temperature, place it in a stand mixer and beat on low speed, then gradually increase to medium-high until it returns to its light, fluffy, and smooth consistency. If it’s too stiff, a tablespoon of milk or cream can be added while beating.
The ideal storage temperature for a cake depends on its ingredients, particularly the filling and frosting. Cakes with dairy-based fillings or frostings (like cream cheese frosting, whipped cream, or pastry cream) must be refrigerated for food safety. Cakes with non-dairy frostings, such as American buttercream (made with butter, powdered sugar, and milk/cream in smaller quantities) or ganache, can often be stored at room temperature for 2-3 days, provided it’s covered and in a cool, dry place. However, almost any cake will last longer and maintain freshness better when stored covered in an airtight container in the refrigerator, typically extending its shelf life to 6-7 days. Always consider your specific recipe and climate.
Yes, absolutely! Making cake components ahead of time is one of the most effective strategies for stress-free baking. By learning how to properly store and freeze cake layers, fillings, and frostings, you can prepare many elements days or even weeks in advance. This approach is invaluable for complex cakes, special events, or busy schedules. Follow the best practices and detailed tips outlined in this guide for successful advanced cake preparation, ensuring your finished cake is as fresh and delicious as possible.
To defrost a frozen cake, whether it’s an entire decorated cake or individual layers, always transfer it from the freezer to the refrigerator to thaw slowly overnight, typically for 8-12 hours. It is critical to keep the cake completely wrapped in its plastic (and foil, if used) during this entire thawing period. This prevents condensation from forming directly on the cake, which could make it soggy or damage delicate decorations. The next morning, remove the cake from the fridge, unwrap it, and allow it to come to room temperature before serving. For best results, place it in a cake box or covered container after unwrapping to protect it from drying out as it warms up.
Now that you’re armed with all the essential knowledge on how to store and freeze cakes like a seasoned baker, it’s time to put these techniques into practice. Get ready to enjoy more organized, stress-free baking and perfectly fresh cakes every time!
Delicious Cake Recipes to Try with Your New Skills
Ready to bake and apply these fantastic storage tips? Here are some irresistible cake recipes that you can prepare with confidence, knowing you can manage your time and keep them fresh.
- Ferrero Rocher Cake
- Moist Chocolate Cake
- Lemon Bar Cake
- Orange Cranberry Cake
If you try any of our cake recipes and utilize these storage tips, be sure to leave a star rating and review on the recipe post!
And don’t forget to follow us on Instagram, Facebook, and Pinterest for more baking inspiration and tips!
