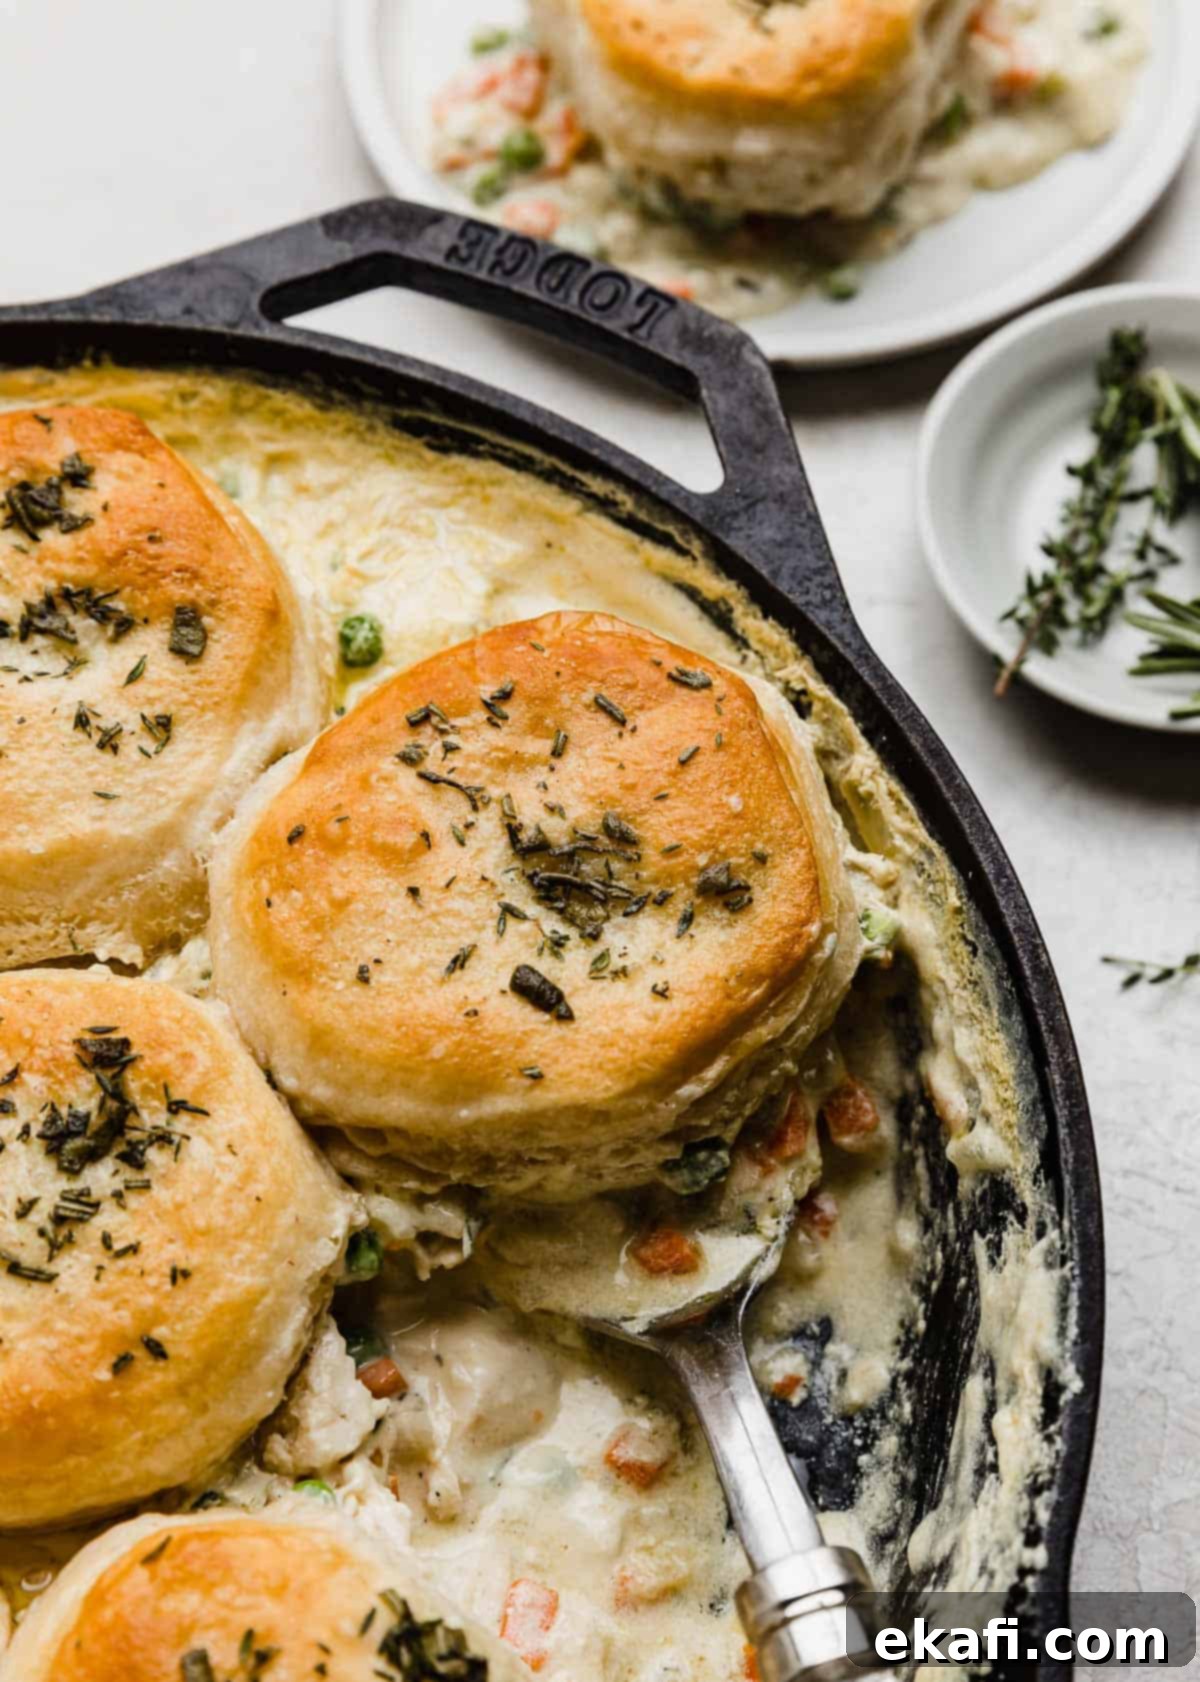
Ultimate One-Pan Cast Iron Chicken Pot Pie: A Cozy Weeknight Delight with Flaky Biscuit Topping
Craving a hearty, soul-warming meal that comes together with minimal fuss and cleanup? Look no further than this incredible Cast Iron Chicken Pot Pie! This effortless and utterly delicious dish combines tender shredded chicken, an abundance of garden-fresh vegetables, and a rich, creamy sauce, all simmered and baked to perfection in a single cast iron skillet. To make your life even easier, we crown this skillet chicken pot pie with light, golden-brown biscuits straight from a can. These flaky biscuits are the perfect complement to the savory filling, offering a delightful texture contrast and an ingenious shortcut for busy home cooks. It’s the quintessential comfort food experience, reimagined for ultimate convenience!
As a devoted fan of one-pan meals, especially on hectic weeknights, I know the value of efficiency without sacrificing flavor. If you share my love for simple yet satisfying dinners, be sure to explore my other fantastic skillet recipes like Cast Iron Lasagna, Mexican Quinoa, and Curry Chicken Rice and Peas. And for those who adore classic chicken pot pie, you absolutely must try my Chicken Pot Pie Noodles for a quick and tasty twist on a beloved favorite!
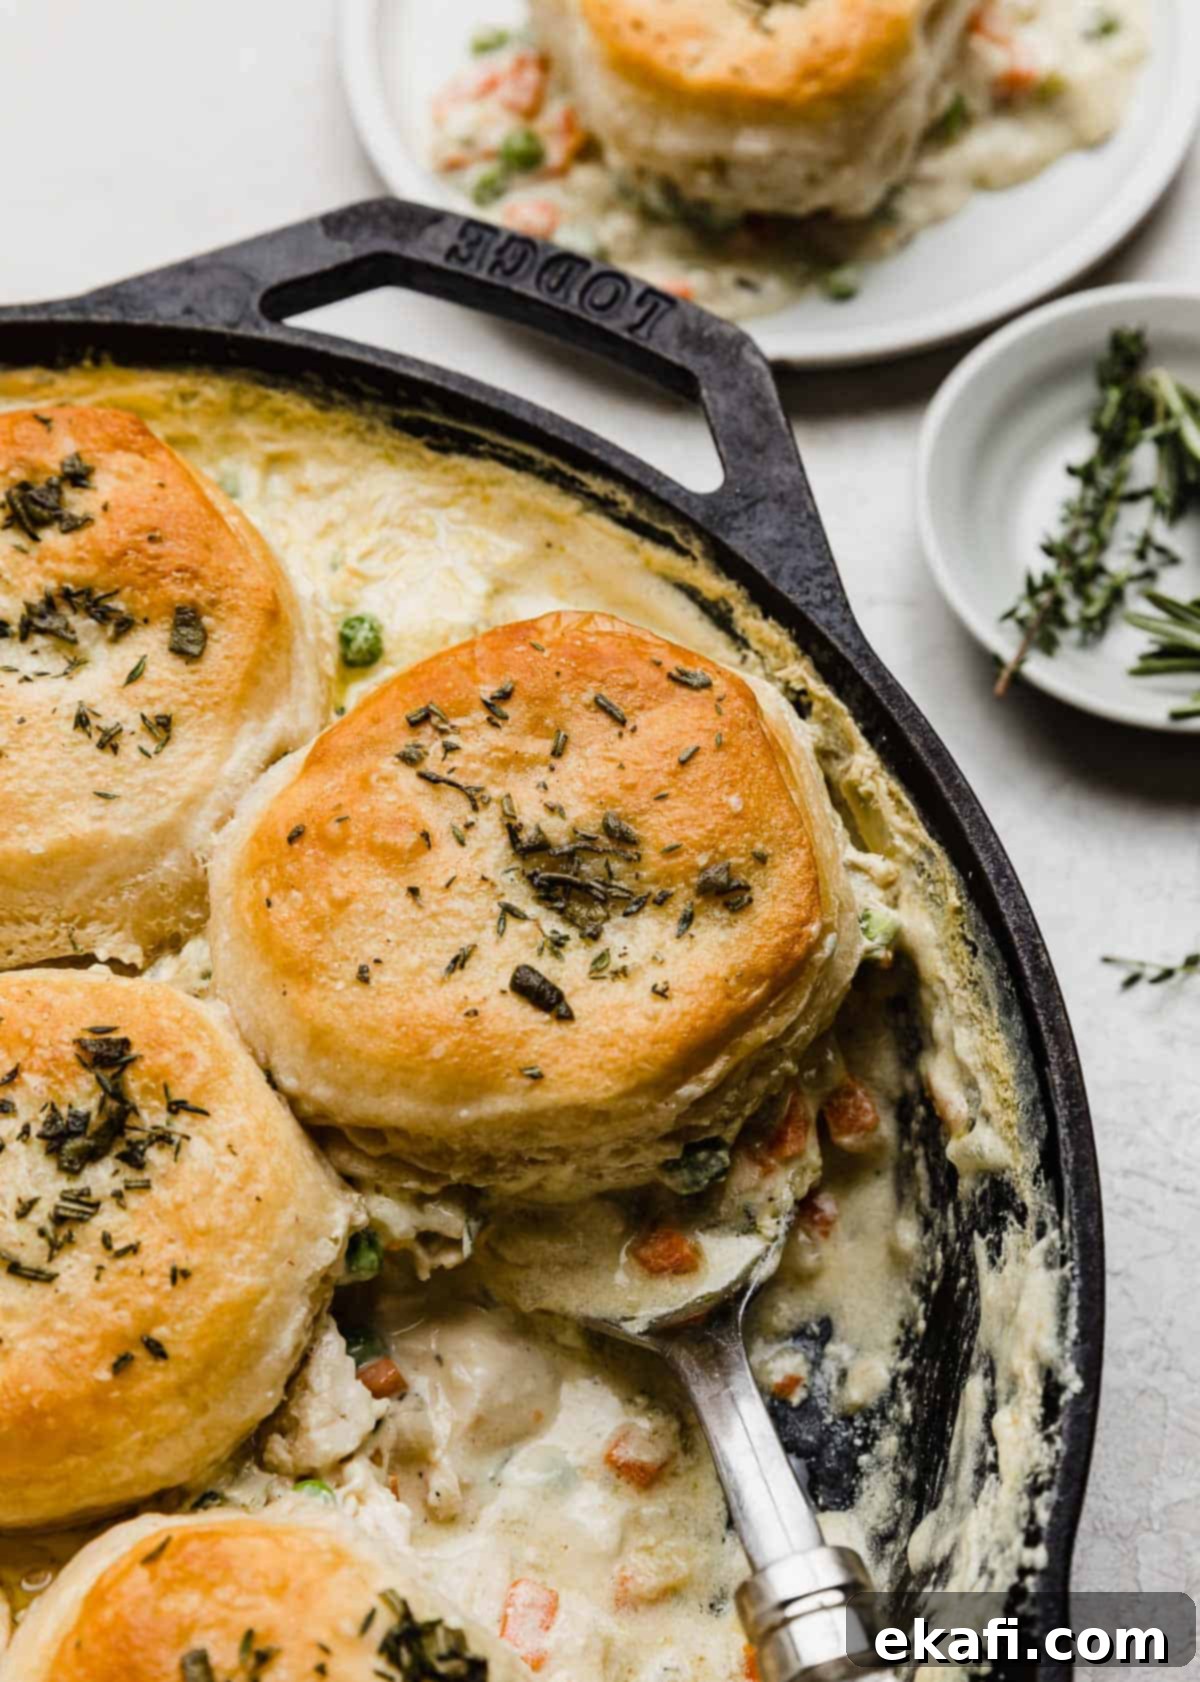
Why This Cast Iron Chicken Pot Pie Recipe is a Must-Try
This Cast Iron Chicken Pot Pie isn’t just another recipe; it’s a testament to how simple ingredients and smart techniques can create extraordinary results. Here’s why this dish will become a staple in your kitchen:
- Effortless One-Skillet Wonder: Say goodbye to mountains of dirty dishes! This entire chicken pot pie, from sautéing the vegetables to baking the flaky biscuit topping, is made in just one cast iron skillet. This not only makes cleanup a breeze but also allows all the delicious flavors to meld together beautifully, creating a more cohesive and rich taste. You’ll only need your cutting board, knife, measuring cups and spoons, and, of course, your trusty cast iron skillet. It’s the ultimate easy dinner recipe the whole family will adore, perfect for busy weeknights when time is of the essence.
- Quick & Delicious with Canned Biscuits: While I deeply appreciate a classic pie crust, I understand that making one from scratch can be both time-consuming and challenging to perfect. This recipe ingeniously skips the bottom crust and uses store-bought canned biscuits for the topping. This brilliant shortcut saves significant time without compromising on that essential, comforting pot pie experience. The canned biscuits puff up beautifully, turning golden brown and achieving that desirable flaky texture that pairs perfectly with the creamy filling. Topping your homemade chicken pot pie with canned biscuits isn’t just easier; it’s a delicious decision that guarantees a consistently great result every time.
- Hearty, Flavorful, and Comforting: This recipe delivers on all the promises of traditional comfort food. It’s packed with tender chicken, a colorful array of vegetables, and a rich, savory sauce that will warm you from the inside out. The cast iron skillet contributes to an even cook and a delightful crust on the bottom (even without a formal pie crust), enhancing the overall flavor and texture of the dish.
Key Ingredients for Your Perfect Skillet Chicken Pot Pie
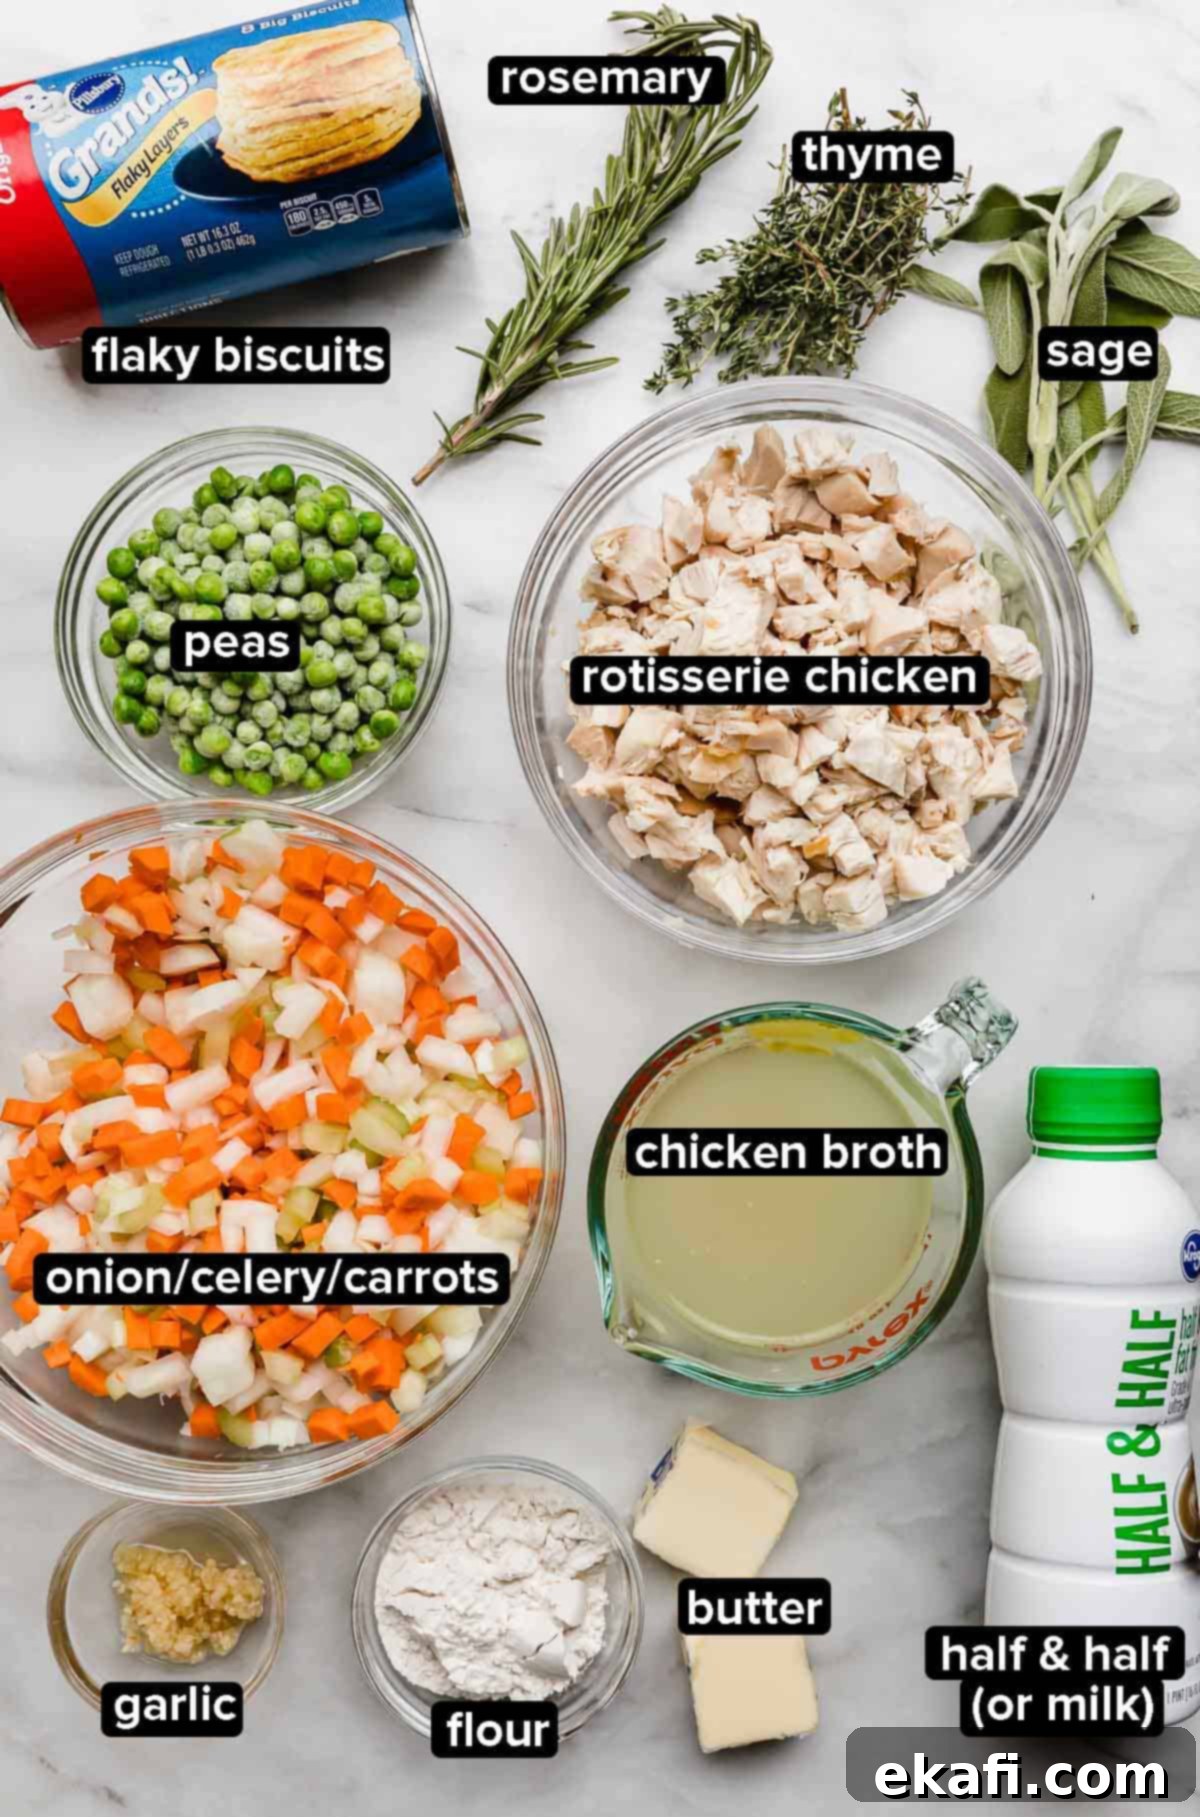
High-quality ingredients are the foundation of any great meal, and this Cast Iron Chicken Pot Pie is no exception. Here’s a closer look at what you’ll need and why each component is essential for that irresistible flavor:
- Rotisserie Chicken: This is our ultimate shortcut hero! Using a pre-cooked rotisserie chicken instantly cuts down on preparation time, allowing you to get dinner on the table faster. You’ll need about two cups, shredded or chopped. This recipe is also fantastic for repurposing leftover cooked chicken, whether it’s from a roast or even leftover Thanksgiving turkey. If you don’t have pre-cooked chicken, simply cook a couple of chicken breasts or thighs on the stovetop or in the oven until done, then shred or dice them.
- Unsalted Butter: The journey to a rich, flavorful pot pie begins with butter. Unsalted butter allows you to control the overall saltiness of the dish while providing a luxurious base for sautéing our vegetables and forming the roux that thickens our creamy sauce. Its rich flavor is irreplaceable.
- Fresh Veggies (Mirepoix + Peas): This skillet chicken pot pie is loaded with vibrant, nutritious vegetables. We start with a classic mirepoix – a flavorful base of finely diced carrots, celery, and onion. These aromatics are slowly cooked in butter until tender and translucent, releasing their sweet and earthy flavors. Towards the end, frozen peas are stirred in, adding a pop of color, sweetness, and additional texture without overcooking. Feel free to use fresh peas if available, but frozen peas are a convenient and perfectly acceptable alternative.
- All-Purpose Flour: This humble ingredient is crucial for creating the luscious, thick filling of our chicken pot pie. When cooked with butter, it forms a roux, which acts as a thickening agent, giving the sauce its characteristic creamy consistency. Don’t skip the step of cooking the flour for a minute to eliminate any raw flour taste.
- Chicken Broth: To build a deep, savory flavor profile, chicken broth is essential. It thins out the roux while infusing the filling with a rich, umami depth. You can use either chicken broth or chicken stock; choose a low-sodium option to better control the seasoning.
- Half and Half: For that signature creamy and decadent filling, half and half is key. Its balance of milk and cream provides the perfect richness without being overly heavy. If you prefer, you can substitute whole milk for a slightly lighter but still creamy result. Avoid using skim or low-fat milk, as it may result in a thinner, less satisfying sauce.
- Fresh Herbs: Elevate your homemade chicken pot pie with the aromatic essence of fresh herbs. I love a blend of fresh thyme, rosemary, and sage for their earthy, fragrant notes that perfectly complement the chicken and vegetables. Mincing them finely helps distribute their flavor throughout the dish. While fresh herbs offer the best flavor, you can certainly substitute dried herbs. Just remember that dried herbs are more potent, so use about one-third the amount of fresh herbs (e.g., 2 tsp fresh thyme = about ⅔ tsp dried thyme).
- Canned Biscuits: The crowning glory of this easy pot pie! Canned biscuits are a brilliant time-saver and provide a wonderfully flaky, buttery topping without any effort. When baked, they become golden brown and light, offering a delightful textural contrast to the creamy filling below. Opt for “extra flaky” varieties if you can find them for an even more satisfying experience.
How to Make This Easy Cast Iron Chicken Pot Pie with Biscuits
Creating this delicious skillet chicken pot pie is simpler than you might think. Follow these straightforward steps to achieve a comforting meal that’s sure to impress:
- Prepare and Sauté the Mirepoix: Begin by preheating your oven to 375°F (190°C). Place a 12-inch cast iron skillet over medium heat on your stovetop. Melt 2 tablespoons of unsalted butter in the skillet. Once the butter is shimmering, add your finely diced medium onion (approximately 1½ cups), 3 diced celery ribs, and 3 peeled and diced medium carrots. Cook these vegetables, stirring occasionally, for about 4-6 minutes, or until the onion becomes translucent and the carrots and celery start to soften. This initial sautéing step is crucial for building the flavor base of your pot pie. Next, add 2 teaspoons of minced garlic and cook for just another minute until fragrant, being careful not to burn it.
- Create the Roux: Sprinkle ¼ cup of all-purpose flour over the cooked vegetable mixture in the skillet. Stir constantly for one minute, ensuring the flour is thoroughly incorporated and cooks slightly. This process creates a roux, which will act as the thickening agent for your creamy sauce. Cooking the flour helps remove its raw taste.
- Whisk in Chicken Broth: Slowly pour 1 cup of chicken broth into the skillet, whisking continuously as you add it. Whisking is key here to prevent lumps and ensure a smooth, uniform sauce base. Continue to whisk until the mixture is well combined and slightly thickened.
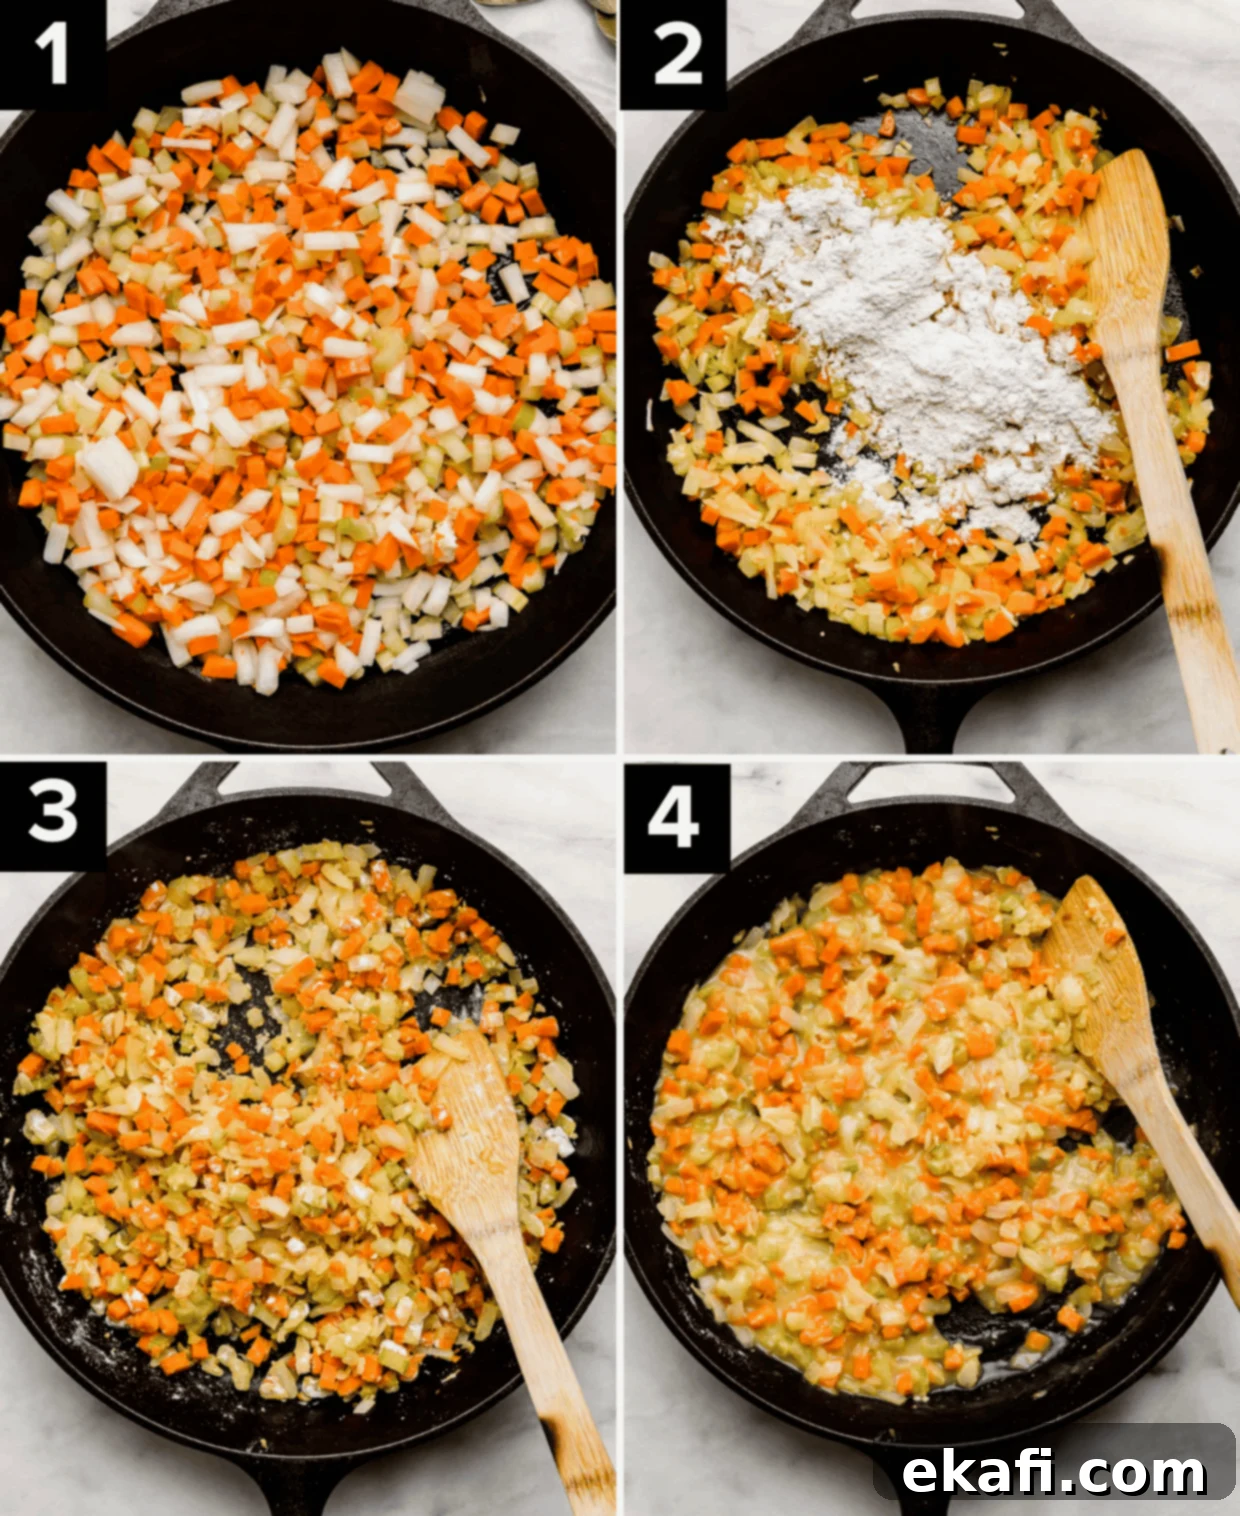
- Add Dairy and Fresh Herbs: Next, stir in 2¾ cups of half and half (or whole milk) along with your minced fresh herbs: 2 teaspoons fresh thyme leaves, 1 teaspoon fresh sage, and 1 teaspoon fresh rosemary. Season generously with kosher salt and black pepper to taste. The fresh herbs are vital for that vibrant, aromatic depth characteristic of a truly homemade dish.
- Thicken the Sauce: Bring the sauce mixture to a gentle simmer over medium heat. Allow it to cook for 4-5 minutes, stirring occasionally, until the sauce has visibly thickened to a creamy, luscious consistency that coats the back of a spoon. This ensures your pot pie filling will be rich and luxurious.
- Incorporate Chicken and Peas: Remove the skillet from the heat. Stir in 2 cups of your chopped or shredded cooked chicken and 1 cup of frozen peas. Mix everything until the chicken and peas are evenly distributed throughout the creamy filling. The residual heat will gently warm the peas without overcooking them.
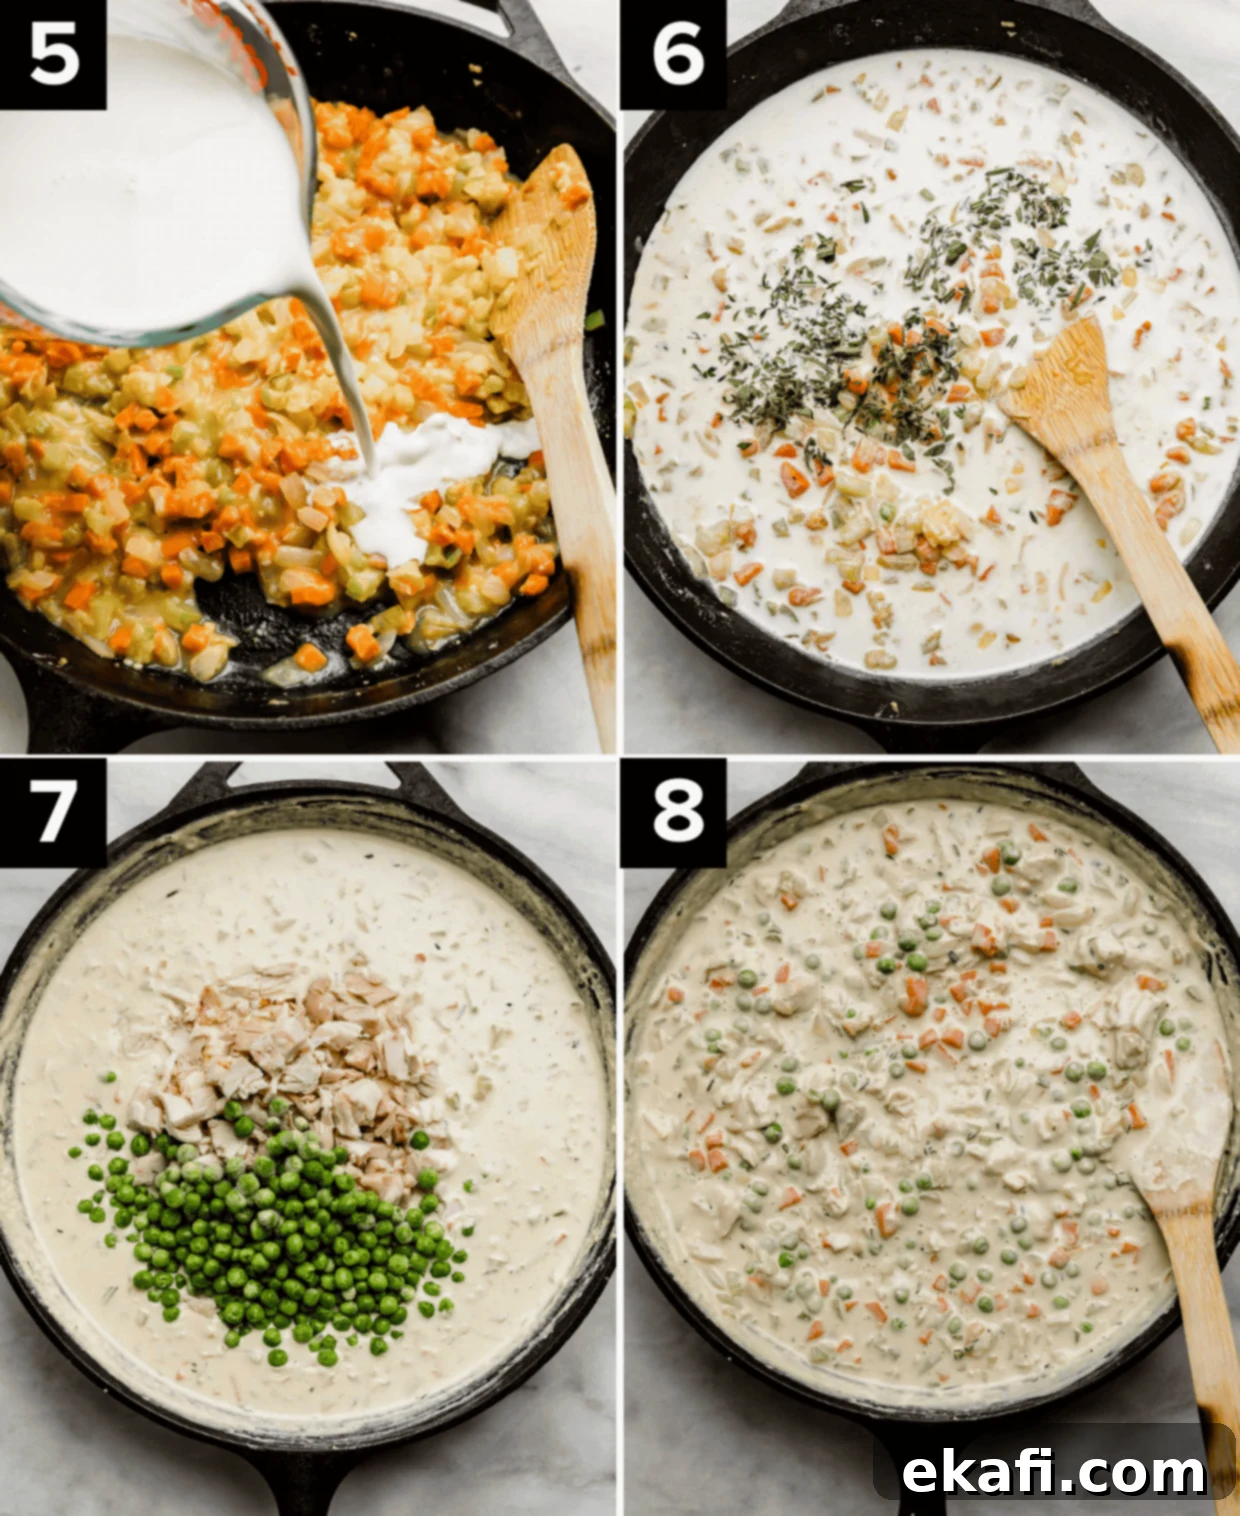
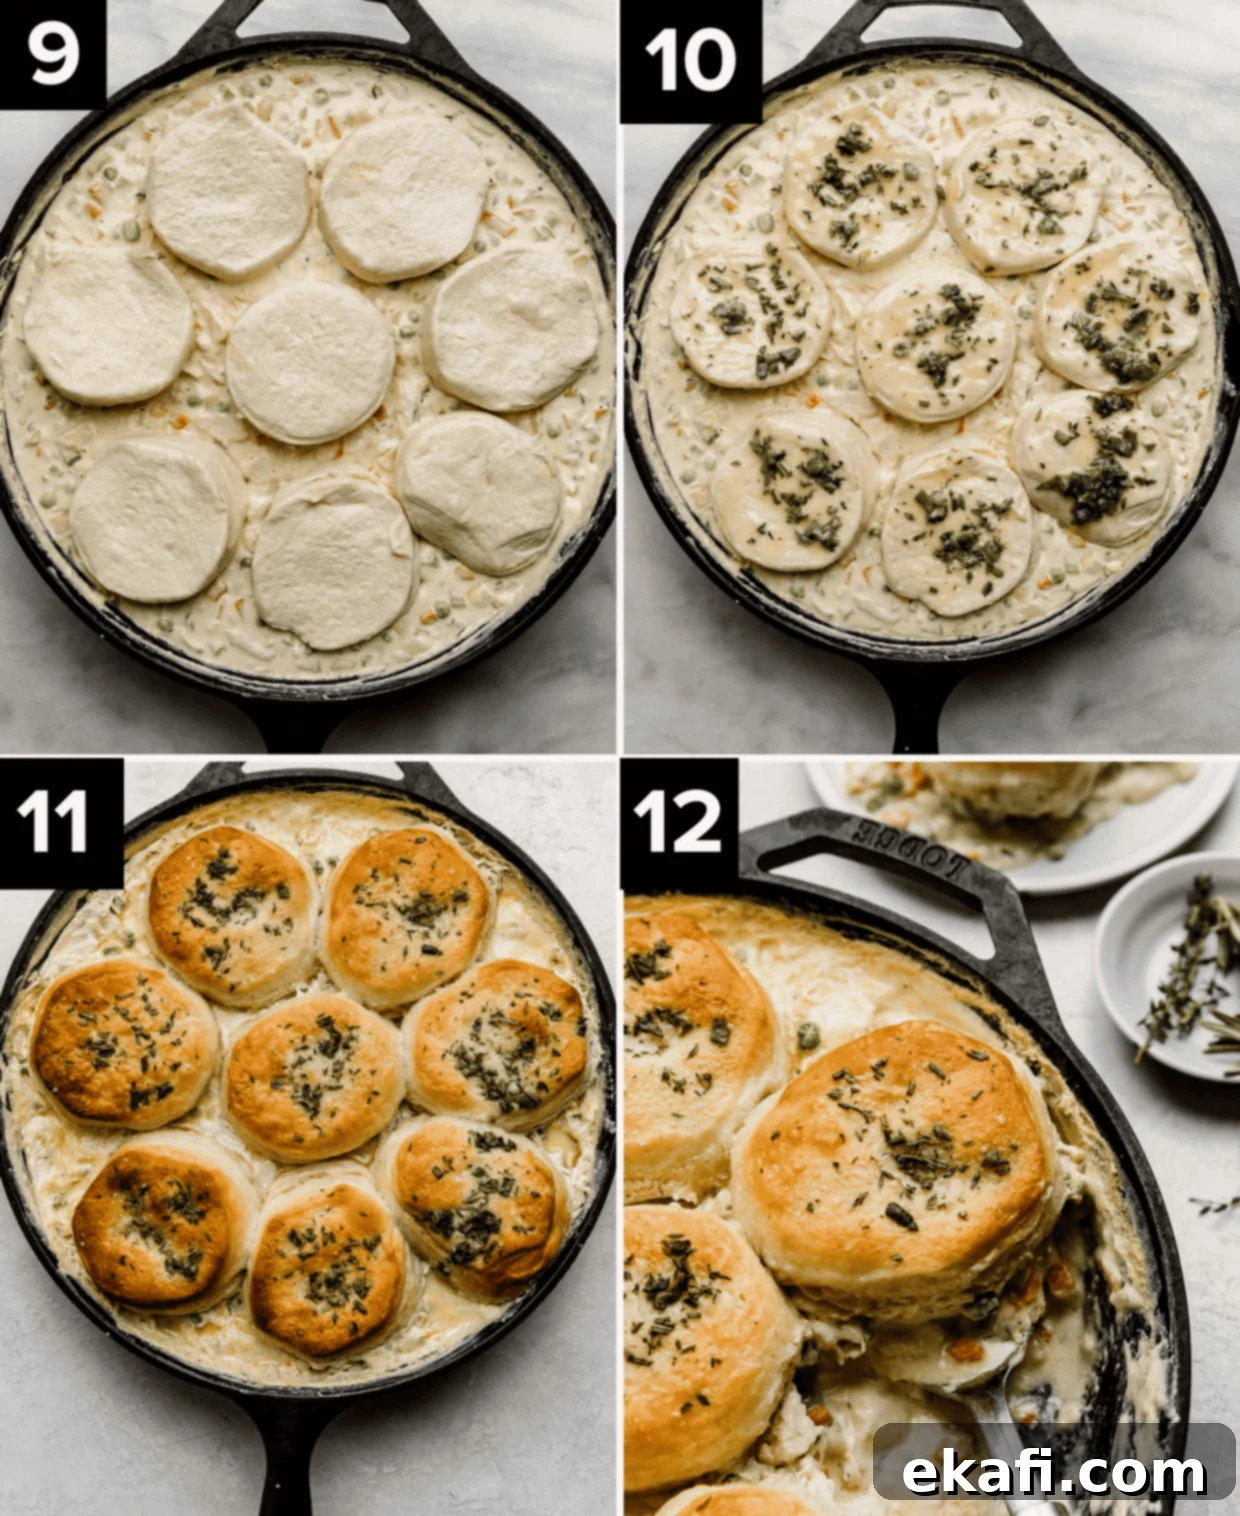
- Top with Biscuits and Herb Butter: Open your can of biscuit dough and arrange the individual biscuits artfully on top of the chicken pot pie filling in the skillet. In a small bowl, melt 2 tablespoons of butter and combine it with 2 tablespoons of finely chopped fresh herbs (using the same blend as before: thyme, rosemary, and sage). Using a pastry brush or spoon, generously brush this aromatic herb butter mixture over the tops of each biscuit. This step not only adds incredible flavor but also helps the biscuits achieve a beautiful golden-brown color and crispy texture.
- Bake to Golden Perfection: Carefully transfer the cast iron skillet to your preheated oven. Bake for 20-25 minutes, or until the biscuits on top are puffed up, beautifully golden brown, and completely cooked through. You can test for doneness by gently poking a biscuit with a toothpick; it should come out clean.
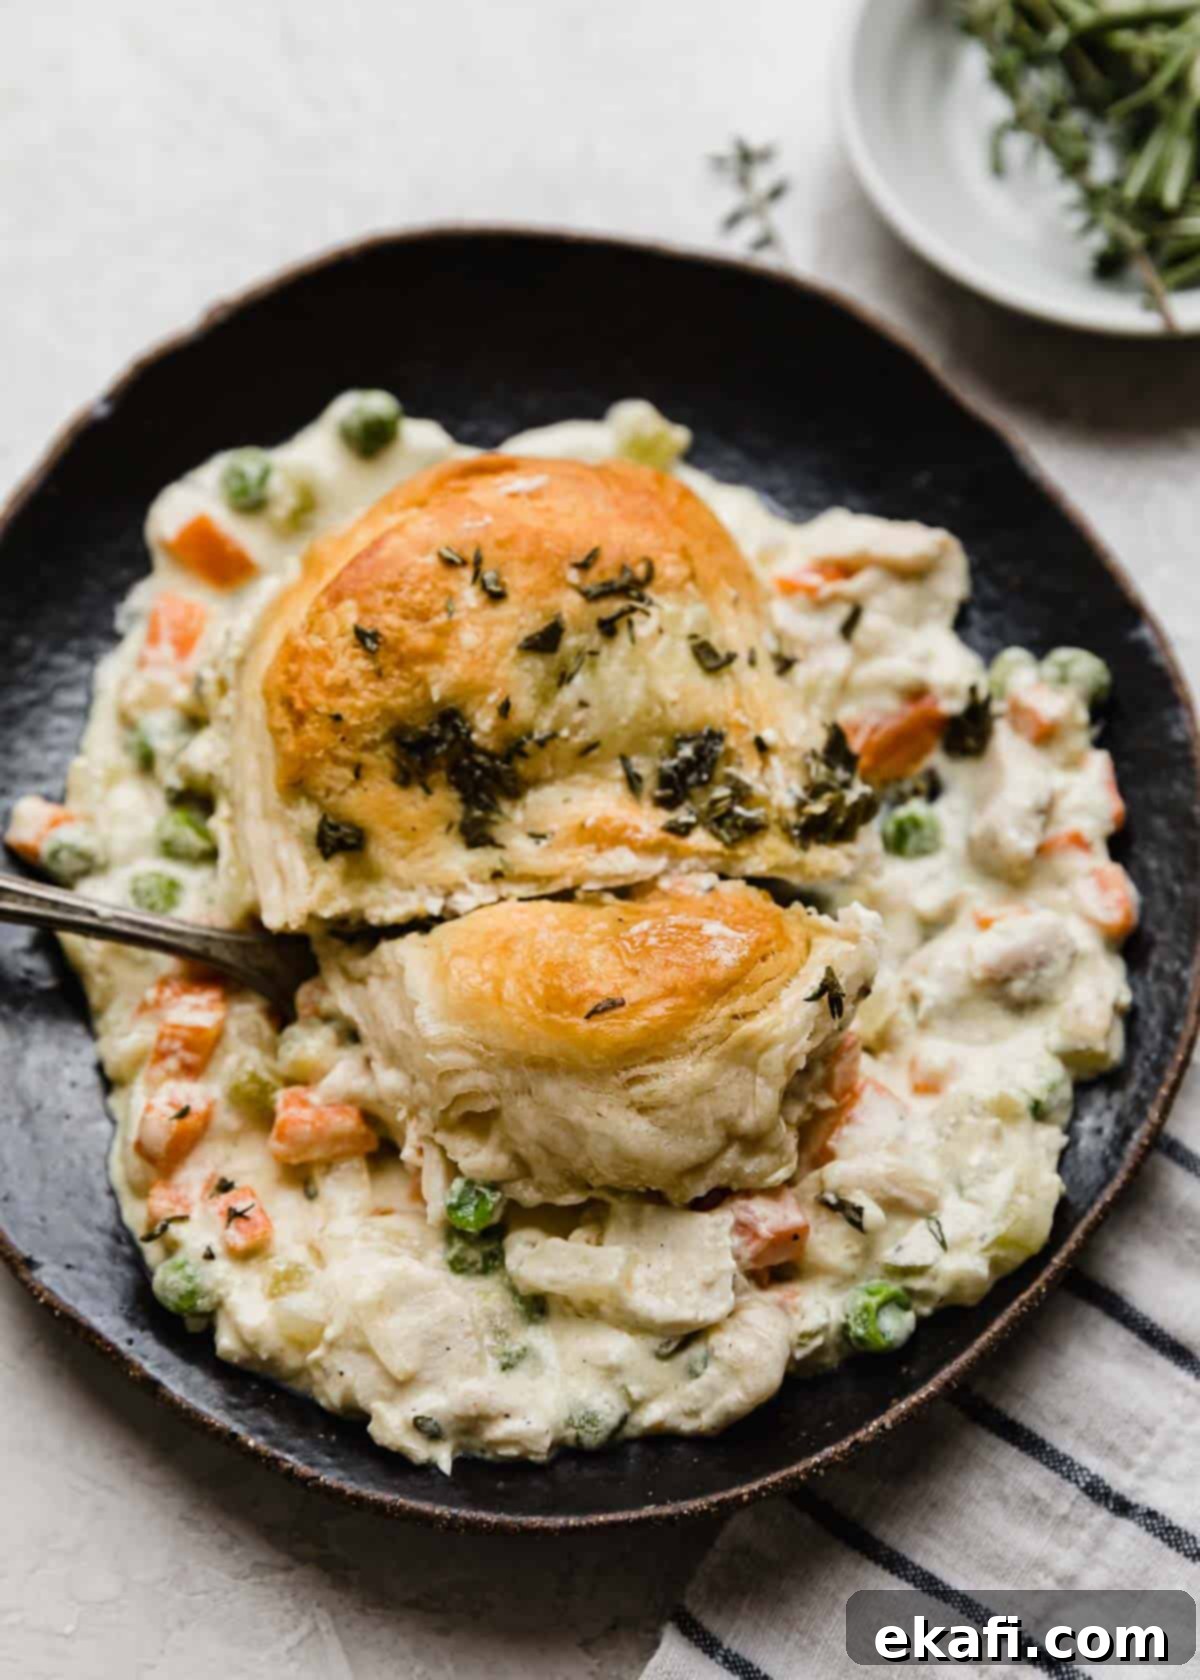
- Rest and Enjoy: Once baked, remove the Cast Iron Chicken Pot Pie from the oven. Let it cool on the stovetop for at least 5 minutes before serving. This brief resting period allows the filling to set slightly, preventing it from being too runny and making it easier to serve. Dive in and enjoy this comforting, homemade meal!
Expert Tips for Your Best Cast Iron Chicken Pot Pie
Achieve perfection with your skillet chicken pot pie by keeping these handy tips in mind:
- No Cast Iron Skillet? No Problem! While a cast iron skillet is ideal for its heat retention and oven-safe properties, you don’t *have* to own one to make this delicious recipe. Simply prepare the chicken pot pie filling in any large skillet you have on hand, following the stovetop instructions. If your skillet isn’t ovenproof, transfer the cooked filling into a suitable oven-safe baking dish (an 8×8-inch or 9×9-inch dish works perfectly). Layer the canned biscuits on top and bake as directed. You might have one extra dish to wash, but the delicious result will be worth it!
- Biscuit Perfection – Canned vs. Homemade: For this recipe, I highly recommend sticking with extra flaky canned biscuits. They consistently provide a specific light and airy texture that pairs wonderfully with the rich filling, and they are incredibly convenient. While you *could* make your own biscuits, I haven’t specifically tested this recipe with homemade versions. However, if you’re inclined to bake from scratch, my Small Batch Buttermilk Biscuits should yield just the right amount and a fantastic homemade flavor, though the texture might be denser.
- Protein Power-Ups: Feel free to customize your cast iron pot pie with other cooked proteins! Leftover turkey is a fantastic substitute for chicken, especially after holidays. You could also transform this into a beef pot pie by using cooked, shredded beef, or even a vegetarian version by incorporating a can of rinsed and drained cannellini beans or lentils for a hearty plant-based option. Adjust cooking times for any raw proteins as needed.
- Vegetable Variations: For even quicker prep, consider using a store-bought mirepoix mix (pre-diced carrots, celery, and onion). You’ll need about 3-3½ cups of total vegetables. Don’t be afraid to experiment with other vegetables you enjoy or have on hand. Bell peppers, sliced mushrooms, corn, or even diced potatoes (add them earlier with the mirepoix to ensure they cook through) would make delicious additions.
- Dairy Swaps for Creaminess: If you don’t have half-and-half, you can easily make your own by mixing equal parts whole milk and heavy cream. It’s crucial, however, to avoid using anything less than whole milk. Skim or low-fat milk will result in a much thinner and less rich pot pie filling that won’t have the desired luxurious texture.
- The Bacon Advantage: For those who believe bacon makes everything better, you’re in for a treat! Cook 4-6 strips of bacon in your cast iron skillet first until crispy. Remove the bacon, crumble it, and set aside. Leave the rendered bacon grease in the skillet to cook your mirepoix. This infuses the entire dish with a smoky, savory depth. Add the crumbled bacon back into the pot pie when you stir in the chicken and peas.
- Serving Suggestions: This skillet chicken pot pie is a complete meal on its own, but it pairs wonderfully with a simple side salad dressed with a light vinaigrette to cut through the richness. A slice of crusty bread or some extra buttered rolls would also be perfect for soaking up every last bit of that delicious, creamy sauce.
Make Ahead, Storing, and Freezing Your Chicken Pot Pie
Planning ahead and managing leftovers is easy with this versatile recipe:
- Make Ahead: This dish truly shines on the day it’s made, especially when the biscuits are fresh, hot, and perfectly flaky right out of the oven. As time passes, the biscuits will naturally soften. However, you can absolutely prepare the creamy filling in advance! Cook the filling as directed, then allow it to cool completely before transferring it to an airtight container. Store it in the refrigerator for 1-2 days. When you’re ready to bake, gently warm the filling on the stovetop or in the microwave until it’s hot. If the filling appears too thick after reheating, gradually stir in a tablespoon of water or milk at a time until it reaches your desired consistency. Then, top with raw biscuits and bake as normal.
- Storing Leftovers: Any leftover cast iron skillet chicken pot pie should be stored in the refrigerator. Cover the skillet tightly with its lid or aluminum foil, or transfer the leftovers into an airtight container. It will keep well for 2-3 days. Be aware that the biscuits will continue to soften as they sit in the fridge. For best results, try to keep the biscuits on top of the filling to minimize sogginess. Reheat individual portions in the microwave or a warm oven until heated through.
- Freezing for Later: This pot pie is also freezer-friendly!
- Baked Leftovers: You can freeze fully baked leftovers in an airtight container for up to 3 months. Always ensure the pot pie has cooled completely to room temperature before freezing to prevent ice crystal formation. When reheating, thaw overnight in the fridge and then warm in the oven.
- Filling Only: For the best texture, I recommend freezing the filling separately from the raw biscuits. Prepare the filling as instructed, cool it completely, and then store it in an airtight container or a heavy-duty ziptop freezer bag for up to 3 months. When ready to enjoy, thaw the filling in the refrigerator. Warm it on the stovetop, then pour it into your skillet or oven-safe dish, top with fresh canned biscuits, and bake as directed. Freezing the filling and baking with fresh biscuits will yield the most satisfying results for the topping. Do NOT freeze the filling with raw biscuits on top, as the biscuits will become soggy and not cook properly when thawed and baked.

Frequently Asked Questions About Cast Iron Chicken Pot Pie
Despite the name, you absolutely don’t *have* to make this delicious chicken pot pie in a cast iron skillet! Simply cook the flavorful filling as directed on your stovetop using any large skillet. Once the filling is ready, transfer it to a suitable oven-safe baking dish (an 8×8-inch or 9×9-inch dish will work perfectly). Layer the canned biscuits on top, brush with herb butter, and bake as directed. The only minor downside to this method is one additional dish to wash, but the comfort food experience remains just as delightful!
Yes, this skillet chicken pot pie can be frozen, with a couple of important considerations for optimal results. You can freeze the fully cooked chicken pot pie with biscuits on top. Allow it to cool completely to room temperature, then transfer it to an airtight freezer-safe container and freeze for up to 3 months. However, for the best biscuit texture, I highly recommend freezing the *filling* separately. Prepare the filling as usual, cool completely, and store it in an airtight container or freezer bag for up to 3 months. When ready to serve, thaw the filling, gently reheat it on the stovetop, then pour it into your baking dish or skillet, top with fresh, raw canned biscuits, and bake. Do NOT freeze the raw filling with biscuits already placed on top, as the biscuits tend to become soggy and don’t bake well after thawing.
The exact origins of the term “pot pie” are a bit obscure, but food historians suggest that the phrase likely originated from the method of cooking. Traditionally, these savory pies were often cooked and served directly in a pot or a deep, lidded vessel, rather than a flat pie dish. The “pie” part refers to the delicious crust (or in our case, biscuit topping) that covers a savory filling, much like a sweet dessert pie.
More Cozy Comfort Food Recipes to Love
If you’re looking for more delicious and comforting meals, explore these other tried-and-true recipes:
- Sausage Ragu
- Creamy Tomato Tortellini Soup
- Instant Pot Ground Beef Stroganoff
- Cheesy Broccoli Potato Soup
- Chickpea and Spinach Curry
Did you make this recipe? I’d love to hear about it! Pleaseleave a star rating and review or scroll below the recipe card and do so there.
Stay up-to-date by following us on Instagram, TikTok, YouTube, Facebook, and Pinterest.

Print
SaveSaved!
Review
Cast Iron Chicken Pot Pie
Ingredients
- 2 cups rotisserie chicken – shredded and/or chopped
- 2 tablespoons unsalted butter
- 1 medium yellow onion – finely diced (about 1 1/2 cups)
- 3 celery ribs – diced
- 3 medium carrots – peeled and diced
- 2 teaspoons garlic – minced
- 1/4 cup all-purpose flour
- 1 cup chicken broth
- 2 3/4 cups half and half – or whole milk
- 2 teaspoons fresh thyme leaves – minced
- 1 teaspoon fresh sage – minced
- 1 teaspoon fresh rosemary – minced
- 1 cup frozen peas
- kosher salt – to taste
- black pepper – to taste
Biscuit topping
- 16.3 oz extra flaky biscuits
- 2 tablespoons butter – melted
- 2 tablespoons fresh herbs – (thyme, sage, rosemary) finely chopped
Equipment
-
12 inch cast iron skillet, with lid
Instructions
-
Preheat oven to 375°F (190°C). In a 12-inch cast iron skillet set over medium heat, melt 2 tablespoons of unsalted butter. Add the finely diced onion, diced carrots, and diced celery. Cook, stirring occasionally, until the onion becomes translucent and the vegetables begin to soften, about 4-6 minutes. Add the minced garlic and cook for an additional minute until fragrant. Stir in ¼ cup of all-purpose flour and cook for one minute, stirring constantly, to create a smooth roux. Slowly pour in 1 cup of chicken broth, whisking continuously to prevent lumps. Then, whisk in 2¾ cups of half and half (or whole milk), along with 2 teaspoons of minced fresh thyme leaves, 1 teaspoon of minced fresh sage, and 1 teaspoon of minced fresh rosemary. Season with kosher salt and black pepper to taste. Bring the mixture to a gentle simmer and cook for 4-5 minutes, or until the sauce has thickened slightly to a creamy consistency.
-
Remove the skillet from the heat. Stir the 2 cups of shredded or chopped cooked chicken and 1 cup of frozen peas into the pot pie filling until well combined.
-
Arrange the uncooked canned biscuits (such as extra flaky biscuits) evenly over the top of the chicken pot pie filling in the skillet. In a small bowl, combine the 2 tablespoons of melted butter with 2 tablespoons of finely chopped fresh herbs (thyme, sage, rosemary). Use a pastry brush or spoon to generously spread this herb butter mixture over the top of each biscuit.
-
Carefully transfer the skillet to your preheated oven and bake for 20-25 minutes, or until the biscuits are golden brown, puffed up, and thoroughly cooked through. Remove from the oven and let the cast iron chicken pot pie cool on the stovetop for at least 5 minutes before serving to allow the filling to set. Enjoy your delicious, homemade comfort food!
Nutrition
Recipe adapted from America’s Test Kitchen.
