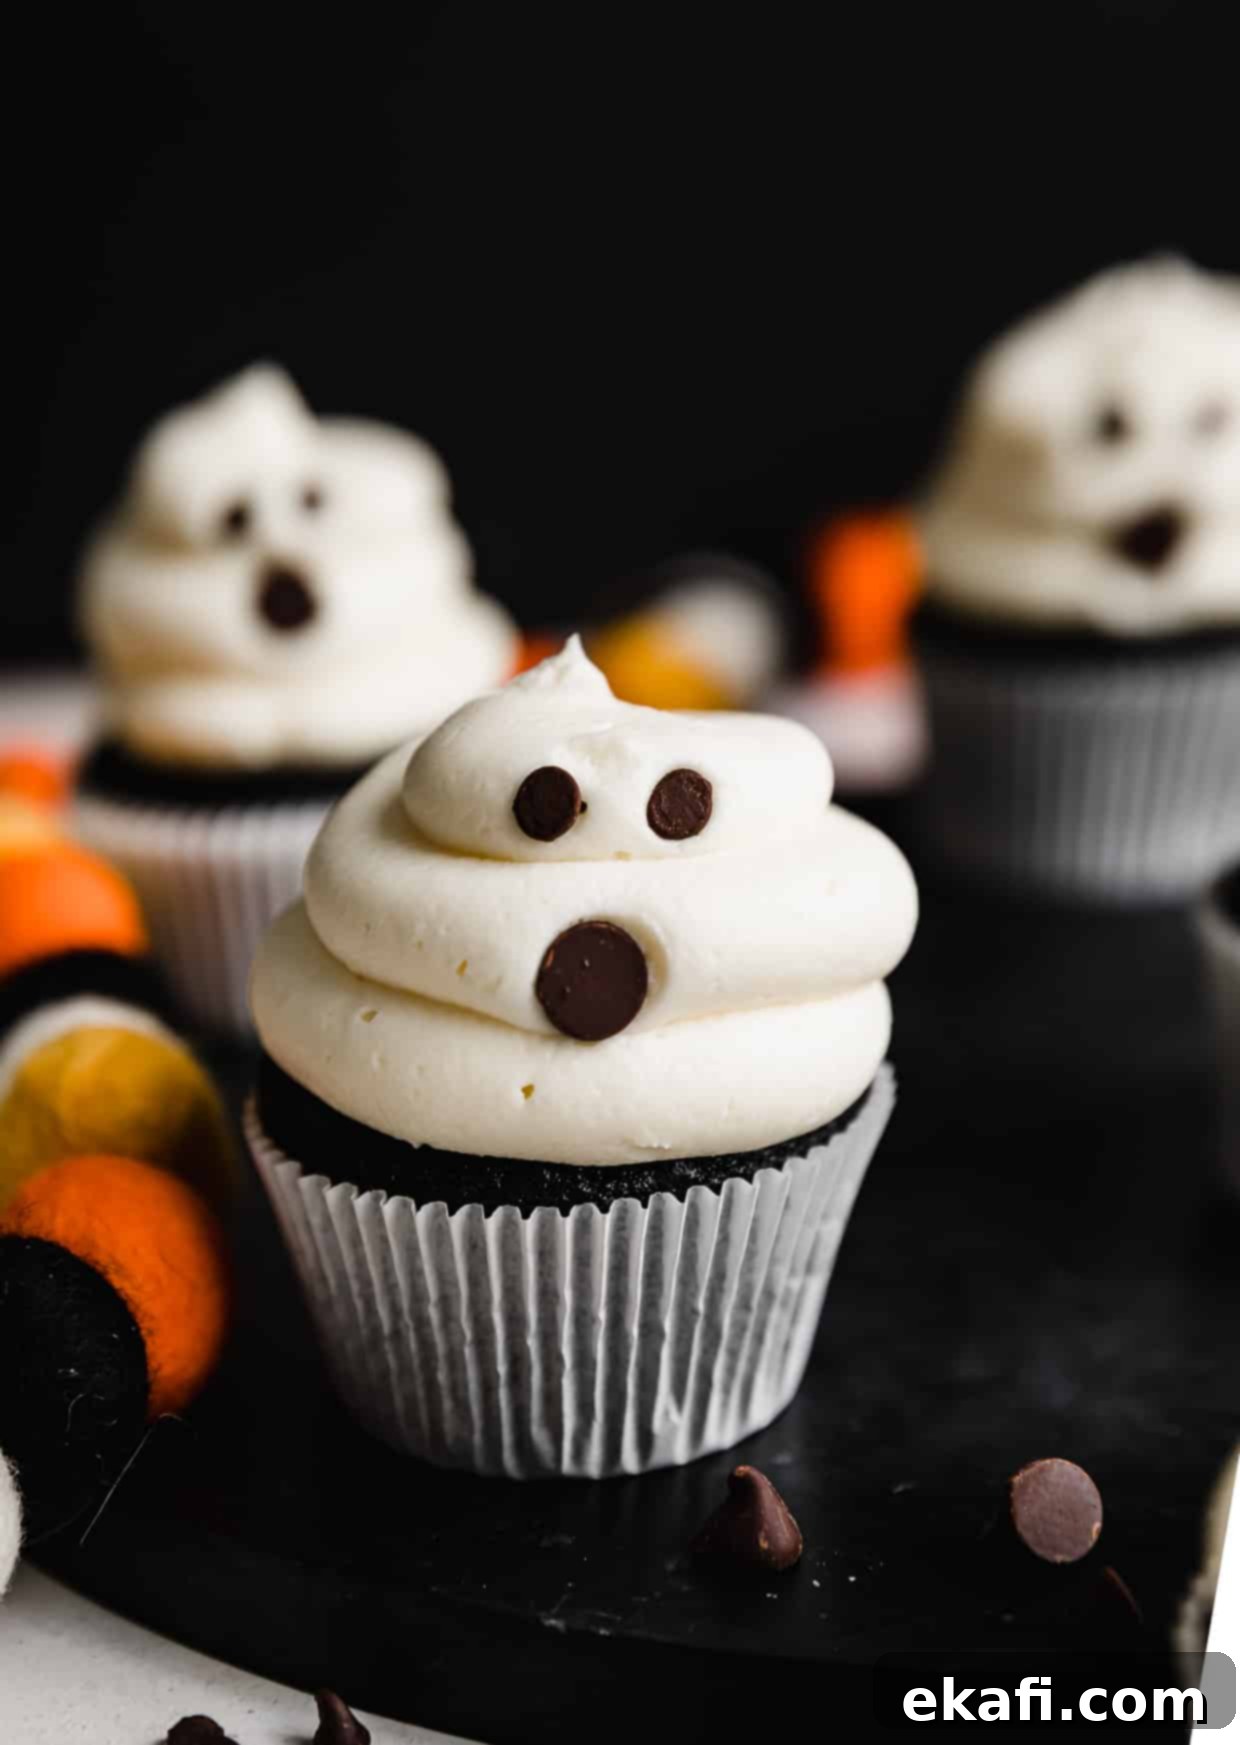
Spooktacular & Easy Ghost Cupcakes: Your Ultimate Halloween Party Treat Recipe
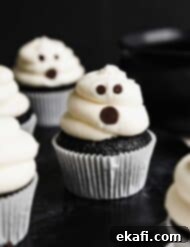
Get ready to enchant your taste buds and impress your guests this Halloween with these irresistibly Black Velvet Ghost Cupcakes! These aren’t just any spooky treat; they’re deliciously moist, dramatically dark, and topped with a light, fluffy Whipped Cream Frosting that gets its amazing stability and subtle sweetness from instant pudding. Transforming them into adorable, ghoulish delights is as simple as adding mini and regular chocolate chips for expressive eyes and mouths. These Halloween ghost cupcakes are guaranteed to be the star of any party, delighting friends and family alike with their charming appearance and incredible flavor.
Planning a full spread of Halloween goodies? Don’t stop at these delightful ghosts! Complete your festive menu with other spooky treats like our eerie Halloween Dirt Cups, a magical Polyjuice Potion, and some delightfully savory Mummy Hot Dogs. Your Halloween gathering will be an unforgettable feast for the eyes and the palate!
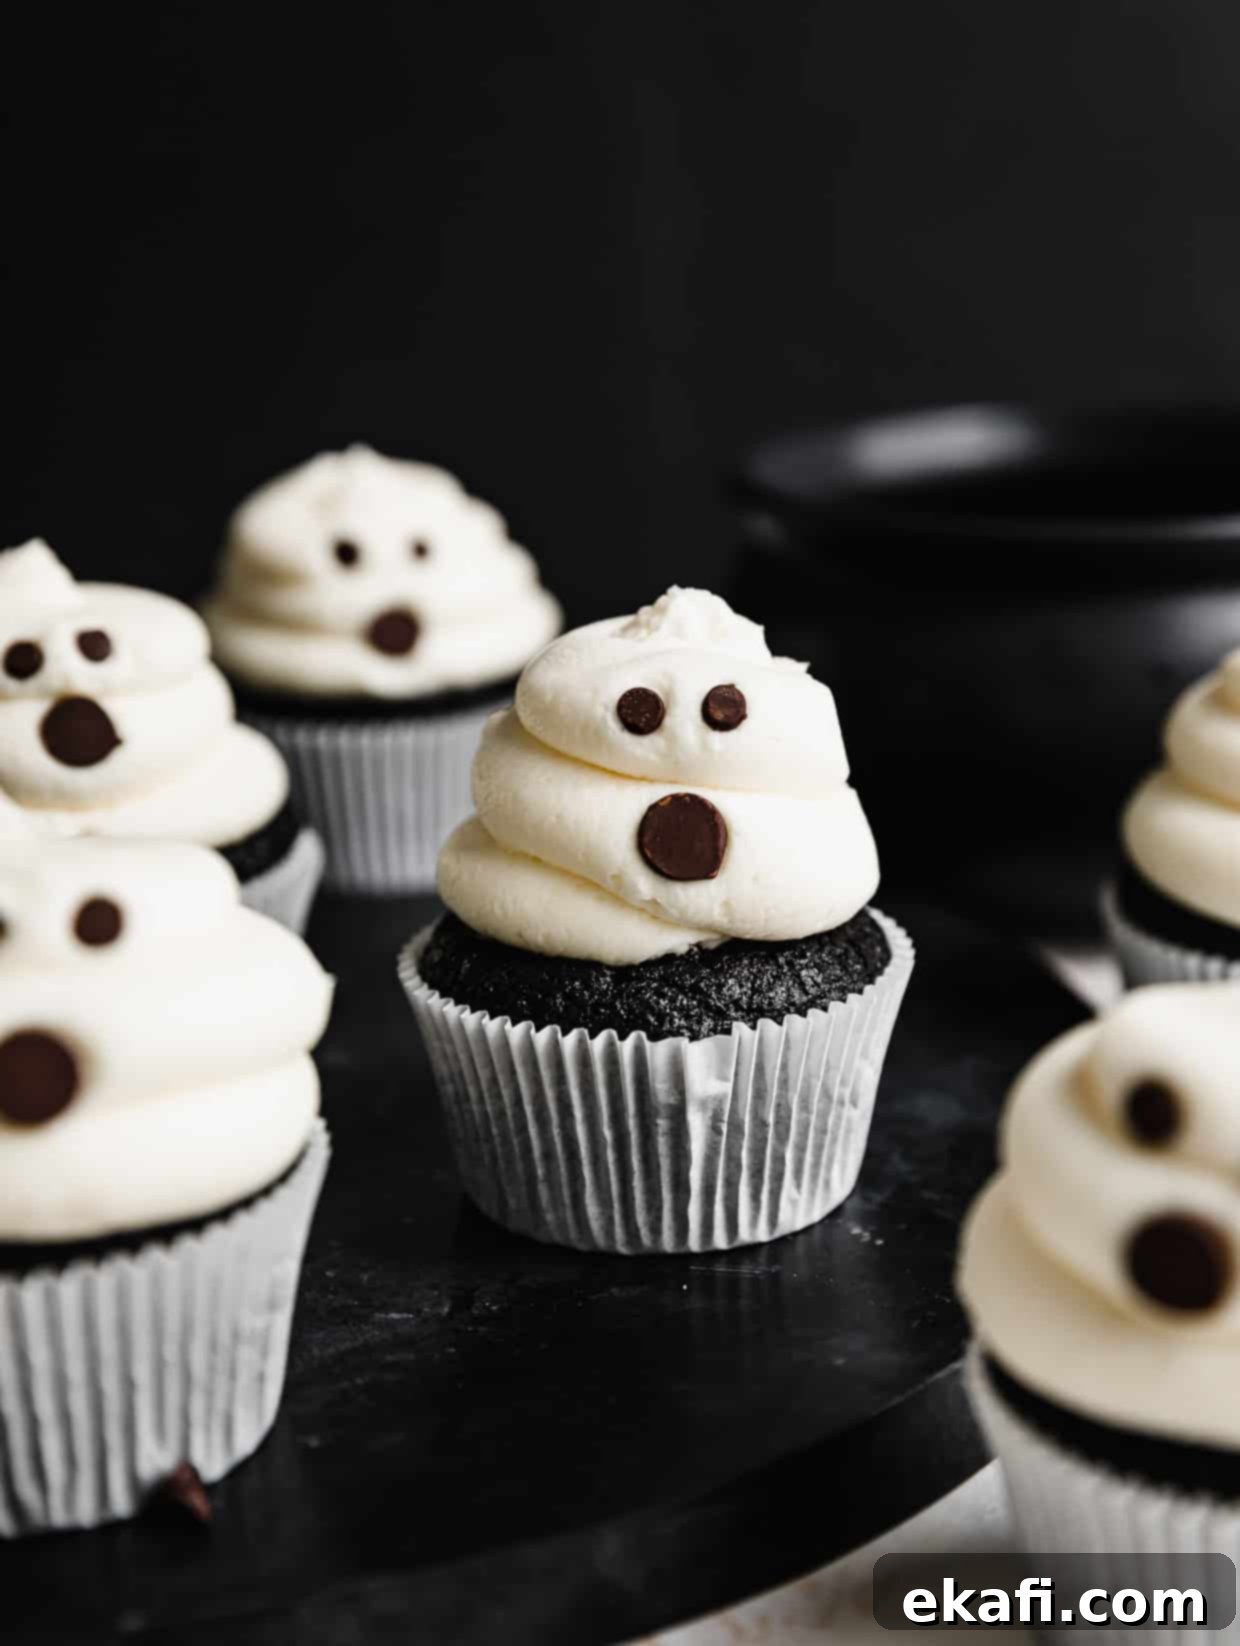
Why These Ghost Cupcakes Will Be Your New Halloween Favorite
Creating memorable Halloween treats doesn’t have to be complicated. This ghost cupcake recipe stands out for several reasons, making it an ideal choice for both seasoned bakers and beginners looking to add a touch of spooky fun to their celebrations.
- Effortlessly Spooky & Easy Halloween Ghost Cupcake Recipe: Forget about elaborate fondant work or searching for specialty candy eyeballs! This recipe makes decorating simple and accessible. We start with a foundation of our incredibly moist Black Velvet Cupcakes, which provide the perfect dark backdrop for our ghostly figures. The magic happens with our homemade Whipped Cream Frosting and a few strategically placed chocolate chips – mini ones for the eyes and regular ones for the mouths. It’s a fool-proof method to achieve maximum spooky effect with minimal effort, allowing you to focus on the fun of Halloween!
- Light, Stable, and Perfectly Sweet Whipped Cream Frosting: Unlike many overly sweet frostings, our whipped cream frosting offers a delightful lightness that perfectly balances the rich cupcake base. The secret to its incredible texture and stability lies in the addition of instant pudding mix. This ingenious ingredient allows us to use significantly less powdered sugar (just 1/2 cup!) compared to traditional buttercream, resulting in a frosting that’s creamy, holds its shape beautifully for piping, and isn’t cloyingly sweet. It’s robust enough for a party but delicate enough to complement every bite.
- The Ultimate Halloween Party Treat: These ghost cupcakes are more than just dessert; they’re a centerpiece! The striking contrast of the deep black cupcakes against the pristine white frosting immediately evokes the classic Halloween aesthetic of ghosts haunting the night. They are guaranteed to be a conversation starter and a hit with guests of all ages. Whether you’re hosting a grand Halloween bash, a small family gathering, or preparing treats for a school party, these charming ghost cupcakes are the perfect festive indulgence that everyone will adore. Their delicious flavor and adorable appearance make them truly irresistible.
Essential Ingredient Notes for Perfect Ghost Cupcakes
Understanding the role of each ingredient is key to achieving the perfect texture and flavor for these delightful ghost cupcakes. Here’s a closer look at what you’ll need and why it matters:
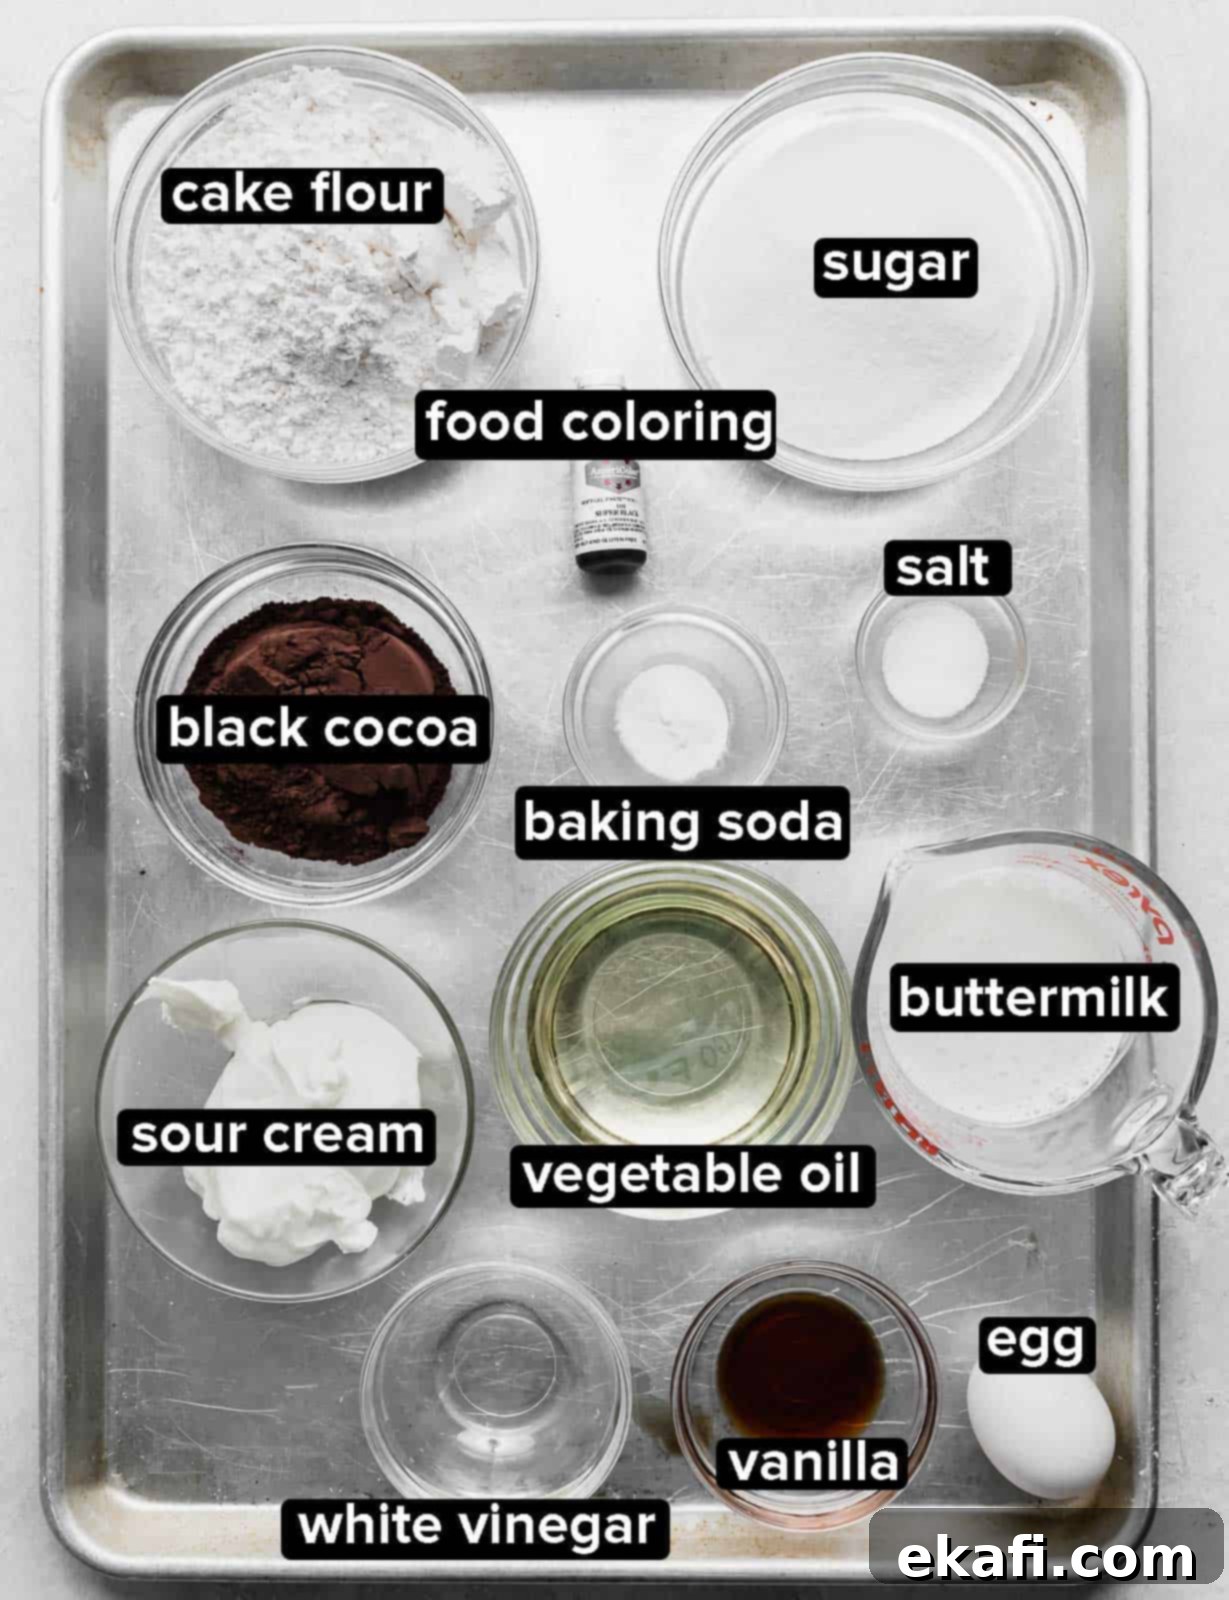
- Cake Flour: This is a non-negotiable ingredient for truly tender cupcakes. Cake flour is very finely milled and has a lower protein content than all-purpose flour. This results in less gluten development, which translates to a softer, more delicate crumb. While it might be tempting to substitute with all-purpose flour, we strongly recommend sticking to cake flour for the best “velvety” texture.
- Black Cocoa Powder: To achieve that striking, deep black color that makes these cupcakes so perfectly spooky, black cocoa powder is essential. Regular cocoa powder, even Dutch-processed, will not yield the same intense hue. Black cocoa powder is ultra-Dutch-processed, giving it a very dark color and a milder, less bitter chocolate flavor, reminiscent of Oreo cookies. This is crucial for the “black” in Black Velvet Cupcakes!
- Vegetable Oil: The use of oil instead of butter contributes significantly to the cupcakes’ moistness and soft texture. Oil remains liquid at room temperature, keeping the cake tender and preventing it from drying out quickly. This helps create a wonderfully rich and satisfying bite every time.
- Sour Cream: Full-fat sour cream is vital here. It adds rich moisture and a slight tang that enhances the depth of flavor in the black velvet base. The fat content in sour cream also helps create a wonderfully tender crumb, ensuring your cupcakes are never dry. Don’t opt for low-fat versions, as they won’t deliver the same moist results.
- Buttermilk: Just like sour cream, room temperature buttermilk is key. Buttermilk’s acidity reacts with the baking soda to create a lift and a tender, moist texture. Using it at room temperature ensures it emulsifies properly with the other ingredients, leading to a smoother batter and a better rise. If you don’t have buttermilk, you can make a quick substitute by adding 1 tablespoon of white vinegar or lemon juice to a liquid measuring cup, then filling the rest with milk to make 1/2 cup. Let it sit for 5-10 minutes until it slightly curdles.
- White Vinegar: A staple in any “velvet” cake recipe, white vinegar plays a crucial role in creating the characteristic velvety texture and flavor of these cupcakes. It reacts with the baking soda and buttermilk, contributing to the rise and tenderizing the crumb, while also subtly enhancing the rich black cocoa notes.
- Black Gel Food Coloring: While black cocoa powder gives a fantastic deep black, adding black gel food coloring to the wet ingredients will deepen the color even further for an intensely dramatic look. This step is entirely optional; if you don’t have it, your cupcakes will still be beautifully dark thanks to the black cocoa powder. Gel food coloring is preferred over liquid as it provides concentrated color without adding excess moisture.
- White Chocolate Instant Pudding Mix: This is the secret weapon for our incredible Whipped Cream Frosting! It’s crucial to use dry mix instant pudding, not the “cook and serve” kind or pre-made pudding. The gelatinized starch in instant pudding acts as a stabilizer, preventing the whipped cream from weeping or deflating, giving you a beautiful, pipeable, and wonderfully textured frosting that holds its ghost shape perfectly.
- Mini Chocolate Chips: These small chips are ideal for creating the cute, expressive eyes of your ghost cupcakes.
- Regular Chocolate Chips: These are used to form the open, spooky mouths of your adorable ghosts. The flat side out creates a neat, defined look.
Crafting Your Spooky Ghost Cupcakes: A Detailed Guide
Follow these detailed steps to create your perfectly moist black velvet cupcakes and light, fluffy ghost frosting. Precision and attention to detail will ensure your Halloween treats are a triumph!
Part 1: Making the Black Velvet Cupcakes
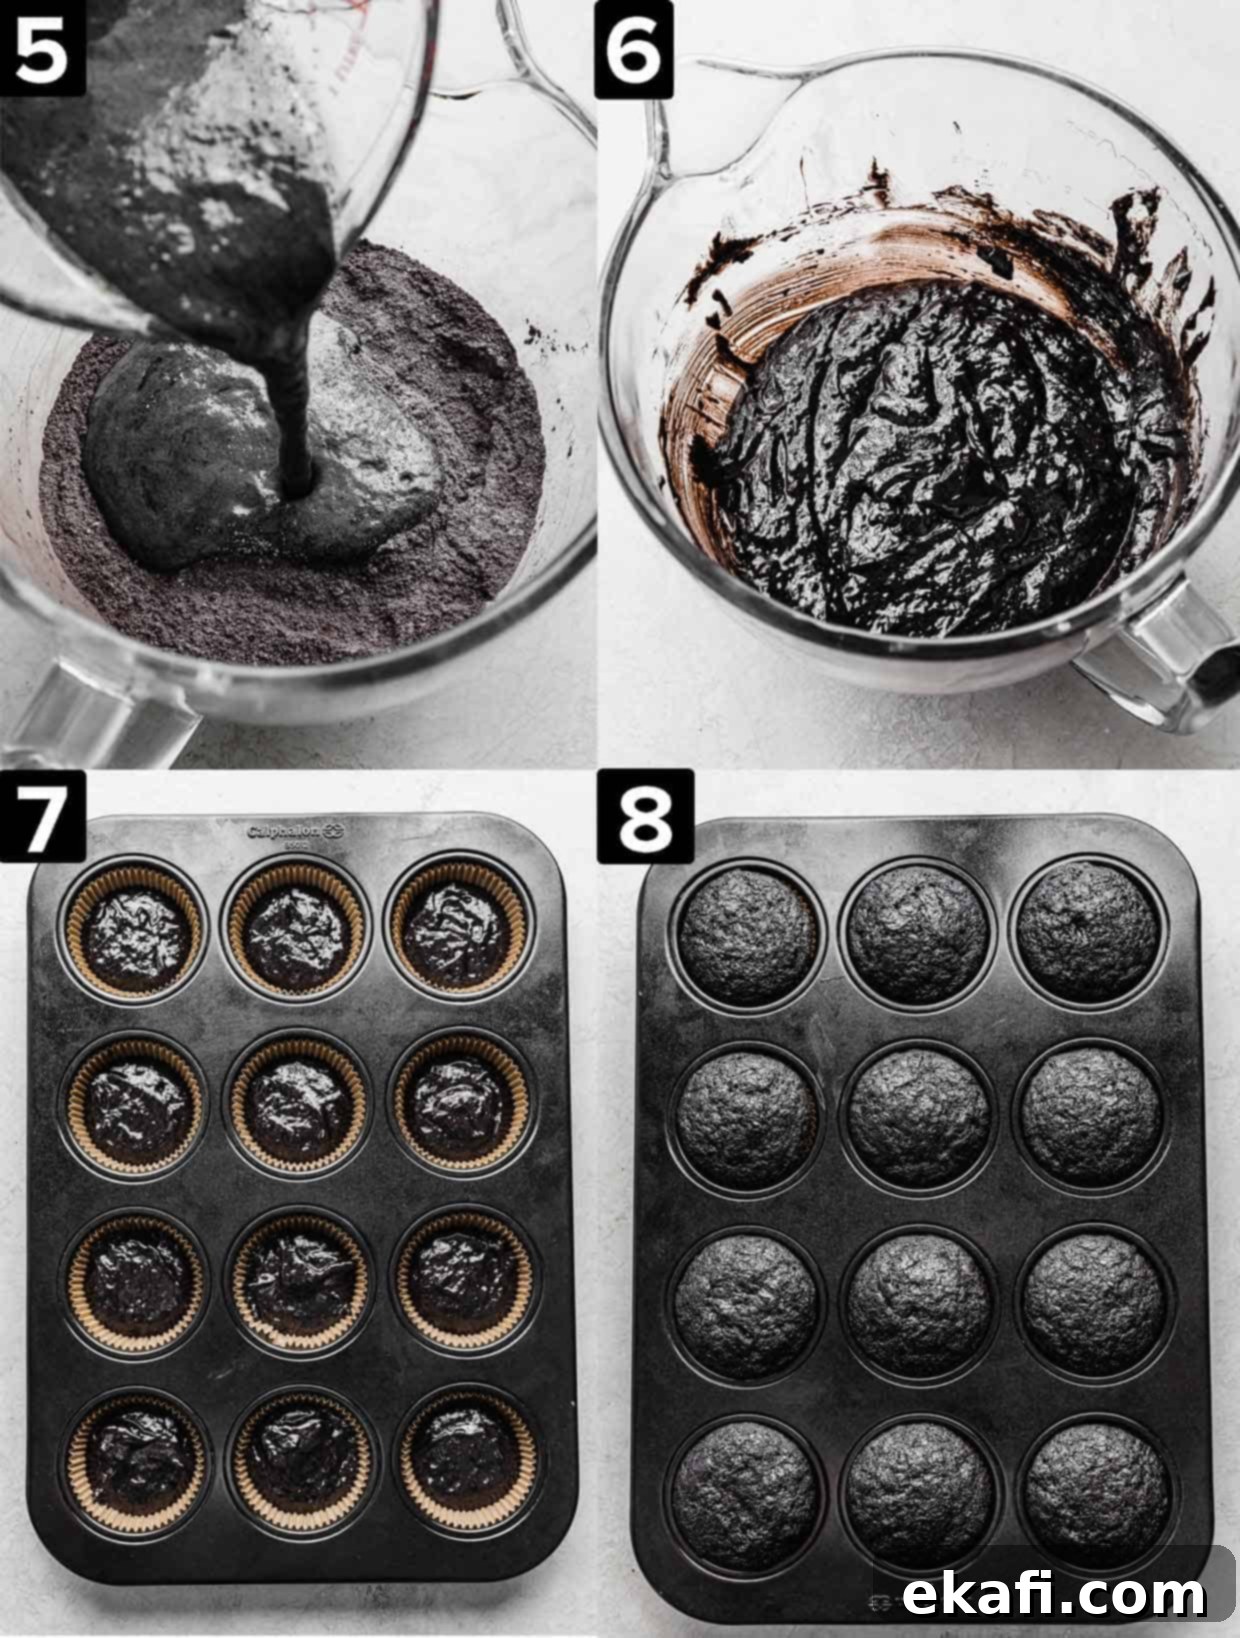
- Prepare Your Workspace and Dry Ingredients: Begin by preheating your oven to 350°F (175°C). Line a standard 12-cavity muffin pan with cupcake liners. In the large bowl of a stand mixer, combine the dry ingredients: cake flour, granulated sugar, black cocoa powder, baking soda, and salt. Whisk these together thoroughly until they are uniformly combined. This ensures even distribution of leavening agents and flavor.
- Whisk Together Wet Ingredients: In a separate medium-sized bowl or a large liquid measuring cup, whisk together the vegetable oil, room temperature buttermilk, full-fat sour cream, white vinegar, large egg, vanilla extract, and black gel food coloring (if you choose to use it for an extra deep black hue). Whisk until all these wet ingredients are thoroughly combined and smooth.
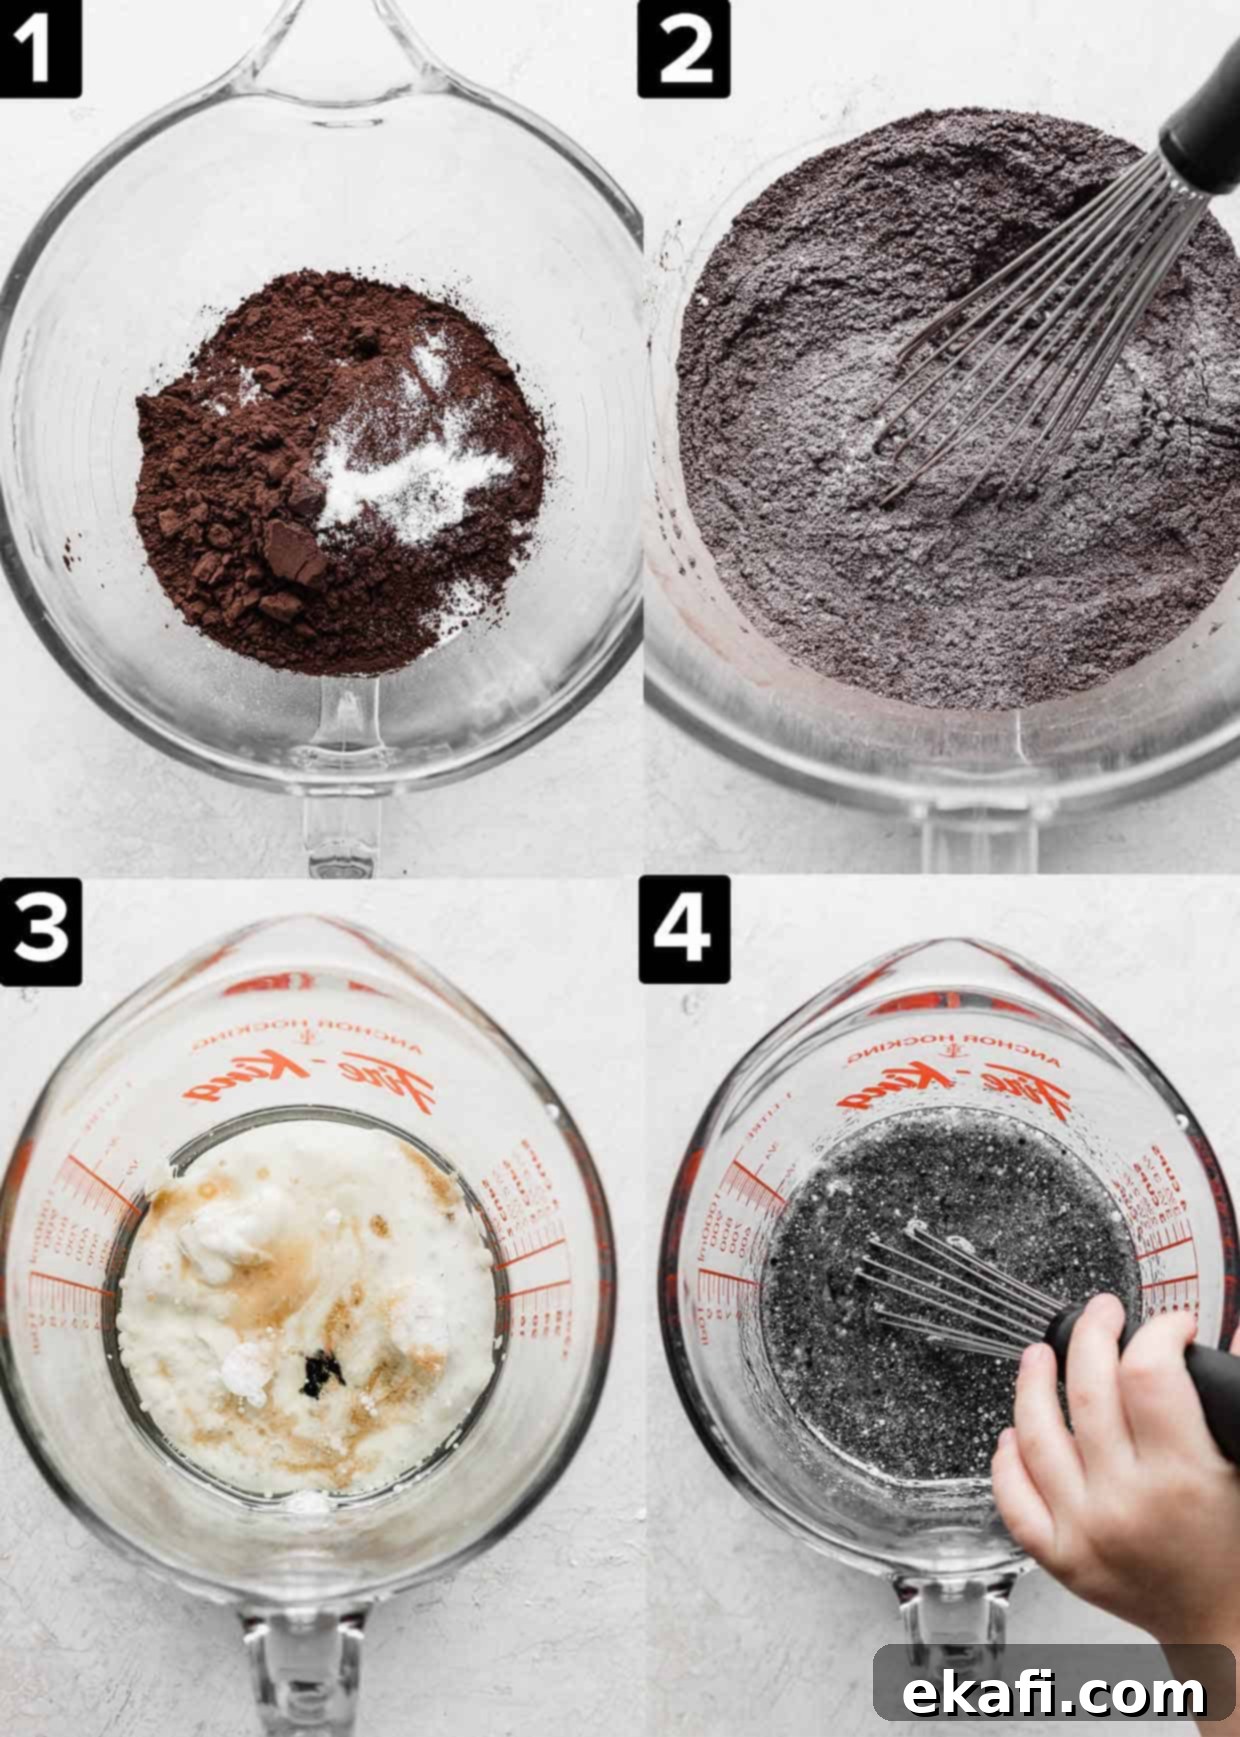
- Combine Wet and Dry Ingredients: With your stand mixer fitted with the paddle attachment, gradually add the wet ingredient mixture into the bowl of dry ingredients. Mix on medium-low speed until the ingredients are just combined. Be careful not to overmix the batter, as this can lead to tough cupcakes. A few small lumps are acceptable.
- Portion into Cupcake Liners: Using a cookie scoop (a size 20, 3-tablespoon scoop works perfectly for even sizing), carefully portion the black velvet cupcake batter into the prepared cupcake liners. It’s crucial to fill each liner only about 1/2 full. Overfilling will cause the cupcakes to spill over the tops of the liners and bake unevenly, losing their perfect shape.
- Bake the Black Cocoa Cupcakes: Place the muffin pan into your preheated oven. Bake for approximately 15-18 minutes. To test for doneness, insert a toothpick into the center of the middle cupcake; it should come out with a few moist crumbs attached, but no wet batter. Remove the cupcakes from the oven and let them cool in the pan for about 5 minutes before carefully transferring them to a wire rack to cool completely. This prevents them from becoming soggy and allows them to firm up.
Part 2: Preparing the Stabilized Whipped Cream Frosting
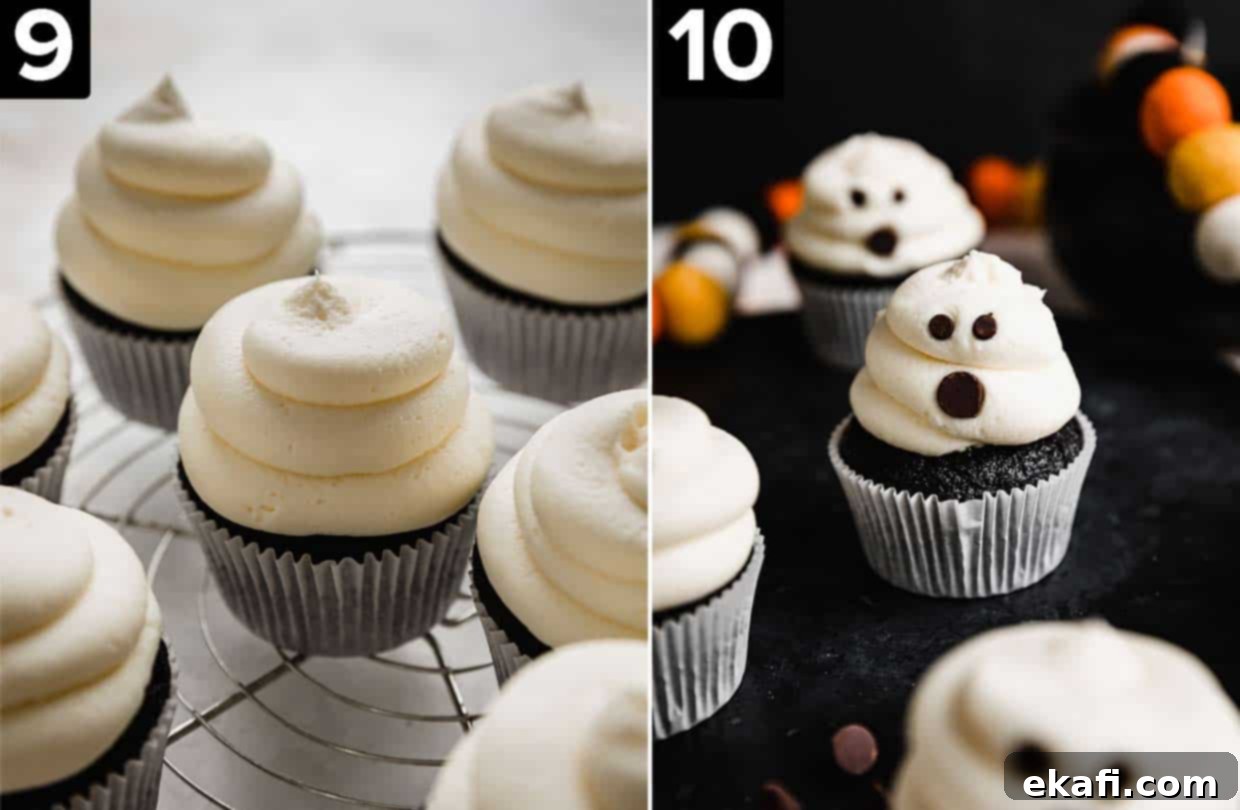
- Whip the Instant Pudding Whipped Cream Frosting: In a large, chilled bowl, combine the cold heavy cream, powdered sugar, and vanilla extract. Using an electric mixer (stand mixer or hand mixer), beat on medium-high speed until soft peaks begin to form. This means when you lift the beaters, the peaks will hold their shape but curl slightly at the top. Gradually add the dry instant pudding mix (remember, only the dry powder!). Continue beating on low to medium speed until the frosting becomes thick, creamy, and holds stiff peaks. If the frosting appears to “curdle” or look lumpy, don’t panic! This is a common effect as the pudding sets. To smooth it out, add a tablespoon of cold milk or heavy cream at a time, mixing well with a rubber spatula after each addition, until the frosting becomes smooth and pipeable. I typically find 3-4 tablespoons of milk does the trick for a perfectly smooth consistency.
Part 3: Assembling Your Adorable Ghost Cupcakes
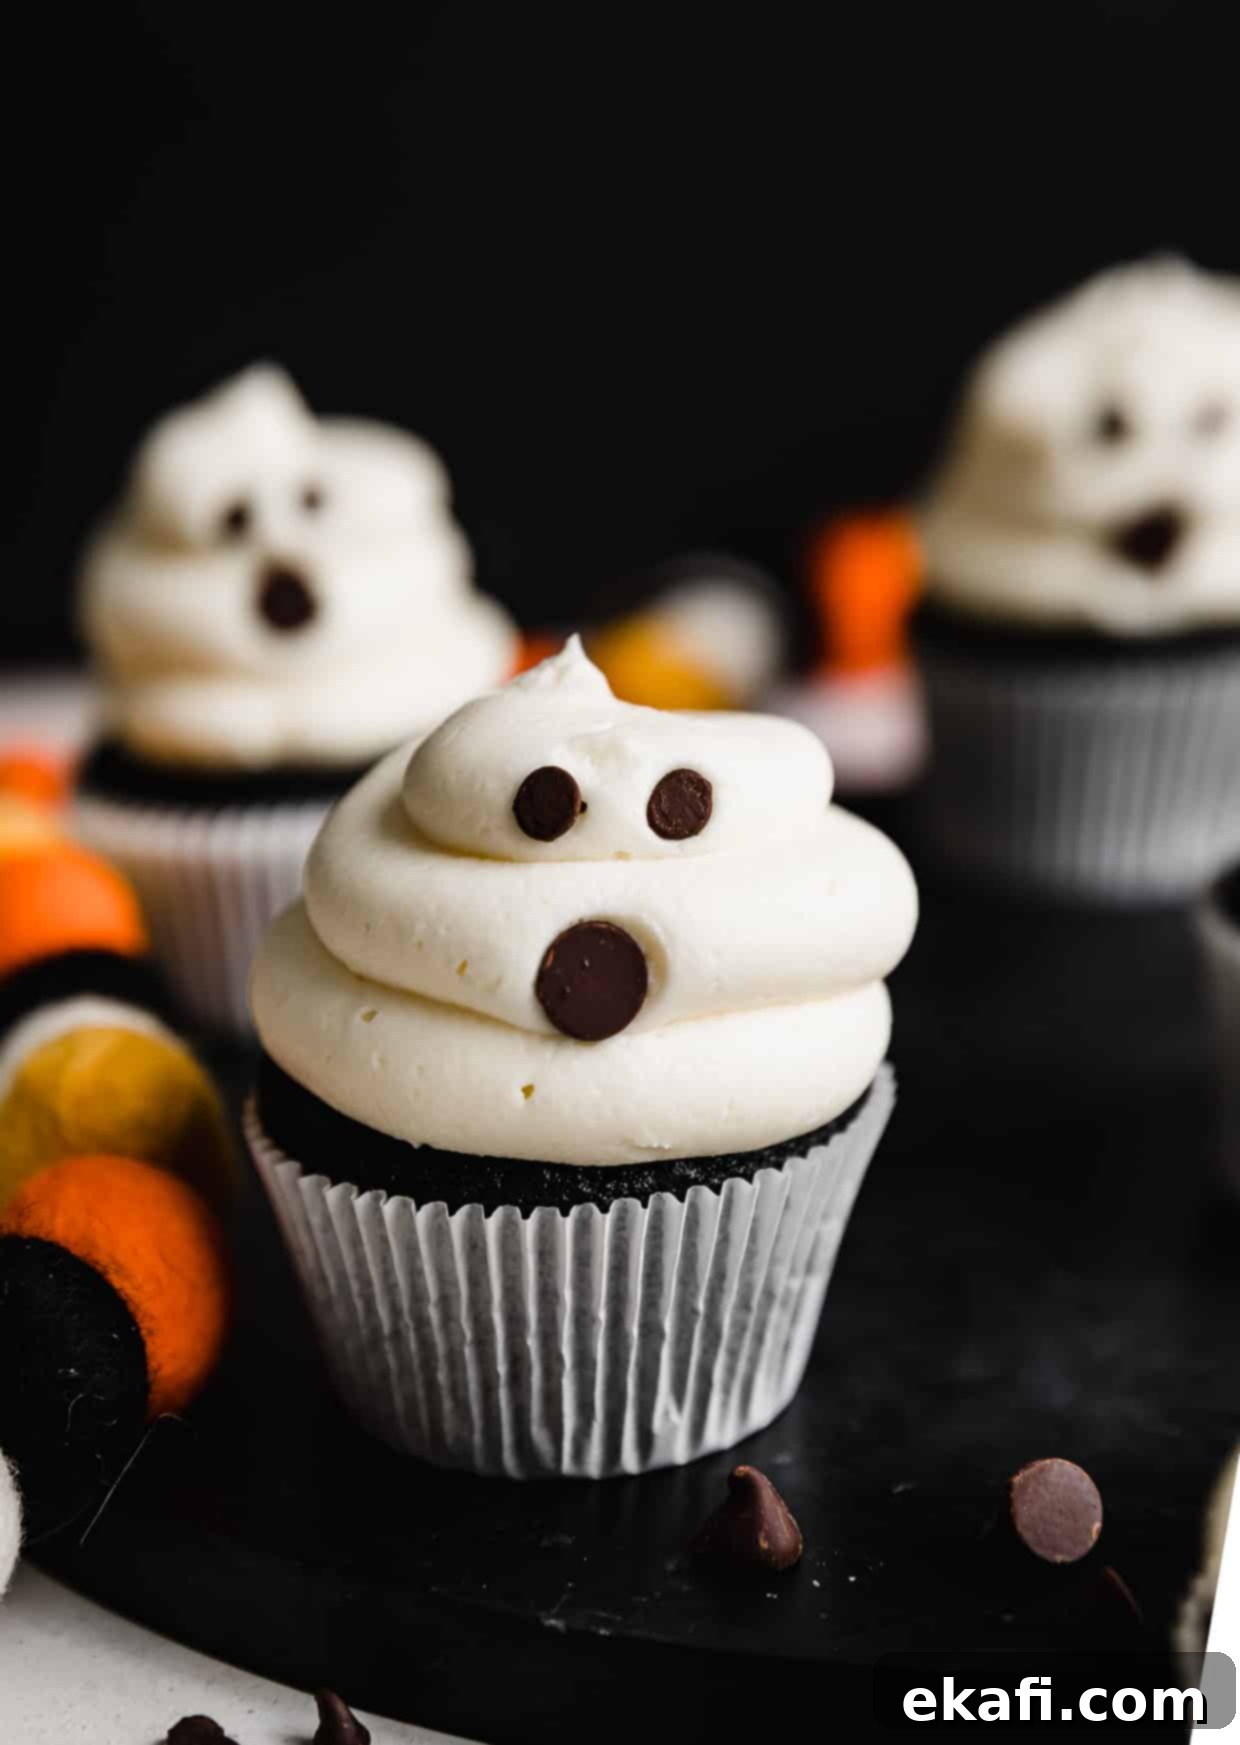
- Assemble and Decorate the Cupcakes: Once the cupcakes are completely cooled and your frosting is ready, it’s time to bring your ghosts to life! Transfer the pudding whipped cream frosting into a piping bag fitted with a large round tip (or simply snip off the end of the bag for a rustic look). Pipe a generous swirl of frosting on top of each cupcake, aiming for about 2-3 swirls to create a distinct ghost shape that tapers upwards. Next, carefully place a regular-sized chocolate chip in the middle swirl, with the flat side facing outwards, to create the ghost’s mouth. For the eyes, position two mini chocolate chips side-by-side on the top swirl, also with their flat sides facing out. Serve these adorable spooky ghosts immediately for the freshest taste, or store them in the fridge until your party begins.
Expert Tips for Ghost Cupcake Perfection
To ensure your ghost cupcakes turn out flawlessly delicious and adorably spooky every time, keep these expert tips in mind:
- Room Temperature Ingredients are a Must: For the best results, always ensure your wet ingredients like buttermilk, sour cream, and egg are at room temperature. This allows them to emulsify more effectively with the other ingredients, creating a smoother batter and promoting a better, more consistent rise in your cupcakes. Cold ingredients can cause the batter to seize and result in a denser texture.
- Don’t Fear the Curdled Frosting: If your whipped cream frosting appears to seize or look curdled after adding the instant pudding mix, do not worry! This is a completely normal reaction caused by the gelatinized starch in the pudding mix beginning to set. It’s actually a sign it’s working as intended. To easily fix this, simply add one tablespoon of cold milk or heavy cream at a time, mixing gently with a rubber spatula after each addition until the frosting becomes silky smooth and perfectly pipeable again. I typically find 3-4 tablespoons are sufficient to achieve the ideal consistency.
- Frosting Application Matters: This particular whipped cream frosting, with its delicate cream base and stabilizing pudding, is best suited for topping cupcakes, cakes, or cookies. It holds its shape beautifully when piped on top but is generally not recommended as a sturdy filling between cake layers, as it’s not as dense as a traditional buttercream or ganache.
- Get Creative with Decorations: While mini and regular chocolate chips are super convenient and effective for creating adorable ghost faces, feel free to get creative! You can use edible candy eyeballs for a more cartoonish look, small pieces of black licorice, or even edible markers to draw on the faces directly. Sprinkles can also add a fun touch.
- Vary Your Cupcake Base: While the black velvet cupcakes provide a stunning contrast, you can certainly adapt this ghost cupcake recipe using other cupcake flavors. A classic Chocolate Cupcake or even a vanilla base could work beautifully with the white whipped cream frosting for a slightly different aesthetic. The key is to have a sturdy, moist cupcake to support the frosting.
- Avoid Overmixing: When combining the wet and dry ingredients for your cupcakes, mix until just combined. Overmixing develops excess gluten, which can lead to tough, chewy cupcakes rather than light and tender ones.
- Cool Completely: Always allow your cupcakes to cool completely on a wire rack before frosting. Attempting to frost warm cupcakes will cause your beautiful whipped cream frosting to melt and slide right off, ruining your ghostly creations.
For those curious about the science behind cocoa, deepen your baking knowledge by reading my comprehensive posts on the Best Cocoa Powder for Baking and my specialized Black Cocoa Powder Guide. They cover everything you need to know about different types of cocoa powders, when to use them, and why, ensuring you achieve perfect results every time.
Make Ahead, Storing, and Freezing Tips for Convenience
These ghost Halloween cupcakes are perfect for making ahead, allowing you to reduce stress on party day. Here’s how to properly store and freeze them:
- Make Ahead Unfrosted Cupcakes: You can absolutely bake the black velvet cupcakes ahead of time! Once fully cooled, store any unfrosted baked cupcakes in an airtight container in the fridge for 2-3 days. This gives you a head start on your Halloween preparations.
- Freezing Unfrosted Cupcakes: For longer storage, unfrosted cupcakes can be frozen. Place cooled cupcakes in a single layer in an airtight freezer-safe container or a heavy-duty freezer bag. They will keep well in the freezer for 2-3 months. When ready to use, simply remove them and let them thaw overnight in the refrigerator before frosting.
- Storing Whipped Cream Frosting: The whipped cream frosting with pudding can be made ahead as well. Store it in an airtight container in the fridge for 3-4 days. If it stiffens too much, you can gently re-whip it with a splash of cold milk or cream until it reaches your desired consistency.
- Storing Assembled Ghost Cupcakes: Once frosted, these ghost cupcakes are best enjoyed fresh. However, if you have leftovers, store them in an airtight container in the refrigerator for 3-4 days. Due to the dairy in the whipped cream, refrigeration is essential. Ensure the container is large enough so the frosting doesn’t get squished.
For a deeper dive into preserving your baked goods, including detailed instructions on how to freeze cakes, cupcakes, buttercream, and even fully decorated creations, make sure to check out my comprehensive How to Store and Freeze Cakes guide!
Ghost Cupcake Recipe FAQs
While these ghost cupcakes are perfectly fine to sit out at room temperature for a short period, typically 1-2 hours while serving, it’s best to return them to the refrigerator afterwards. Due to the heavy cream in the frosting, prolonged exposure to room temperature can affect its stability and freshness. When stored properly in an airtight container in the fridge, they will last for 3-4 days.
Yes, absolutely! The instant pudding mix incorporated into this recipe acts as a fantastic stabilizer. This means our whipped cream frosting is much more resilient than traditional whipped cream. It won’t weep or melt easily, even in a warm room (though direct sunlight on a very hot day might challenge it, like most frosted desserts!). You can pipe it confidently knowing it will hold its beautiful ghost shape for your entire party.
If your whipped cream frosting isn’t setting up to a firm, pipeable consistency, the most common culprit is the type of pudding mix used. Double-check that you purchased “instant pudding mix” and not “cook and serve” pudding. Only instant pudding contains the special gelatinized starch that acts as a stabilizer, allowing the frosting to hold its shape and prevent weeping. If you used “cook and serve,” it simply won’t work for this recipe’s intended stability.
Absolutely! Adding a spooky surprise filling can elevate these ghost cupcakes even further. To do this, use a cupcake corer or a piping tip to carefully remove the center of each cooled cupcake. You can then fill the cavity with a vibrant red Raspberry Sauce for a “bloody” effect, a rich chocolate ganache, or even some gummy worms for an unexpected, eerie treat! Just be sure the filling isn’t too liquid to avoid making the cupcake soggy.
Discover More Spooktacular Halloween Treats
If you’re looking to expand your collection of holiday recipes, especially for the spooky season, here are some other fantastic Halloween treats from our kitchen that you’ll love:
- Pumpkin Juice
- Black Cocoa Brownies
- Halloween Crackers
- Halloween Oreo Balls
- Apple Pie Caramel Apples
- Halloween Spider Cookies
Did you make this recipe? We’d be absolutely thrilled to hear about your experience! Leave a star rating and review right here on the blog post, or scroll down to the recipe card to share your thoughts. Your feedback helps us and other bakers!
Don’t miss out on our latest delicious creations! Stay up-to-date by following us on Instagram, TikTok, YouTube, Facebook, and Pinterest. We love seeing what you’re baking!
Print
SaveSaved!
Review
Ghost Cupcakes
Ingredients
Black Cocoa Cupcakes
- 1 3/4 cups cake flour
- 1 1/4 cup granulated sugar
- 2/3 cup black cocoa powder
- 3/4 teaspoon baking soda
- 1/2 teaspoon salt
- 1/2 cup vegetable oil
- 1/2 cup sour cream – I used full fat sour cream
- 1/2 cup buttermilk – at room temperature
- 1 large egg
- 2 teaspoons vanilla extract
- 1/2 teaspoon white vinegar
- black gel food coloring – optional
Whipped Cream Frosting with Pudding
- 2 1/2 cups heavy cream – cold, plus more if needed (see directions)
- 1/2 cup powdered sugar
- 3.4 oz white chocolate INSTANT pudding – just the dry mix!
- 1/4 teaspoon vanilla extract
Assembly
- mini chocolate chips
- regular sized chocolate chips
Instructions
Black Cocoa Cupcakes
-
Make the Black Cocoa Cupcakes: Preheat the oven to 350°F (175°C). Line a standard 12-cavity muffin pan with cupcake liners and set aside.
-
In the bowl of a stand mixer, whisk together the cake flour, granulated sugar, black cocoa powder, baking soda, and salt until well combined.
-
In a separate medium-sized bowl or a large liquid measuring cup, whisk the vegetable oil, sour cream, buttermilk (at room temperature), egg, vanilla extract, white vinegar, and black food coloring (if you are using it). Whisk until thoroughly combined.
-
Add the wet ingredients mixture to the bowl of dry ingredients in the stand mixer (fitted with a paddle attachment). Mix on low speed until the ingredients are just combined, being careful not to overmix.
-
Portion the batter into the cupcake liners until each is about ½ full. (A size 20, 3-tablespoon cookie scoop works well for evenly portioning the batter). Bake for 15-18 minutes, or until a toothpick inserted into the center of a cupcake comes out with a few moist crumbs, but no wet batter.
-
Remove the cupcakes from the oven, let them cool in the muffin pan for 5 minutes, then carefully transfer them to a wire rack to cool completely before frosting.
Whipped Cream Frosting with Pudding
-
Make the Stabilized Whipped Cream Frosting: In a large, chilled bowl, combine the cold heavy cream, powdered sugar, and vanilla extract. Beat with an electric mixer until soft peaks form. Gradually add the dry instant pudding mix, then continue beating on low to medium speed until the frosting is thick, creamy, and holds its shape well. If the frosting appears curdled, it’s just the pudding setting. To fix this, add a tablespoon of cold milk or heavy cream to the frosting and stir it in using a rubber spatula. Continue adding a tablespoon at a time and mixing until the frosting is smooth and no longer curdled looking. I typically add an additional 3-4 tablespoons of milk to achieve the perfect consistency.
Assembly
-
Place the prepared whipped cream frosting into a piping bag (with a large round tip or simply a snipped end). Pipe a generous swirl of frosting on top of each cooled cupcake to create a ghost shape. Use the flat side of regular chocolate chips to form the ghost’s mouth, and mini chocolate chips (flat side out) for the eyes, placing them side-by-side on the top swirl. Serve immediately or store in the refrigerator.
Video
Notes
Curious about how to best preserve your delicious baked goods? My guide on How to Store and Freeze Cakes provides extensive information, applicable to cupcakes as well, including tips for storing and freezing with frosting.
Nutrition
