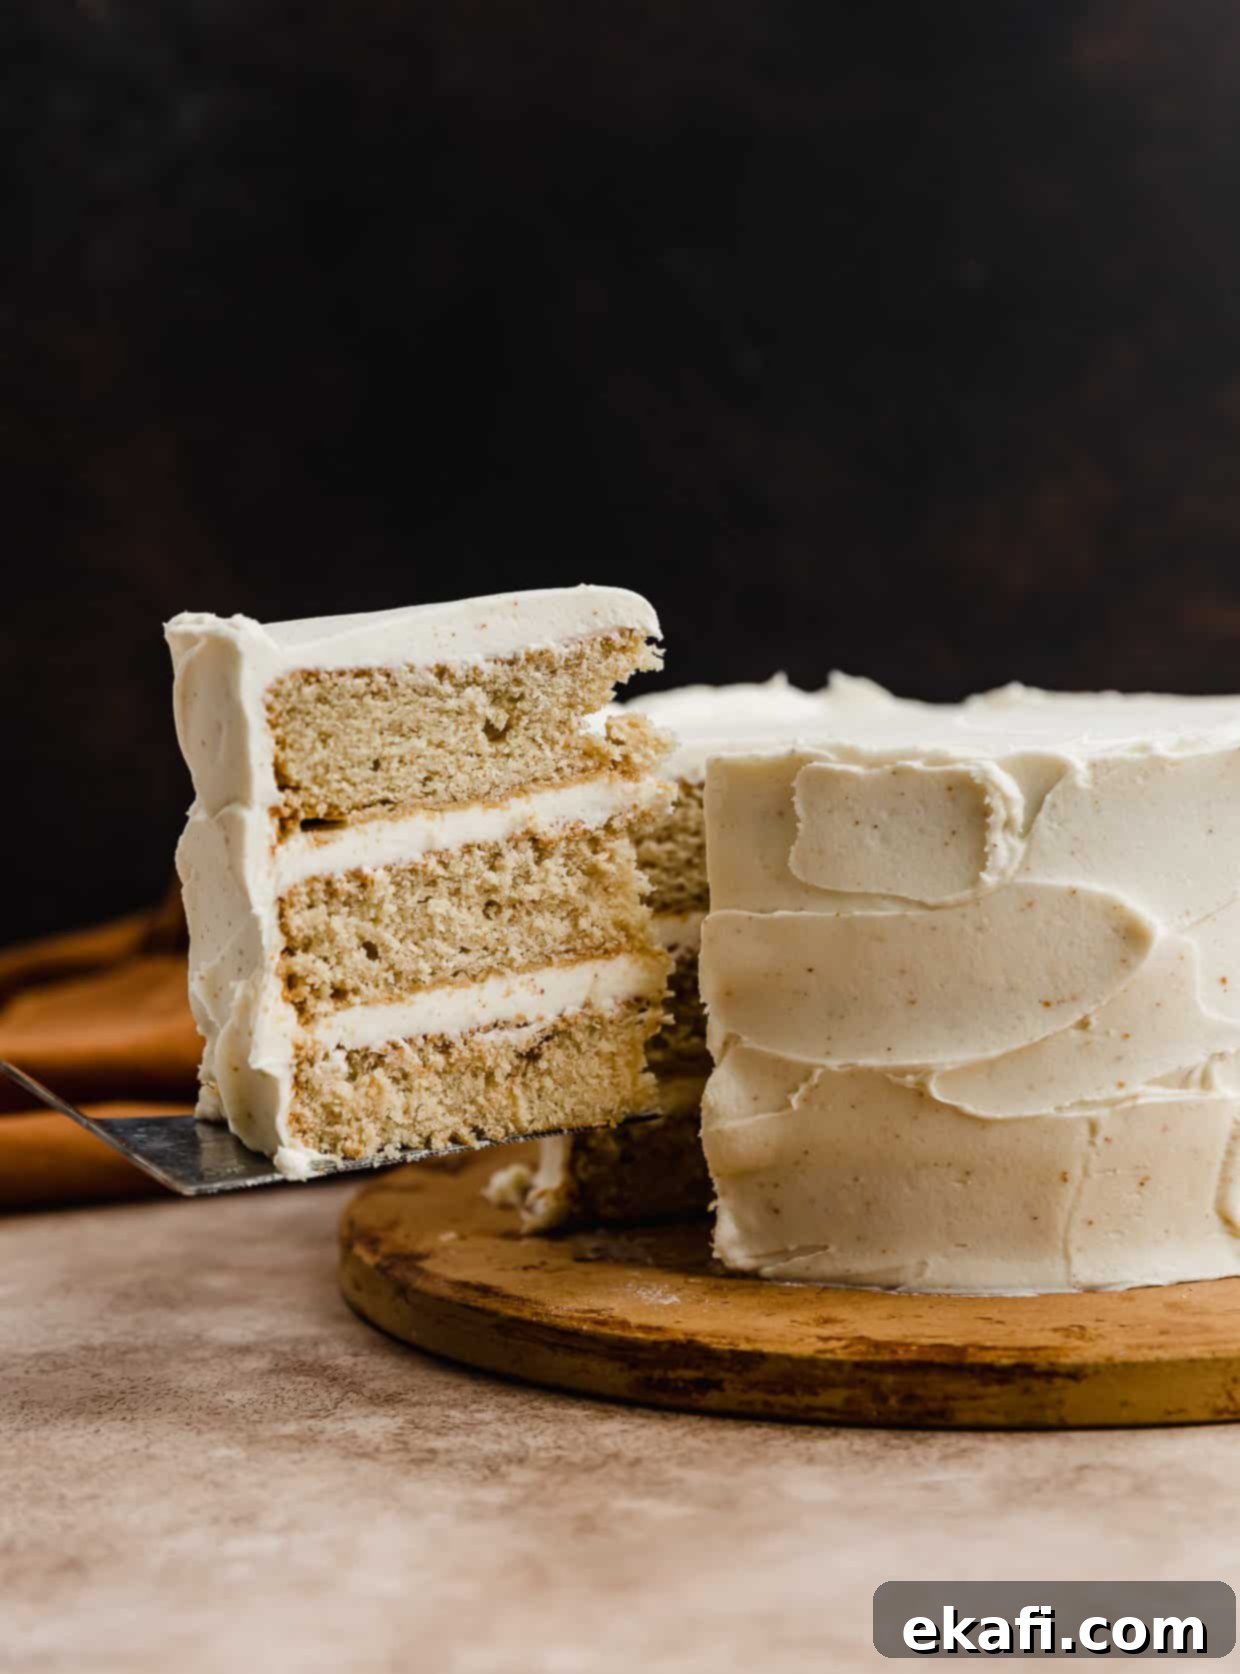
Indulge in the Best Brown Butter Cake: A Decadent, Nutty, and Moist Layer Cake Recipe
Prepare to elevate your baking experience with this extraordinary Brown Butter Cake. Crafted with the finest browned butter and rich dark brown sugar, this cake delivers an unparalleled depth of flavor that is both nutty and beautifully caramel-like. Each tender, moist slice is then generously enrobed in a creamy, irresistible Brown Butter Buttercream, transforming a simple dessert into an entirely new level of gourmet delight. The magical touch of browned butter truly makes every bite an experience to savor.
Browned butter, often referred to as ‘beurre noisette’, is a culinary game-changer, renowned for its ability to enhance the flavor of any dish, sweet or savory. It introduces a complex, toasty note that makes desserts taste infinitely better! It’s the secret ingredient behind many of my personal favorites, including my exquisite Butterscotch Cake, the delightful Cookie Dough Cake, and my famously chewy Brown Butter Chocolate Chip Cookies. Once you experience the rich, deep flavor brown butter imparts, you’ll want to use it in everything!
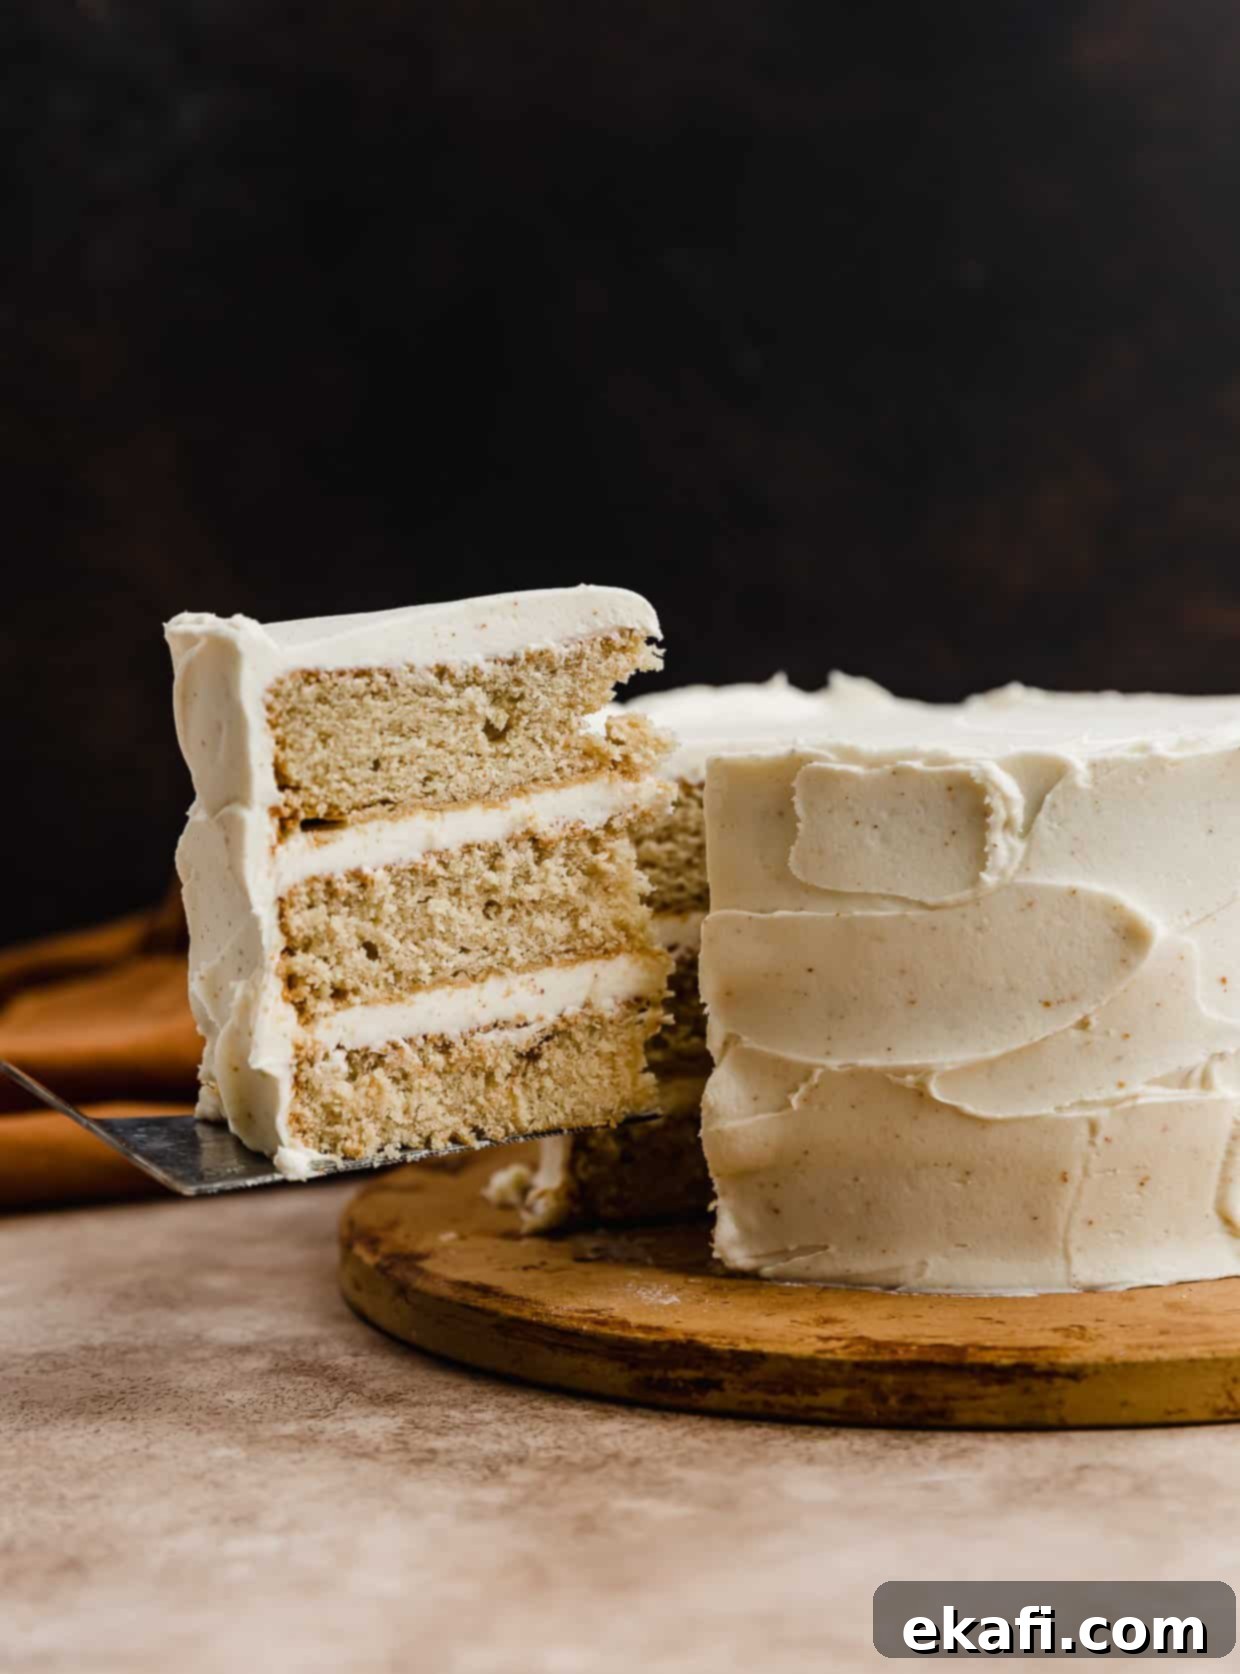
Why This Brown Butter Cake Recipe Works Wonders
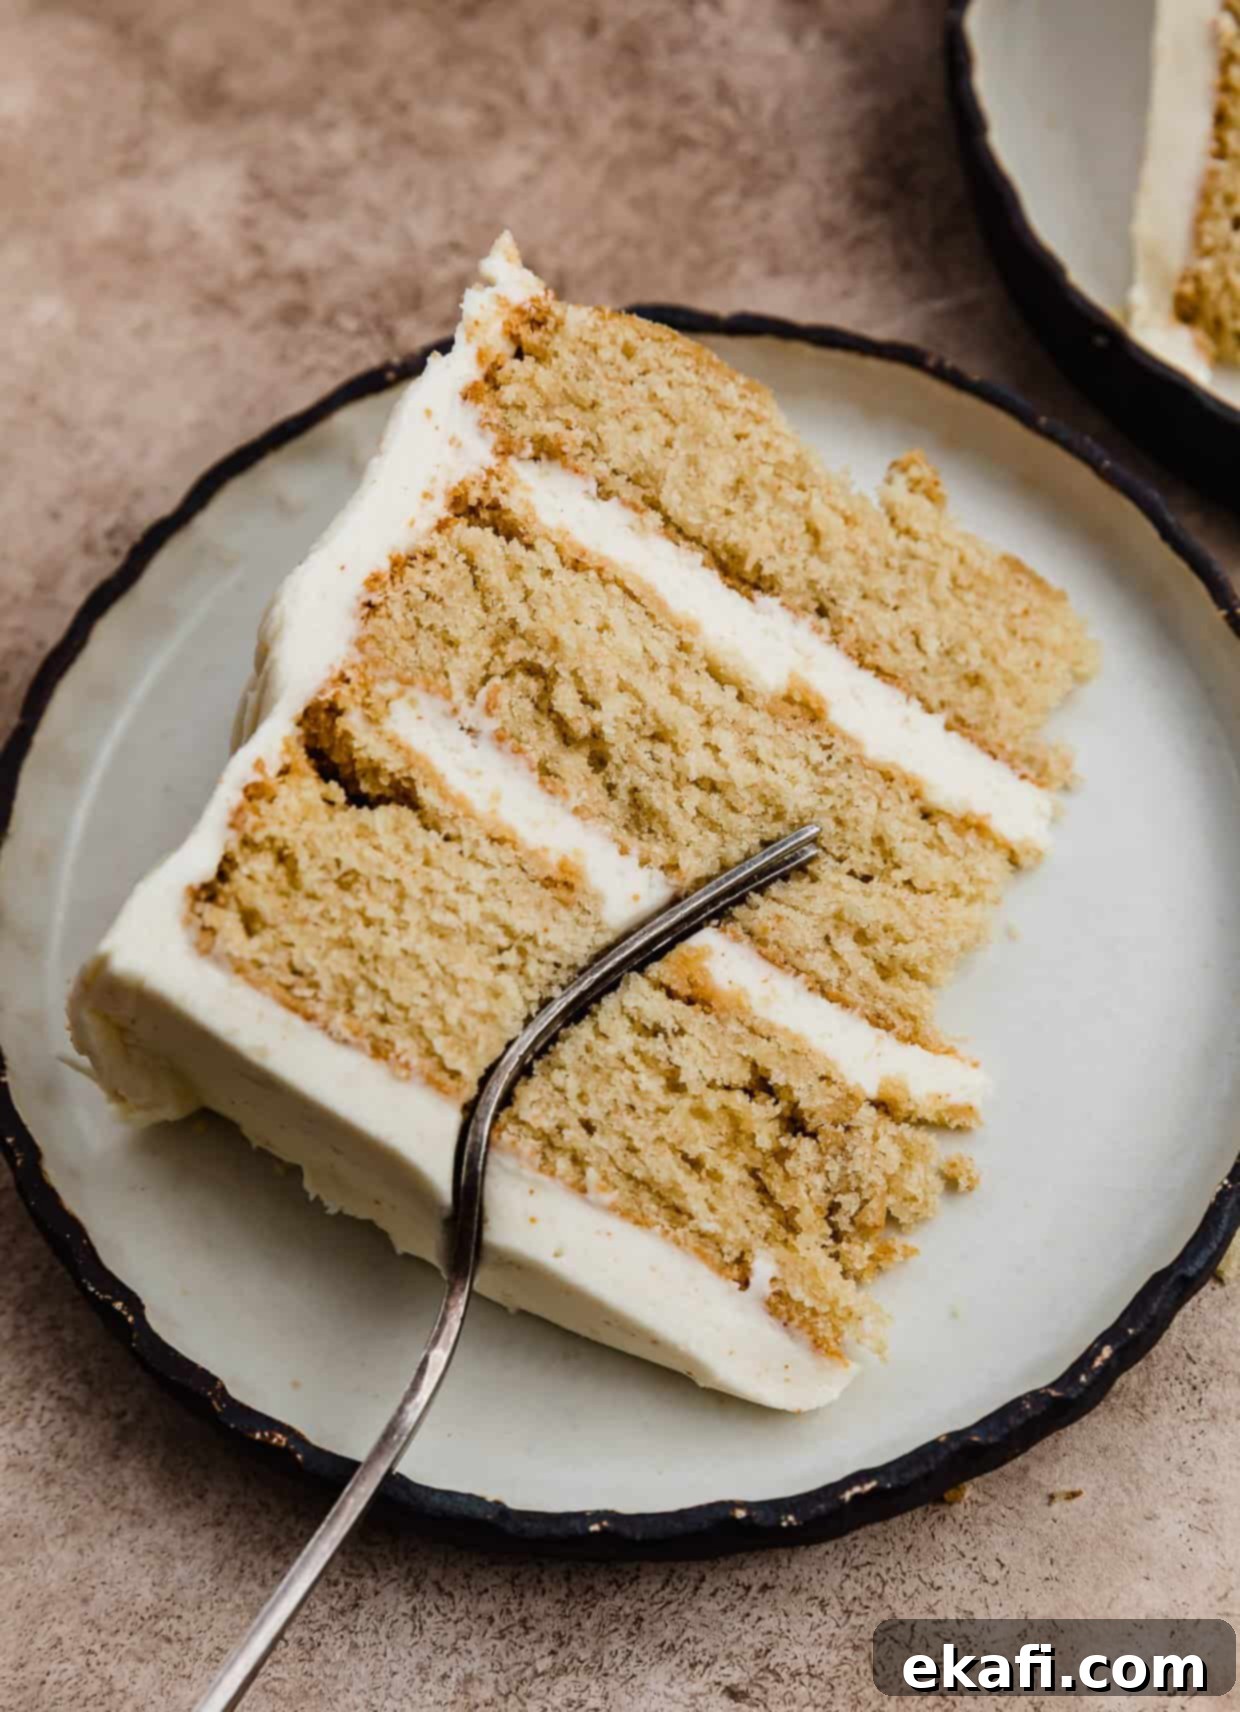
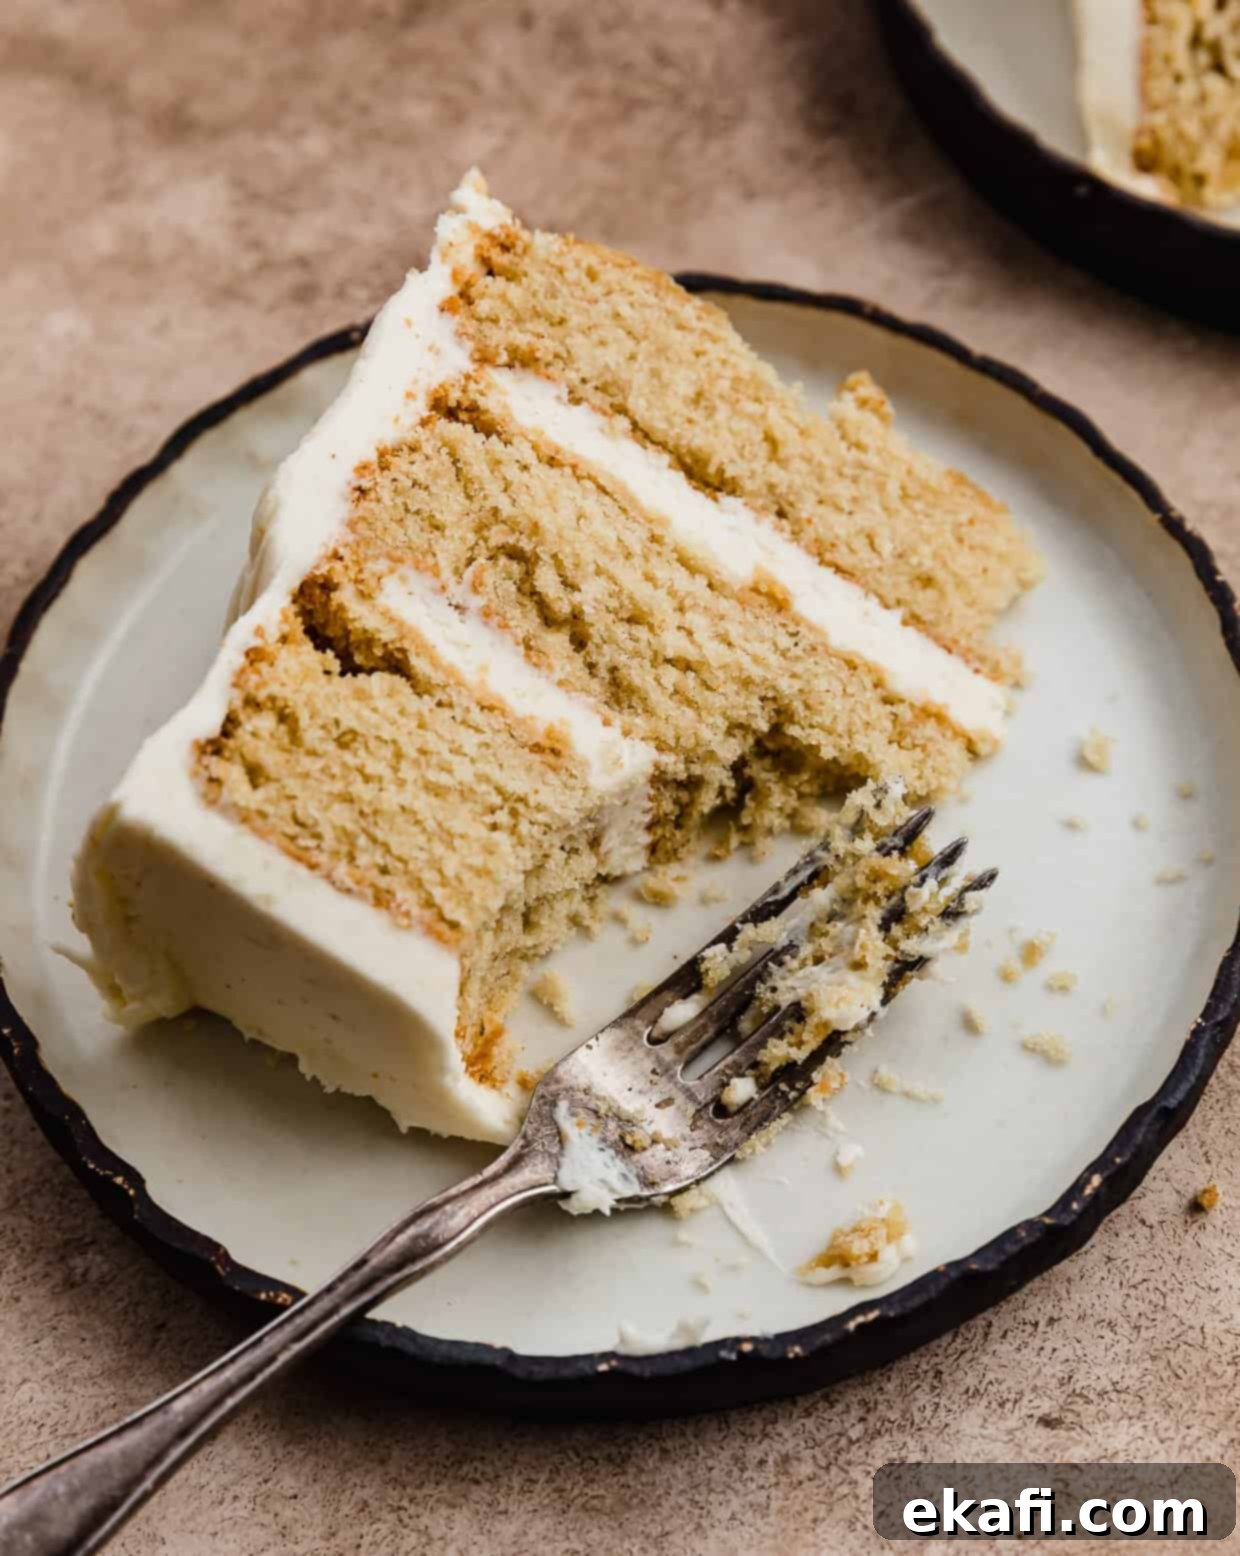
- Achieves a Perfectly Tender and Moist Crumb: This brown butter cake is exceptionally soft, light, and tender, dissolving beautifully in your mouth. This exquisite texture is no accident; it’s a careful combination of key ingredients. We use cake flour, with its lower protein content and finer milling, to create a delicate and fine crumb. Buttermilk adds crucial moisture and a subtle tang, reacting with leavening agents for a soft rise. And finally, a touch of vegetable oil ensures a luscious moistness that persists, keeping the cake fresh and delicious for longer.
- An Abundance of Irresistible Brown Butter Flavor: Prepare for a true brown butter celebration! Not only is the cake batter deeply infused with the rich, nutty notes of browned butter, but the luxurious buttercream frosting also features this golden ingredient. This double dose guarantees that the signature flavor shines through, offering a complex profile that is deliciously nutty, subtly sweet with caramel undertones, and wonderfully toasty. It’s a flavor experience that stands out from typical vanilla cakes, offering sophisticated warmth and depth.
- Effortlessly Easy to Master: Despite its gourmet taste and impressive appearance, this brown butter cake recipe (also known as beurre noisette cake) is surprisingly simple to make. The steps are straightforward, designed to guide even novice bakers to success. You’ll be rewarded with an amazing brown butter cake flavor and texture that tastes like it came from a high-end bakery, all from the comfort of your own kitchen.
Essential Ingredient Notes for the Best Brown Butter Cake
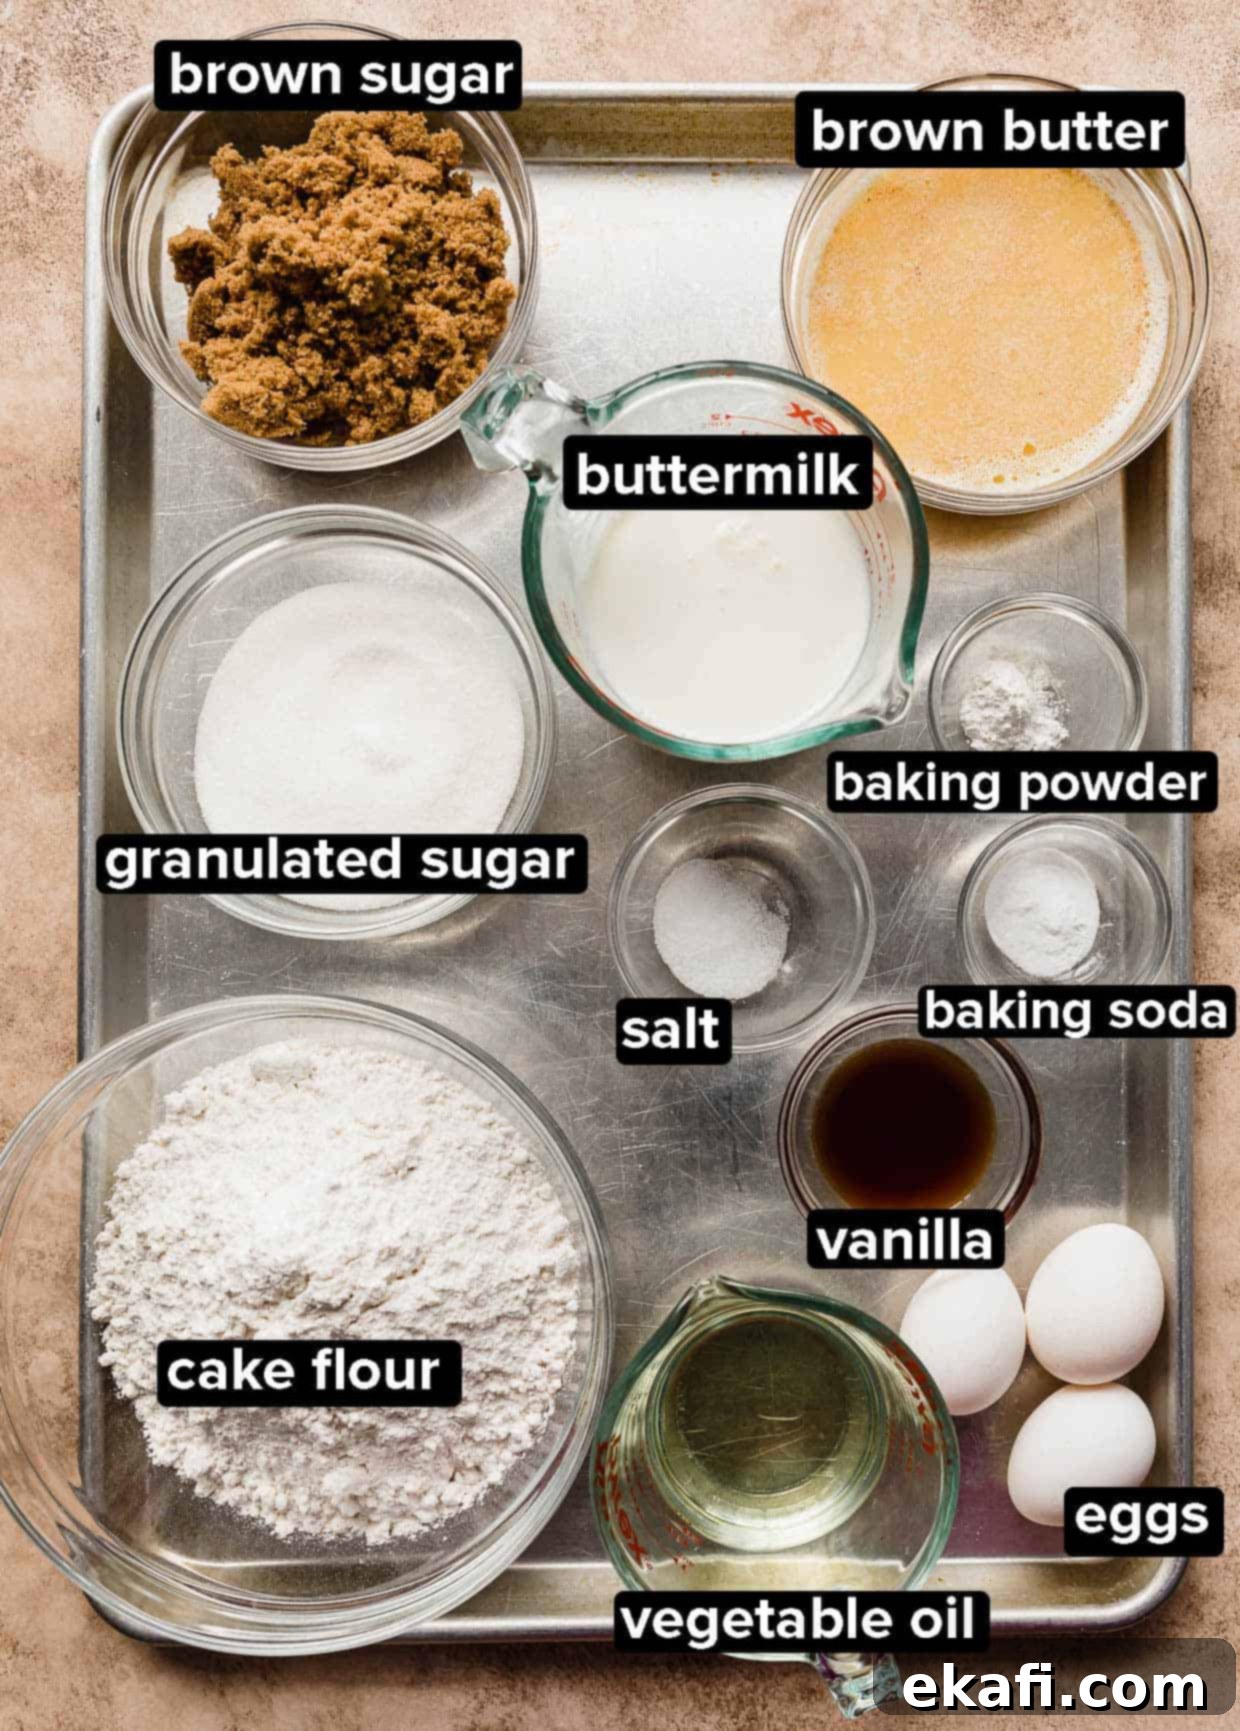
- Cake Flour: This isn’t just any flour; cake flour is specifically chosen for its lower protein content and ultra-fine milling. This characteristic is crucial for inhibiting excessive gluten development, resulting in a cake that is exceptionally soft, light, and boasts a truly delicate, fine crumb. It’s key to that melt-in-your-mouth texture.
- Dark Brown Sugar: While granulated sugar provides sweetness, dark brown sugar is the secret to enhancing the rich, caramel-like notes that perfectly complement the browned butter. Its higher molasses content contributes to a deeper, more complex flavor profile and also adds moisture, ensuring a wonderfully tender cake.
- Buttermilk: Always opt for room temperature buttermilk. The acidity in buttermilk tenderizes the cake crumb, creating an incredibly soft texture. Additionally, it reacts with the baking soda to provide lift, ensuring a light and airy result while also imparting a subtle, pleasing tang.
- Brown Butter: This is the star ingredient! You’ll need about 20 tablespoons (2 ½ sticks) of unsalted butter to yield approximately 8 oz of browned butter for the cake. The browning process concentrates the butter’s flavor, transforming it into a nutty, toasty, and utterly irresistible essence. For detailed instructions, expert tips, and FAQs on achieving perfectly browned butter every time, be sure to consult my comprehensive guide on How to Brown Butter.
- Vegetable Oil: Even with the rich flavor from brown butter, adding vegetable oil is essential for achieving that signature moist cake texture often associated with oil-based cakes. It contributes to the cake’s tenderness and keeps it moist for days, without diluting the glorious nutty notes of the browned butter.
- Unsalted Butter (for Frosting): This butter is distinct from the one you’ll brown for the cake. It forms the luscious base for our Brown Butter Buttercream. Using unsalted butter gives you control over the overall saltiness of your frosting, allowing the rich brown butter flavor to truly shine.
Step-by-Step Instructions: Crafting Your Decadent Brown Butter Cake
Make the Brown Butter Cake Layers
- Brown the Butter: Begin by placing 20 tablespoons (1 1/4 cups) of unsalted butter into a light-colored saucepan or skillet. Melt the butter over medium-low heat, stirring constantly to ensure even browning and prevent scorching. The butter will foam and sizzle as the water content evaporates. Soon, milk solids will separate and settle at the bottom of the pan. Continue cooking and stirring until these milk solids turn a beautiful golden brown and a rich, nutty aroma fills your kitchen – this typically takes about 8 minutes from the time the butter has melted. Immediately remove the pan from the heat and transfer the browned butter, including all the precious brown bits at the bottom, into a heatproof bowl to halt the cooking process. Allow it to cool to room temperature until it solidifies again (you can speed this up by placing it in the fridge for 10-15 minutes). Never burn the butter; golden brown is the goal. For a more detailed guide, refer to my How to Brown Butter post.
- Prepare Buttermilk Mixtures: In a small bowl or container, combine 4 oz of room temperature buttermilk with the vegetable oil. Whisk until fully incorporated and set this mixture aside. In a separate container, whisk together the remaining 6 oz of room temperature buttermilk, the large eggs, and the vanilla extract until smooth. Set this second mixture aside as well.
- Combine Dry Ingredients: In the large bowl of a stand mixer fitted with the paddle attachment, add the cake flour, granulated sugar, dark brown sugar, baking soda, baking powder, and salt. Mix on low speed for about 30 seconds until all the dry ingredients are thoroughly combined and no lumps remain.
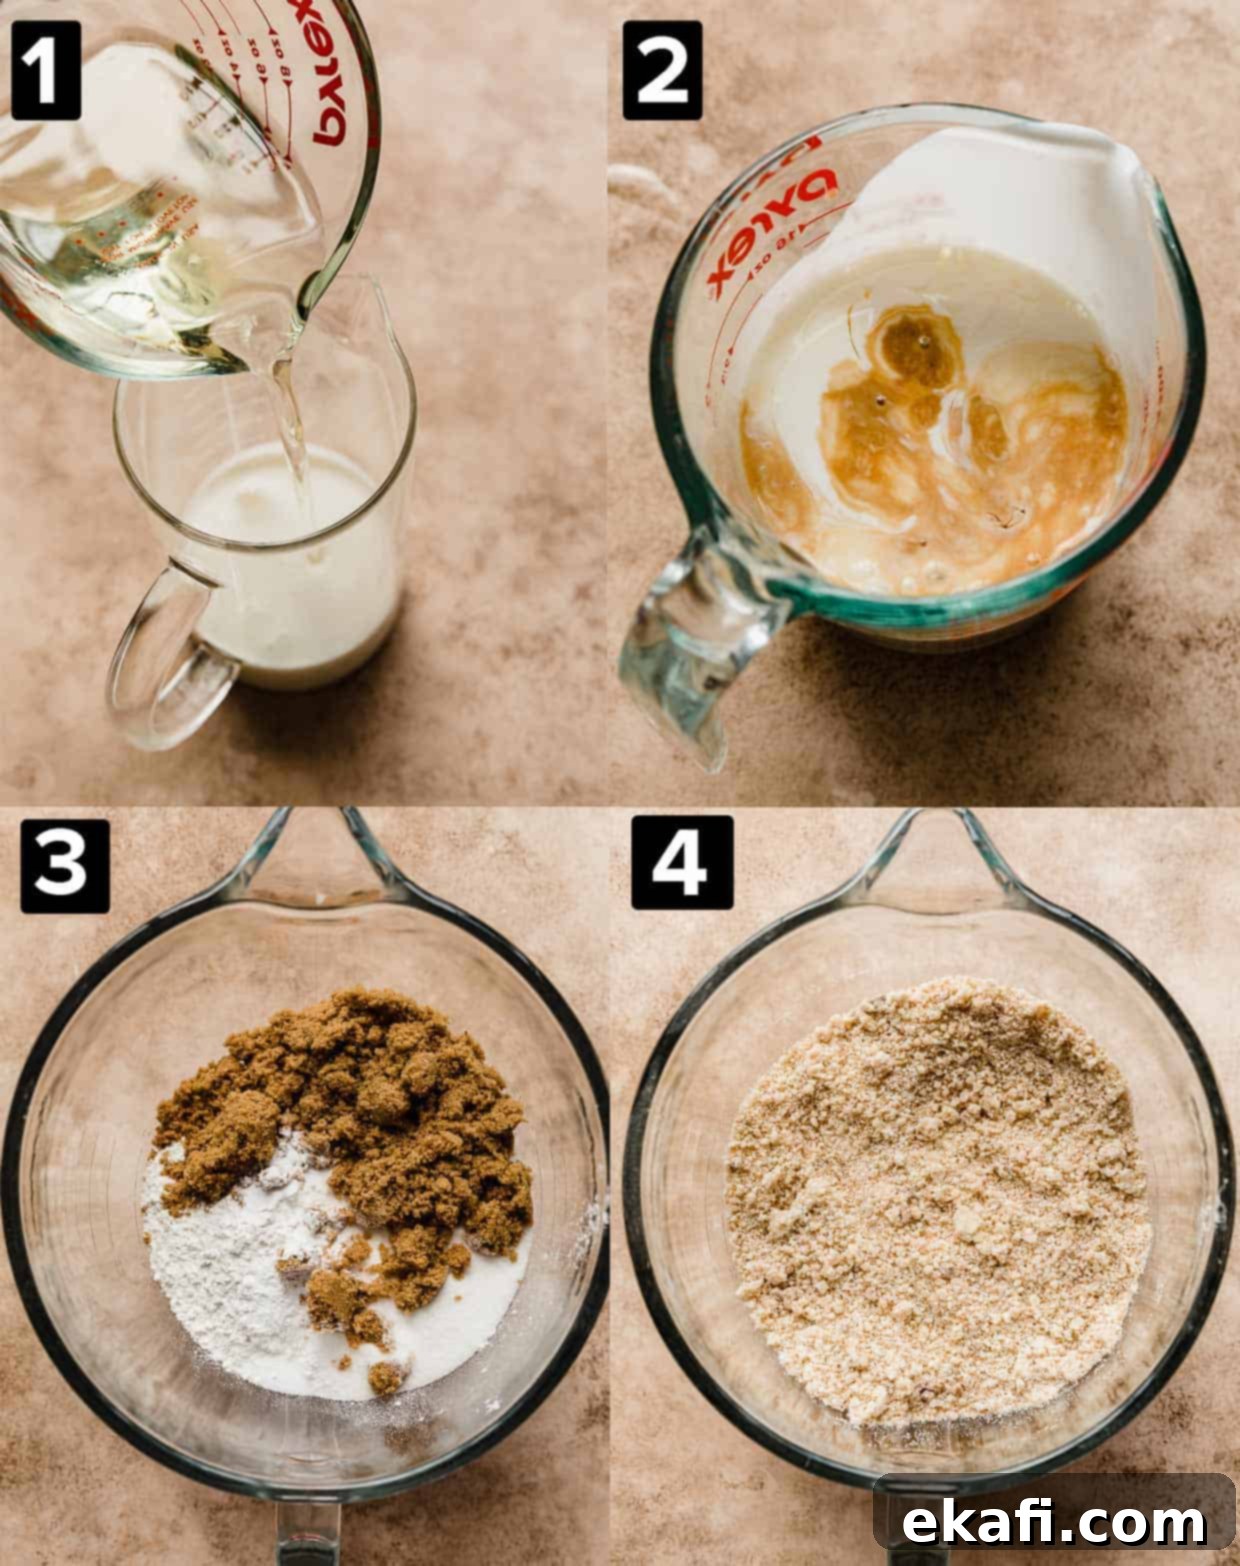
- Incorporate Brown Butter and Oil Mixture: Add the cooled, solidified browned butter to the dry flour mixture in the stand mixer. Mix on low speed for about 15-20 seconds until the mixture resembles coarse, wet sand. Next, pour in the buttermilk and vegetable oil mixture. Increase the mixer speed to medium and beat for 1 minute. The batter will visibly thicken and lighten in color. Stop the mixer, scrape down the sides of the bowl thoroughly with a rubber spatula, and then mix for another minute on medium speed to ensure everything is well combined and aerated.
- Stream in Remaining Wet Ingredients: Reduce the mixing speed to low. Slowly and steadily stream in the second buttermilk, vanilla, and egg mixture into the batter. Mix only until just combined, being careful not to overmix. Overmixing can lead to a tough cake. Scrape down the sides of the bowl as needed to ensure all ingredients are incorporated without overworking the gluten.
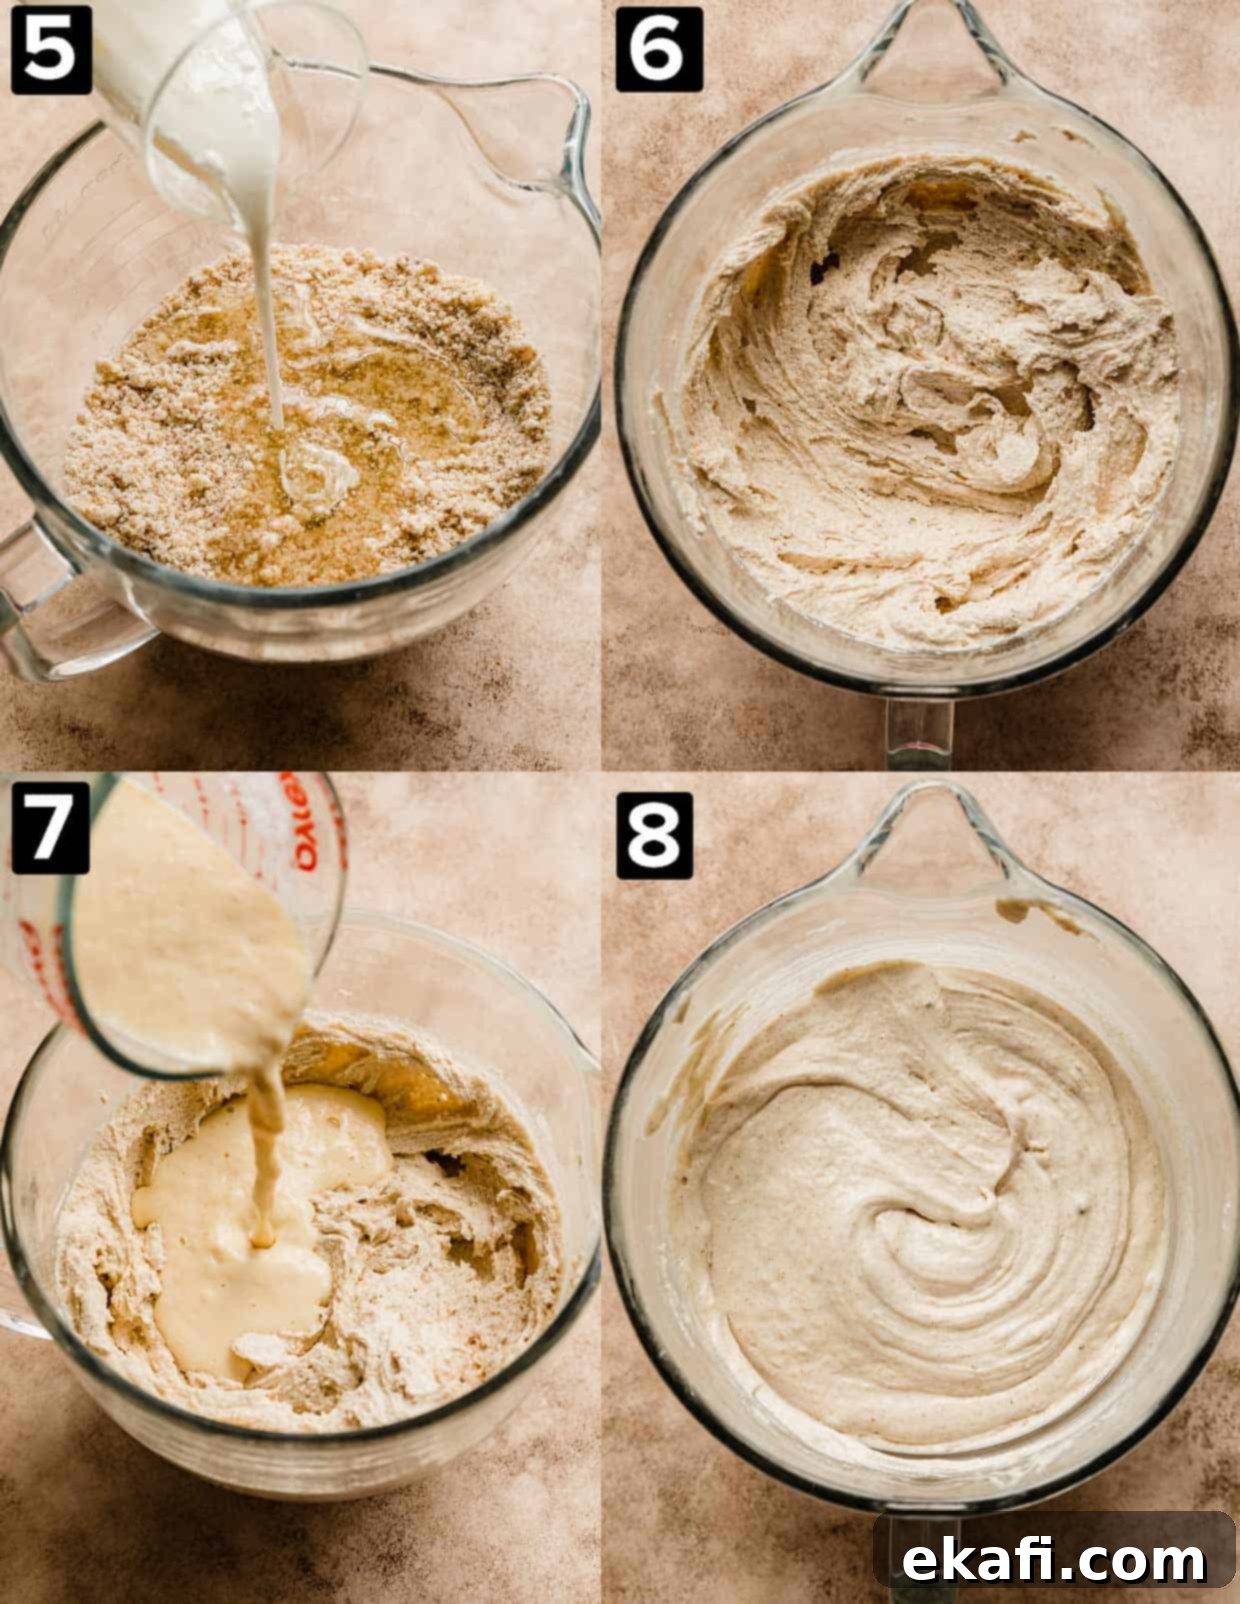
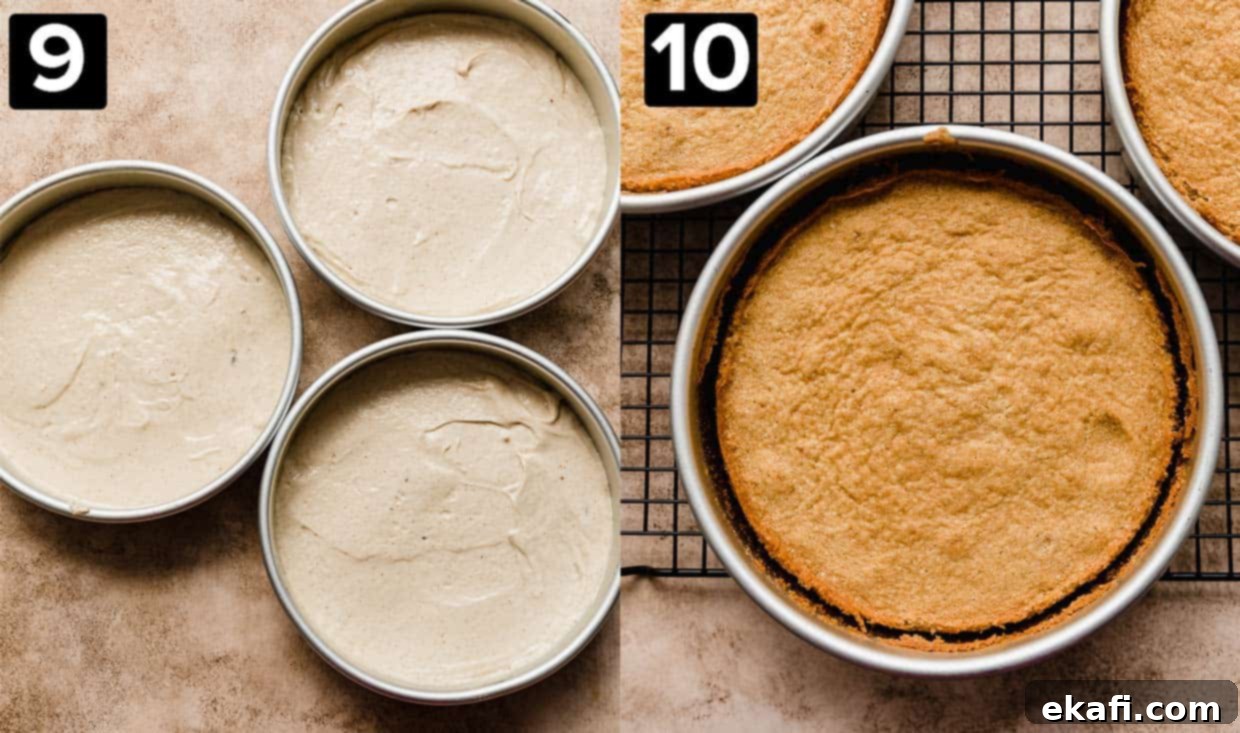
- Bake the Brown Butter Cake Layers: Prepare three 8-inch round cake pans by generously spraying them with nonstick baking spray (preferably one that contains flour). Line the bottom of each pan with a circle of parchment paper, and then spray again for extra non-stick insurance. This ensures your cakes release perfectly. Divide the cake batter evenly among the prepared pans. For consistently level layers, I recommend weighing the batter in each pan. Bake in a preheated oven at 335°F (168°C) for 25-30 minutes, or until the cake layers are set, spring back slightly when gently touched, and a toothpick inserted into the center comes out with a few moist crumbs (not wet batter). Avoid overbaking, which can dry out the cake. Remove from the oven and allow the cakes to cool in their pans for 5 minutes before carefully inverting them onto a wire rack to finish cooling completely to room temperature.
Prepare the Brown Butter Buttercream and Assemble Your Cake
- Brown the Butter for Frosting: You’ll need to brown 19 tablespoons (1 cup + 3 tablespoons) of unsalted butter for the buttercream. Follow the same detailed instructions for browning butter as outlined in step 1 under “Make the Brown Butter Cake,” or refer directly to my dedicated Brown Butter Recipe. Ensure the browned butter cools completely to room temperature until it becomes solid again before proceeding.
- Cream the Butters: In the bowl of a stand mixer fitted with the paddle attachment, add the remaining 13 tablespoons of softened unsalted butter and the cooled, solidified 19 tablespoons of browned butter. Beat on medium-high speed for several minutes until the mixture is incredibly smooth, light in texture, and pale in color. This creaming process is essential for a fluffy buttercream.
- Add Remaining Ingredients: Gradually add the powdered sugar, one cup at a time, beating well after each addition until fully incorporated. Frequently scrape down the sides and bottom of the bowl with a rubber spatula to ensure all sugar is mixed in and prevent lumps. Stir in the vanilla extract and salt. Finally, add the heavy cream, one tablespoon at a time, beating after each addition, until your brown butter buttercream frosting reaches your desired smooth and spreadable consistency.
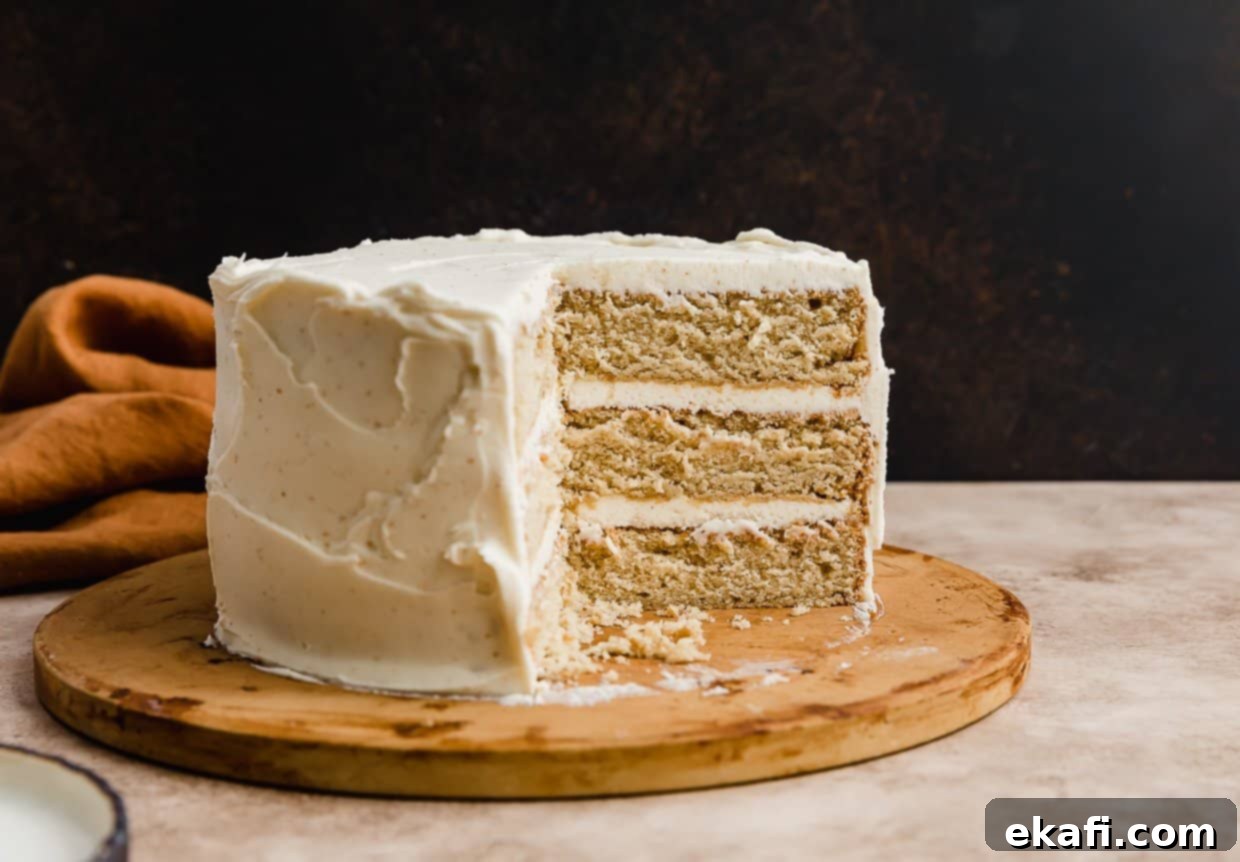
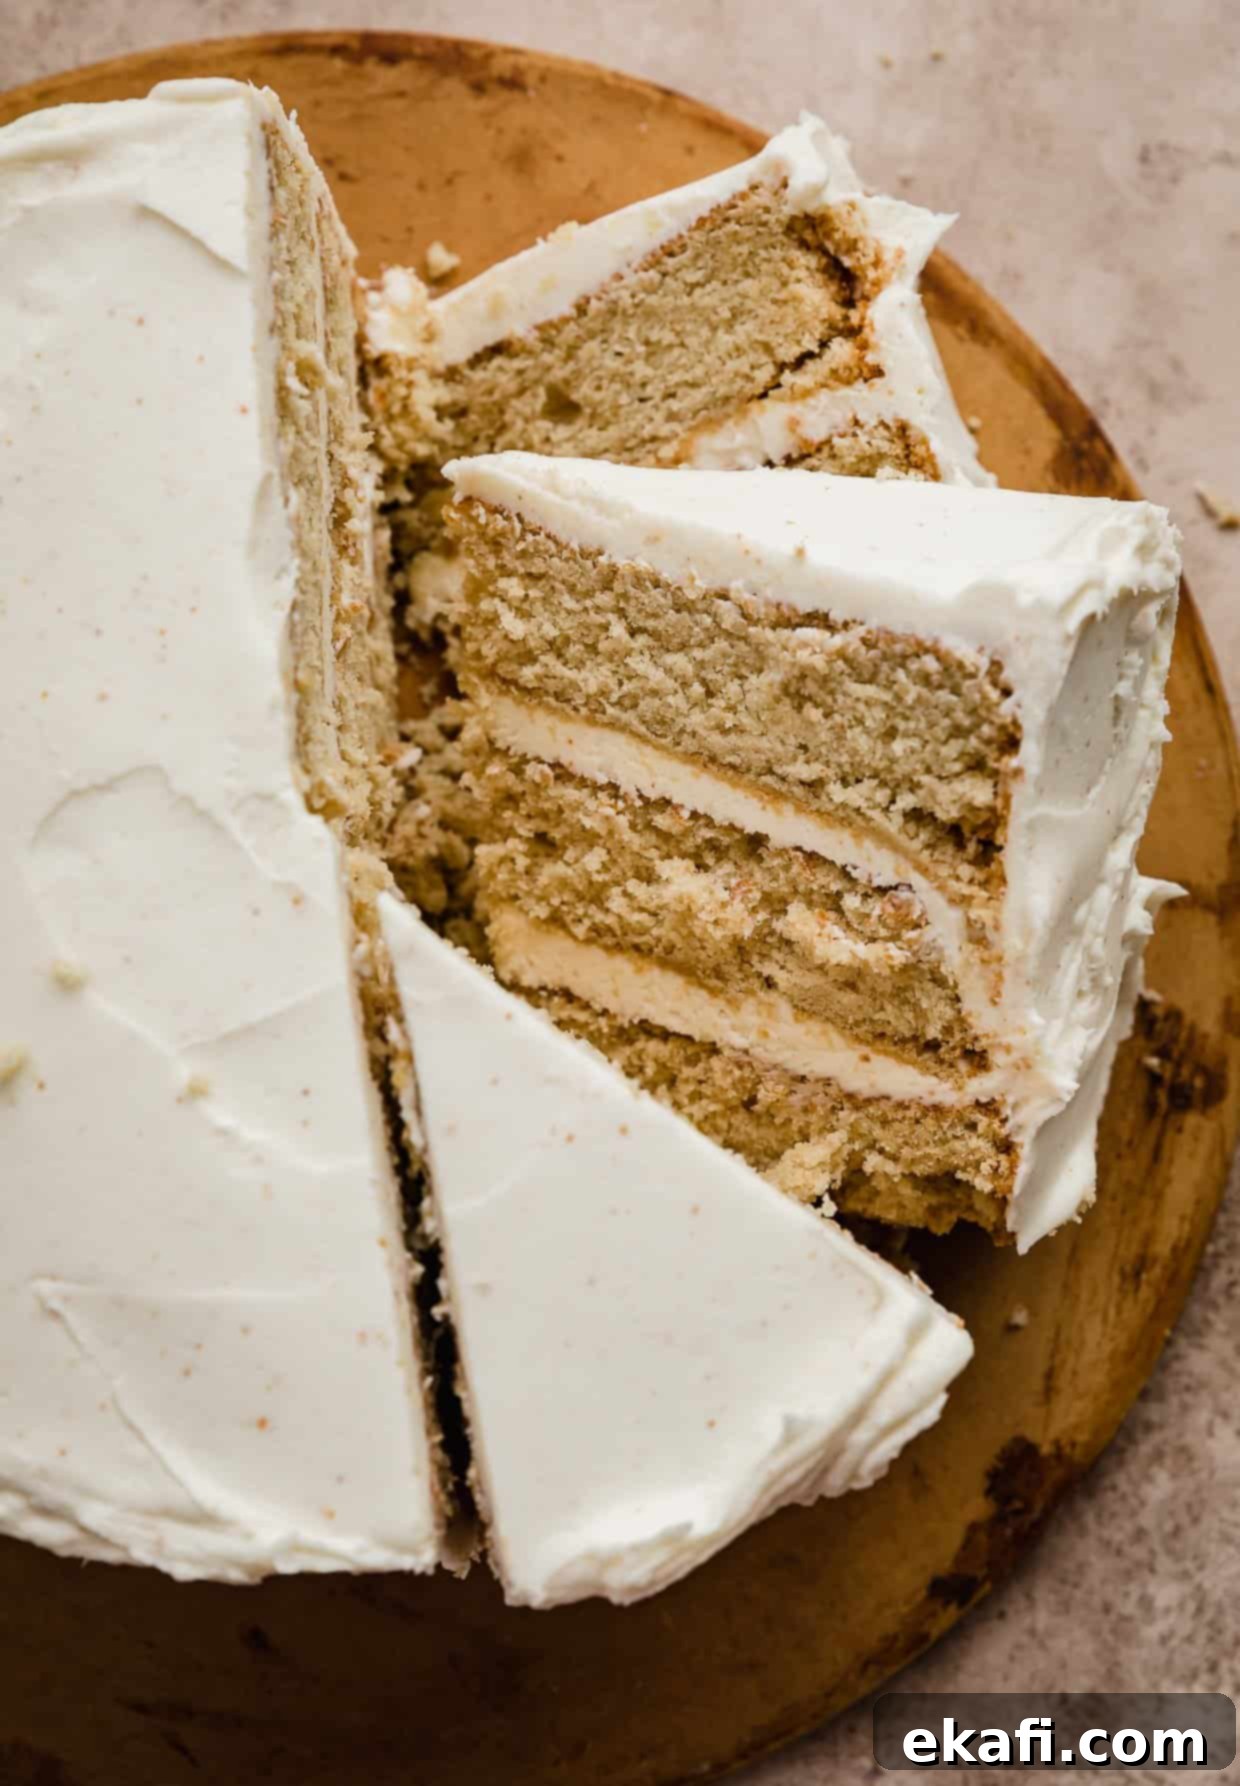
- Layer the Cake: Place one completely cooled cake layer on a cake board or your chosen cake stand. Using an offset spatula or a piping bag, apply a generous and even layer of brown butter buttercream over the top. Carefully place the second cake layer on top and repeat the frosting process. Finish by topping with the third cake layer.
- Frost the Cake: Using an offset spatula, apply a thin layer of brown butter frosting over the entire cake – this is called a “crumb coat” and helps to trap any loose crumbs. Chill the cake in the refrigerator for 15-20 minutes until the crumb coat is firm. Once chilled, apply the remaining brown butter frosting, smoothing it out or creating a rustic pattern as desired. Slice, serve, and savor every exquisite bite!
Expert Tips for a Flawless Brown Butter Cake
Pan Size Variations: For even thicker, more dramatic cake layers, you have the option to bake this brown butter cake recipe in three 6-inch round pans. Alternatively, if you prefer a two-layer cake, you can use two 9-inch pans, though baking times may need slight adjustment. Always keep an eye on doneness cues.
Achieve Even Layers: To ensure each cake layer is perfectly uniform in thickness, I highly recommend weighing the cake batter as you distribute it into each prepared pan. This simple step guarantees a beautifully balanced and professional-looking finished cake.
Mastering Brown Butter: When browning butter, constant stirring is your best friend. It helps the butter melt evenly, prevents milk solids from sticking and burning to the bottom of the pan, and allows you to monitor the browning process effectively. The transformation from melted to perfectly golden, nutty brown butter typically takes around 8 minutes. Don’t rush it, but don’t walk away!
Why More Butter at the Start? You might notice the recipe calls for more unsalted butter than the final quantity of browned butter needed. This is because butter loses some of its water content during the browning process, reducing its overall weight. Starting with a slightly larger amount ensures you have enough flavorful browned butter for the recipe.
Room Temperature Ingredients are Key: For a smooth, emulsified batter and an even bake, ensure all your wet ingredients – buttermilk, eggs, and even the solidified brown butter – are at room temperature. This allows them to incorporate seamlessly, preventing separation and creating a superior cake texture.
The Magic of a Crumb Coat: For a pristine final frosting, consider applying a crumb coat. This is a thin layer of buttercream spread over the entire cake. Once applied, chill the cake in the fridge or freezer until the crumb coat is firm. This step effectively locks in any loose cake crumbs, ensuring they don’t mix into your beautiful final layer of brown butter buttercream as you finish frosting.
Prevent Burning Your Butter: The line between perfectly browned and burnt butter is incredibly fine. Once the milk solids start turning golden brown and a nutty aroma develops, immediately remove the pan from the heat. Promptly transfer the browned butter to a separate heatproof bowl to stop the cooking process. Leaving it in the hot pan, even off the burner, can cause it to continue cooking and quickly burn, resulting in a bitter flavor you don’t want in your cake.
Don’t Waste the Good Stuff: After browning, make sure to use a rubber spatula to scrape every last bit of that flavorful browned butter out of the pan and into your cooling bowl. The delicious, toasted milk solids, which hold much of the nutty flavor, tend to settle at the bottom, and you definitely want them in your recipe!
For more details on how to brown butter, along with FAQs and tips, check out my How to Brown Butter post!
Make Ahead, Storing, and Freezing Your Brown Butter Cake
Storing Frosted Cake: Once frosted, this brown butter cake should be stored covered or in an airtight cake container in the refrigerator. It will maintain its delicious flavor and texture for 5-6 days. Bring it to room temperature for about 30 minutes before serving for the best experience.
Make-Ahead Cake Layers: For convenient planning, you can bake the cake layers ahead of time. Once they are completely cooled, double-wrap each layer tightly in plastic wrap to prevent moisture loss. Store them in the refrigerator for up to 3 days before you plan to frost and serve. If you need to prepare them further in advance, wrap the plastic-wrapped layers again with a layer of aluminum foil, and then freeze them for up to 2 months. When ready to use, thaw frozen cake layers overnight in the refrigerator, then remove them and let them come to room temperature before frosting.
Buttercream Storage: Leftover brown butter buttercream can be stored in an airtight container in the fridge for up to 7 days, or in the freezer for up to 2 months. To use, thaw frozen buttercream overnight in the fridge, then let it come to room temperature. Re-whip it in your stand mixer for a few minutes until it returns to its original fluffy and light texture before using.
My How to Store and Freeze Cakes guide offers comprehensive advice on proper storage and freezing techniques for various cakes, including individual cake layers, buttercream, and even fully decorated cakes.
Brown Butter Cake: Your Questions Answered
A brown butter cake is a delightful dessert that takes advantage of the transformative process of browning butter. This involves cooking unsalted butter over gentle heat until its milk solids separate, caramelize, and turn a beautiful golden brown, releasing a deep, nutty, and almost toffee-like aroma. This flavorful browned butter is then incorporated into the cake batter, infusing every bite with its complex, rich essence, making it far more dynamic than a traditional butter cake.
Brown butter cake offers a taste experience unlike any other. It possesses a profound, rich flavor that is wonderfully nutty, with distinct caramel and toasty notes that are incredibly comforting and sophisticated. Unlike a simple vanilla cake, it features a warm, complex sweetness from the brown sugar and browned butter, resulting in a deep, satisfying taste that is both sweet and exquisitely aromatic. It’s truly a light, fluffy cake with an amazing, unforgettable flavor profile!
Browning butter is an ingenious technique used in baking and cooking to effortlessly elevate recipes to new culinary heights. The process creates a Maillard reaction, developing incredible depth and complexity of flavor that plain butter simply cannot offer. It introduces a delicious nutty, toasted, and caramel-like profile, making desserts (and even savory dishes!) taste exponentially better. Imagine the richness it brings to mashed potatoes, like in my Brown Butter Rosemary Mashed Potatoes, or how it transforms a classic treat like my Salted Brown Butter Rice Krispie Treats, turning ordinary Rice Krispie Treats into something truly crazy delicious!
Explore More Delicious Layer Cake Recipes
- Classic Chocolate Cake Recipe
- Decadent Twix Cake
- Irresistible Scotcheroo Cake
- Campfire S’mores Cake
- Golden Oreo Cake Delight
Did you make this unforgettable Brown Butter Cake recipe? We’d absolutely love to hear about your experience! Please leave a star rating and a detailed review below the recipe card, or scroll down to share your feedback. Your thoughts help us and other bakers!
Stay connected and up-to-date with our latest delicious creations by following us on Instagram, TikTok, Facebook, and Pinterest. Don’t miss out on more mouth-watering recipes!
Print
Save
Saved!
Review
Brown Butter Cake
3 minutes
30 minutes
33 minutes
12
servings
Prevent your screen from going dark
Ingredients
Brown Butter Cake
-
3
cups
cake flour –
(14 oz) -
3/4
cup + 2 Tablespoons
granulated sugar -
3/4
cup
dark brown sugar –
packed (about 6 oz) -
1
teaspoon
baking soda -
1
teaspoon
baking powder -
1
teaspoon
salt -
1
tablespoon
vanilla extract -
10
oz
buttermilk –
divided, room temperature or on the warmer side -
3
large
eggs –
room temperature -
8
oz
browned butter –
room temperature, will need about 20 tablespoons of unsalted butter prior to browning) -
1/2
cup
vegetable oil –
(4 oz)
Brown Butter Buttercream Frosting
-
2
cups
unsalted butter –
room temperature but still slightly chilled -
1
teaspoon
vanilla extract -
7
cups
powdered sugar –
measured then sifted -
4-5
tablespoons
heavy cream –
more or less to reach your desired consistency -
1/2
teaspoon
salt
Equipment
-
8″ inch round cake pans
-
Ateco cake stand
-
Kitchen Aid stand mixer
Instructions
Brown Butter Cake
-
Generously spray three 8-inch round cake pans with a nonstick baking spray (preferably one containing flour). Line the bottom of each pan with a circle of parchment paper, then spray again. (For thicker layers, you can bake in three 6-inch pans or two 9-inch pans, adjusting baking time as needed).
-
Preheat your oven to 335°F (168°C). Measure 4 oz of room temperature buttermilk into a container. Add the vegetable oil and whisk to combine, then set aside.
-
To the remaining 6 oz of room temperature buttermilk, add the large eggs and vanilla extract. Whisk until smooth and well combined, then set this mixture aside.
-
In the bowl of a stand mixer fitted with a paddle attachment, add the cake flour, granulated sugar, dark brown sugar, baking soda, baking powder, and salt. Mix on low speed until just combined. Add the cooled, solidified browned butter and mix for about 15 seconds until the mixture resembles coarse, wet sand.
-
Add the buttermilk and oil mixture to the dry ingredients in the stand mixer. Mix on medium speed for 1 minute. The batter will thicken and visibly lighten in color. Stop the mixer, scrape down the sides of the bowl with a rubber spatula, and mix on medium speed for 1 more minute.
-
Reduce the mixer speed to low and slowly stream in the buttermilk, vanilla, and egg mixture. Mix only until just combined, ensuring not to overmix the batter. Scrape down the sides of the bowl as needed to incorporate all ingredients evenly.
-
Divide the cake batter evenly among the prepared pans. (For best results, I recommend weighing the amount of batter that goes into each pan to ensure perfectly equal layers). Gently smooth the tops into an even layer.
-
Bake for 25-30 minutes. The cakes are done when they are set and spring back slightly, and a toothpick inserted into the center comes out with a few moist crumbs (not wet batter). Remove from the oven and let cool in the cake pans for 5 minutes before carefully inverting them onto a wire rack to cool completely to room temperature.
Brown Butter Buttercream Frosting
-
Place 19 tablespoons (1 cup + 3 tablespoons) of unsalted butter in a light-colored saucepan or skillet. Place the pan over medium to medium-low heat.
-
Stir the butter constantly around the pan until it melts completely. Continuous stirring is crucial during browning to keep the milk solids moving and prevent them from burning on the bottom. The entire browning process typically takes about 8 minutes from the time the butter has fully melted.
-
Once melted, the butter will begin to foam and sizzle. Continue stirring until the foam subsides somewhat and the milk solids at the bottom of the pan start to turn a very light golden color. Keep stirring until these milk solids achieve a rich golden brown, almost amber color. You’ll notice a distinct nutty and intensely buttery aroma. Be vigilant, as butter can burn in a matter of seconds; remove from heat promptly once the desired color is achieved.
-
Immediately remove the pan from the heat and pour all the browned butter, including all the precious brown bits, into a heatproof bowl or container. This stops the cooking process. The butter needs to cool completely to room temperature until it solidifies again. You can expedite this by placing the bowl in the fridge for 10-15 minutes, stirring occasionally.
-
In the bowl of a stand mixer fitted with a paddle attachment, combine the remaining 13 tablespoons of softened (but still slightly chilled) unsalted butter and the room temperature, solidified browned butter. Beat on medium-high speed until light, fluffy, and well combined. Add the vanilla extract, salt, and gradually add the powdered sugar, 1 cup at a time, beating after each addition. Finally, add the heavy cream, 1 tablespoon at a time, until the buttercream reaches your desired smooth and spreadable consistency. Mix until combined and scrape down the bowl as needed.
Assembly
-
Place one cooled cake layer on your chosen cake stand or plate. Apply a generous portion of the brown butter buttercream frosting to the top of the cake layer and spread it into an even, smooth layer. Carefully place the second cake layer on top and repeat the frosting process. Finish by topping with the final cake layer and use the remaining frosting to generously cover all sides of the cake. You can smooth it out for a clean finish or create a rustic, textured look. Slice, serve, and enjoy this incredible treat!
Notes
My How to Store and Freeze Cakes guide offers invaluable information on effectively storing and freezing various types of cakes, including individual cake layers, prepared buttercream, and even fully decorated cakes, ensuring freshness and quality.
Nutrition
Calories:
1045
kcal
(52%)
Carbohydrates:
125
g
(42%)
Protein:
7
g
(14%)
Fat:
59
g
(91%)
Saturated Fat:
33
g
(165%)
Polyunsaturated Fat:
8
g
Monounsaturated Fat:
15
g
Trans Fat:
2
g
Cholesterol:
177
mg
(59%)
Sodium:
558
mg
(23%)
Potassium:
155
mg
(4%)
Fiber:
1
g
(4%)
Sugar:
101
g
(112%)
Vitamin A:
1598
IU
(32%)
Vitamin C:
0.03
mg
Calcium:
83
mg
(8%)
Iron:
1
mg
(6%)
Whitney Wright
Dessert
American, English
Did you make this recipe?
Please leave a star rating and review on the blog post letting me know how you liked this recipe! Take a picture and tag @saltandbaker on Tik Tok, Instagram, and Facebook so I can see what you’re making!
