Ultimate Cheesy Pepperoni Pizza Dip with Homemade Pull-Apart Bread
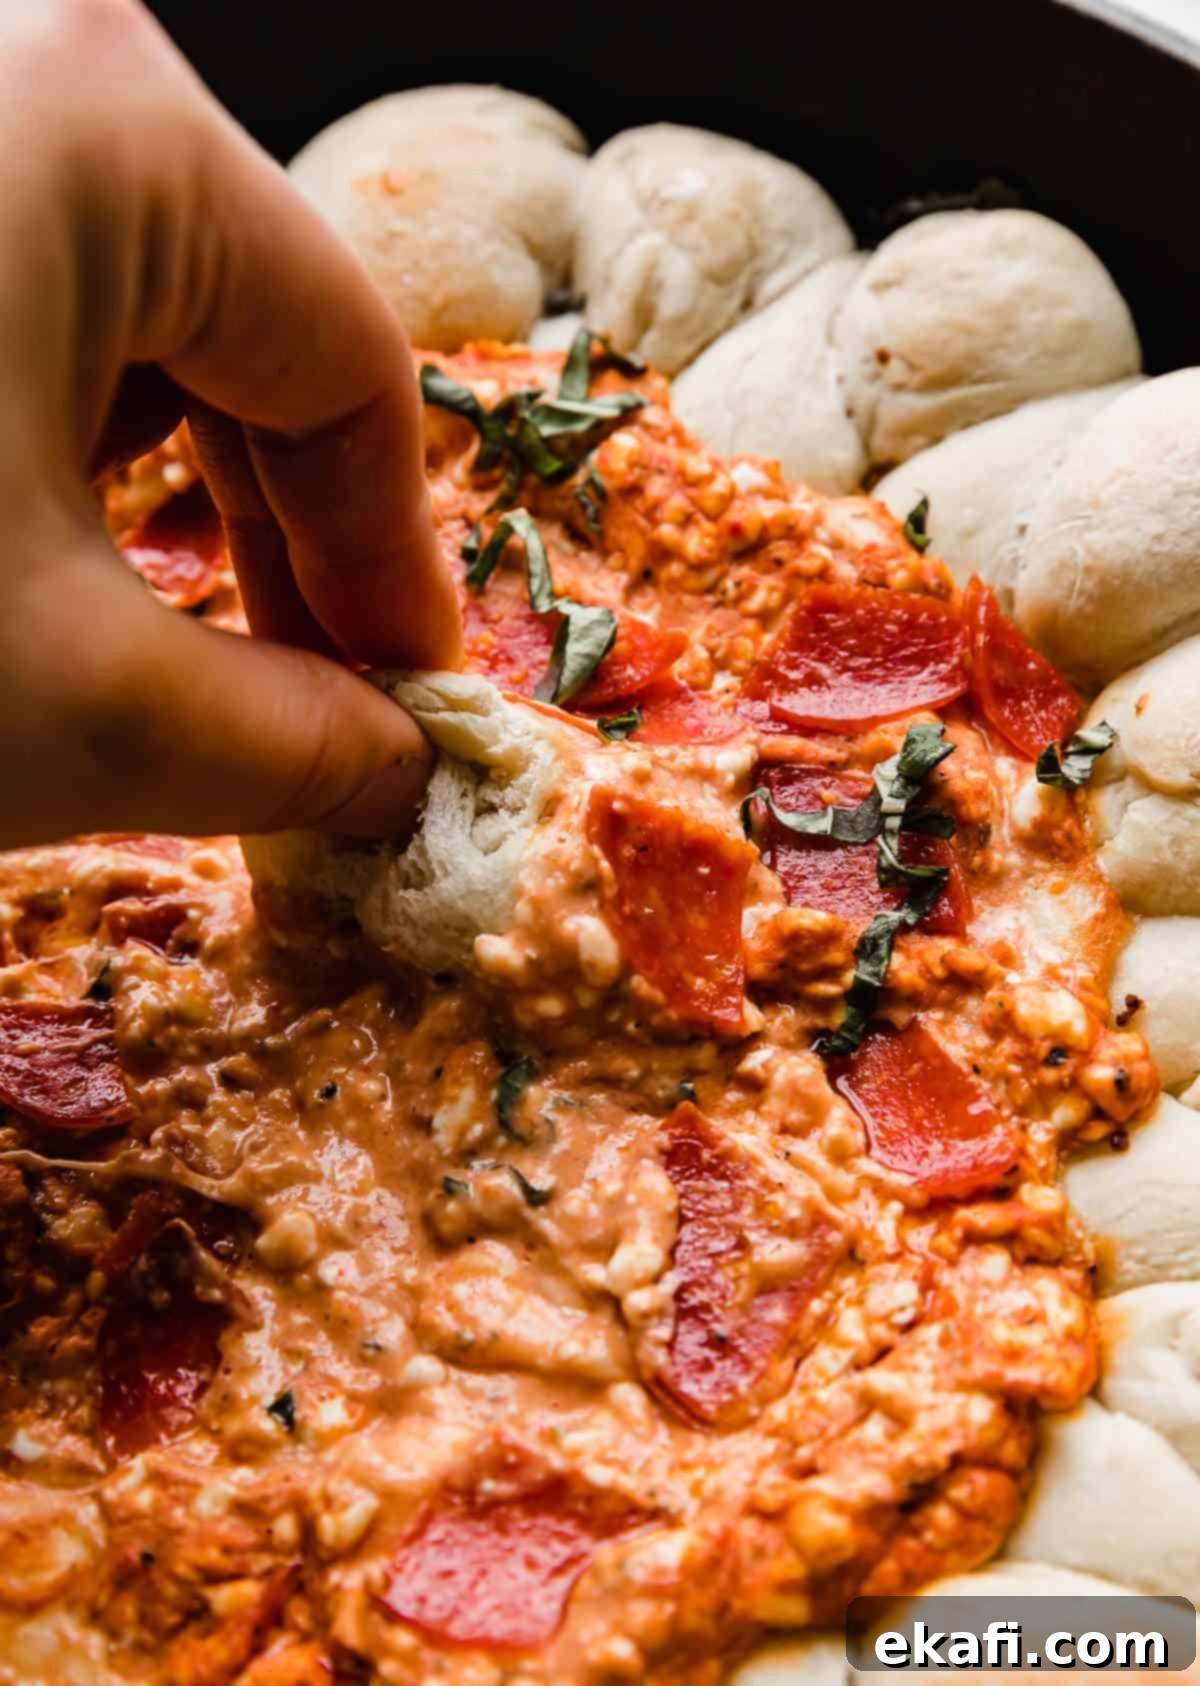
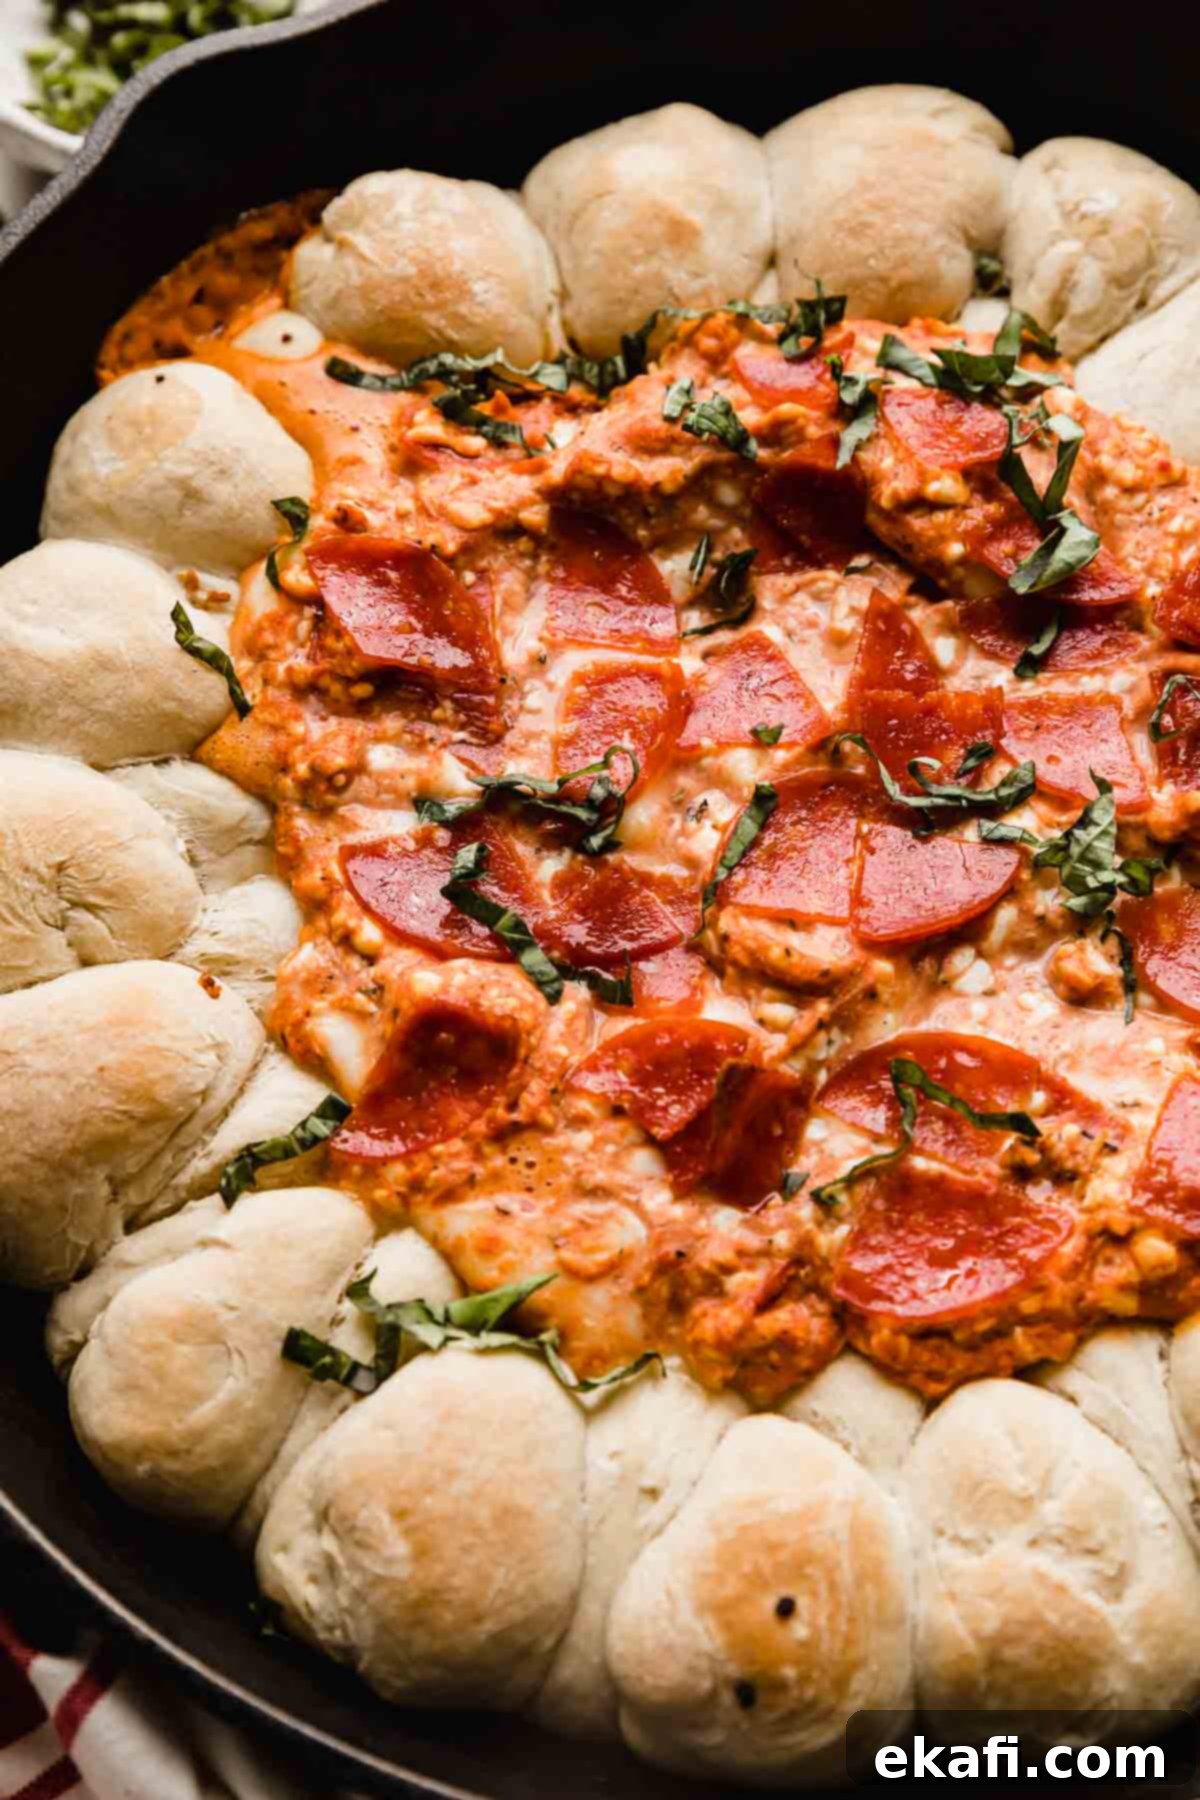
Prepare to elevate your appetizer game with this incredible Pepperoni Pizza Dip! This crowd-pleasing recipe features a rich, creamy, and incredibly flavorful pizza sauce dip, generously loaded with fresh mozzarella, cream cheese, and plenty of savory pepperoni. But what truly sets this dish apart and makes it an unforgettable experience are the delightful homemade pizza dough balls, baked right in the skillet, creating the ultimate pull-apart bread perfect for dipping. The result is a fun, interactive, and undeniably delicious appetizer that will have everyone reaching for more, making it an instant hit at any gathering.
Here at Salt & Baker, we are undeniable pizza lovers. Our culinary journey often leads us to discover new and exciting ways to enjoy the classic, comforting flavors of pizza, especially in formats that are both fun and kid-friendly. We’ve mastered beloved variations like our easy English Muffin Pizzas and satisfying French Bread Pizza, both of which are perfect for quick lunches or simple dinners, and are straightforward enough for even the youngest chefs to help prepare. This Pepperoni Pizza Dip takes that passion for pizza to a whole new level, ingeniously transforming a cherished main course into an irresistible communal appetizer. It’s the ideal finger food for any occasion, from casual weeknight family meals to lively game days, festive holidays, and elegant dinner parties, offering a fresh and exciting twist on everyone’s favorite Italian-American classic.

Why This Pepperoni Pizza Dip Recipe Works So Well
This isn’t just another dip; it’s a culinary experience meticulously designed for maximum enjoyment and minimal fuss, ensuring it stands out as a true crowd-pleaser. Here’s why this particular pepperoni pizza dip will undoubtedly become a staple in your recipe rotation:
- Effortlessly Creamy with Rich Cream Cheese: The undisputed secret to this dip’s utterly irresistible texture and depth of flavor lies in the generous addition of cream cheese. Unlike the more traditional and sometimes drier pizza experience, the cream cheese melts into a luxuriously smooth, velvety, and incredibly rich base, creating a dip that’s both comforting and profoundly satisfying. It masterfully balances the tangy notes of the pizza sauce with the savory, slightly salty punch of the pepperoni, ensuring every single bite is a delightful burst of harmonized flavor. This creamy foundation elevates the dip from a simple snack to an absolutely unforgettable appetizer, making it distinctively delicious.
- The Ultimate Versatile Pizza Dip Appetizer for Any Occasion: Are you on the hunt for the perfect party snack that guarantees smiles? Your search ends here! This pepperoni pizza dip is a surefire hit for virtually any celebration imaginable – from the roaring cheers of lively game days and the warm glow of festive holidays to casual family get-togethers, school events, and even more sophisticated dinner parties. It brilliantly combines all your favorite, familiar pizza flavors in an easy-to-share, interactive format that naturally encourages mingling, laughter, and conversation amongst guests. It’s wonderfully hearty enough to be satisfying as a substantial appetizer but remains light enough not to spoil dinner, striking the perfect balance. This versatility makes it a universally loved and highly adaptable dish that fits seamlessly into any event.
- Featuring Irresistible Homemade Pull-Apart Rolls: While the dip itself is stellar and could easily stand alone, the true showstopper and defining characteristic of this recipe is the inviting ring of homemade pull-apart pizza dough balls that encircle it. These soft, golden-brown, garlicky rolls are baked fresh directly in the skillet alongside the dip, offering the absolute ideal, warm vehicle for scooping up every last bit of that cheesy goodness. There’s something inherently fun, communal, and deeply satisfying about tearing off a warm, pillowy roll, still fragrant with garlic, and diving into the rich, bubbly, and cheesy center. This interactive element transforms a simple dip into a truly memorable culinary event, making it incredibly appealing and enjoyable for both eager children and discerning adults alike.
Essential Ingredients for Your Perfect Skillet Pizza Dip
Crafting the perfect pepperoni pizza dip begins with a thoughtful selection of high-quality ingredients. Each component, no matter how small, plays a vital role in achieving that authentic pizza flavor, desirable creamy texture, and overall deliciousness. Here’s a closer look at exactly what you’ll need and the rationale behind each choice, along with some helpful tips:
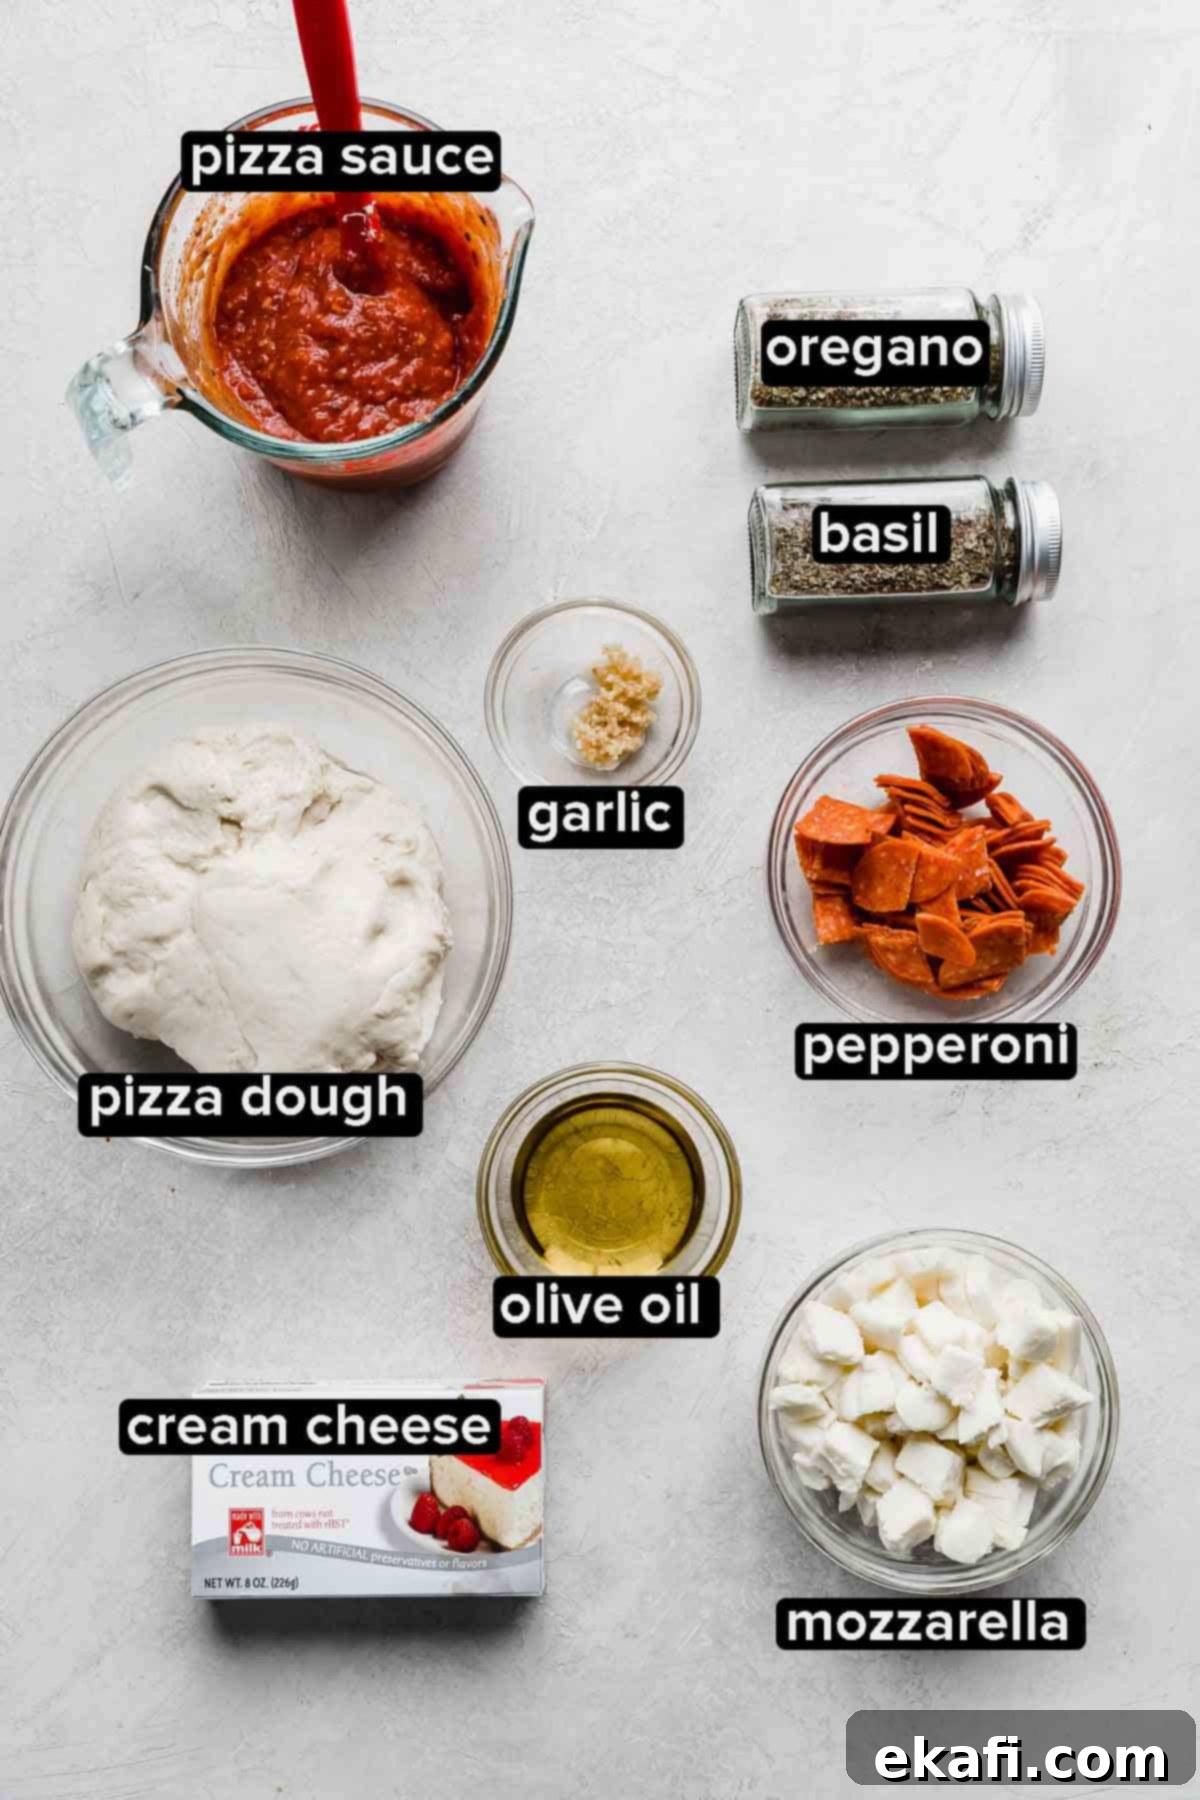
- Pizza Dough: While the convenience of good-quality store-bought dough is certainly an option, for an unparalleled taste and texture that truly elevates the pull-apart rolls, we wholeheartedly recommend trying our favorite homemade pizza dough recipe. It results in rolls that are wonderfully soft on the inside and perfectly crisp on the outside. A standard batch of our homemade dough yields enough for two pizzas, meaning you’ll only need about half for this dip, leaving the rest perfectly portioned for another delicious pizza crust on a separate evening. If you opt for store-bought, look for fresh dough in the refrigerated section of your grocery store that is known for a good rise and flavor.
- Pepperoni Slices: The namesake and a key flavor contributor! For optimal flavor distribution within the dip, cut your pepperoni into quarters. This ensures that every spoonful of the creamy dip contains a savory piece of pepperoni. For an appealing presentation and an added textural dimension, you can also reserve a small amount of whole pepperoni slices to scatter artfully over the top of the cheesy dip before its final bake; these will crisp up beautifully in the oven. Feel free to use mini pepperoni for ease, or explore spicier pepperoni varieties if you desire an extra kick.
- Cream Cheese: This is a non-negotiable ingredient that is absolutely fundamental for achieving that signature, luscious, and incredibly creamy pizza dip texture. It’s crucial to ensure your cream cheese is softened to room temperature before you begin mixing. This essential step allows it to blend seamlessly and smoothly with the pizza sauce and other ingredients, effectively preventing any undesirable lumps and creating a uniformly velvety, luxurious dip base. Do not skip this step for the very best, silkiest results!
- Pizza Sauce: The choice between pizza sauce and generic marinara or spaghetti sauce might seem subtle, but it makes a significant difference in the final flavor profile of your dip. Authentic pizza sauce is specifically formulated to be thicker, richer, and seasoned with a more robust blend of herbs (typically oregano and basil) that complement pizza toppings. Marinara or spaghetti sauces, conversely, can often be thinner, sweeter, or have a different herb balance, which could alter the desired authentic flavor balance of your dip. Stick to a good quality, dedicated pizza sauce for that unmistakable, classic taste.
- Fresh Mozzarella Cheese: For the ultimate gooey melt and satisfying cheese pull, fresh mozzarella is absolutely key. Its inherently creamy texture and superior melting properties are simply unmatched by pre-shredded varieties, which often contain anti-caking agents. You can either cut or break the fresh mozzarella into small, manageable pieces, or for even easier preparation, opt for convenient mozzarella pearls. This cheese will melt beautifully into the dip, providing that classic cheesy stretch that everyone loves.
- Fresh Basil: This isn’t merely a garnish; it’s a vital component that offers far more than just visual appeal. Generously chopped fresh basil adds a vibrant, aromatic, and distinctly herbaceous finish, providing a refreshing counterpoint to the rich, savory dip. While dried basil is incorporated into the dip for its underlying, slow-released flavor, the fresh basil truly brightens the entire dish, imparting an extra punch of authentic Italian-inspired taste and a pop of color. For maximum aromatic impact, always add the fresh basil right before serving.
- Olive Oil & Garlic: Essential for infusing the pull-apart rolls with a foundational layer of savory flavor. The gentle heating ensures the garlic flavor permeates the oil without burning, creating a mild yet aromatic coating for the dough.
- Dried Oregano & Basil: These dried herbs are crucial for building the classic Italian flavor profile within the dip itself, complementing the fresh basil garnish. They provide a deeper, more sustained herbal note.
Easy Step-by-Step Instructions to Create Your Pepperoni Pizza Dip
Ready to get cooking and bring this amazing pepperoni pizza dip to life? This recipe is designed to be straightforward and enjoyable, ensuring a perfect, mouth-watering result every time. Follow these detailed steps for a delicious appetizer:
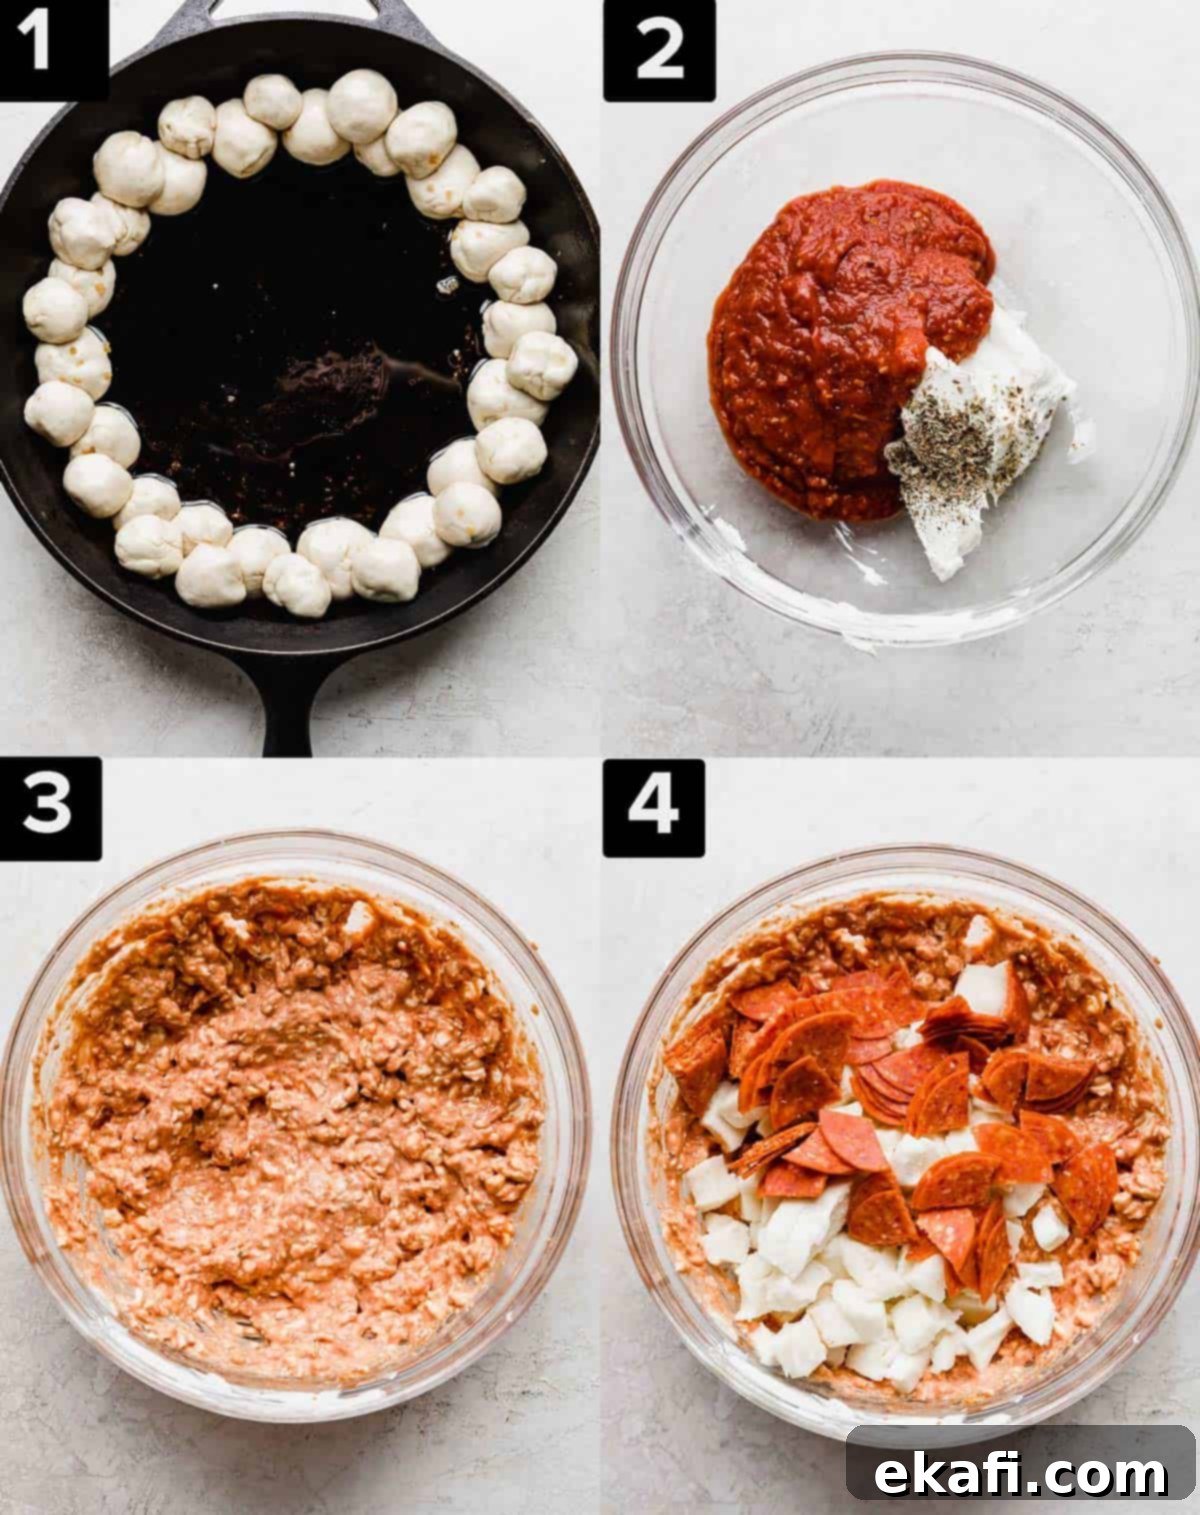
- Prepare Garlic Infused Oil: Begin by infusing your olive oil with fragrant garlic. In your cast iron skillet (or a similar oven-safe, medium-sized baking dish), heat 1 tablespoon of olive oil over medium-low heat. Add ½ teaspoon of minced garlic (which is roughly equivalent to about 3 cloves, finely minced) and gently cook for 1-2 minutes, stirring occasionally, or until the garlic becomes beautifully aromatic and just slightly golden. It’s crucial to be vigilant here and prevent the garlic from burning, as burnt garlic can taste bitter. Once fragrant, carefully transfer this delicious garlic-infused oil to a small, separate bowl and set it aside to cool slightly. This infused oil will be used to coat your pizza dough balls, imparting a wonderful foundational flavor.
- Cut and Portion the Dough: Lightly flour your work surface (a clean countertop or a large cutting board works well) to prevent the dough from sticking. Place your pizza dough on the floured surface and either pat or gently roll it out into an approximate 8×8-inch square. Using a sharp knife or a pizza cutter, carefully divide the dough into 36 equal pieces. Each piece should be quite small, approximately ½ ounce each, to create perfect bite-sized pull-apart rolls. Roll each small piece of dough into a neat, tight ball. Then, one by one, roll each dough ball through the reserved garlic-infused olive oil, ensuring it is lightly coated on all sides. This coating not only adds flavor but also helps prevent the balls from sticking together and promotes a golden crust.
- Arrange Dough Balls in Skillet: With your dough balls ready, carefully arrange 18 of the olive oil-coated balls around the outer edge of your cast iron skillet. These will form the first, base layer of your pull-apart bread ring. Next, take the remaining 18 balls and place them on top of the first layer, carefully staggering them so they sit snugly in the gaps (or “seams”) between the balls underneath. This creates a beautiful, rustic, and inviting pull-apart bread ring. Critically, ensure you leave a clear, empty circular space in the very center of the skillet – this central area is where your flavorful pepperoni dip will eventually go.
- Allow Dough to Rise: Once the dough balls are meticulously arranged, loosely cover the skillet with plastic wrap or a clean kitchen towel. Place the skillet in a warm, draft-free spot (such as a slightly warmed oven that’s turned off, or simply on your countertop in a warm room) and let the dough rise for about 45 minutes, or until the balls have visibly puffed up slightly and feel softer to the touch. While the dough is rising and developing its airy texture, preheat your oven to 400ºF (200ºC) and ensure the oven rack is positioned in the middle for even baking.
- First Bake of the Pizza Dough Balls: Carefully remove the plastic wrap or towel from the skillet. Place the skillet, with its beautifully risen dough balls, into the preheated oven. Bake for 18-22 minutes, or until the tops of the dough balls are beautifully golden brown and appear cooked through. You can lightly tap one to check for a hollow sound, indicating doneness. Once baked to perfection, remove the skillet from the oven but keep the oven on, as it will be needed for the final bake.
- Prepare the Pepperoni Dip: While your dough balls are in their first baking phase, it’s the perfect time to prepare the star attraction: the creamy pepperoni dip! In a medium-sized mixing bowl, combine 8 ounces of softened cream cheese (remember, room temperature is key for smoothness), ¾ cup of your chosen pizza sauce, ¼ teaspoon of dried oregano, and ¼ teaspoon of dried basil. Using an electric mixer (or a sturdy whisk and some elbow grease), beat the mixture until it is completely smooth, creamy, and well combined, ensuring there are absolutely no lumps. Gently stir in 1 ½ cups of shredded mozzarella (or your diced fresh mozzarella) and almost all of the ¾ cup of chopped pepperoni. Be sure to reserve a small handful of chopped pepperoni to sprinkle on top later for an attractive and delicious finish.
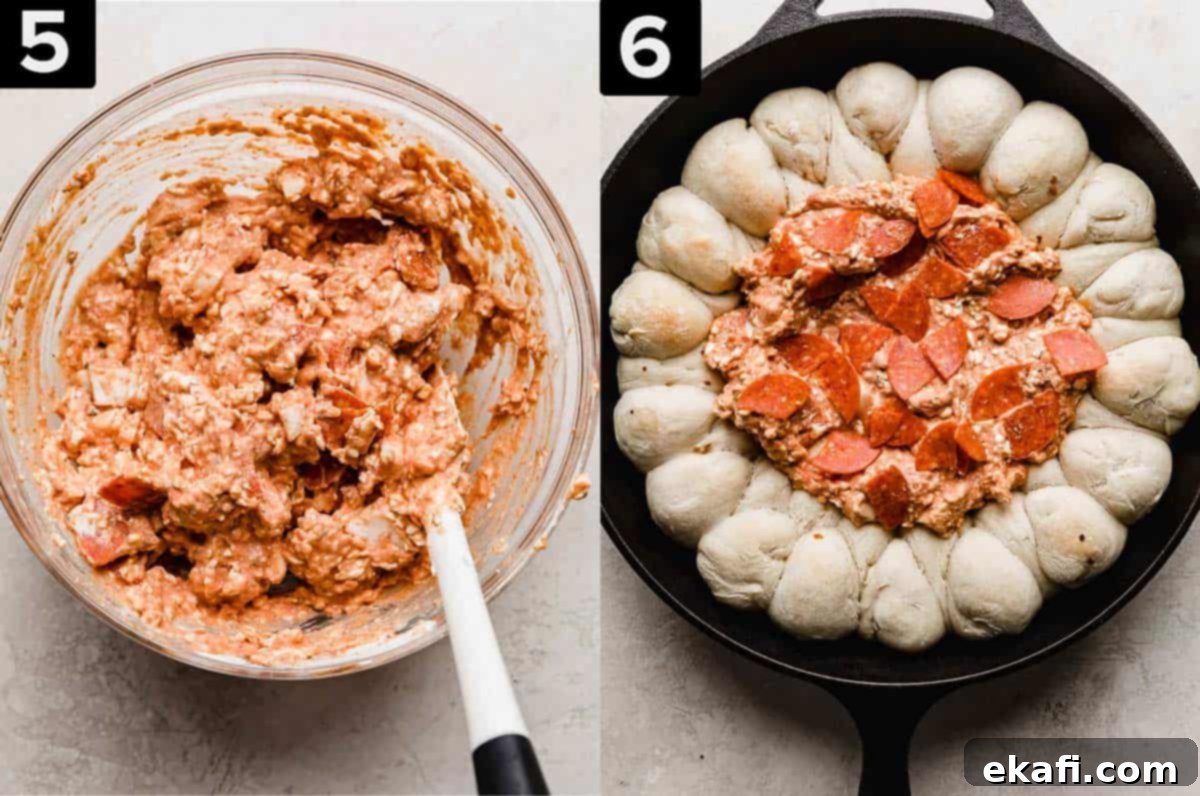
- Combine Dip and Dough, Bake Again: With the dough balls baked to a perfect golden hue, it’s time to bring everything together. Spoon the prepared creamy pepperoni pizza dip mixture generously into the empty center of the skillet, spreading it evenly to fill the space. Take the remaining chopped pepperoni (which you wisely reserved) and sprinkle them evenly over the top of the dip for an extra layer of flavor and visual appeal. Return the skillet to the oven for an additional 8-10 minutes. This second bake is crucial: it heats the dip through completely, melts the cheese to a wonderfully bubbly, gooey perfection, and ensures the pull-apart rolls are perfectly golden brown and slightly crispy on top.
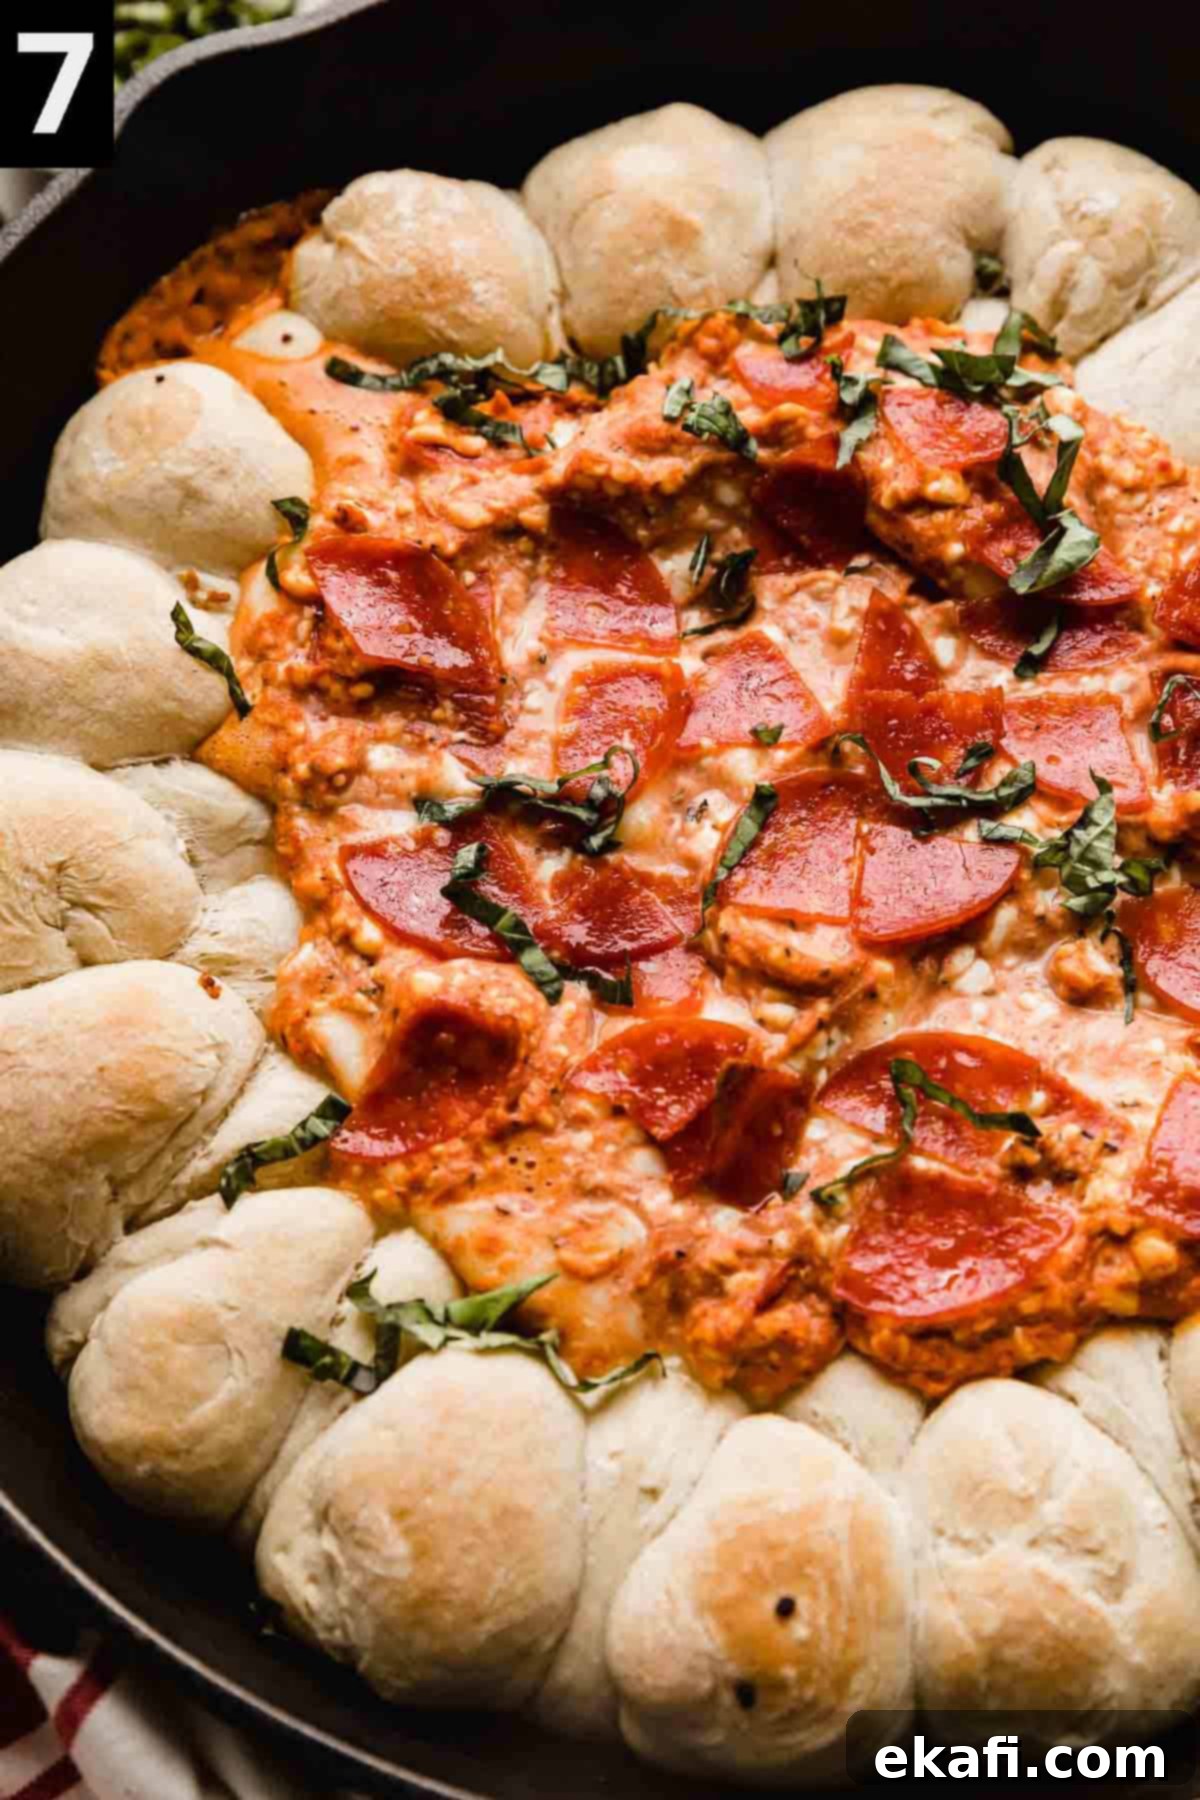
- Garnish and Serve Immediately: Once baked to bubbly, golden perfection, carefully remove the skillet from the oven. For a final flourish and a burst of vibrant, fresh flavor, generously sprinkle freshly chopped basil over the top of the hot dip. The heat from the dip will help release the basil’s aromatics. Serve immediately while it’s wonderfully warm, gooey, and utterly irresistible! Encourage everyone to pull off one of the warm, garlic-infused bread balls and dive into the glorious, cheesy center. Get ready for applause and rave reviews – this dish is truly a showstopper and the ultimate interactive appetizer!
Expert Tips for the Best Pepperoni Pizza Dip
To ensure your pepperoni pizza dip turns out perfectly every single time, from the initial prep to the final, delicious bite, keep these invaluable tips and tricks in mind. They’ll help you maximize flavor, optimize texture, and make the cooking process a breeze:
- Mixing the Dip for Creaminess: While a sturdy spoon or a whisk can certainly get the job done for blending the cream cheese and pizza sauce mixture, an electric hand mixer is highly recommended. It significantly speeds up the process and, more importantly, ensures a wonderfully smooth, lump-free consistency, which is absolutely crucial for achieving that luxurious, velvety dip. Regardless of the tool you choose, the ultimate goal is a thoroughly combined and homogenous creamy base that melts beautifully.
- Embrace the Dough Balls: Seriously, whatever you do, do not skip these pull-apart pizza dough balls! They are not just an accompaniment; they are fundamentally what make this recipe truly special, interactive, and a guaranteed family favorite. The sheer joy and satisfaction of pulling off a warm, garlicky, slightly crispy roll and then dipping it into the rich, bubbly, cheesy center is an experience in itself. It’s fun, delicious, and incredibly satisfying for both kids and adults, transforming a simple dip into an engaging culinary adventure.
- Pepperoni Selection and Preparation: You have flexibility with your pepperoni! You can use regular-sized pepperoni slices and simply cut them into quarters as directed in the recipe for even distribution. Alternatively, for ultimate convenience, opt for pre-packaged mini pepperoni. For an extra layer of texture and intensified flavor, consider crisping up a portion of the pepperoni slices in a separate dry pan or even in the microwave until slightly crispy before adding them to the top of the dip. This adds a delightful textural contrast to the creamy dip.
- Skillet Alternatives: Don’t have a cast iron skillet? No problem at all! This recipe is adaptable. You can easily prepare this delicious dip in a regular oven-safe baking dish. A square or circular ceramic baking dish will work wonderfully, and a pie plate is also an excellent option as it will naturally mimic the round, pull-apart skillet look. Just be sure to generously spray the bottom and sides of your chosen dish with cooking spray to ensure nothing sticks and for easy serving.
- Dough Versatility and Alternatives: Feel free to use either homemade or a good-quality store-bought pizza dough. If you’re seeking an absolutely amazing base with superior flavor and texture, our homemade pizza dough recipe is highly recommended and truly worth the effort. Alternatively, if your focus is solely on the dip or if you’re short on time, you can make just the pepperoni pizza dip separately and serve it with your favorite store-bought dippers. Excellent choices include sturdy breadsticks, crisp garlic bread slices, toasted baguette rounds, pita chips, or even crunchy sturdy crackers.
- Customization is Your Canvas: Don’t be afraid to experiment and personalize this classic pepperoni pizza dip with your favorite pizza toppings! This recipe is incredibly forgiving and open to customization. Consider adding finely diced green peppers, thinly sliced sautéed mushrooms, cooked and crumbled Italian sausage pieces, black olives, or even a sprinkle of red pepper flakes if you enjoy a bit of heat. These thoughtful additions can transform the dip into a unique reflection of your ideal pizza, catering to various tastes and preferences.
- Maximizing Your Homemade Dough: If you decide to use our homemade pizza dough recipe, you’ll notice it yields enough dough for two standard pizzas. This means you’ll only need about half of the batch for this particular pizza dip recipe. Instead of halving the dough recipe itself (which can be tricky with yeast), we love to wrap the leftover pizza dough tightly in plastic wrap and store it in the fridge. This clever trick provides the foundation for a super quick and easy thin-crust homemade pizza the very next night for dinner, perfectly embodying that efficient “two birds, one stone” meal prep philosophy!
Make Ahead, Storing, and Freezing Tips for Convenience
Planning ahead can significantly streamline your cooking process and make entertaining a breeze. Here’s how to efficiently manage this delicious pepperoni pizza dip recipe for maximum convenience and optimal freshness:
- Make Ahead Strategies: You can certainly prepare the pizza dough in advance and store it using the methods detailed below. However, for the absolute best texture and freshness of the dip itself, we generally recommend assembling and baking the creamy dip components (cream cheese, sauce, pepperoni, mozzarella) on the very same day you plan to serve it. The dip mixture (without the mozzarella) can be combined a day or two in advance and kept refrigerated in an airtight container. Just be sure to stir in the mozzarella and final pepperoni only just before you assemble and bake the dish. This ensures the cheese melts perfectly and the flavors remain vibrant.
- Storing Leftovers: If, by some miracle, you happen to have any delicious leftovers of this highly popular dip (which is a rare occurrence!), simply transfer them to an airtight container. Store this in the refrigerator for up to 3 days. To reheat, individual portions can be quickly warmed through in the microwave, or for a larger quantity, place the entire skillet back into a low oven (around 300°F or 150°C) until it’s warmed through and bubbly once more.
- Freezing Pizza Dough: One of the best time-saving tricks for any avid home cook: pizza dough freezes exceptionally well! After you’ve prepared your dough, divide it into the specific portions you’ll need for future recipes. For this dip, you can divide it into small, individual balls. If you’re planning for regular pizzas, divide it into larger balls suitable for rolling out. Lightly coat each dough ball with a thin layer of olive oil; this crucial step helps prevent freezer burn and keeps the dough from sticking together. Place them in an airtight freezer bag, ensuring you press out as much air as possible before sealing, and store them in the freezer for up to 3 months.
- Thawing Frozen Dough: To effectively thaw your frozen pizza dough and prepare it for use, transfer it from the freezer to the refrigerator and allow it to thaw slowly overnight. The next morning, or approximately 30 minutes to an hour before you intend to use it, remove the dough from the fridge and let it sit on your kitchen counter at room temperature. Make sure it’s covered (with plastic wrap or a damp towel) to prevent it from drying out. This crucial resting period allows the dough to relax and become perfectly pliable and easy to work with for rolling out or shaping according to your recipe’s needs.
Frequently Asked Questions About Pepperoni Pizza Dip
Absolutely! While it’s truly at its best when served fresh and warm, you can certainly do a good amount of prep work in advance to save time. The pizza dough, for instance, can be prepared days or even weeks ahead and stored safely in the refrigerator or freezer (please refer to our specific freezing instructions below for best results). For the dip itself, you can mix the cream cheese, pizza sauce, and seasonings up to 1-2 days before you plan to bake it. Store this mixture in an airtight container in the fridge, and then incorporate the mozzarella and pepperoni just before you assemble and bake the dish. This strategic approach allows you to significantly cut down on preparation time on the day of your event without compromising the vibrant flavors or delightful texture. Fun fact: our homemade pizza dough recipe yields enough dough for two pizzas, so I often make the full batch and freeze half, ensuring I always have dough ready for a spontaneous pizza night or another batch of this delicious dip!
Unfortunately, freezing the fully prepared pepperoni pizza dip itself is not recommended. The dairy components, particularly the cream cheese and mozzarella, are highly susceptible to separating and undergoing undesirable textural changes once they have been frozen and then thawed. This often results in a grainy, watery, or otherwise unappetizing consistency and appearance, significantly diminishing the dip’s quality. For the absolute best and most enjoyable experience, we strongly advise savoring the dip fresh. However, as mentioned, the pizza dough component can be frozen successfully, offering a great way to prep ahead!
Yes, absolutely! Freezing pizza dough is a fantastic, game-changing technique for saving time and ensuring you always have fresh dough readily available. As a staunch proponent of make-ahead meal prep, I wholeheartedly recommend it. For simple, effective directions, Taste of Home provides excellent guidance: Begin by dividing your prepared dough into individual balls according to the size you’ll require (for example, small balls perfectly sized for this dip, or larger ones for a full pizza crust). Lightly coat each of these dough balls with a thin layer of olive oil; this crucial step helps prevent them from sticking together and guards against freezer burn. Finally, place the coated balls into a sealed freezer bag, making sure to press out all excess air before placing them in the freezer. This method ensures your dough stays fresh and ready for future use.
When properly stored using the method described above (lightly oiled and in an airtight freezer bag), pizza dough can last wonderfully in the freezer for an impressive period of up to 3 months! This extended shelf life makes it an excellent, reliable option for long-term meal planning and for satisfying those spontaneous pizza or dip cravings without extensive fresh preparation.
For the absolute best and most successful thawing results, we recommend following Taste of Home’s expert advice: First, transfer your frozen pizza dough from the freezer to the refrigerator and allow it to thaw slowly and gradually overnight. The next morning, or approximately 30 minutes to an hour before you plan to use the dough, carefully move it from the fridge to your kitchen counter. Be sure to keep it covered (with plastic wrap or a clean, damp kitchen towel) to prevent it from drying out. This crucial room temperature resting period allows the dough to relax, become more pliable, and reach an optimal temperature, making it much easier to roll out or shape for your specific recipe.
You have a few convenient and effective options for storing pizza dough, depending on your immediate and future needs. If you plan to use it right away, you can make the dough, allow it to complete its initial rise, and then immediately proceed with your recipe (such as this delightful pizza dip or a traditional pizza). If you need to store it for a shorter period, wrap the dough tightly and thoroughly in plastic wrap and keep it in the refrigerator for up to 3 days. For longer-term storage, freezing is your best and most reliable bet, as comprehensively detailed in the previous FAQ sections. Regardless of the method, always ensure the dough is well-wrapped or sealed to prevent it from drying out, forming a crust, or absorbing any unwanted odors from your fridge or freezer.
Absolutely! This pepperoni pizza dip is wonderfully adaptable for vegetarian diets. To make it vegetarian, simply omit the pepperoni entirely. You can replace it with a variety of delicious vegetarian alternatives that add fantastic flavor and texture. Consider adding plant-based pepperoni alternatives, finely diced bell peppers, sautéed mushrooms, caramelized onions, or even sun-dried tomatoes (chopped) for a burst of rich umami flavor. The creamy cheese base and delicious pizza sauce ensure that it will still be incredibly flavorful, satisfying, and a hit with everyone, even without the meat.
While the homemade pull-apart rolls are undeniably a highlight and perfectly complement the dip, this creamy pizza dip is incredibly versatile and pairs wonderfully with a wide variety of other dippers. If you’re looking for alternatives or simply want more options, consider serving it with store-bought breadsticks, crispy toasted baguette slices, warm garlic bread, crunchy pita chips, a selection of sturdy crackers, or even a healthier option like raw vegetable sticks (such as colorful bell pepper strips, crisp carrot sticks, or refreshing cucumber slices) for a lighter and fresher contrast. Feel free to get creative and use whatever delightful dippers you have on hand or prefer!
More Delicious Pizza Recipes to Satisfy Your Cravings
If you’re as passionate about the comforting and versatile world of pizza as we are, you’ll absolutely love exploring these other fantastic pizza-inspired dishes from our kitchen. Each recipe offers a unique way to enjoy those familiar, cherished flavors:
- French Bread Pizza: A wonderfully quick and effortlessly easy classic, perfect for a no-fuss weeknight meal that kids and adults alike adore.
- Arugula Pizza: For those who appreciate a fresh, slightly peppery, and sophisticated twist on their traditional pizza pie, offering a vibrant contrast to rich cheeses.
- Pepperoni Pizza Noodles: A comforting and incredibly fun deconstructed pizza experience, served up in a hearty, family-friendly casserole form.
- CPK Club Pizza: Learn how to masterfully recreate your favorite restaurant-style pizza right in the comfort of your own home, perfect for a special treat.
- Pizza Stuffed Rolls: Another delightful and ingenious pull-apart concept, these rolls are individually packed with gooey, cheesy fillings and all your favorite pizza elements.
Did you try this irresistible Pepperoni Pizza Dip recipe and fall in love with its creamy, cheesy goodness and those delightful pull-apart rolls? We’d absolutely love to hear your thoughts and experiences! Please leave a star rating and a detailed review right here on the blog, or simply scroll down below the recipe card to share your valuable feedback. Your honest reviews and ratings are incredibly helpful to other home cooks who are looking to discover and enjoy these delicious recipes!
Stay connected with us and ensure you’re always up-to-date with all our latest culinary adventures, new recipes, and kitchen tips by following us on your favorite social media platforms. Join our vibrant community on Instagram, TikTok, YouTube, Facebook, and Pinterest. Don’t miss out on any delicious inspiration!

Print
SaveSaved!
Review
Pepperoni Pizza Dip
Ingredients
- 18 oz pizza dough
- 3 oz pepperoni – cut into quarters (about 3/4 cup)
- 1 tablespoon olive oil
- 1/2 teaspoon garlic, minced – about 3 garlic cloves
- 8 oz cream cheese – softened
- 3/4 cup pizza sauce
- 1/4 teaspoon dried oregano
- 1/4 teaspoon dried basil
- 1 1/2 cups shredded mozzarella – or 6 oz fresh mozzarella, diced
- fresh basil – chopped for garnish
Equipment
-
hand mixer
-
12 inch cast iron skillet, with lid
-
garlic mincer
-
Herb scissors
Instructions
-
In a cast iron skillet over medium low heat, warm 1 tablespoon of olive oil. Add ½ teaspoon of minced garlic and sauté for 1-2 minutes until it becomes fragrant. Be careful not to let the garlic burn. Transfer the garlic-infused oil to a small bowl and set aside for later.
-
On a lightly floured surface, gently pat or roll your pizza dough into a rough 8×8-inch square. Using a sharp knife or pizza cutter, divide the dough into 36 small pieces, each weighing approximately ½ ounce.
-
Roll each small dough piece into a neat ball. Then, dip and roll each ball into the garlic olive oil you prepared earlier, ensuring it’s evenly coated. Arrange 18 of these coated dough balls around the outer edge of your cast iron skillet. Place the remaining 18 balls on top, staggering them between the seams of the lower layer of balls. Leave the center of the skillet empty for the dip.
-
Loosely cover the skillet with plastic wrap and let the dough balls rise in a warm spot for about 45 minutes, or until they have noticeably puffed up. While the dough is rising, preheat your oven to 400°F (200°C) and place the oven rack in the middle position.
-
Once the dough has risen, carefully remove the plastic wrap. Place the skillet containing the dough balls into the preheated oven and bake for 18-20 minutes, or until the tops of the rolls are lightly golden brown and appear cooked through.
-
While the dough balls are baking, prepare the creamy pepperoni dip. In a medium-sized bowl, combine the 8 oz softened cream cheese, ¾ cup pizza sauce, ¼ teaspoon dried oregano, and ¼ teaspoon dried basil. Using an electric mixer (or a strong whisk), beat the mixture until it is smooth and well combined, ensuring no lumps remain. Stir in 1 ½ cups of shredded mozzarella (or diced fresh mozzarella) and ¾ of the chopped pepperonis, reserving the remaining pepperoni for topping.
-
After the first bake, carefully remove the skillet from the oven. Spoon the prepared cheese and pepperoni mixture into the empty center of the skillet, spreading it evenly. Sprinkle the reserved chopped pepperonis over the top of the dip. Return the skillet to the oven and bake for an additional 8-10 minutes, or until the cheese mixture is heated through, bubbly, and the rolls are a deeper golden brown.
-
Once done, carefully remove the skillet from the oven. Garnish generously with freshly chopped basil. Serve immediately while the dip is warm, gooey, and irresistible! Encourage your guests to pull off a warm bread ball and dip it into the glorious, cheesy goodness. Enjoy!
Notes
Recipe Source: adapted from Cooks Country Cook it in Cast Iron
Nutrition
