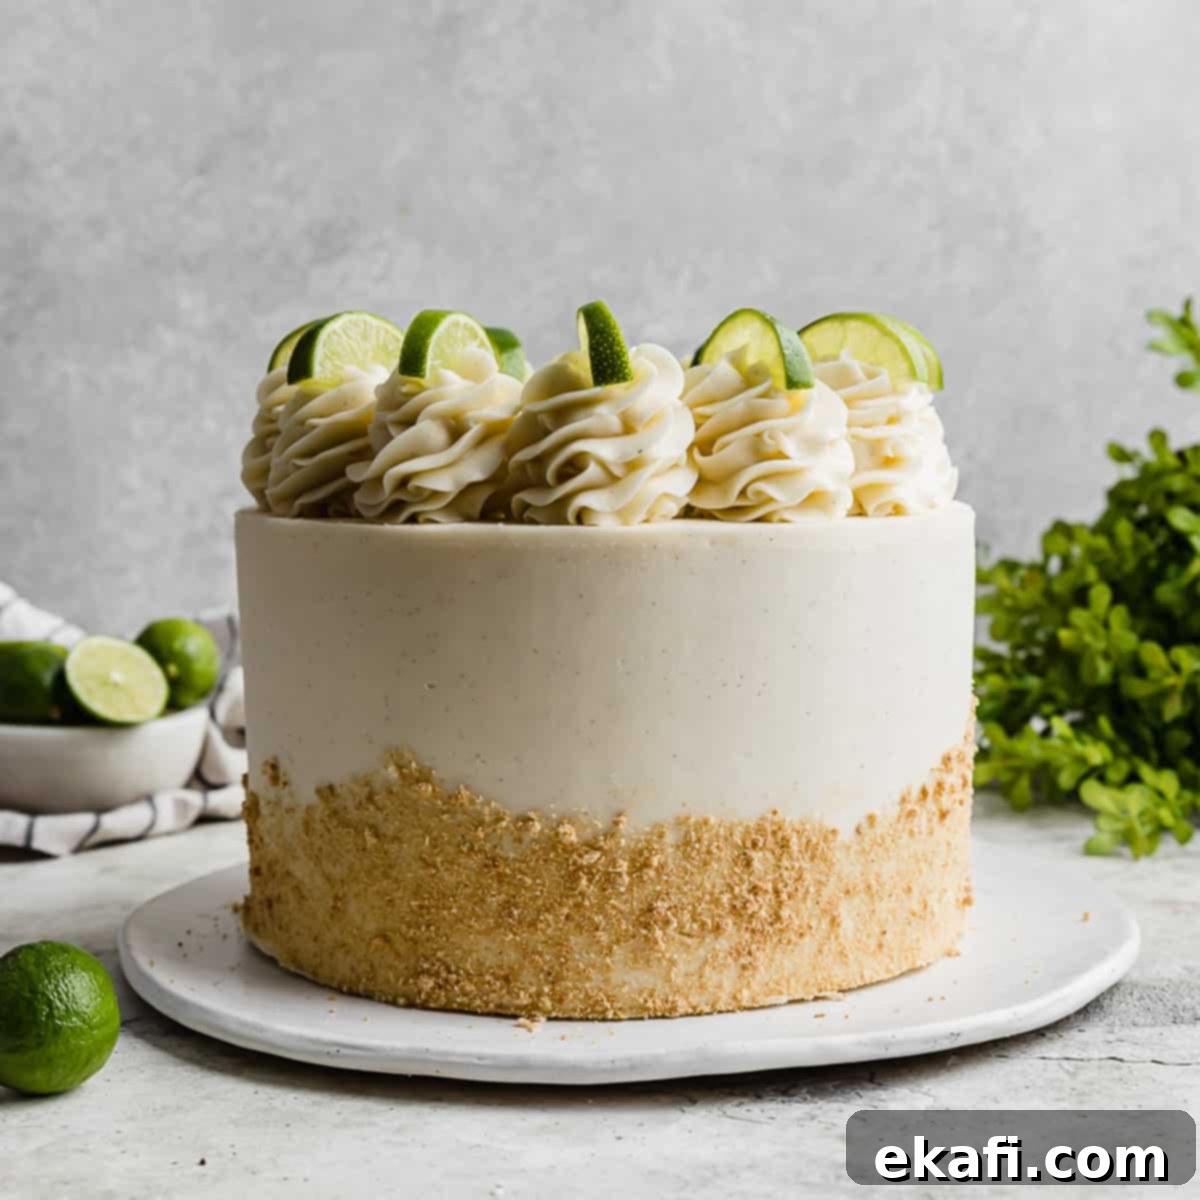
Ultimate Key Lime Pie Cake: Zesty Layers, Graham Cracker Crust & Vanilla Bean Buttercream
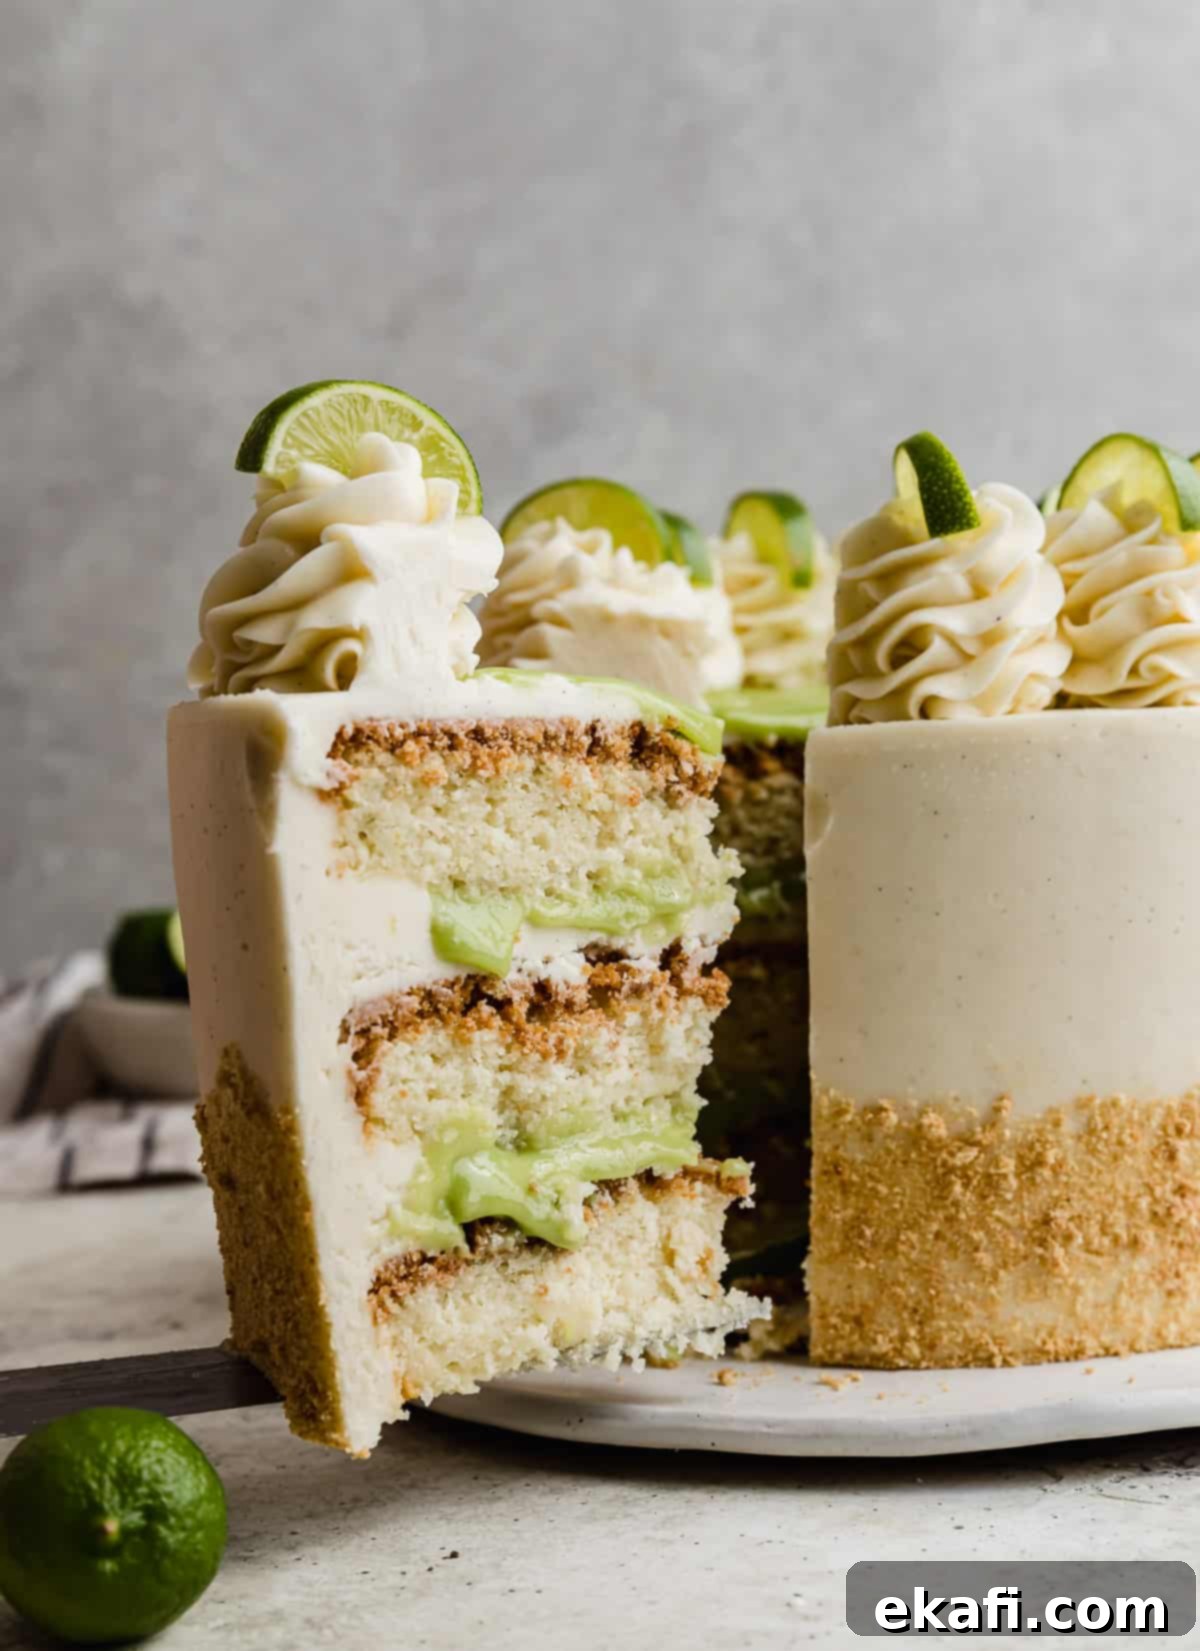
Prepare to be swept away by the vibrant, tangy essence of our Key Lime Pie Cake – a dessert that truly captures the spirit of the classic pie in an extraordinary layered cake format. This isn’t just a cake; it’s an experience, featuring irresistibly moist key lime cake layers baked directly on a crunchy, buttery graham cracker crust. Each bite delivers a burst of intense lime flavor, complemented by a luscious, zesty homemade lime curd nestled between the layers. The entire masterpiece is then enveloped in a cloud of smooth, rich vanilla bean buttercream, making it a show-stopping dessert for any occasion. Whether you’re a long-time fan of traditional Key Lime Pie or enjoy a playful twist like Crumbl Key Lime Pie Cookies, the truth is, lime brings a uniquely fun and refreshing flavor to any sweet treat, and this cake is no exception. Get ready to bake a dessert that’s as delightful to look at as it is to eat!
Why This Key Lime Pie Cake Recipe Works Wonders
This Key Lime Pie Cake recipe isn’t just another dessert; it’s a meticulously crafted culinary delight designed to deliver maximum flavor and an unforgettable experience. Here’s why it stands out:
- Prominent Key Lime Flavor: Unlike recipes that only hint at lime, our cake boasts an incredibly intense and authentic key lime taste. We achieve this by incorporating both the fresh juice and the aromatic zest of key limes into both the moist cake layers and the homemade lime curd. The zest, in particular, carries essential oils that amplify the citrus notes, creating a brighter, more pronounced lime profile that truly sings with every mouthful. This dual application ensures a deep, rich, and truly prominent key lime experience.
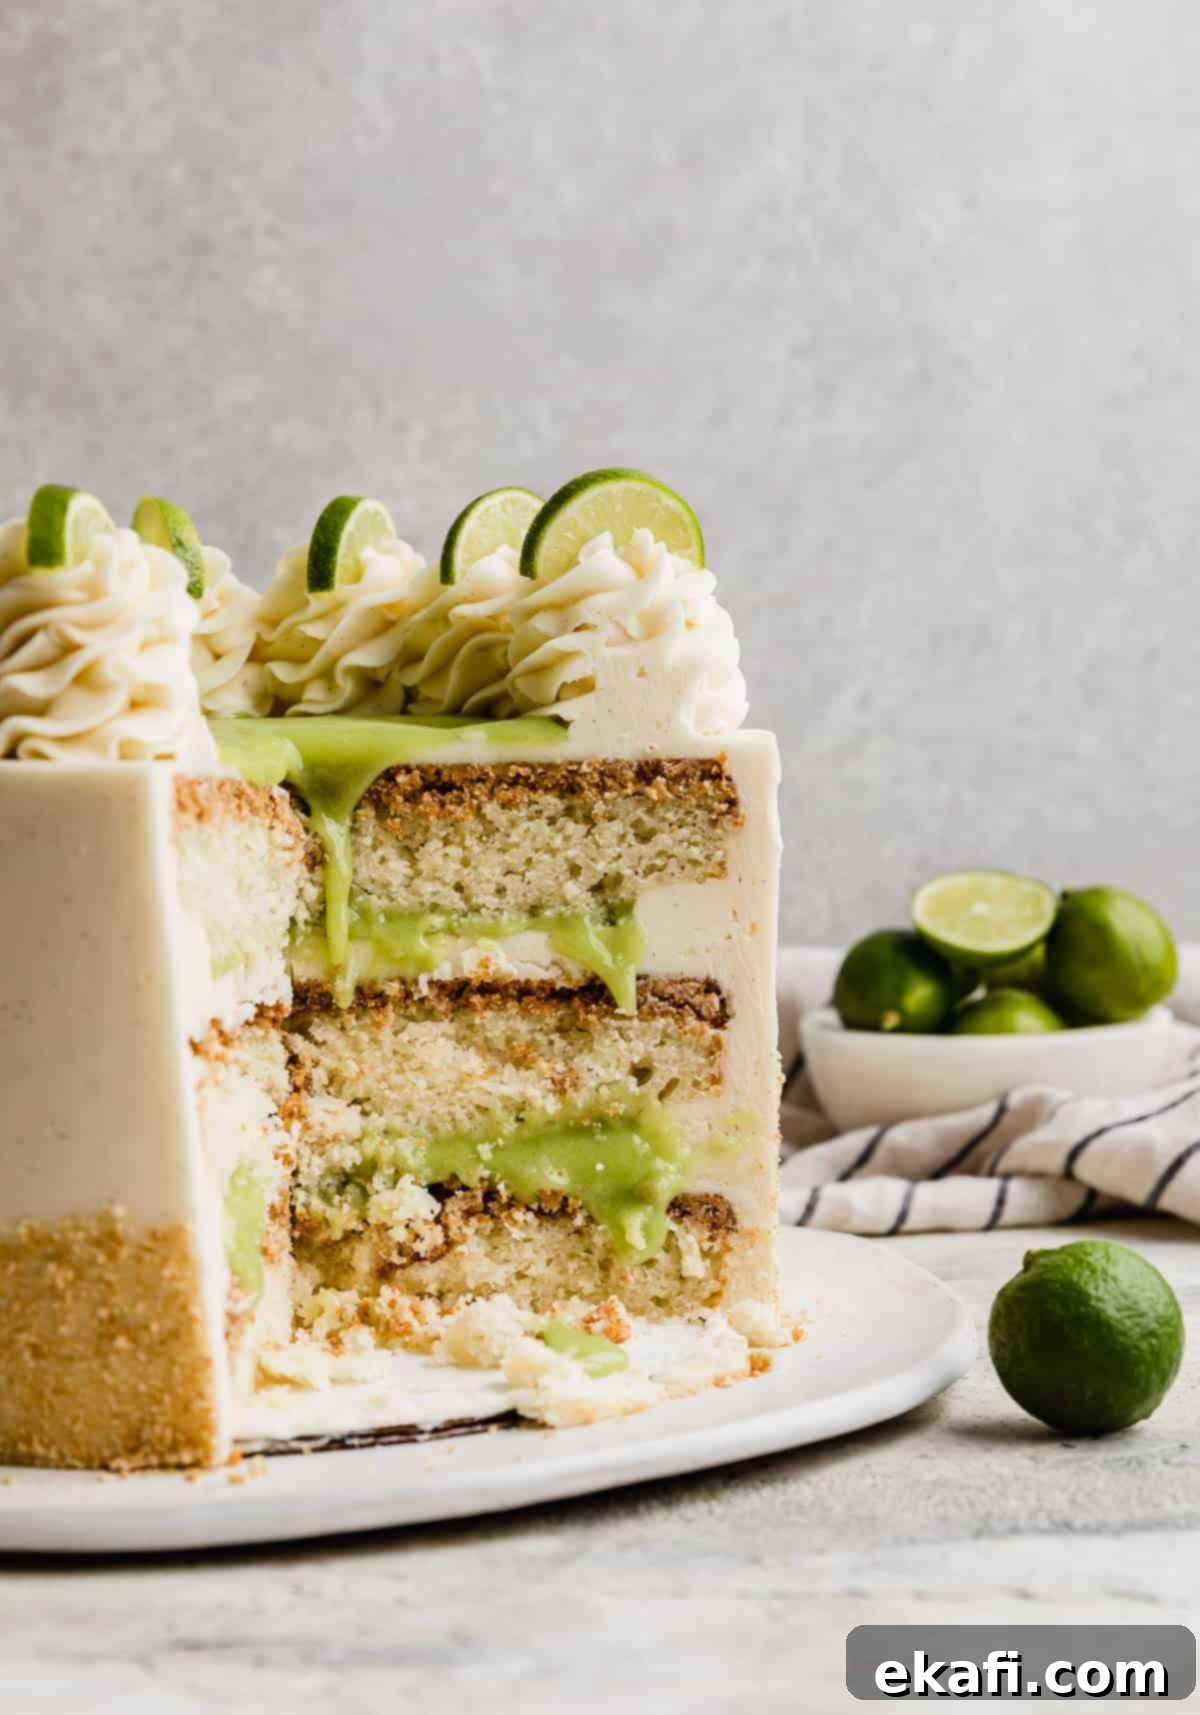
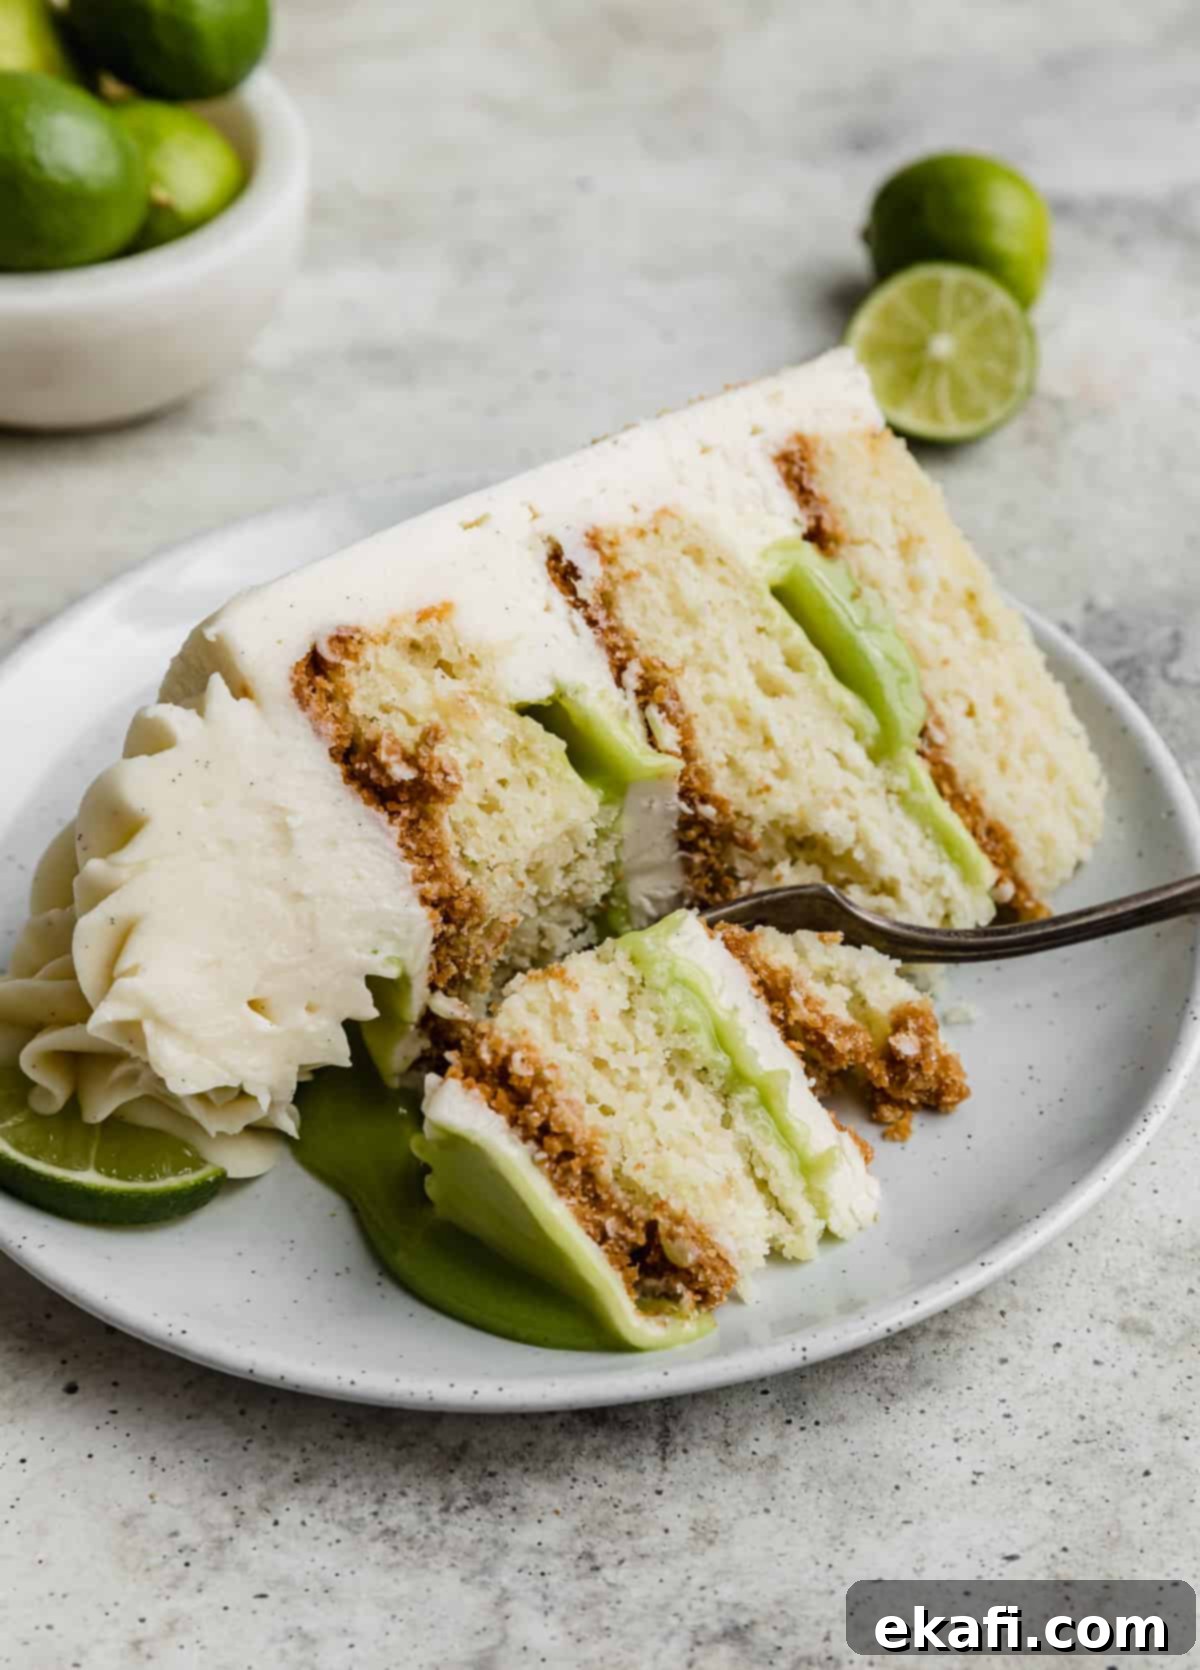
- Key Lime Pie in Cake Form: Imagine the beloved elements of a classic key lime pie, transformed into a magnificent layered cake. That’s precisely what this recipe delivers. By baking the delicate lime cake layers directly on a sturdy, buttery graham cracker crust, we cleverly mimic the iconic base of a traditional key lime pie. This not only pays homage to its namesake but also introduces a delightful textural contrast. The tender, fluffy cake layers are perfectly balanced by the crisp, crumbly crust, adding an irresistible dimension to each slice. It’s the best of both worlds – a pie and a cake, beautifully combined.
- Vanilla Bean Paste for Flavor and Flair: While vanilla extract is a staple, our recipe elevates the vanilla component by utilizing vanilla bean paste in the buttercream. This premium ingredient isn’t just about adding flavor; it’s about making vanilla a star. Vanilla bean paste offers a significantly more robust and complex vanilla profile than extract, moving it from a subtle background note to a rich, warm, and inviting presence. Furthermore, the charming flecks of real vanilla bean visible in the buttercream add a sophisticated, gourmet flair, enhancing the cake’s visual appeal and promising an artisanal quality that will impress any guest.
Essential Ingredient Notes for Your Key Lime Pie Cake
Crafting the perfect Key Lime Pie Cake begins with understanding your ingredients. Here’s a closer look at the key components and why they matter:
- Graham Cracker Crumbs: For that perfect, smooth, and cohesive crust that mimics a pie, ensure your graham cracker crumbs are very fine. You can buy them pre-crushed or finely process whole graham crackers in a food processor. This fine texture is crucial for a crust that holds together well and provides a consistent base for your cake layers.
- Unsalted Butter: Butter is a workhorse in this recipe, used in three different components: the graham cracker crust, the tangy lime curd, and the rich vanilla bean buttercream. Paying close attention to the recipe card for the specific state of butter – whether melted for the crust, soft for the buttercream, or cold for the curd – is vital for achieving the correct texture and consistency in each element. If using salted butter, remember to adjust or omit any added salt in the crust and buttercream to maintain optimal flavor balance.
- Cake Flour: This is a non-negotiable ingredient for achieving a tender, light, and airy cake crumb. Cake flour has a lower protein content and finer consistency compared to regular all-purpose flour, which prevents the cake from becoming tough. While you can create a makeshift cake flour substitute, for best results and convenience, we highly recommend purchasing it. Brands like Softasilk are excellent choices for ensuring a wonderfully delicate texture.
- Oil: The secret to an exceptionally moist cake lies in the addition of a neutral-flavored oil such as grapeseed, vegetable oil, or canola oil. Oil contributes a different kind of moisture than butter, resulting in a cake that stays tender and soft for longer, without drying out. Choose an oil that won’t overpower the delicate key lime flavor.
- Buttermilk: Achieving a perfectly balanced cake batter requires room temperature wet ingredients. Buttermilk not only adds a subtle tang that complements the lime but also contributes to the cake’s tender crumb. Using it at room temperature ensures it emulsifies beautifully with other ingredients, leading to a smoother batter and a more even bake.
- Sour Cream: Just like buttermilk, room temperature sour cream is essential. We opt for full-fat sour cream because it serves a dual purpose: it introduces a delightful tart, tangy note that brightens the overall flavor profile, and its high-fat content significantly enhances the cake’s moisture, ensuring every slice is incredibly rich and succulent.
- Key Lime Juice: For the most consistent and balanced flavor in your homemade lime curd, we strongly recommend using store-bought key lime juice (like the Nellie and Joe’s brand). Through extensive testing, fresh key lime juice often yielded a bitter curd, whereas store-bought consistently produced a perfect, tangy, and sweet result. However, if you prefer, fresh key lime juice can certainly be used for the cake layers where the other ingredients help balance its intensity.
- Vanilla Extract: While vanilla bean paste takes center stage in the buttercream, a touch of vanilla extract in the cake batter adds a foundational layer of warm, sweet aroma that perfectly harmonizes with the bright citrus notes. It’s a subtle but important background player.
- Key Lime Zest: This ingredient is a flavor powerhouse! The zest contains the essential oils that deliver the most potent and aromatic lime flavor. If key limes are hard to find, you can substitute with the zest of regular limes. However, be aware that key limes offer a distinctively punchier and more aromatic lime flavor, so the overall intensity might vary. Always zest only the green part of the lime, avoiding the bitter white pith.
- Powdered Sugar: For a flawlessly smooth, velvety buttercream that pipes beautifully and melts in your mouth, sifting the powdered sugar is a crucial step. This removes any lumps, ensuring a consistent and refined texture. Don’t skip this!
- Vanilla Bean Paste: As mentioned, this is our secret weapon for a truly gourmet vanilla experience. It’s thicker than extract, delivers a richer, more profound vanilla flavor, and comes with those beautiful, tiny black flecks of vanilla bean. These flecks not only signify its superior quality but also add an elegant, professional visual appeal to your vanilla bean buttercream, making your cake look as impressive as it tastes.
Crafting Your Key Lime Pie Cake: Detailed Instructions
Follow these meticulous steps to create a show-stopping Key Lime Pie Cake that will impress everyone:
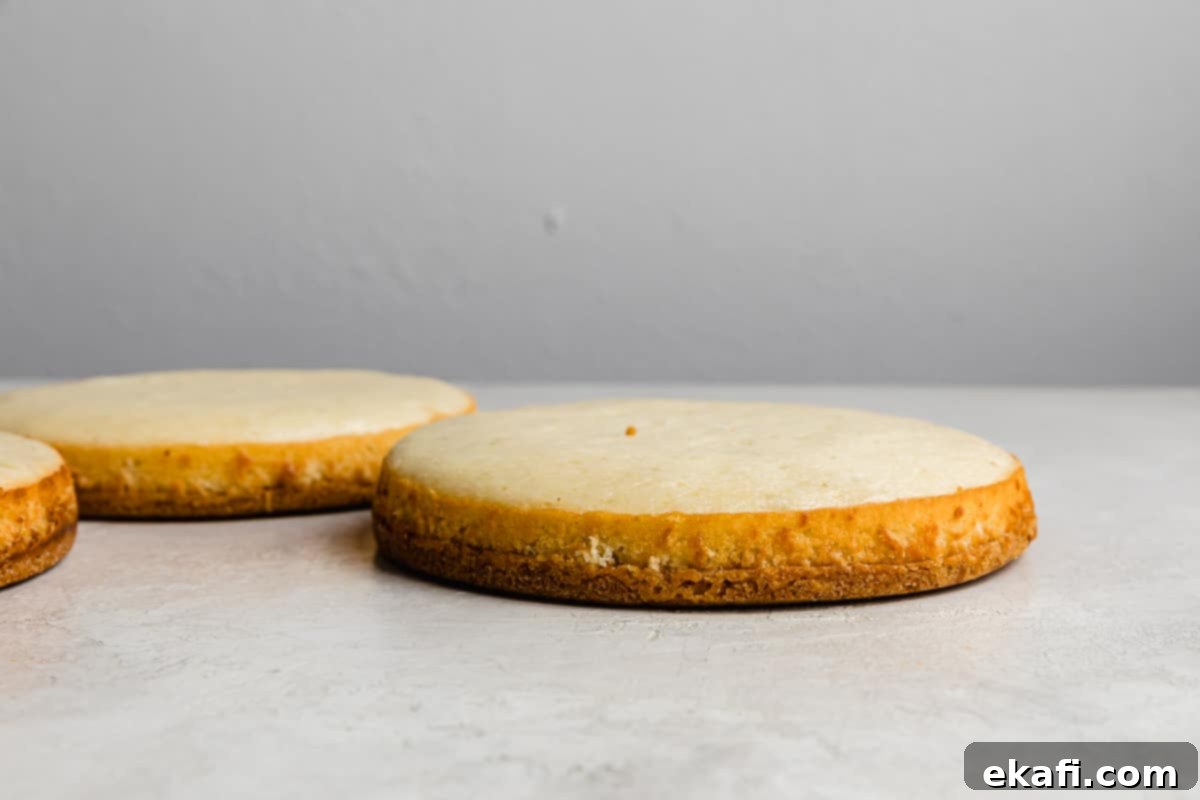
- Prepare the Buttery Graham Cracker Crust: Begin by preheating your oven to 325°F (160°C). Lightly spray three 8-inch round cake pans with nonstick cooking spray, then line the bottoms with parchment paper. Spray the parchment paper too for easy release. In a large bowl, combine the finely crushed graham cracker crumbs, melted unsalted butter, granulated sugar, and salt. Mix thoroughly until the mixture resembles wet sand and is evenly combined. Divide this fragrant mixture into thirds and press one-third firmly into the bottom of each prepared cake pan. Use the back of a spoon or a flat-bottomed glass to create an even, compact crust. Bake for just 4 minutes to set the crust, then remove from the oven and let them cool completely while you prepare the cake layers. This brief bake gives the crust stability and enhances its buttery flavor.
- Whip Up the Moist Key Lime Cake Batter: In a medium bowl, whisk together the cake flour, baking powder, and salt until well combined. Set this dry mixture aside. In a separate, smaller bowl, combine the room temperature sour cream, buttermilk, key lime juice, aromatic key lime zest, and vanilla extract. Whisk gently until smooth. Now, in the bowl of a stand mixer fitted with the paddle attachment, beat the granulated sugar and neutral-flavored oil together for 2-3 minutes on medium speed. The mixture should become noticeably lighter in color and well emulsified. Add the large eggs one at a time, beating thoroughly after each addition to ensure they are fully incorporated and the batter remains smooth. Scrape down the sides of the bowl as needed.
- Carefully Combine Wet and Dry Ingredients: With your stand mixer on the lowest speed, begin to add the dry flour mixture to the wet ingredients in alternating additions. Start by adding approximately one-third of the flour mixture, mixing just until barely combined. Follow this with half of the buttermilk/sour cream mixture, again mixing until just incorporated. Repeat this pattern: another third of the flour, the remaining half of the buttermilk mixture, and finally the last third of the flour. The key here is to not overmix the batter once the wet and dry ingredients come together. Overmixing will develop the gluten in the flour, resulting in a tough, dense cake. Mix only until the streaks of flour disappear. Divide the perfectly smooth batter evenly among your three prepared cake pans, pouring it directly over the cooled graham cracker crusts.
- Bake the Zesty Lime Cake Layers: Place the cake pans into your preheated 325°F (160°C) oven and bake for 28-34 minutes. Baking times can vary, so begin checking for doneness around the 28-minute mark. The cakes are ready when a wooden toothpick inserted into the center comes out clean or with only a few moist crumbs attached. Avoid overbaking, as this can lead to a dry cake. Once baked, remove the pans from the oven and let the cake layers cool in their pans on a wire rack for about 15-20 minutes. This resting period helps the cakes firm up before you handle them. After this time, carefully invert the cakes onto the wire rack to cool completely. Allowing them to cool fully is crucial before frosting to prevent the buttercream from melting.
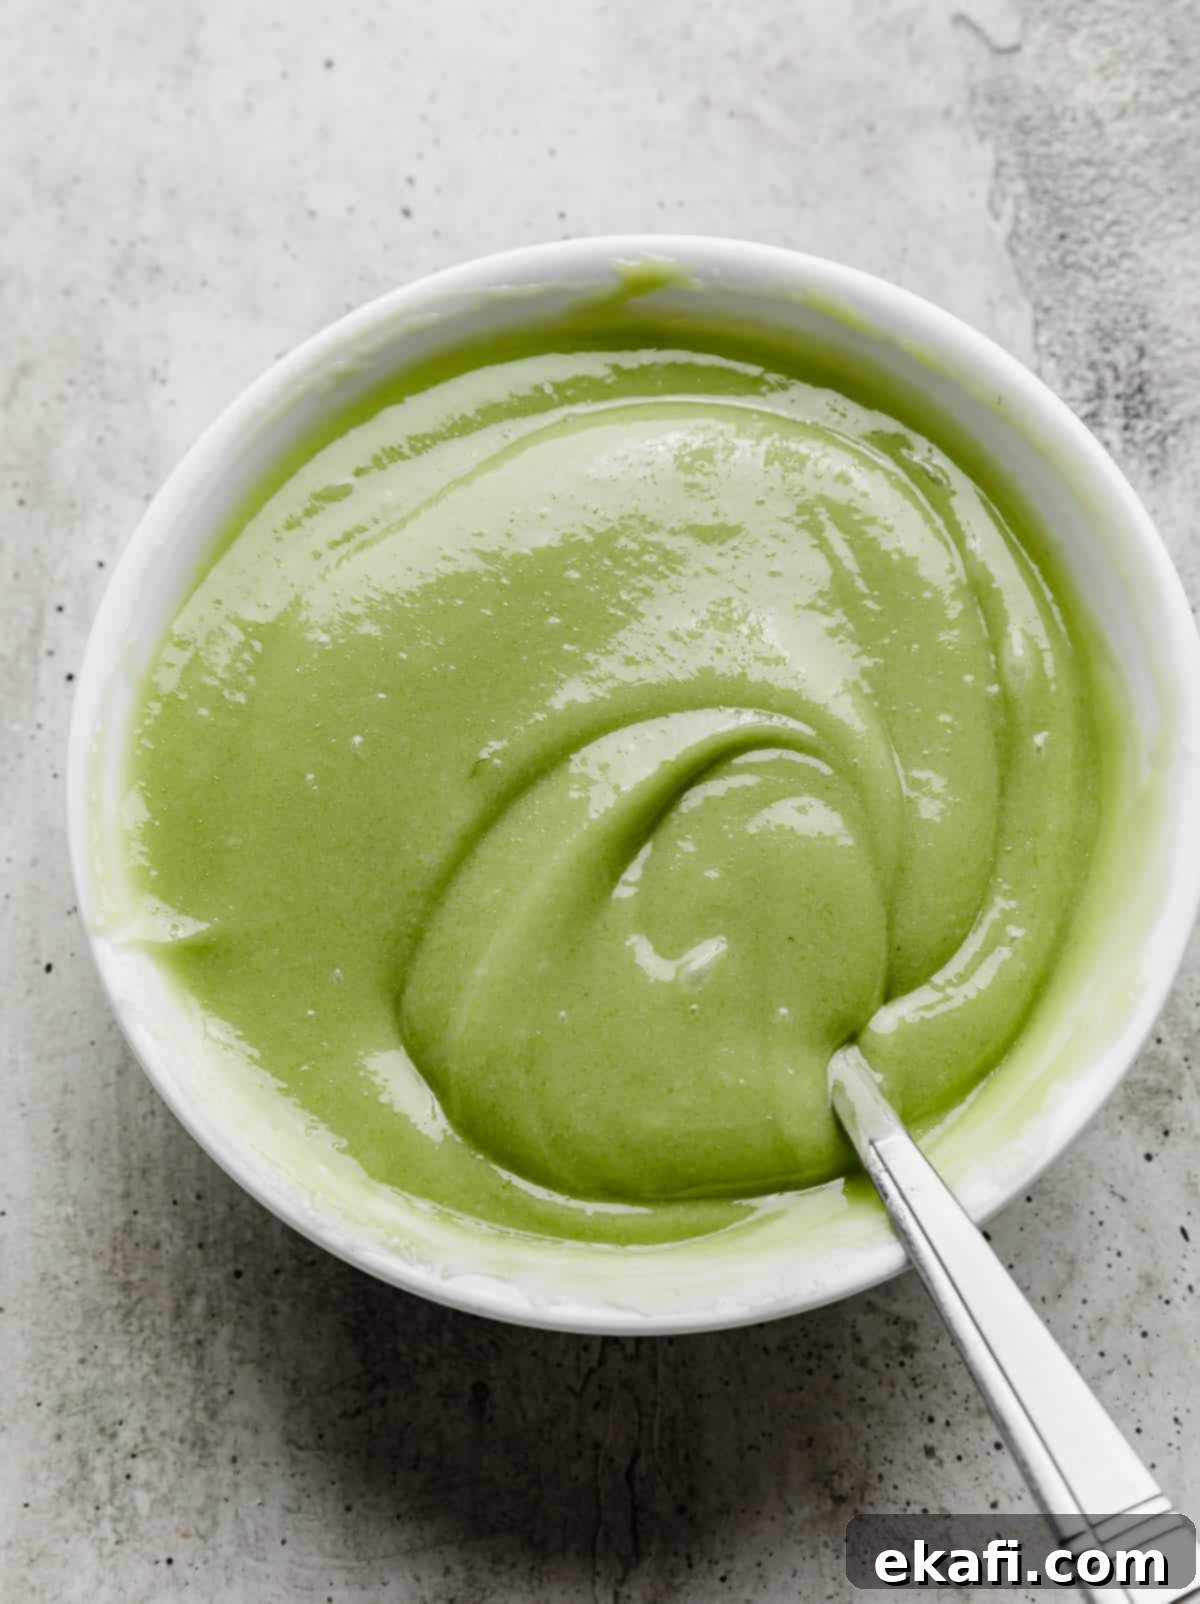
- Prepare the Zesty Homemade Lime Curd: In a medium saucepan, combine the egg yolks, whole eggs, and granulated sugar. Whisk constantly over medium-low heat. The goal is to cook the mixture gently, allowing it to gradually thicken without scrambling the eggs. Continue cooking and stirring until the curd is noticeably thicker, coating the back of a spoon, and you can draw a clear line with your finger. Next, add the key lime juice (store-bought recommended for consistent flavor) and the key lime zest. Continue to cook for a few more minutes, ensuring the curd reaches an even thicker consistency. Remove the saucepan from the heat and immediately add the butter, one tablespoon at a time, whisking continuously until each piece of butter has melted and is fully incorporated into the smooth, glossy curd. For a more vibrant green hue, a couple of drops of green food coloring can be added at this stage. While still hot, pour the curd through a fine-mesh strainer into a clean bowl. This step is crucial for removing any small chunks of cooked egg or zest, ensuring a silky-smooth curd. Cover the surface of the curd directly with plastic wrap to prevent a skin from forming and chill in the refrigerator until it is completely cold and set – this can take several hours or be done overnight.
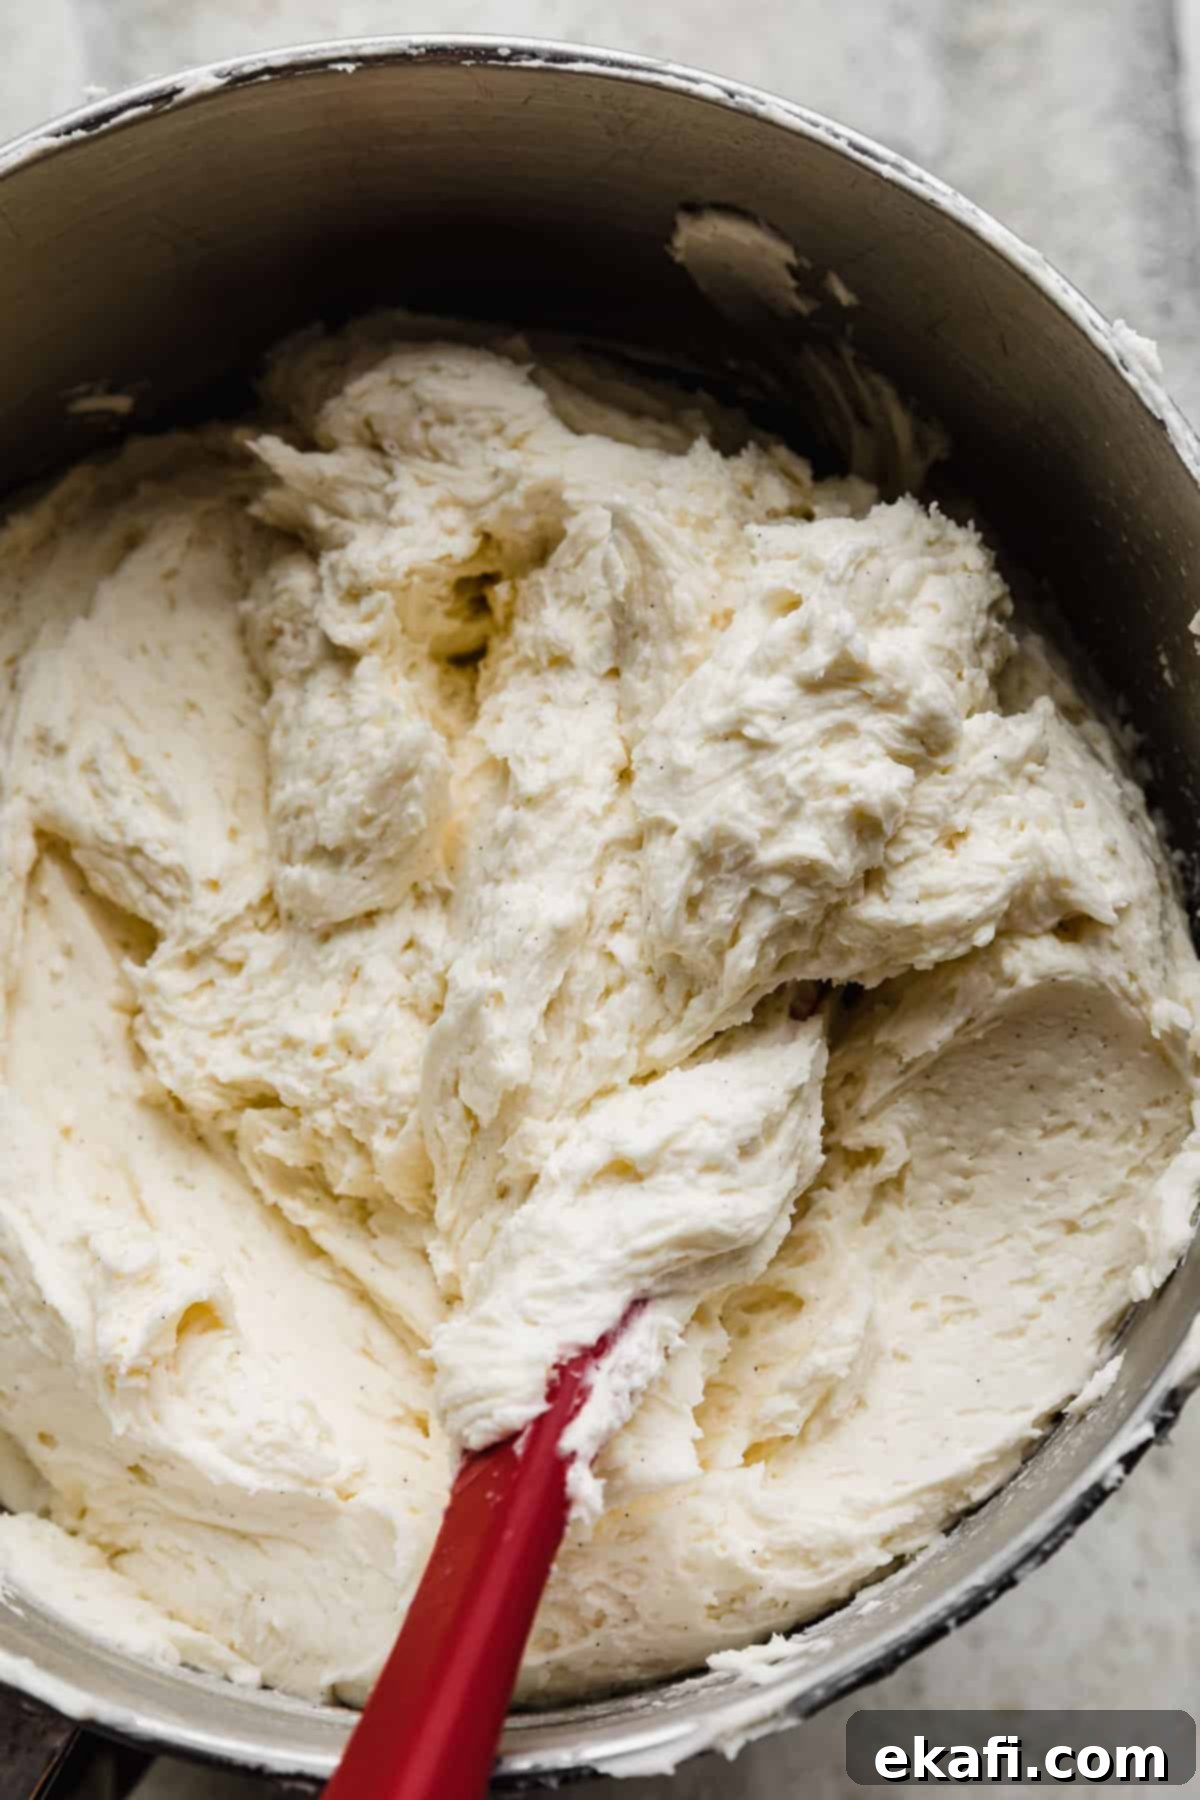
- Whip Up the Luxurious Vanilla Bean Buttercream: In the bowl of a stand mixer fitted with the paddle attachment, begin by beating the slightly softened but still cool unsalted butter on medium-high speed for 5-7 minutes. You want the butter to become incredibly light in color, fluffy, and smooth in texture. This creaming process incorporates air, making for a truly light buttercream. Add the vanilla bean paste and a pinch of salt, mixing until just combined. Gradually, and one cup at a time, add the sifted powdered sugar to the butter mixture, mixing on low speed after each addition to prevent a sugar cloud. Once all the powdered sugar has been added, increase the speed to medium-high and add the heavy cream, one tablespoon at a time, until you reach your desired smooth and spreadable consistency. Finally, beat the buttercream on high speed for an additional 3 minutes. This final high-speed mixing will make the buttercream incredibly light, airy, and luscious, ready for frosting.
- Assemble with Care and Crumb Coat: To begin assembly, place a small dollop of buttercream in the center of your cake board or serving stand. This acts as an anchor to prevent the cake from sliding. Carefully place one cooled cake layer onto the board, with the graham cracker crust side facing up. Spread a thin, even layer of vanilla bean buttercream over the entire crust. Using a piping bag, pipe a sturdy rim of buttercream around the top edge of this layer, creating a “dam.” This dam will hold the lime curd securely in place. Spoon 1/2 to 2/3 cup of the chilled lime curd within the buttercream dam, spreading it gently. Ensure you don’t overfill, as excess curd will seep out when the next layer is added, making the cake unstable. Repeat these steps with the second cake layer, again placing it crust side up. Finally, place the third cake layer on top, also crust side up. Now, apply a thin, even layer of buttercream all over the entire cake – sides and top. This is your “crumb coat,” designed to trap any loose crumbs. Flash freeze the cake for 5-10 minutes, or refrigerate for 15-20 minutes, until the crumb coat is firm to the touch and no longer soft. This step is essential for a clean, crumb-free final frosting layer.
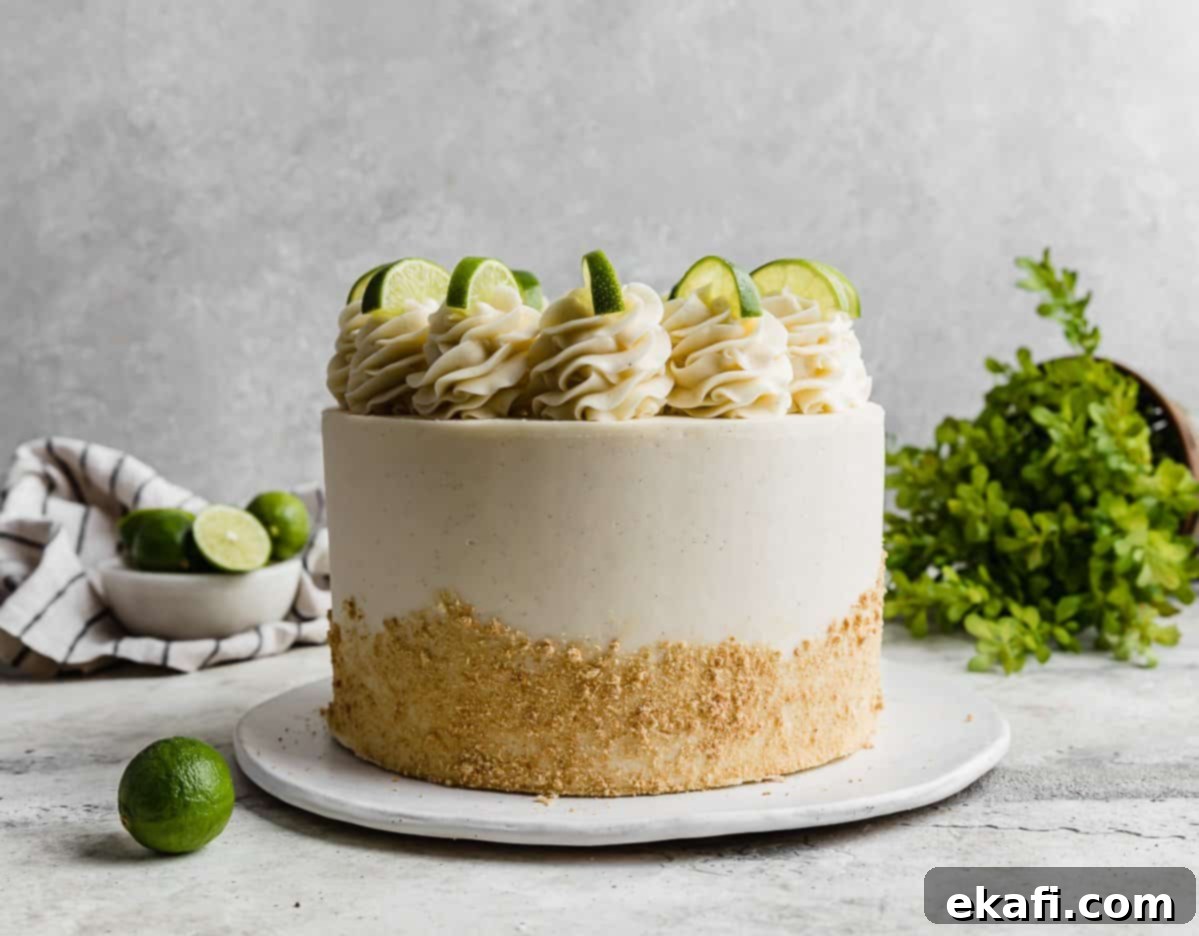
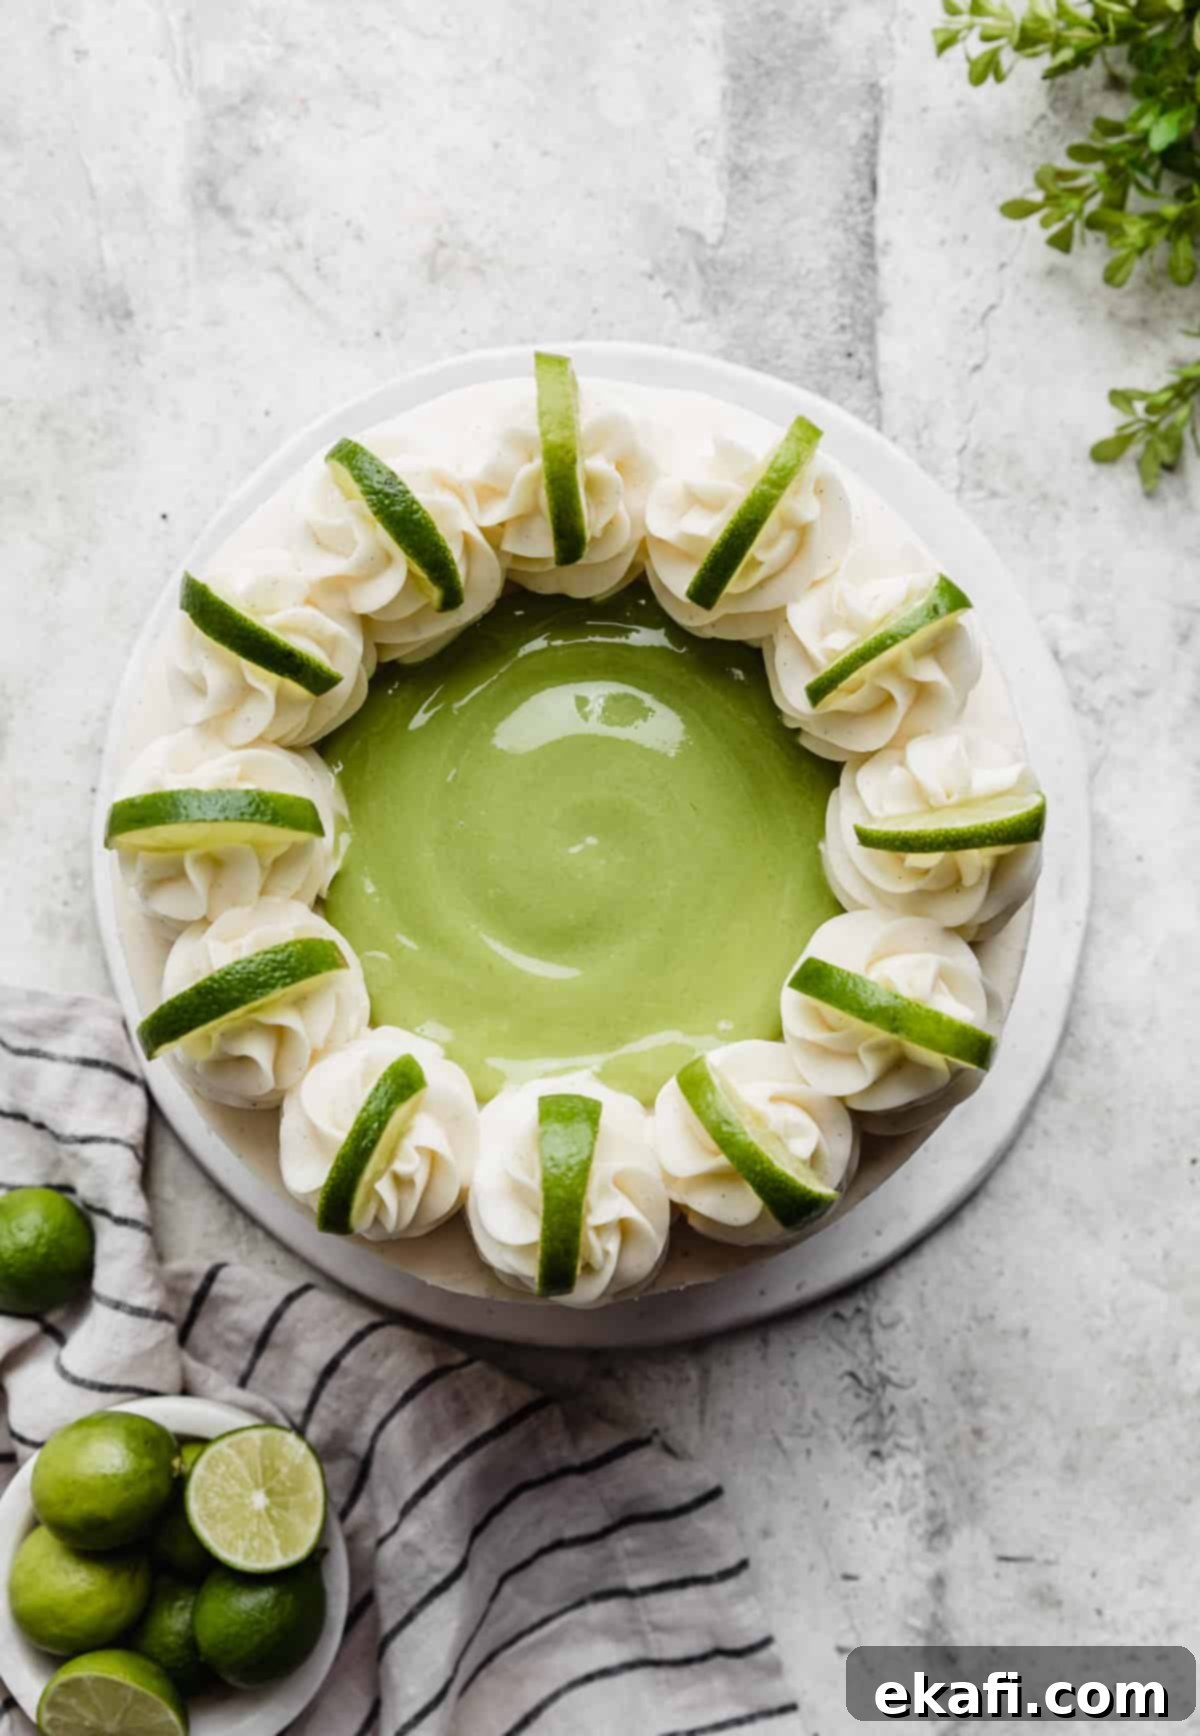
- Frost and Decorate Your Masterpiece: Once the crumb coat is chilled and firm, remove the key lime pie cake from the freezer or refrigerator. Apply the remaining vanilla bean buttercream, smoothing it evenly over the entire cake. Use an offset spatula or bench scraper for a professional finish. If you desire additional decoration, you can pipe elegant swirls on the top of the cake. For this, we recommend preparing an extra 1/4 batch of buttercream to ensure you have ample frosting for decorative piping. Garnish your beautiful cake with fresh lime slices strategically placed on top of the swirls and consider pressing crushed graham crackers along the base or sides of the cake for an extra touch of texture and visual appeal.
Expert Tips for a Flawless Key Lime Pie Cake
Achieving cake perfection often comes down to a few key insights. Keep these expert tips in mind for a smooth baking and assembly process:
- Secure Your Cake: Always begin assembling your cake by placing a small dollop of buttercream in the center of your cake board or serving stand before adding the first cake layer. This acts as a sticky anchor, preventing the cake from shifting or sliding around as you work, making frosting and decorating significantly easier and safer.
- Mind the Curd Filling: When adding the delicious lime curd between layers, be mindful not to overfill. While tempting to load up on the tangy goodness, excessive curd can cause it to seep out from between the layers once you add the next cake on top. This not only creates a messy situation but also compromises the structural integrity of your cake, making it unstable and incredibly difficult to finish frosting neatly. Stick to the recommended 1/2 to 2/3 cup per layer.
- Vibrant Green Curd: If you prefer a more visually striking lime curd, don’t hesitate to add a few drops of green food coloring. Incorporate it after removing the curd from the heat and adding the butter, while it’s still warm, for even distribution. This will enhance the cake’s aesthetic appeal, making the tangy green filling pop beautifully.
- Extra Buttercream for Decorations: Planning to pipe intricate swirls, borders, or other decorative elements on your cake? We highly recommend making an extra 1/4 batch of the vanilla bean buttercream. This ensures you have ample frosting to work with for both the final smooth coat and any creative flourishes, without running short mid-decoration. It’s always better to have a little extra than not enough!
- The Golden Rule: Do NOT Overmix Your Batter: This is perhaps the most crucial tip for a tender, moist cake. Once you start combining the wet and dry ingredients, mix only until they are just combined and no streaks of flour remain. Overmixing the cake batter at this stage will overdevelop the gluten, resulting in a tough, chewy texture and potentially a dense cake that doesn’t rise properly. Feel free to thoroughly whisk your dry ingredients in one bowl and beat your wet ingredients well in another, but once they meet, mix minimally!
- Crust Side Up Assembly: You might notice the instruction to place the cake layers with the graham cracker crust side up. This is a deliberate technique! Placing the crust directly on top of the lime curd could allow the crust to absorb moisture from the curd, potentially becoming soggy. By placing the cake layer upside down, the layer of buttercream acts as a protective barrier between the crisp crust and the moist curd, ensuring your crust remains perfectly crunchy.
Make Ahead, Storing, and Freezing Options for Convenience
Planning ahead or have leftovers? Here’s how to properly store and preserve your Key Lime Pie Cake and its components:
- Cake Layers: If you want to get a head start, bake your cake layers in advance. Once completely cooled, remove them from their pans, wrap each layer tightly in multiple layers of plastic wrap, and then an additional layer of aluminum foil. Store them in the freezer for up to 3 weeks. Thaw them at room temperature before assembling.
- Lime Curd: The zesty lime curd is an excellent component to make ahead of time. Once prepared and strained, cover it tightly with plastic wrap (ensuring the wrap touches the surface of the curd to prevent a skin from forming) and store it in an airtight container in the refrigerator for up to 4 days.
- Vanilla Bean Buttercream: Prepare your buttercream ahead of time and store it in an airtight container. It can be kept in the refrigerator for up to a week or in the freezer for up to a month. When ready to use, allow it to come to room temperature, then re-whip it in your stand mixer until it’s light, fluffy, and smooth again. This re-whipping restores its perfect consistency.
For even more comprehensive information on storing and freezing various types of cakes, be sure to consult our detailed How to Store and Freeze Cakes guide!
Key Lime Pie Cake: Frequently Asked Questions
A crumb coat is a crucial initial thin layer of buttercream that is applied to the entire cake, covering both the sides and the top. Its primary purpose is to trap and seal in any loose cake crumbs, preventing them from mixing into your final, smooth layer of frosting. After applying the crumb coat, the cake is typically chilled or flash-frozen for 10-20 minutes until the buttercream is firm. This ensures that when you apply the second, thicker layer of frosting, you achieve a pristine, crumb-free finish, resulting in a professional and aesthetically pleasing cake.
Yes, absolutely, you can use regular limes and their juice if key limes are unavailable at your local grocery store. However, it’s important to note that key limes are known for their distinctly punchier, more aromatic, and slightly sweeter lime flavor compared to regular Persian limes. If you opt for regular limes, the overall lime flavor in your cake and curd may not be as intense or complex. For the most authentic and robust key lime experience, we highly recommend sourcing genuine key limes and key lime juice if possible. The Nellie and Joe’s brand of key lime juice is a reliable store-bought option for the curd.
Several factors can contribute to flat or dense cake layers, but here are the most common culprits and how to avoid them:
- Expired Leavening Agents: Always check the expiration date on your baking powder. Old or inactive baking powder won’t provide the necessary lift, resulting in flat cakes.
- Overmixing the Batter: This is a frequent mistake. Once you combine the wet and dry ingredients, mix only until the flour streaks have just disappeared. Overmixing develops gluten, which leads to a tough, dense texture and inhibits the cake from rising properly.
- Incorrect Oven Temperature: An oven that isn’t at the correct temperature can severely impact your cake’s rise. Investing in an inexpensive oven thermometer can help ensure your oven is truly at the temperature you set.
- Opening the Oven Door Prematurely: Resist the urge to peek! Opening the oven door too early, especially during the first two-thirds of the baking time, can cause a sudden drop in temperature, making the cakes collapse and leading to a flat top.
- Room Temperature Ingredients: Ensure all wet ingredients (eggs, buttermilk, sour cream) are at room temperature. This helps them emulsify better, creating a smoother batter that rises more consistently.
Explore More Delicious Cake Recipes
- Carrot Cake with Pineapple and Pecans
- Refreshing Lemon Jello Cake
- Delectable Lemon Bar Cake
- Easy Raspberry Shortcake Sheet Cake
Did you bake this incredible Key Lime Pie Cake? We would absolutely love to hear about your experience! Please consider leaving a rating and review right here on the blog post, or scroll down to the recipe card below to share your thoughts. Your feedback helps us and other bakers!
Don’t miss out on our latest delicious creations! Stay up-to-date by following us on Instagram, TikTok, Facebook, and Pinterest. We love seeing your baking adventures!
Print
SaveSaved!
Review
Key Lime Pie Cake
Ingredients
Graham Cracker Crust
- 2 2/3 cups finely ground graham cracker crumbs – about 20 full graham cracker sheets, finely processed for a smooth crust
- 10 tablespoons unsalted butter – melted; if using salted butter, omit the 1/4 tsp salt in the crust mixture
- 1/2 cup granulated sugar
- 1/4 teaspoon salt
Key Lime Cake
- 3 1/4 cups cake flour – for a tender crumb, Softasilk brand is recommended
- 1 tablespoon baking powder – ensure it is fresh and not expired
- 1 teaspoon salt
- 1 3/4 cups granulated sugar
- 1 cup canola oil – or other neutral-flavored oil like grapeseed or vegetable oil, for moisture
- 4 large eggs – at room temperature for better emulsion
- 1/2 cup buttermilk – at room temperature for a tender crumb
- 1 cup sour cream – full-fat and at room temperature for moisture and tang
- 1/2 cup key lime juice – freshly squeezed is fine for the cake, but use store-bought (Nellie and Joe’s) for the curd
- 2 teaspoons vanilla extract – adds foundational vanilla flavor to the cake
- 2 tablespoons key lime zest – from fresh key limes for intense flavor; regular lime zest can be substituted if needed
Key Lime Curd
- 4 large egg yolks
- 2 large eggs
- 1 1/3 cup granulated sugar
- 3/4 cup key lime juice – crucial to use store-bought key lime juice for the curd (Nellie and Joe’s is great) to avoid bitterness sometimes found with fresh juice in curd recipes.
- 1 tablespoon key lime zest – adds intense lime aroma
- 6 tablespoons butter – cold, cut into cubes; salted or unsalted is fine for the curd
Vanilla Bean Buttercream
- 3 cups unsalted butter – slightly softened, but still cool to the touch for best whipping results
- 9 cups powdered Sugar – sifted to ensure a smooth, lump-free buttercream
- 1/4 cup heavy cream – add more as needed to reach desired consistency
- 1 tablespoon vanilla bean paste – for a rich vanilla flavor and beautiful flecks
- pinch salt – enhances all the flavors
Equipment
-
Ateco cake stand
-
Kitchen Aid stand mixer
-
liquid measuring cups
-
Measuring cups
-
Three 8-inch round cake pans
-
Parchment paper
-
Fine mesh strainer
-
Saucepan
Instructions
Graham Cracker Crust
-
Preheat your oven to 325°F (160°C). Lightly spray three 8-inch round cake pans with nonstick cooking spray, then line the bottoms with parchment paper. Spray the parchment paper too for seamless release.
-
In a large mixing bowl, combine the finely ground graham cracker crumbs, melted unsalted butter, granulated sugar, and salt. Mix thoroughly until the mixture is cohesive and resembles wet sand.
-
Divide the graham cracker mixture evenly into the three prepared cake pans. Press it down very firmly and evenly into the bottom of each pan to create a compact crust. Bake for 4 minutes to set the crust. Remove from oven and let cool completely on a wire rack while you prepare the cake batter.
Key Lime Cake Layers
-
Ensure your oven remains at 325°F (160°C). In a medium bowl, whisk together the cake flour, baking powder, and salt until completely blended. Set aside.
-
In a separate, small bowl, combine the room temperature sour cream, buttermilk, key lime juice, key lime zest, and vanilla extract. Whisk until smooth. Set aside.
-
In the bowl of a stand mixer fitted with a paddle attachment, beat the granulated sugar and neutral-flavored oil together for 2-3 minutes on medium speed until the mixture is lighter in color and well emulsified. Add the large eggs one at a time, beating well after each addition and scraping down the bowl as needed to ensure everything is fully incorporated.
-
With the mixer on low speed, add about one-third of the flour mixture, mixing just until combined. Follow with half of the buttermilk/sour cream mixture, mixing just until incorporated. Repeat this: add another third of the flour mixture, then the remaining half of the buttermilk mixture, and finally the last third of the flour mixture. Mix only until all ingredients are combined and no dry streaks of flour remain. Be extremely careful not to overmix!
-
Divide the cake batter evenly among the three cake pans, pouring it directly over the cooled graham cracker crusts.
-
Bake for 28-34 minutes, or until a wooden toothpick inserted into the center of a cake comes out clean or with only a few moist crumbs attached. Remove from the oven and allow the cakes to cool in their pans on a wire rack for 15-20 minutes. Then, carefully invert them onto the wire rack to cool completely. If preparing ahead, wrap cooled layers tightly in plastic wrap and freeze for up to 3 weeks.
Luscious Key Lime Curd
-
In a medium saucepan, whisk together the egg yolks, whole eggs, and granulated sugar until well combined. Cook this mixture over medium-low heat, whisking constantly, until it visibly thickens. This process prevents the eggs from scrambling.
-
Add the key lime juice (store-bought recommended for curd) and key lime zest. Continue to cook for a few more minutes, stirring, until the mixture is thick enough to generously coat the back of a spoon and leaves a clear trail when a finger is drawn across it.
-
Remove the saucepan from the heat. Add the cold butter, one tablespoon at a time, whisking vigorously after each addition until all the butter has melted and is fully incorporated, creating a smooth and glossy curd. If desired, add a couple of drops of green food coloring for a more vibrant hue.
-
Immediately pour the hot curd through a fine-mesh strainer into a clean bowl to remove any solids and ensure a perfectly silky texture. Cover the surface of the curd directly with plastic wrap to prevent a skin from forming, and chill in the refrigerator until it is completely cold and set, which usually takes several hours or overnight. This curd can be made up to 4 days in advance.
Smooth Vanilla Bean Buttercream
-
In the clean bowl of a stand mixer fitted with a paddle attachment, beat the slightly softened (but still cool) unsalted butter on medium-high speed for 5-7 minutes. The butter should become very light in color, incredibly fluffy, and smooth.
-
Mix in the vanilla bean paste and a pinch of salt until just combined. Then, gradually add the sifted powdered sugar, one cup at a time, mixing on low speed after each addition until fully incorporated. Once all powdered sugar is added, slowly drizzle in the heavy cream as needed, increasing speed to medium-high. Beat the buttercream on high speed for a final 3 minutes to achieve an exceptionally light, airy, and smooth consistency.
Assembly & Decoration
-
Place a small dollop of buttercream in the center of your cake board or serving stand to act as an anchor. Carefully place your first cooled cake layer onto the board, with the graham cracker crust side facing up.
-
Spread a thin, even layer of vanilla bean buttercream over the entire graham cracker crust of the first cake layer.
-
Using a piping bag (or a spoon), pipe a sturdy rim of buttercream around the very top edge of this cake layer, creating a “dam.” Spoon 1/2 to 2/3 cup of the thoroughly chilled lime curd inside this buttercream dam, spreading it gently. Be careful not to overfill, as excess curd can seep out and destabilize the cake.
-
Carefully place the second cake layer on top, ensuring it is also crust side up. Repeat steps 4.1 and 4.2: spread a thin layer of buttercream, pipe a dam, and fill with another 1/2 to 2/3 cup of lime curd.
-
Place the third and final cake layer on top, again with the graham cracker crust side up. Apply a thin, even layer of buttercream to the entire cake (top and sides) to create a “crumb coat.” This traps any loose crumbs. Refrigerate or flash freeze the cake for 15-20 minutes (or 5-10 minutes in the freezer) until the crumb coat is firm and no longer soft.
-
Once the crumb coat is firm, remove the cake from the chilling. Apply the remaining vanilla bean buttercream in a final, thicker layer, smoothing it around the entire cake for a polished finish. We recommend making an extra 1/4 batch of buttercream if you plan to add decorative elements.
-
For an exquisite presentation, pipe elegant swirls of buttercream on the top of the cake. Garnish with fresh lime slices on each swirl, and for an extra touch of texture and flavor, gently press crushed graham crackers along the base or sides of the cake, if desired.
Notes
Make-Ahead Cake Layers: For convenience, bake your cake layers in advance. Once fully cooled, remove them from their pans, wrap each layer individually and tightly in plastic wrap, then an additional layer of aluminum foil. These can be stored in the freezer for up to 3 weeks. Thaw at room temperature before assembly.
Make-Ahead Lime Curd: The homemade lime curd can be prepared up to 4 days ahead of time. After straining, cover the curd’s surface directly with plastic wrap to prevent a skin from forming, then chill it in an airtight container in the refrigerator. If you prefer a more vivid green color, feel free to add a few drops of food coloring when the curd is still warm.
Make-Ahead Buttercream: Your vanilla bean buttercream can also be made in advance. Store it in an airtight container in the refrigerator for up to a week or in the freezer for up to a month. Before using, bring it to room temperature and re-whip it vigorously in your stand mixer until it becomes light, fluffy, and smooth again. This re-whipping step is crucial for restoring its ideal consistency for frosting.
Nutrition
