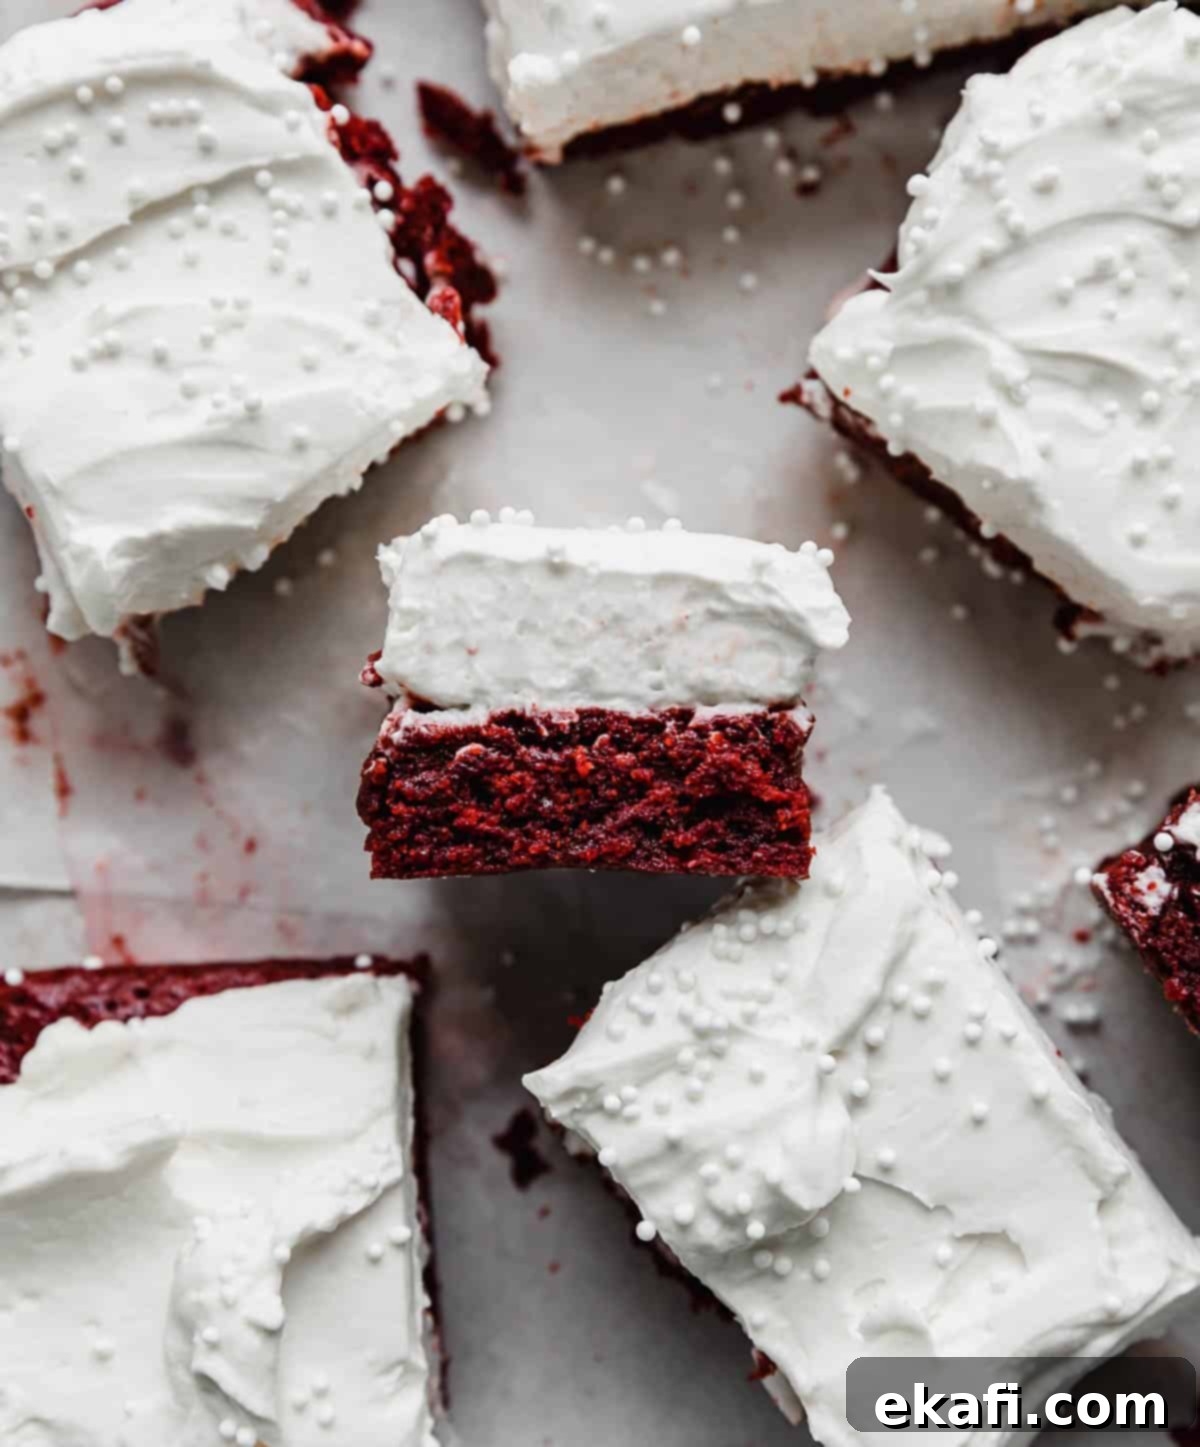
The Best Fudgy Red Velvet Brownies with Light Cream Cheese Whipped Cream Frosting
Prepare to fall head over heels for these incredibly decadent Red Velvet Brownies! Imagine a perfect square of fudgy, rich, and intensely flavored red velvet goodness, crowned with a cloud-like, tangy yet sweet Cream Cheese Whipped Cream Frosting. This isn’t just another brownie recipe; it’s a culinary experience designed to delight your taste buds and impress your guests. The deep red hue of the brownies, reminiscent of classic red velvet cake, perfectly contrasts with the pure white frosting, making them a visual showstopper on any dessert table.
What makes these brownies truly special is the exquisite balance between textures and flavors. The dense, chewy brownie provides a satisfying foundation, while the airy, less-sweet frosting adds a refreshing counterpoint. It’s a combination that our readers rave about, and we’re confident you’ll find it irresistible too. Whether you’re a long-time fan of red velvet or new to its charm, these homemade Red Velvet Brownies promise a delightful indulgence.
Once you’ve mastered this recipe, don’t stop there! Explore more of our beloved red velvet creations, including our equally amazing Red Velvet Oreo Brownies for an extra crunch, the magnificent Oreo Red Velvet Cake, delightful Red Velvet Donuts, and our fantastic Red Velvet Waffles. Each recipe celebrates the unique charm of red velvet, promising more delicious adventures.
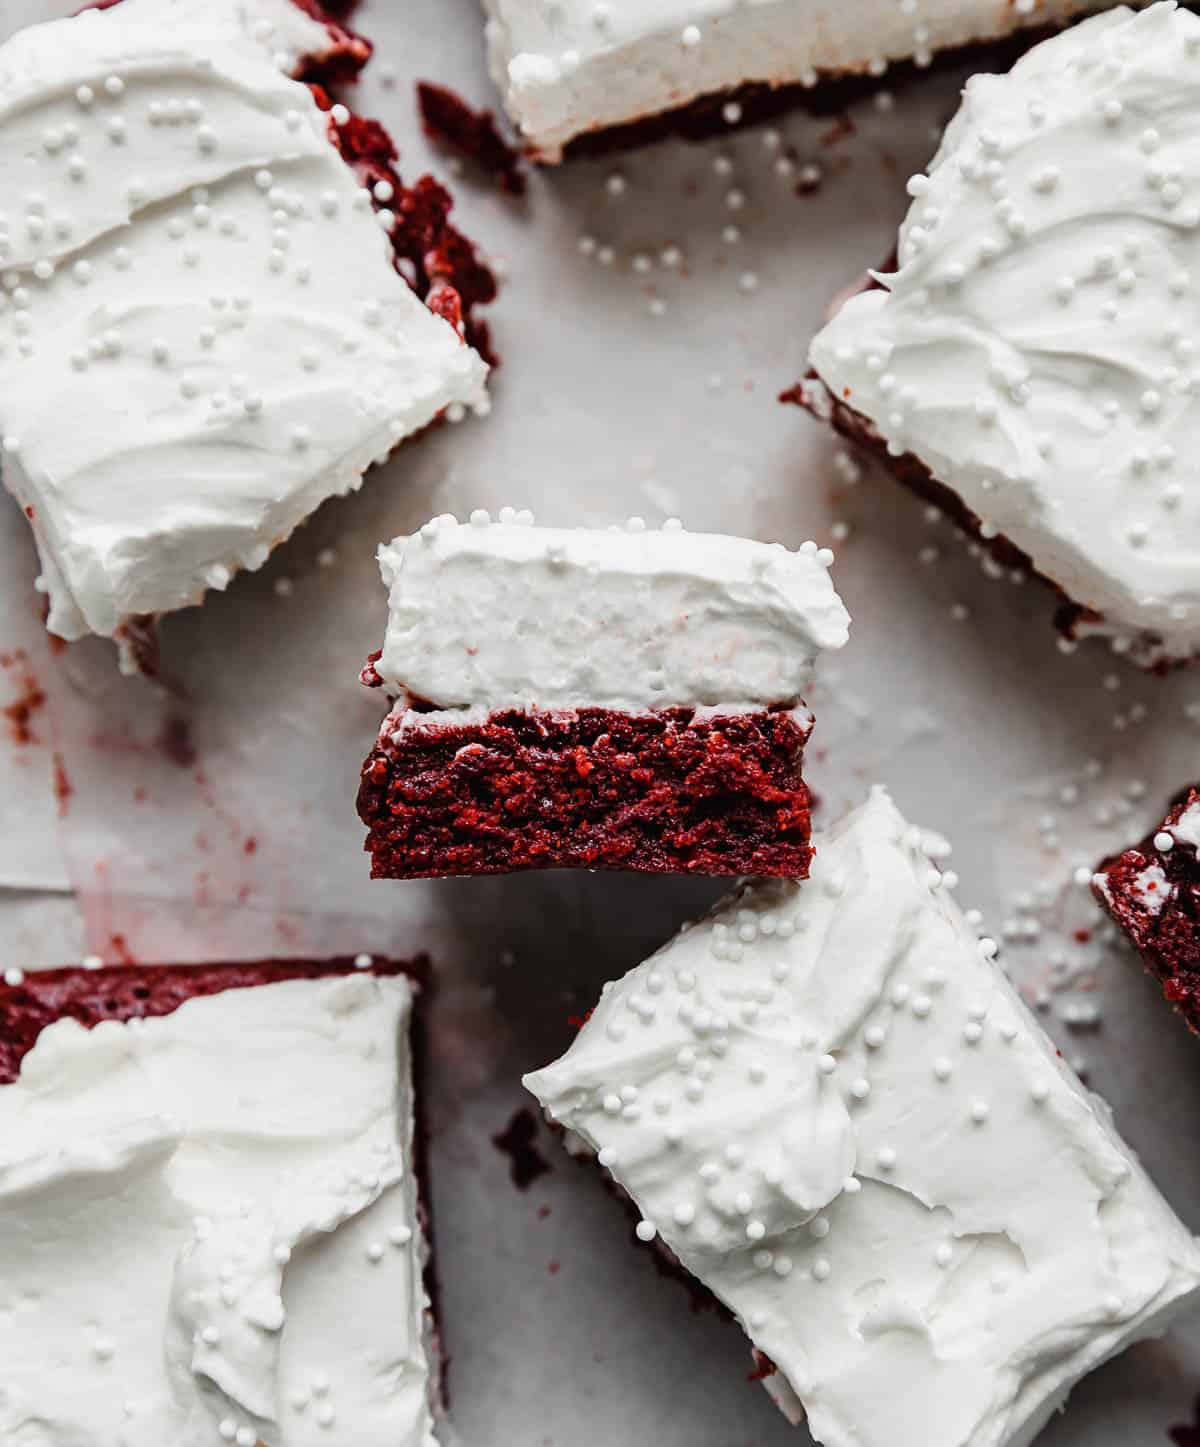
Why These Red Velvet Brownies are an Absolute Must-Try
This Red Velvet Brownies recipe stands out from the rest, not just for its stunning appearance and incredible flavor, but for several key reasons that make it a truly special treat:
- A Reader-Inspired Combination! This recipe holds a special place in our hearts because its unique frosting was developed with direct input from readers like you! Your valuable feedback pointed towards creating a lighter, more balanced cream cheese frosting for these delightful red velvet brownies. We listened, experimented, and the result is this perfectly paired Cream Cheese Whipped Cream Frosting that truly elevates the entire dessert. It’s a testament to community-driven deliciousness!
- The Perfect Cream Cheese Whipped Cream Frosting. Traditional cream cheese frostings can sometimes be overly rich or sweet, which might overpower the delicate red velvet flavor. However, by using a whipped cream base for our cream cheese frosting, we’ve achieved a remarkable balance. This innovative approach results in a frosting that is wonderfully light in both texture and sweetness. It provides a dreamy, airy counterpoint to the dense, fudgy, chocolate-flavored brownies, creating a harmonious and utterly addictive combination that won’t leave you feeling weighed down.
- The Best Homemade Red Velvet Brownie Recipe. Forget those mediocre box mixes! Our recipe guides you to create the absolute best red velvet brownies from scratch, ensuring a rich, authentic flavor and a vibrant, bright red color that is simply captivating. You’ll love the signature red velvet taste, characterized by a subtle cocoa note with a hint of tang, perfectly complemented by the exquisite, light cream cheese frosting. These are truly homemade brownies, crafted with care and designed for superior taste and texture.
- Ideal for Any Holiday or Special Occasion. With their striking deep red color, these Red Velvet Brownies instantly evoke a sense of celebration. They taste remarkably similar to a classic Red Velvet Cake but in a convenient, easy-to-serve brownie format. This makes them absolutely perfect for any festive gathering or special event throughout the year. Imagine them gracing your table for Valentine’s Day, adding cheer to your Christmas spread, or bringing patriotic flair to the Fourth of July. Their vibrant appearance and irresistible taste make them a guaranteed hit for any celebration.
Essential Ingredient Notes for Perfect Red Velvet Brownies
Crafting the perfect batch of fudgy Red Velvet Brownies begins with understanding the role each ingredient plays. Here’s a closer look at the key components for both the brownies and the dreamy cream cheese whipped cream frosting:
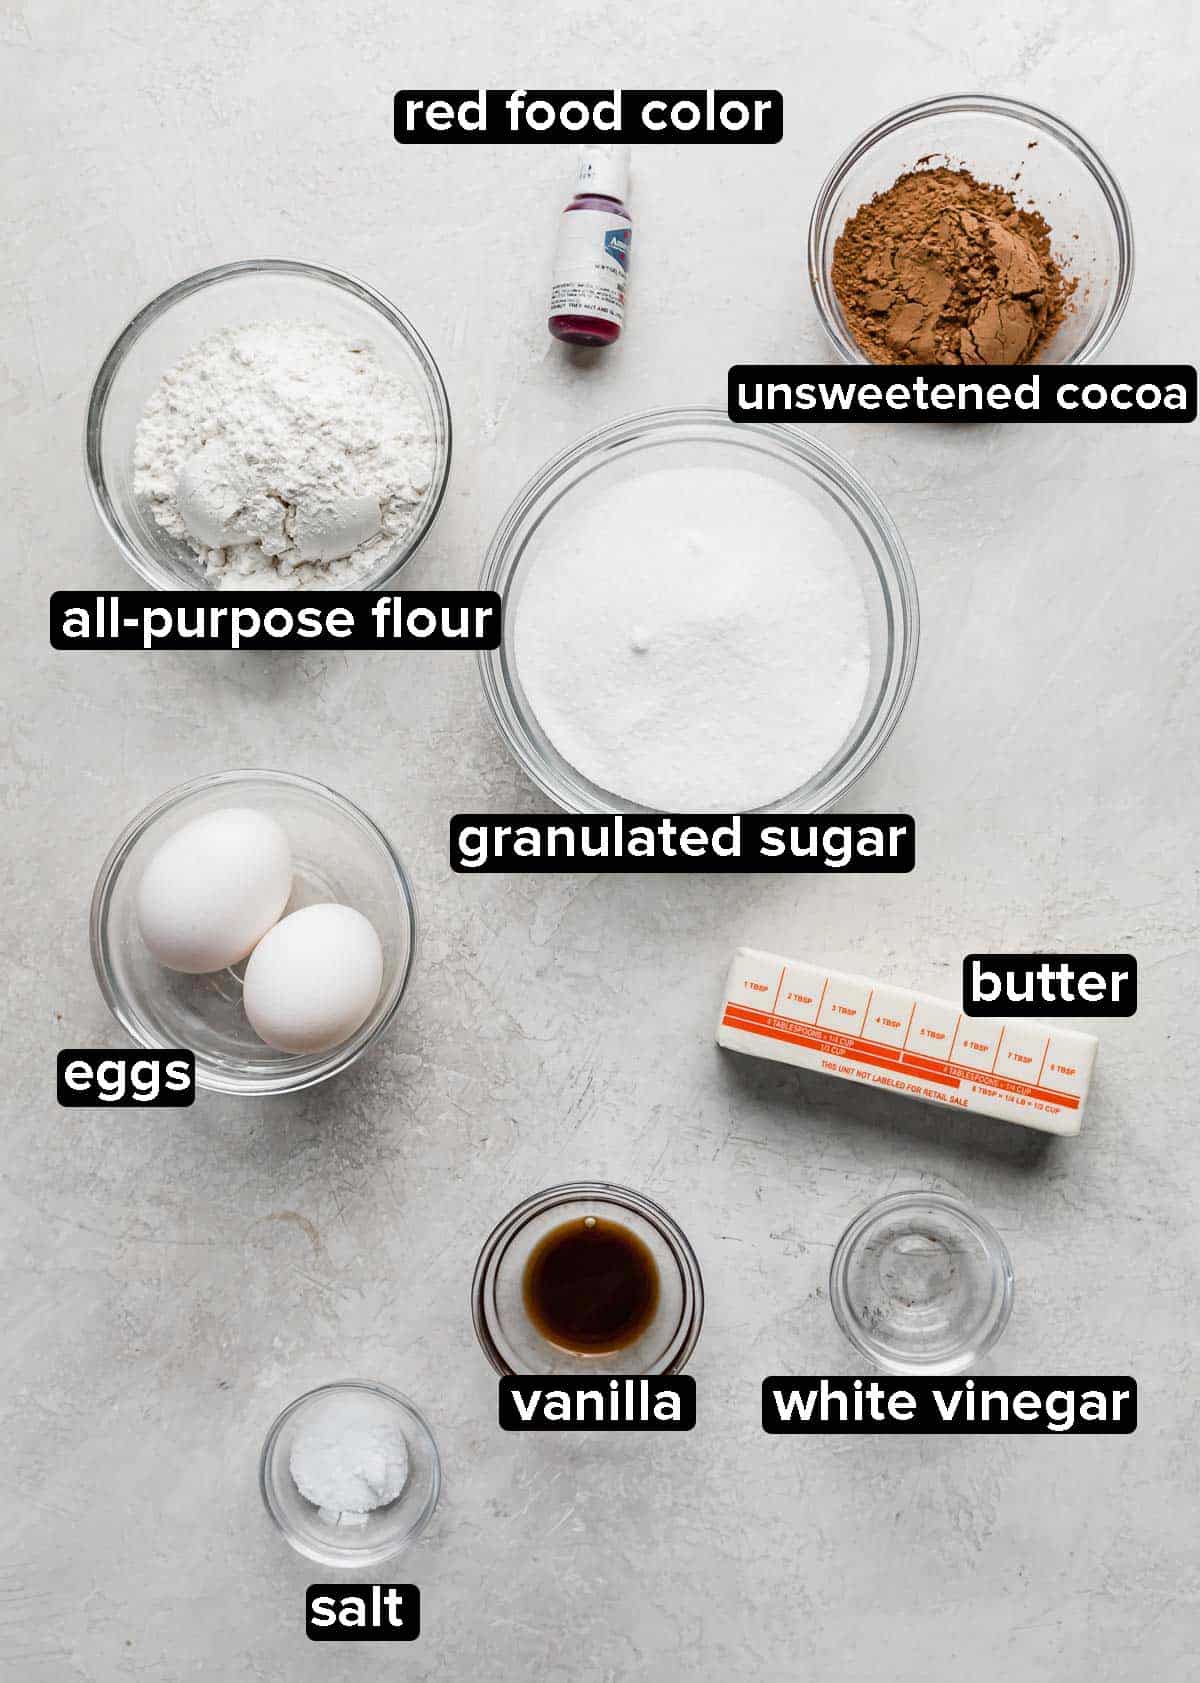
- Unsalted Butter: Unlike many cookie recipes that benefit from creamed butter, fudgy brownies thrive on melted fat. Using melted unsalted butter in this recipe contributes significantly to the signature fudgy texture we’re aiming for in these red velvet brownies. It also adds a rich, deep flavor that enhances the overall taste profile.
- Unsweetened Cocoa Powder: It’s a common misconception that red velvet isn’t chocolatey! In fact, the characteristic “velvet” flavor profile has its roots in chocolate. The cocoa powder provides a subtle yet distinct chocolate base that pairs beautifully with the acidity of vinegar and the vibrant red food coloring, creating that classic red velvet depth. Ensure you use unsweetened cocoa for the best results, as sweetened cocoa would alter the sugar balance.
- Granulated Sugar: This essential ingredient not only provides the necessary sweetness to the brownies but also contributes to their moist and chewy texture. Sugar plays a crucial role in creating that desirable crackly top crust often associated with perfect brownies.
- White Vinegar: A cornerstone of traditional red velvet recipes, white vinegar serves a dual purpose. Firstly, its acidic component reacts with the cocoa powder, helping to bring out the subtle red undertones and deepen the color. Secondly, it adds a signature tangy note that is characteristic of classic red velvet flavor, distinguishing it from a regular chocolate brownie.
- Gel Red Food Color: To achieve that stunning, deep red velvet hue without adding excessive liquid to your batter, gel food coloring is highly recommended. It’s much more concentrated than liquid food coloring, meaning you only need a few drops to get a vibrant and beautiful red color, ensuring the perfect visual appeal for your red velvet brownies.
- Cream Cheese: For the luxurious cream cheese whipped cream frosting, it’s crucial to use cold cream cheese. Cold cream cheese holds its structure better when beaten, leading to a smoother, more stable frosting. Make sure it’s full-fat cream cheese for the best flavor and texture.
- Powdered Sugar: The beauty of our whipped cream-based frosting is its reduced sweetness. You’ll find there aren’t heaps of powdered sugar here; just 1/2 cup is all that’s needed to provide enough sweetness and stability, allowing the tangy cream cheese flavor to shine without being overly sugary.
- Heavy Cream: The foundation of our light and airy frosting, cold heavy cream is whipped to stiff peaks, creating the light, ethereal texture that perfectly complements the rich brownies. It provides the volume and lightness that makes this frosting so unique and delightful. Ensure your heavy cream is very cold for optimal whipping results.
Easy Step-by-Step Instructions to Make Your Red Velvet Brownies
Follow these detailed steps to create perfectly fudgy and flavorful Red Velvet Brownies, complete with their luscious cream cheese whipped cream frosting.
- Prepare your workspace and combine the first set of ingredients. Begin by preheating your oven to 350ºF (175ºC). Line an 8×8-inch square baking pan with parchment paper, leaving an overhang on the sides to easily lift the brownies out later. Lightly spray the parchment paper with nonstick cooking spray to ensure no sticking. In a medium-sized mixing bowl, add 1/2 cup of melted unsalted butter while it is still warm. Incorporate 1/4 cup unsweetened cocoa powder, stirring well until thoroughly combined and no dry streaks of cocoa remain. Next, add 1 cup of granulated sugar and whisk vigorously until the mixture is smooth and fully incorporated, creating a glossy base.
- Add the remaining wet ingredients for the brownie batter. To the beautiful chocolate-sugar mixture, crack in 2 large eggs, ensuring they are at room temperature for better emulsion. Stir in 1 teaspoon of vanilla extract for a hint of warmth, 1/2 teaspoon of white vinegar to activate that classic red velvet tang, and 2 generous teaspoons of red gel food coloring to achieve that vibrant, iconic red hue. Whisk all these wet ingredients together until they are well combined and the color is uniform throughout the batter.
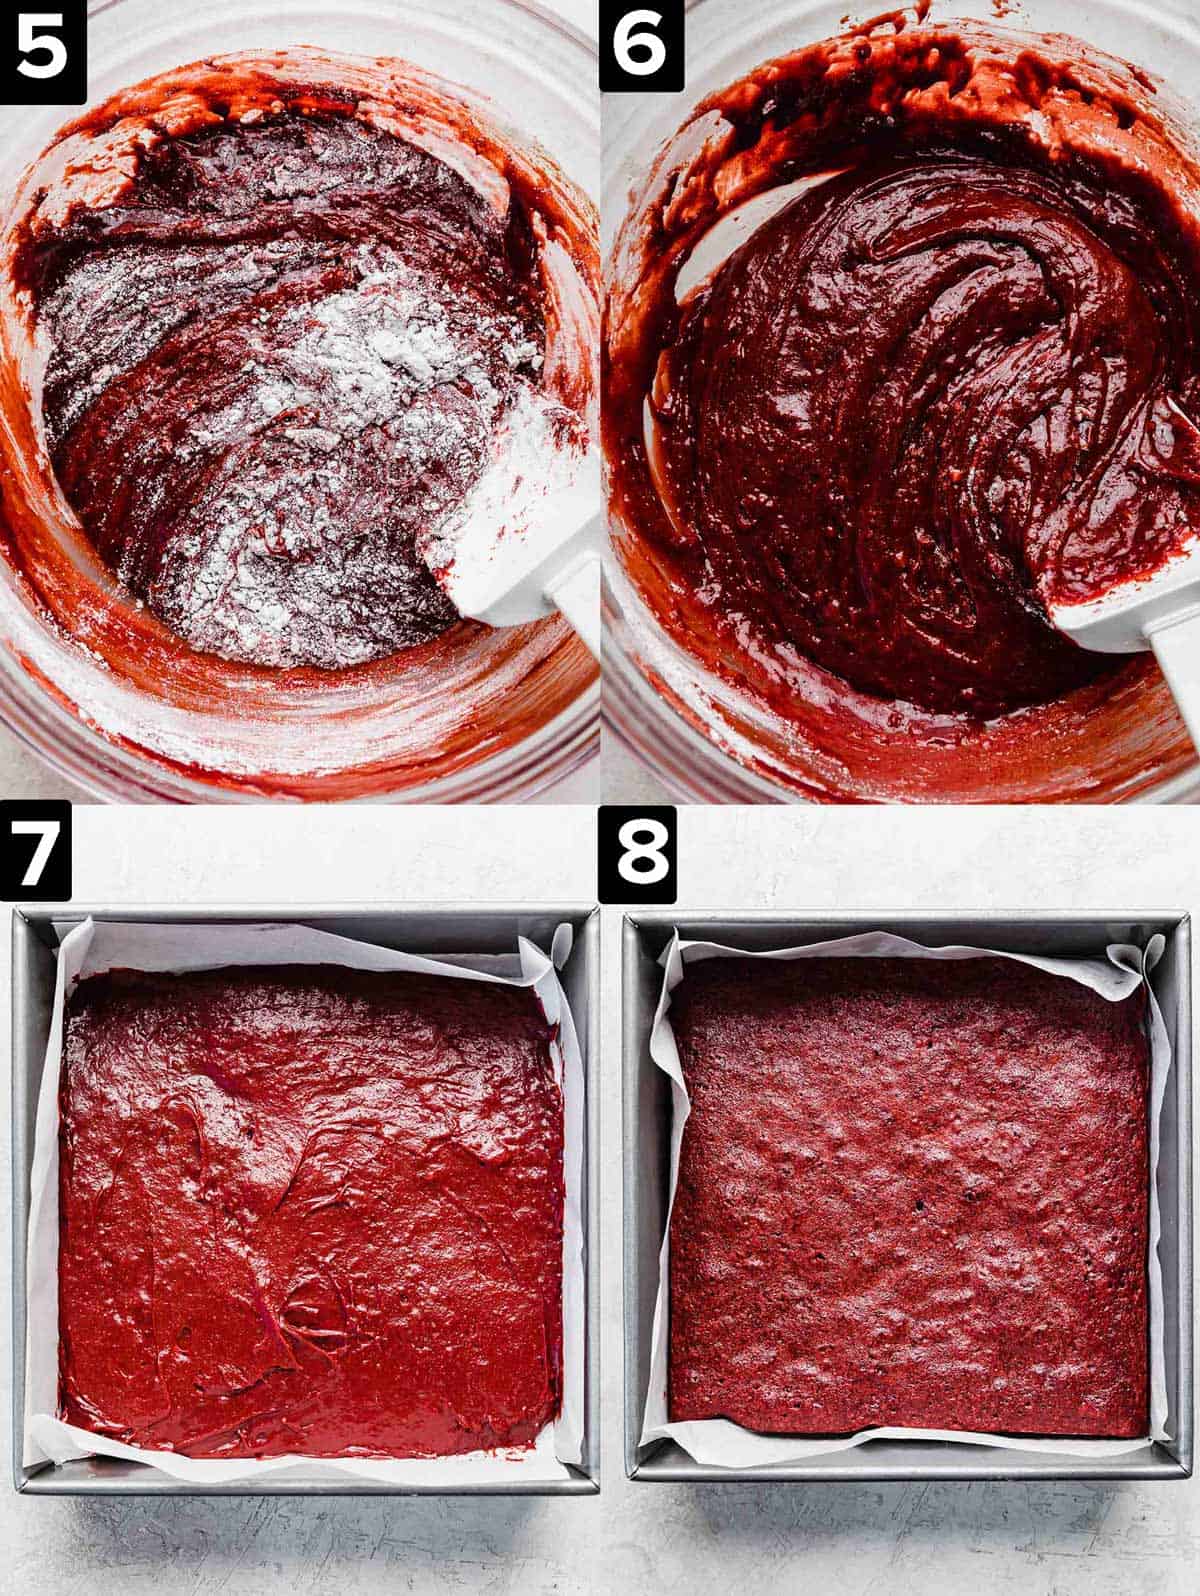
- Gently fold in the dry ingredients. Into the wet mixture, sift or add 2/3 cup of all-purpose flour and 1/2 teaspoon of salt. Using a rubber spatula, gently fold the dry ingredients into the wet mixture. Be careful not to overmix at this stage; overmixing can lead to tough brownies. Stir just until no dry streaks of flour are visible, and the batter comes together. A few small lumps are fine.
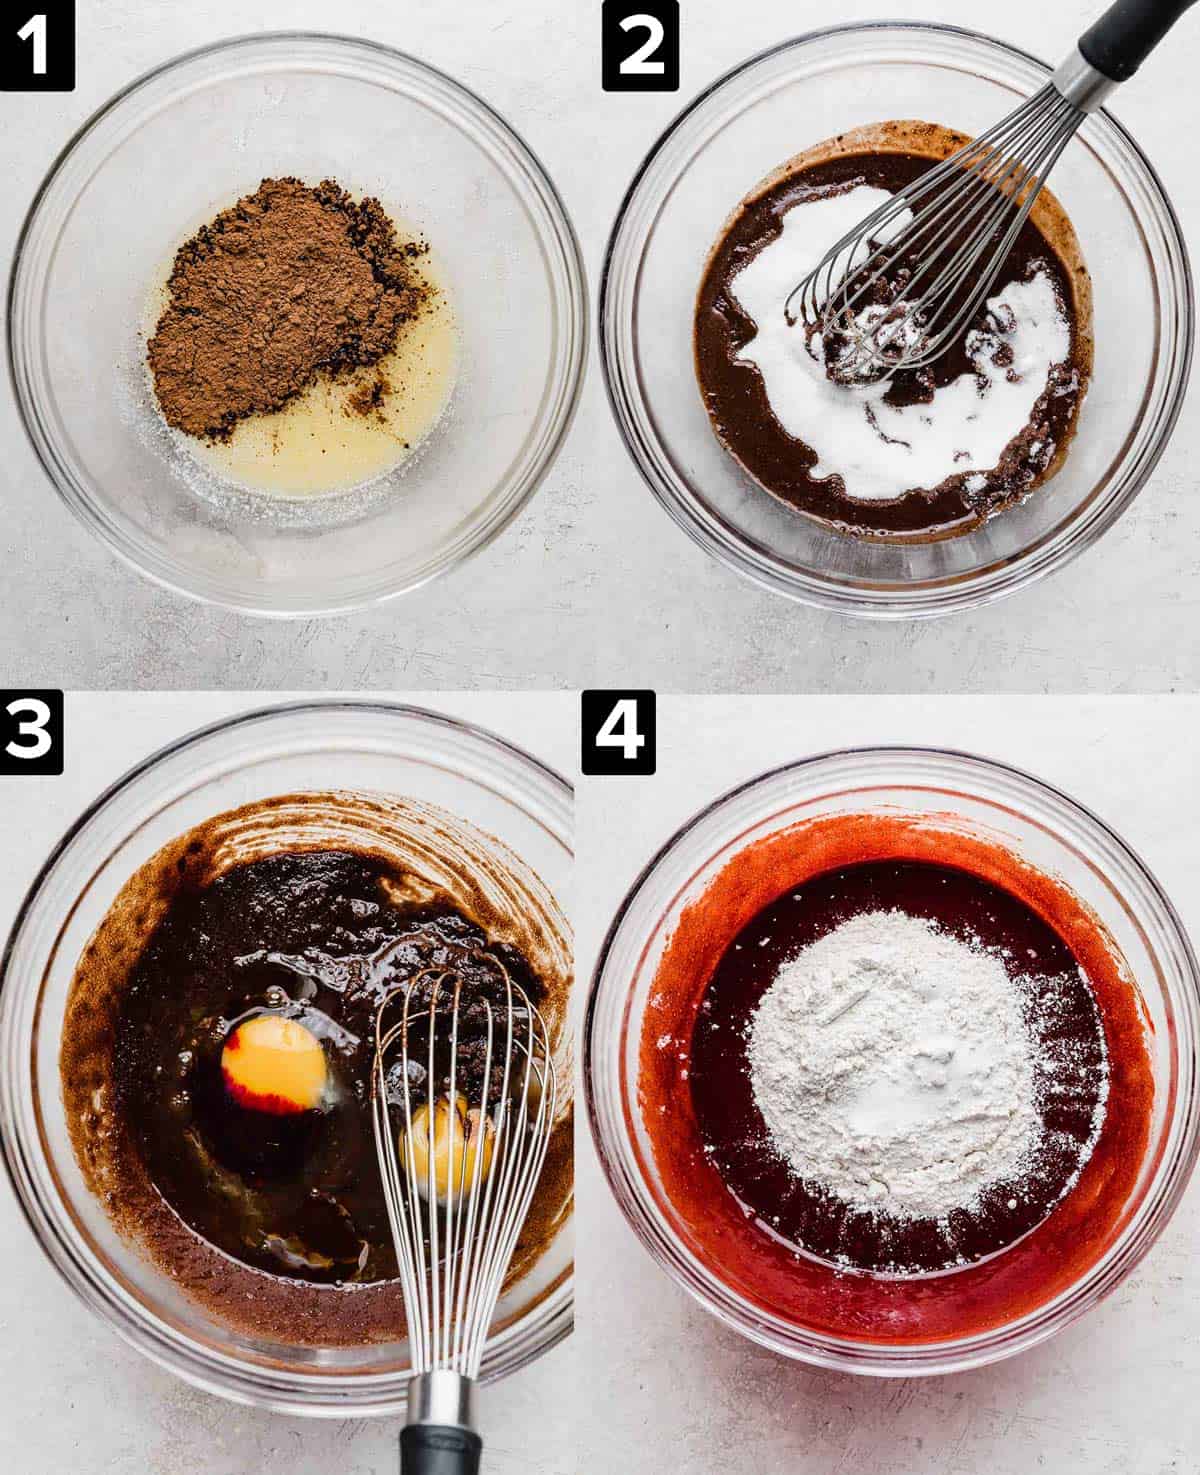
- Transfer and bake the red velvet brownies. Carefully spoon the prepared red velvet brownie batter into the parchment-lined 8×8-inch pan. Gently spread the batter into an even layer using your rubber spatula or an offset spatula, ensuring it reaches all corners for uniform baking.
- Bake until perfectly fudgy. Place the pan in the preheated oven and bake for 23-25 minutes. To check for doneness, insert a toothpick into the center of the brownies. It should come out with a few moist crumbs clinging to it, indicating a perfectly fudgy interior. If the toothpick comes out completely clean, they are likely overbaked. Remove the brownies from the oven and let them cool completely in the pan on a wire rack before attempting to frost them. This cooling step is crucial for the brownies to set properly and prevent the frosting from melting.
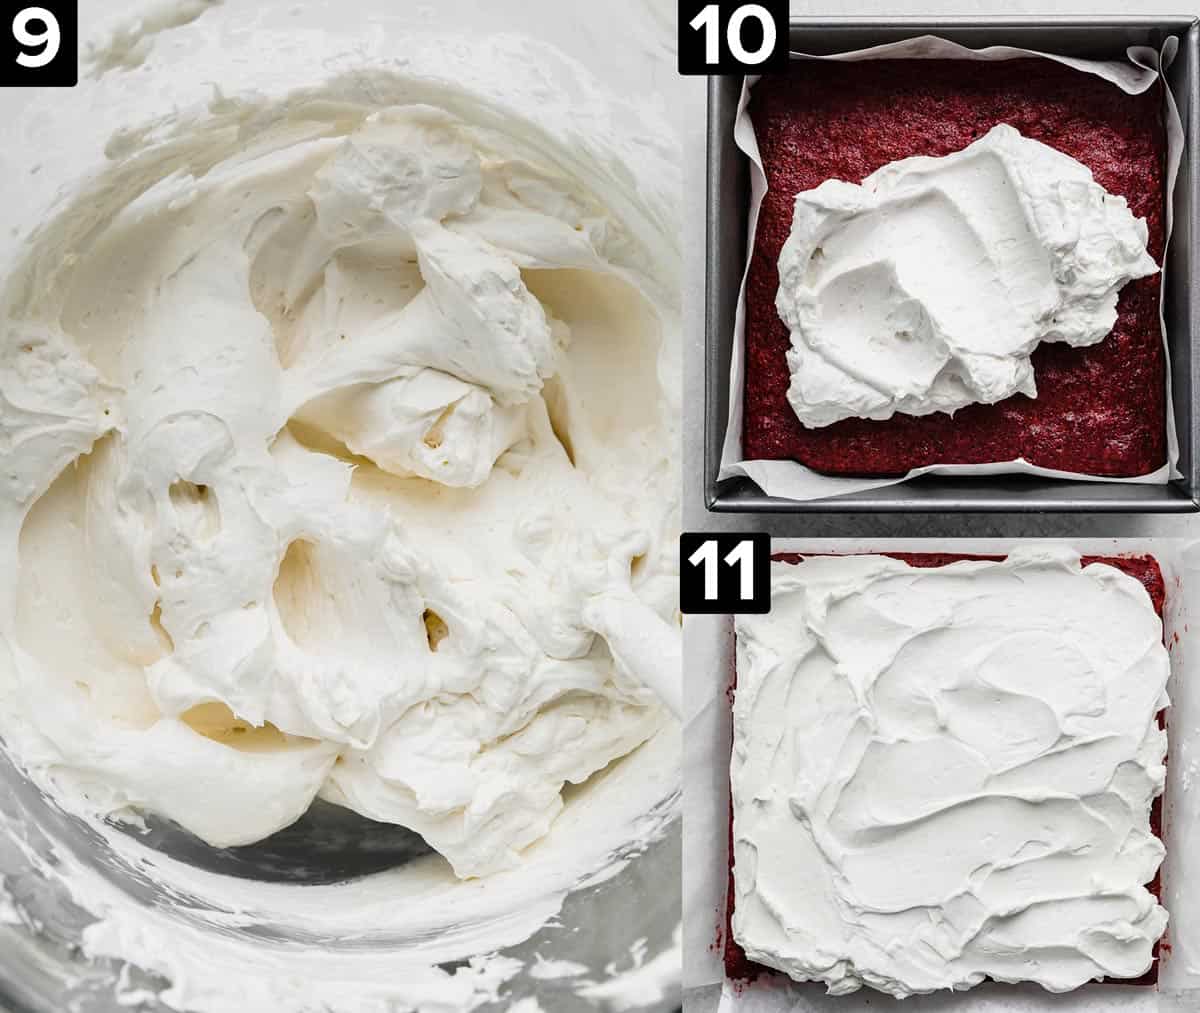
- Prepare the luscious cream cheese whipped cream frosting. In the bowl of a stand mixer fitted with a whisk attachment (or a large bowl with an electric hand mixer), add 4 oz of cold cream cheese. Beat the cream cheese on medium speed until it is smooth and lump-free, about 1 minute. Add 1/2 cup of powdered sugar and 1/2 teaspoon of vanilla extract. Beat on medium speed for another 2 minutes, stopping to scrape down the sides of the bowl as needed to ensure all ingredients are well combined. With the mixer running on low speed, slowly and gradually pour 1 cup of cold heavy cream down the side of the bowl into the cream cheese mixture. This slow pouring prevents splashing. Once all the cream is added, increase the mixer speed to medium-high and beat until the frosting thickens and holds stiff peaks, which should take approximately 30 seconds to 1 minute. Be careful not to overmix, as this can cause the frosting to become soupy or separate.
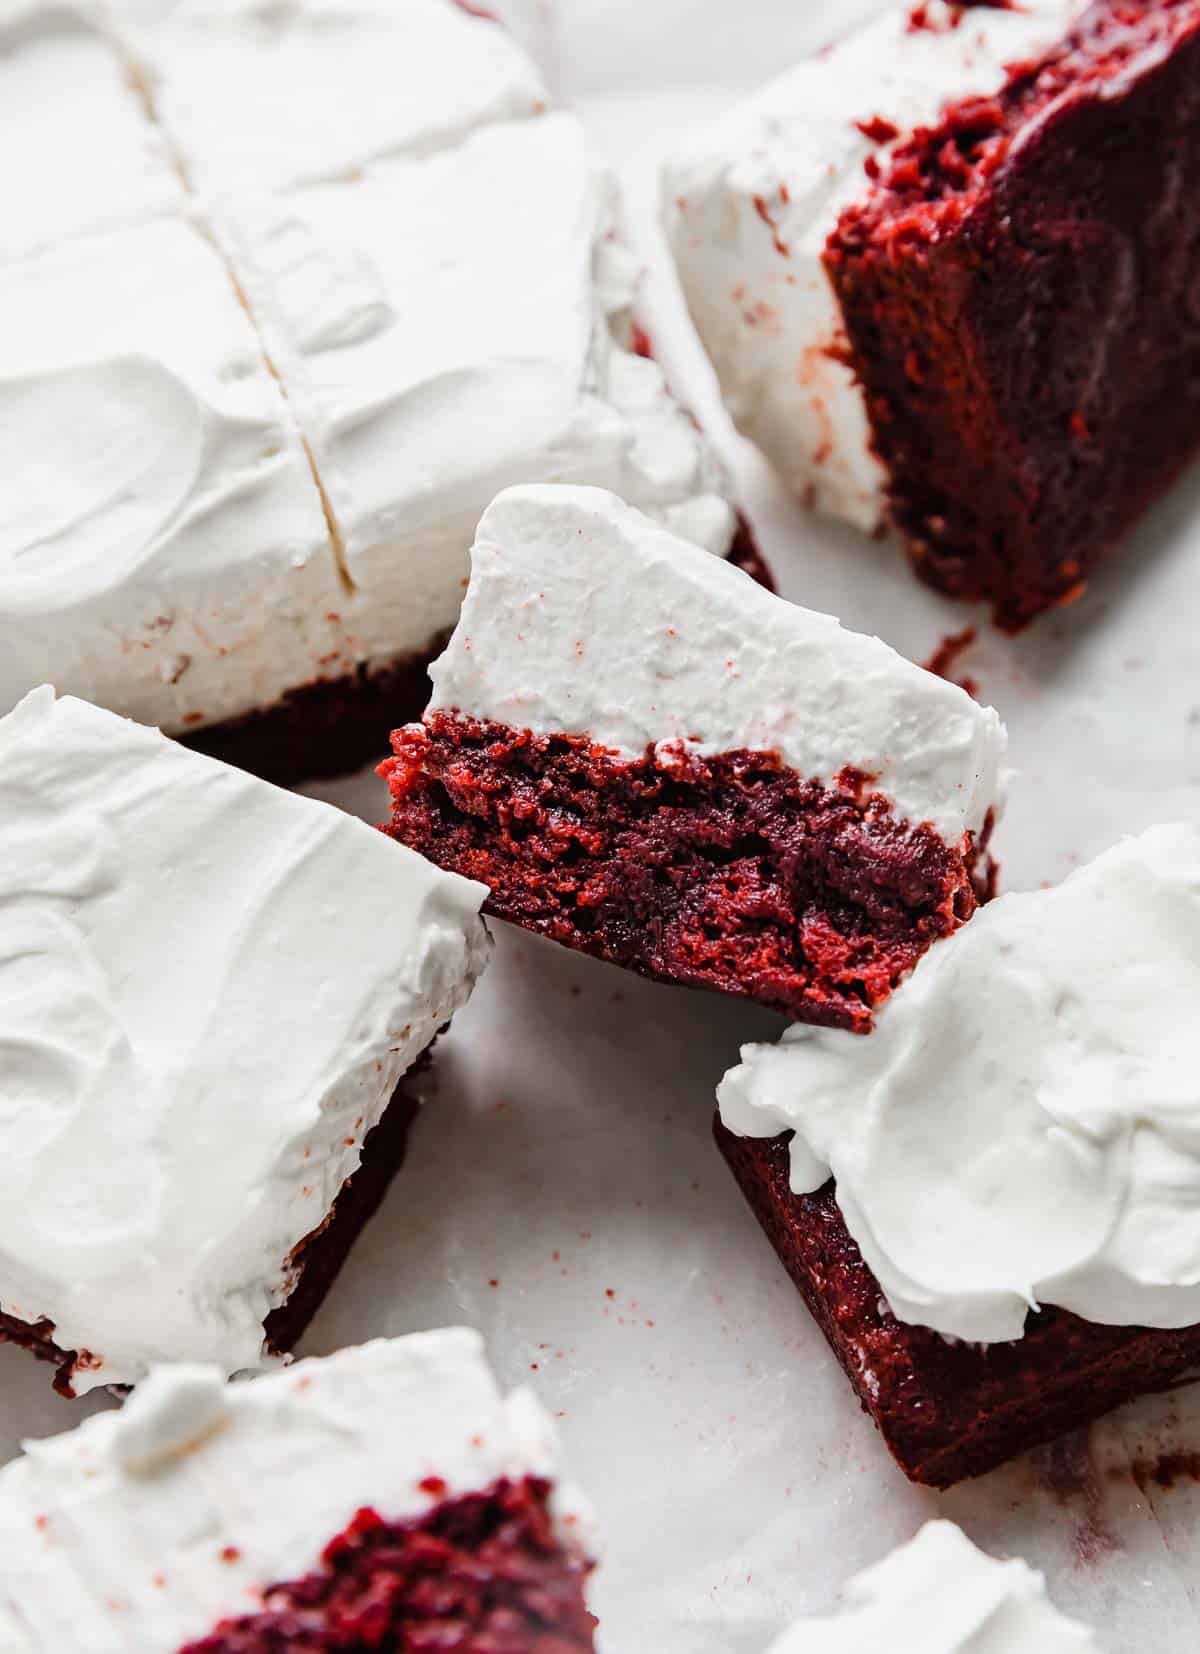
- Frost and serve your magnificent red velvet brownies. Once the brownies have completely cooled to room temperature, carefully lift them out of the pan using the parchment paper overhang. Spread the prepared cream cheese whipped cream frosting evenly over the top of the brownies. For neat slices, you can chill the frosted brownies for about 15-30 minutes before cutting. Slice into squares and serve these delightful fudgy red velvet brownies. Enjoy every single bite of this irresistible homemade dessert!
Expert Tips for the Best Red Velvet Brownies
Achieving perfect fudgy Red Velvet Brownies with a light and airy frosting requires a few key techniques. Here are some expert tips to ensure your dessert turns out absolutely divine:
- Do Not Overmix the Brownie Batter: This is crucial for fudgy brownies. Once you add the flour, mix the batter just until the dry ingredients are incorporated and no streaks of flour remain. Overmixing develops the gluten in the flour, which can lead to a tougher, more cake-like brownie texture, and we’re aiming for that rich, dense fudginess!
- Know When to Remove Brownies from the Oven: The secret to fudgy brownies is slight underbaking. Look for a crackly top and when a toothpick inserted into the center of the pan comes out with moist crumbs attached – this is your cue! If the toothpick is completely clean, your brownies are likely overbaked and will be drier. Remember, they continue to cook slightly as they cool.
- Use a Stand Mixer for the Frosting (If Possible): While an electric hand mixer can certainly get the job done for the cream cheese whipped cream frosting, a stand mixer is significantly faster and more efficient. It also typically produces stiffer, more stable peaks, which is ideal for a light yet well-structured frosting. Ensure your bowl and whisk attachment are thoroughly chilled for optimal whipping of the heavy cream.
- Identify Perfectly Whipped Frosting: You’ll know your cream cheese whipped cream frosting is finished when you stop the mixer, dip the whisk attachment into the frosting, and turn it upside down. The frosting should hold its shape beautifully and form a stable peak without drooping. If it’s still too soft, continue mixing in short 15-second intervals, checking after each burst, to avoid overmixing.
- Chill Your Mixing Bowl for Frosting: For the best whipped cream results, consider chilling your stand mixer bowl (or the large bowl you’re using for a hand mixer) and whisk attachment in the freezer for about 10-15 minutes before you start making the frosting. A cold environment helps the heavy cream whip up faster and achieve a more stable consistency.
- Flavor Variations: If you’re looking for a different frosting experience, particularly a more intensely chocolatey one, I highly recommend trying the chocolate cream cheese frosting from my Chocolate Cake with Chocolate Cream Cheese Frosting recipe. It offers a richer, deeper chocolate flavor that could also pair wonderfully with these red velvet brownies.
Make Ahead, Storing, and Freezing Your Red Velvet Brownies
These fudgy Red Velvet Brownies are fantastic for making ahead, making them a perfect dessert for entertaining or enjoying throughout the week. Here’s how to properly store and freeze them:
- Make Ahead: You can prepare the brownies entirely, including frosting them, a day or two in advance. Store them in an airtight container in the refrigerator. The flavors often meld and deepen overnight, making them even more delicious.
- Storing Frosted Brownies: Due to the cream cheese whipped cream frosting, any frosted red velvet brownies must be stored in an airtight container or tightly covered in the refrigerator. This preserves their freshness, prevents them from drying out, and ensures the frosting maintains its texture. Stored this way, the brownies will keep beautifully for 4-5 days.
- Storing Unfrosted Brownies: If you prefer to frost them just before serving, unfrosted brownies can be stored at room temperature in an airtight container for up to 3 days, or in the refrigerator for up to a week.
- Storing the Frosting: Any leftover cream cheese whipped cream frosting can be stored in an airtight container in the fridge for up to 5 days. You may need to give it a quick whisk to regain its airy texture before using.
- Freezing Brownies (Frosted): Yes, you can freeze these red velvet brownies with the frosting on! To do so, first flash freeze them uncovered on a baking sheet until the frosting is completely firm (this prevents smudging). Once firm, you can wrap individual brownies tightly in plastic wrap, then place them in an airtight freezer-safe container or a heavy-duty freezer bag. They will keep well in the freezer for up to 3 weeks (the frosting limits the freezer time). To thaw, remove the desired number of brownies and let them thaw unwrapped but in a covered container in the fridge overnight.
- Freezing Brownies (Unfrosted): For longer storage, you can freeze the unfrosted brownie slab. Wrap the cooled brownie slab tightly in several layers of plastic wrap, then a layer of aluminum foil. It can be stored in the freezer for up to 2-3 months. Thaw in the refrigerator overnight before frosting and serving.

Red Velvet Brownies: Your Questions Answered
Yes, you can use liquid food coloring, but I highly recommend gel food coloring for optimal results. Gel food coloring is much more concentrated, meaning you’ll need significantly less to achieve a deep, vibrant red color. This also ensures you don’t add excess liquid to the brownie batter, which could alter its fudgy texture and consistency. If using liquid, you might need to add a bit more and slightly reduce another liquid component, if possible, to maintain batter consistency.
For the classic red velvet flavor and color enhancement, white vinegar is preferred. Its mild acidity won’t significantly alter the overall taste of your brownies, allowing the cocoa and other flavors to shine. While some recipes might suggest alternatives like lemon juice or apple cider vinegar, these can impart their own distinct flavors, which might not be what you’re looking for in a traditional red velvet brownie. To truly capture that authentic taste, sticking to white vinegar is best.
Absolutely! These red velvet brownies freeze beautifully. If you want to freeze them with the cream cheese whipped cream frosting already applied, it’s best to flash freeze them first. Place the frosted brownies on a baking sheet, uncovered, in the freezer until the frosting is firm to the touch (usually 1-2 hours). Once firm, you can wrap each brownie individually in plastic wrap, then store them in an airtight container or a freezer-safe bag. They will keep well in the freezer for up to 3 weeks with the frosting. To thaw, simply remove them from the freezer and let them thaw unwrapped but in a covered container in the refrigerator overnight. If freezing unfrosted brownies, wrap them tightly in plastic wrap and then foil, and they’ll last up to 2-3 months.
Yes, absolutely! White chocolate chips make a fantastic addition to red velvet brownies, adding an extra layer of sweetness and a delightful textural contrast. Simply fold in about 1/2 to 1 cup of white chocolate chips into the brownie batter just before you pour it into the prepared pan. This will ensure they are evenly distributed throughout the fudgy goodness and melt perfectly during baking.
Explore More Delicious Red Velvet Desserts
If you’ve fallen in love with the vibrant color and unique flavor of these Red Velvet Brownies, then you’re in for a treat! The red velvet craze doesn’t stop here. We have a variety of other fantastic recipes that showcase this beloved dessert profile. From crunchy snacks to classic cakes, there’s a red velvet option for every craving and occasion. Be sure to check out these other irresistible red velvet delights:
- Red Velvet Popcorn: A fun and festive snack with a sweet, subtly chocolatey red velvet twist.
- Red Velvet Cake Mix Cookies: Super easy and incredibly soft, these cookies bring all the red velvet flavor with minimal effort.
- Old Fashioned Red Velvet Cake: The timeless classic, a moist and tender cake with the iconic cream cheese frosting that started it all.
Did you make this recipe for fudgy Red Velvet Brownies? We’d absolutely love to hear about your experience! Please take a moment to leave a star rating and a review right here on the blog, or scroll down below the recipe card to share your thoughts. Your feedback helps us and other bakers!
Stay connected and get all our latest delicious recipes by following us on Instagram, TikTok, YouTube, Facebook, and Pinterest. Don’t miss out on any of our baking adventures!
Print
SaveSaved!
Review
Red Velvet Brownies
Ingredients
Red Velvet Brownies
- 1/2 cup unsalted butter – melted and still warm
- 1/4 cup unsweetened cocoa powder
- 1 cup granulated sugar
- 2 large eggs
- 1 teaspoon vanilla extract
- 1/2 teaspoon white vinegar
- 2 teaspoons gel red food color
- 2/3 cup all-purpose flour
- 1/2 teaspoon salt
Cream Cheese Whipped Cream Frosting
- 4 oz cream cheese – cold
- 1/2 cup powdered sugar
- 1/2 teaspoon vanilla extract
- 1 cup heavy cream – cold
Instructions
Red Velvet Brownies
-
Preheat oven to 350°F. Line an 8″x8″ square pan with parchment paper. Lightly spray the parchment with nonstick cooking spray. Set aside.
-
In a medium sized bowl add the warm melted butter. Stir in the cocoa powder. Next add the sugar and whisk to combine.
-
Whisk in the eggs, vanilla, vinegar, and red food coloring. Using a rubber spatula, stir in the flour and salt until just combined. Spoon the batter into the prepared pan, spread into an even layer.
-
Bake for 23-25 minutes or until toothpick inserted in center comes out with moist crumbs. Remove from the oven and let brownies cool completely before frosting them.
Cream Cheese Whipped Cream Frosting
-
In a bowl of a stand mixer fitted with a whisk attachment, mix the cold cream cheese on medium speed for 1 minute. Add the powdered sugar and vanilla extract and mix on medium speed for 2 minutes, scraping down the sides of the bowl to make sure everything is combined.
-
With the mixer on, slowly pour the heavy cream down the side of the bowl, into the cream cheese mixture. Pouring it along the edge of the bowl will prevent the cream from hitting the whisk and splashing everywhere. Turn the mixer to medium high speed. The frosting should thicken and take shape. Mix for about 30 seconds, but keep a close eye on the frosting as over-mixing it can cause the mixture to get soupy.
-
You’ll know the frosting is finished when you stop the mixer, dip the whisk attachment in the frosting and turn it upside down. The frosting should keep its shape and hold its’ peak. If yours hasn’t reached this stage, mix in 15 second intervals and test again.
Notes
Store any frosted brownies (and the frosting) in the fridge.
Nutrition
