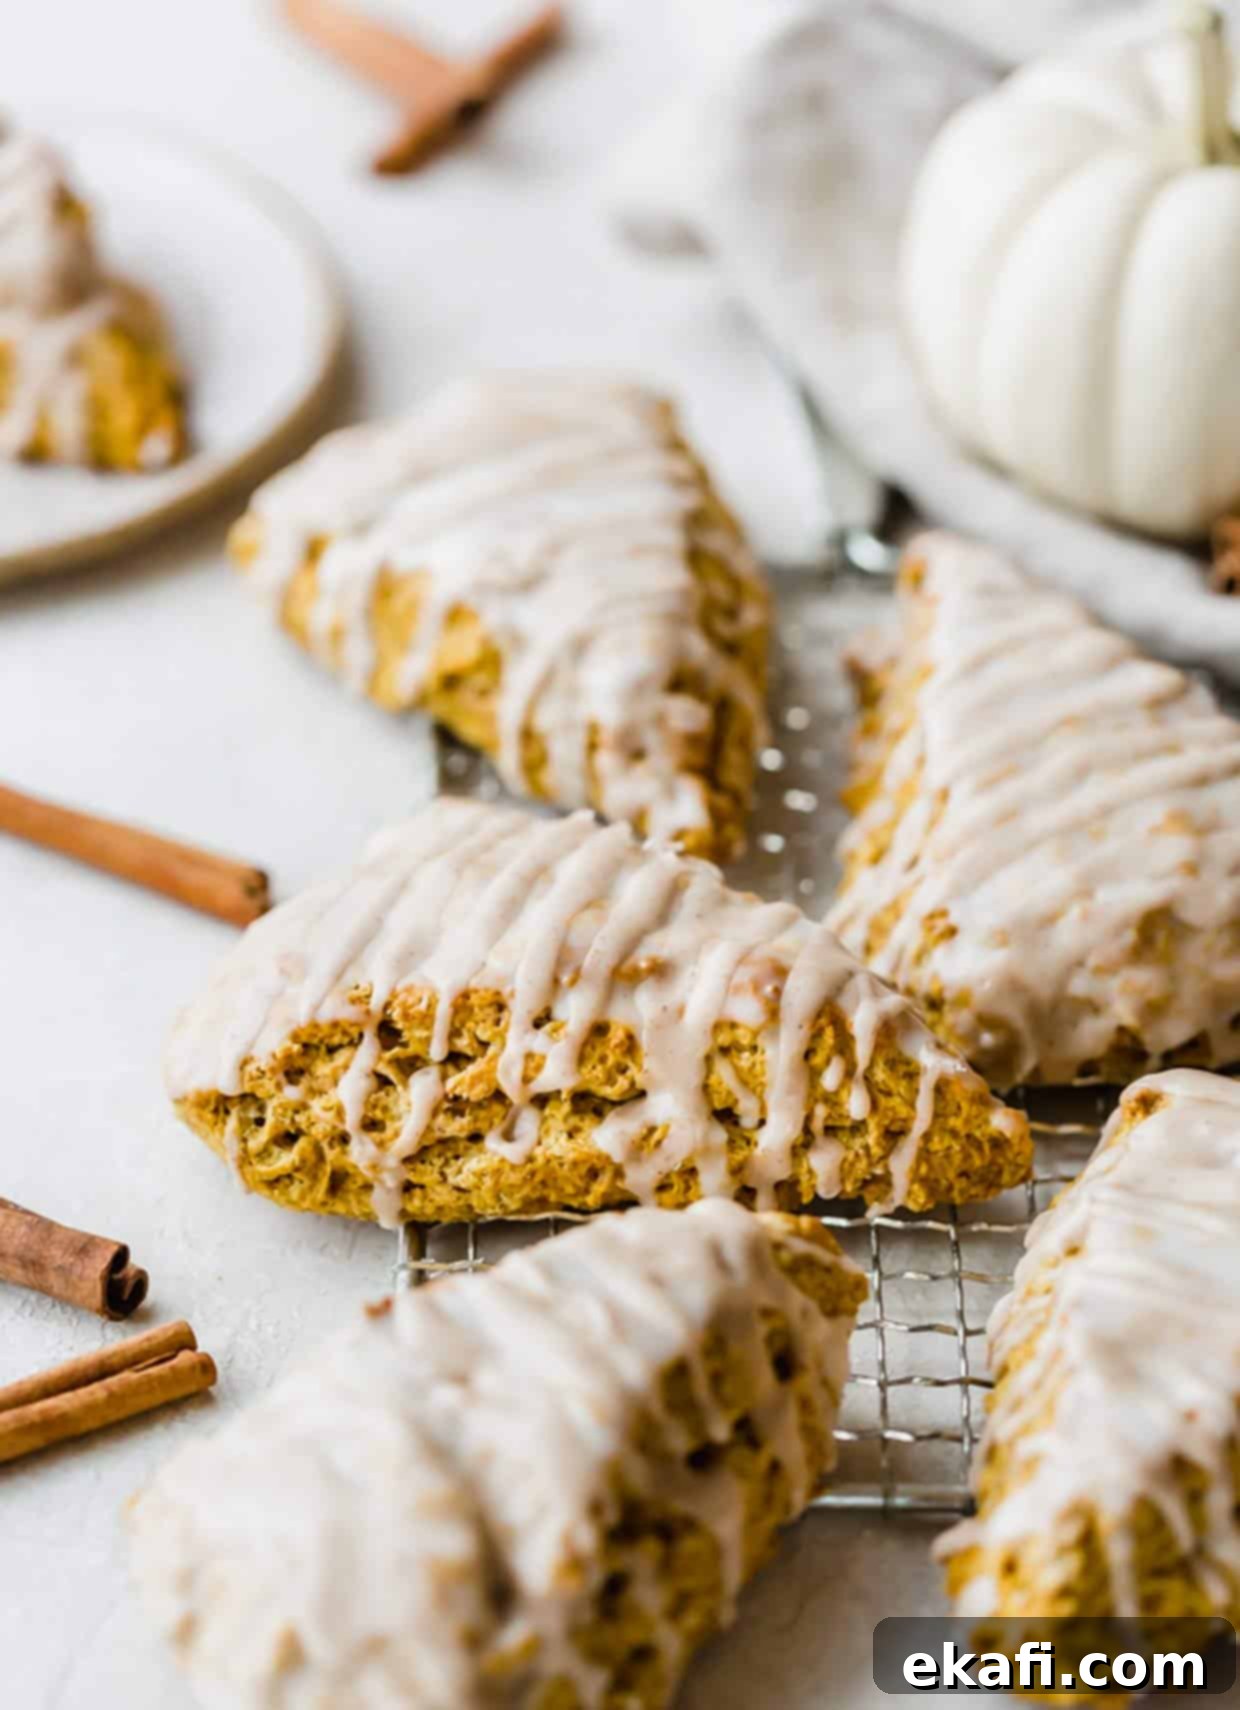
The Best Copycat Starbucks Pumpkin Scones Recipe: Homemade Fall Perfection
As autumn leaves begin to fall and the air gets a crisp chill, there’s one treat that consistently captures the essence of the season: Starbucks Pumpkin Scones. That warm, inviting aroma, the soft, moist texture, and the irresistible blend of spices, all topped with a luscious double glaze – it’s a fall favorite for so many. But what if you could recreate that magic in your own kitchen? Get ready to discover the ultimate copycat Starbucks Pumpkin Scone recipe that promises to deliver deliciously moist pumpkin spice scones, crowned with not one, but two decadent glazes.
The joy of fall is truly found in its flavors, and lately, I’ve been indulging in all the delightful fall recipes. From the recent Crumbl Pumpkin Chocolate Chip Cookies, which were an absolute triumph, to the comforting Pumpkin Coffee Cake that brings cozy vibes with every bite, my kitchen has been a hub of autumnal baking. And for those who prefer a smooth, creamy pumpkin dessert, my Mini No-Bake Pumpkin Cheesecakes are an absolute dream. But for a true taste of fall, these homemade pumpkin scones are simply unparalleled.
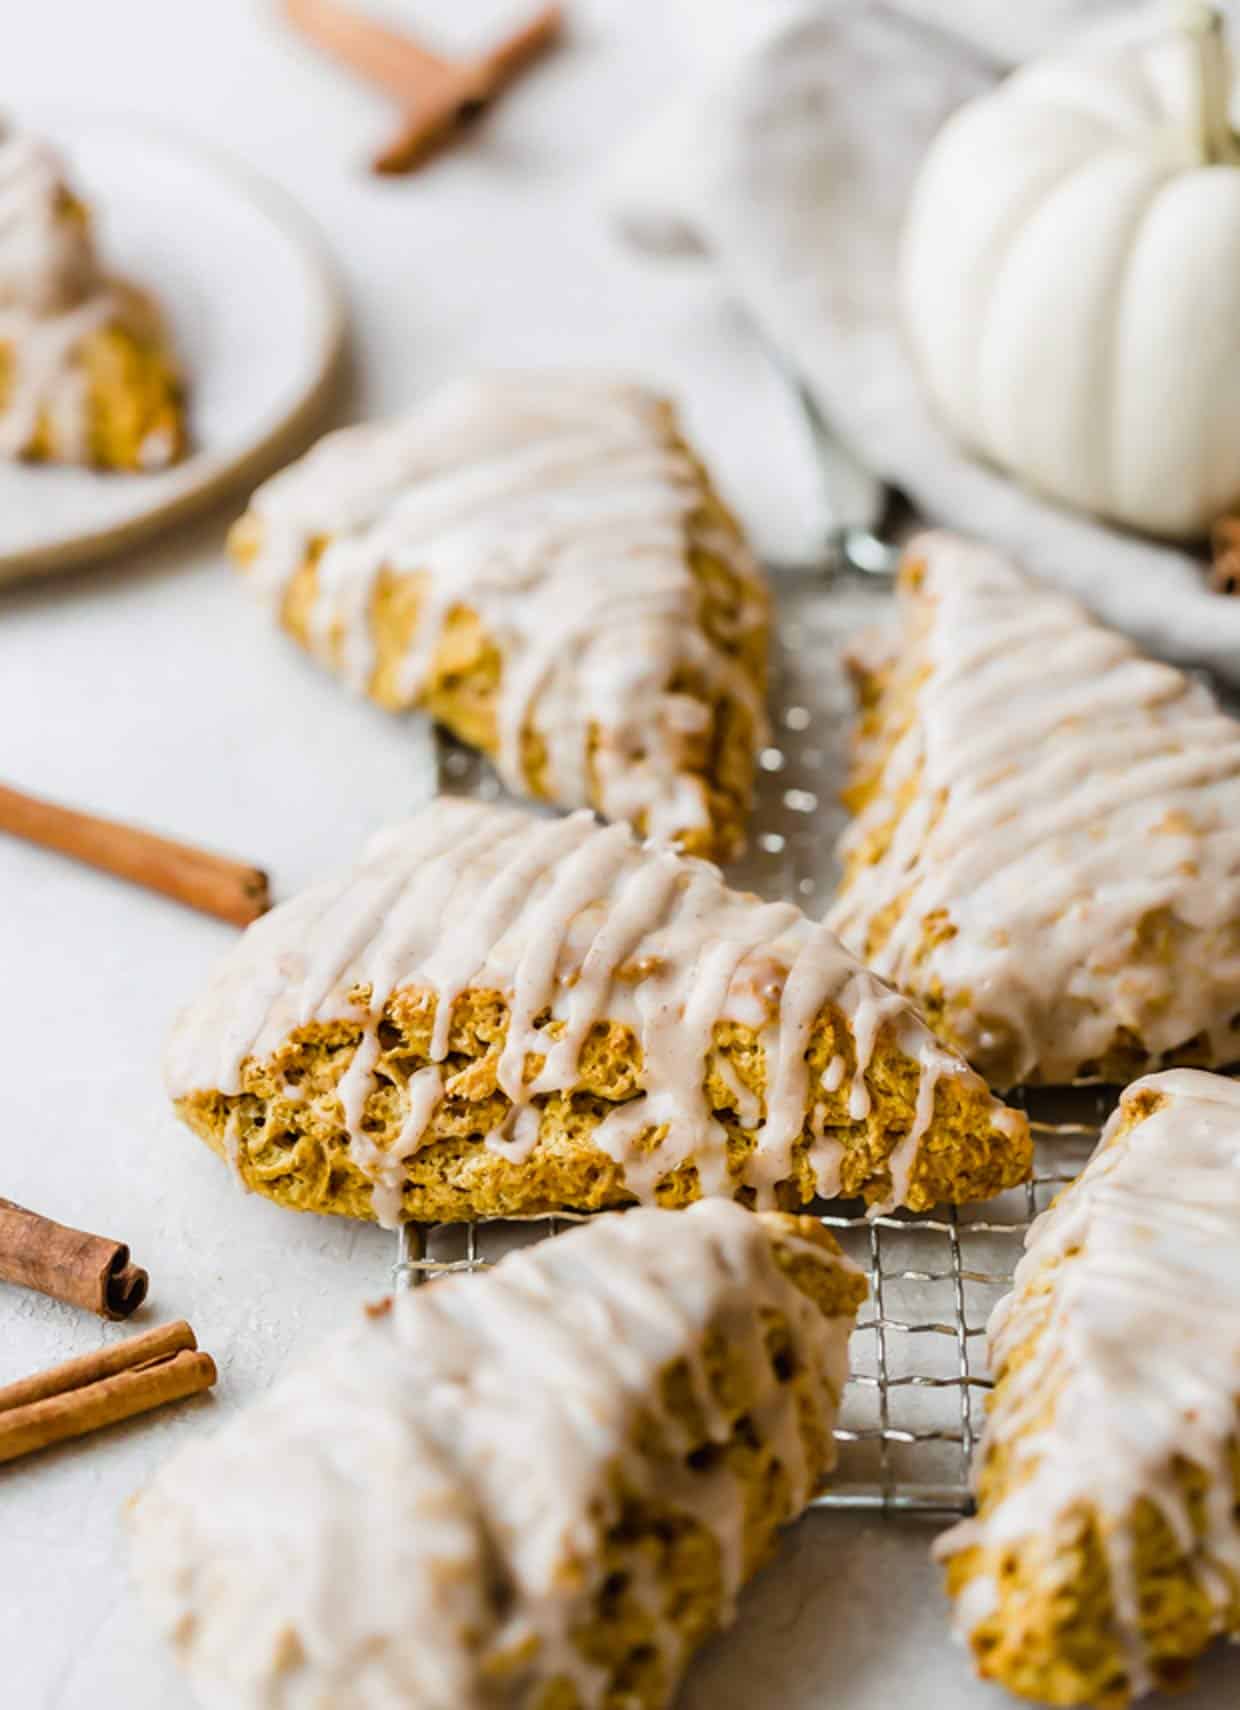
Why This Homemade Pumpkin Scone Recipe Works
There are countless pumpkin scone recipes out there, but this particular one stands out. It’s not just another scone; it’s a carefully crafted duplicate of your beloved Starbucks treat. Here’s why this recipe will become your go-to for delicious homemade pumpkin scones:
- Unbeatable Pumpkin Scones: Unlike dry, crumbly scones often found, these pumpkin scones are designed to be exceptionally moist and tender. They’re not just ‘pumpkin-flavored’; they’re truly packed with real pumpkin puree, ensuring a rich, authentic flavor that perfectly complements the warming spices of fall. Every bite is soft, flavorful, and utterly satisfying.
- The Magic of Double Glaze: What truly elevates these glazed pumpkin scones is the dual-glaze topping. We start with a smooth, sweet base glaze that locks in moisture and adds a foundational sweetness. Then, a second, spiced glaze is artfully drizzled on top, providing an extra layer of autumn flavor with hints of cinnamon, nutmeg, and cloves. This double glaze not only adds incredible flavor and moisture but also creates that signature Starbucks look that makes them so enticing.
- Perfectly Balanced Flavor & Moist Texture: These easy pumpkin scones are celebrated for their superb balance of flavor and their wonderfully moist interior. They are generously infused with aromatic fall spices—cinnamon, nutmeg, cloves, and a subtle hint of ginger—which perfectly enhance the pumpkin without overpowering it. You’ll experience a delightful symphony of tastes that evokes the cozy spirit of the season. Forget overly spiced or bland alternatives; this recipe delivers a scone that is better than the Starbucks version, offering a refined and comforting flavor profile you’ll adore.
Essential Ingredient Notes for Perfect Pumpkin Scones
Crafting the perfect scone starts with understanding your ingredients. Each component in this Starbucks pumpkin scone recipe plays a vital role in achieving that desirable texture and flavor. Pay close attention to these notes to ensure your homemade pumpkin scones are nothing short of perfection.
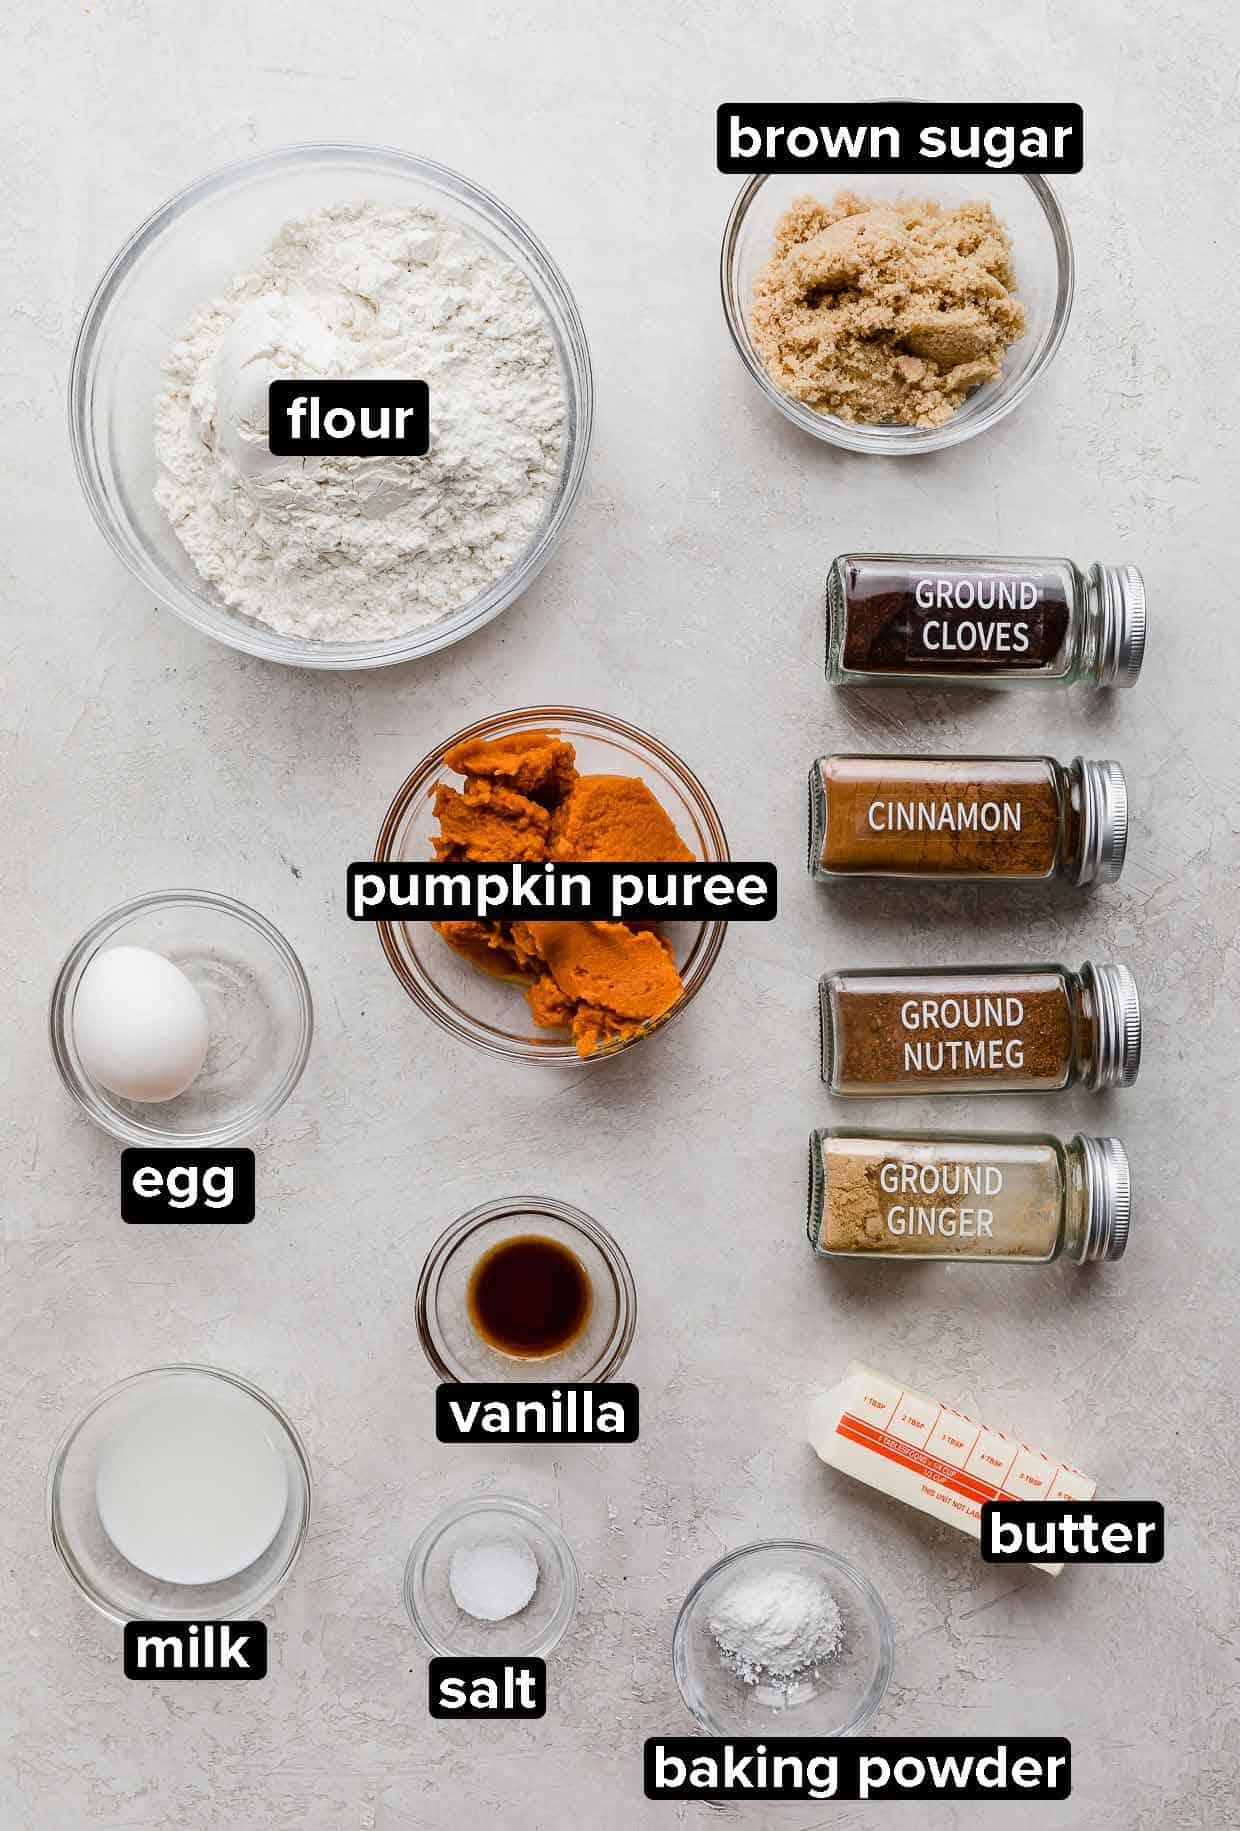
- All-Purpose Flour: Standard all-purpose flour is perfect for these pumpkin scones. It provides the ideal structure without needing any special flours like cake flour, keeping the recipe accessible and straightforward. Sifting your flour can help achieve a lighter scone.
- Light Brown Sugar: Opting for light brown sugar over granulated sugar is a key step. Its molasses content not only imparts a richer, deeper flavor to the scones but also contributes significantly to their moist and tender texture, enhancing that delightful autumnal sweetness.
- Spices: The heart of any pumpkin recipe! A thoughtfully selected blend of ground cinnamon, nutmeg, cloves, and ginger creates that quintessential warm, aromatic, and perfectly balanced fall spice mixture that makes these pumpkin scones truly irresistible. Ensure your spices are fresh for the most vibrant flavor.
- Baking Powder: This is your primary leavening agent. Baking powder is crucial for giving the scones their characteristic lift and tender crumb. Make sure your baking powder is fresh to ensure a good rise; it should bubble when mixed with a bit of warm water.
- Unsalted Butter: The secret to flaky scones is using cold, unsalted butter, cut into small cubes. When cold butter is cut into the flour mixture and then bakes, the butter melts and releases steam, creating pockets of air that result in a beautiful, flaky texture. Unsalted butter allows you to control the exact amount of salt in your recipe.
- Pumpkin Puree: It’s essential to use pure pumpkin puree, not pumpkin pie filling. Pumpkin puree is simply cooked, mashed pumpkin, while pie filling contains added sugars and spices that would throw off the balance of this recipe. Look for cans labeled “100% Pure Pumpkin.”
- Milk: Milk adds necessary moisture to the scone dough, helping all the ingredients come together without overworking. For the glazes, it helps achieve the perfect pourable consistency. You can use 2% milk, whole milk, or even a non-dairy alternative like almond or oat milk, depending on your preference.
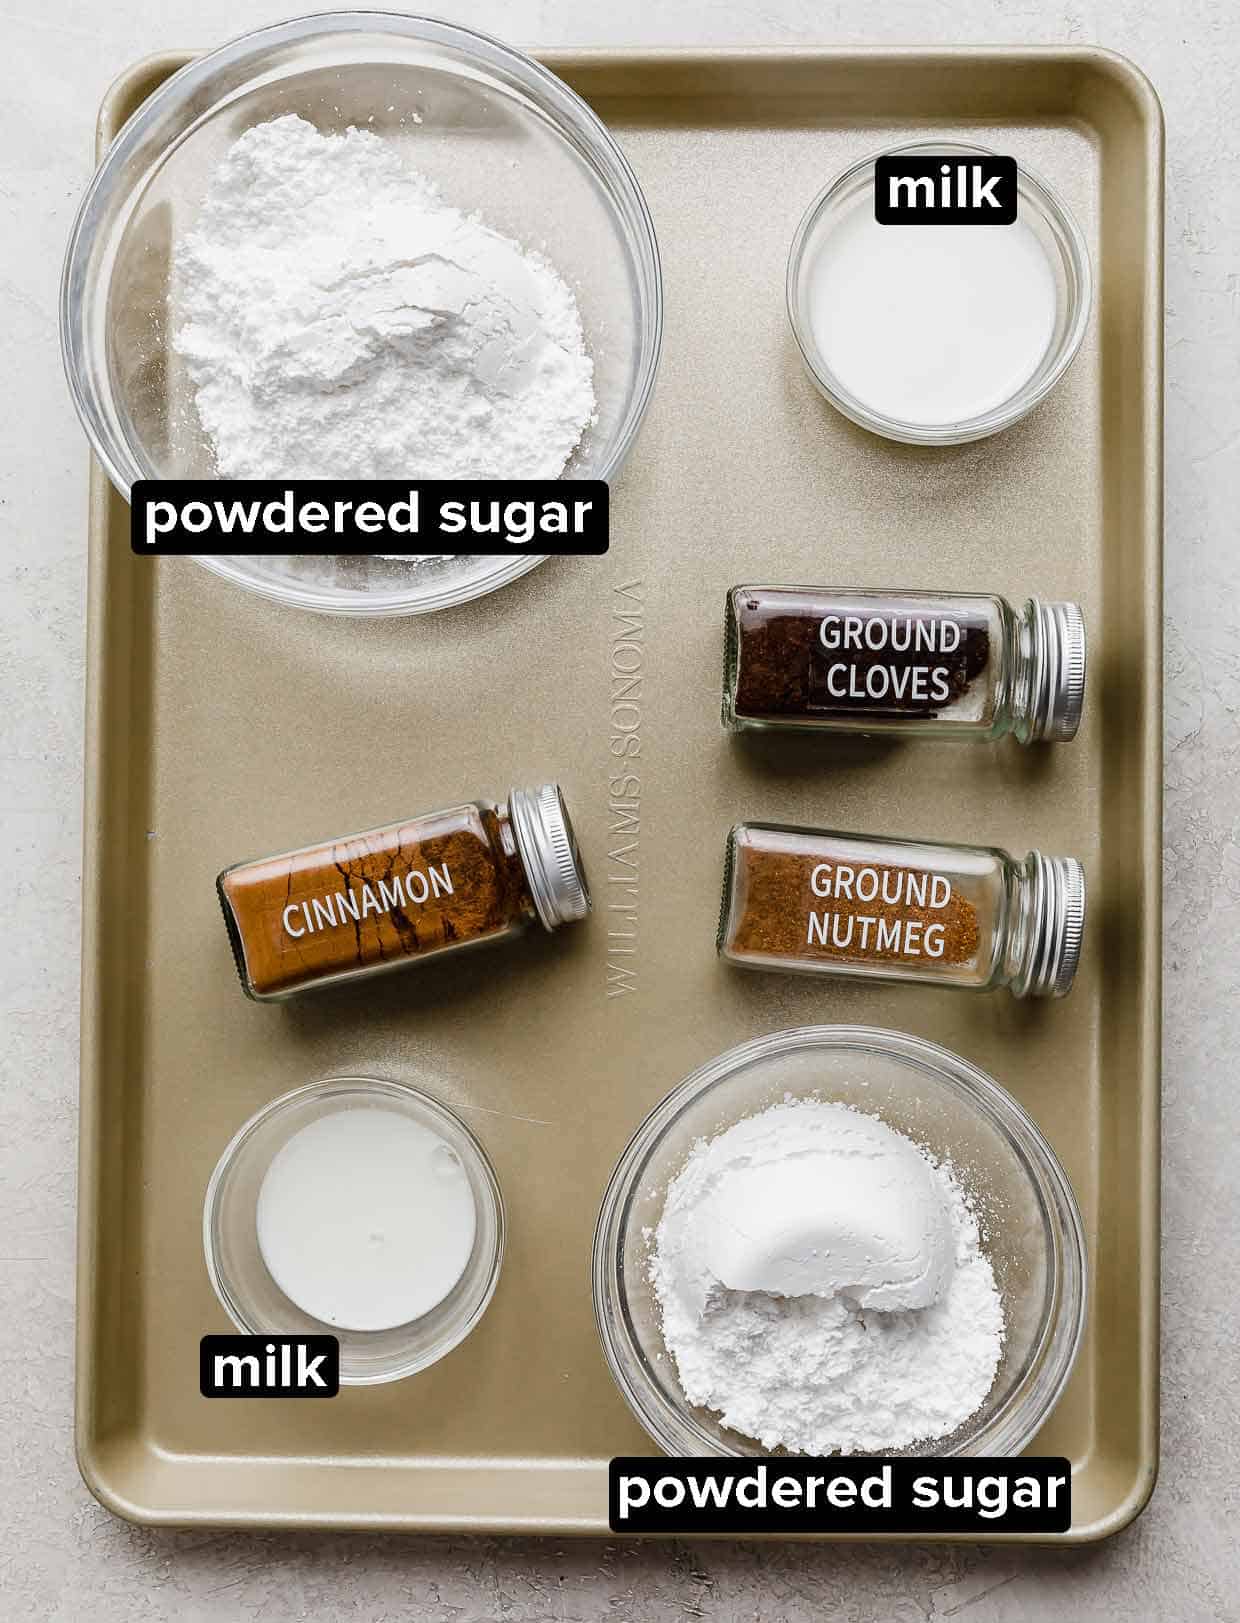
- Powdered Sugar: Also known as confectioners’ sugar, this fine sugar is the base for both of our glazes. Its smooth texture dissolves easily, creating a silky glaze. The first glaze is a simple powdered sugar and milk mix, while the second, spiced glaze, incorporates a touch of nutmeg and cloves for an extra layer of autumnal flavor.
- Vanilla Extract & Egg: These bring richness and help bind the dough. Pure vanilla extract offers a delightful aroma and enhances the overall sweetness, while the egg contributes to the scones’ structure and tenderness.
Step-by-Step Instructions: Crafting Your Pumpkin Scones
Follow these detailed steps to create perfectly moist and flavorful homemade pumpkin scones, just like your favorite coffee shop.
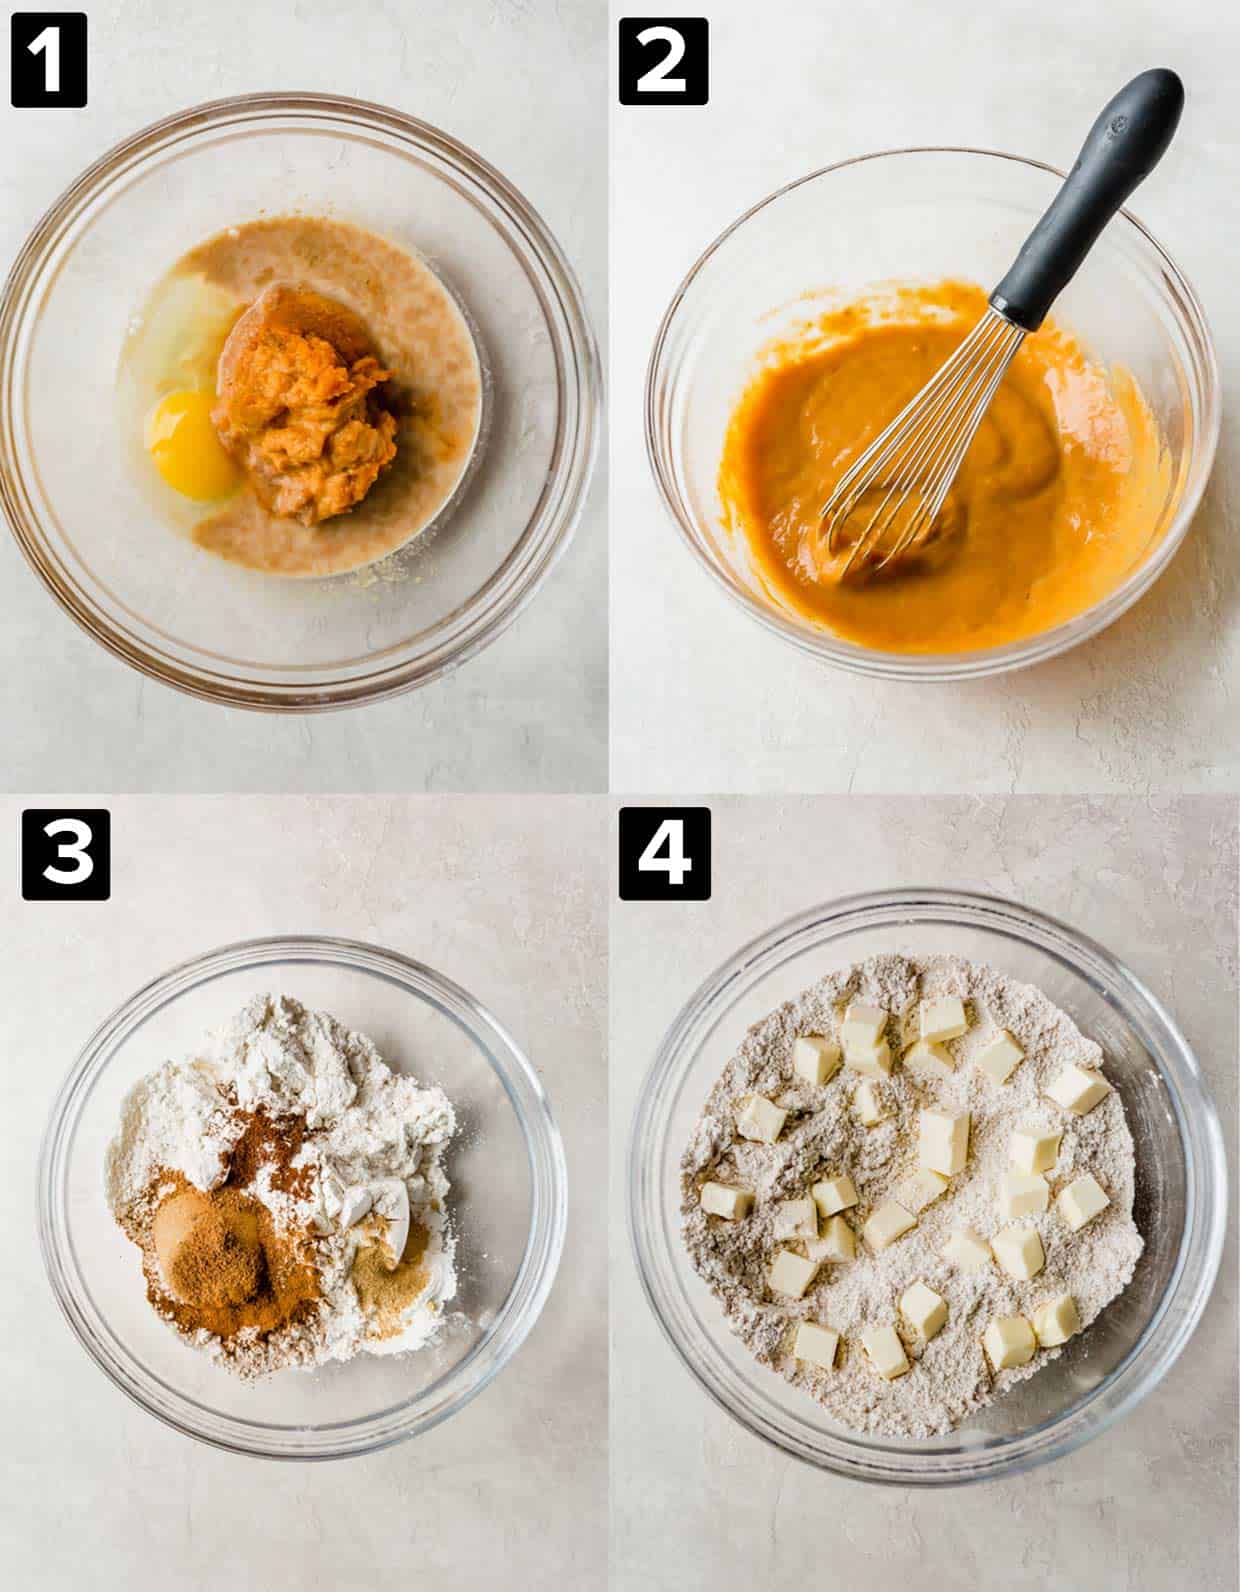
- Prepare Your Wet Ingredients. In a medium-sized bowl, combine the pumpkin puree, milk, large egg, and vanilla extract. Whisk these ingredients together until they are fully combined and smooth, ensuring no streaks remain. Set this mixture aside.
- Mix the Dry Ingredients. In a large mixing bowl, whisk together the all-purpose flour, light brown sugar (packed), baking powder, ground cinnamon, ground nutmeg, ground cloves, ground ginger, and salt. Make sure all the dry ingredients are evenly distributed for consistent flavor throughout the scones.
- Incorporate the Cold Butter. Add the cubed, cold unsalted butter to the dry ingredients. Using a pastry blender, two knives, or your fingertips, swiftly cut the butter into the flour mixture. Work quickly to prevent the butter from warming up. Continue until the butter pieces are no larger than small peas and the mixture resembles a coarse crumble. This step is critical for developing that signature flaky scone texture.
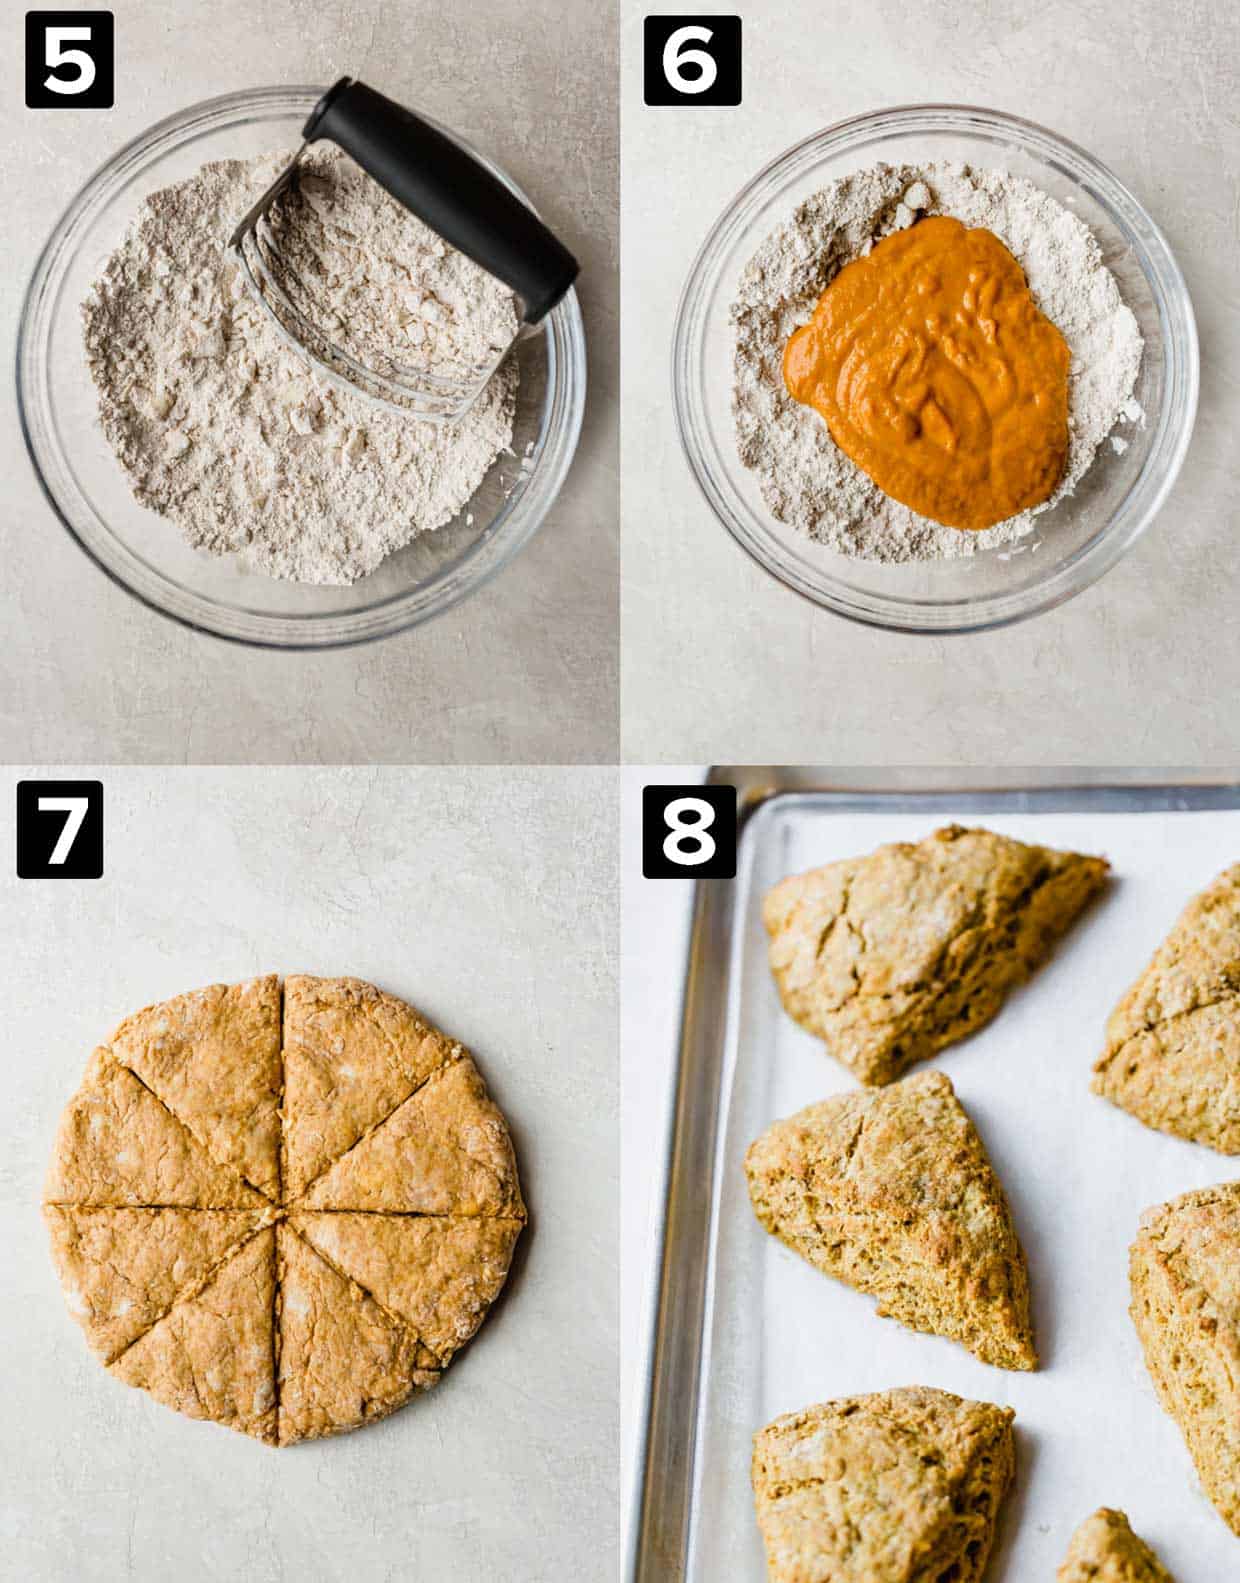
- Combine Wet and Dry Ingredients. Pour the pumpkin mixture into the flour and butter mixture. Using a spatula, gently fold the wet ingredients into the dry until just combined. Be careful not to overmix, as this can lead to tough scones. The dough will be moist and shaggy.
- Form and Cut the Dough. Turn the scone dough out onto a lightly floured, clean work surface. Gently gather the dough and pat it into an even 8-inch circle, about 1-inch thick. Using a sharp knife or bench scraper, cut the circle into 8 uniform triangles. Avoid twisting the knife, which can seal the edges and inhibit the scones from rising properly.
- Bake to Golden Perfection. Carefully transfer the pumpkin scone triangles onto a baking sheet lined with parchment paper. Bake in a preheated oven at 425°F (220°C) for 15-17 minutes, or until the tops are lightly golden brown and the scones are cooked through. Remove them from the oven and let them cool on the baking sheet for about 20 minutes before glazing. This cooling time allows the scones to set and prevents the glaze from melting off.
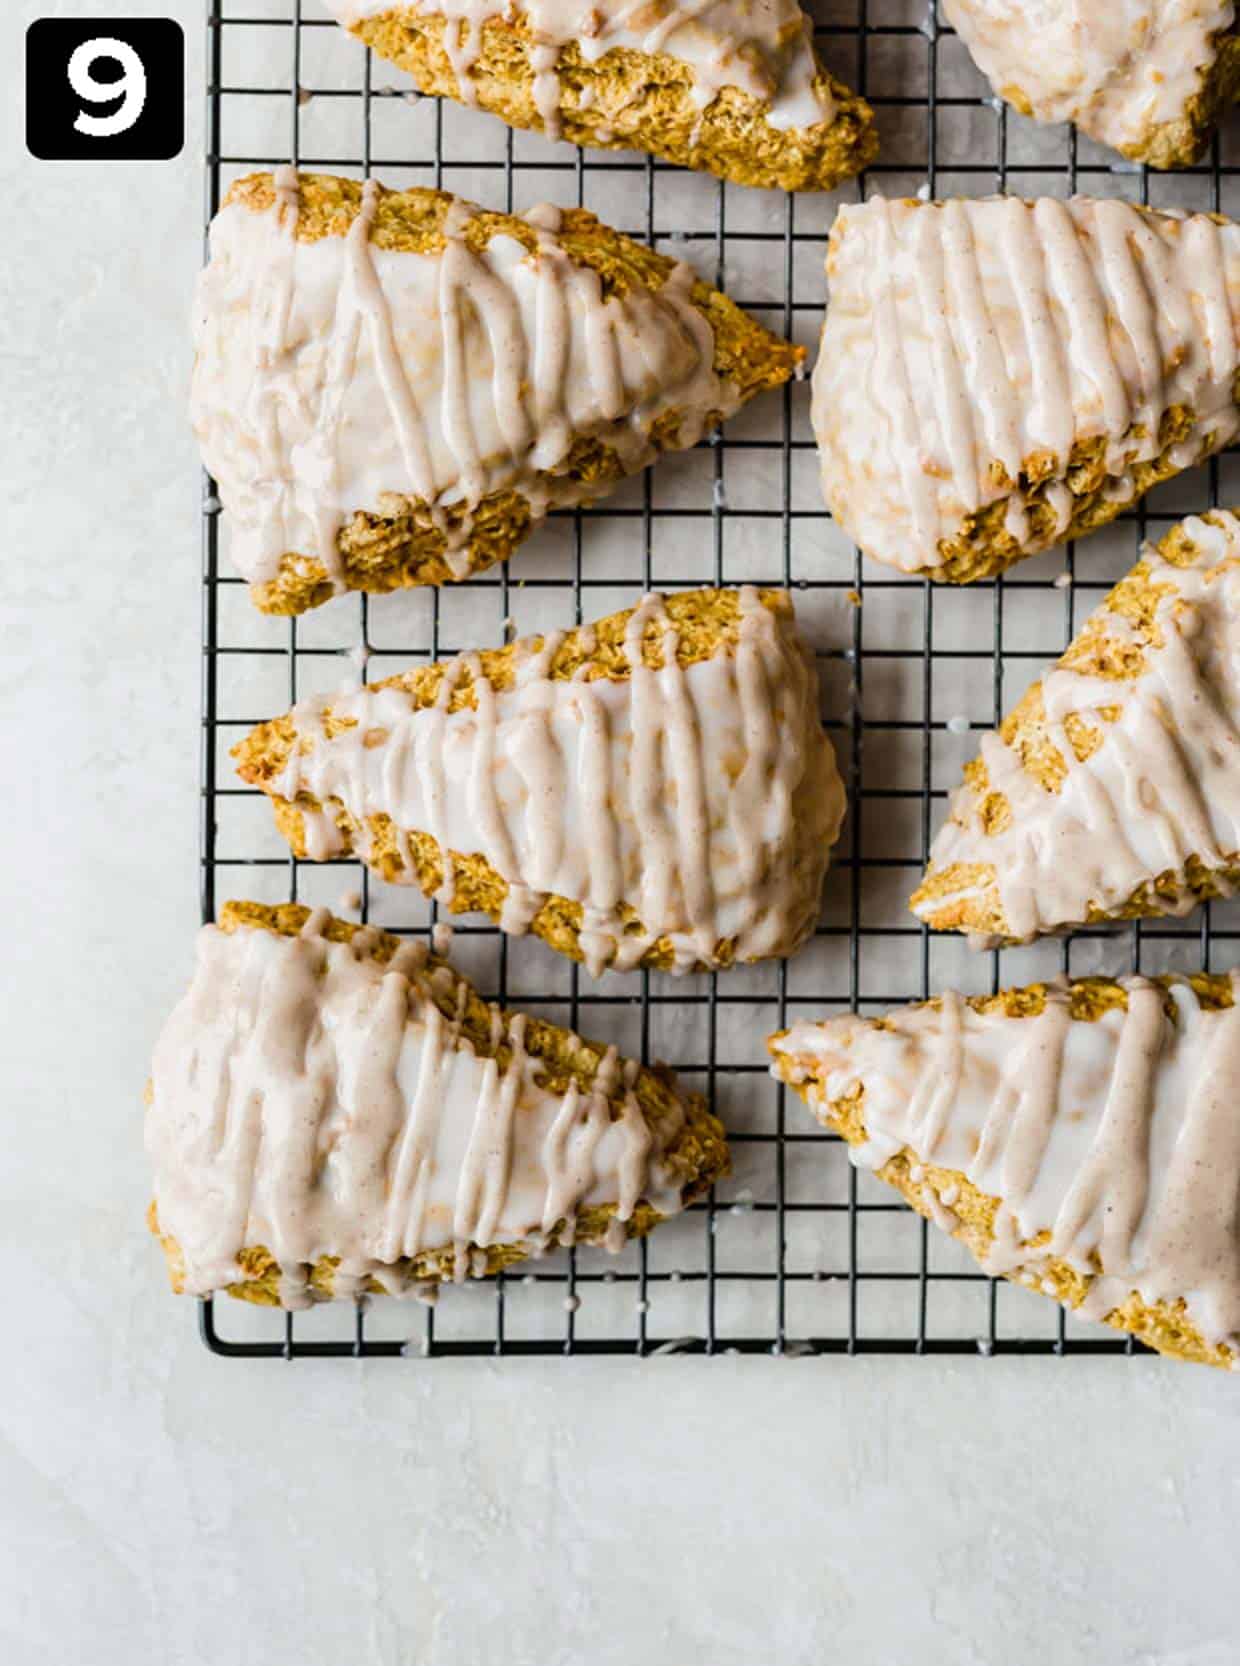
- Prepare the Signature Glazes. While your homemade Starbucks pumpkin scones are cooling, prepare the two glazes. In two separate small bowls, whisk together the ingredients for the plain glaze (powdered sugar and milk) and the spiced glaze (powdered sugar, cinnamon, cloves, nutmeg, and milk) until each is smooth and lump-free. Adjust consistency with a touch more milk or powdered sugar if needed.
- Glaze and Serve. Once the scones are sufficiently cooled (this is important to prevent the glaze from running), use a pastry brush to apply a generous layer of the plain white glaze over the top of each scone. Let this first glaze set for about 10 minutes. Then, using a spoon, artfully drizzle the spiced glaze on top of the plain glaze. Allow the glazes to fully set before serving. Now, they are ready to be enjoyed!
Expert Tips for the Perfect Pumpkin Scones
Achieving perfectly moist and flaky pumpkin scones is easier than you think with these expert tips:
- Choose Your Milk Wisely (But Don’t Stress!): Many wonder about the best type of milk. Honestly, it doesn’t matter too much! I often use 2% milk, and it yields fantastic results. For an extra rich scone, feel free to use whole milk, half-and-half, or even heavy cream. If you’re looking for a dairy-free option, unsweetened almond milk or oat milk can also work well without significantly altering the flavor.
- The Golden Rule: COLD Butter is King: This is perhaps the most crucial tip for flaky scones. Butter contains both fat and water. When cold butter is cut into the flour, it creates tiny pockets within the dough. As the scones bake, the water in the butter turns to steam, which puffs up these pockets, creating that signature flaky, airy texture. If your butter is too warm, it will blend completely into the flour, resulting in a dense, cake-like scone rather than a light and flaky one. For even better results, you can grate frozen butter directly into the flour mixture, or chill your cubed butter in the freezer for 10-15 minutes before using.
- Handle the Dough with Care: After adding the wet ingredients to the dry, the dough will look quite dry and shaggy initially. Resist the urge to add more liquid! Use your hands to gently bring the dough together. Overworking the dough develops the gluten, which can lead to tough, chewy scones. Knead it just enough until it forms a cohesive mass.
- Precision in Cutting: When forming your 8-inch circle and cutting the triangles, use a sharp knife or bench scraper and press straight down. Avoid twisting the knife as you cut, as this can seal the edges of the scones and prevent them from rising properly in the oven, hindering that beautiful lift.
- Achieving the Ideal Glaze Consistency: The glazes are key to the Starbucks experience. When making them, pay close attention to their consistency. If a glaze appears too runny, gradually add more powdered sugar, a tablespoon at a time, until it thickens. Conversely, if it’s too thick and doesn’t drizzle smoothly, add a tiny bit more milk (a teaspoon at a time) until it reaches the desired flow.
- Double Up for Delight: These pumpkin scones are so incredibly good that they disappear quickly! Every time I make a batch, I regret not making more. If you’re baking for a crowd, or just want to ensure you have enough for a few days, consider doubling the recipe. Just ensure you have enough baking sheets so you don’t overcrowd them in the oven.
- High Heat for a Perfect Rise: Baking scones at a high temperature (425°F) helps them rise quickly and develop a crisp exterior while maintaining a soft, moist interior. Don’t be tempted to lower the temperature.
Make Ahead, Storing, and Freezing Your Pumpkin Scones
These delicious pumpkin scones are wonderful fresh, but they also store beautifully, making them perfect for meal prep or enjoying later!
- Storing Baked Scones: Once completely cooled, store your glazed pumpkin scones in an airtight container or a large ziplock bag at room temperature for up to 3 days. If you prefer to extend their freshness, you can keep them in the refrigerator for 5-6 days. For best texture, lightly warm them in the microwave for 10-15 seconds before serving.
- Freezing Baked Scones: To freeze, allow the scones to cool completely after glazing. For the glaze to fully set and prevent stickiness, chill the glazed scones in the freezer for about 5 minutes. Once firm, wrap each glazed scone individually in plastic wrap, then place them in a large freezer-safe ziplock bag or an airtight container. They can be stored in the freezer for up to 2 months. When you’re ready to enjoy, simply remove a scone from the freezer, let it thaw in the refrigerator overnight, and then warm it briefly in the microwave for that fresh-baked feel!
- Freezing Unbaked Scones (Make-Ahead Dough): You can also prepare the scone dough ahead of time and freeze it. After cutting the dough into triangles, place them on a parchment-lined baking sheet and freeze until solid (about 1-2 hours). Once frozen, transfer the unbaked scones to a freezer-safe bag or container. When ready to bake, place frozen scones on a prepared baking sheet and bake directly from frozen, adding a few extra minutes to the baking time (typically 18-22 minutes at 425°F) until golden brown.
Common Questions About Pumpkin Scones (FAQs)
While the exact date can vary slightly each year, Starbucks typically introduces its beloved pumpkin-flavored items, including their glazed pumpkin scones, around the end of August or the beginning of September. This marks the unofficial start of pumpkin spice season! However, why wait or spend money on just one scone when you can use this incredible Starbucks copycat pumpkin scone recipe to make a whole batch of 8 delicious scones right at home?
Absolutely, you can freeze pumpkin scones! To do so effectively, first ensure the glazed pumpkin scones have cooled completely. For best results, chill them in the freezer for about 5-10 minutes after glazing to help the glaze fully set and prevent stickiness. Once firm, remove them, wrap each scone individually in plastic wrap, and then store them in a freezer-safe bag or airtight container. They will keep well in the freezer for up to 2 months. When you’re ready for a treat, simply remove a scone, let it thaw in the refrigerator overnight, and then warm it up in the microwave for a fresh, comforting experience!
These delicious pumpkin scones are incredibly versatile! For the ultimate fall pairing, serve them with a refreshing glass of homemade Pumpkin Juice. They make an excellent breakfast or brunch item alongside my hearty Pumpkin Steel Cut Oats or fluffy Pumpkin Pecan Pancakes! They’re also perfect on their own with a cup of coffee or tea, or as a delightful dessert after a meal. The rich pumpkin and spice flavors complement a wide range of beverages and dishes.
Scones often turn out dry due to a few common mistakes: overworking the dough, not using enough fat, or baking them for too long. To avoid dry scones, ensure your butter is very cold and cut it into the flour quickly. Mix the wet and dry ingredients just until combined; resist the urge to knead excessively. Finally, keep an eye on your baking time and oven temperature. Scones should be lightly golden brown, not dark or hard.
While this recipe is written for all-purpose flour, you can often adapt it to be gluten-free. I recommend using a high-quality 1:1 gluten-free baking flour blend that contains xanthan gum. You might find the dough to be a little stickier, so a bit more flour for dusting your work surface could be helpful. The baking time and liquid amounts may need slight adjustments, so keep an eye on the consistency of the dough and the appearance of the baked scones.
Explore More Delicious Pumpkin Recipes
If you’re as big a fan of pumpkin as we are, you’re in for a treat! The versatility of pumpkin means there’s always a new delicious creation to explore. Once you’ve mastered these incredible copycat Starbucks Pumpkin Scones, dive into these other irresistible pumpkin-themed recipes that are perfect for fall baking:
- Pumpkin Bars: A classic fall dessert, these moist bars with cream cheese frosting are always a crowd-pleaser.
- Pumpkin Cake: A rich and tender cake, bursting with pumpkin flavor and warm spices, ideal for any autumn celebration.
- Pumpkin Chocolate Chip Cookies: The perfect blend of pumpkin spice and sweet chocolate chips in a soft, chewy cookie.
- Pumpkin Pancakes: Start your day with a stack of fluffy pumpkin pancakes, elevated with a decadent cinnamon brown butter pecan syrup.
- Pumpkin Coffee Cake: A delightful coffee cake featuring a spiced streusel topping and a sweet cinnamon glaze – perfect with your morning coffee.
Did you make this recipe? I’d love to hear about it! Leave a star rating and review or scroll below the recipe card and do so there.
Stay up-to-date by following us on Instagram, TikTok, YouTube, Facebook, and Pinterest.

Print
SaveSaved!
Review
Starbucks Pumpkin Scones
Ingredients
- 2 cups all-purpose flour
- 1/3 cup light brown sugar – packed
- 1 teaspoon ground cinnamon
- 1 tablespoon baking powder
- 1/2 teaspoon salt
- 1/2 teaspoon ground nutmeg
- 1/2 teaspoon ground cloves
- 1/4 teaspoon ground ginger
- 6 tablespoons unsalted butter – cold, cut into cubes
- 1/2 cup pumpkin puree
- 3 tablespoons milk
- 1 egg – large egg
- 1 teaspoon vanilla extract
Glaze
- 1 cup + 2 tablespoons powdered sugar
- 2 tablespoons milk
Spiced Glaze
- 1 cup powdered sugar
- 1/4 teaspoon ground cinnamon
- pinch cloves
- pinch nutmeg
- 1 tablespoon milk
Instructions
-
Preheat your oven to 425°F (220°C). Line a large baking sheet with parchment paper to prevent sticking and for easy cleanup. Set this aside.
-
In a spacious mixing bowl, thoroughly whisk together the all-purpose flour, light brown sugar (ensure it’s packed for accurate measurement), ground cinnamon, baking powder, salt, ground nutmeg, ground cloves, and ground ginger until all the dry ingredients are uniformly combined. Next, add the cold, cubed unsalted butter to this mixture. Using a pastry blender, two forks, or your fingertips, swiftly cut the butter into the flour. Work it until the butter pieces are no larger than small peas and the mixture resembles a coarse, crumbly texture. This swift action helps keep the butter cold, which is essential for flaky scones.
-
In a separate medium-sized bowl, combine the pumpkin puree, milk, large egg, and vanilla extract. Whisk these wet ingredients together until the mixture is completely smooth and well-integrated. Set aside.
-
Pour the wet pumpkin mixture into the bowl with the dry ingredients. Using a sturdy spatula or a wooden spoon, gently fold the wet into the dry until they are just combined. The dough will appear shaggy and somewhat sticky, but resist the urge to overmix or add more flour at this stage.
-
Turn the dough out onto a clean, lightly floured work surface. Gently pat the dough into an even 8-inch circle, approximately 1 inch thick. Using a sharp knife or a bench scraper, cut the circle into 8 equal triangles. Press straight down with the knife; avoid twisting it, as this can seal the edges and inhibit the scones from rising properly during baking.
-
Carefully transfer the scone triangles to your prepared baking sheet, ensuring they are spaced evenly. Bake for 15-17 minutes, or until the tops are lightly golden brown and a skewer inserted into the center comes out clean. Remove from the oven and allow the scones to cool on the baking sheet for at least 20 minutes before proceeding with the glazing. This crucial cooling period prevents the glaze from melting off.
Glaze
-
While your scones are cooling, prepare the glazes. In two separate small bowls, combine the ingredients for the plain glaze (powdered sugar and milk) and the spiced glaze (powdered sugar, ground cinnamon, pinch of cloves, pinch of nutmeg, and milk). Whisk each mixture until smooth and free of lumps. Adjust consistency by adding more powdered sugar if too thin, or a tiny bit more milk if too thick.
-
Once the scones are cool, use a pastry brush to apply a generous layer of the plain white glaze over the top of each scone. Ensure even coverage. Allow this first layer of glaze to set and firm up for about 10 minutes.
-
After the first glaze has set, take a spoon and artfully drizzle the spiced glaze over the top of the plain glaze on each scone. Let the spiced glaze also set for a few minutes. Once both glazes are firm, your homemade Starbucks pumpkin scones are ready to be served and savored!
Nutrition
