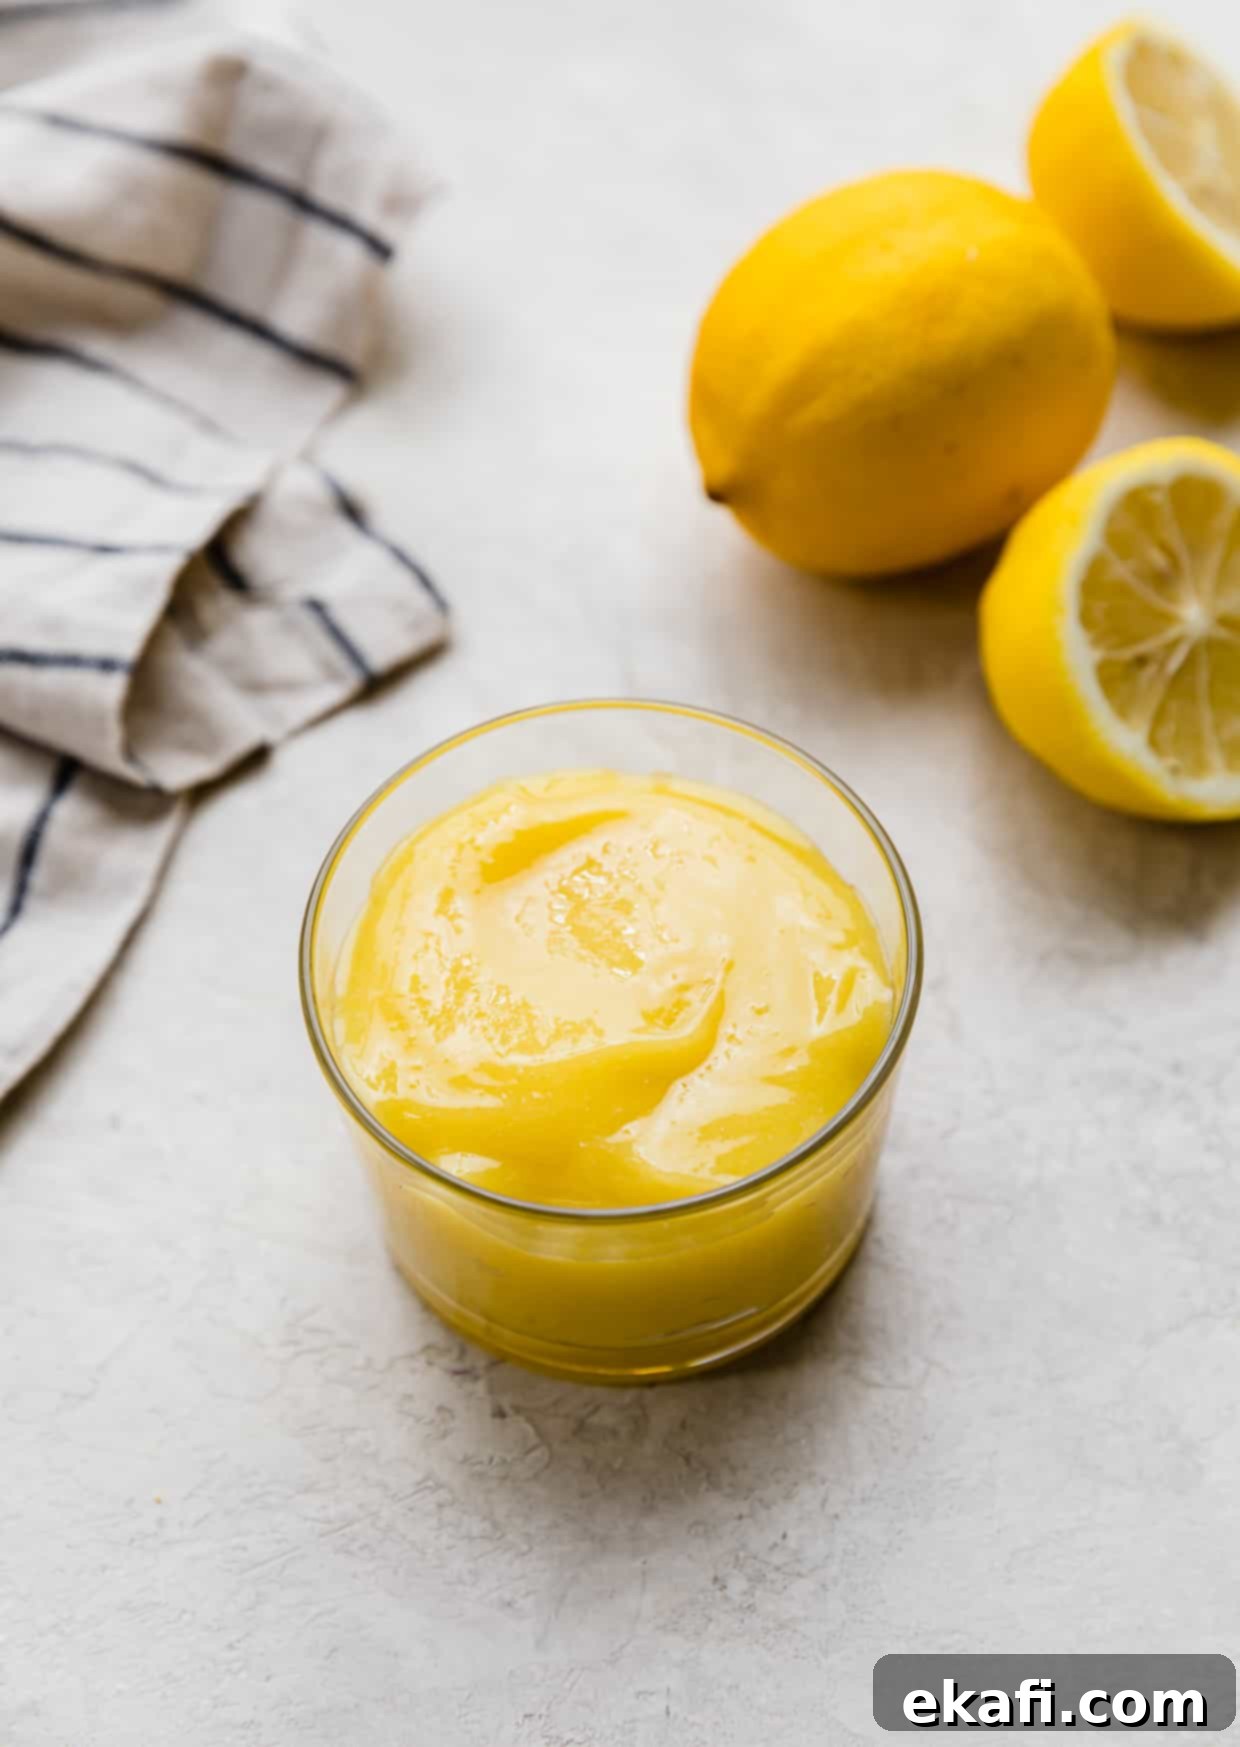
The Best Homemade Lemon Curd Recipe: Silky Smooth, Zesty Perfection, and Effortlessly Easy
Prepare yourself for the most exquisite lemon curd you’ll ever taste! This homemade delight is an absolute game-changer – incredibly silky smooth, bursting with vibrant tangy flavor, and perfectly balanced with just the right amount of sweetness. What’s even better? It comes together with only five simple ingredients and in about 20 minutes! Forget store-bought versions; once you try this recipe, you’ll be making it again and again.
This versatile lemon curd isn’t just a treat on its own; it’s a fantastic accompaniment to a multitude of desserts and breakfast items. Imagine it generously spread on light and fluffy English Pancakes, layered into a delicate Angel Food Cake, or gently folded into a cloud of Greek Yogurt Whipped Cream for a refreshing parfait. It’s also the secret star ingredient in my delectable Lemon Poppy Seed Cookies, provides a luscious filling for my popular Lemon Bar Cake, and makes a dazzling cake topping for my tender Lemon and Poppy Seed Cake! The possibilities are truly endless.
For all you lemon enthusiasts out there, you’re in for a treat! Our kitchen is a haven for citrus-inspired desserts. After mastering this ultimate lemon curd recipe, you’ll surely want to explore more of our amazing lemon creations. Don’t miss out on our cheerful Lemon Crinkle Cookies, the elegant Lemon Raspberry Cake, our wonderfully simple Easy Lemon Bars Recipe, and the delightful Lemon Poppy Seed Scones. Which will be your next lemony adventure?
Why This Easy Lemon Curd Recipe Will Be Your Go-To
There are countless reasons why this particular lemon curd recipe stands head and shoulders above the rest. It’s not just about the incredible flavor; it’s about the simplicity, the texture, and the sheer versatility it offers in your kitchen. Here’s why this recipe truly works:
- Achieves a Perfectly Smooth, Creamy, and Luscious Texture: The hallmark of an exceptional lemon curd is its velvety texture, and this recipe delivers just that. By carefully whisking the egg, sugar, and lemon mixture and then cooking it slowly, we create a stable, thick, and wonderfully smooth custard base. The final step of straining ensures every last trace of zest or potential lump is removed, leaving you with a truly luxurious spread that glides across your palate.
- Boasts a Truly Bold and Authentic Lemon Flavor: What sets this recipe apart is its commitment to fresh, vibrant lemon taste. We don’t rely on artificial flavors; instead, we harness the power of both fresh lemon juice and, crucially, fresh lemon zest. The zest is packed with aromatic oils that infuse the curd with an intense, sunny flavor that’s both punchy and authentic, creating a bright, unmistakable citrus profile that sings.
- Simplifies the Process with an Easy One-Pot Method: Forget the fuss and complexity of a traditional double boiler! This delicious lemon curd recipe streamlines the cooking process, allowing you to achieve perfect results using just a single pot. This not only makes for an easier cooking experience but also significantly reduces cleanup time. Just follow our detailed steps and crucial tips to ensure even cooking and prevent any scrambling, resulting in a flawless batch every time.
- Offers Unparalleled Versatility for Pairing with Other Sweets: This homemade lemon curd isn’t meant to be enjoyed in isolation. Its bright, tangy-sweet profile makes it an ideal companion for an astonishing array of desserts and breakfast items. Picture it enhancing your freshly baked scones, adding a zing to warm breakfast buns, elevating delicate crepes, or drizzled over creamy ice cream. It’s also an exquisite filling for cakes, cookies, and cupcakes, and truly shines as a vibrant topping for pancakes served with fresh fruit and a dollop of whipped cream. Its adaptability ensures it will quickly become a staple in your repertoire.
Essential Ingredients for Your Perfect Lemon Curd
Crafting the best lemon curd starts with understanding the role of each high-quality ingredient. While the list is short, each component plays a vital part in achieving that coveted silky smooth texture and unforgettable flavor. Here’s a closer look at what you’ll need and why:
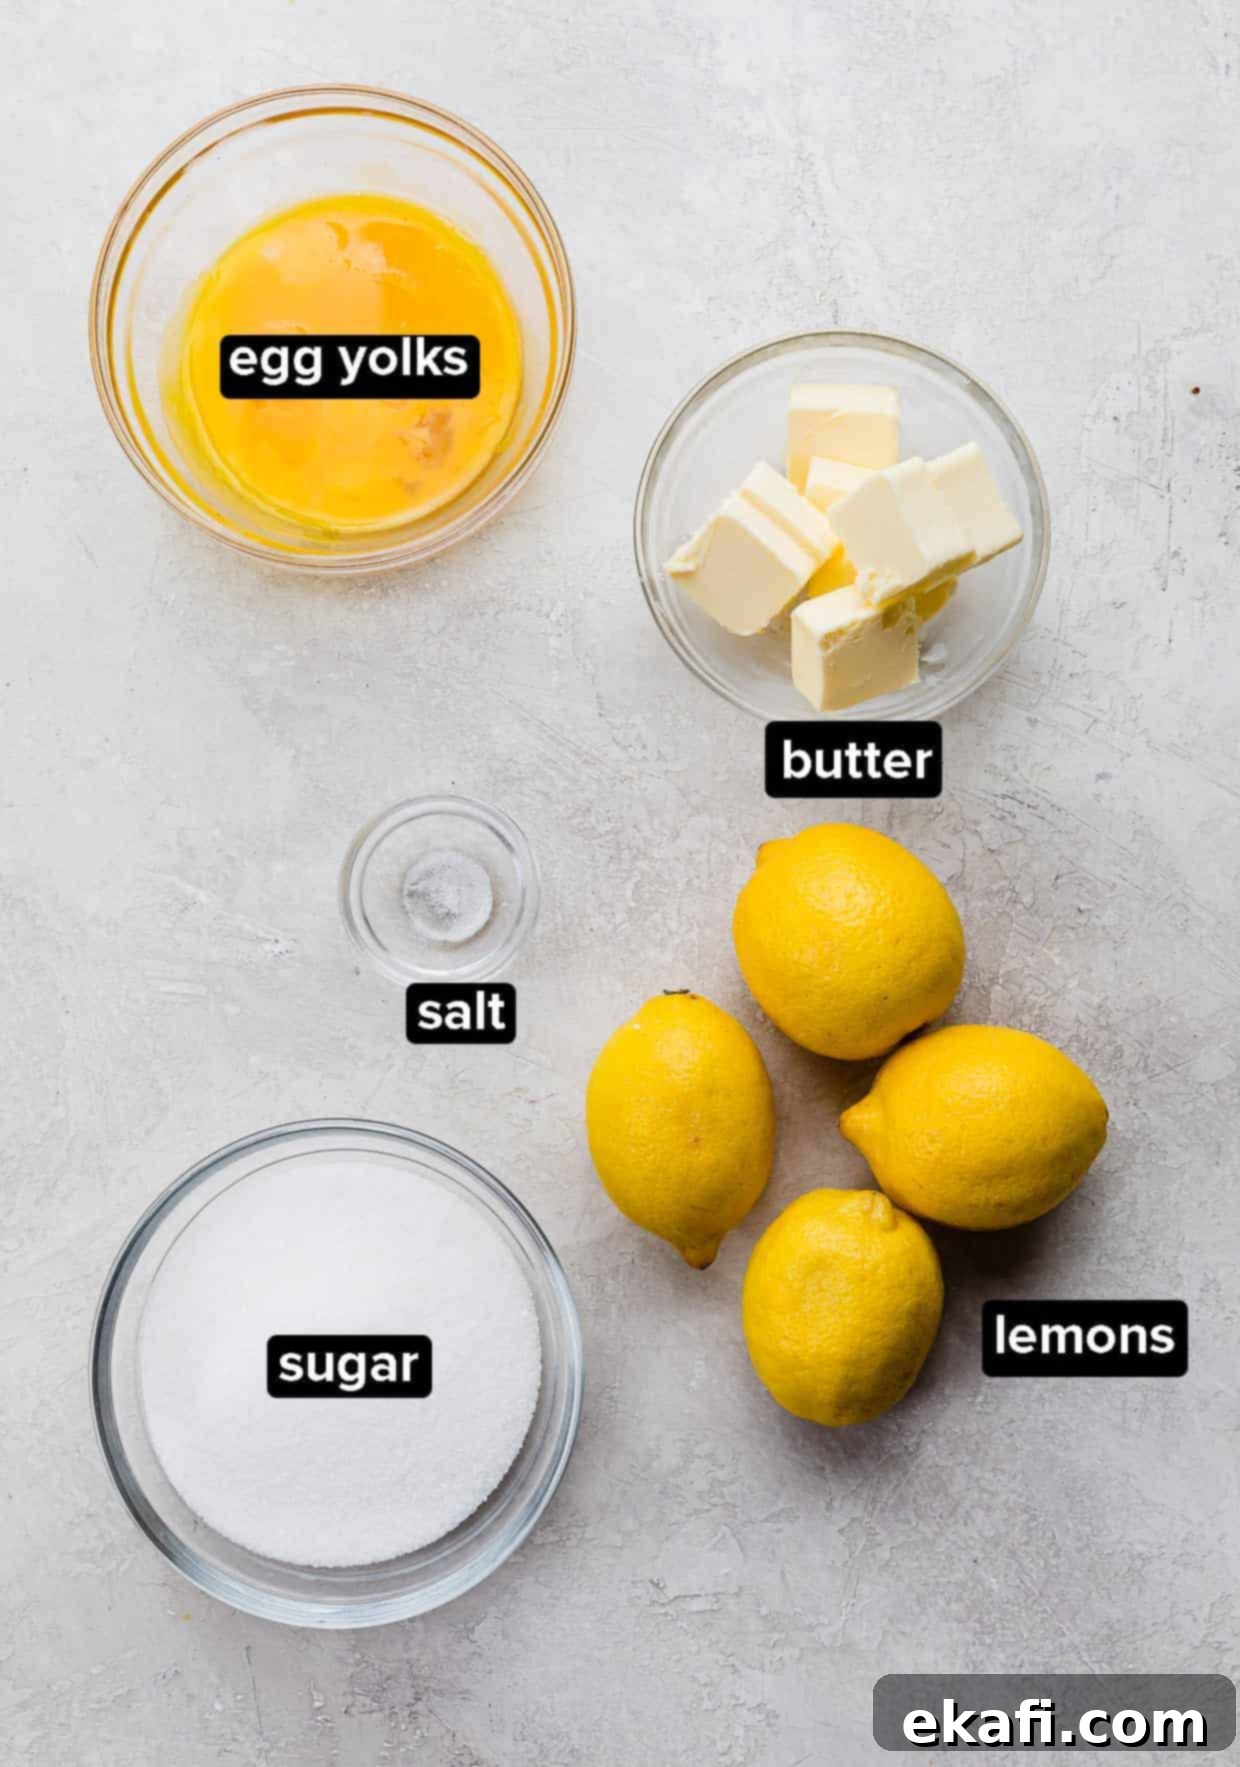
- Granulated Sugar: Lemons are inherently tart, so the granulated sugar is essential for achieving that delightful balance of sweet and tangy. But its role isn’t just about sweetness; sugar also contributes significantly to the curd’s structure and helps it thicken into that perfect, spoonable consistency. Don’t be tempted to reduce the sugar too much, or you might end up with a curd that’s either too tart or too thin.
- Fresh Lemon Juice & Lemon Zest: This is where the magic happens for an authentic lemon flavor. Always opt for fresh lemons – you’ll need them for the zest anyway, and the flavor of freshly squeezed juice is simply incomparable to bottled alternatives. The zest contains concentrated lemon oils, providing a bright aroma and deep citrus notes that the juice alone cannot offer. Don’t skip the zest for truly vibrant results!
- Large Egg Yolks: The egg yolks are the foundational component that gives lemon curd its rich, custard-like texture and helps it emulsify. We use only the yolks because they provide the necessary fat and protein for thickening and creaminess, without the added water or potential for a rubbery texture that egg whites can introduce in a custard. While large egg yolks are preferred for consistency in this recipe, medium yolks can work; just avoid extra-large ones as they can alter the balance of the mixture.
- Unsalted Butter: Cold, cubed unsalted butter is folded into the hot curd at the end of the cooking process. This crucial step not only adds a luxurious richness and smooth mouthfeel but also helps to emulsify the curd further, giving it that beautiful glossy finish. Using unsalted butter allows you to control the exact amount of salt in the recipe (though only a pinch is needed), ensuring the flavor profile remains perfectly balanced without any unexpected brininess. Make sure it’s cold and cut into small cubes to melt quickly and smoothly into the hot mixture.
Step-by-Step Instructions for Your Silky Lemon Curd
Making this incredible lemon curd is simpler than you might think, even without a double boiler! Follow these easy steps to achieve a perfectly smooth and flavorful batch every time. Precision and patience are key for the best results.
- Prepare the Aromatic Lemon Sugar Mixture: Begin by combining the granulated sugar, finely grated lemon zest, and a tiny pinch of salt in a medium-sized bowl. This initial step is vital for extracting maximum lemon flavor. Use your fingertips to gently rub the lemon zest into the sugar. As you do this, you’ll notice the sugar becoming fragrant and slightly yellowish, as the essential oils from the zest are released and absorbed by the sugar crystals. This technique deepens the lemon flavor in the final curd.
- Whisk the Egg Yolks and Combine Mixtures: Take a medium-sized, heavy-bottomed pot and add the large egg yolks. Using a wire whisk, vigorously whisk the yolks until they are completely smooth and uniform in color and consistency. There should be no streaks or lumps. Next, add your fragrant lemon sugar mixture to the whisked egg yolks in the pot. Whisk everything together thoroughly until the sugar and yolks are well combined, creating a thick, pastel-yellow paste.
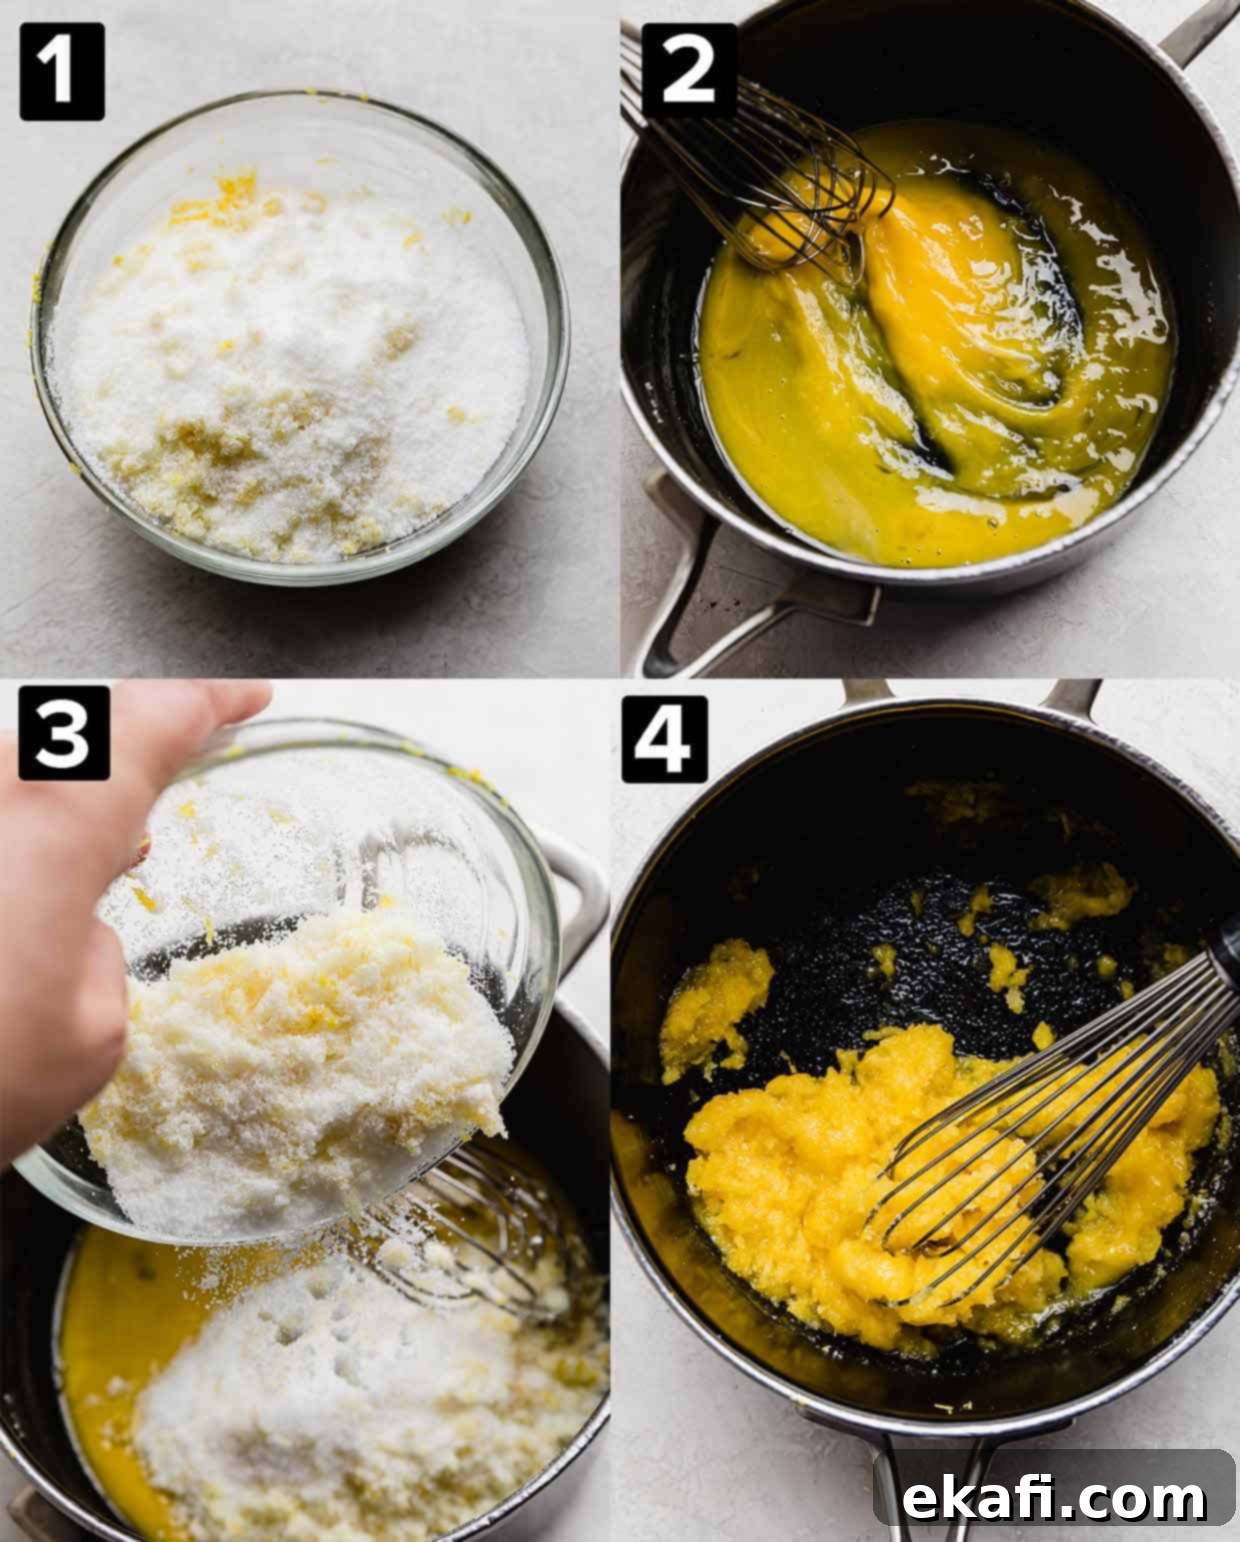
- Cook the Curd to Perfection with Lemon Juice: While continuously whisking the egg and sugar mixture, slowly stream in the fresh lemon juice. This gradual addition helps prevent the eggs from scrambling. Place the pot over low heat, and this is crucial: you must stir constantly. Use your wire whisk to scrape the bottom and sides of the pot to ensure even cooking and prevent the eggs from sticking or overcooking. The mixture will gradually start to thicken. You’ll know it’s done when it begins to bubble gently and coats the back of a spoon thickly enough that when you draw your finger across the spoon, it leaves a clean path that doesn’t immediately run back together. This typically takes about 10-15 minutes.
- Remove from Heat and Incorporate Butter for Richness: As soon as the curd reaches the desired thickness and passes the spoon test, immediately remove the pot from the heat. Add the cold, cubed unsalted butter to the hot lemon curd. Stir vigorously until all the butter has fully melted and is completely incorporated into the curd. The butter will add a beautiful sheen, extra richness, and contribute to the curd’s luxurious, smooth texture.
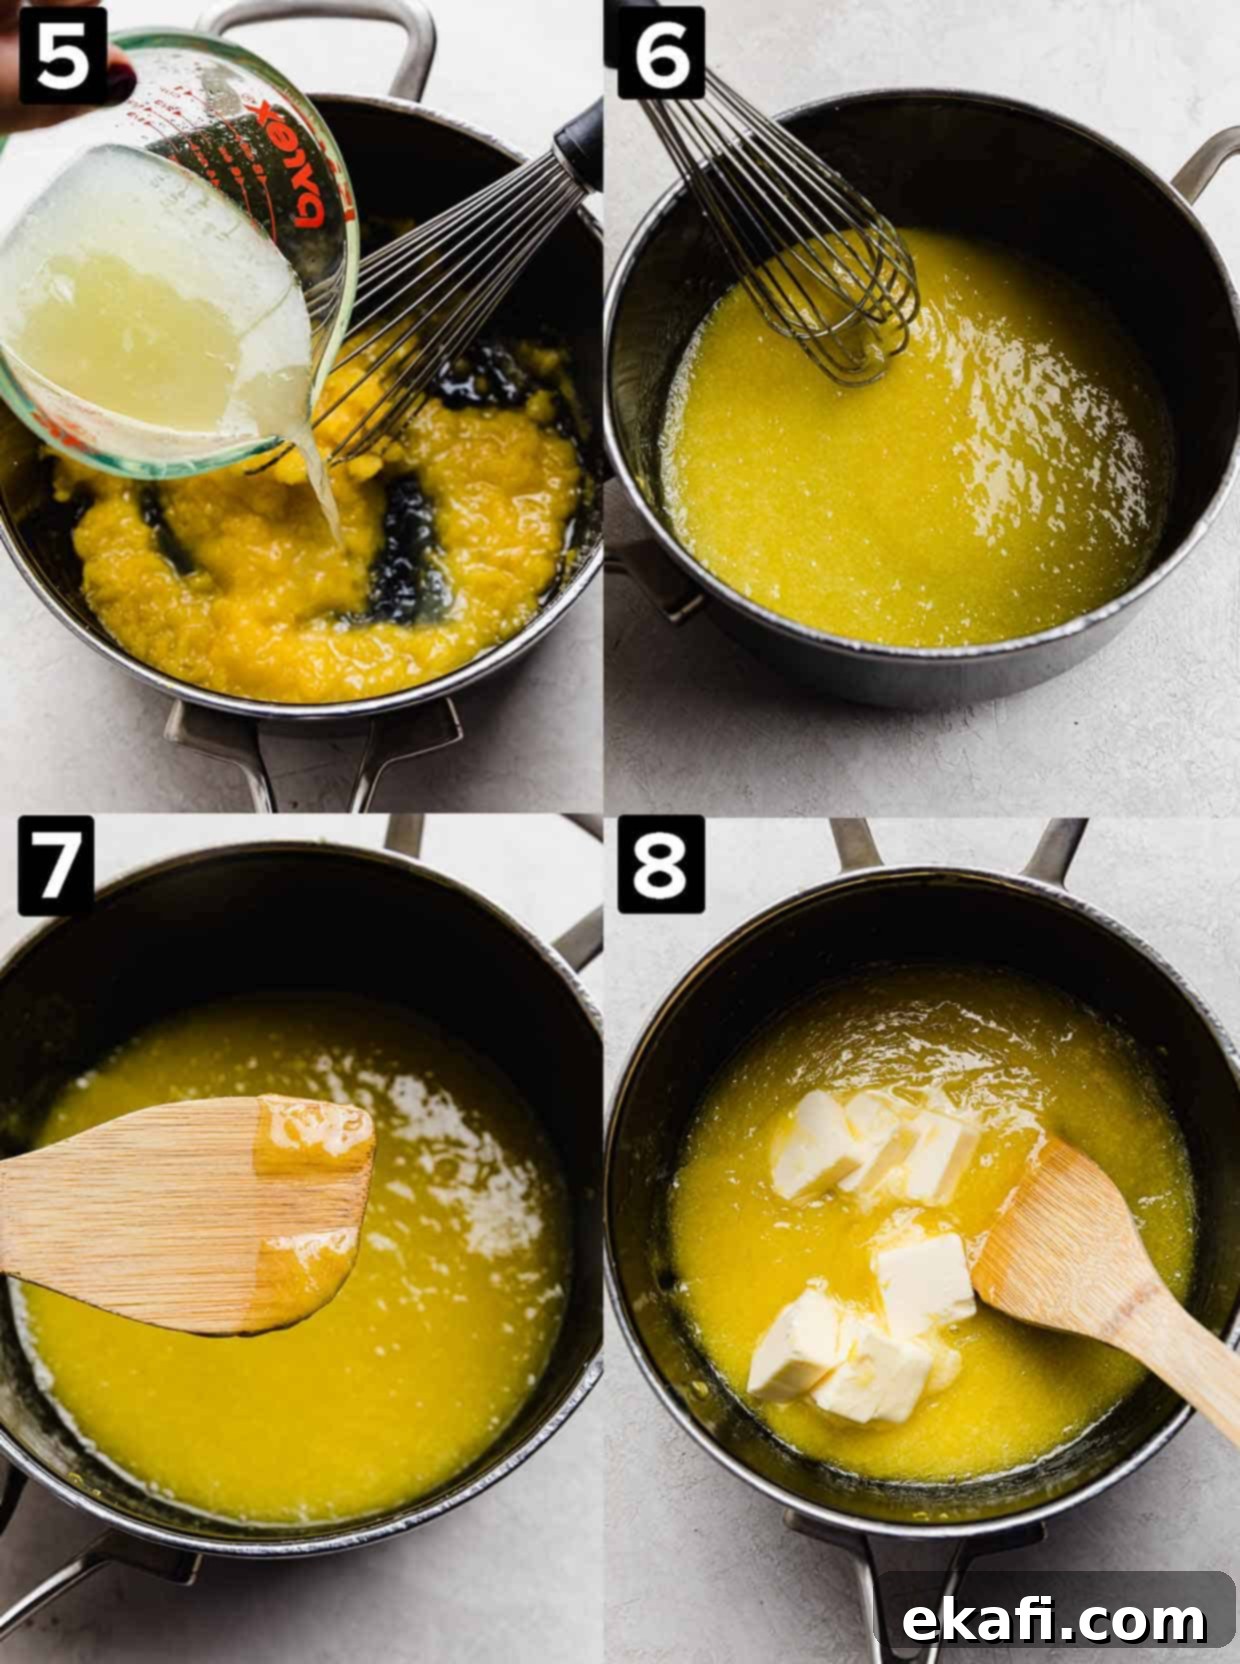
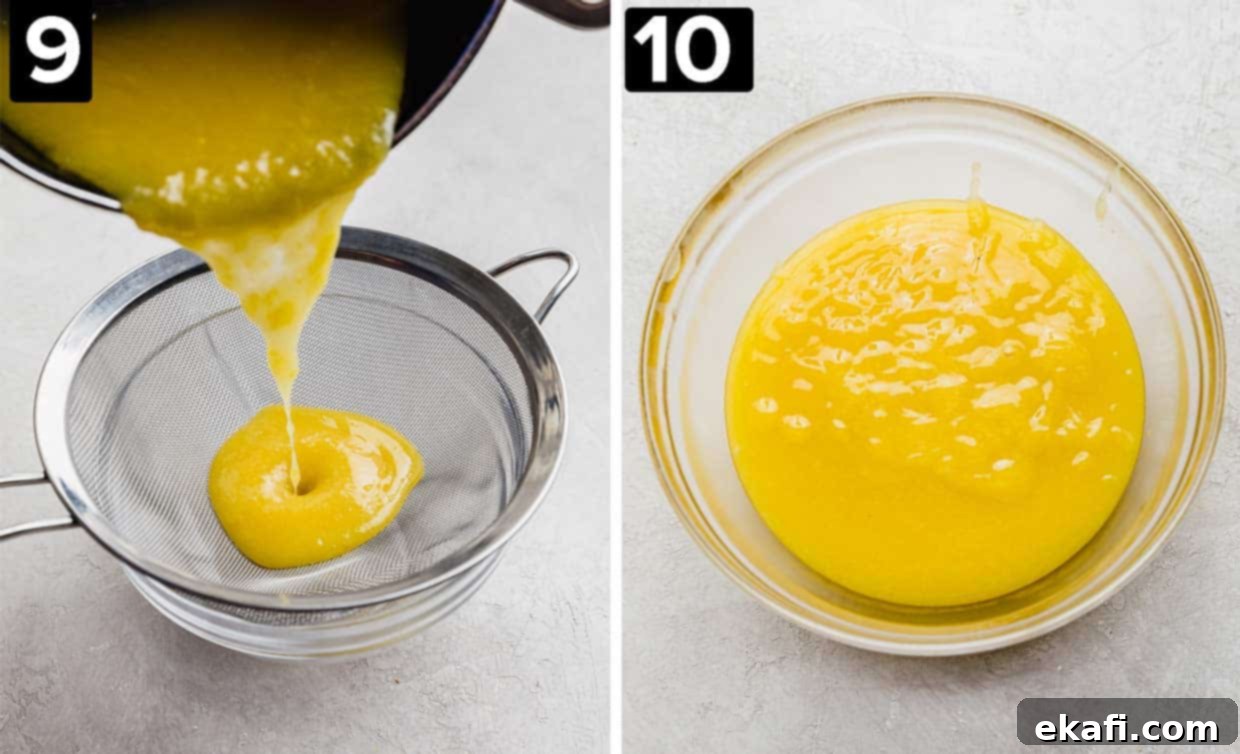
- Achieve Ultimate Smoothness by Straining: For that truly professional, ultra-silky texture, pour the freshly made lemon curd through a fine-mesh sieve set over a clean bowl. Use a spoon or rubber spatula to gently press the curd through the sieve, ensuring that any small bits of cooked egg (which can sometimes form despite constant whisking) or residual lemon zest are left behind. This step is non-negotiable for the creamiest, most luxurious curd imaginable. Discard any solids remaining in the sieve.
- Cool and Enjoy Your Homemade Lemon Curd: Your exquisite lemon curd is now ready! You can serve it warm for an immediate indulgence, or allow it to cool completely before chilling it in the refrigerator. As it chills, the curd will firm up further, developing its final thick and spreadable consistency. Serve this versatile creation on top of your favorite cakes, alongside cookies, as a spread for warm scones, or to elevate any breakfast or dessert. The vibrant flavor will instantly brighten any dish!
Expert Tips for the Most Amazing Lemon Curd
While this recipe is straightforward, a few key tips will help ensure your lemon curd turns out absolutely perfect every single time. Pay attention to these details for a truly restaurant-quality result:
- Maximize Lemon Flavor with Zest Rubbing: Don’t underestimate the power of rubbing the granulated sugar and lemon zest together with your fingers. This simple action effectively ruptures the oil glands in the zest, releasing its potent aromatic oils and infusing the sugar with a deeper, more pronounced lemon essence. This technique is a secret weapon for an intensely flavorful curd.
- Understand the Yield: This recipe typically yields around 10-11 ounces (approximately 1.25 to 1.4 cups) of delicious, vibrant lemon curd. This is a perfect amount for topping a small cake, filling a tart, or having on hand for various uses throughout the week. If you plan to make larger batches for gifting or extensive baking, you can easily double or triple the recipe.
- Prevent Scrambling: Cook Slowly and Whisk Constantly: This is perhaps the most critical tip for a smooth curd. Eggs cook quickly, and if exposed to high heat without sufficient agitation, they will scramble. Always keep the heat on low and continuously whisk the mixture from the moment it hits the stove until it thickens. Constant stirring prevents the egg from setting too quickly at the bottom of the pot and ensures a uniform, creamy consistency throughout.
- Master the Doneness Test: Knowing when your curd is perfectly cooked is key. The curd is ready when it has noticeably thickened to a custard-like consistency and generously coats the back of a spoon. To confirm, simply run your finger across the back of the spoon. If the line holds and the curd doesn’t immediately flow back together, it’s done. Overcooking can lead to a grainy texture, while undercooking will result in a runny curd that won’t set properly.
Make Ahead, Storing, and Freezing Homemade Lemon Curd
One of the many advantages of homemade lemon curd is its excellent shelf life and freezer-friendliness, allowing you to enjoy this sunny treat long after you’ve made it. Proper storage is key to maintaining its exquisite texture and flavor:
Perfect Chilling and Storing: When your lemon curd is still warm, transfer it to a clean, airtight container or bowl. The most important step for storing is to place a piece of plastic wrap directly onto the surface of the curd, pressing it down so it makes full contact and covers it completely. This ingenious trick prevents a “skin” from forming on the top, which can lead to a lumpy or undesirable texture. After applying the plastic wrap, seal the container with an airtight lid. Store the lemon curd in the refrigerator for up to 7 days. It will continue to thicken and fully set as it chills, becoming spoonable and spreadable.
Freezing for Long-Term Enjoyment: To enjoy your homemade lemon curd even longer, it freezes beautifully! Follow the same storing instructions by transferring the curd to an airtight, freezer-safe container and pressing plastic wrap directly onto its surface, then sealing with a lid. Store it in the freezer for up to 3 months. When you’re ready to use it, simply remove the frozen curd from the freezer and let it thaw slowly in the refrigerator overnight. Once thawed, give it a gentle stir to restore its smooth consistency before serving.
Remember, the delightful, rich consistency of lemon curd fully develops and sets only after it has been properly chilled in the refrigerator. This waiting period is essential for achieving its signature spoonable texture.
Lemon Curd: Your Questions Answered!
Curious about lemon curd? Here are some of the most common questions we get, with detailed answers to help you master and enjoy this bright, tangy delight.
Lemon curd is a deliciously rich and tangy spread or filling made from a simple yet magical combination of sugar, vibrant lemon zest, fresh lemon juice, rich egg yolks, and creamy butter. It’s cooked until thick and smooth, creating a luscious, intensely lemon-flavored custard-like concoction. Often compared to jam or a fruit preserve, it has a much richer, creamier texture and a brighter, more pronounced citrus taste due to the high concentration of fresh lemon and egg yolks. Its origins trace back to English cuisine, traditionally served with scones and tea.
Lemon curd is incredibly versatile and can elevate almost any sweet dish! It’s a sensational spread for classic breakfast items like warm Pancakes, fluffy Waffles, toast, scones, or croissants. Beyond breakfast, it’s a divine filling or topping for a wide array of Cakes, delicate Cookies, adorable Cupcakes, and elegant Pies & Tarts. You can swirl it into Ice Cream, use it as a layer in trifles or parfaits, or simply enjoy it by the spoonful straight from the jar!
When stored properly in an airtight container with plastic wrap pressed directly onto its surface, homemade lemon curd will stay fresh and delicious in the refrigerator for up to 7 days. For longer storage, it can be frozen for up to 3 months (see our freezing tips above).
Absolutely, yes! Lemon curd is perfectly safe to eat. The egg yolks undergo a thorough cooking process on the stovetop, reaching a temperature that ensures they are fully cooked and safe for consumption. This process transforms the raw yolks into a stable, creamy custard, eliminating any concerns about consuming uncooked eggs.
Lumpy lemon curd is a common issue but entirely preventable! The most frequent cause is the eggs scrambling due to too high heat or insufficient whisking. To prevent this, always cook your curd over low heat and whisk the egg mixture constantly, scraping the bottom and sides of the pot to ensure even cooking. Another critical step for achieving a smooth texture is pouring the finished curd through a fine-mesh strainer. This removes any small bits of cooked egg or zest that might have formed. Lastly, always remember to place plastic wrap directly on the surface of the curd when storing it, as this prevents a “skin” from forming on top that can also lead to lumps. Following these steps diligently should guarantee a wonderfully smooth and silky curd!
While you technically *can* use bottled lemon juice, we highly recommend using fresh lemon juice for the best possible flavor. Freshly squeezed lemon juice, combined with fresh zest, provides a brighter, more authentic, and nuanced citrus flavor that bottled versions simply cannot replicate. The zest also contributes significantly to the aromatic profile, which would be completely missed with bottled juice alone.
If your lemon curd is too thin, it likely means it wasn’t cooked long enough to reach the proper thickening point. The eggs and sugar need sufficient heat and time to form the custard. Make sure you’re cooking it over low heat, whisking constantly, until it visibly thickens and coats the back of a spoon. It should leave a clear path when you draw your finger across it. If it’s still warm and thin, you can gently return it to low heat and continue whisking until it reaches the correct consistency. Remember, it will also thicken further as it cools in the refrigerator.
More Zesty Lemon Desserts You’ll Love
If you’re anything like us, your love for lemon doesn’t stop with this incredible curd! Explore these other fantastic lemon dessert recipes that are guaranteed to brighten your day and satisfy your citrus cravings:
- Lemon Powdered Sugar Cookies
- Lemon Poppy Seed Bundt Cake
- Easy Lemon Poppy Seed Bread
- Easy Lemon Bars Recipe
- Lemon Ricotta Cookies
Did you make this unforgettable lemon curd recipe? We’d absolutely love to hear about your experience! Your feedback helps us grow and inspires other home bakers. Leave a star rating and a detailed review right here on the blog post, or scroll down below the recipe card to share your thoughts. Your delicious creations could even be featured!
Stay connected and never miss a new recipe or baking tip! Follow us on Instagram, TikTok, Facebook, and Pinterest for daily inspiration and behind-the-scenes glimpses of our kitchen adventures.

Print
SaveSaved!
Review
Lemon Curd Recipe
Ingredients
- 1 cup granulated sugar
- 2 tablespoons lemon zest – from about 2 fresh, medium-sized lemons
- pinch salt
- 6 large egg yolks – use large yolks for best consistency, medium also works; avoid extra-large
- 1/2 cup fresh lemon juice – freshly squeezed from about 2-3 lemons for optimal flavor
- 1/2 cup unsalted butter – cold and cubed into small pieces
Instructions
-
In a medium sized bowl, add the sugar, lemon zest, and a pinch of salt. Using your fingers, rub the zest into the sugar for about 1-2 minutes until fragrant and slightly yellow. This helps release the lemon oils for a bolder flavor.
-
Add the egg yolks to a medium-sized, heavy-bottomed pot. Whisk thoroughly until smooth and uniformly yellow. Incorporate the lemon sugar mixture and whisk until well combined. Gradually pour in the fresh lemon juice, whisking continuously as you do so to prevent the eggs from scrambling. Place the pot over low heat and stir constantly with a wire whisk. Cook until the mixture noticeably thickens, just begins to bubble, and coats the back of a spoon without running when you slide your finger across it. This process typically takes about 10-15 minutes.
-
Immediately remove the pot from the heat. Add the cold, cubed butter and stir vigorously until it is fully melted and completely incorporated, resulting in a smooth and glossy curd.
-
For an ultra-silky texture, pour the lemon curd through a fine mesh sieve set over a clean bowl. Use a spoon or rubber spatula to gently press all the curd through, ensuring no bits of zest or potential lumps remain. Discard any solids left in the sieve.
-
Transfer the warm curd to an airtight container or bowl. Place plastic wrap directly onto the surface of the curd, pressing it down to eliminate air pockets – this prevents a skin from forming. Cover with an airtight lid. Lemon curd will continue to thicken and fully set as it cools in the fridge.
Notes
- This recipe yields approximately 10-11 ounces (roughly 1.25 to 1.4 cups) of delicious lemon curd.
- Store your homemade lemon curd in an airtight container in the refrigerator for up to 1 week.
- For longer storage, the curd can be frozen for up to 3 months. Thaw overnight in the fridge before use.
- The lemon curd’s final thick and spreadable consistency is achieved once it has fully cooled and set in the refrigerator.
- The curd is properly cooked when it coats the back of a spoon thickly and a clear path remains after drawing a finger across it.
-
To prevent the eggs from scrambling, it is crucial to cook the curd over low heat and whisk it continuously and vigorously throughout the cooking process.
