Easy 2-Ingredient Pineapple Mango Popsicles: Your Healthy Summer Treat!
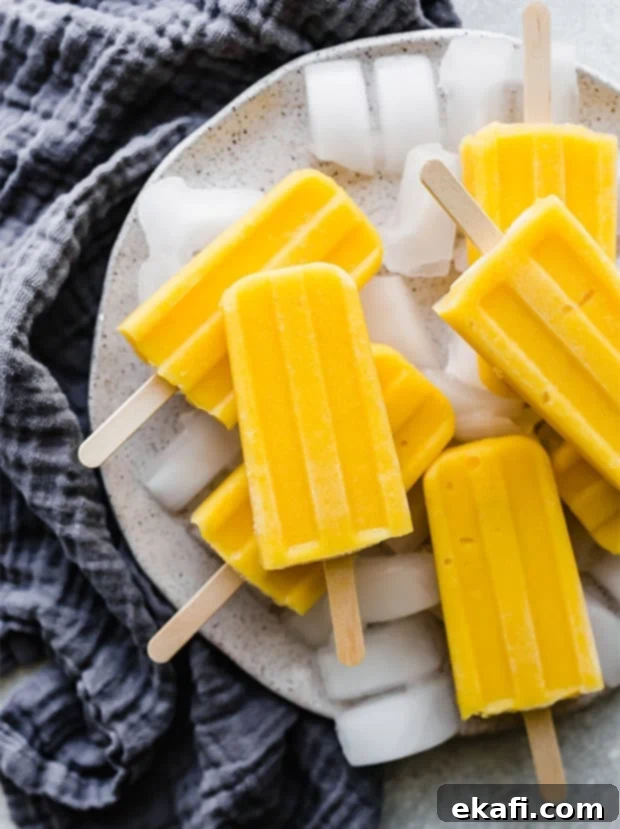
Searching for the ultimate summer refreshment that’s both effortless to make and incredibly healthy? Look no further than these delightful Pineapple Mango Popsicles! Crafted with just two simple ingredients, these vibrant frozen treats are a true game-changer. They effortlessly satisfy any sweet craving, offering instant relief from the scorching summer heat. Best of all, they’re surprisingly light, packing only about 61 calories per popsicle, making them the perfect guilt-free indulgence for the entire family.
If you’re a devoted mango enthusiast, we have more delicious ideas for you! Be sure to explore our recipes for mango overnight oats and luscious mango sorbet for even more tropical bliss.

The Magic of 2-Ingredient Popsicles: Simple, Natural, Delicious
The beauty of these homemade fruit popsicles lies in their sheer simplicity. You only need two natural ingredients to create a batch of these incredibly flavorful and refreshing summer treats. This minimalist approach not only saves you time but also ensures you’re enjoying a wholesome snack free from artificial flavors or excessive sugars. It’s the perfect way to embrace natural fruit goodness!
Essential Ingredients for Your Tropical Popsicles:
- Pineapple Juice: Opt for 100% pure pineapple juice, preferably not from concentrate, to get the most authentic and vibrant flavor. Pineapple is a powerhouse of Vitamin C and contains bromelain, an enzyme known for its anti-inflammatory properties. Its natural sweetness and tartness perfectly complement the creamy mango.
- Frozen Mango Chunks: Using frozen mango is key for achieving that immediate frosty texture and often provides a richer flavor. Plus, it eliminates the need for ice, ensuring a pure, undiluted fruit flavor. Mangoes are packed with Vitamins A and C, along with dietary fiber, making them a fantastic healthy choice.
Pro Tip: While frozen mango chunks are recommended for convenience and a quicker freeze, you can absolutely use fresh, ripe mango. If using fresh mango, ensure it’s very ripe for maximum sweetness and an easier blend. Just peel, pit, and cut into chunks before blending.

Crafting Your Pineapple Mango Popsicles: A Step-by-Step Guide
Making these healthy summer dessert popsicles is incredibly straightforward, but a few tips can elevate your experience and ensure perfect results every time.
Equipment You’ll Need:
- High-Powered Blender: Essential for achieving a super smooth consistency, especially with a low liquid-to-solid ratio.
- Popsicle Molds: Available in various shapes and sizes, choose ones that suit your preference.
- Popsicle Sticks: If your molds don’t come with reusable sticks.
- Optional: A piping bag or a funnel for easy pouring.
Step 1: Blending for Perfection
Begin by adding your frozen mango chunks and pineapple juice to a high-powered blender. This dynamic duo is about to transform into a silky-smooth puree.

Blend until the mixture is perfectly smooth and creamy. It’s crucial to use a high-quality blender for this step, as we’re working with a small liquid-to-solid ratio. A powerful blender, like my trusted Vitamix, can handle the frozen fruit with ease, ensuring no chunky bits are left behind unless you want them! While a perfectly smooth consistency is often desired, don’t worry if you end up with small mango chunks; some people actually prefer that added texture in their popsicles. It’s all about personal preference!

Step 2: Filling the Popsicle Molds with Care
This next step is technically optional, but it’s a little trick that can make a big difference in presentation and cleanliness. I transferred the freshly blended pineapple mango puree into a piping bag and then used it to fill the popsicle molds. This method (as pictured below) helps avoid any messy spills and ensures a neat fill every time.
However, if you don’t have a piping bag, don’t fret! You can absolutely pour the puree directly into the popsicle molds from your blender. A small funnel can also be a helpful tool if you want to minimize spills. Whatever method you choose, the goal is to get that delicious puree into the molds efficiently.

Pro Tip for Filling: It’s crucial to NOT fill the popsicle molds completely to the very top. The mixture will expand slightly as it freezes, and leaving about 3mm (or 1/8 inch) of space from the rim will prevent overflowing and ensure your popsicles have a perfectly flat bottom once frozen.
Once filled, all that’s left to do is secure the cover over your popsicle mold, insert the popsicle sticks into their designated slots, and place them in the freezer.
How Long Should Pineapple Mango Popsicles Freeze For?
The freezing time for your easy homemade popsicles can vary slightly depending on whether you used frozen or fresh mango chunks and the power of your freezer.
- If you used frozen mango chunks: These popsicles often freeze faster because the initial temperature of the mango is already very low. You can typically get away with as little as 4 hours of freezer time before they are firm enough to enjoy.
- If you used fresh mango chunks: Since fresh mango has a higher starting temperature, you’ll want to freeze your pineapple mango popsicles for a longer duration, usually 6-8 hours, or until they are completely solid and hard.
For best results and maximum firmness, an overnight freeze is always a safe bet, regardless of the mango type used. Once fully frozen, prepare for an explosion of tropical flavor!

Why You’ll Love These Healthy Summer Treats: Benefits & Variations
Beyond their incredible taste, these pineapple mango popsicles offer numerous benefits. They are naturally sweet, packed with vitamins, and low in calories, making them an excellent alternative to sugary store-bought treats. They’re also naturally vegan and gluten-free, catering to a wide range of dietary needs. Serve them at your next backyard BBQ, a pool party, or simply as a refreshing afternoon snack for yourself and the kids.
Customization & Variations:
While the classic 2-ingredient recipe is perfect as is, feel free to get creative!
- Add a Citrus Zing: A squeeze of lime juice can brighten the flavors even further.
- Spicy Kick: For an adventurous palate, a tiny pinch of chili powder (like Tajín) can add a delightful sweet and spicy contrast.
- Creamy Texture: For a creamier popsicle, add a splash of coconut milk or a dollop of Greek yogurt (if not strictly vegan) before blending.
- Mixed Fruit Delight: Experiment with adding other frozen fruits like strawberries, peaches, or a few kiwi slices for different flavor combinations.
- Herbal Freshness: A few fresh mint leaves blended in can add an unexpected refreshing twist.
Storage Tips:
Once your popsicles are completely frozen, you can remove them from the molds and store them individually wrapped in plastic wrap or parchment paper in an airtight freezer bag. This prevents freezer burn and keeps them fresh for up to 2-3 weeks, though they’ll likely be devoured much faster!
If you’re as passionate about delightful frozen treats as we are, then you absolutely must check out these other mouth-watering recipes:
- Oreo Ice Cream Cake
- Kiwi Strawberry Popsicles
- Mango Sorbet
- Raspberry Sorbet
- Homemade Vanilla Ice Cream
- Oreo Ice Cream

Subscribe to Salt & Baker for More Delicious Recipes!
If you’re enjoying these incredible recipes, don’t miss out on future culinary adventures! Be sure to subscribe to Salt & Baker, and you’ll receive new, exciting recipes delivered straight to your inbox. You definitely don’t want to miss a single one!
And remember, if you whip up a recipe from our blog, we’d love to see your creations! Make sure to share it on social media. Tag @saltandbaker and use the hashtag #saltandbaker so we can admire what you’ve made and share in your kitchen triumphs!

Print
SaveSaved!
Review
Pineapple Mango Popsicles
Ingredients
- 3 cups frozen mango chunks
- 1 1/2 cups pineapple juice
Equipment
-
popsicle molds
Instructions
-
Add the frozen mango chunks and pineapple juice to a high powered blender.
-
Blend until smooth.
-
Divide the pineapple mango mixture evenly amongst the popsicle molds. Do not fill all the way to the top. Leave 3mm or so from the top.
-
Cover. Place popsicle sticks in the mold and freeze for 6 hours.
-
After the popsicles are fully frozen, run warm water around the exterior of the popsicle mold. This will help loosen the popsicles from the mold.
-
Enjoy!
Notes
Nutrition
