Decadent Red Velvet Oreo Truffle Brownies: The Ultimate Fudgy Dessert
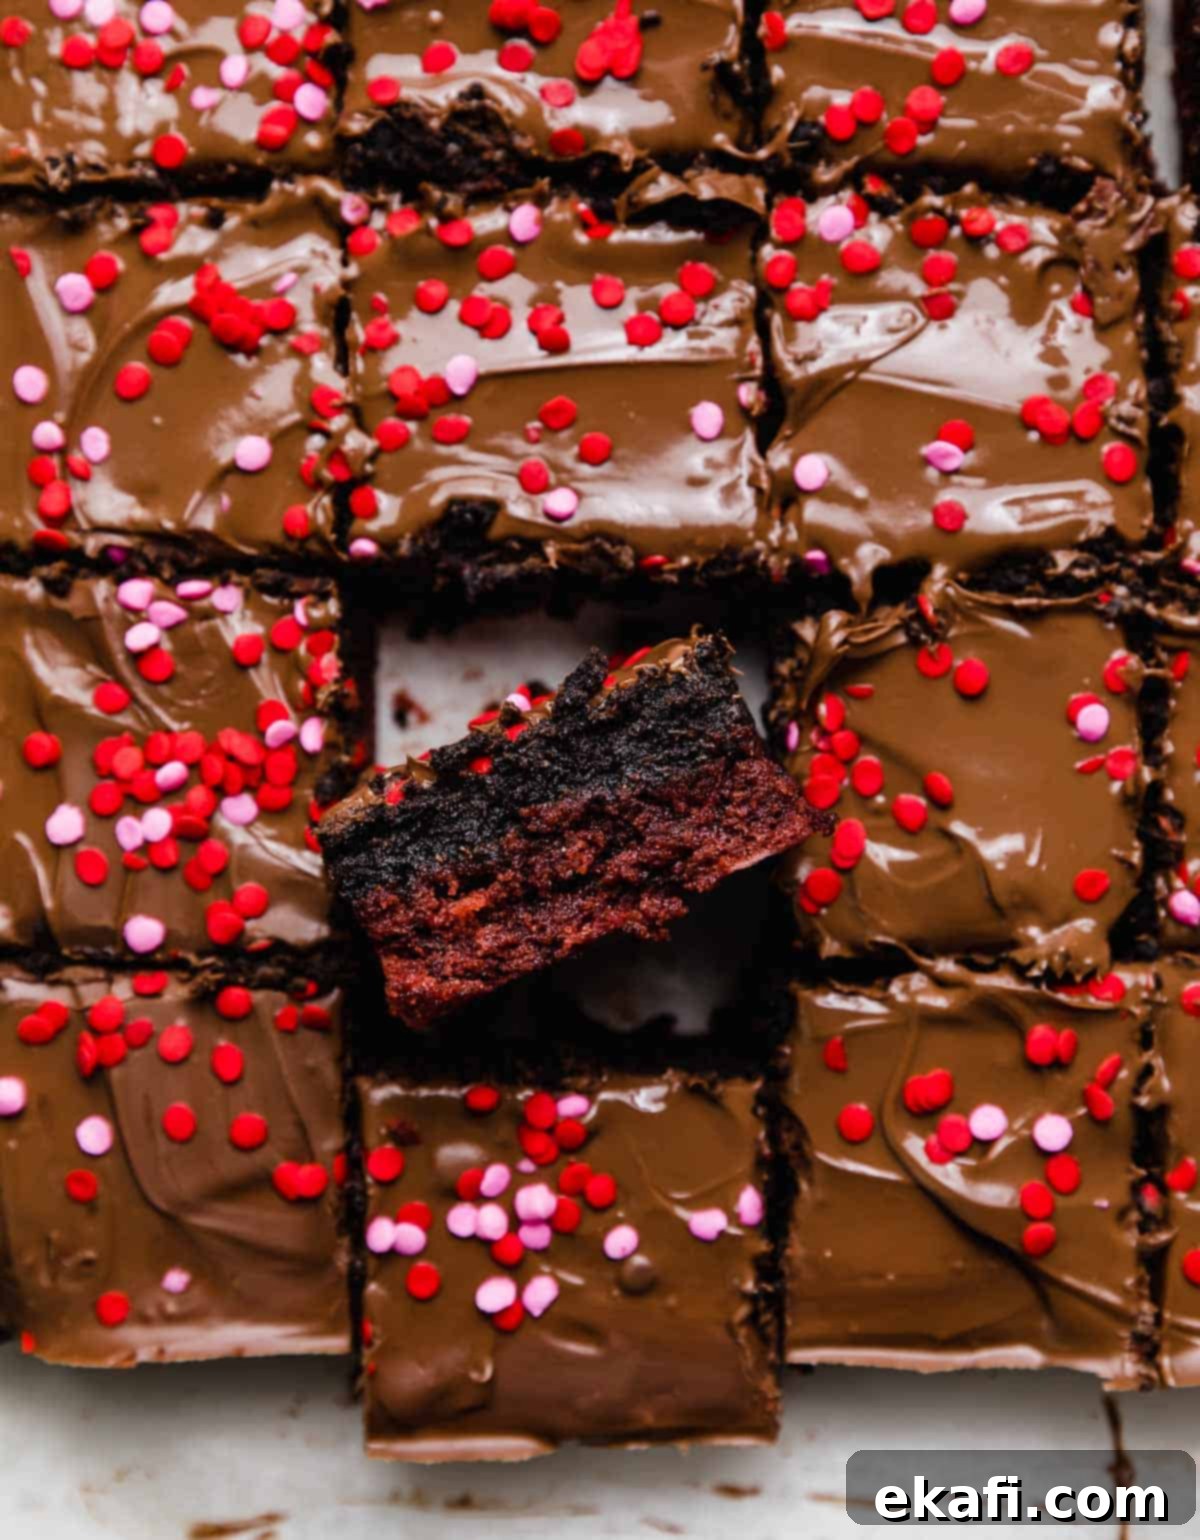
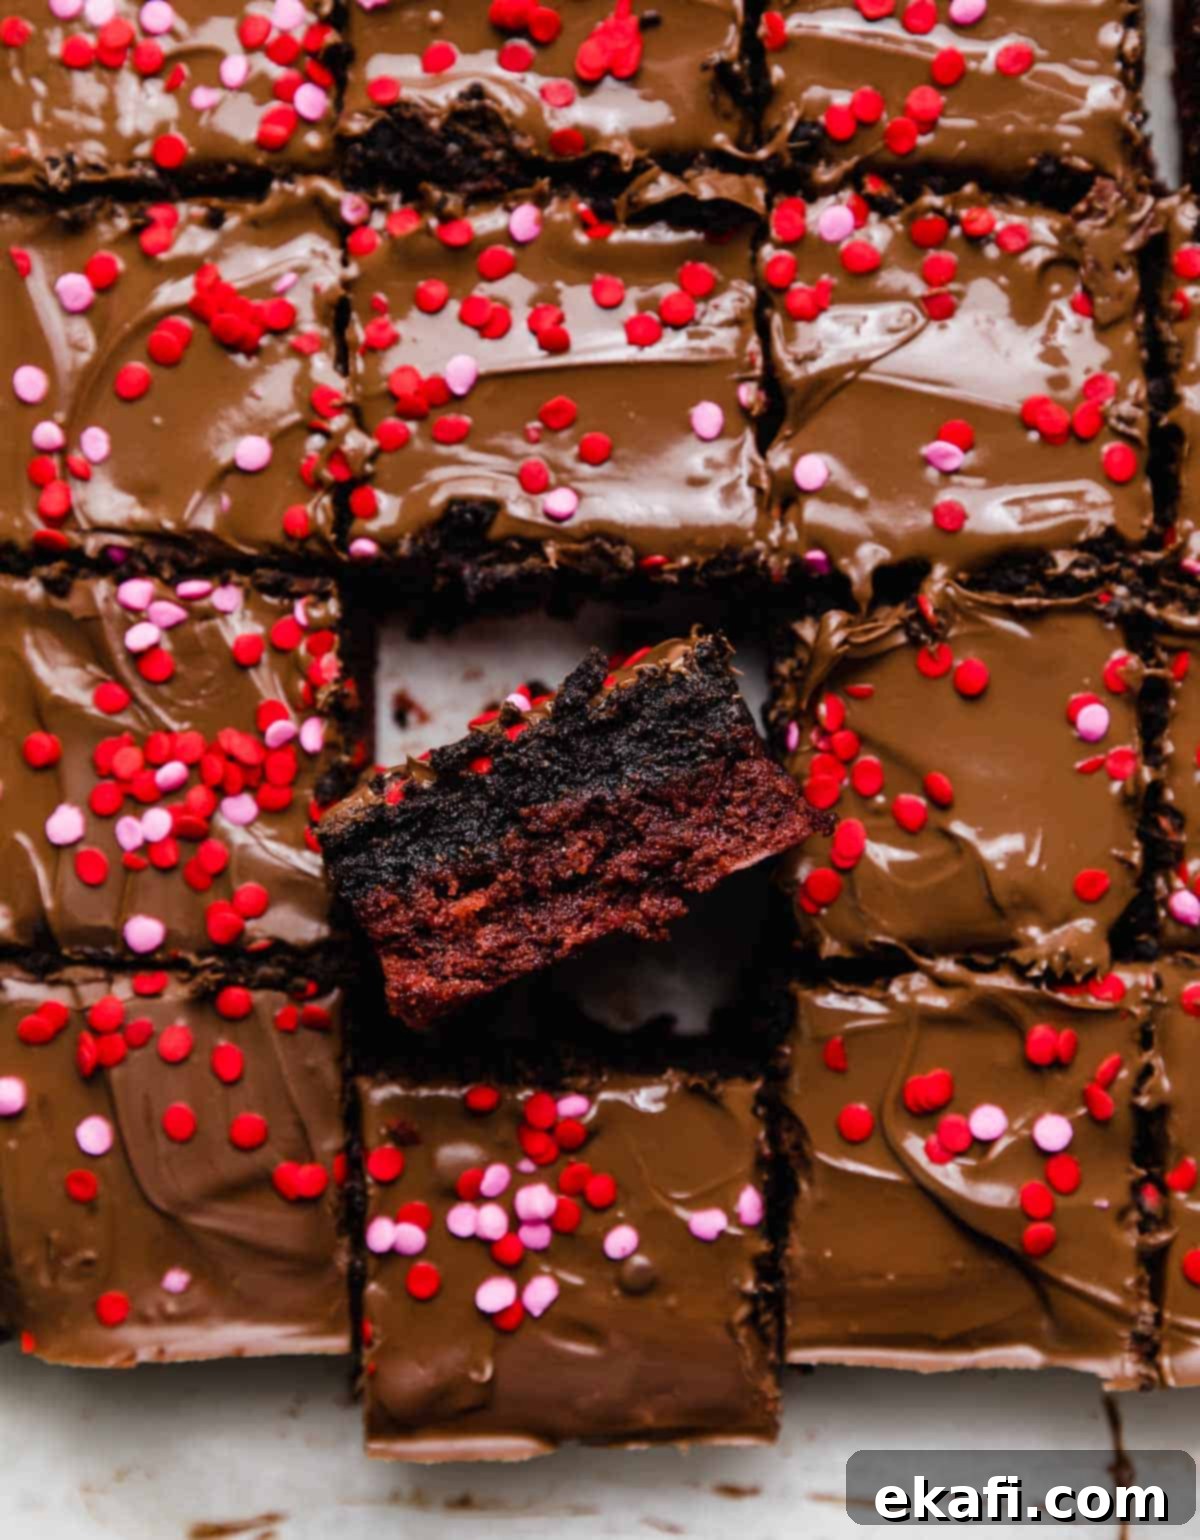
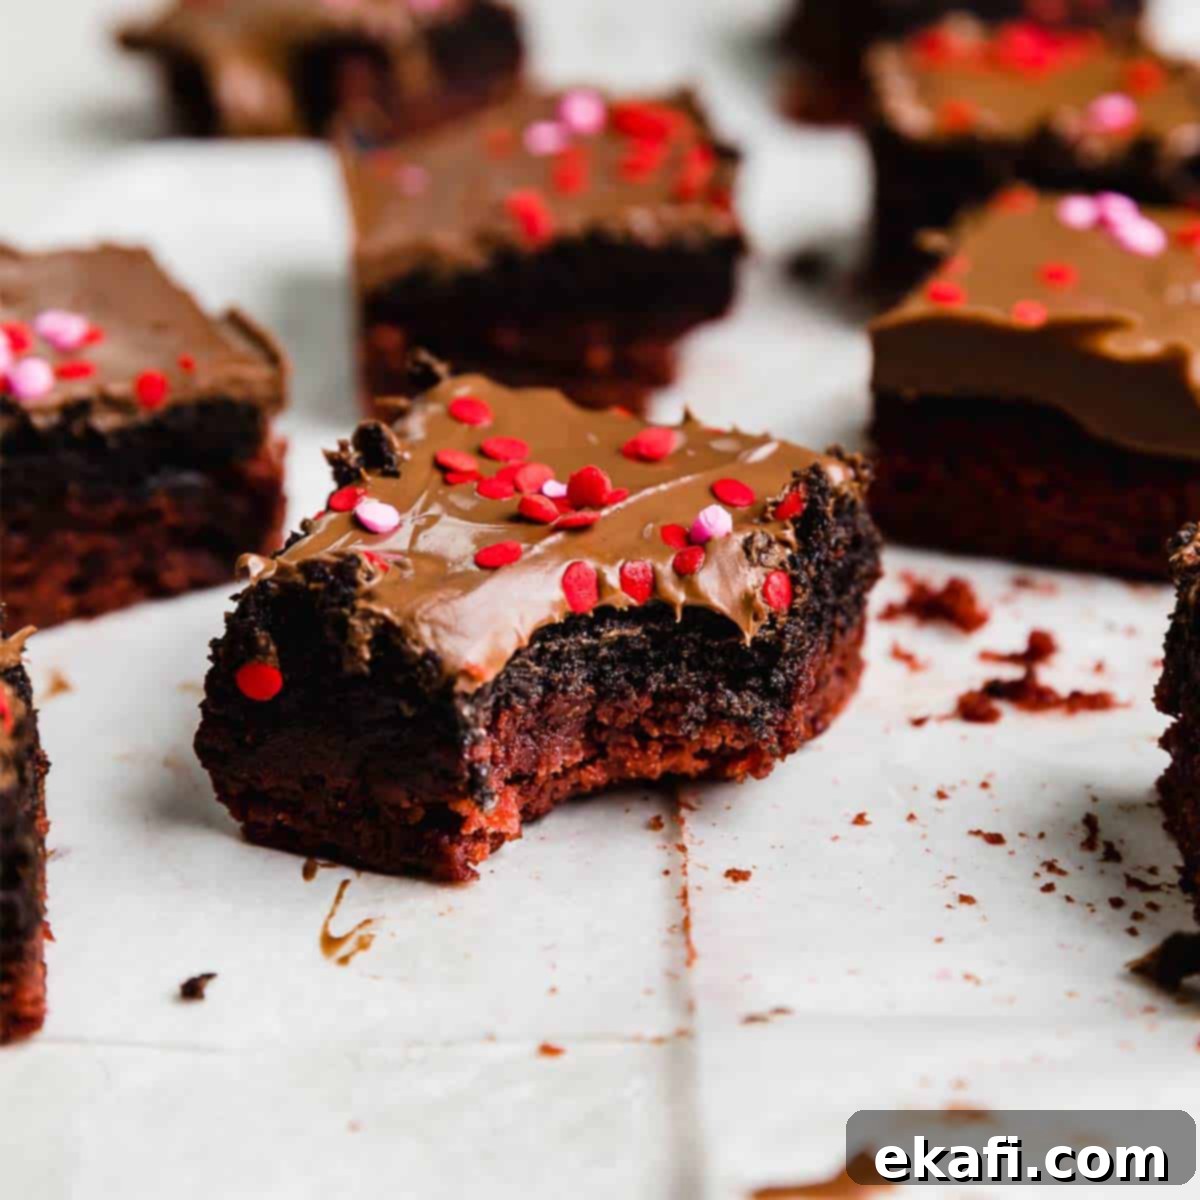
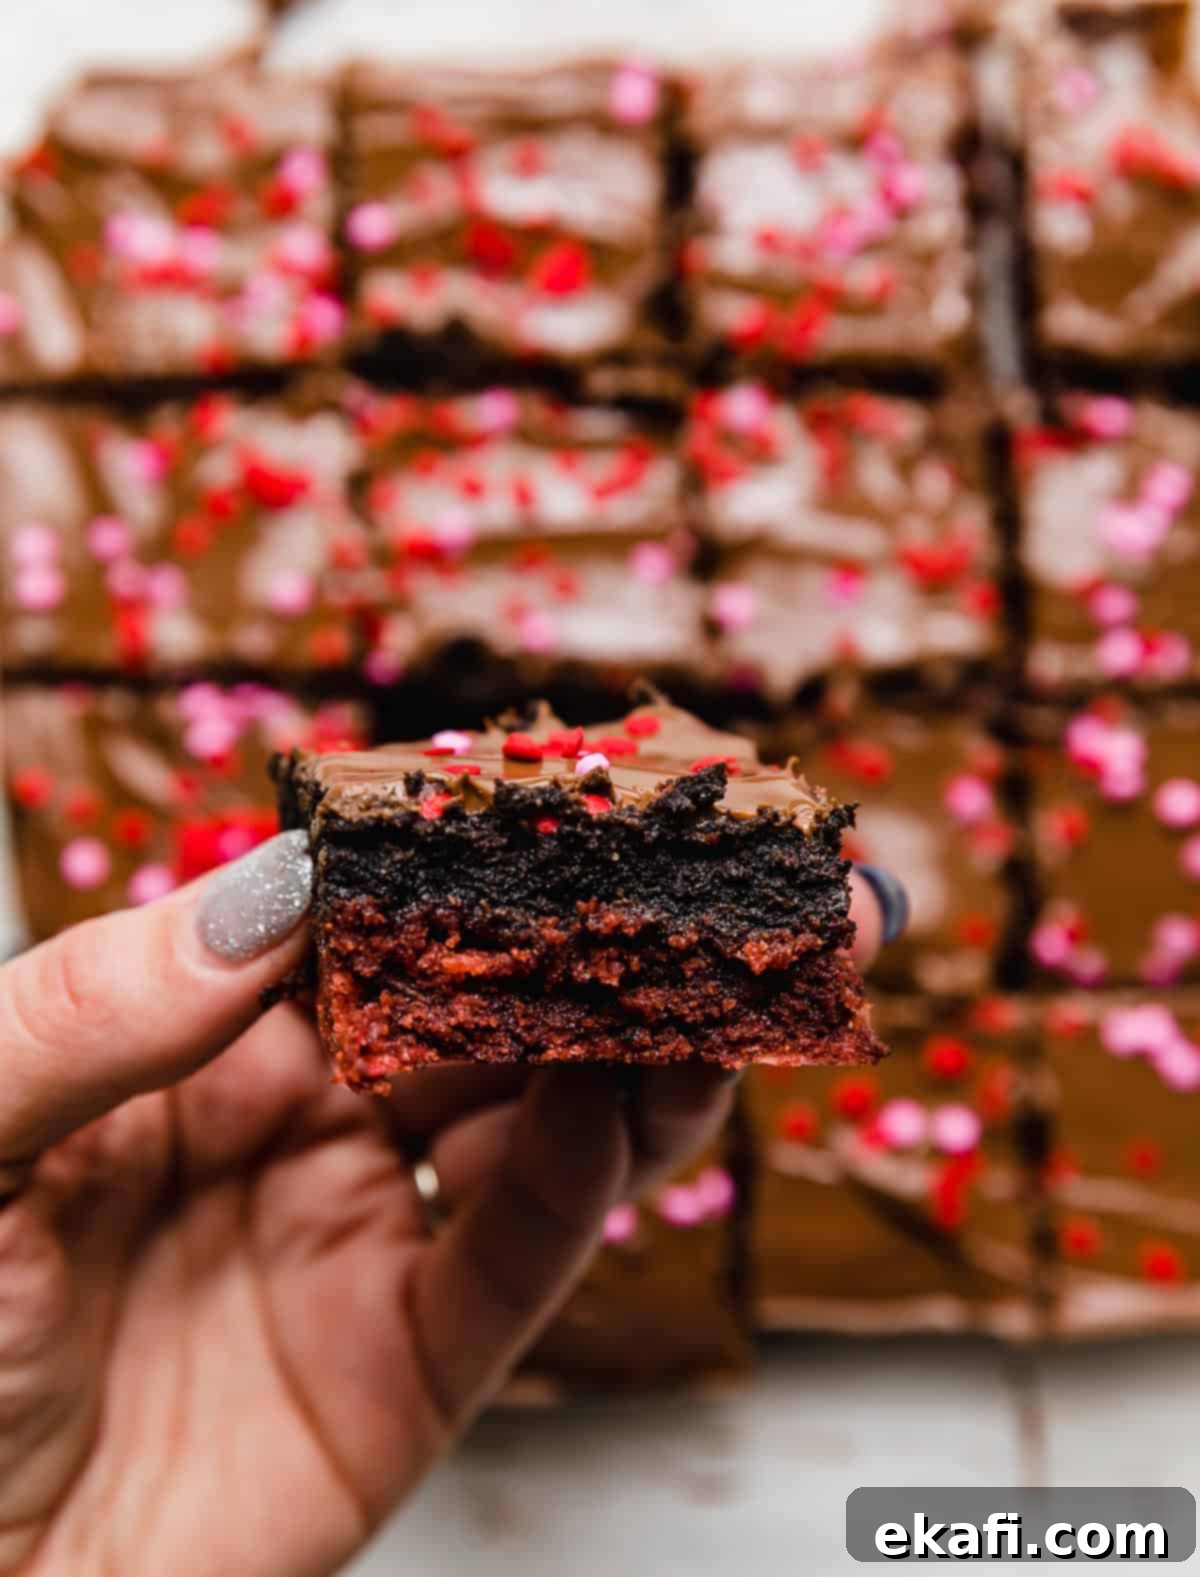
Prepare yourself for an extraordinary treat that takes two beloved desserts – classic red velvet and indulgent Oreo truffles – and combines them into one spectacular creation: **Red Velvet Oreo Truffle Brownies**. This recipe isn’t just about baking; it’s about crafting an unforgettable experience for your taste buds. Imagine a rich, fudgy red velvet brownie base, generously topped with a creamy, crushed Oreo truffle layer, all enrobed in a smooth blanket of melted chocolate. It’s a truly decadent, chocolatey sensation that will have everyone reaching for a second slice.
I find pure joy in a truly exceptional red velvet recipe, and these brownies are no exception. If you’re as enamored with the enchanting combination of red velvet and Oreos as I am, you’ll also adore my Oreo Red Velvet Cake, a show-stopping dessert for any occasion. For those who appreciate the timeless pairing of red velvet with tangy cream cheese, be sure to explore my foundational recipes for classic Red Velvet Brownies and my light, fluffy Red Velvet Cupcakes. But for an ultimate indulgence, these layered treats are simply unparalleled.
Why These Red Velvet Oreo Truffle Brownies Are a Must-Try
These **Red Velvet Oreo Truffle Brownies** aren’t just another dessert; they’re a revelation. Here’s why this recipe deserves a spot in your baking repertoire:
- Homemade Red Velvet Brownies from Scratch: Many bakers shy away from “from scratch” red velvet, assuming it’s overly complicated. This recipe demystifies the process, guiding you to create truly fudgy, flavorful red velvet brownies without relying on a boxed mix. You’ll be amazed at how simple it is to achieve that signature tender crumb and delicate chocolate flavor, all while knowing exactly what goes into your delectable dessert. The satisfaction of baking these glorious brownies yourself is unmatched.
- The Perfect Treat for Any Occasion: While the vibrant red hue makes these **Red Velvet Oreo Brownies** an obvious choice for Valentine’s Day or Christmas, their irresistible flavor ensures they’re a hit year-round. Their striking appearance, coupled with layers of rich taste, makes them ideal for birthdays, Fourth of July celebrations, family gatherings, or simply as an everyday indulgence when you crave something extra special. They bring a touch of gourmet flair to any table.
- An Amazingly Easy Dessert Recipe: Don’t let the elegant layers fool you; this is an incredibly straightforward recipe to assemble. Brownies are inherently forgiving, requiring less precision than cakes or cookies. There’s no fussy egg separation or elaborate piping. You simply mix the batter, pour, and bake. The magnificent Oreo truffle topping? It’s even simpler – just crushed Oreos and softened cream cheese. This layered dessert offers maximum impact with minimal effort, making it perfect for both novice and experienced bakers alike.
Essential Ingredients for Your Red Velvet Oreo Truffle Brownies
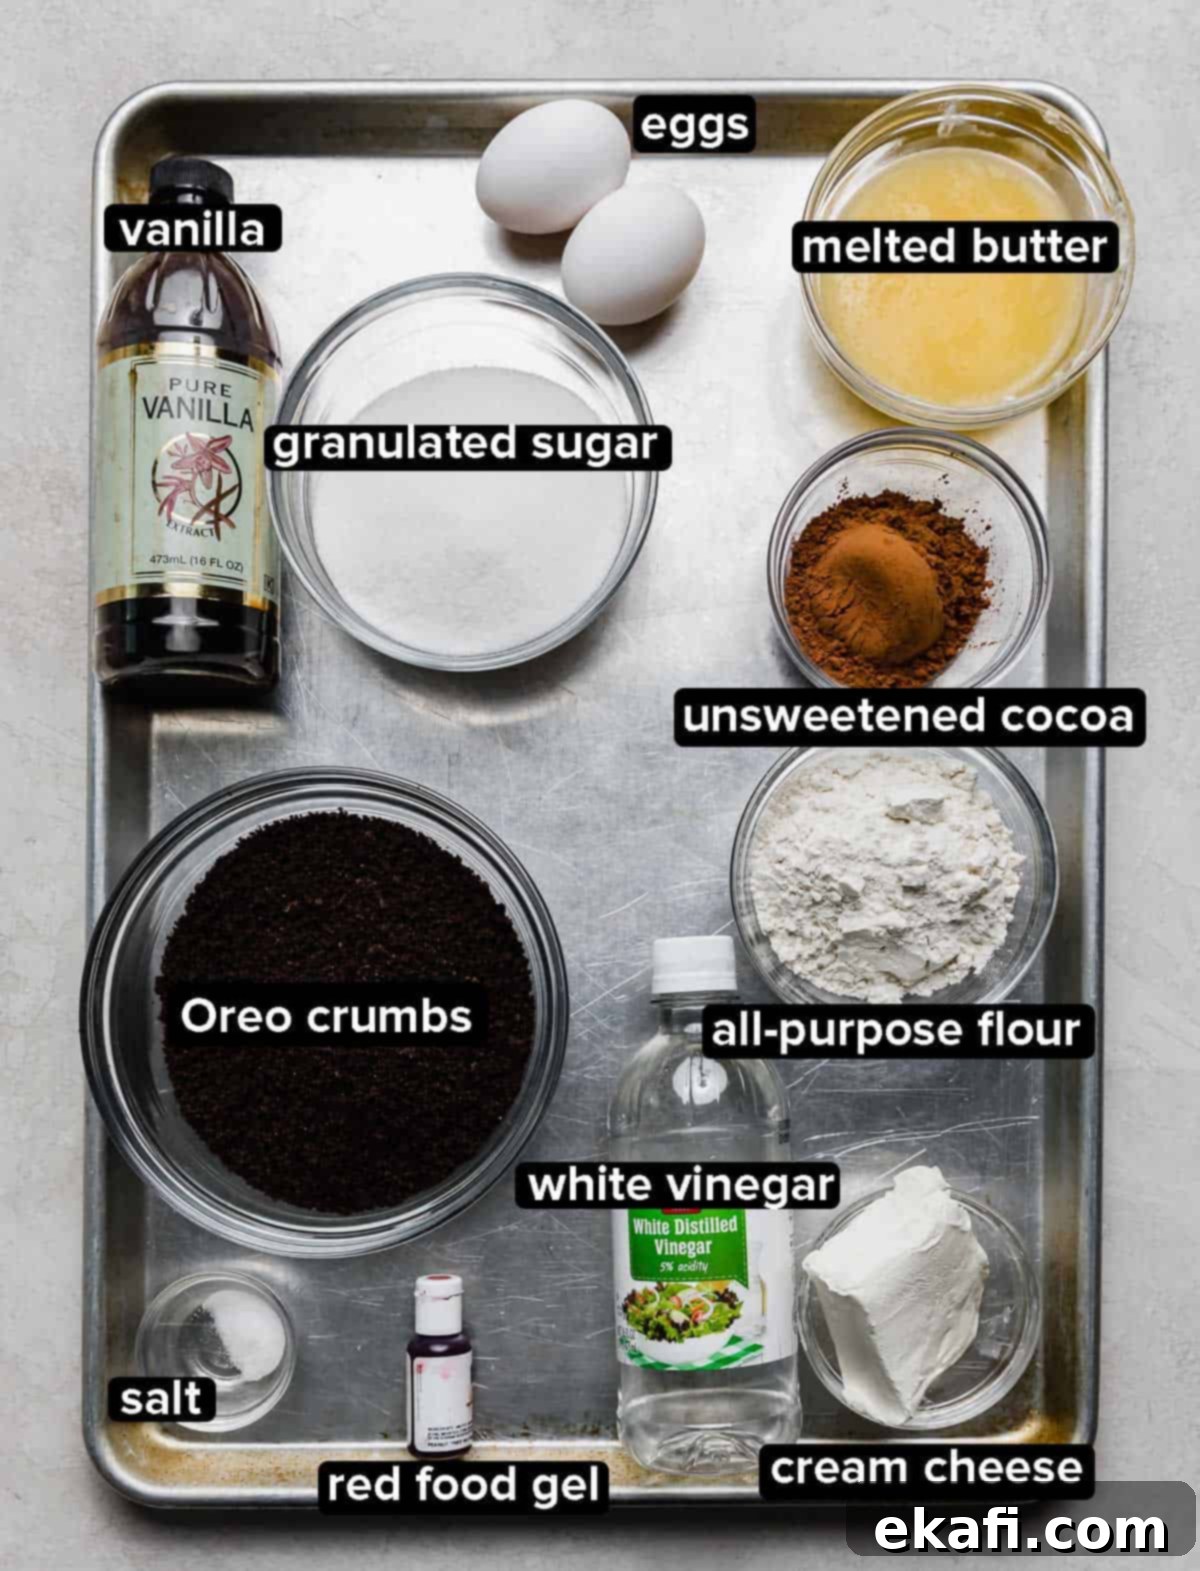
Creating these **decadent Red Velvet Oreo Truffle Brownies** requires a few key ingredients. Each plays a crucial role in achieving the perfect flavor, texture, and vibrant color:
- Unsweetened Cocoa Powder: The subtle chocolate flavor of red velvet comes from cocoa powder. We opt for unsweetened or “natural” cocoa powder to ensure the chocolate notes are present but not overwhelming, allowing the unique red velvet tang to shine through. A small amount is all that’s needed for this signature flavor.
- Vanilla Extract: A classic flavor enhancer, vanilla extract beautifully complements both the chocolate and the subtle tang of the red velvet, adding depth and warmth to the brownies.
- White Vinegar: This is a secret weapon in traditional red velvet. The white vinegar reacts with the cocoa powder and baking soda (if used, or just contributes to the tang), intensifying the red color and creating that characteristic subtle tang that defines red velvet flavor. Don’t worry, the finished brownies won’t taste like vinegar!
- Red Gel Food Color: While natural ingredients like beet powder can be used for coloring, gel food coloring provides the most consistent and vibrant red hue. Gel dyes are highly concentrated, meaning you need less to achieve a deep, rich red without altering the brownie’s texture.
- All-Purpose Flour: For a supremely fudgy brownie texture, all-purpose flour is essential. Measuring it correctly (spooning into the cup and leveling off) prevents a cakey texture, ensuring a dense, chewy bite.
- Unsalted Butter: Melted unsalted butter is my go-to fat for brownies. It contributes to a rich, moist, and incredibly flavorful crumb, giving these **fudgy red velvet brownies** their luxurious texture.
- Oreo Cookies: The star of the truffle layer! You’ll need about 20 whole Oreo cookies, crushed into fine crumbs. Feel free to use regular or double-stuffed; the cream filling adds to the richness of the truffle. A food processor makes this task quick and easy.
- Cream Cheese: Softened cream cheese is the magical binder for our Oreo truffle layer, providing a creamy, tangy contrast that perfectly complements the red velvet and chocolate. Ensure it’s at room temperature for smooth mixing.
- Milk Chocolate Chips: These are simply melted and poured over the Oreo truffle layer, creating a smooth, glossy, and utterly delicious chocolate topping. Milk chocolate adds a sweet, creamy flavor, but you can easily substitute semi-sweet chocolate chips if you prefer a darker chocolate note.
How to Bake Your Red Velvet Oreo Truffle Brownies
Follow these detailed steps to create your magnificent **Red Velvet Oreo Truffle Brownies**, ensuring each layer is perfect:
- Prepare Oven and Pan: Begin by preheating your oven to 350°F (175°C). Line an 8×8-inch square baking pan with parchment paper, leaving an overhang on two sides to easily lift the brownies out later. Lightly spray the parchment paper with cooking spray to prevent sticking. Set this prepared pan aside.
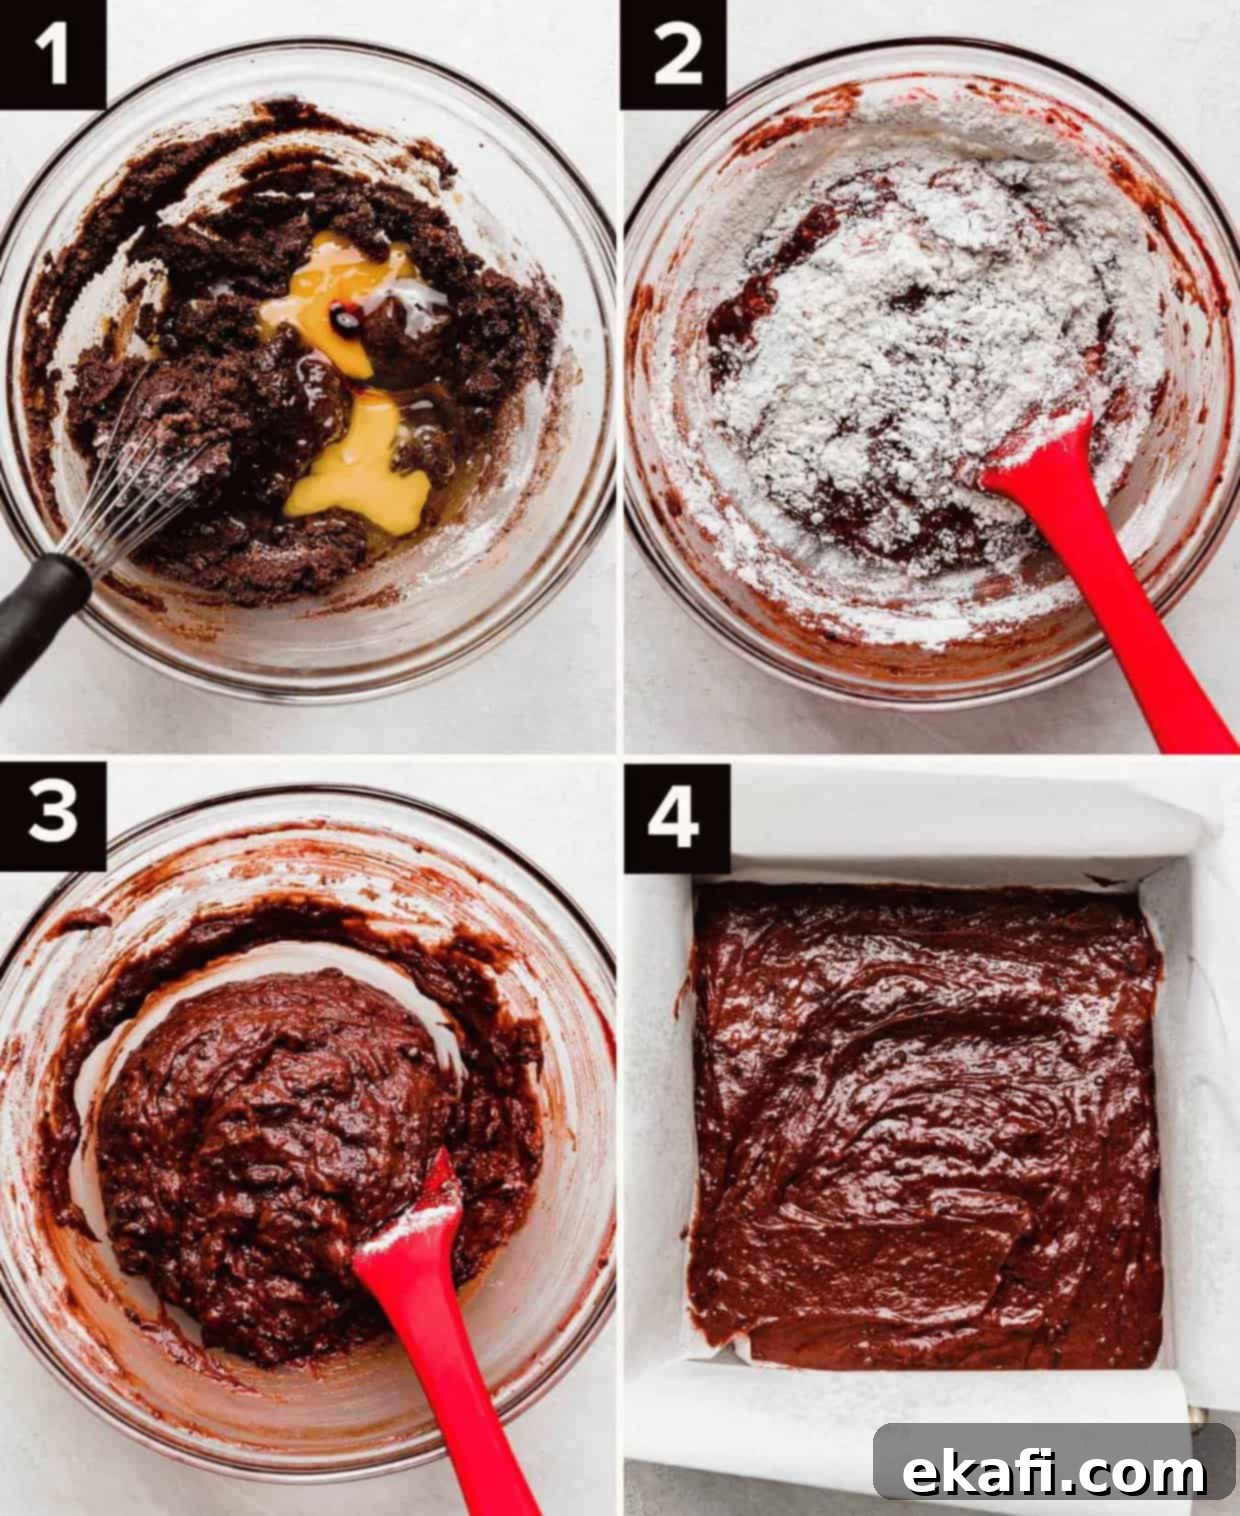
- Combine Butter, Cocoa, and Sugar: Melt ½ cup (113g) of unsalted butter and let it cool slightly for a few minutes. While still warm, add the melted butter to a medium bowl. Stir in ¼ cup (21g) of unsweetened cocoa powder until smooth, creating a rich chocolate base. Finally, add 1 cup (200g) of granulated sugar and whisk thoroughly until the mixture is well combined and glossy.
- Incorporate Remaining Wet Ingredients: To the butter and sugar mixture, crack in 2 large eggs. Then, add 1 teaspoon of vanilla extract, 1 teaspoon of vibrant red gel food color (for that iconic red velvet hue), and ½ teaspoon of white vinegar. Whisk vigorously until all ingredients are fully incorporated and the mixture is smooth and evenly colored.
- Fold in Dry Ingredients: Gently add ⅔ cup (85g) of all-purpose flour and ½ teaspoon of salt to the bowl. Using a rubber spatula, carefully stir the flour into the wet ingredients until *just* combined. It’s crucial not to overmix the batter, as this can lead to a tougher, more cake-like brownie instead of the desired fudgy texture. Stop mixing as soon as no dry streaks of flour remain.
- Bake the Red Velvet Brownies: Pour the luscious red velvet brownie batter into your prepared 8×8-inch baking dish. Use the rubber spatula to spread it into an even layer, ensuring consistent thickness. Bake for 22-24 minutes. The brownies are ready when a toothpick inserted into the center comes out with a few moist crumbs clinging to it, but no wet batter. Remove the pan from the oven and let the brownies cool for 10 minutes before proceeding.
- Crush the Oreos: While your red velvet brownies are cooling, prepare the indulgent Oreo truffle layer. Take 20 whole Oreo cookies and crush them into fine crumbs. A food processor is the quickest and most efficient way to achieve this, but you can also place them in a resealable plastic bag and crush them with a rolling pin. Remember to leave the cream filling in the cookies; it adds to the richness and texture of the truffle. You should aim for approximately 2 to 2¼ cups of fine crumbs.
- Form the Oreo Truffle Layer: Transfer your finely crushed Oreo crumbs to a medium-sized bowl. Add 4 ounces (113g) of softened cream cheese to the crumbs. Mix thoroughly, either with a spoon or your hands, until the cream cheese is completely combined with the Oreo crumbs and forms a cohesive, moldable mixture. Next, place this glorious Oreo cream cheese mixture between two sheets of parchment paper or wax paper. Use your hands or a rolling pin to press and squish the truffle mixture into an even 8×8-inch square, matching the size of your brownie pan. Chill this truffle layer in the refrigerator or freezer for about 10 minutes while the brownies continue to cool. This crucial step will make the truffle layer much easier to handle and transfer onto the brownies.
- Add the Truffle Layer: Once the baked red velvet brownies have cooled for about 10 minutes and the Oreo truffle layer is slightly firmed up from chilling, carefully remove the top sheet of parchment or wax paper from the truffle. Invert the truffle layer onto the cooled brownies, then peel off the remaining parchment. Adjust gently to ensure it covers the brownies evenly.
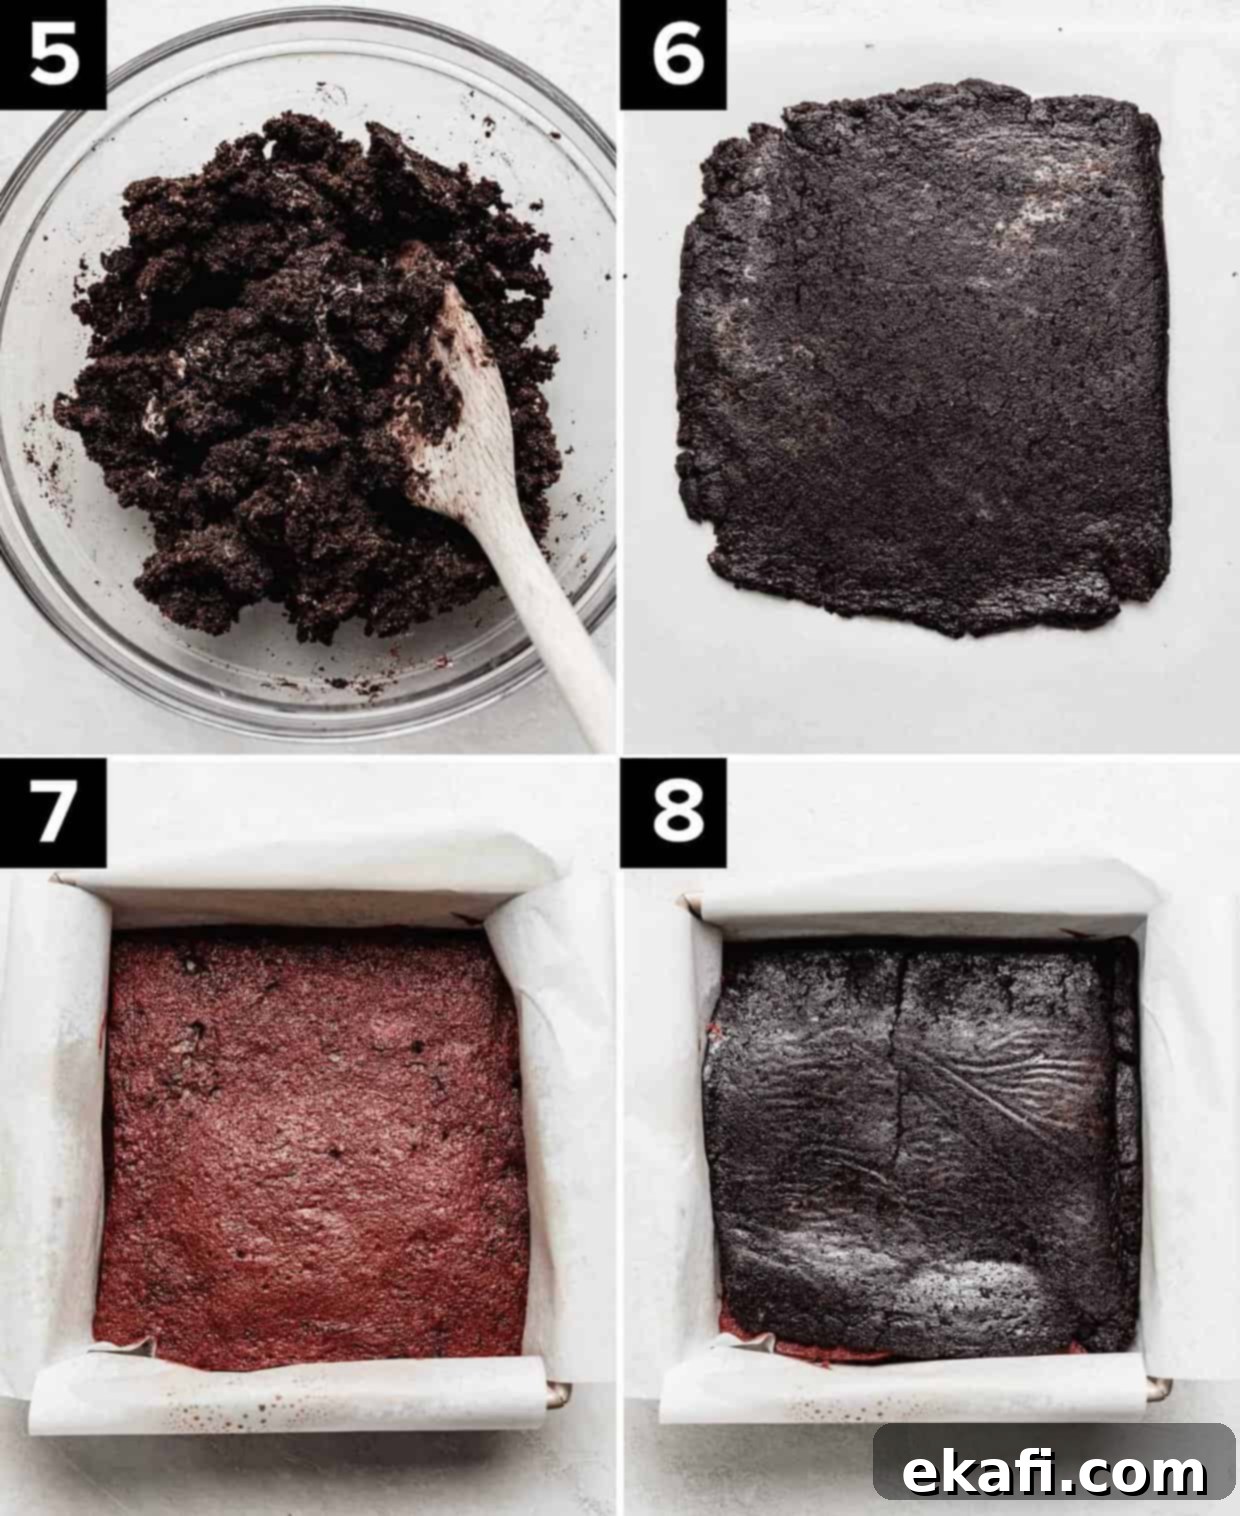
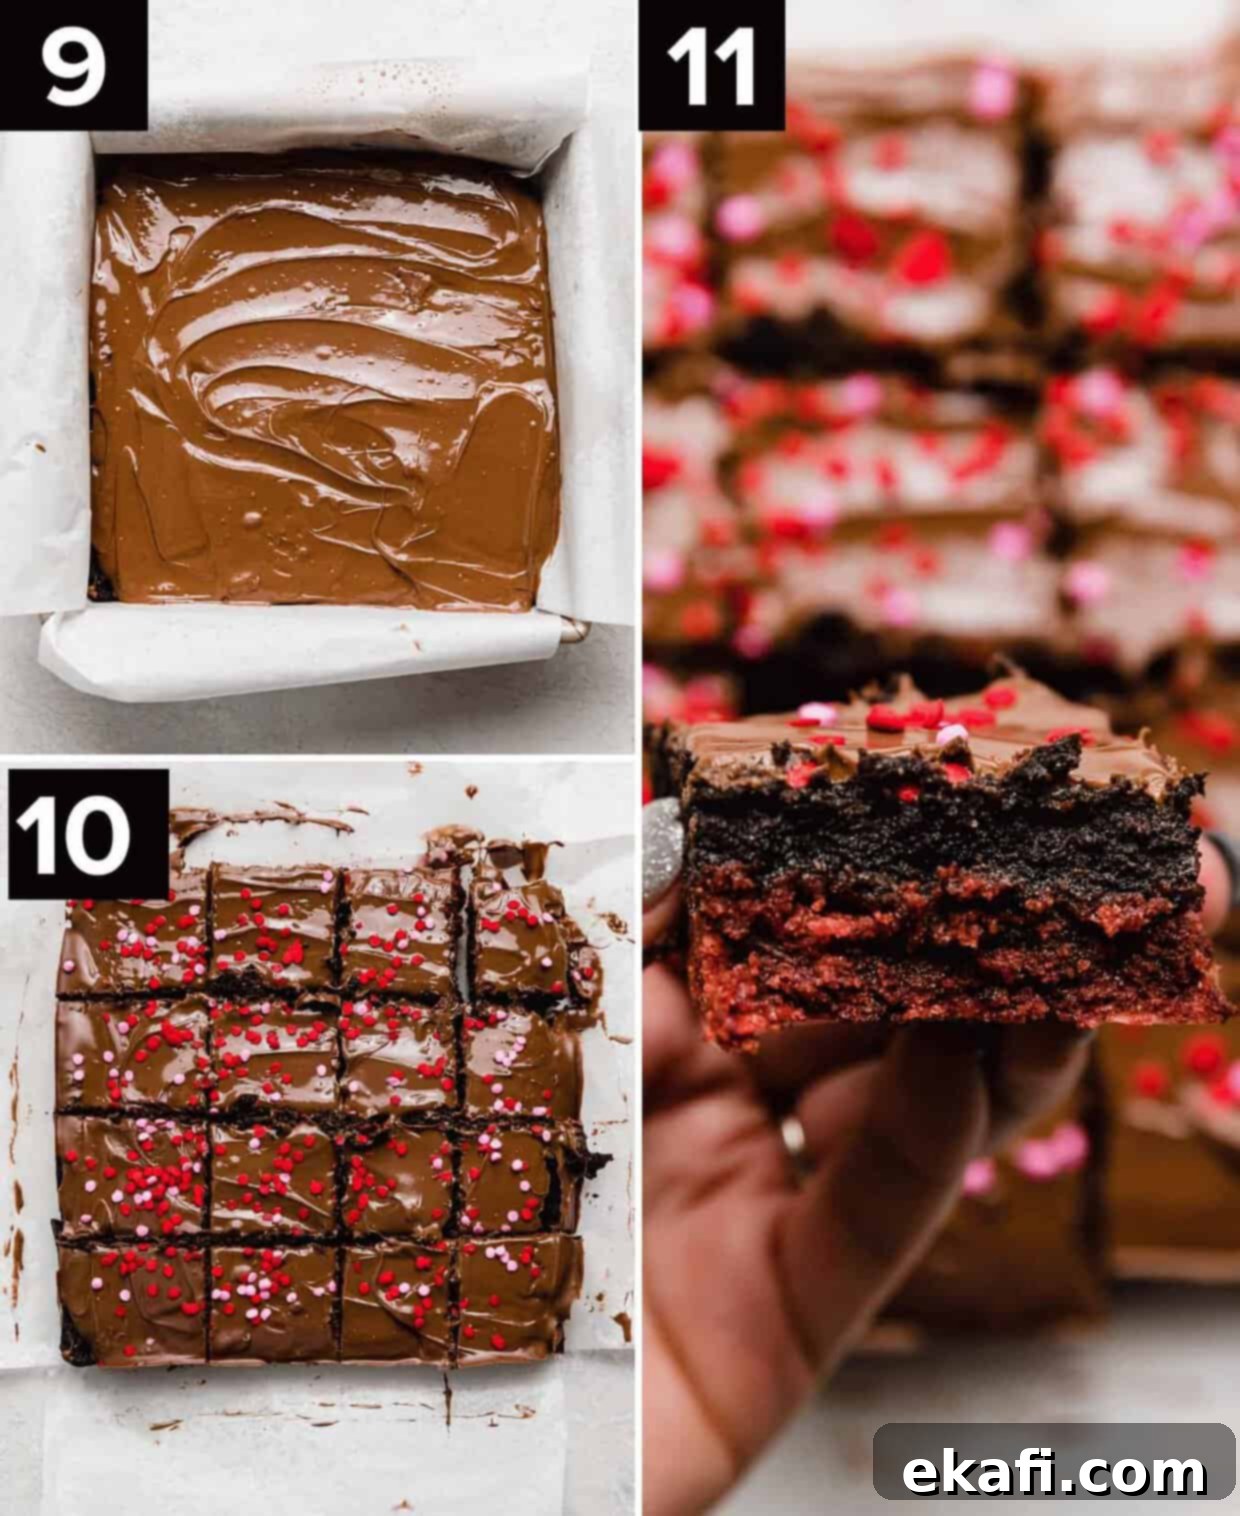
- Melt and Top with Chocolate: Place 1 cup (170g) of milk chocolate chips into a small microwave-safe bowl. Melt the chocolate in 30-second intervals in the microwave, stirring well after each burst, until the chocolate is completely smooth and melted. Pour this luscious melted chocolate over the Oreo truffle layer, spreading it evenly across the entire surface using a spatula. For an extra festive touch, you can add decorative sprinkles on top while the chocolate is still wet.
- Serve and Savor: Your **Red Velvet Oreo Truffle Brownies** are now complete! You have a choice: enjoy them immediately while the chocolate topping is still warm and gloriously gooey, creating a melt-in-your-mouth experience. Alternatively, allow the chocolate to fully set at room temperature or in the refrigerator before slicing and serving for cleaner squares and a satisfying snap to the chocolate. Either way, these rich, multi-layered brownies are guaranteed to be a sensational hit!
Expert Tips for Perfect Red Velvet Oreo Truffle Brownies
To ensure your **Red Velvet Oreo Truffle Brownies** turn out perfectly every time, keep these valuable tips in mind:
- Get Creative with Sprinkles: Decorative sprinkles are an effortless way to customize these red velvet brownies for any holiday or theme. Pink and red sprinkles are perfect for Valentine’s Day, while green and red work for Christmas. You can even sprinkle extra crushed Oreo pieces on top for an extra boost of Oreo goodness and texture.
- Experiment with Chocolate Toppings: While milk chocolate provides a sweet, creamy finish, don’t hesitate to customize your chocolate topping. Semi-sweet chocolate chips will give a richer, slightly less sweet contrast, while white chocolate chips can create a beautiful visual appeal and a different flavor profile. The possibilities are endless!
- Avoid Overmixing for Fudgy Texture: The key to truly fudgy and dense brownies is a delicate hand. Overmixing the batter introduces too much air, which can lead to a more cake-like, less desirable texture. Stir until the flour is just combined, and then stop. Similarly, do not overbake! Brownies should come out slightly moist in the center to remain tender and fudgy once cooled.
- Chill the Oreo Truffle Layer: This step is non-negotiable! Chilling the Oreo truffle layer for at least 10 minutes significantly firms it up, making it much easier to transfer and lay smoothly over the warm brownies. Skipping this step can result in a messy, difficult-to-handle truffle layer.
- Room Temperature Cream Cheese: For the smoothest, most lump-free Oreo truffle layer, ensure your cream cheese is properly softened to room temperature before mixing. This allows it to combine effortlessly with the crushed Oreos.
- Quality Ingredients Matter: Using good quality cocoa powder, butter, and vanilla extract will elevate the flavor of your brownies. Fresh ingredients always make a difference in the final taste.
Make Ahead, Storing, and Freezing Your Red Velvet Oreo Truffle Brownies
These **Red Velvet Oreo Truffle Brownies** are fantastic for planning ahead, making them an ideal treat for busy schedules or special events.
Make Ahead: Good news for planners! These rich brownies maintain their deliciousness for up to 5 days, making them a perfect candidate for baking several days in advance of when you plan to serve them. For added convenience, you can even prepare the Oreo truffle layer a day or two before you bake the brownies. Just wrap it tightly in parchment or wax paper and store it in the refrigerator until ready to use.
Storing: Due to the cream cheese in the Oreo truffle layer, it’s essential to store any leftover **Red Velvet Oreo Truffle Brownies** in an airtight container in the refrigerator. They will keep well for up to 5 days, maintaining their fudgy texture and delicious layers. Bring them to room temperature for about 15-20 minutes before serving for optimal flavor and texture.
Freezing: While I haven’t personally tested freezing these exact brownies, in theory, they should freeze beautifully. You have a couple of options: you can freeze the entire pan of brownies (after they’ve fully cooled and the chocolate has set) by wrapping it tightly in several layers of plastic wrap, followed by a layer of aluminum foil. Alternatively, slice the brownies into individual servings, wrap each tightly in plastic wrap, and then place them in a freezer-safe bag or container. This allows for easy thawing of single portions. Please note that the texture of the brownie and truffle layers might be slightly affected upon thawing, possibly becoming a little softer. Thaw frozen brownies in the refrigerator overnight before bringing to room temperature to serve.
Frequently Asked Questions About Red Velvet Oreo Truffle Brownies
Yes, you absolutely can! These **Red Velvet Oreo Truffle Brownies** should freeze quite well. For best results, allow them to cool completely and the chocolate topping to set before freezing. You can wrap and freeze the entire pan, or for more convenience, cut them into individual servings and wrap each brownie tightly in plastic wrap before placing them in a freezer-safe container. Thaw them in the refrigerator overnight when you’re ready to enjoy.
Not entirely! While red velvet certainly contains chocolate (from the cocoa powder), it’s not simply a chocolate cake or brownie. The chocolate flavor in red velvet is much more subtle, often described as a hint rather than an intense chocolate punch. What truly distinguishes red velvet is the addition of white vinegar and often buttermilk, which creates a characteristic tang and helps activate the cocoa’s reddish undertones, contributing to its unique flavor profile and vibrant color.
You can use liquid red food coloring, but be aware that it will likely require a much larger quantity to achieve the same intense red hue as gel food coloring. The downside is that adding a significant amount of liquid food coloring can introduce too much moisture into the brownie batter, potentially affecting the final texture and bake time of your **fudgy red velvet brownies**. For the most vibrant color and ideal texture, gel food coloring is highly recommended.
Yes, white vinegar is a vital ingredient for achieving the authentic flavor and color of classic red velvet. It reacts with the cocoa powder, enhancing the red pigment, and contributes to the signature subtle tang that balances the sweetness. I promise, your **Red Velvet Oreo Truffle Brownies** will not taste like vinegar! However, it’s crucial to stick to white vinegar; other types of vinegar (like apple cider vinegar) have stronger flavors that would noticeably alter the taste of your brownies in an undesirable way.
While an 8×8 inch pan is ideal for the thickness of these **fudgy red velvet brownies**, you can use a 9×9 inch pan. The brownies will be slightly thinner and may bake a few minutes faster, so keep a close eye on them during the last few minutes of baking. Adjust the baking time accordingly, checking for moist crumbs with a toothpick. If you use a significantly larger pan, you might consider doubling the recipe.
Discover More Irresistible Red Velvet Recipes
If you’ve fallen in love with the classic allure of red velvet, then you’re in for a treat! Explore some of my other favorite red velvet creations:
- Delicate Red Velvet Macarons
- Easy Red Velvet Cake Mix Cookies
- Baked Red Velvet Donuts
- Fun Red Velvet Rice Krispie Treats
Did you whip up a batch of these glorious **Red Velvet Oreo Truffle Brownies**? I’d absolutely love to hear about your experience! Please leave a star rating and review right here on the blog post, or simply scroll below the recipe card to share your thoughts and photos. Your feedback helps other bakers!
Stay connected and up-to-date with all my latest sweet and savory creations by following us on Instagram, TikTok, YouTube, Facebook, and Pinterest. Don’t forget to tag #saltandbaker so I can see your amazing bakes!

Print
SaveSaved!
Review
Red Velvet Oreo Truffle Brownies
Ingredients
Red Velvet Brownies
- 1/2 cup unsalted butter – melted and still warm
- 1/4 cup unsweetened cocoa powder
- 1 cup granulated sugar
- 2 large eggs
- 1 teaspoon vanilla extract
- 1 teaspoon red gel food color
- 1/2 teaspoon white vinegar
- 2/3 cup all-purpose flour
- 1/2 teaspoon salt
Oreo Truffle Layer
- 20 Oreo cookies – finely crushed! (regular or double stuffed… leave the cream filling inside of the cookies) this should equate about 2 – 2 1/4 cups
- 4 oz cream cheese – softened
Topping
- 1 cup milk chocolate chips
Equipment
-
8×8 inch glass baking dish
Instructions
Make the Red Velvet Brownies
-
Preheat oven to 350°F. Line an 8″x8″ square pan with parchment paper. Lightly spray the parchment with nonstick cooking spray. Set aside.
-
In a medium sized bowl add the warm melted butter. Stir in the cocoa powder. Next add the sugar and whisk to combine.
-
Whisk in the eggs, vanilla, vinegar, and red food coloring. Using a rubber spatula, stir in the flour and salt until just combined. Spoon the batter into the prepared pan, spread into an even layer.
-
Bake for 22-24 minutes or until toothpick inserted in center comes out with moist crumbs. Remove from the oven and let brownies cool for 10 minutes before adding the Oreo truffle layer on top.
Make the Oreo Truffle Layer
-
While the brownies are cooling make the Oreo truffle layer. In a medium sized bowl mix the crushed Oreos and cream cheese until combined. Place the oreo truffle mixture between two sheets of parchment or wax paper. Use a rolling pin, or your hands, to press the oreo truffle into an 8″x8″ square. Chill in the fridge or freezer for 10 minutes to help the oreo truffle be easier to transfer to the brownies. Once slightly chilled remove the parchment paper and transfer the oreo truffle to the top of the baked and slightly cooled brownies.
Melt, and add the topping
-
Melt the milk chocolate chips in the microwave until fully melted. Pour overtop of the oreo truffle layer. Spread into an even layer. Add festive sprinkles overtop (if desired). Let set before slicing and serving. (Or slice and eat them while the top is still melty.. that’s what I like to do!)
Notes
I like to add festive sprinkles to the top of the melted chocolate, you don’t have to, but I think it’s fun!
Make Ahead: These brownies are good for up to 5 days, so they can be made several days in advance. You can also make the Oreo truffle layer a day or two in advance before making the brownies.
Storing: Store leftover red velvet Oreo truffle brownies in an airtight container in the fridge for up to 5 days.
Freezing: In theory I think these brownies would freeze well. You can freeze the entire pan by wrapping it tightly in plastic wrap, or slice and freeze individually wrapped brownies. I have not tested this, however, and I’m not sure how the brownie texture might be affected after thawing.
