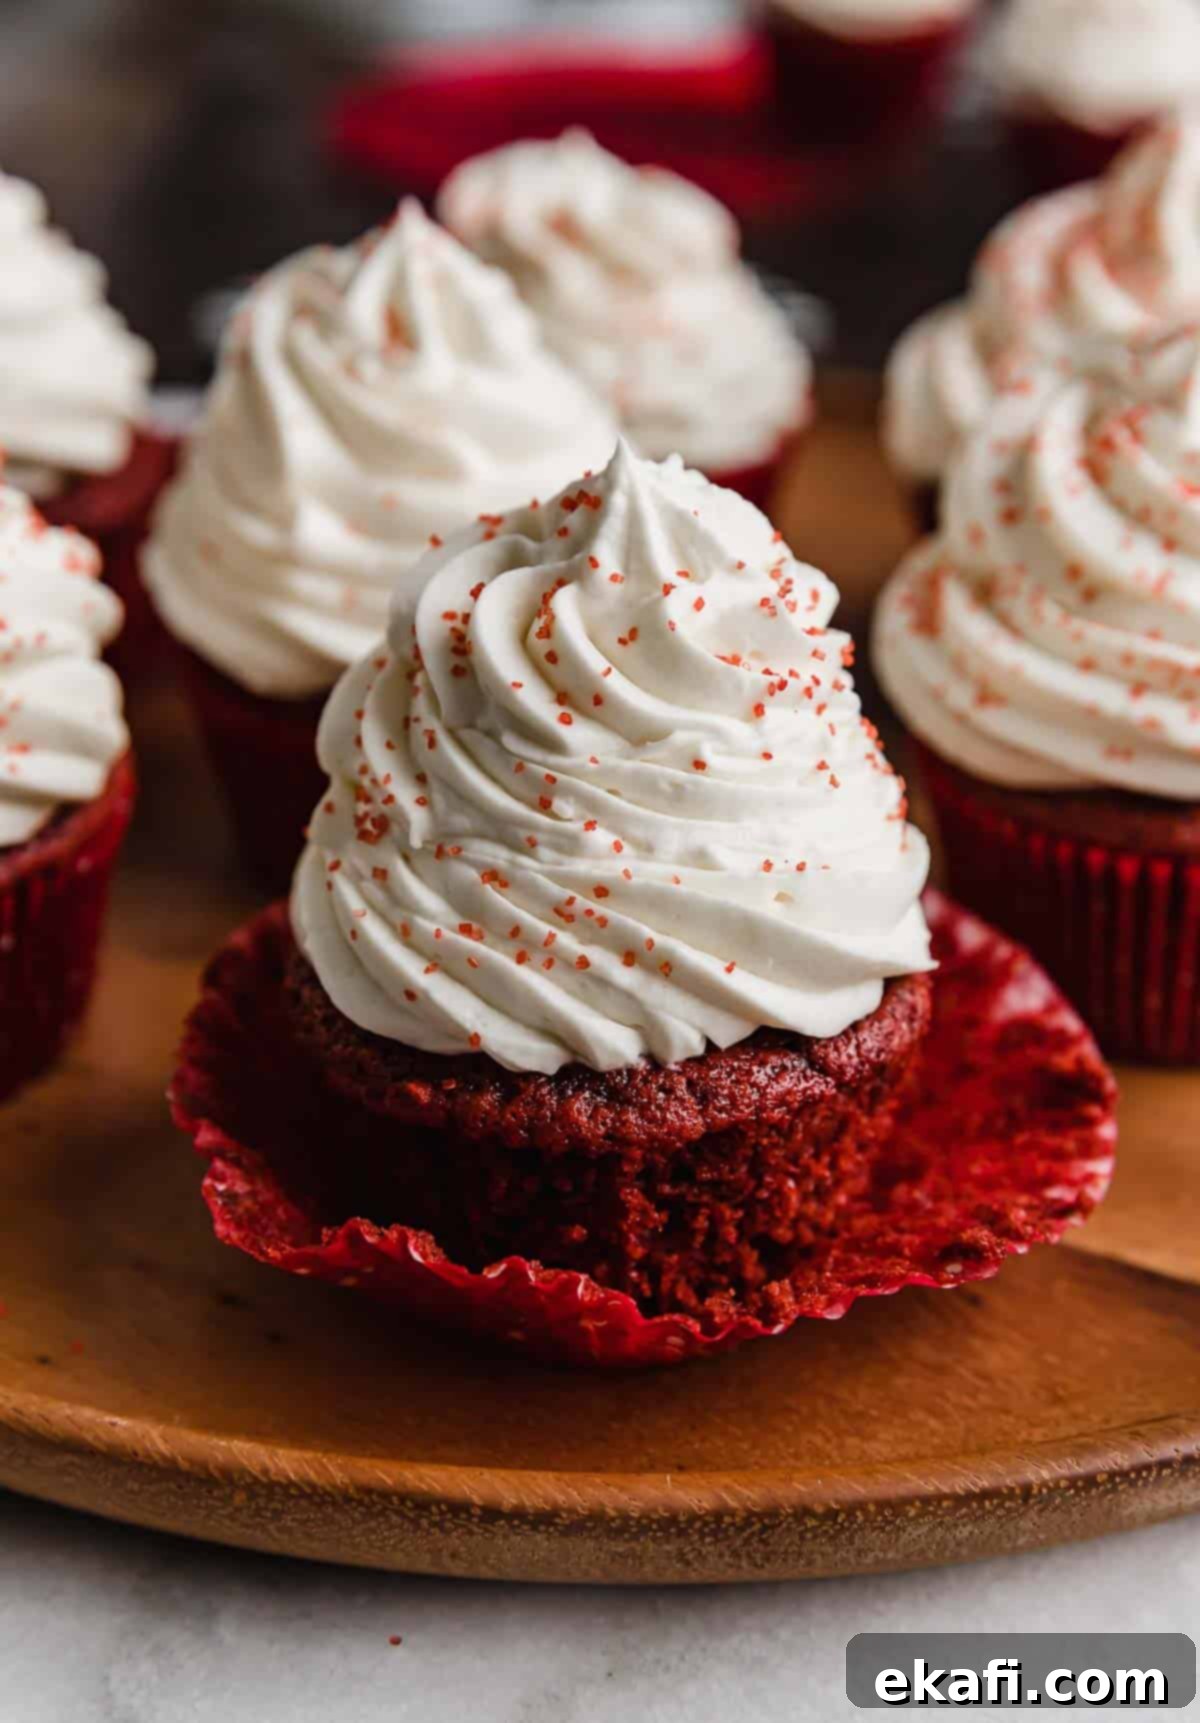
Decadent Red Velvet Cupcakes: The Ultimate Recipe for Moist Perfection with Tangy Cream Cheese Whipped Frosting
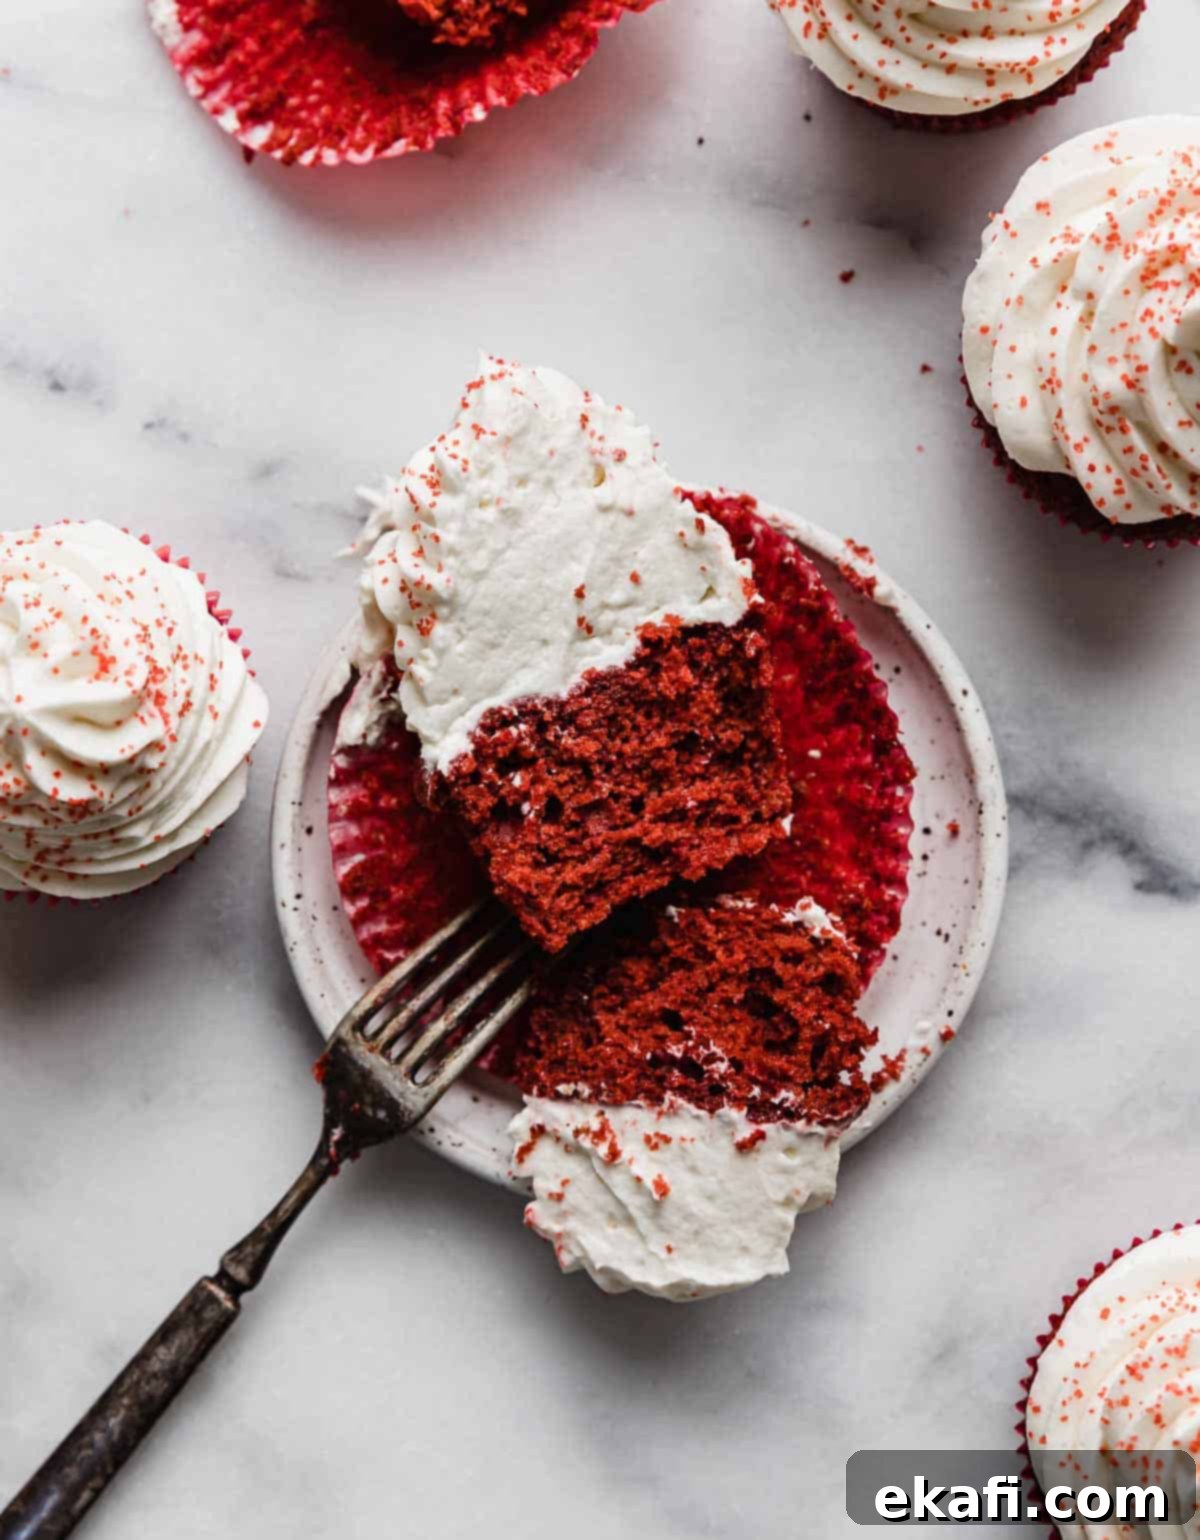
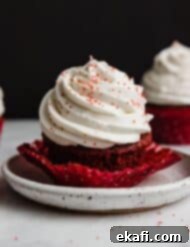
Prepare to fall in love with these incredibly moist Red Velvet Cupcakes, boasting a rich, deep red color and a more pronounced chocolate flavor than your average recipe. Unlike many recipes that offer just a hint of cocoa, ours is crafted with extra cocoa powder, ensuring that iconic subtle chocolate taste shines through. Each decadent cupcake is crowned with a smooth, luxurious, and delightfully light Cream Cheese Whipped Cream Frosting. This perfect pairing creates a dessert that’s not only light and fluffy but also utterly indulgent and irresistibly delicious!
The timeless charm of red velvet recipes truly captures hearts, especially around holidays and special occasions. If you, like me, are captivated by the unique blend of cocoa and tang, you’ll find yourself obsessed with these cupcakes. My Red Velvet Brownies, also adorned with that dreamy cream cheese whipped cream frosting, are another fan favorite. For those who appreciate the classics, don’t miss my beloved Old Fashioned Red Velvet Cake Recipe and the elegant Red Velvet Bundt Cake. And for a fun breakfast treat that kids adore, especially on Valentine’s Day, my playful Red Velvet Waffles are an absolute must-try! Each recipe celebrates the beloved red velvet flavor profile, promising a delightful culinary experience.
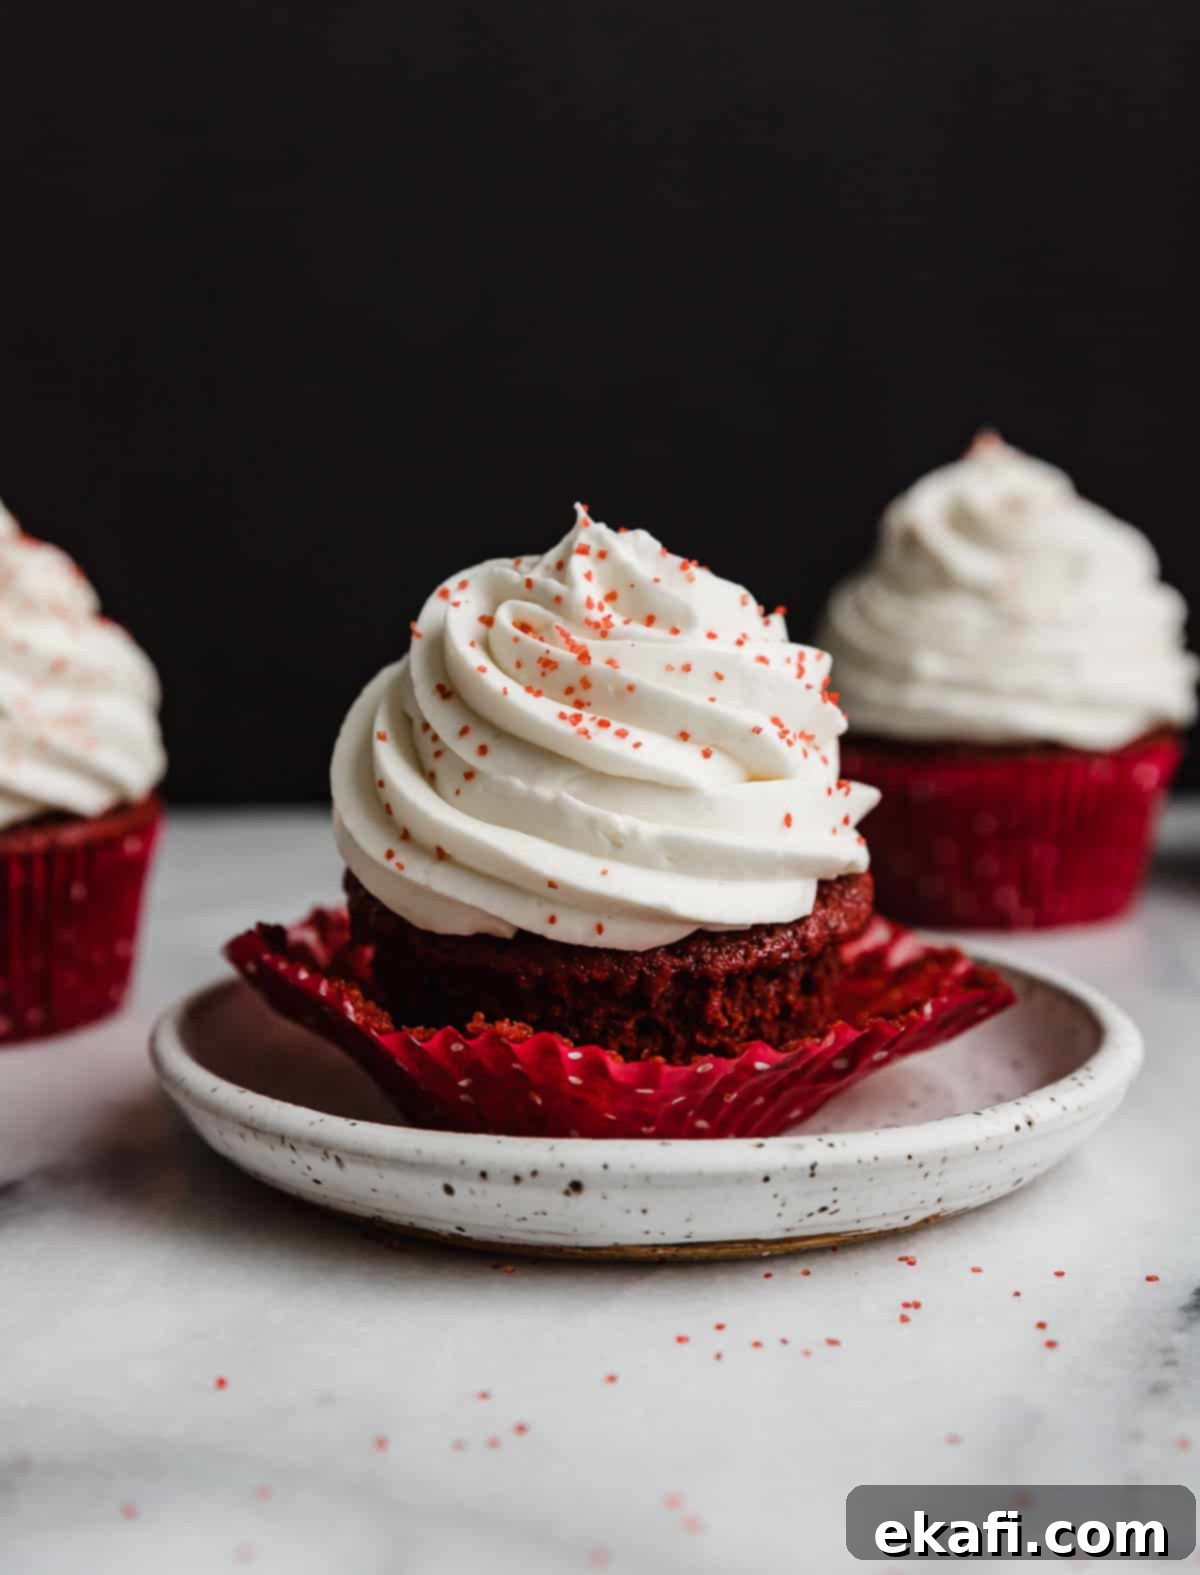
Why This Red Velvet Cupcake Recipe Is a Must-Try
What makes these Red Velvet Cupcakes truly stand out from the crowd? It’s all about the perfect balance of ingredients and techniques that result in an unforgettable dessert. Here’s why this recipe will become your new favorite:
- Unbelievably Moist and Tender Red Velvet Cupcakes. This homemade red velvet cupcake recipe utilizes the powerful combination of buttermilk and vegetable oil. Buttermilk, an acidic ingredient, reacts with baking soda to create a beautifully tender crumb and a light texture. Meanwhile, vegetable oil, which remains liquid at room temperature, ensures that the cake stays incredibly moist, yielding a delicate cake texture that simply melts in your mouth. Say goodbye to dry, crumbly cupcakes!
- Amped-Up Chocolate Flavor with Extra Cocoa Powder. Many red velvet cupcake recipes online unfortunately feature only a minimal amount of cocoa – often just 2-4 teaspoons. In my opinion, that’s simply not enough to deliver the signature subtle chocolate notes that define true red velvet. This recipe boldly uses 2 tablespoons (that’s 6 teaspoons!) of unsweetened cocoa powder. This generous addition significantly amplifies the chocolate flavor, providing a delicious depth that perfectly complements the traditional tang of red velvet without overpowering it. You’ll truly taste the difference!
- Topped with a Light, Tangy, and Less Sweet Frosting. Are you the kind of person who usually scrapes off half the frosting from a cupcake because it’s just too sweet or heavy? You’ll find that impossible with our unique Cream Cheese Whipped Cream Frosting recipe! This frosting is a game-changer. It contains only 1/2 cup of powdered sugar, making it remarkably lighter not only in texture but also in sweetness compared to conventional frostings that often call for 5-7 cups of sugar. Its tangy, airy consistency is the perfect counterpoint to the sweet, rich cupcakes, creating a harmonious balance of flavors that will leave you craving more without feeling overwhelmed. It truly elevates the entire red velvet experience.
Essential Ingredient Notes for Perfect Red Velvet Cupcakes
Understanding the role of each ingredient is key to achieving bakery-quality red velvet cupcakes at home. Here’s a closer look at the components that make this recipe shine:
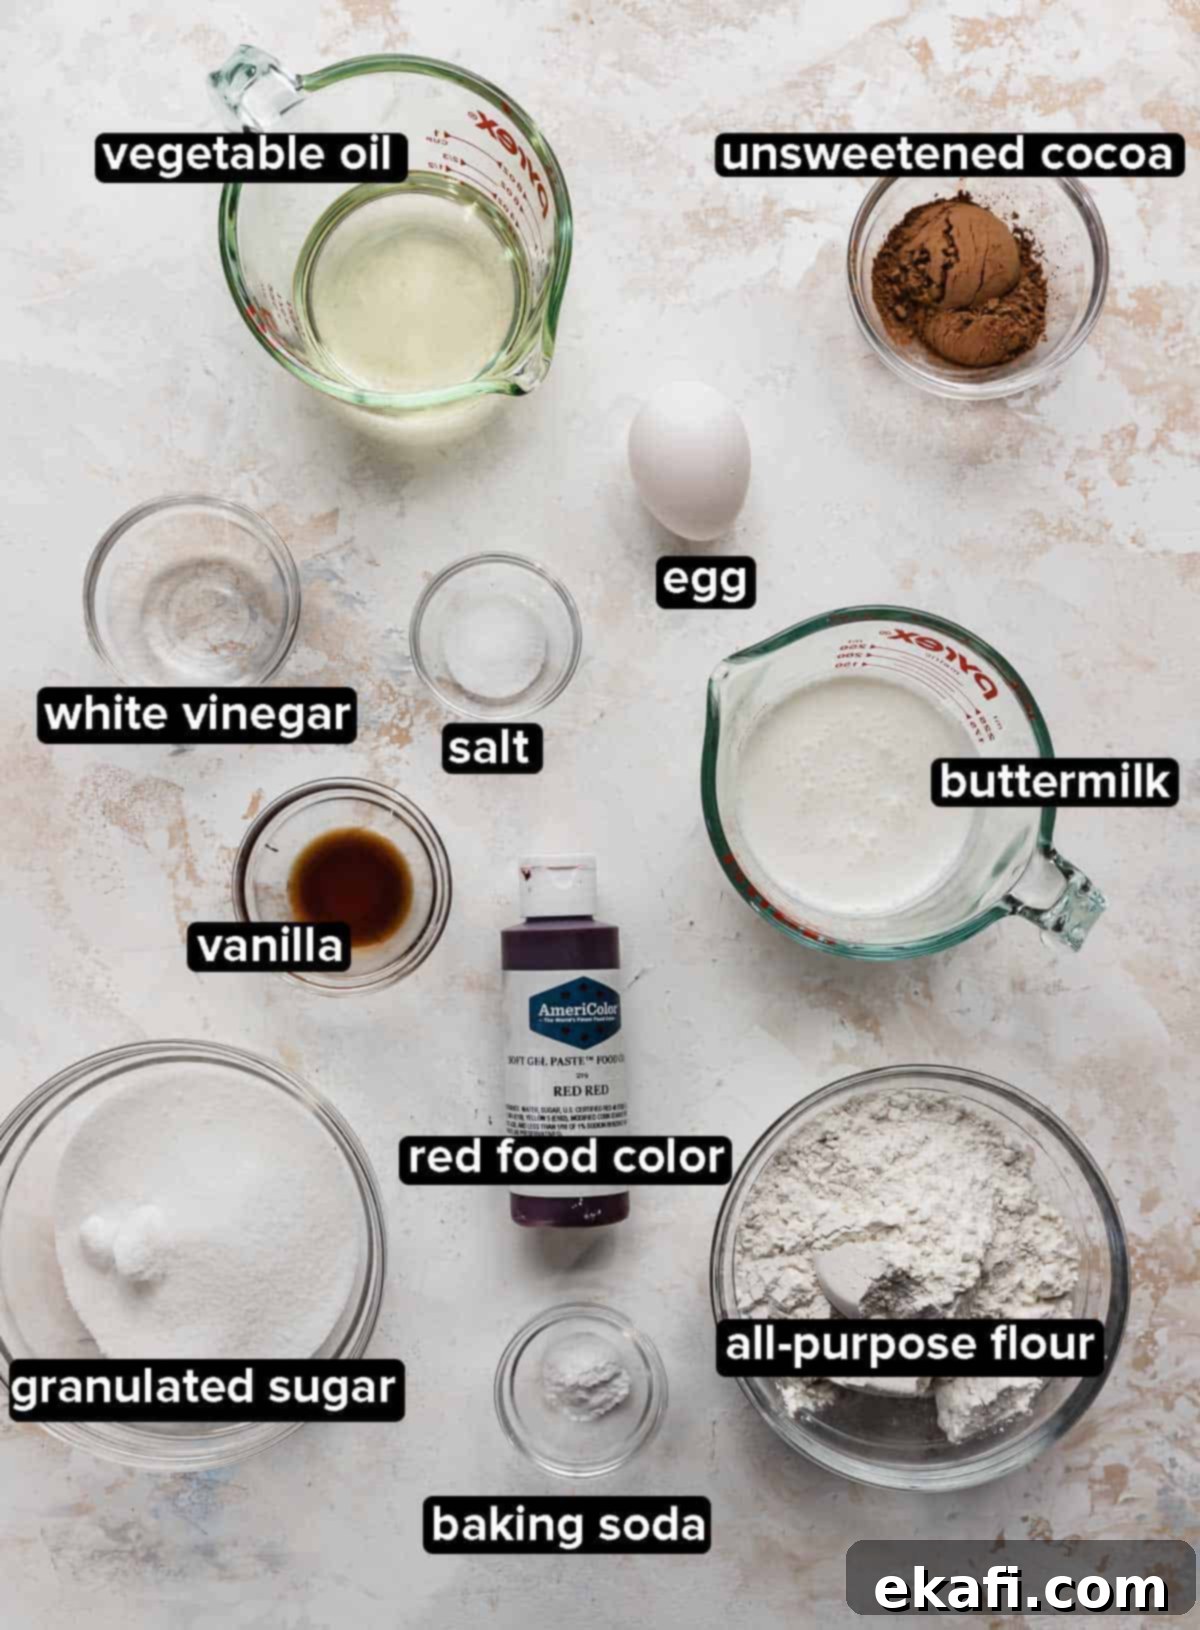
- Unsweetened Cocoa Powder: As mentioned, this recipe calls for a more generous amount of cocoa powder (2 tablespoons) than traditional red velvet recipes. This isn’t just to darken the color; it’s to ensure the distinct, subtle chocolate flavor is truly present and doesn’t get lost amidst the other ingredients. Using unsweetened cocoa helps control the overall sweetness of the cupcake, allowing the unique red velvet tang to shine.
- Buttermilk: A cornerstone of moist red velvet cake, buttermilk is acidic and reacts with the baking soda (a base) to produce carbon dioxide. This chemical reaction creates tiny air bubbles, resulting in a lighter, fluffier, and incredibly tender cake texture. If you don’t have buttermilk on hand, you can easily make a substitute by adding 1/2 tablespoon of white vinegar or lemon juice to a measuring cup, then filling the rest of the way to 1/2 cup with regular milk. Let it sit for 5-10 minutes until it curdles slightly before using.
- Vegetable Oil: Using a neutral-flavored oil like vegetable or canola oil as the primary fat in this recipe is crucial for moisture. Unlike butter, which can solidify and make cakes denser when cooled, oil remains liquid at room temperature, contributing to a consistently moist and tender crumb that stays soft for days.
- White Vinegar: While it might seem unusual, white vinegar is a simple yet incredibly important ingredient for authentic red velvet flavor and color. Its acidity further reacts with the cocoa and baking soda, enhancing the red hue and providing that characteristic, slightly tangy flavor profile that defines red velvet. Don’t skip it!
- Red Gel Food Coloring: For achieving that vibrant, deep red color without altering the batter’s consistency, I highly recommend using gel food coloring. Gel colors are much more concentrated than liquid food coloring, meaning you need to use less to get a bright, rich hue. This prevents adding excess liquid to your batter, which could negatively impact the cupcake’s texture. Aim for a high-quality gel food coloring for the best results.
- Cream Cheese: For the best Cream Cheese Whipped Cream Frosting, ensure your cream cheese is cold and firm straight from the refrigerator. Cold cream cheese helps the frosting hold its shape and prevents it from becoming too soft or runny during the whipping process. Use full-fat block cream cheese for optimal texture and flavor.
- Powdered Sugar: We’re only using 1/2 cup of powdered sugar in this frosting, which is incredibly low compared to most traditional frosting recipes that often call for 5 to 7 cups. This minimal amount contributes just enough sweetness to balance the tang of the cream cheese, allowing the whipped cream and cream cheese flavors to truly shine. It keeps the frosting light, airy, and perfectly sweet without being cloying.
- Heavy Cream: The base of our amazing frosting is cold heavy cream, which, when whipped, gives the frosting its incredibly light, airy, and delicate texture. It’s what makes this a true Whipped Cream Frosting with a cream cheese twist. Don’t worry, despite its lightness, it holds its shape beautifully when piped. Ensure it’s very cold to achieve maximum volume and stability. If you prefer a richer, more traditional cream cheese frosting, you can double the recipe for my Small Batch Cream Cheese Frosting for the perfect amount.
Easy Step-by-Step Instructions for Perfect Red Velvet Cupcakes
Creating these delightful red velvet cupcakes is simpler than you think! Follow these detailed instructions for a baking experience that’s both enjoyable and rewarding.
- Prepare Your Oven and Dry Ingredients. First, preheat your oven to 325ºF (160ºC) and line a 12-cup muffin pan with cupcake liners. In the large bowl of a stand mixer (or a large mixing bowl if using a hand mixer), combine 1 1/4 cups all-purpose flour, 3/4 cup granulated sugar, 2 tablespoons unsweetened cocoa powder, 1/2 teaspoon baking soda, and 1/2 teaspoon salt. Whisk these dry ingredients together thoroughly for about 30 seconds to ensure they are well combined and aerated, which helps with even baking.
- Combine the Wet Ingredients. In a separate liquid measuring cup or a medium bowl, add 1/2 cup buttermilk, 1/2 cup vegetable oil, 1 large egg, 1 teaspoon white vinegar, and 1/2 to 1 teaspoon red gel food coloring. Start with 1/2 teaspoon and add more if you desire a deeper red. Whisk these wet ingredients together until they are fully combined and the color is uniform.
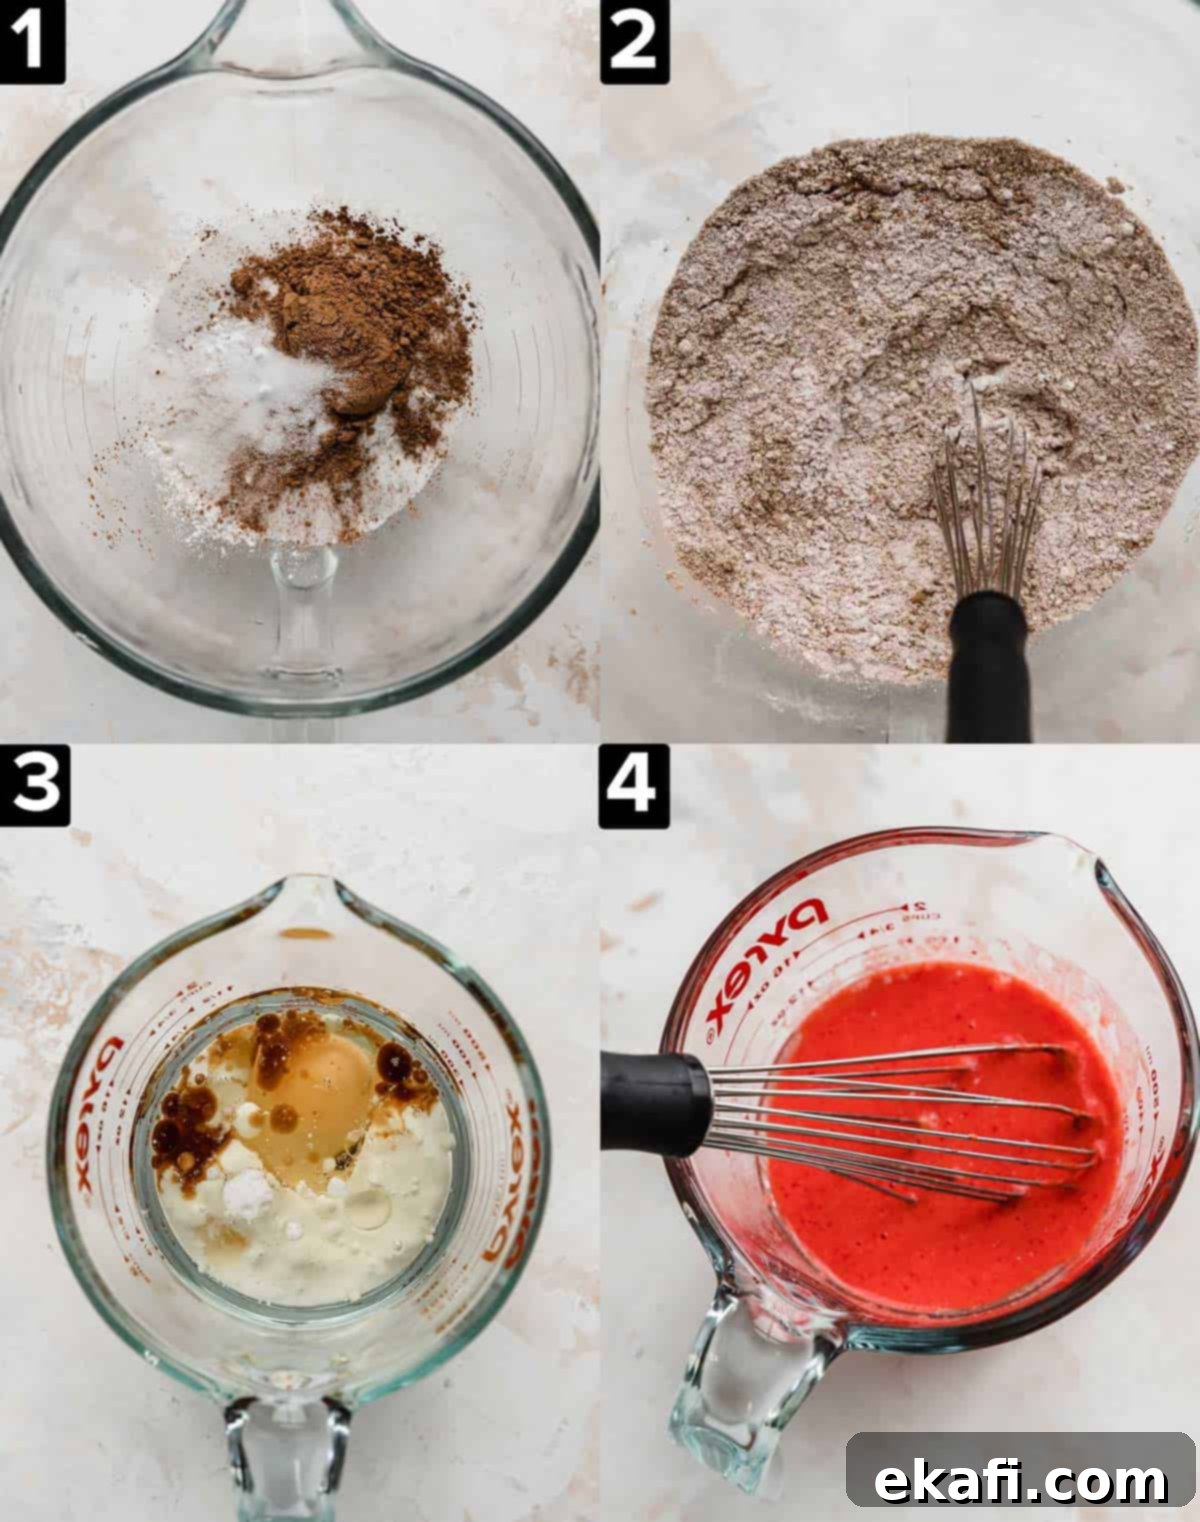
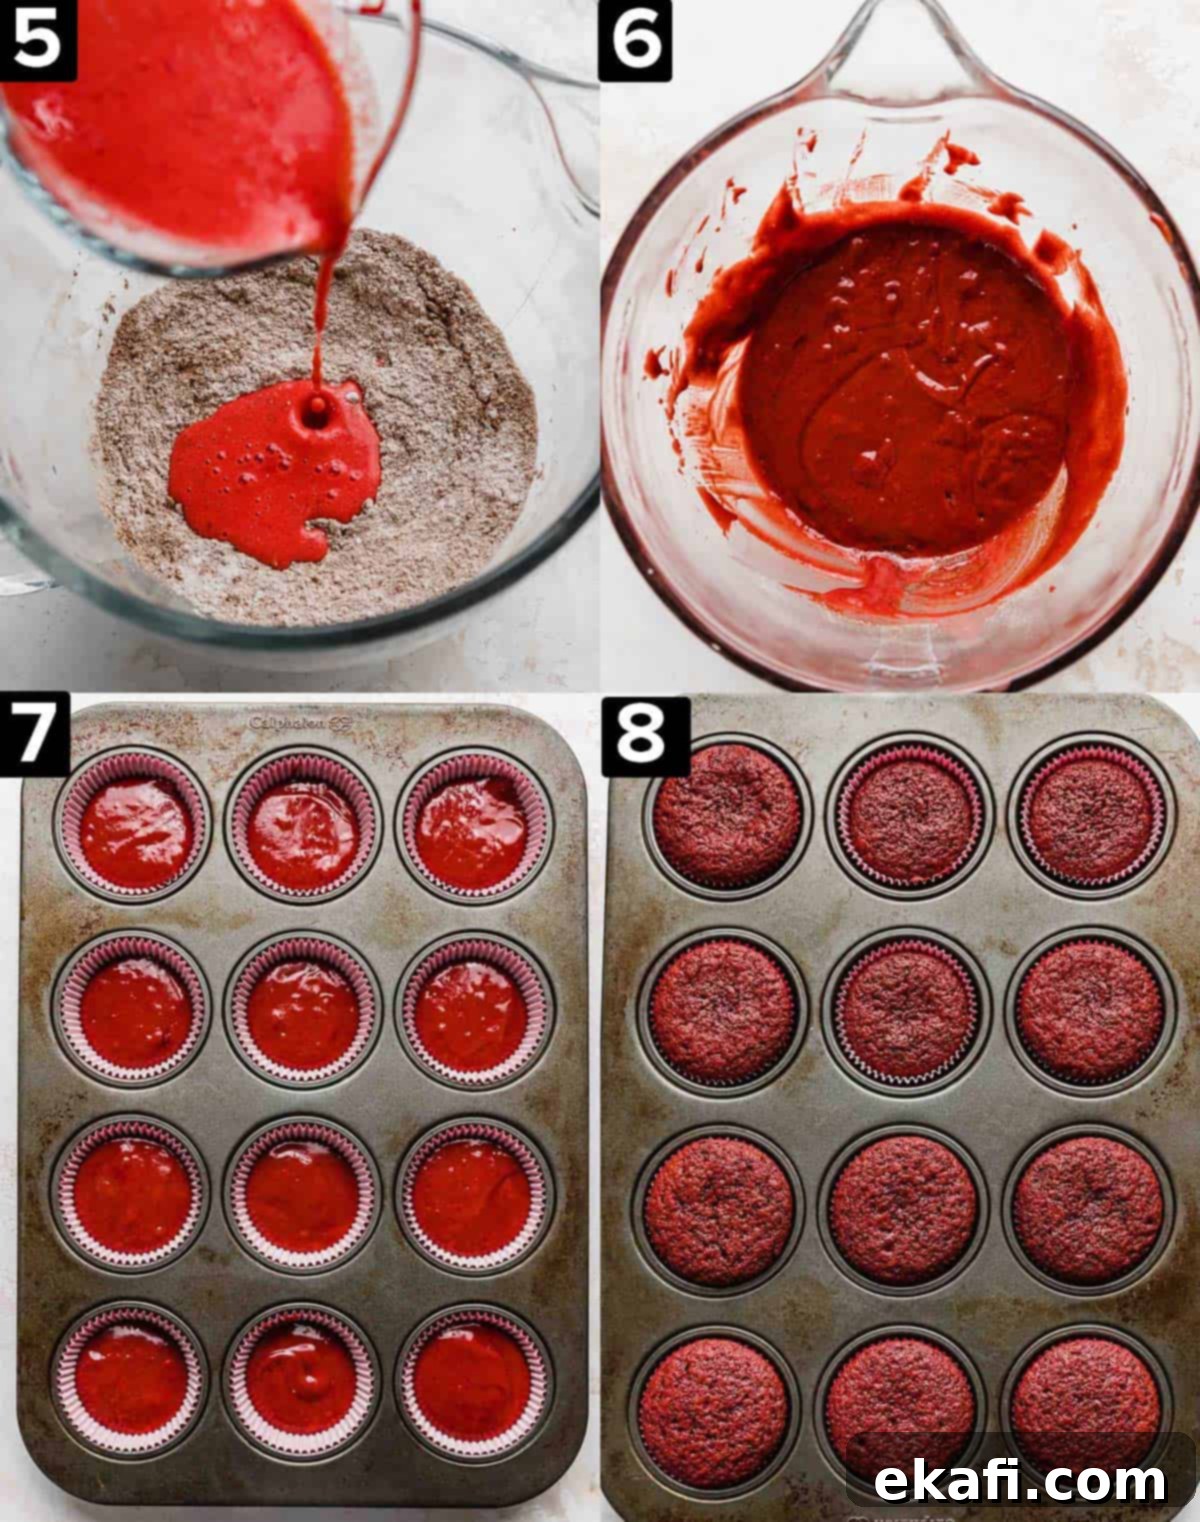
- Combine Wet and Dry Ingredients. Attach the paddle attachment to your stand mixer (or use your hand mixer). With the mixer on low speed, slowly pour the combined wet ingredients into the bowl with the dry ingredients. Mix until the ingredients are just combined and no dry streaks of flour remain. Be careful not to overmix, as this can lead to tough cupcakes. Use a rubber spatula to scrape down the sides and bottom of the bowl, ensuring all ingredients are evenly incorporated for a uniform batter.
- Portion the Batter into Cupcake Pan. Carefully spoon the red velvet batter into each lined cupcake well. Ensure that each well is filled no more than 2/3 full. Filling them too high can cause the cupcakes to bake over the top of the liners, creating an undesirable “muffin top.” For consistent results, a 3-tablespoon cookie scoop (filled slightly less than full) works perfectly for portioning.
- Bake to Perfection. Transfer the cupcake pan to your preheated oven and bake for 18-20 minutes. To check for doneness, insert a toothpick into the center of a cupcake in the middle of the pan. The toothpick should come out with a few moist crumbs attached, but no wet batter. A completely clean toothpick indicates an overbaked, potentially dry cupcake, while wet batter means it needs more time. Once baked, remove the pan from the oven and let the cupcakes cool in the pan for 5 minutes before carefully transferring them to a wire rack to cool completely. Cooling on a rack prevents the bottoms from getting soggy.
- Prepare the Cream Cheese Whipped Cream Frosting. While the cupcakes cool, it’s time to make the star frosting! In the bowl of a stand mixer fitted with a whisk attachment (or a large bowl with a hand mixer), beat 4 oz of cold cream cheese on medium speed until it is completely smooth and creamy, which usually takes about 1 minute. Next, add 1/2 cup powdered sugar and 1/2 teaspoon vanilla extract. Mix on low speed until these ingredients are fully combined and smooth.
- Whip the Frosting to Perfection. With the mixer still on low, slowly pour 1 cup of cold heavy cream down the side of the bowl into the cream cheese mixture. This slow pour along the edge helps prevent the cream from hitting the whisk directly and splashing everywhere. Once all the cream is added, increase the mixer speed to medium-high. Continue mixing until the frosting thickens and holds its shape. This typically takes about 30 seconds to 1 minute, but keep a very close eye on it! Over-mixing can quickly turn the creamy frosting into a soupy mess or even separate it. You’ll know the frosting is perfect when you stop the mixer, dip the whisk attachment into the frosting, and turn it upside down: the frosting should hold its shape and form firm peaks. If it hasn’t reached this stage, mix in 15-second intervals and test again until desired consistency is achieved.
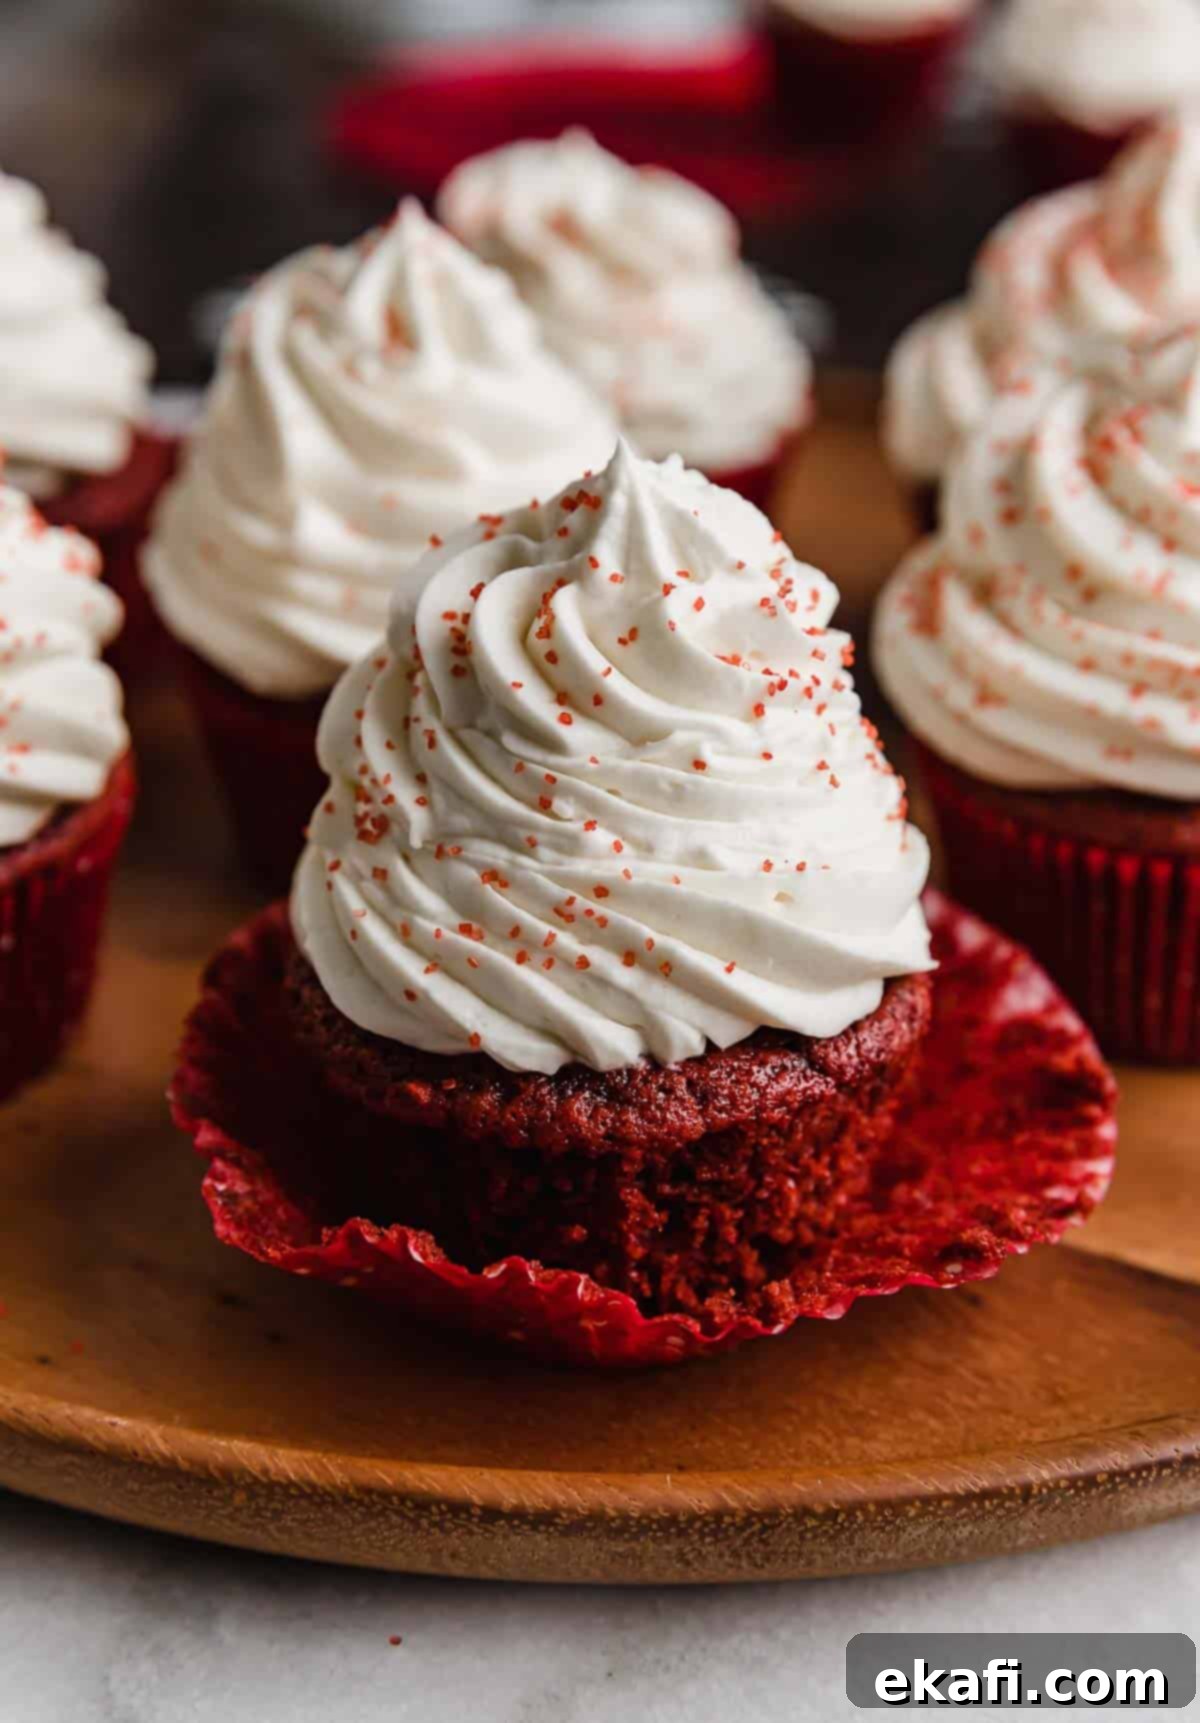
- Frost and Enjoy Your Red Velvet Cupcakes! Once the cupcakes are completely cooled (this is crucial to prevent the frosting from melting!), transfer your freshly made Cream Cheese Whipped Cream Frosting to a piping bag fitted with your favorite tip, or simply use a ziplock bag with a corner snipped off. Pipe a generous swirl of frosting onto each red velvet cupcake. For an extra touch of festivity, top with sprinkles if desired. Serve immediately and savor every light, fluffy, and decadent bite!
Expert Tips for Red Velvet Cupcake Success
Achieve bakery-perfect results every time with these additional tips and tricks:
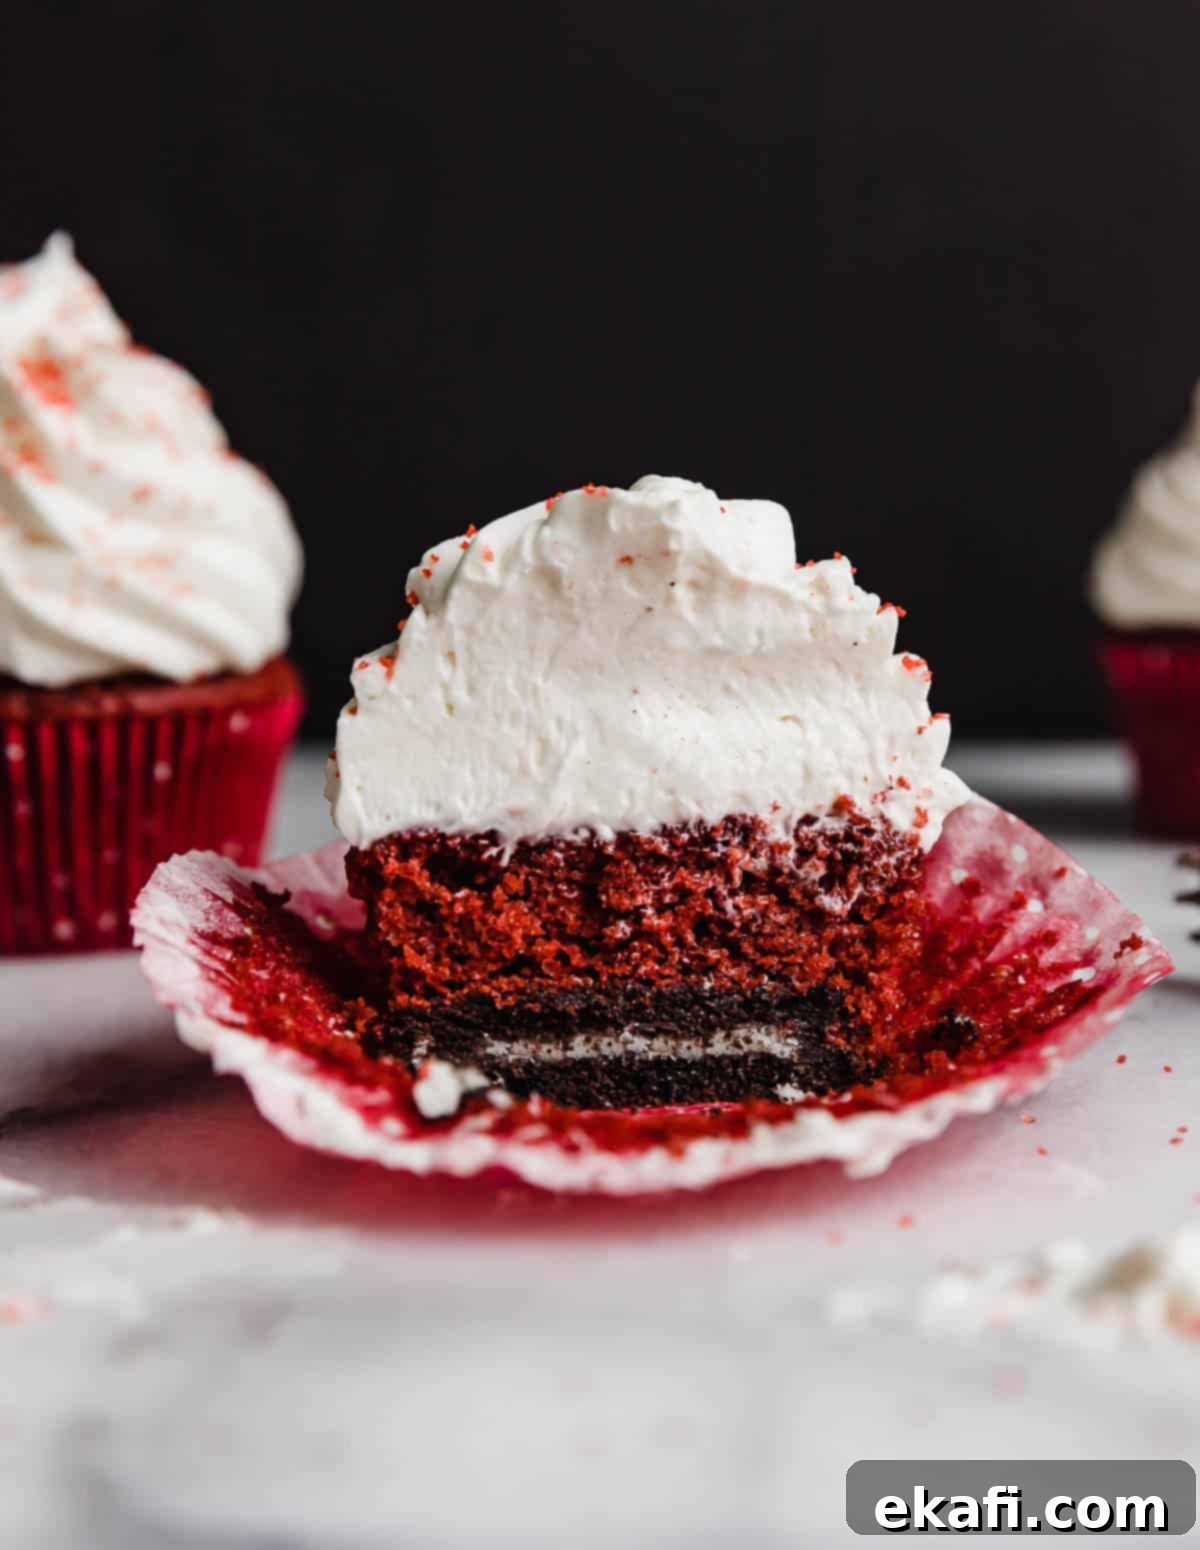
- Fun Oreo Variation: For an extra layer of deliciousness and a delightful crunch, try adding a full Oreo cookie to the bottom of each cupcake liner before spooning in the batter. If you opt for this, remember to adjust the batter amount per well; you’ll only need about 2 to 2 1/2 tablespoons of batter to prevent overflow.
- Perfect Portioning: To ensure all your cupcakes bake evenly and look uniform, precise portioning is key. I find a 3-tablespoon cookie scoop to be the perfect tool. Just don’t fill the scoop entirely to the brim. Remember the golden rule: fill each cupcake well no more than 2/3 full. Overfilling will cause the batter to spill over the liners and create an uneven dome, affecting both appearance and texture.
- Preventing Frosting Splatter: When adding the cold heavy cream to your cream cheese mixture, pour it slowly along the inner edge of the mixing bowl. This technique minimizes splashing, keeping your kitchen cleaner and ensuring the cream is gradually incorporated for a smooth frosting.
- Frosting Consistency is Key: After incorporating the heavy cream, turn your mixer to medium-high speed. The frosting will quickly begin to thicken and take shape. Mix for approximately 30-60 seconds, but watch it diligently! Over-mixing cream cheese whipped cream frosting can cause it to become soupy and lose its structure or even curdle.
- Testing for Perfect Frosting Peaks: To confirm your frosting is ready, stop the mixer and lift the whisk attachment. The frosting should cling to the whisk and hold firm, defined peaks without drooping. If it’s still too soft, mix for additional 15-second intervals, checking the consistency after each increment, until those beautiful peaks form.
- Food Coloring Choices: While gel food coloring is highly recommended for its concentration and minimal liquid content, you can certainly use liquid red food coloring if that’s what you have available. Just be aware you might need to use a bit more to achieve the desired vibrant red hue, and it could slightly thin the batter, so adjust accordingly.
- Cool Completely: Always ensure your cupcakes are entirely cooled before you apply the frosting. Frosting warm cupcakes will cause the frosting to melt, slide off, and create a messy presentation. Patience is a virtue here!
- Do Not Overmix Batter: Just as with the frosting, overmixing your cupcake batter can develop the gluten too much, leading to tough and chewy cupcakes instead of light and tender ones. Mix only until the dry ingredients are just incorporated and no streaks of flour remain.
Make Ahead, Storing, and Freezing Your Red Velvet Cupcakes
Planning ahead or dealing with leftovers? Here’s how to properly store your red velvet masterpieces to maintain their freshness and flavor:
- Make-Ahead Frosting: You can prepare the cream cheese whipped cream frosting 1-2 days in advance. Store it in an airtight container in the refrigerator. Before using, give it a quick whip with a hand mixer on low speed to restore its light, fluffy texture. It’s best used within 1-2 days of making for optimal freshness, ensuring your treats stay delicious for a few more days after frosting.
- Storing Frosted Cupcakes: Due to the cream cheese and heavy cream in the frosting, frosted red velvet cupcakes must be stored in the refrigerator. Place them in a covered container to prevent them from drying out. They will keep well for 3-4 days, though they are truly at their peak freshness and flavor on day one or two.
- Storing Unfrosted Cupcakes: If you’re not ready to frost them immediately, unfrosted red velvet cupcakes can be stored at room temperature in an airtight container or a ziplock bag for up to 3 days. Ensure they are completely cool before storing to prevent condensation.
- Freezing Unfrosted Cupcakes: For longer storage, unfrosted cupcakes freeze beautifully. Place them in a single layer in a freezer-safe container or ziplock bag, ensuring as much air is removed as possible. They can be frozen for up to 3 months. When ready to enjoy, thaw them at room temperature for a few hours before frosting.
- Freezing Frosted Cupcakes: To freeze frosted red velvet cupcakes, first “flash freeze” them. Place the frosted cupcakes on a baking sheet and freeze until the frosting is completely firm (this prevents smudging). Once firm, individually wrap each cupcake in plastic wrap, then place them in an airtight freezer-safe container or bag. They can be frozen for up to 3 months. To thaw, remove them from the freezer, unwrap, and place them in a covered container in the refrigerator overnight. This slow thaw helps maintain the frosting’s integrity.
Red Velvet Cupcake Recipe FAQs
Got questions about baking these classic cupcakes? Here are answers to some frequently asked questions:
Yes, they absolutely are! Red velvet cupcakes are characterized by a subtle chocolate flavor profile, created by using cocoa powder in the batter. However, unlike a traditional chocolate cake, the amount of cocoa is less, and it’s often combined with acidic ingredients like buttermilk and vinegar, which react to enhance the red color and create a unique, slightly tangy taste that sets it apart from a standard chocolate cupcake.
It depends on whether they are frosted or not. If your red velvet cupcakes are unfrosted, you can comfortably store them at room temperature in an airtight container or a ziplock bag for up to 3 days. However, if they are topped with our delicious Cream Cheese Whipped Cream Frosting, refrigeration is a must! This is because the frosting contains dairy products (cream cheese and heavy cream) that require cold temperatures to remain safe and maintain their texture. Store frosted cupcakes in an airtight container in the fridge for 3-4 days.
Dry cupcakes are a common baking woe, and it usually comes down to two main culprits: overmixing the cupcake batter or overbaking the cupcakes. When you overmix batter, you develop the gluten in the flour too much, resulting in a tough, dry texture. Always mix until ingredients are just combined, with no visible dry streaks. Overbaking, on the other hand, removes too much moisture. To avoid this, pull the cupcakes out of the oven when a toothpick inserted into the center comes out with a few moist crumbs attached. If the toothpick is completely clean, they’ve likely baked too long; if it comes out with wet batter, they need more time.
Historically, the subtle red hue in red velvet cakes came from a natural chemical reaction between the anthocyanin in cocoa powder, the acidity of buttermilk and vinegar, and baking soda. However, most modern cocoa powders are processed differently and don’t yield a strong red color naturally. This is why red food coloring, particularly concentrated gel food coloring, is now essential to achieve the vibrant, deep red associated with classic red velvet. The combination of ingredients still plays a role, but food coloring is the primary contributor to the striking color today.
While butter can be used, this recipe specifically calls for vegetable oil because it contributes to a consistently moist and tender crumb that stays soft for longer. Butter, being solid at room temperature, can lead to a slightly denser cake that might dry out faster. If you prefer the flavor of butter, you could substitute it, but be aware that the texture of your cupcakes may be slightly different and less moist over time. For the ultimate moist red velvet, stick with oil!
Explore More Delicious Cupcake Recipes
If you’ve enjoyed these Red Velvet Cupcakes, you’ll love exploring other delightful cupcake creations. Expand your baking repertoire with these fantastic recipes:
- The Best Chocolate Cupcake Recipe
- Black Velvet Cupcakes
- Ferrero Rocher Cupcakes
- Cookie Dough Cupcakes
- Best Ever German Chocolate Cupcakes
Did you make this recipe? I’d absolutely love to hear about your experience! Leave a star rating and review right here on the blog post, or scroll down to the recipe card below and share your thoughts there.
Stay connected and up-to-date with all our latest recipes and baking adventures by following us on Instagram, TikTok, YouTube, Facebook, and Pinterest. Don’t forget to tag us in your creations!
Print
SaveSaved!
Review
Red Velvet Cupcakes
10 minutes
20 minutes
30 minutes
12 cupcakes
Prevent your screen from going dark
Ingredients
Cupcakes
- 1 1/4 cups all-purpose flour
- 3/4 cup granulated sugar
- 2 tablespoons unsweetened cocoa powder
- 1/2 teaspoon baking soda
- 1/2 teaspoon salt
- 1/2 cup buttermilk
- 1/2 cup vegetable oil – or canola oil
- 1 teaspoon vanilla extract
- 1 large egg
- 1 teaspoon white vinegar
- 1/2-1 teaspoon red gel food coloring
Cream Cheese Whipped Cream Frosting
- 4 oz cream cheese – cold
- 1/2 cup powdered sugar
- 1/2 teaspoon vanilla extract
- 1 cup heavy cream – cold
Instructions
Cupcakes
-
Preheat oven to 325°F (160°C). Line a 12-cup muffin pan with cupcake liners.
-
In the bowl of a stand mixer, whisk together the flour, granulated sugar, cocoa powder, baking soda, and salt.
-
In a large liquid measuring cup, whisk together the buttermilk, vegetable oil, vanilla extract, large egg, white vinegar, and red gel food coloring until well combined and the color is uniform.
-
With the stand mixer fitted with the paddle attachment and on low speed, slowly pour the wet ingredients into the bowl with the dry ingredients. Mix until just combined and no dry streaks of flour remain. Use a rubber spatula to scrape down the bottom and sides of the bowl to ensure everything is evenly incorporated without overmixing.
-
Portion the batter into the prepared cupcake liners, filling each no more than 2/3 full. (A scant 3-tablespoon sized cookie scoop works well for consistent portioning). Bake for 18-20 minutes, or until a toothpick inserted into the center of a cupcake comes out with a few moist crumbs but no wet batter. Remove from the oven and let cool in the pan for 5 minutes, then transfer to a wire rack to cool completely before frosting.
Cream Cheese Whipped Cream Frosting
-
In a large bowl, or the bowl of a stand mixer fitted with a whisk attachment, beat the cold cream cheese on medium speed until completely smooth and creamy, about 1 minute.
-
Add the powdered sugar and vanilla extract to the cream cheese. Mix on low speed until smooth and fully combined.
-
With the mixer running on low speed, slowly pour the 1 cup of cold heavy cream down the side of the bowl, into the cream cheese mixture. Pouring along the edge helps prevent splashing. Once all the cream is added, increase the mixer to medium-high speed. Continue mixing until the frosting thickens and holds its shape. This should take about 30 seconds to 1 minute, but keep a close eye on the frosting, as over-mixing can cause it to become soupy.
-
You’ll know the frosting is finished when you stop the mixer, dip the whisk attachment into the frosting, and turn it upside down. The frosting should keep its shape and hold firm peaks without drooping. If yours hasn’t reached this stage, mix in 15-second intervals and test again until the desired consistency is achieved.
Notes
Refrigeration for Frosted Cupcakes: Any frosted cupcakes must be stored in the fridge. The frosting, made with heavy cream and cream cheese, requires refrigeration to maintain its freshness, safety, and stable consistency.
Nutrition
Carbohydrates: 30g (10%)
Protein: 3g (6%)
Fat: 21g (32%)
Saturated Fat: 8g (40%)
Polyunsaturated Fat: 6g
Monounsaturated Fat: 5g
Trans Fat: 0.1g
Cholesterol: 49mg (16%)
Sodium: 195mg (8%)
Potassium: 78mg (2%)
Fiber: 1g (4%)
Sugar: 19g (21%)
Vitamin A: 457IU (9%)
Vitamin C: 0.1mg
Calcium: 39mg (4%)
Iron: 1mg (6%)
Did you make this recipe?Please leave a star rating and review on the blog post letting me know how you liked this recipe! Take a picture and tag @saltandbaker on Tik Tok, Instagram, and Facebook so I can see what you’re making!
