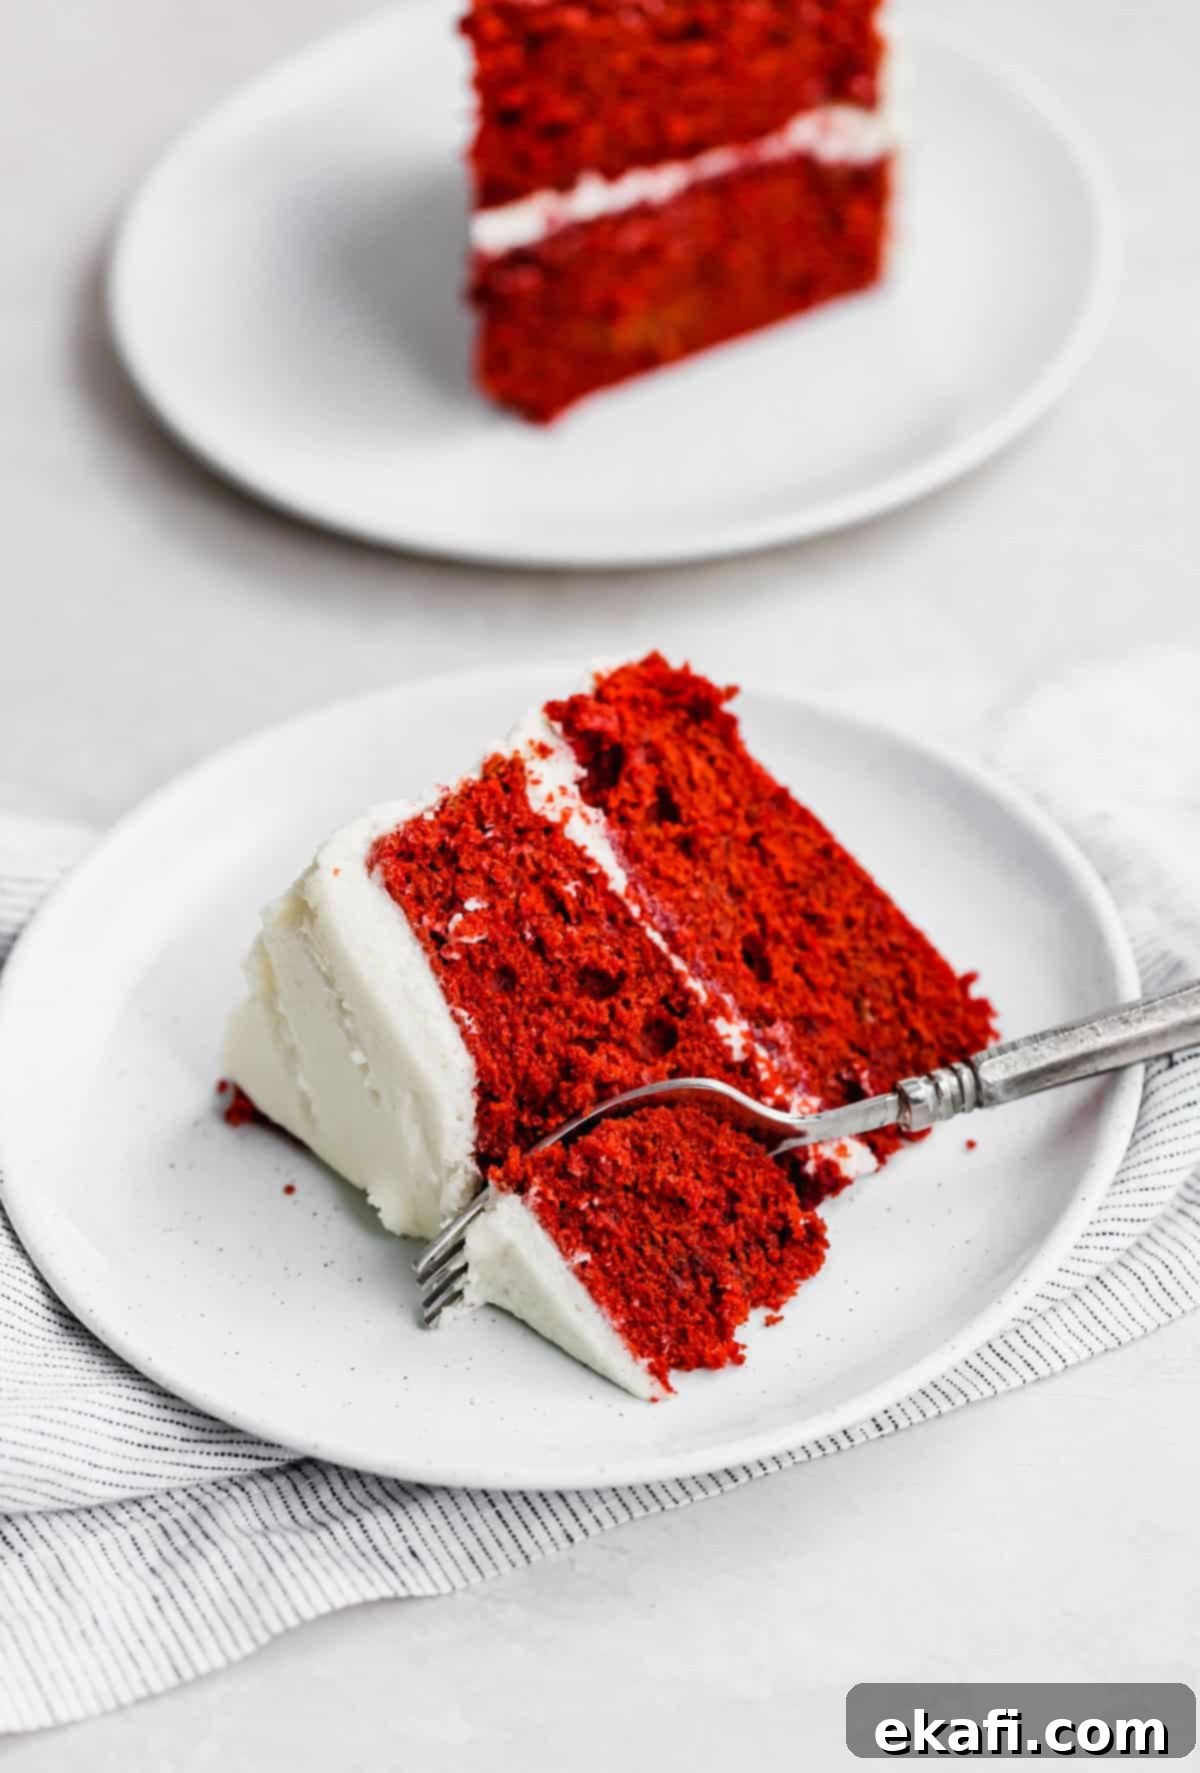
The Best Old Fashioned Red Velvet Cake Recipe: Light, Fluffy & Perfectly Moist from Scratch
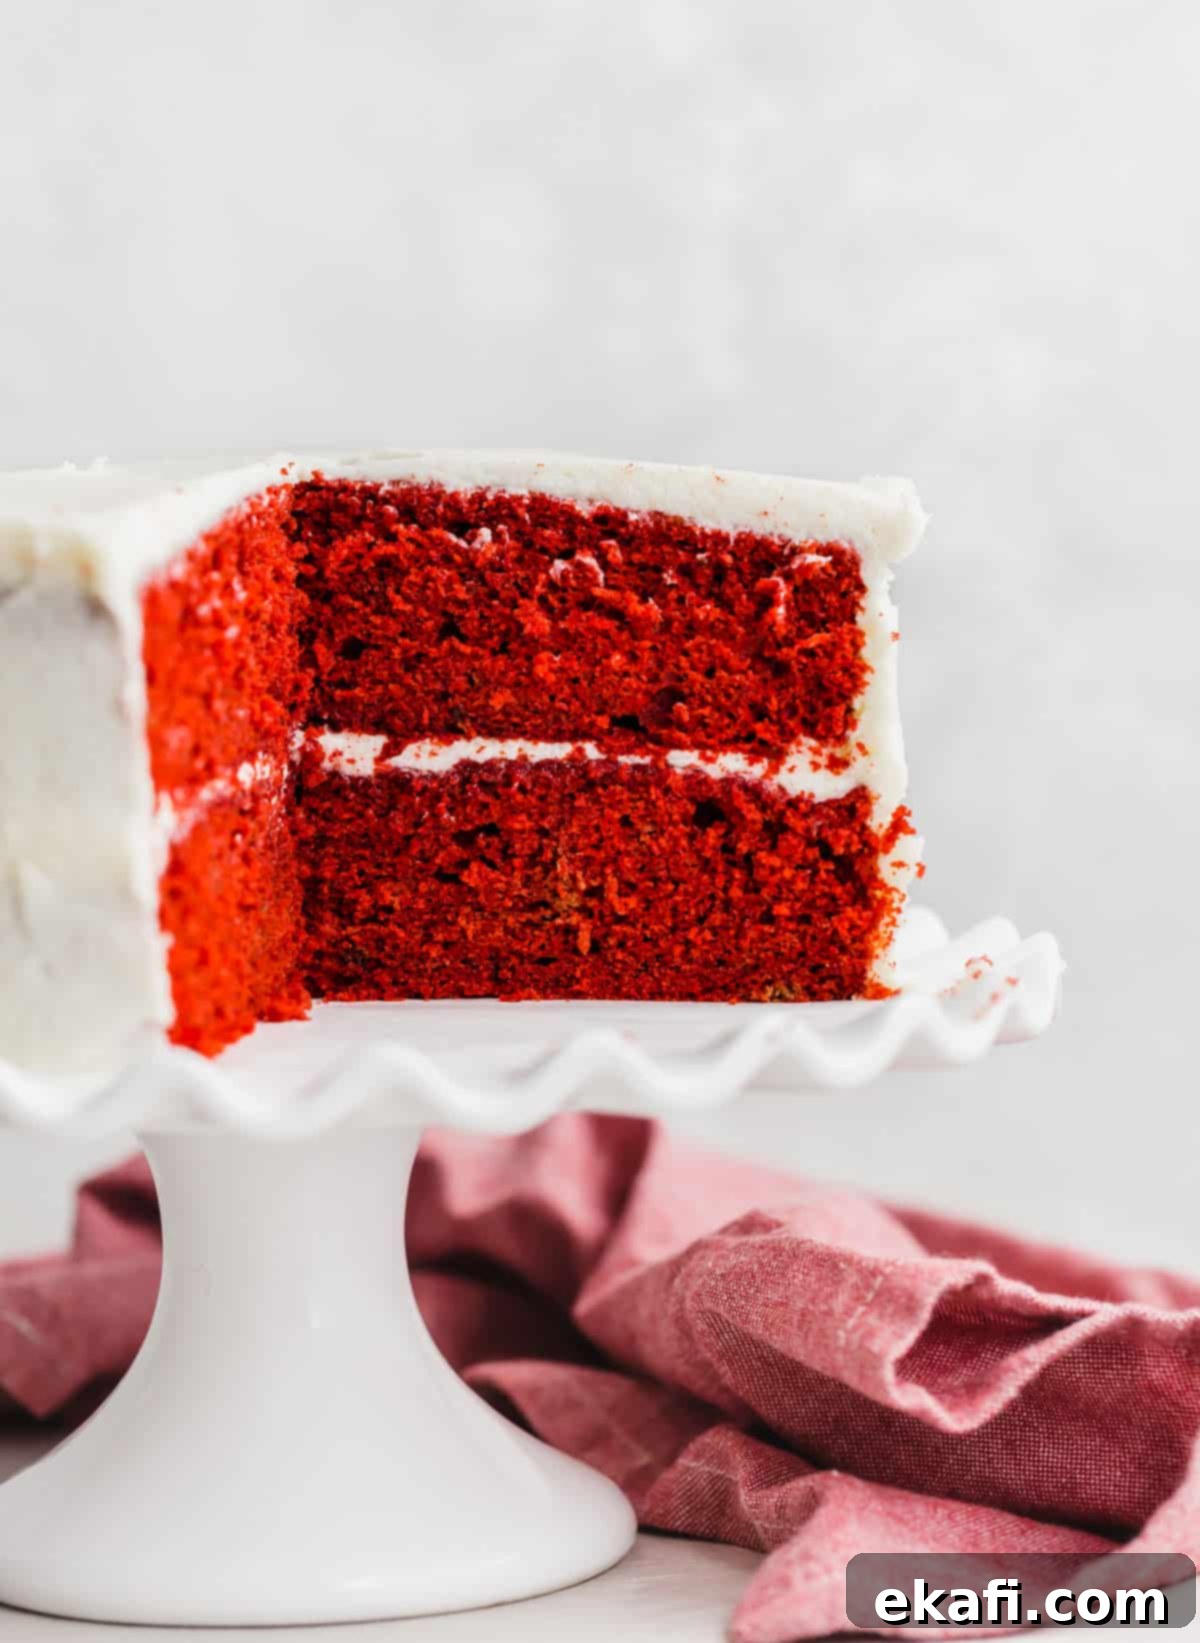
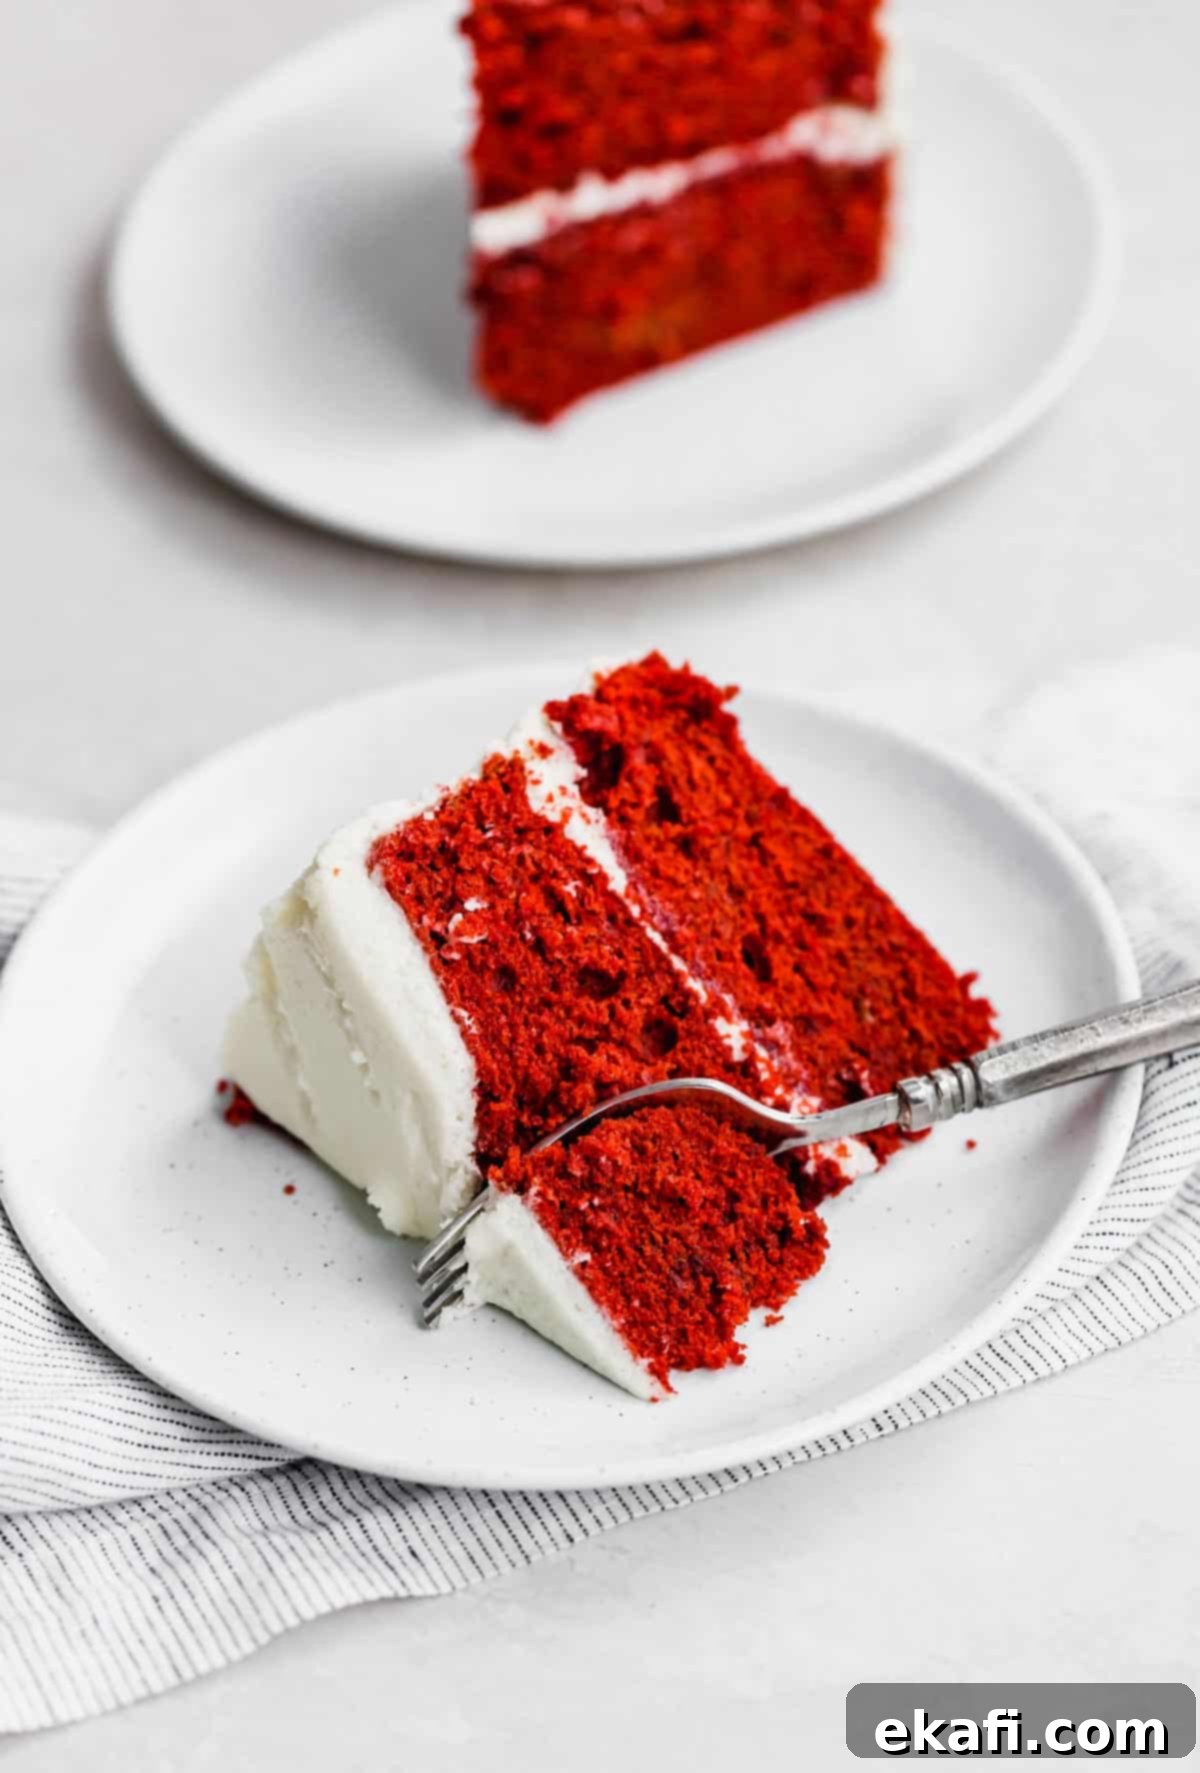
Prepare to be enchanted by this exquisite Old Fashioned Red Velvet Cake, a recipe so perfect it will become your go-to for Valentine’s Day, festive holidays, or any celebratory birthday. What truly sets this cake apart are its layers: incredibly light and delightfully fluffy, a texture achieved by gently folding whipped egg whites into the batter. This traditional approach, combined with a perfectly balanced old-fashioned icing, ensures a dessert that’s sweet without being overpowering, beautifully complementing the cake’s subtle chocolatey tang.
The moment I spot a red velvet dessert, whether it’s delicate red velvet macarons or a towering cake, my mind instantly drifts to the romance of Valentine’s Day. That iconic, rich red hue simply radiates “L-O-V-E.” If you’re planning a Valentine’s Day celebration and searching for more delightful red-themed treats, don’t miss out on trying my vibrant Red Velvet Waffles, addictively crunchy Red Velvet Popcorn, or my charming Strawberry Chex Mix. While the Chex Mix leans more towards a pretty pink, it’s still absolutely ideal for adding a touch of festive cheer to the holiday!
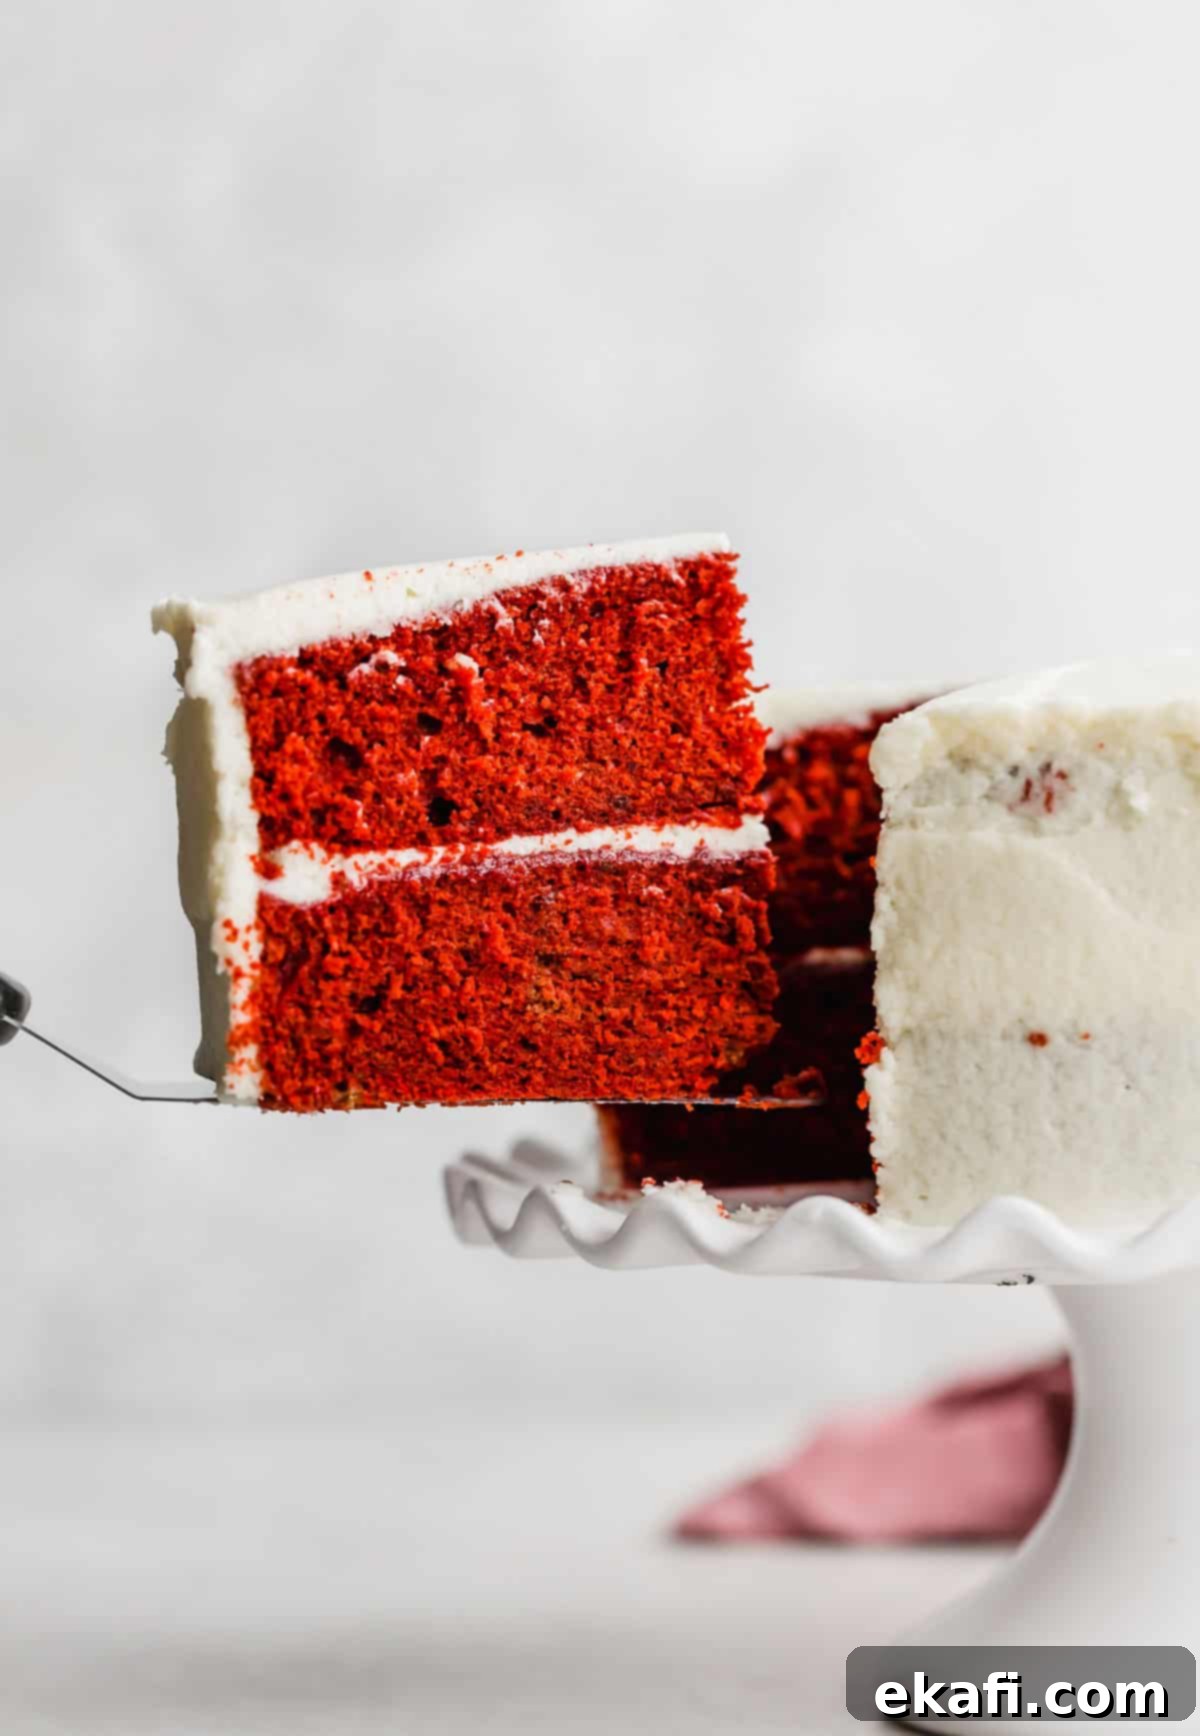
Why This Old Fashioned Red Velvet Cake Recipe Stands Out
This isn’t just another red velvet cake recipe; it’s a meticulously crafted formula designed for exceptional results every time. Here’s why this particular recipe guarantees a show-stopping dessert:
- Achieve a Truly Light and Fluffy Cake: The hallmark of a truly great red velvet cake is its ethereal lightness and tender crumb. Many home bakers, myself included, often worry about cakes sinking in the center. To conquer this common baking fear and ensure your cake rises beautifully every time, this recipe incorporates a crucial technique: separating the eggs and whipping the whites to stiff peaks. Once the main batter is prepared, these aerated egg whites are delicately folded in. This simple yet profound step, when executed with care, infuses the batter with air, resulting in an incredibly fluffy cake with a delicate, melt-in-your-mouth texture. This method is key to preventing a dense or collapsed cake, leaving you with layers that are a joy to behold and eat.
- Experience an Exceptionally Moist Red Velvet Cake: Dry cakes are a baker’s worst nightmare, but this old fashioned red velvet cake is anything but! The secret to its outstanding moisture lies in the generous inclusion of vegetable oil—a full cup, to be precise. Vegetable oil is a liquid at room temperature, which contributes to a more consistently moist crumb compared to solid fats. While oil provides incredible moisture, we also incorporate butter into the recipe. This combination offers the best of both worlds: the superior moisture retention of oil and the rich, classic flavor profile that only butter can deliver. The added fat from both ingredients ensures a cake that stays moist and delicious for days, making it perfect for making ahead.
- The Best Red Velvet Cake Recipe from Scratch: Forget those boxed mixes and embrace the superior taste and texture of a truly homemade red velvet cake. Several elements elevate this to the “best” category. Firstly, we opt for cake flour over all-purpose flour. Cake flour has a lower protein content, which creates a softer, more tender crumb crucial for red velvet. Secondly, the strategic use of both butter and vegetable oil (as explained above) ensures both flavor and moisture. But perhaps the most distinctive element is the old-fashioned frosting. Unlike the ubiquitous cream cheese frosting (which is lovely, but often too rich for a cake already bursting with flavor), this traditional frosting offers a delicate sweetness that perfectly balances the cake without overwhelming it. This harmonious pairing creates a red velvet experience that is genuinely authentic and deeply satisfying. Save your red velvet cake mix for cookies and treat yourself to the real deal!
Essential Ingredient Insights
Understanding the role of each ingredient is key to mastering this traditional red velvet cake. Here’s a closer look at what makes this recipe special:
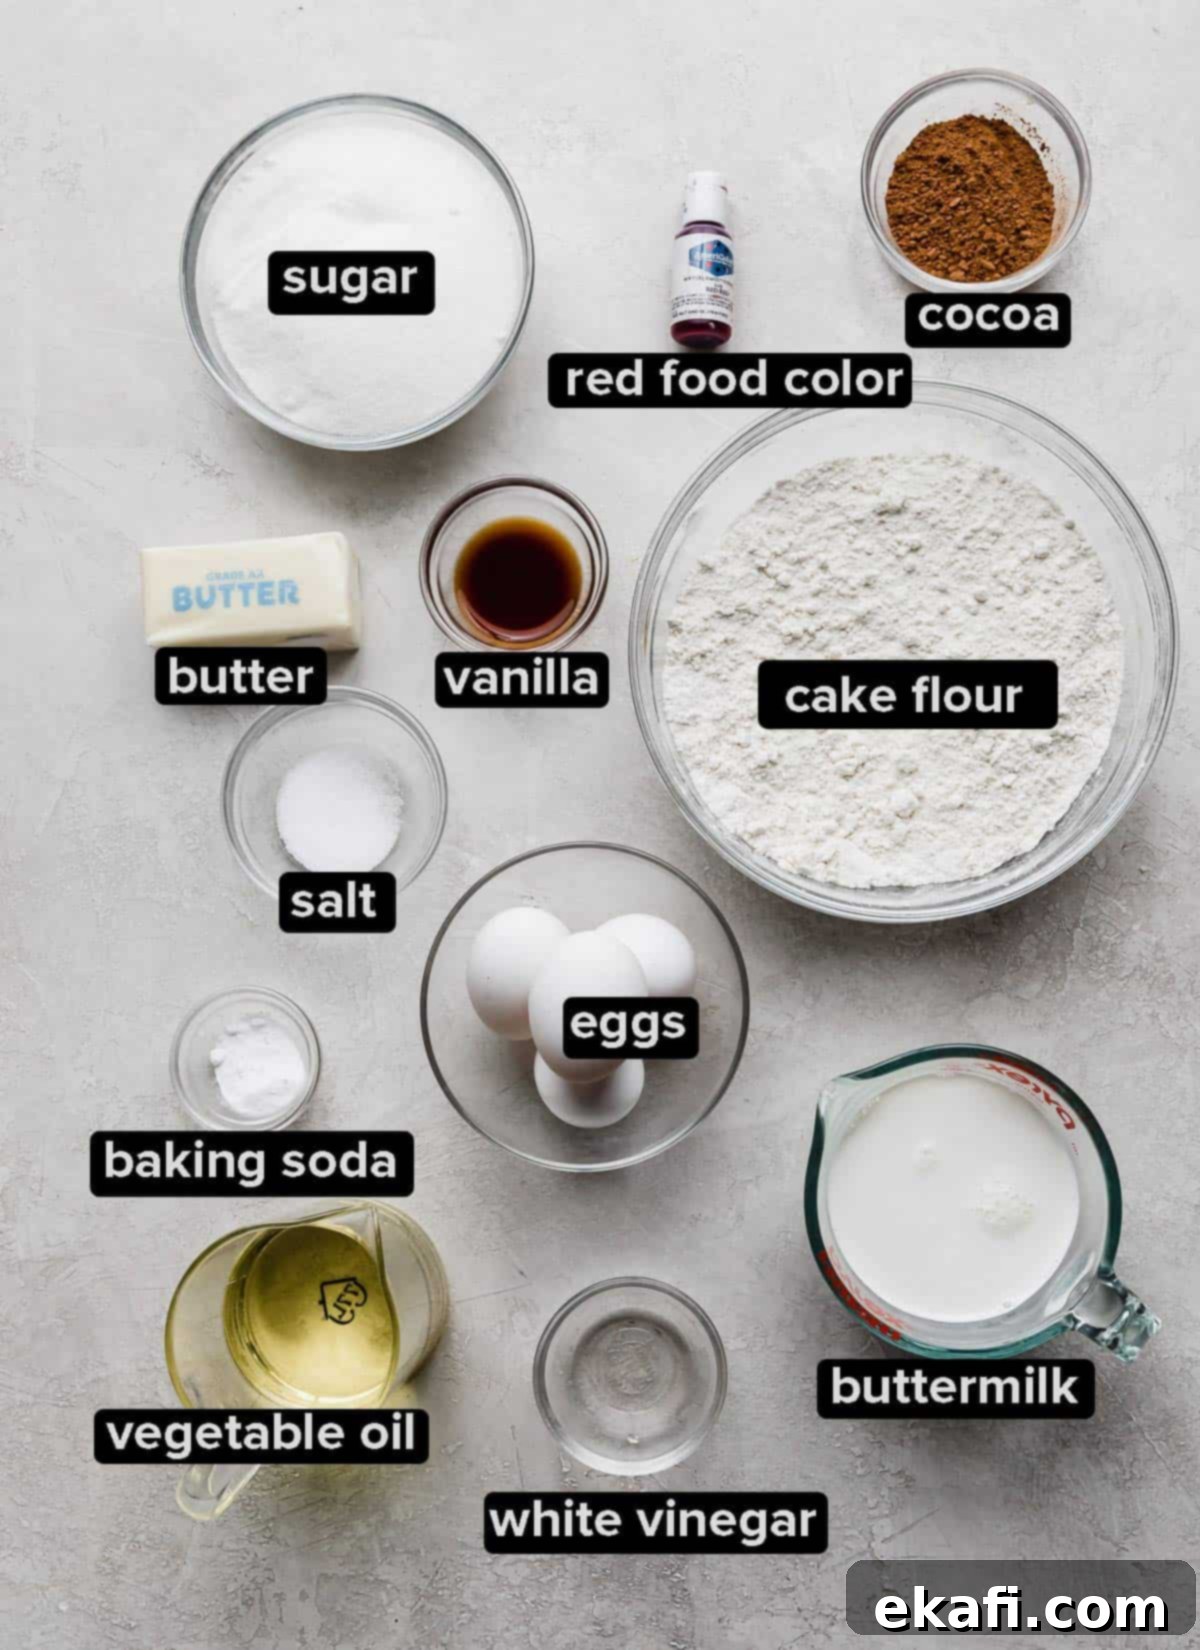
- Cake Flour: While some recipes opt for all-purpose flour, cake flour is indispensable for achieving the signature delicate and tender crumb of an authentic red velvet cake. Its lower protein content results in less gluten development, preventing a tough cake and ensuring that beautiful, fine texture this old-fashioned recipe demands.
- Baking Soda: This powerful leavening agent is critical. As an alkaline compound, baking soda reacts with acidic ingredients like white vinegar and buttermilk in the batter. This reaction produces carbon dioxide gas, which creates air pockets, giving the cake its volume, lift, and that wonderfully fluffy, non-dense texture.
- Unsweetened Cocoa Powder: Red velvet cake is not a chocolate cake; it’s a “red” cake with a subtle chocolate undertone. The specific amount of unsweetened cocoa powder used in this recipe is carefully measured to provide just enough chocolate flavor to complement the distinct red velvet profile without turning it into an overpowering chocolate cake.
- Unsalted Butter: The inclusion of butter, alongside vegetable oil and buttermilk, is a testament to the incredible moisture and rich flavor this cake delivers. Butter contributes significantly to the cake’s structure and imparts a classic, satisfying richness that truly enhances the overall taste.
- Vegetable Oil: A full cup of vegetable oil is a key player in ensuring this cake is incredibly moist. Unlike butter, which is solid at room temperature, oil remains liquid, creating a cake crumb that stays soft and tender for a longer period. This is essential for a cake that’s not only delicious on baking day but also maintains its quality for several days after.
- Eggs (Separated): This is one of the recipe’s most important techniques! The egg yolks are incorporated directly into the batter for richness and color. The egg whites, however, are whipped separately until they form stiff peaks. This aerated meringue is then gently folded into the batter, adding an extra layer of lift and contributing significantly to the cake’s light and fluffy texture, helping to prevent sinking.
- Buttermilk: The acidity in buttermilk plays a dual role. Firstly, it activates the baking soda, contributing to the cake’s rise. Secondly, the acid works to break down the gluten strands in the flour, resulting in an exceptionally tender and moist cake. Its tangy flavor also adds depth and a classic characteristic to red velvet.
- Gel Red Food Coloring: To achieve that iconic, deep, luxurious red color without affecting the cake’s texture, gel food coloring is highly recommended. While liquid red food coloring can be used, you’ll need a much larger quantity to achieve the same vibrant hue, which can sometimes thin the batter. I personally use this red gel food coloring for consistent, striking results.
Detailed Step-by-Step Baking Guide
Follow these instructions carefully to ensure your Old Fashioned Red Velvet Cake turns out perfectly moist, fluffy, and beautifully vibrant:
- Prepare the Cake Batter with Precision. Begin by whisking together all the dry ingredients – cake flour, baking soda, cocoa powder, and salt – in a medium bowl until thoroughly combined, then set this mixture aside. In the bowl of your stand mixer, cream the room-temperature butter and granulated sugar on medium speed for about 2-3 minutes until light and fluffy. Next, incorporate the vegetable oil, egg yolks, vanilla extract, and white vinegar, mixing on low to medium-low speed until everything is just combined. Now, alternately add the dry ingredients and the buttermilk to the wet mixture, starting and ending with the dry ingredients. Mix until just combined after each addition, being careful not to overmix.
- Infuse with Vibrant Red Food Coloring. Once your batter is mostly combined, it’s time to add the gel red food coloring. Start with the recommended amount (about 2 teaspoons) and mix until the color is uniformly distributed throughout the batter. Mix just until combined to avoid overworking the gluten.
- Gently Fold in Whipped Egg Whites. This step is crucial for the cake’s light texture. Using a rubber spatula, carefully and gently fold the previously whipped egg whites into the red velvet cake batter. The goal is to incorporate the air without deflating the whites. Continue folding until no streaks of white remain, and the batter appears uniformly airy.
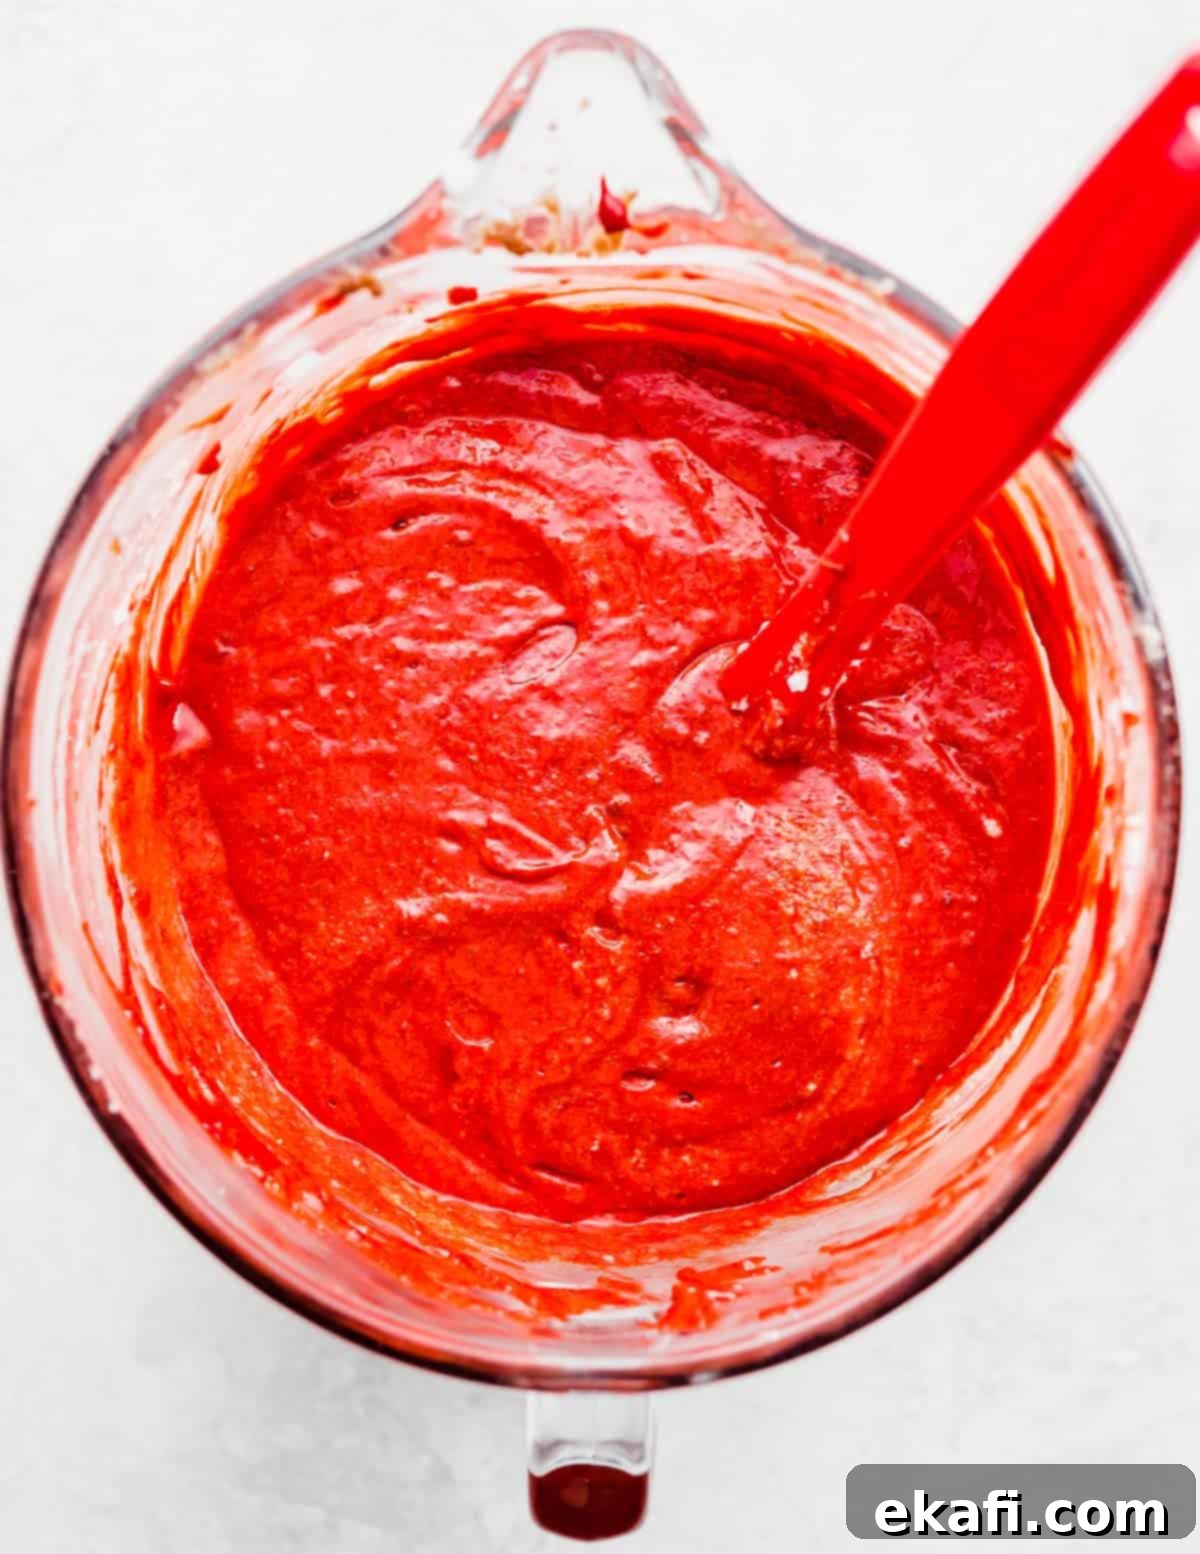
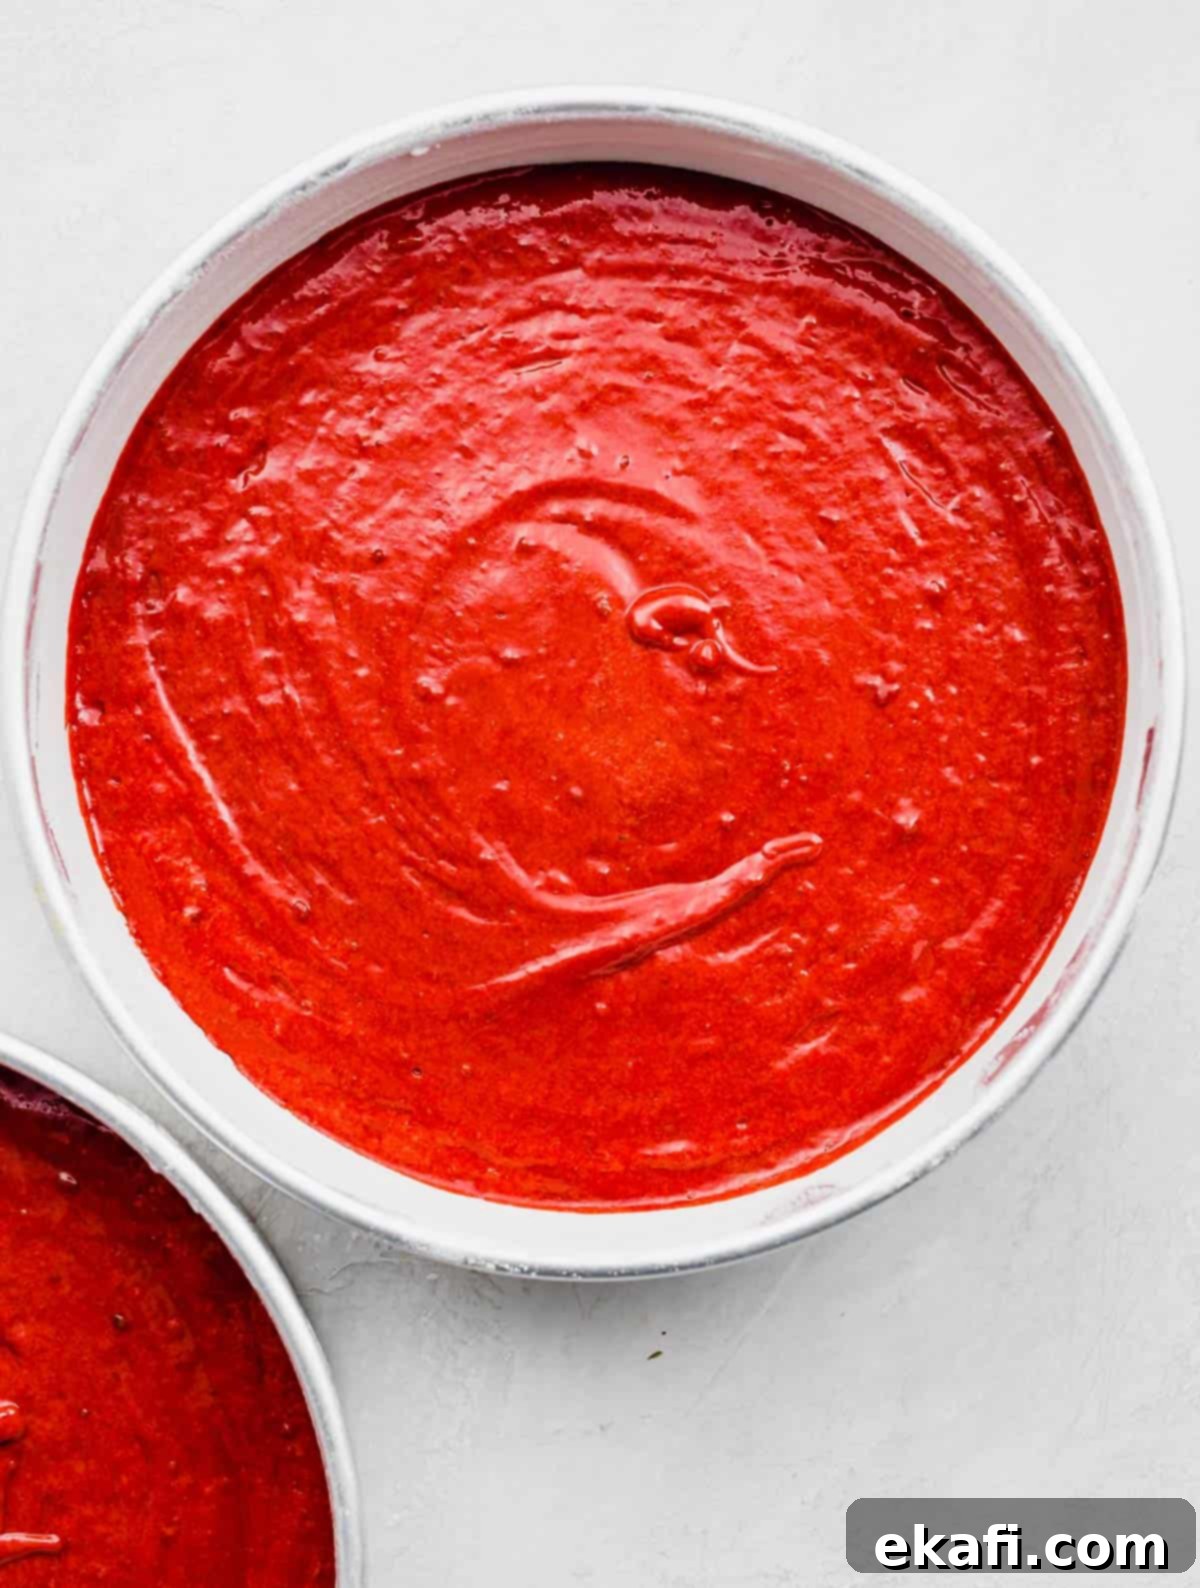
- Bake to Perfection. Evenly divide the prepared batter between two greased and floured 9-inch cake pans. For consistent layer thickness, use a kitchen scale to ensure equal amounts of batter in each pan. Bake in a preheated oven at 350°F (175°C) for approximately 29-33 minutes. The cakes are done when a toothpick inserted into the center comes out with a few moist crumbs attached, but no wet batter. Remove the cakes from the oven and let them cool in their pans for a full 10 minutes before inverting them onto a wire cooling rack to cool completely. Ensure they are only slightly warm to the touch before handling further.
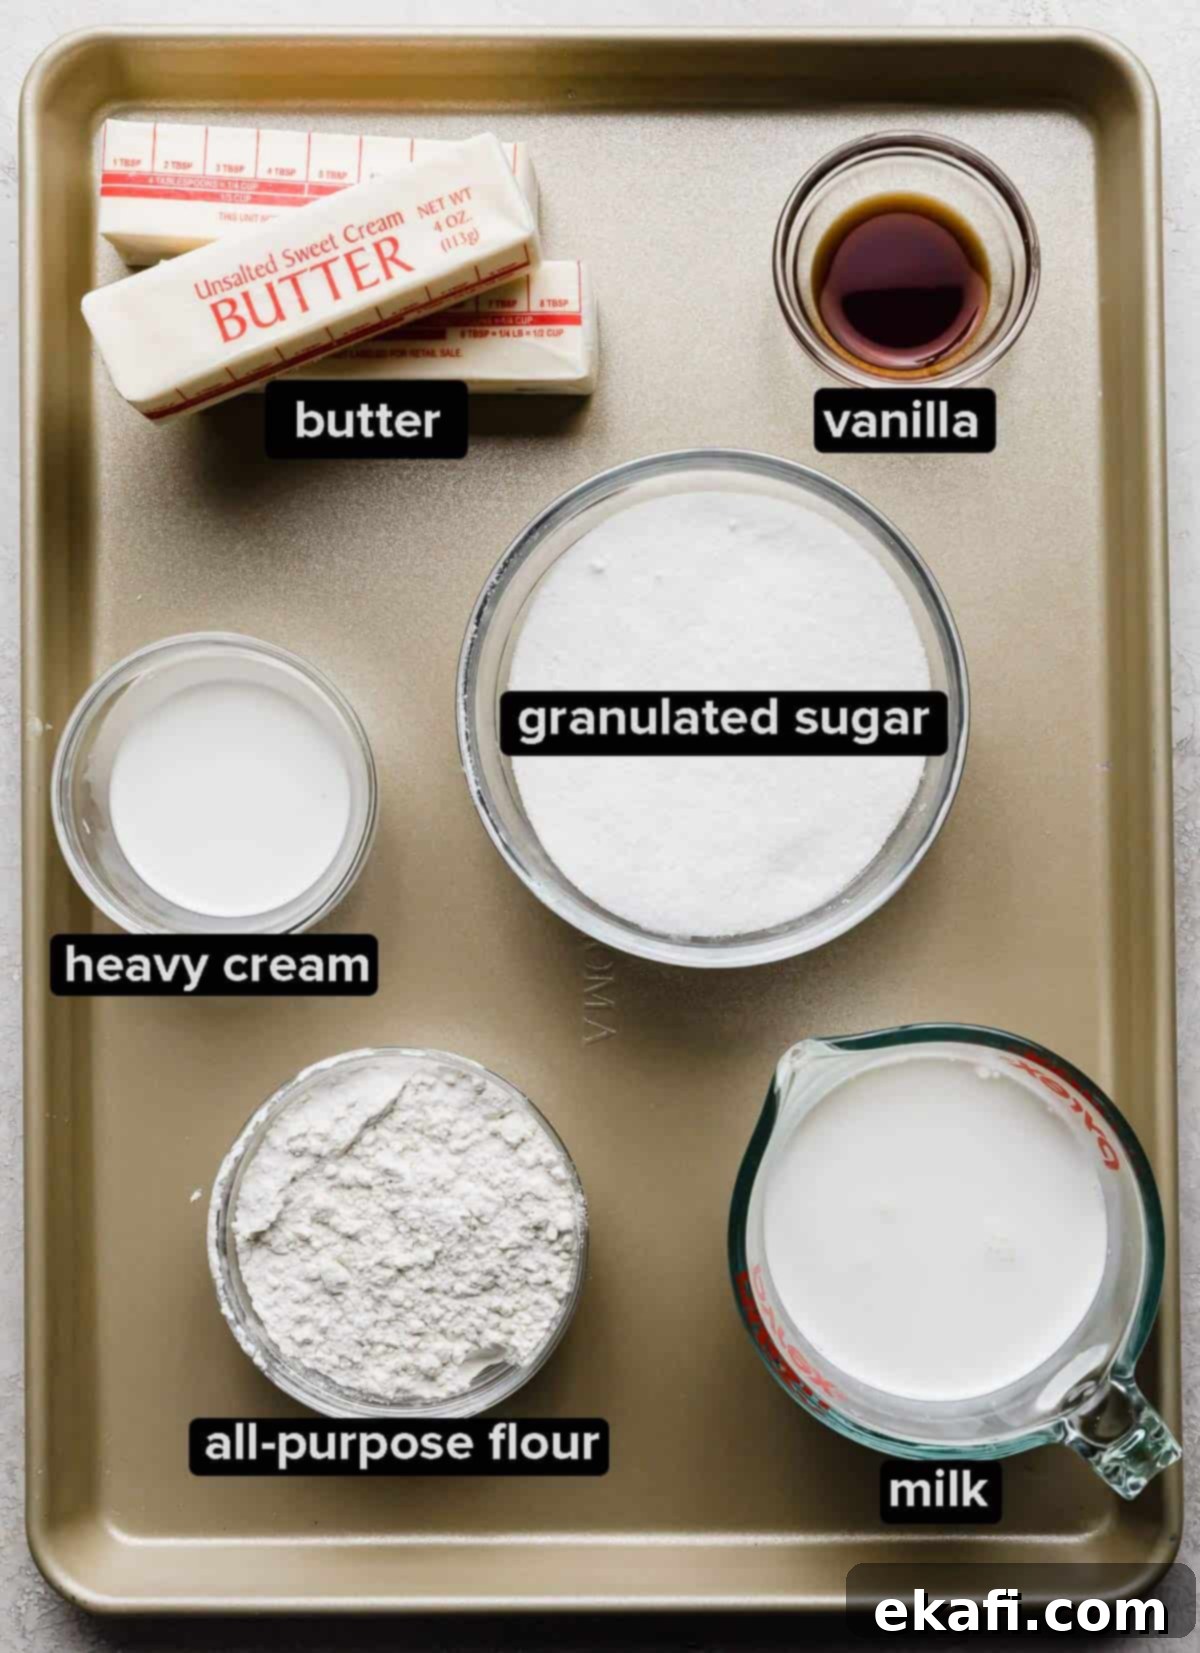
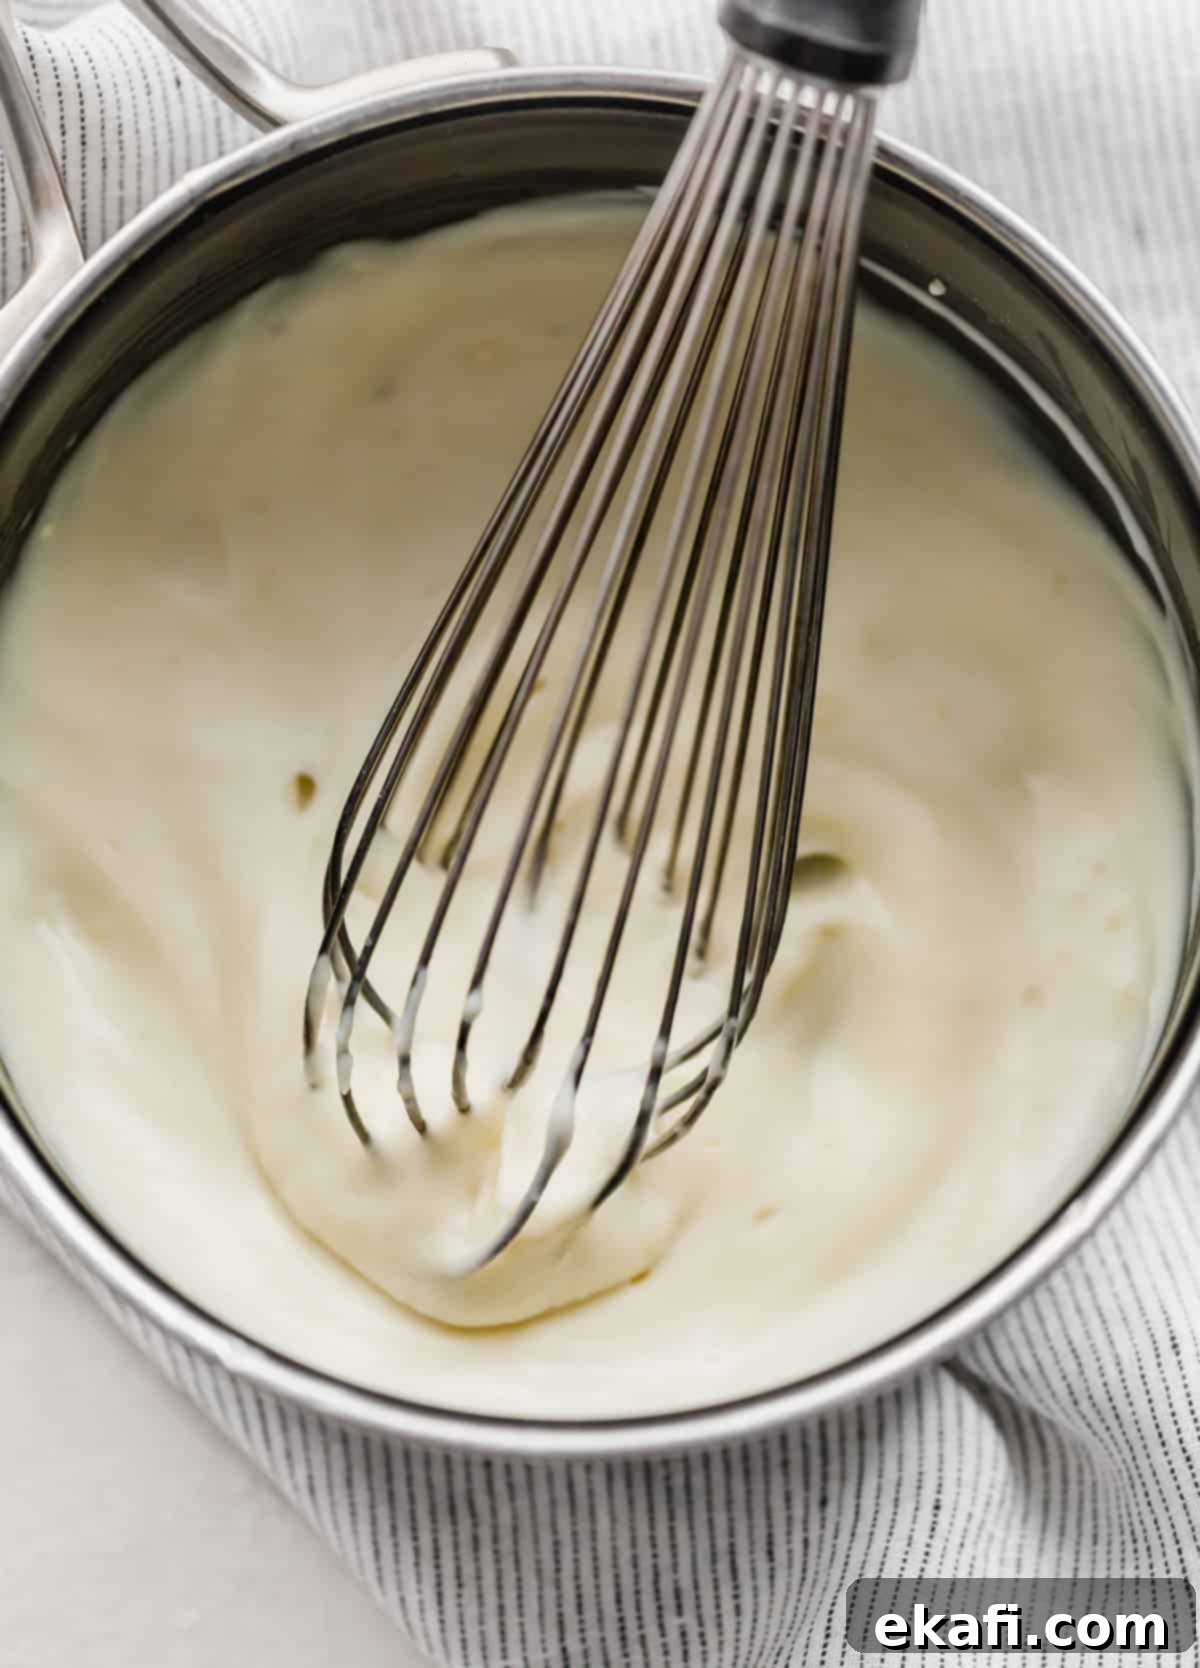
- Craft the Silky Old-Fashioned Frosting. The unique frosting for this old fashioned red velvet cake begins with transforming granulated sugar into “super fine” sugar. Process the granulated sugar in a food processor for 2 minutes until it reaches a fine, powdery consistency. Next, in a small saucepan, vigorously whisk the flour and milk over medium heat. Stir constantly to prevent lumps, bringing the mixture to a gentle simmer. Continue cooking and stirring until it visibly thickens. Remove from heat and allow it to cool slightly. Once it’s no longer piping hot, cover the surface directly with plastic wrap to prevent a skin from forming and refrigerate for at least 2 hours, or until thoroughly chilled. Once chilled, combine the room-temperature butter, super fine sugar, and vanilla extract in the bowl of a stand mixer. Beat on medium speed for 2 minutes until light and fluffy. Gradually add the chilled flour and milk mixture, a little at a time, beating on medium speed for 4-5 minutes until the frosting is no longer grainy and has a smooth, whipped consistency. If needed, add a tablespoon of milk or heavy cream at a time until you achieve your desired spreadable consistency. (I typically add about 1 tablespoon of heavy cream for perfect richness).
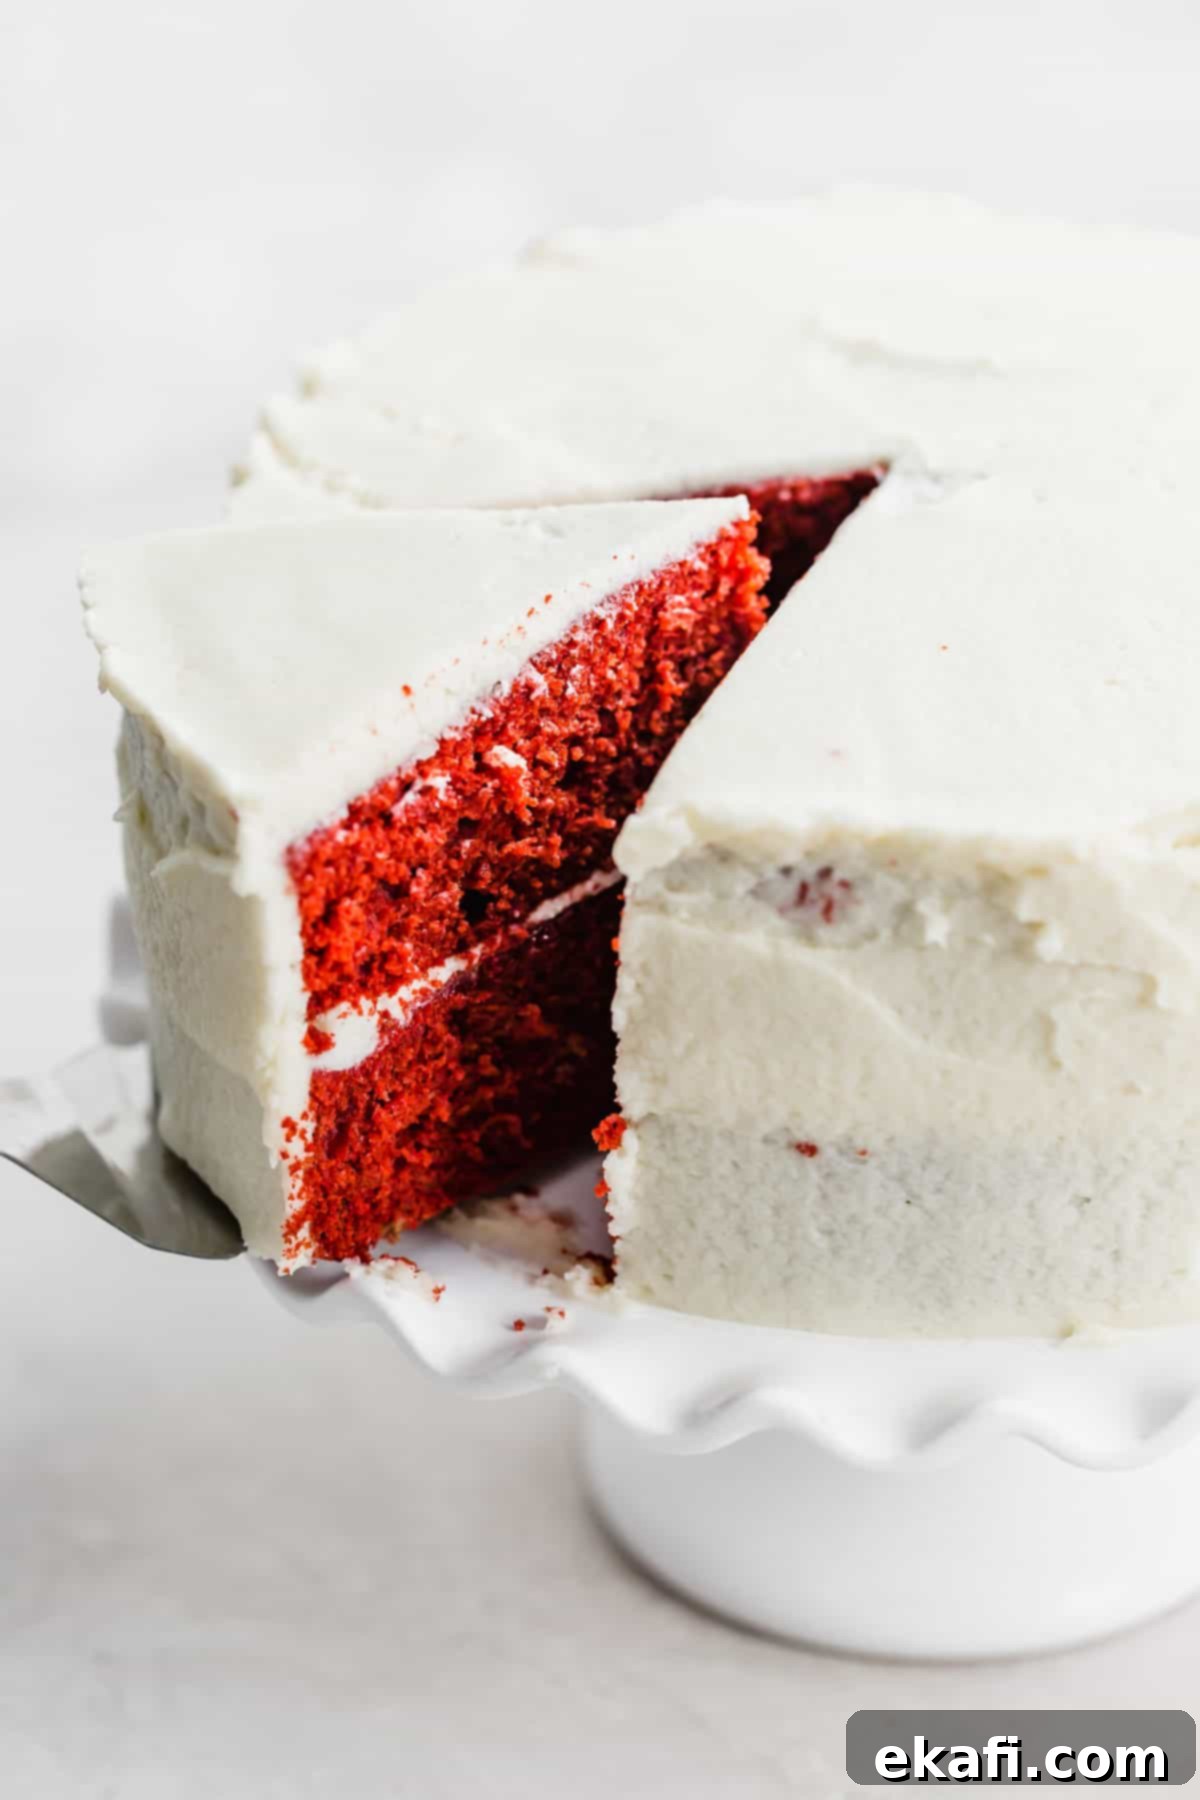
- Assemble and Frost Your Masterpiece. This step must wait until the cake layers are completely cool. If your cake layers have domed tops, gently level them using a serrated knife for a neat, professional look. Place the first cake layer, top-side up, on a cake stand or serving platter. Spread just under half of the prepared old-fashioned frosting evenly over the top surface. Carefully place the second cake layer on top of the frosting, orienting it bottom-side up for a flat top. Use the remaining frosting to generously cover the top and sides of the cake, creating a smooth, elegant finish. Chill briefly before serving for best results.
Expert Red Velvet Cake Baking Tips
Achieving red velvet perfection is easier with a few insider tips:
- Avoid Oven Door Peek-a-Boo: Resist the urge to open your oven door before the cakes are fully baked. Even with the delicate airiness from whipped egg whites, a sudden temperature drop can cause the center of your cakes to sink, ruining their beautiful rise. Trust the baking time and only check near the end.
- Cake Flour Substitute: If you don’t have cake flour on hand, don’t despair! You can create a suitable substitute using all-purpose flour and cornstarch. This article provides excellent guidance on how to make this substitution, ensuring your cake still achieves a wonderfully tender crumb.
- Room Temperature Ingredients are Key: Always use room temperature wet ingredients (butter, eggs, buttermilk) for both the cake and frosting. Ingredients at room temperature emulsify more easily, creating a smoother, more homogenous batter and frosting. This leads to a better texture and a more evenly baked cake.
- Precision with a Kitchen Scale: For professional-looking, perfectly even cake layers, a kitchen scale is invaluable. By weighing the batter as you divide it between the cake pans, you guarantee that each layer will be of equal thickness, resulting in a beautifully balanced finished cake.
- Calibrate Your Oven: An accurate oven temperature is paramount for successful baking. Many home ovens run hotter or cooler than their dial indicates. Invest in an inexpensive oven thermometer to know your exact oven temperature. My oven, for example, runs about 10°F cooler, so I adjust accordingly. The cakes are ready when the tops gently spring back when lightly touched.
- Keep Cake Layers Moist for Frosting: Once your cake layers have cooled to slightly warm, double-wrap each layer tightly in plastic wrap. This crucial step locks in moisture and prevents the cakes from drying out while they finish cooling or await frosting. You can even refrigerate them at this stage.
- Super Fine Sugar for Silky Frosting: Don’t skip the step of processing your granulated sugar into “super fine” sugar for the frosting. This extra step ensures a truly smooth, luxurious, and non-gritty old-fashioned frosting consistency. While not strictly mandatory, it makes a significant difference in the final texture of your frosting.
Make Ahead, Storing, and Freezing Your Red Velvet Cake
To enjoy this delicious red velvet cake at its best, here’s how to properly store it and plan ahead:
- Storing the Frosted Cake: Due to the dairy in the old-fashioned frosting, the completed cake must be stored covered in the refrigerator. It will stay fresh and delicious for 3-5 days. Be sure to use an airtight cake dome or cover it tightly with plastic wrap to prevent it from drying out or absorbing refrigerator odors.
- Make Ahead Cake Layers: If you’re planning ahead, bake the cake layers, let them cool completely, and then wrap each layer individually in plastic wrap. You can store these wrapped layers in the refrigerator for 1-2 days before frosting. Once frosted, the assembled cake will last another 3-4 days in the fridge.
- Freezing Cake Layers: For longer storage, allow the baked cake layers to cool completely. Wrap each layer tightly in plastic wrap and place them in the freezer for up to 1 week. For freezing longer than 1 week (up to 3 months), add an additional layer of aluminum foil around the plastic-wrapped layers to protect against freezer burn. When ready to use, remove from the freezer and let thaw in the refrigerator overnight.
- Freezing a Decorated Cake: Yes, you can freeze an entirely decorated cake! First, flash freeze the cake in the freezer for 20-30 minutes, or until the frosting is completely firm. This prevents the frosting from sticking to the wrapping. Once firm, remove from the freezer and wrap the entire cake completely in plastic wrap. It can be stored this way for up to 1 week. For extended freezing (up to 2 months), add an additional layer of aluminum foil. To serve, remove from the freezer and let it thaw in the refrigerator overnight. The next morning, remove it from the fridge and unwrap it, allowing it to come to room temperature before serving for the best texture and flavor.
For even more comprehensive details and tips on preserving your baked goods, be sure to check out my dedicated How to Store and Freeze Cakes guide!
Frequently Asked Questions About Red Velvet Cake
Red velvet cake is a classic American dessert renowned for its stunning deep red or reddish-brown hue and a subtle, distinctive chocolate flavor. It’s typically a layered cake, lavishly topped with a white frosting, which is often a tangy cream cheese frosting or, in the case of this traditional recipe, a lighter, old-fashioned cooked flour frosting. Historically, during World War II, bakers sometimes used beets to achieve the red color due to food rationing. While modern recipes rely on red food coloring, a few drops of gel coloring are usually enough to create the signature vibrant red. The flavor profile is a unique blend of mild chocolate, subtly enhanced by a characteristic tang from ingredients like buttermilk and vinegar.
Yes, you absolutely can use liquid red food coloring for your red velvet cake, but be prepared to use a significantly larger amount to achieve the deep, vibrant red color that defines red velvet. Liquid food coloring is less concentrated than gel varieties, meaning you might need several tablespoons to get the desired intensity. I personally prefer and recommend using gel food coloring because a much smaller quantity is needed to produce a potent and striking color, without adding excess liquid that could alter the batter’s consistency.
Red velvet cake offers a unique flavor experience that distinguishes it from a straightforward chocolate cake. It possesses a delicate and subtle chocolate flavor, not intense or bitter. This chocolate note is beautifully balanced by distinctive tangy undertones, which come from key ingredients like buttermilk and vinegar. These acidic components not only contribute to the cake’s signature tender texture and rise but also provide a slight sourness that creates a wonderfully complex and balanced taste profile. It’s often described as moist, tender, and uniquely palatable.
Explore More Delicious Cake Recipes
If you’ve fallen in love with baking from scratch, or simply enjoy trying new cake creations, be sure to explore these other fantastic recipes:
- Funfetti Cake: A festive and colorful cake perfect for any celebration.
- German Chocolate Cake: Indulge in rich chocolate layers and a decadent coconut-pecan frosting.
- Moist Chocolate Cake Recipe: The ultimate recipe for a consistently moist and flavorful chocolate cake.
- Coconut Cookies and Cream Cake: A unique and delightful combination of tropical and classic flavors.
- Biscoff Caramel Cake: Layers of spiced cookie and rich caramel for an unforgettable treat.
- Yellow Cake with Chocolate Frosting: A timeless classic that always brings joy.
Did you try this amazing Old Fashioned Red Velvet Cake recipe? I’m eager to hear about your baking experience! Click here to leave a star rating and review, or simply scroll down to the recipe card below and share your thoughts there. Your feedback helps others discover the joy of this classic cake!
Stay connected and up-to-date with all our latest recipes and baking tips by following us on Instagram, joining our community on Facebook, and finding inspiration on Pinterest.
Print
SaveSaved!
Review
Old Fashioned Red Velvet Cake
Ingredients
- 3 cups cake flour
- 1 teaspoon baking soda
- 4 tablespoons unsweetened natural cocoa powder
- 1/2 teaspoon salt
- 1/2 cup unsalted butter – at room temperature
- 2 cups granulated sugar
- 1 cup vegetable oil
- 4 large eggs – separated
- 1 tablespoon vanilla extract
- 1 teaspoon white vinegar
- gel red food coloring – I used about 2 teaspoons worth
- 1 cup buttermilk – at room temperature
Old Fashioned Frosting
- 1 1/2 cups milk
- 1/2 cup all purpose flour
- 1 1/2 cups butter – salted or unsalted at room temperature
- 1 1/2 cup super fine granulated sugar
- 1 1/2 teaspoon vanilla extract
- 1 1/2 tablespoon milk – or heavy cream
Equipment
-
food processor
-
Kitchen Aid stand mixer
-
kitchen scale
-
Ateco cake stand
-
offset spatula
Instructions
-
1. Preheat oven to 350°F (175°C). Grease and flour two 9-inch cake pans thoroughly.
-
2. In a medium bowl, whisk together the cake flour, baking soda, cocoa powder, and salt until well combined. Set aside.
-
3. In a separate, clean medium bowl, beat the egg whites with an electric mixer until stiff peaks form. Be careful not to overbeat, as they can become dry.
-
4. In the bowl of a stand mixer fitted with the paddle attachment, cream the room-temperature butter and granulated sugar on medium speed for 2-3 minutes until light and fluffy. Scrape down the sides of the bowl as needed to ensure even mixing. Add the vegetable oil, egg yolks, vanilla extract, and white vinegar, mixing on low/medium-low speed until just combined.
-
5. With the mixer on low, alternate adding the dry ingredients mixture with the buttermilk, beginning and ending with the dry ingredients. Mix until just combined after each addition. Scrape down the sides of the bowl as needed. Add 2 teaspoons (or more, to achieve desired color) of gel red food coloring. Mix gently until the color is uniformly incorporated.
-
6. Using a rubber spatula, carefully and gently fold the whipped egg whites into the cake batter until no white streaks remain. This step adds crucial air for a light texture.
-
7. Divide the batter evenly between the two prepared cake pans. Tip: Use a kitchen scale to ensure precise, equal amounts of batter in each pan for perfectly even cake layers.
-
8. Bake for 29-33 minutes, or until a toothpick inserted into the center of a cake comes out with a few moist crumbs, but no wet batter. (Refer to Note #1 in the Recipe Tips for more baking advice.) The tops of the cakes should lightly spring back when gently touched. Remove from the oven and allow them to cool in the pans for 10 minutes, then invert them onto a wire cooling rack to cool completely before frosting.
Old Fashioned Frosting
-
1. To make super fine sugar for a silky smooth frosting, place the granulated sugar in a food processor and process for 2 minutes until it becomes a fine powder.
-
2. In a small saucepan, whisk together the all-purpose flour and milk over medium heat. Whisk constantly to prevent lumps and ensure a smooth mixture. Bring the mixture to a gentle simmer, at which point you will notice it thickening considerably. Once thick, remove from heat and allow it to cool slightly. Place plastic wrap directly onto the surface of the flour/milk mixture to prevent a skin from forming, then refrigerate for about 2 hours, or until thoroughly chilled.
-
3. Once the flour/milk mixture is fully chilled, continue with the frosting. In the bowl of a stand mixer, beat the room-temperature butter, super fine sugar, and vanilla extract on medium speed for 2 minutes until light and fluffy. Gradually add the chilled flour and milk mixture, a little at a time, beating on medium speed for 4-5 minutes until the frosting is no longer grainy and achieves a smooth, whipped consistency. If necessary, add 1-2 tablespoons of additional milk or heavy cream, one tablespoon at a time, until your desired spreadable consistency is reached. (I typically use about 1 tablespoon of heavy cream.)
-
4. Frost the completely cooled cake. If needed, gently level the cake layers with a serrated knife for a flat surface. Place the first cake layer on a cake stand or serving platter, top side up. Spread approximately one-third of the frosting evenly over the top. Carefully place the second cake layer on top, bottom side up. Use half of the remaining frosting to cover the top of this second layer, then use the final portion to generously frost the sides of the cake, creating a beautiful, smooth finish.
Notes
Store the frosted cake covered in the fridge for 3-5 days. Refrigeration is essential due to the cream and milk in the frosting.
For make-ahead convenience, bake the cake layers, cool them completely, and then wrap them tightly in plastic wrap. They can be stored in the fridge for 1-2 days before you’re ready to frost.
To freeze cake layers: Once completely cooled, wrap each layer individually in plastic wrap and freeze for up to 1 week. For longer storage (up to 3 months), add an extra layer of aluminum foil. Thaw overnight in the refrigerator before using.
Nutrition
