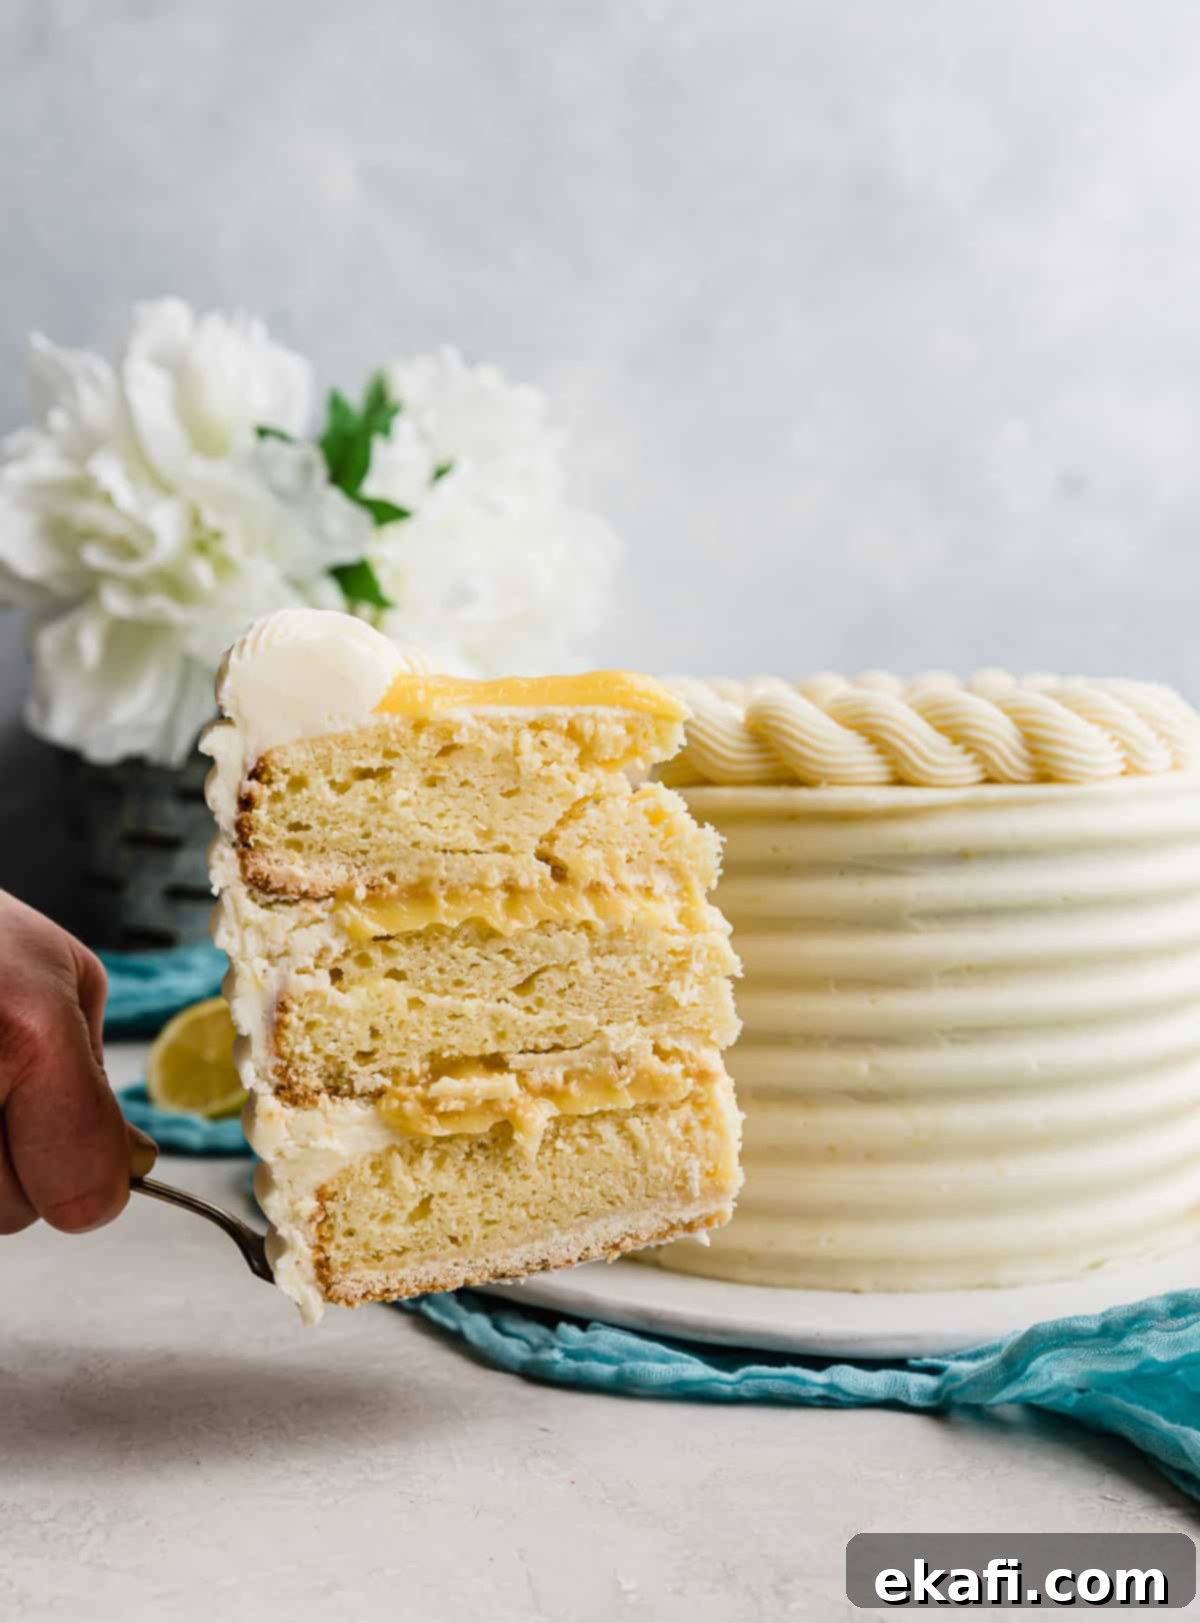
The Ultimate Lemon Bar Layer Cake: A Perfectly Sweet and Tart Dessert
Prepare to fall head over heels for this incredible Lemon Bar Cake! Imagine all the bright, zesty flavors and delightful textures of your favorite classic lemon bars, transformed into a show-stopping layer cake. This isn’t just a lemon cake; it’s an homage to the beloved lemon bar, meticulously crafted to include every irresistible element.
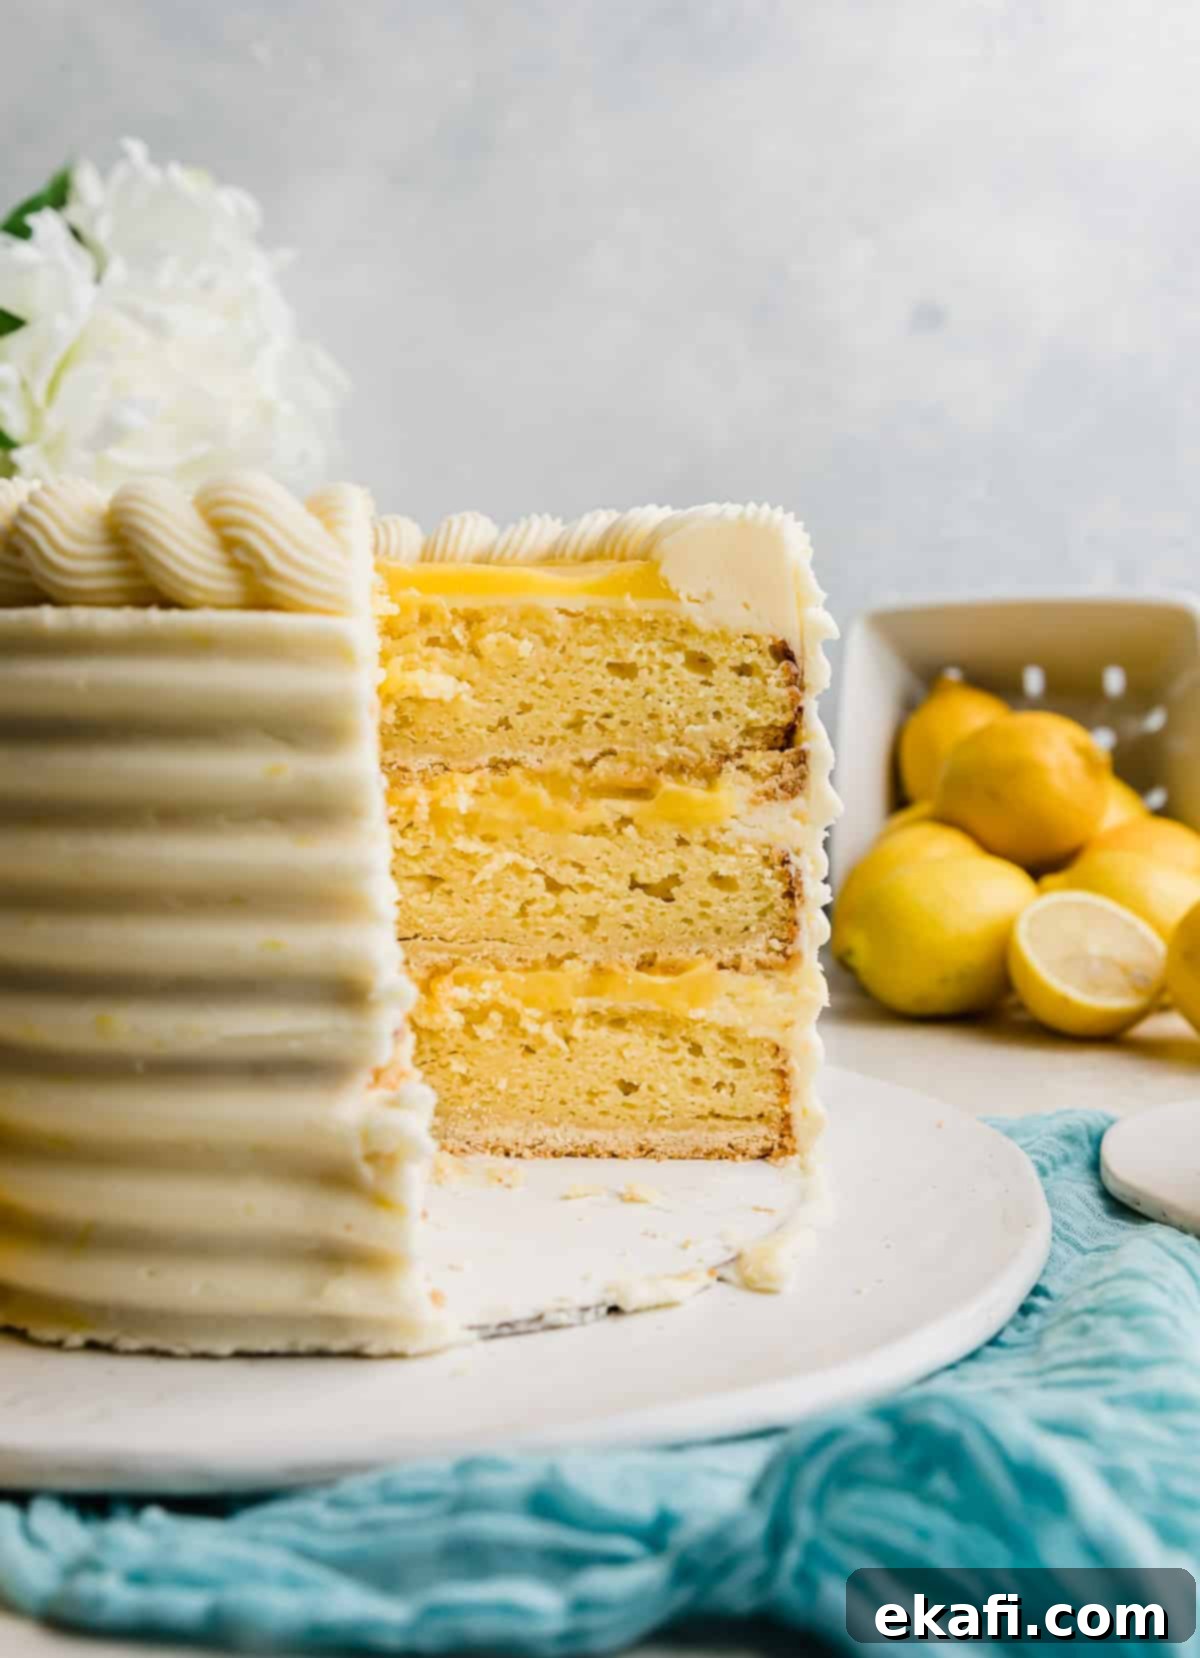
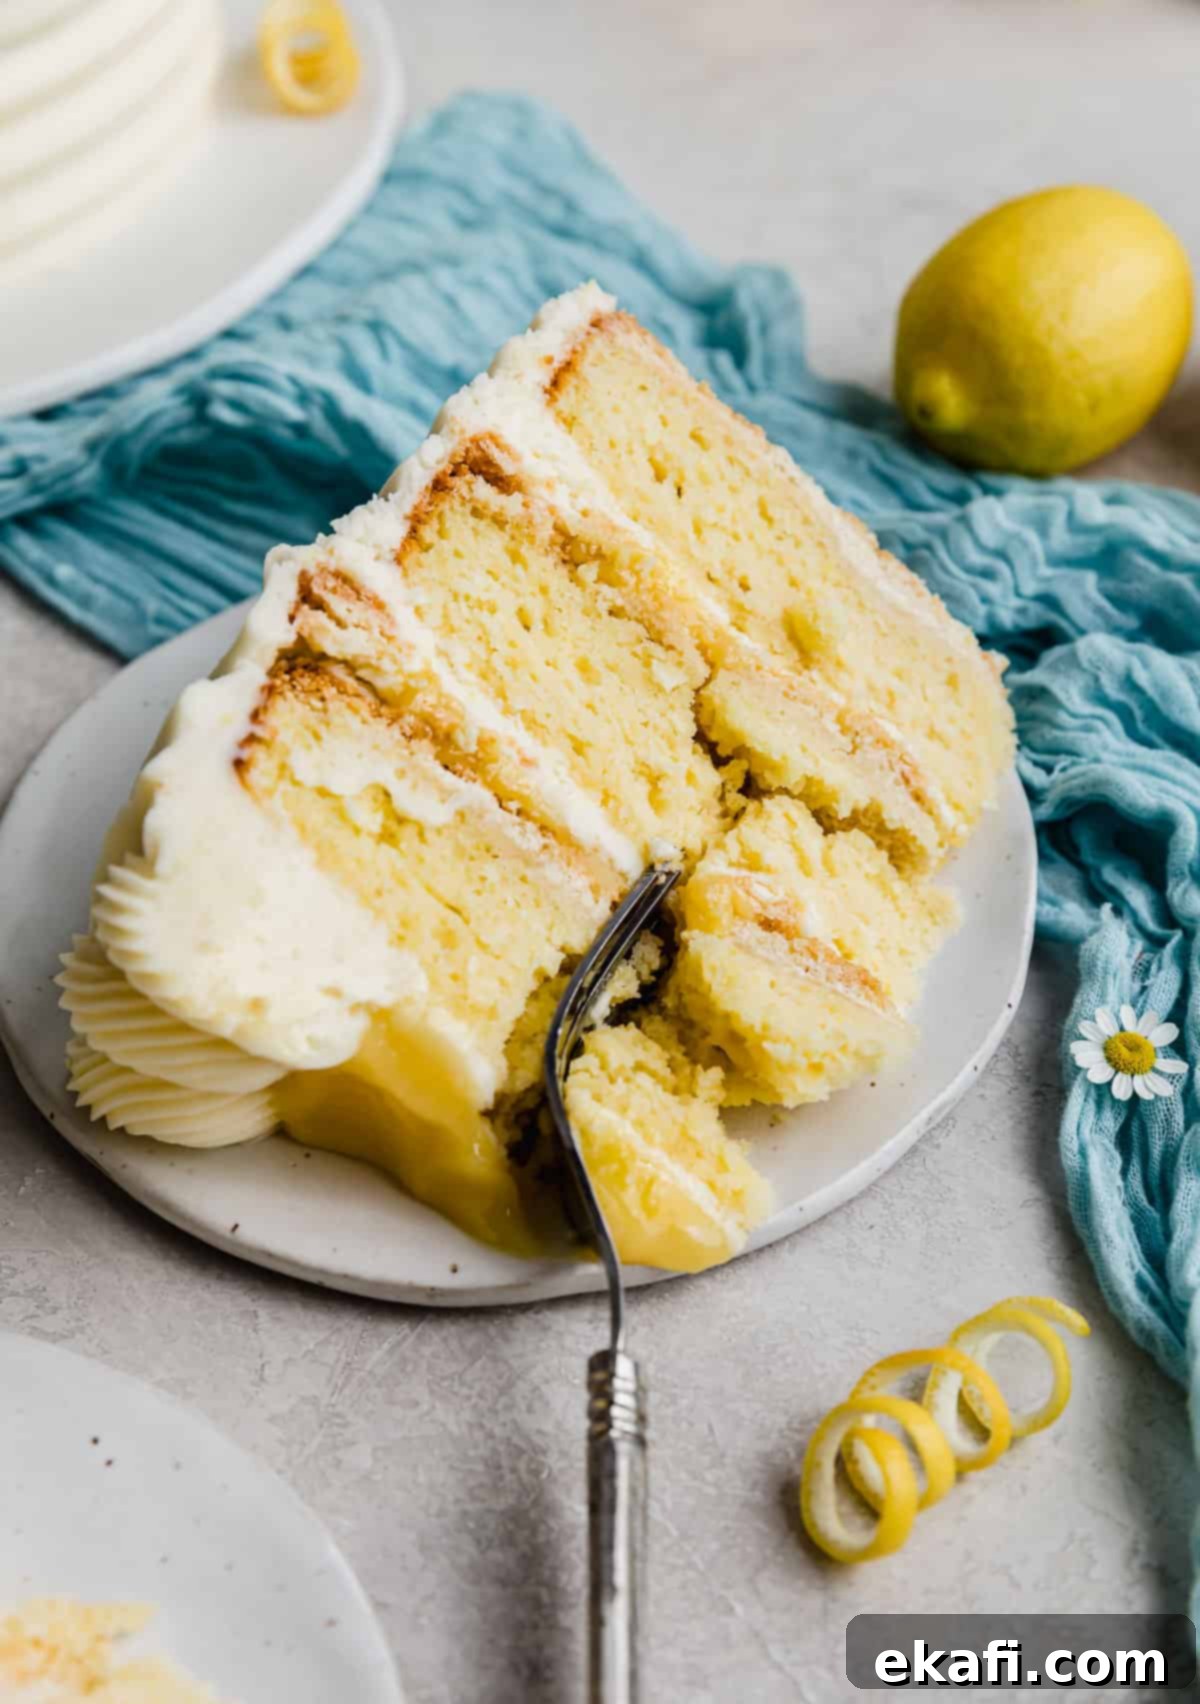
Each slice of this homemade masterpiece reveals layers of tender, moist lemon cake, baked right on top of a buttery, golden shortbread crust – just like the foundation of a traditional lemon bar. Nestled between these citrus-infused cake layers is a vibrant, tart lemon curd, providing that quintessential tangy kick. And to complete this symphony of flavors, the entire cake is generously frosted with a silky-smooth, perfectly sweet lemon buttercream, echoing the delicate dusting of powdered sugar found on classic lemon bars. It’s truly a celebration of lemon in its most exquisite form, offering a dessert experience that is both refreshing and deeply satisfying.
Citrus desserts offer such a refreshing and joyful experience, especially when transformed into a celebratory cake! If you adore bright, tangy flavors, you’ll love exploring other vibrant options from my kitchen. For a tropical twist, my Key Lime Pie Cake is an absolute must-try, bursting with authentic lime flavor and a creamy texture that transports you to paradise. It’s perfect for any occasion that calls for a fresh, unique dessert. Another fantastic choice for warmer months, or whenever you crave a delightful fruity combination, is my Lemon Raspberry Cake, where the tartness of lemon beautifully complements the sweetness of raspberries. These recipes prove that citrus cakes are always a good idea and a welcome addition to any dessert table!
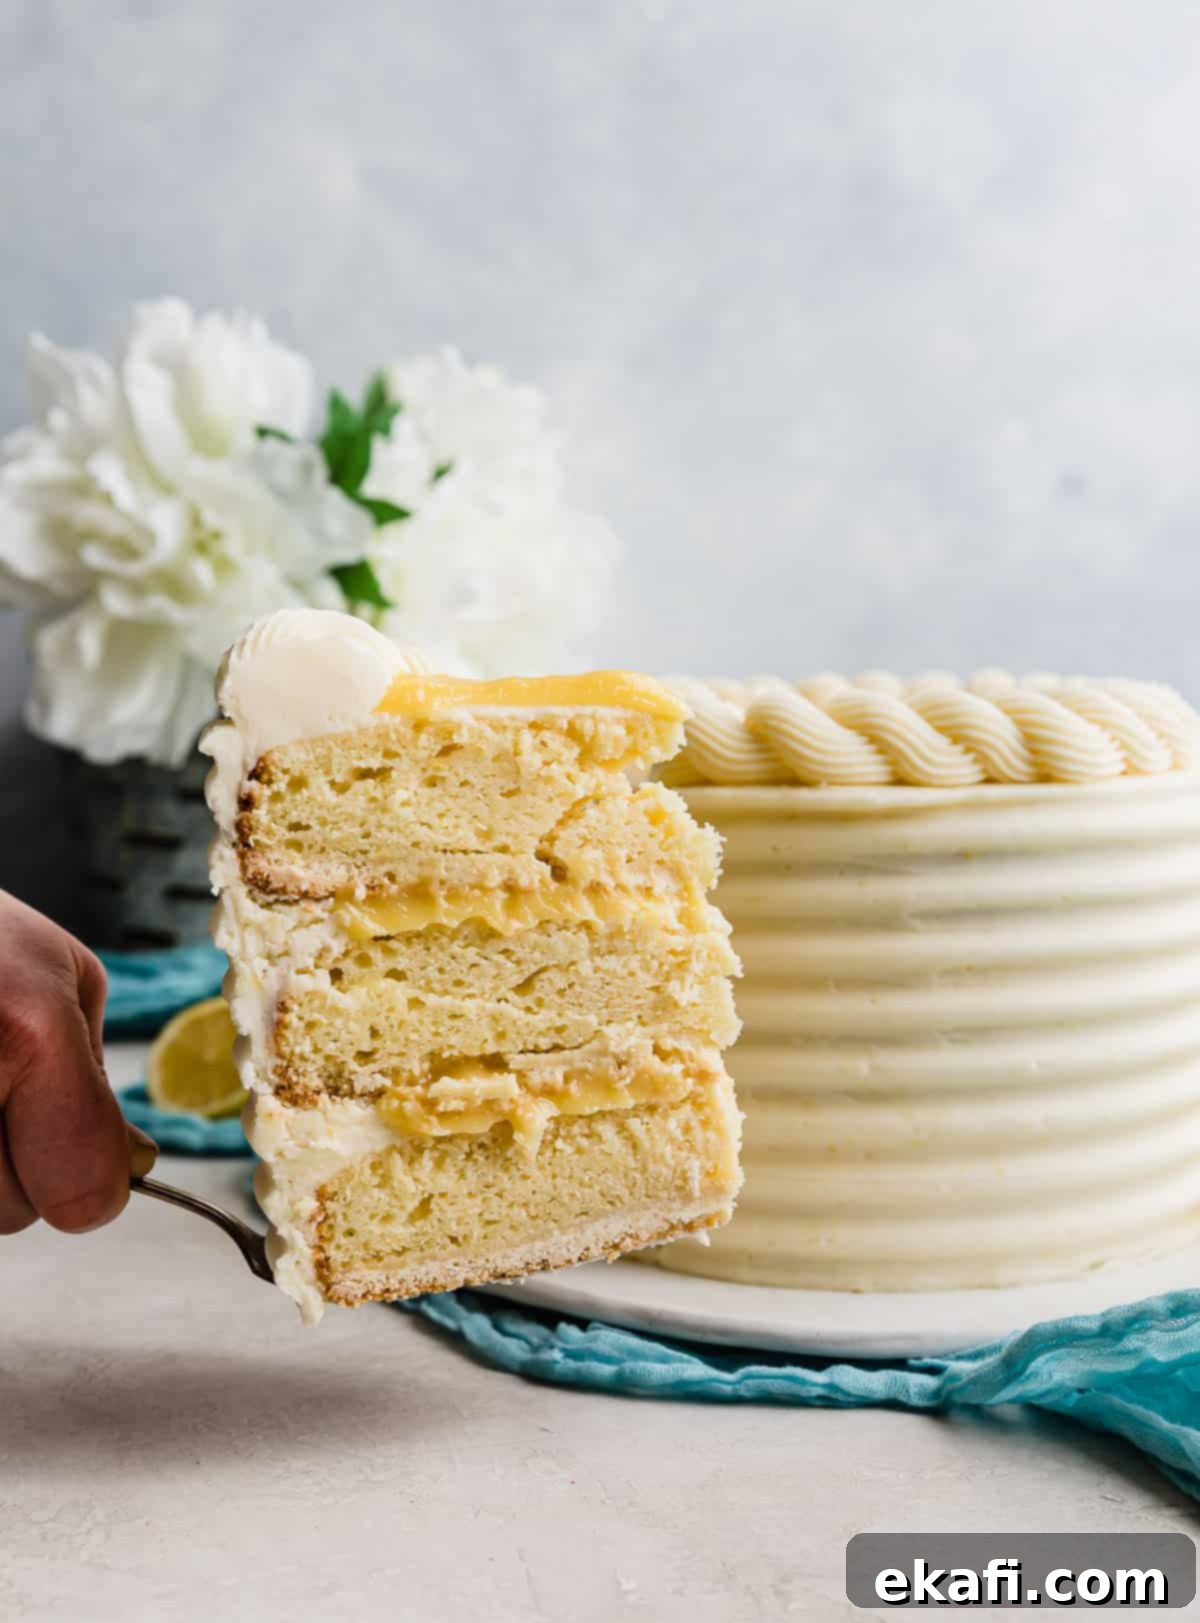
Confession time: I used to not be a huge cake person. Growing up, cakes were often dry, overly sweet, or simply lacking in distinctive flavor. For my birthdays, I’d typically request a rich, creamy cheesecake instead. It’s hard to believe now, but I genuinely thought I just wasn’t a “cake lover.” However, I’ve since become a passionate convert, discovering that the problem wasn’t cake itself, but rather the type of cakes I was accustomed to. When done right, with the perfect balance of moisture, flavor, and sweetness, a cake can be an absolute revelation – and this Lemon Bar Cake is a prime example of such perfection!
If my journey from cake skeptic to cake enthusiast resonates with you, or if you’re simply on a quest for truly exceptional desserts, then you absolutely must explore some of my other favorite recipes. Each one promises an insanely moist texture, perfectly balanced sweetness, and incredibly rich flavor. Dive into the unique delight of my Coconut Cookies and Cream Cake, indulge in the decadent Biscoff Caramel Cake, or experience a nostalgic treat with my 7 Layer Bar Cake. For a spring celebration or a comforting dessert any time of year, my Carrot Cake with Pineapple and Pecans offers a delightful blend of spices and textures that are sure to please any crowd.
Why This Lemon Bar Cake Recipe is a Must-Try
This isn’t just another lemon cake; it’s a meticulously designed dessert that captures the essence of a classic lemon bar in an elegant, layered format. Here’s why this recipe stands out:
- Authentic Lemon Bar Experience in Cake Form: We’ve gone to great lengths to ensure that every bite of this cake evokes the familiar joy of a traditional lemon bar. The foundation is a rich, buttery shortbread crust, providing that delightful crumbly texture and sweet base. Layered above are incredibly moist lemon cake layers, infused with a bright citrus flavor that perfectly complements the luscious, tart lemon curd filling. To top it all off, a velvety lemon buttercream, made with powdered sugar, gives a nod to the classic dusting on lemon bars, creating a harmonious blend of textures and tastes. This cake truly delivers on its promise to be a lemon bar in an elevated cake form.
- Unbelievably Moist Cake Layers: Say goodbye to dry, crumbly cakes! This recipe guarantees remarkably moist and tender lemon cake layers every single time. The secret lies in a carefully balanced combination of ingredients: sour cream and buttermilk provide richness and acidity, which react with the leavening agents to create a soft, fine crumb. Additionally, vegetable oil contributes to a consistently moist crumb that stays fresh longer than cakes made solely with butter. The result is a light, airy, yet deeply flavorful cake that will convert even the most skeptical cake critics.
- Perfect Harmony of Tart and Sweet: One of the hallmarks of a great lemon dessert is its ability to strike a perfect balance between pucker-inducing tartness and comforting sweetness. This Lemon Bar Cake excels in this regard. The intensely tart lemon curd, bursting with fresh citrus, beautifully contrasts with the smooth, sweet lemon buttercream. Each component plays its part in achieving this exquisite equilibrium, creating a dynamic flavor profile that is both refreshing and utterly satisfying without being overwhelmingly sweet.
- Pure, Fresh Lemon Flavor: You won’t find any artificial lemon extract here! We believe in harnessing the true, vibrant essence of fresh lemons. This recipe relies solely on freshly squeezed lemon juice and finely grated lemon zest to infuse every element – from the cake layers to the curd and buttercream – with an authentic, bright, and invigorating lemon flavor. This commitment to fresh, natural ingredients is what truly elevates the taste of this remarkable cake, giving it a superior, clean citrus profile that stands out.
Essential Ingredients for Your Lemon Bar Cake
Crafting the perfect Lemon Bar Cake relies on a selection of quality ingredients. Understanding the role each one plays will help you achieve the best possible results. Here’s a closer look at the key components:
Key Ingredients for the Cake Layers, Curd, and Buttercream
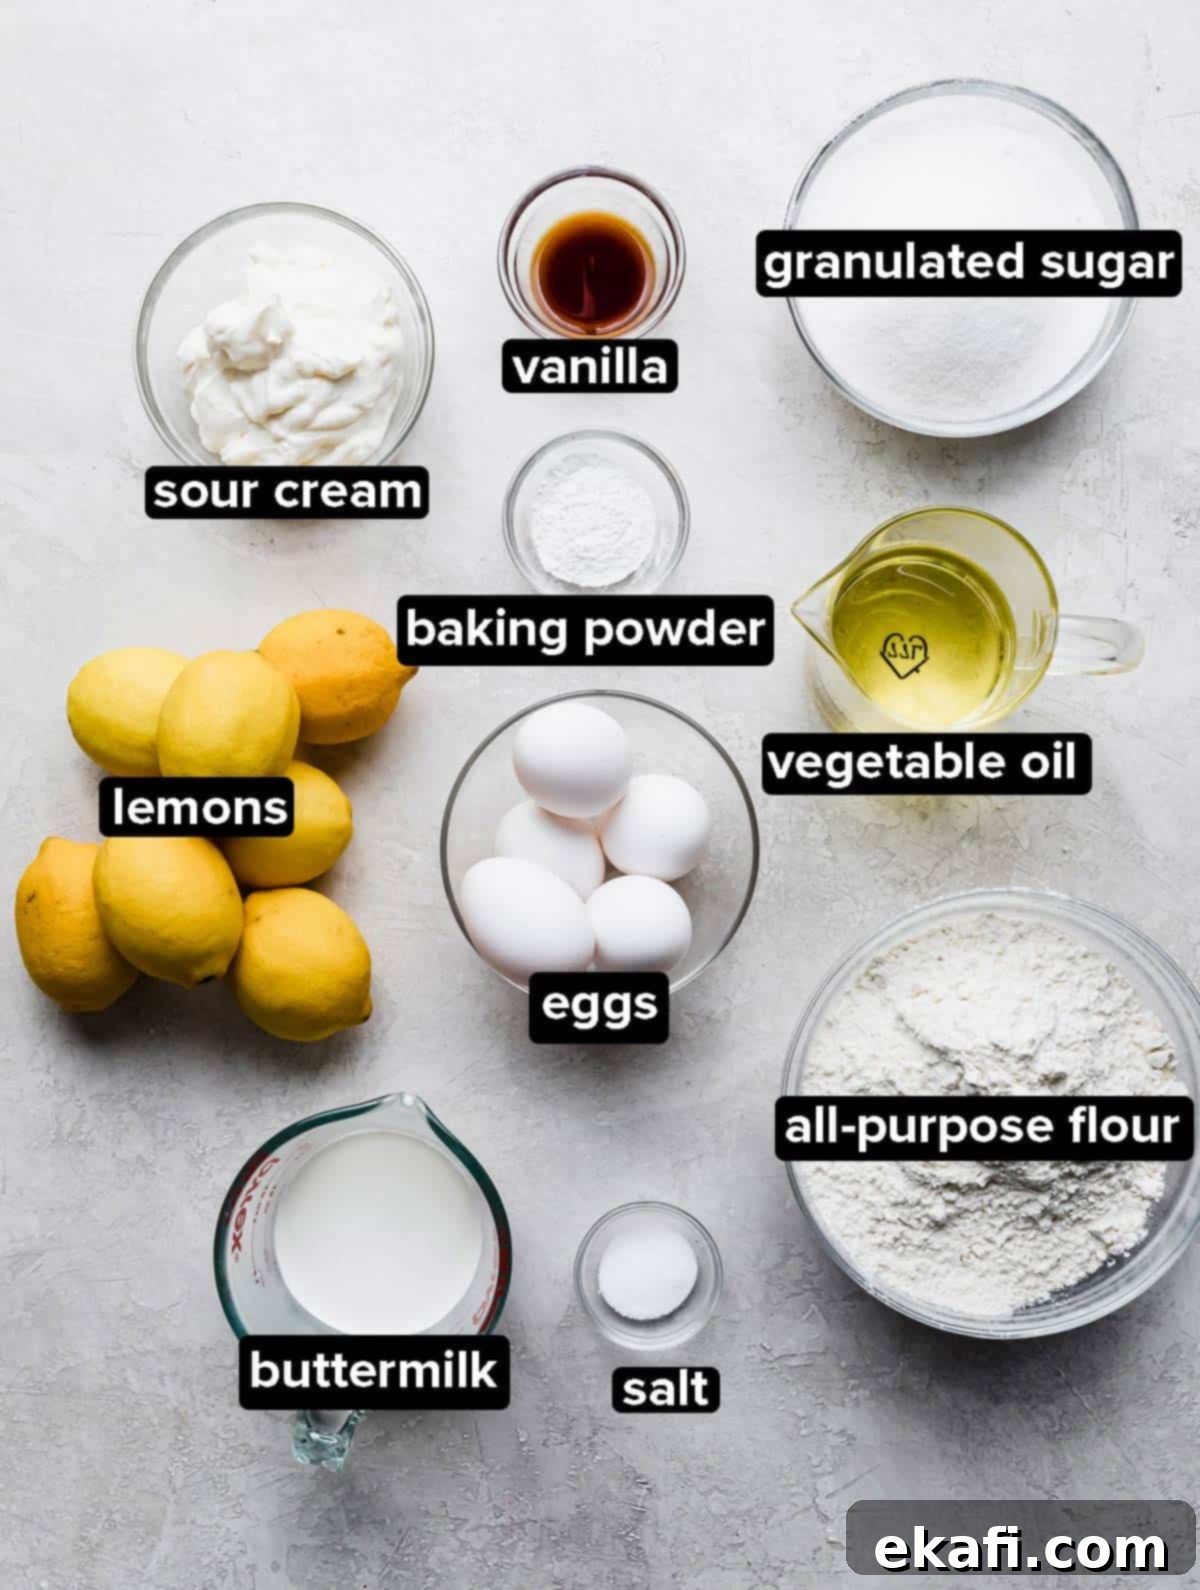
- Buttermilk: This acidic ingredient is a cornerstone of moist and tender cakes. Buttermilk reacts with baking soda to create a soft, fine crumb, and its slight tang enhances the overall flavor profile, adding a subtle depth that sets these cake layers apart. It also helps to break down gluten, resulting in a more tender bite.
- Sour Cream: A high-fat dairy product, sour cream is a secret weapon for incredibly moist cakes. It contributes richness and an additional layer of moisture, ensuring your cake remains tender and never dry. Furthermore, its natural tanginess complements the lemon flavor beautifully, creating a more complex and satisfying taste and texture in the finished cake.
- Vegetable Oil: Unlike butter, which can solidify when cooled, vegetable oil remains liquid at room temperature. This is crucial for maintaining the cake’s moisture over time, ensuring that your Lemon Bar Cake stays deliciously soft and fresh for days. It contributes to a consistently tender crumb, preventing the cake from becoming dense or dry.
- Fresh Lemon Juice: For an authentic, bright, and vibrant lemon flavor, freshly squeezed lemon juice is paramount. While store-bought lemon juice can be used in a pinch, the difference in taste is noticeable. Fresh juice provides a cleaner, more aromatic citrus burst that elevates both the cake layers and the lemon curd, making the lemon flavor truly pop.
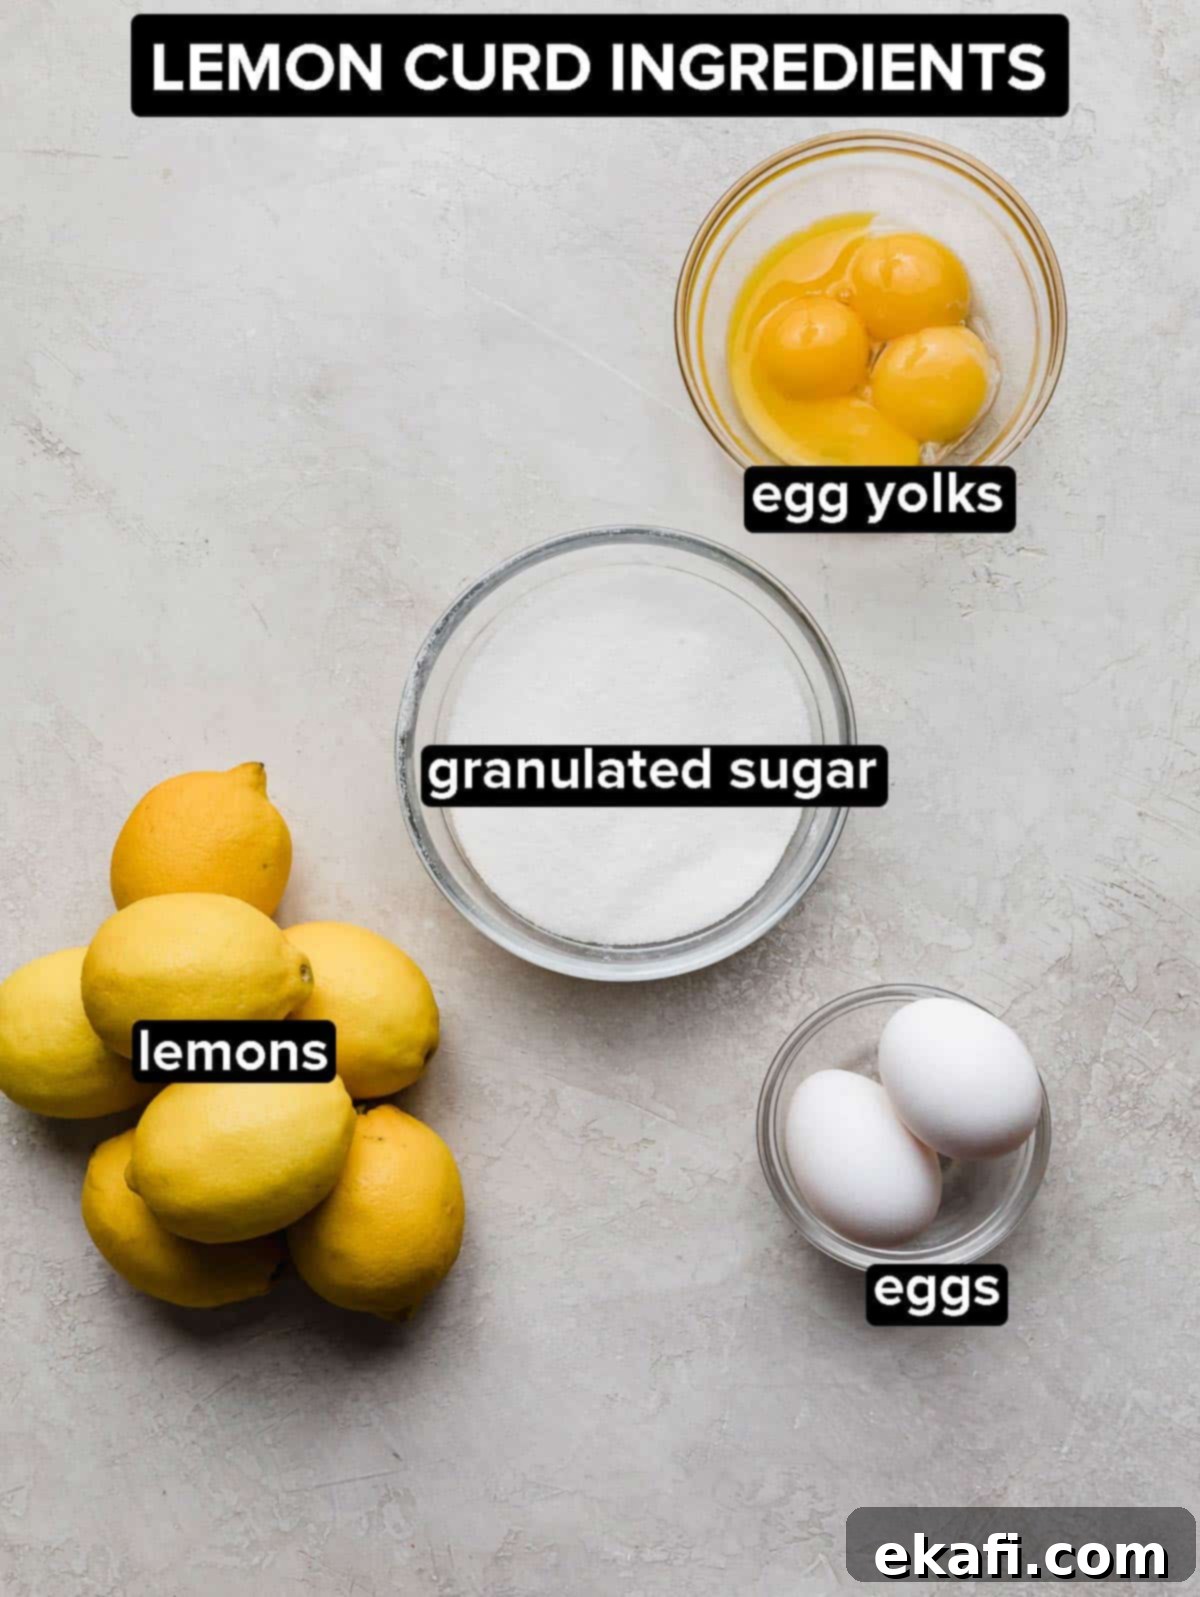
- Eggs (and Egg Yolks): Eggs are essential for structure and richness in both the cake and the lemon curd. For the lemon curd specifically, a combination of whole eggs and extra egg yolks is used. The yolks are key to achieving that luxuriously thick, silky-smooth texture and a beautiful golden yellow color without the “eggy” flavor that can sometimes come from too many egg whites. Be sure to carefully separate the yolks and remove as much of the whites as possible for the curd, as egg whites contain the majority of that characteristic eggy taste.
- Lemon Zest: The zest, or the colored outer skin of the lemon, is packed with aromatic oils that deliver an intense and fragrant lemon punch. Using both lemon juice and zest amplifies the citrus flavor, providing a sharper, more pronounced lemon essence that truly shines through in every component of the cake, from the light cake layers to the rich buttercream.
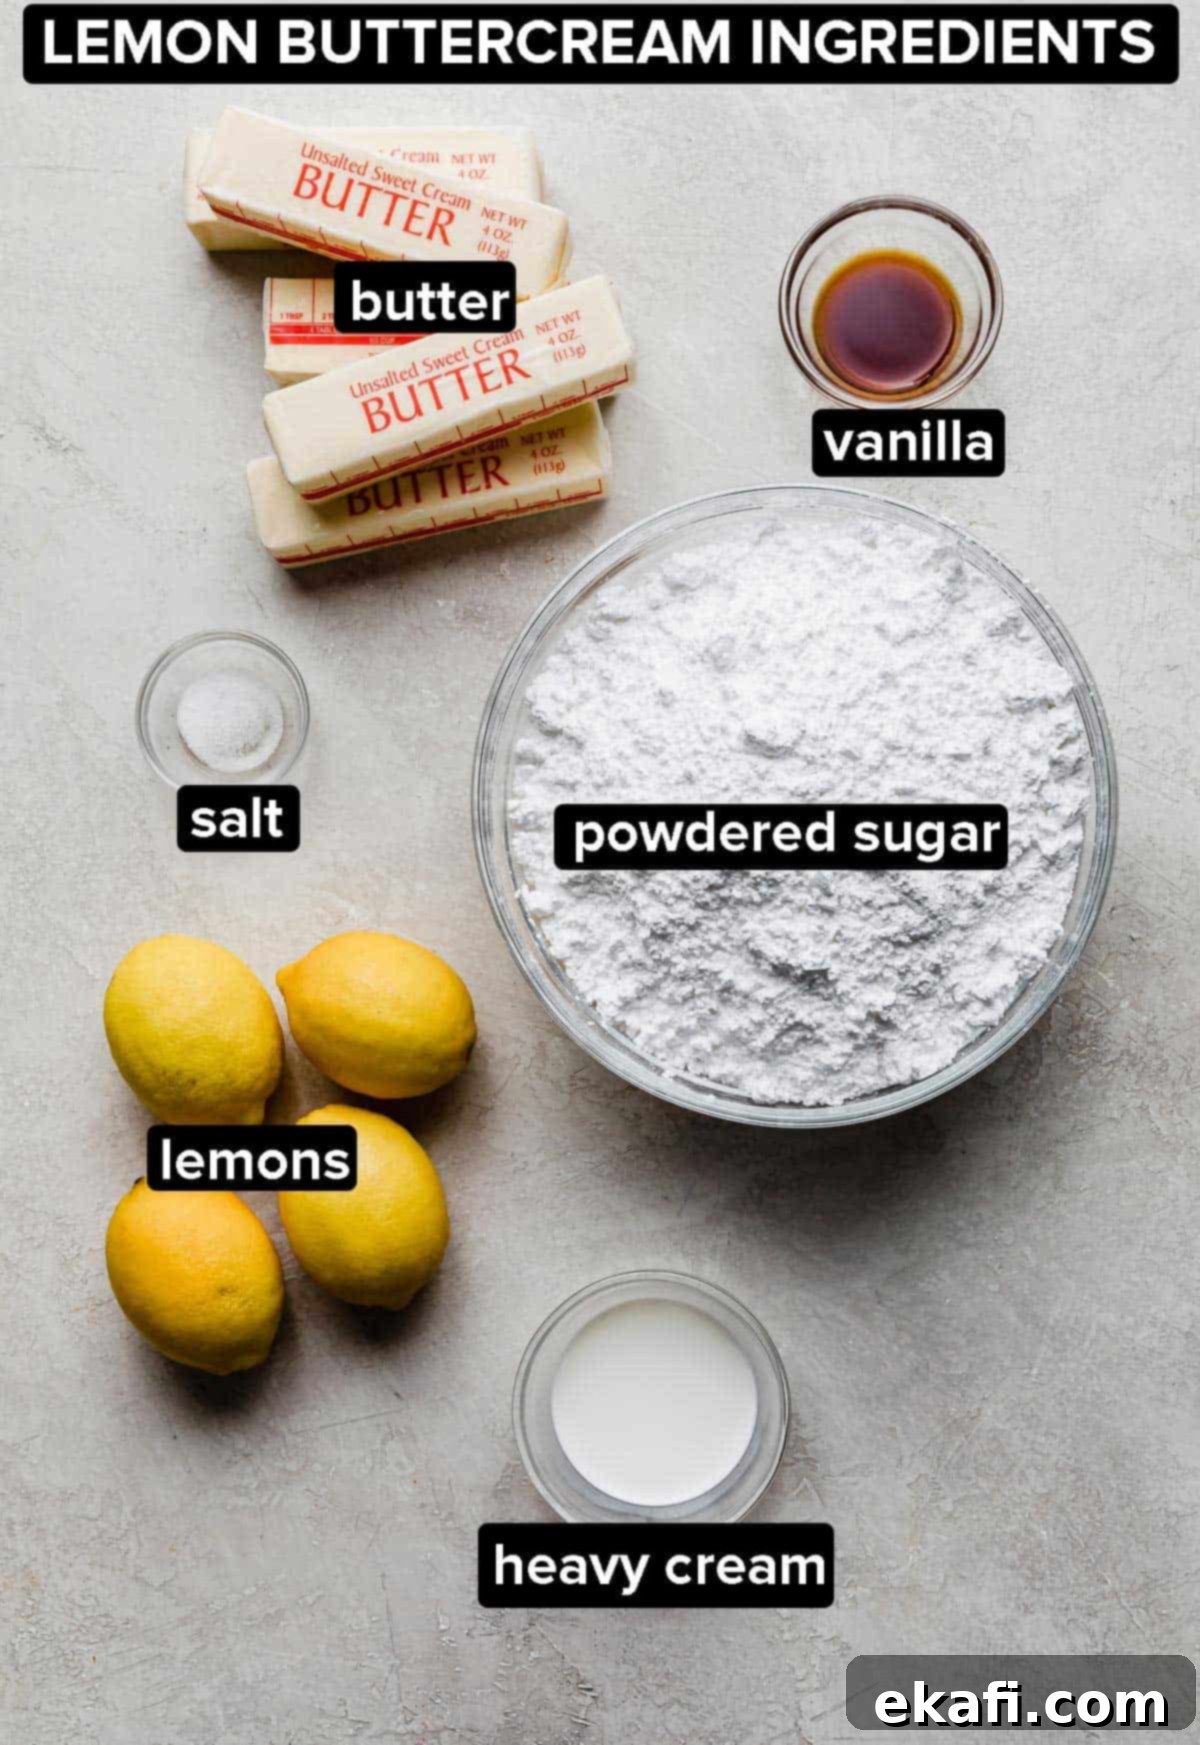
- Heavy Cream: Incorporated into the lemon buttercream, heavy cream plays a vital role in achieving a light, airy, and incredibly smooth frosting. When whipped, heavy cream transforms into a fluffy emulsion, adding volume and a delicate richness that prevents the buttercream from feeling too heavy or overly sweet. It helps create a beautiful, pipeable consistency.
Crafting Your Lemon Bar Cake: Step-by-Step Guide
Creating this magnificent Lemon Bar Cake is a rewarding process that brings together delightful textures and vibrant flavors. Follow these detailed steps to bring this zesty masterpiece to life in your own kitchen:
- Prepare the Shortbread Crust: Begin by properly preparing your cake pans as instructed in the full recipe card below. This foundational shortbread crust is key to the “lemon bar” experience. Mix the ingredients until just combined, then firmly and evenly press the mixture into the prepared cake pans. Bake this delicious base at 350ºF (175ºC) for approximately 11-13 minutes, or until the edges turn a beautiful golden hue and the center appears lightly golden. Once baked, remove the pans from the oven and allow the crusts to cool slightly while you prepare the cake batter.
- Prepare the Moist Lemon Cake Layers: In a separate medium-sized bowl, whisk together all the dry ingredients for the lemon cake (flour, sugar, baking powder, and salt) until thoroughly combined and lump-free. Set this mixture aside. In the bowl of a stand mixer fitted with a paddle attachment, or using a large bowl and a hand mixer, beat the wet ingredients (eggs, buttermilk, sour cream, vegetable oil, lemon juice, vanilla, and lemon zest) until they are smooth and well-integrated. With your mixer running on a low speed, gradually add about half of the dry ingredients, mixing for about 30 seconds until mostly combined. Then, add the remaining dry ingredients and continue mixing just until no dry streaks of flour are visible. It’s crucial not to overmix, as this can lead to a dense and tough cake.
- Combine Batter and Crust: Carefully divide the freshly prepared lemon cake batter evenly among the three cake pans. Pour the batter directly on top of the slightly cooled shortbread crusts. This ingenious layering ensures that every bite of your finished cake includes that delightful crumbly shortbread element, truly mimicking the original lemon bar structure.
- Bake the Cake Layers to Perfection: Place the cake pans in your preheated oven and bake for 30-40 minutes. The cakes are done when a toothpick inserted into the very center of a cake layer comes out with only a few moist crumbs clinging to it. Remember that oven temperatures and pan materials can vary significantly, so keep a close eye on your cakes, adjusting baking time as needed to prevent over-baking.
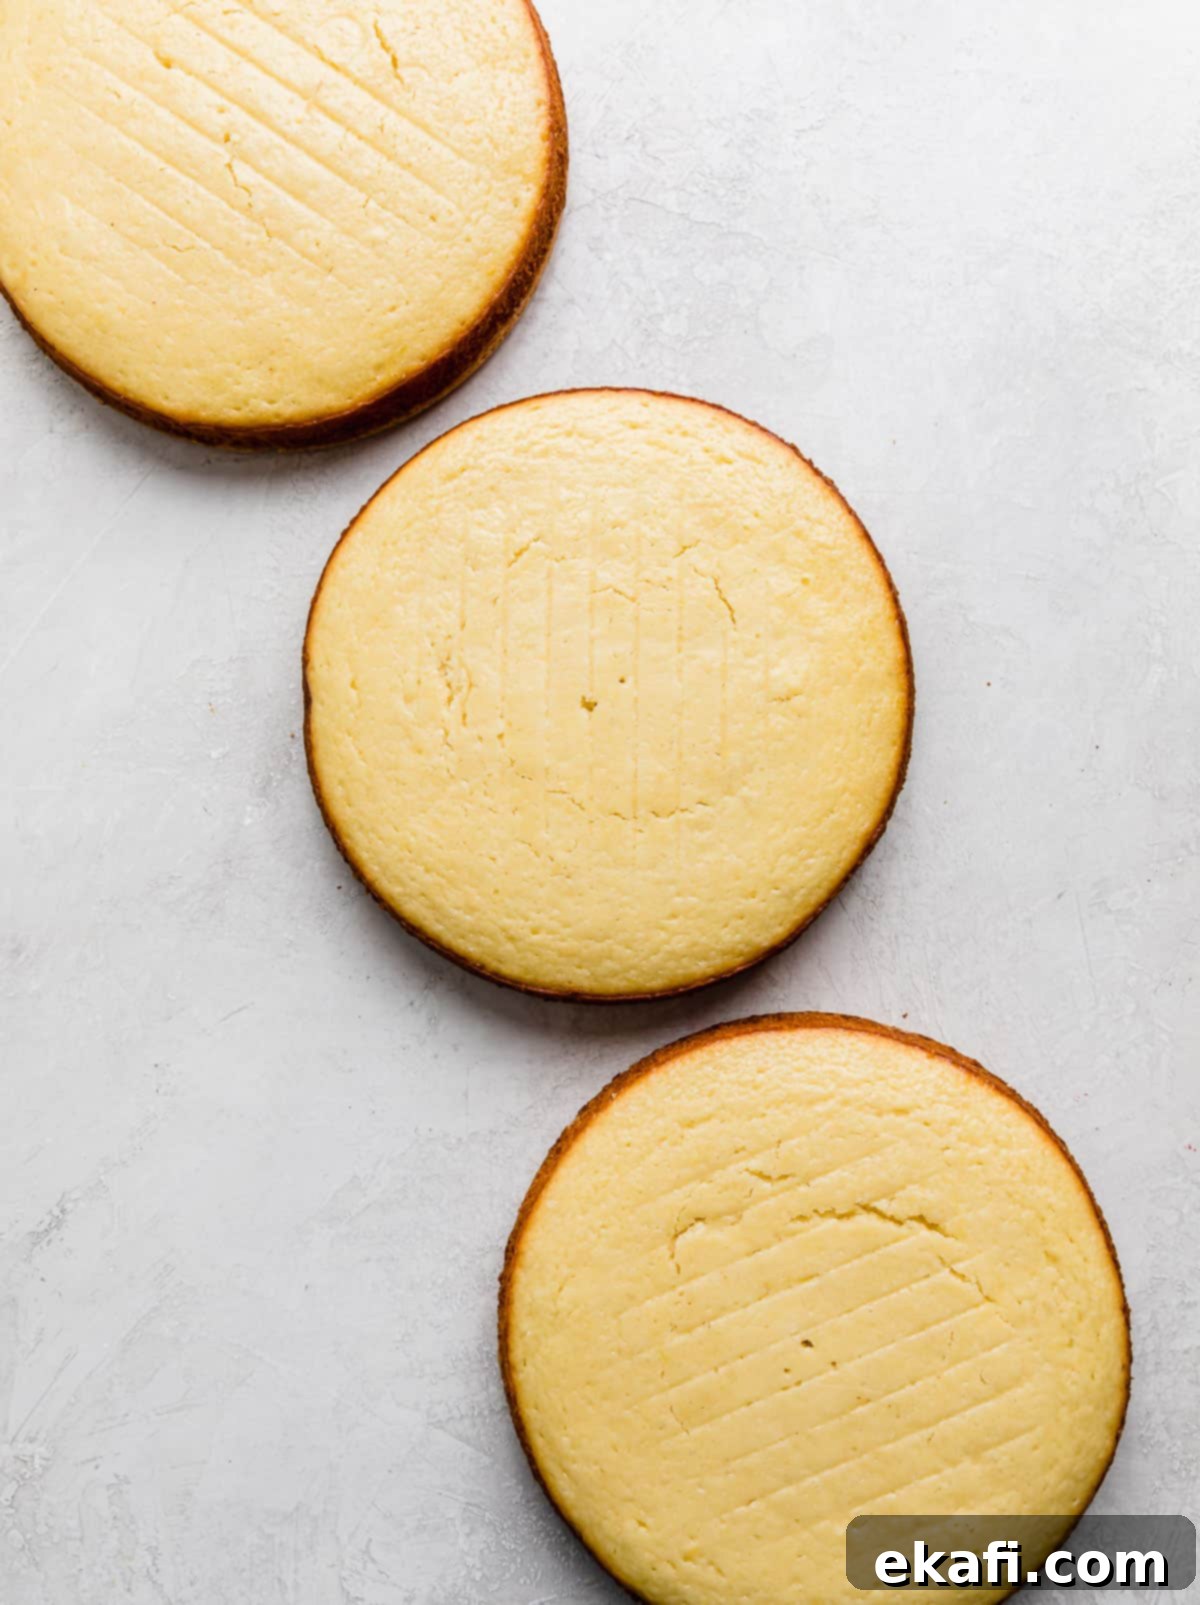
- Cool and Level the Cake Layers: Once baked, remove the pans from the oven and let them cool for about 10-15 minutes in their pans until they are comfortable to handle. Carefully invert the cakes out of their pans and transfer them onto a wire cooling rack to cool completely. For a beautifully even cake assembly, use a sharp serrated knife or a specialized cake leveler to gently slice off any domed tops from each layer, creating flat, uniform surfaces that stack perfectly.
- Craft the Tangy Lemon Curd: In a small saucepan, combine all the designated lemon curd ingredients (egg yolks, whole eggs, granulated sugar, fresh lemon juice, and lemon zest). Place the saucepan over medium heat and stir continuously with a whisk or heat-proof spatula. It’s crucial to keep mixing to prevent the eggs from scrambling and to achieve a smooth, custardy consistency. Continue cooking until the mixture visibly thickens, becoming substantial enough to coat the back of a spoon without running off. This typically takes several minutes and indicates the curd is properly cooked.
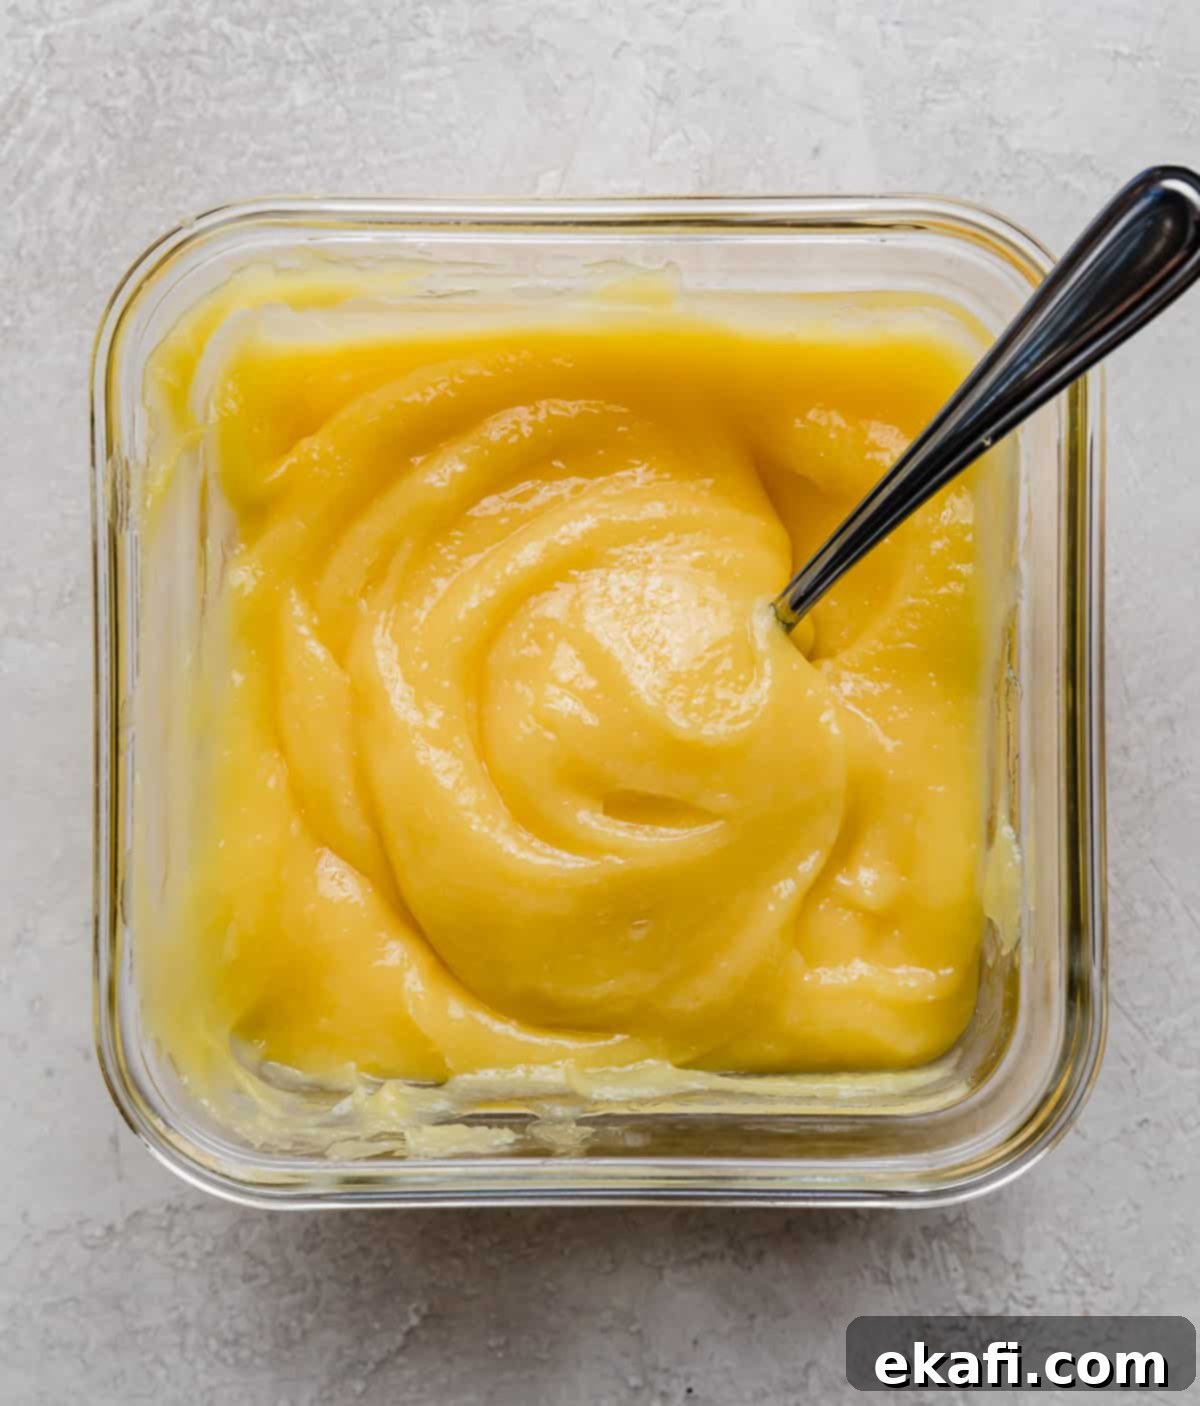
- Achieve Silky Smoothness: Once thickened, immediately pour the hot lemon curd through a fine-mesh strainer directly into a clean storage container. This essential step removes any tiny bits of cooked egg, pulp, or zest, ensuring your curd is incredibly smooth and silky to the palate. To prevent an unsightly “skin” from forming on the surface as it cools, press a piece of plastic wrap directly onto the surface of the curd, ensuring it touches the entire top. Allow it to cool completely at room temperature, then transfer it to the refrigerator to chill and set fully. The lemon curd can be prepared 3-4 days in advance, making this a great make-ahead component for less stress on assembly day.
- Whip Up the Zesty Lemon Buttercream: In the bowl of your stand mixer, fitted with a paddle attachment, cream together the slightly cold unsalted butter, a pinch of salt, and fresh lemon zest. Beat this mixture on medium-high speed until it becomes noticeably smooth, pale in color, and light and fluffy in texture (this can take 3-5 minutes). Gradually add the first 3 cups of sifted powdered sugar, mixing on low speed until fully incorporated, and be sure to scrape down the sides of the bowl as needed to ensure everything is well combined. Next, add 2 tablespoons of fresh lemon juice and the remaining powdered sugar, then beat for another 2-3 minutes on medium-high speed until the frosting is incredibly light and airy. Finally, incorporate 1 tablespoon of heavy cream and beat for about a minute to achieve optimal fluffiness and a creamy consistency. Adjust consistency with more heavy cream or lemon juice if necessary (see tips below). This buttercream is the perfect sweet counterpoint to the tart curd, bringing all the flavors together.
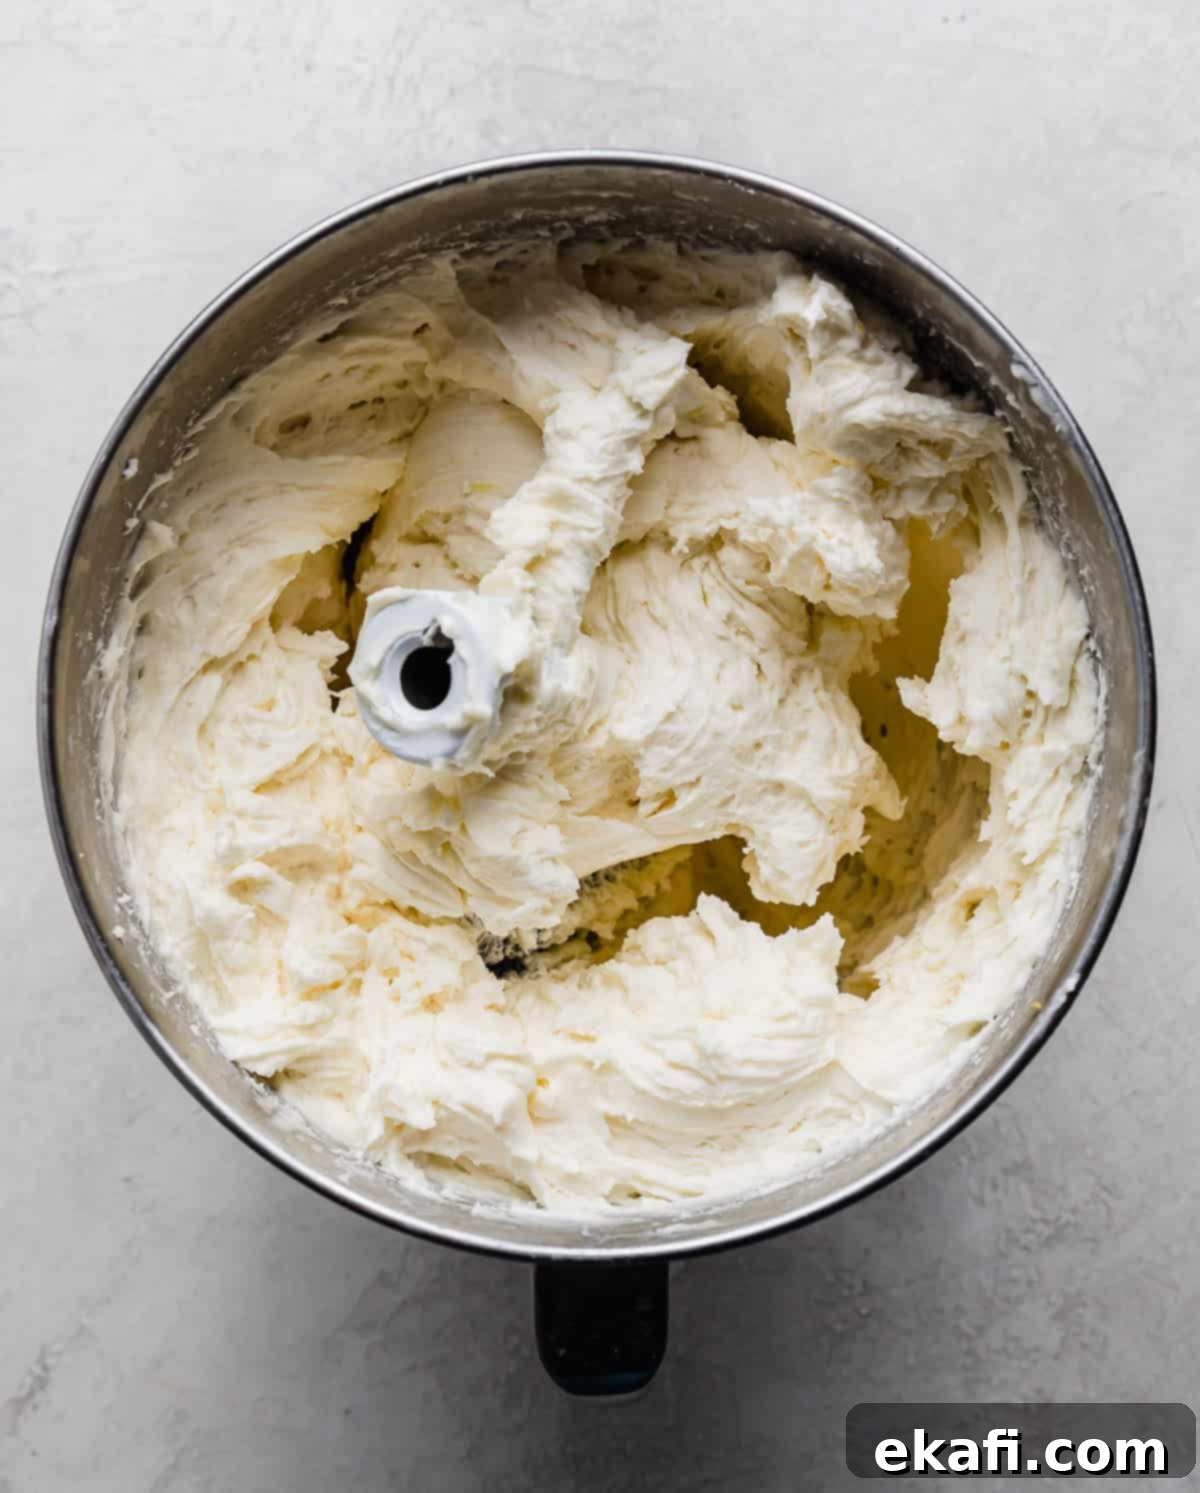
- Begin Cake Assembly: On your chosen cake board or stand, place a small dollop of lemon buttercream in the center; this acts as an anchor to prevent your cake from sliding during the assembly process. Carefully place the first cake layer onto the board, ensuring the shortbread crust side is facing down. Spread a thin, even layer of the lemon buttercream across the entire top surface of this cake layer.
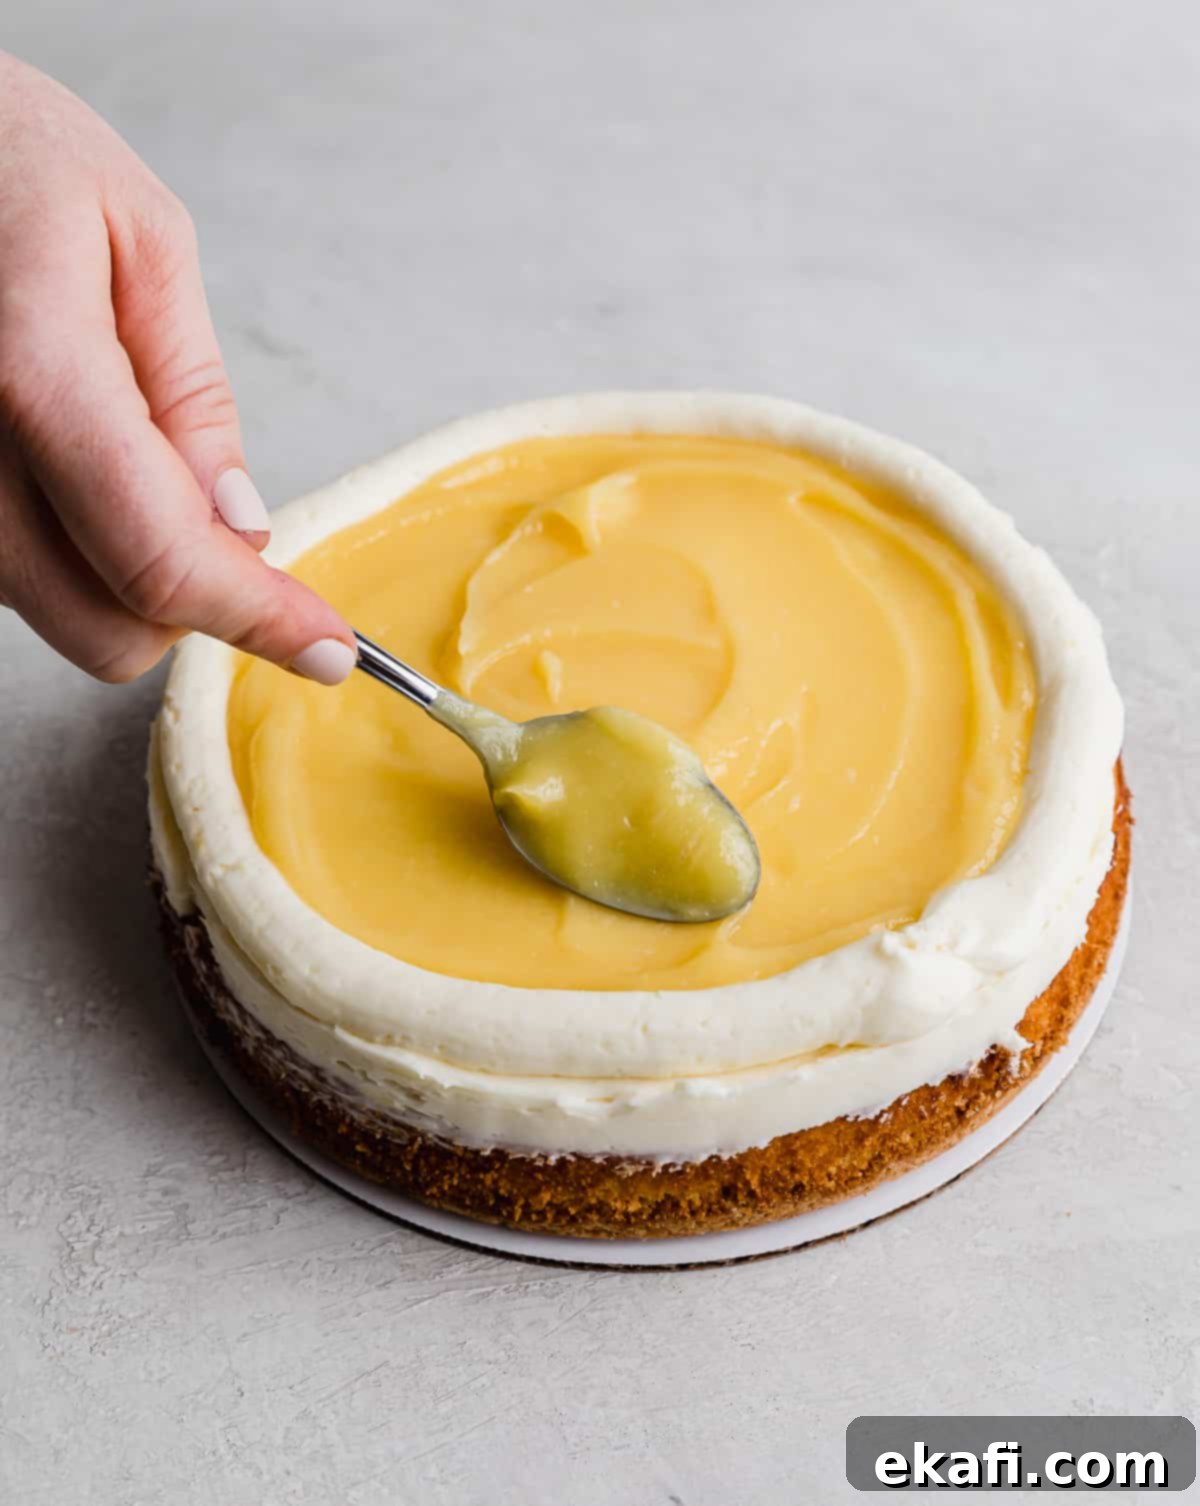
- Create the Lemon Curd Dam: Using a piping bag fitted with a round tip, or simply a spoon and steady hand, pipe a sturdy rim (or “dam”) of buttercream around the very top edge of the cake layer. This dam is essential for holding the lemon curd securely in place and preventing it from seeping out. Within this buttercream dam, spoon 1/2 to 2/3 cup of the chilled, tart lemon curd. Be mindful not to overfill, as excess curd can seep out when the next layer is added and destabilize the cake.
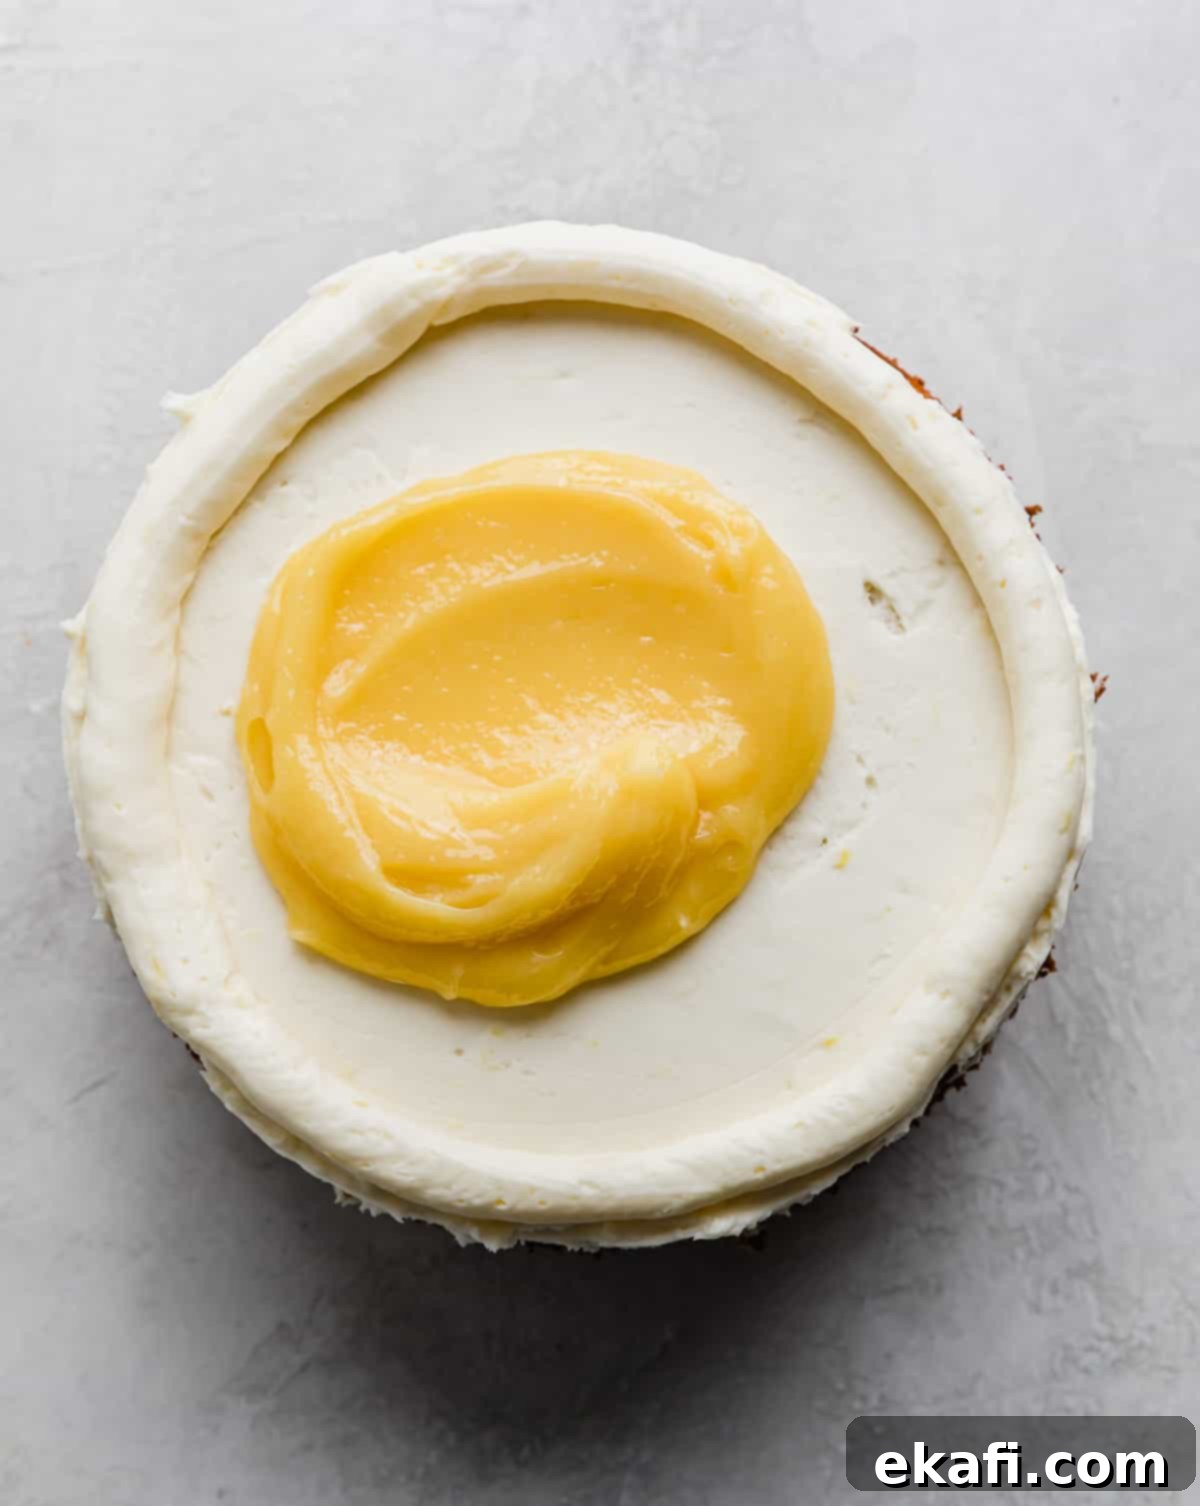
- Layer and Crumb Coat: Carefully place the second cake layer on top of the first, aligning it perfectly. Repeat the process of spreading a thin layer of buttercream, piping a dam, and filling with lemon curd. Finally, place the third and final cake layer on top. Now, apply a very thin, even layer of lemon buttercream all over the entire cake – this is known as a “crumb coat.” Its purpose is to trap any loose crumbs, creating a smooth, stable surface for your final frosting layer. Once applied, refrigerate or freeze the cake for 10-15 minutes, or until the crumb coat is firm and no longer soft to the touch. This step is crucial for a professional-looking finish.
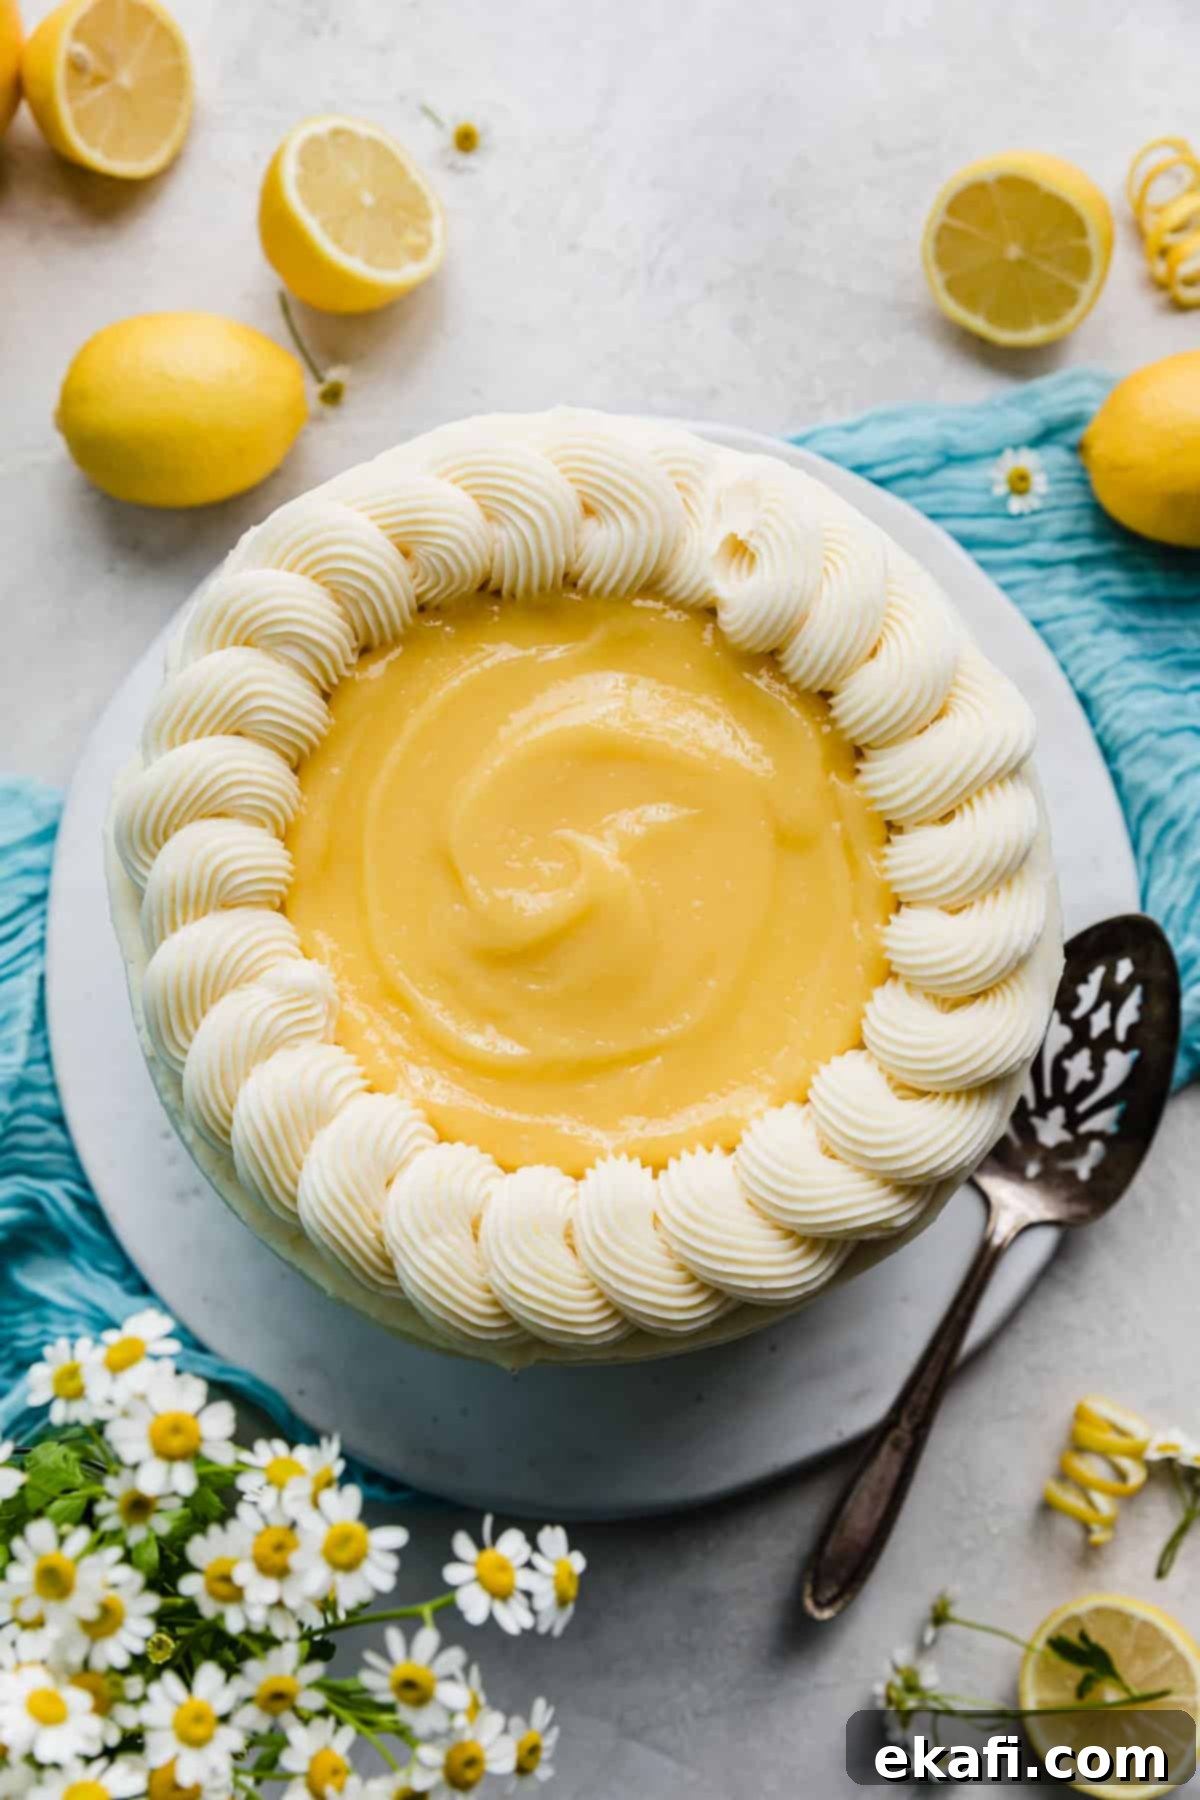
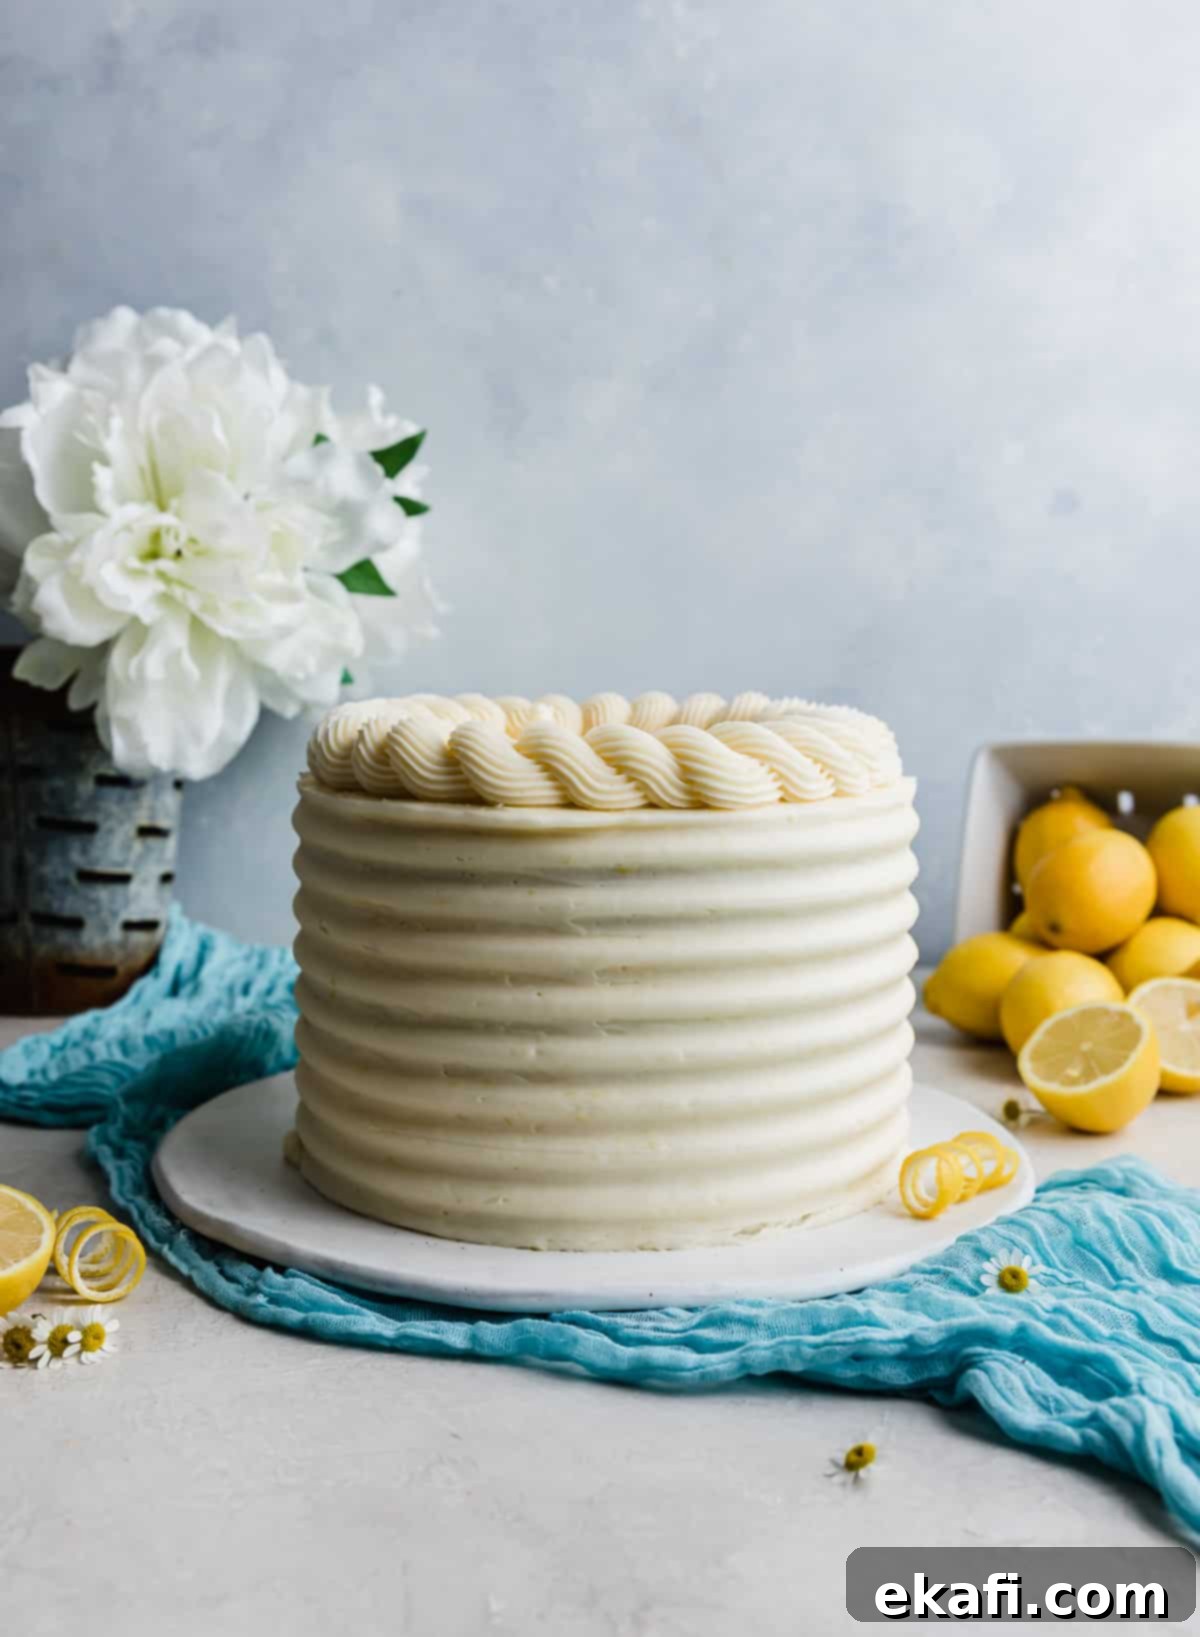
- Apply Final Frosting and Decorate: Once the crumb coat is set, apply the remaining lemon buttercream in a generous, even layer around the entire cake. Use an offset spatula or bench scraper to smooth the sides and top for a polished look. For added elegance and a beautiful finish, we utilized some extra frosting to create a decorative twisted rope border along the top edge of the cake, then filled the center with a final swirl of fresh lemon curd. Feel free to unleash your creativity and add any additional decorations you desire, such as fresh lemon slices, candied lemon peel, or edible flowers, to make your Lemon Bar Cake truly special and visually stunning.
Expert Tips for a Flawless Lemon Bar Cake
Achieving bakery-quality results at home is easier than you think with these helpful tips and tricks. Pay attention to these details for a perfectly executed Lemon Bar Cake:
Baking & Cooling Cake Layers
- Monitor Baking Time Closely: Remember that every oven is unique, and cake pans vary in material and heat conductivity. The baking times provided are estimates. Always keep a watchful eye on your cakes as they bake. Look for visual cues like golden edges and a toothpick test (inserted into the center, it should come out with just a few moist crumbs) to determine doneness, rather than relying solely on the timer. This careful monitoring will prevent over-baking and ensure your lemon cake layers remain beautifully moist and tender.
- Level Your Cake Layers: For a stable and aesthetically pleasing stacked cake, it’s essential to have flat layers. Once your cakes have cooled completely on a wire rack, use a sharp serrated knife or a dedicated cake leveler to carefully trim off any domed tops. This simple step creates even surfaces, making assembly much easier and resulting in a professional-looking, level cake.
- Perfect Your Lemon Curd: To ensure your lemon curd remains wonderfully smooth and silky, it’s crucial to prevent a “skin” from forming on its surface during cooling. Immediately after straining the warm curd, place a piece of plastic wrap directly onto its surface, ensuring it touches the entire top. This creates a barrier against air, keeping the curd beautifully consistent. Always allow it to cool completely before chilling it further in the refrigerator.
- Secure Your Cake Base: To prevent any frustrating sliding or movement during the assembly process, place a small dab of buttercream directly onto your cake board or serving stand before positioning the first cake layer. This acts as a gentle, edible adhesive, keeping your cake firmly in place as you stack and decorate, ensuring stability from the very beginning.
Mastering Your Lemon Buttercream
- Prepare Buttercream in Advance: For convenience and to break up your baking tasks, your lemon buttercream can be prepared up to 3-4 days ahead of time. Store it in an airtight container in the refrigerator. A few hours before you plan to assemble your cake, take the frosting out and let it come to a cool room temperature. Before using, give it a good whip in your stand mixer until it regains its smooth, light, and spreadable consistency.
- Achieve Ultra-Smooth Buttercream: Sifting your powdered sugar before adding it to the butter mixture is a game-changer for silky-smooth buttercream. It removes any lumps, ensuring a uniform, velvety texture without grainy bits. As you mix, remember to frequently scrape down the sides and bottom of your mixing bowl with a spatula to incorporate all ingredients evenly and prevent any unmixed pockets from forming.
- Adjust Lemon Flavor to Your Liking: The beauty of homemade buttercream is the ability to customize. As you prepare the lemon buttercream, taste it! If you desire a more intense, zesty lemon flavor, add additional fresh lemon juice, one tablespoon at a time, mixing well after each addition. Continue this process until you achieve your perfect balance of sweet and tart. Be cautious not to add an excessive amount of liquid, as this can thin the frosting excessively and compromise its ability to hold its shape for piping and stacking.
- Adjust Consistency with Heavy Cream: If, after mixing, your buttercream feels too stiff or thick to spread smoothly at room temperature, simply add a small amount of heavy cream, a teaspoon at a time. Beat well after each addition until you reach your desired, perfectly spreadable consistency. This technique ensures a smooth application without tearing the cake layers.
Successful Cake Assembly & Decoration Techniques
- Avoid Overfilling Your Layers: When filling the buttercream dam with lemon curd, exercise restraint. Overfilling the layers will inevitably lead to the curd seeping out when the next cake layer is placed on top. This not only creates a messy appearance but also compromises the structural integrity and stability of your cake, making it challenging to frost smoothly. Aim for a generous but contained amount within the dam to maintain neatness and stability.
- Optimal Buttercream Temperature for Decorating: The temperature of your buttercream is critical for successful decorating. If your buttercream is too warm, it will be soft, difficult to pipe cleanly, and the “dam” around your lemon curd filling won’t hold its shape, causing the curd to escape and creating a messy filling. For the best results, I’ve found that buttercream that is slightly colder than room temperature (but still pliable and not hard) is ideal. This firmer consistency provides better structure for piping and allows for smoother, cleaner frosting work. If it’s too soft, pop it in the fridge for 10-15 minutes, then give it a quick re-whip before proceeding.
Make Ahead, Storing, and Freezing Guidelines
Thoughtful preparation and proper storage can significantly extend the enjoyment of your Lemon Bar Cake, allowing you to savor its fresh flavors for longer or prepare components in advance. Here’s how to manage it:
- Freezing Cake Layers in Advance: For ultimate convenience and to streamline your baking process, you can easily bake your cake layers ahead of time! Once completely cooled, individually wrap each layer tightly in several layers of plastic wrap, ensuring no air exposure, and then add an additional layer of aluminum foil for extra protection. Properly wrapped, these cake layers can be frozen for up to four weeks without compromising their flavor or moisture. When ready to assemble, simply remove them from the freezer and let them thaw at room temperature for about one hour before unwrapping and proceeding with the assembly steps.
- Preparing Lemon Curd Ahead: The vibrant, tangy lemon curd is another excellent component to prepare in advance. It can be made 3-4 days before your cake assembly day, which allows its flavors to meld beautifully and saves you precious time. Once cooled and strained, store it in an airtight container in the refrigerator until it’s time to incorporate it into your cake.
- Storing the Assembled Cake: Due to the fresh lemon curd filling between its layers and the heavy cream content in the luscious buttercream frosting, the assembled Lemon Bar Cake is best stored in the refrigerator. Ensure it is covered with a cake dome or placed in an airtight container or wrapped carefully with plastic wrap to prevent it from drying out, absorbing other refrigerator odors, or spoiling. When stored correctly, it will remain fresh and delicious for 3-5 days.
For a comprehensive guide on preserving your baked creations, including detailed methods and best practices for various types of cakes, be sure to explore my detailed resource: How to Store and Freeze Cakes!
Frequently Asked Questions About Lemon Bar Cake
Yes, absolutely! Given that this delightful Lemon Bar Cake contains a generous amount of homemade lemon curd between its layers and uses heavy cream in the luscious buttercream frosting, it is highly recommended to store it in the refrigerator. Chilling helps maintain the freshness, stability, and food safety of these ingredients, ensuring your cake remains delicious and safe to eat for an extended period. Always keep it covered with a cake dome or plastic wrap to prevent it from drying out or absorbing other food odors in the fridge.
It’s a common concern with homemade curds, which rely heavily on eggs for their rich texture and thickening properties. The distinct “eggy” flavor often comes from the egg whites, rather than the yolks. Our recipe specifically calls for four extra egg yolks in addition to two whole eggs for the curd. To prevent an undesirable eggy taste, it’s crucial to meticulously separate the four egg yolks and ensure as much of the egg white as possible is removed from them. The whites contain the majority of that characteristic flavor you want to avoid in a perfectly tangy lemon curd. Plus, proper cooking (stirring continuously over medium heat without boiling) helps to cook out any raw egg flavor effectively without overcooking the curd into a scrambled texture.
Yes, you absolutely can! Freezing is one of the many wonderful advantages of baking a layer cake, offering great flexibility. You have a couple of excellent options: you can freeze the individual cake layers ahead of time (wrapped tightly in plastic wrap and then foil) and assemble the cake at a later, more convenient date. Alternatively, you can freeze the entire decorated cake. To do this, first place the whole cake, uncovered, in the freezer until the frosting is completely firm and set (this typically takes a few hours and prevents any smudging). Once solid, wrap the entire cake thoroughly in several layers of plastic wrap, followed by a layer of aluminum foil to protect it from freezer burn. The cake can be safely stored in the freezer for up to 2 months. When you’re ready to enjoy it, transfer the cake to the refrigerator to thaw overnight. In the morning, remove the plastic wrap (this prevents condensation from forming on the frosting as it fully thaws) and continue to let it thaw in the fridge until it reaches your desired serving temperature.
More Zesty Lemon Recipes to Enjoy
If you’re a true lemon enthusiast and can’t get enough of that bright, tangy flavor, you’ll love these other fantastic lemon-infused recipes:
- Lemon Jello Cake: A wonderfully light and airy cake with a distinct jello-infused lemon flavor.
- Lemon Poppy Seed Muffins: Perfect for breakfast or a snack, these muffins are packed with lemon zest and a delightful crunch from poppy seeds.
- Lemon Poppy Seed Bundt Cake: An elegant bundt cake offering a moist crumb and bright lemon flavor, complete with a sweet glaze.
- Lemon Zucchini Bread: A surprisingly delicious way to enjoy zucchini, with a refreshing lemon twist.
- Lemon Shortbread Cookies: Buttery, crisp, and infused with vibrant lemon, these cookies are melt-in-your-mouth perfection.
Did you make this recipe? I’d love to hear about it! Click here to leave a rating and review, or scroll below the recipe card and do so there.
Stay up-to-date by following us on Instagram, Facebook, and Pinterest for more delicious recipes and baking inspiration.
Print
SaveSaved!
Review
Lemon Bar Cake
Ingredients
Shortbread Crust
- 1 cup unsalted butter – cold and cubed, for a perfectly flaky crust
- 1/2 cup granulated sugar – for sweetness in the crust
- 2 1/2 cups all purpose flour – the base of our tender crust
- 1/4 teaspoon salt – to balance the flavors
Lemon Cake
- 3 cups all purpose flour – for the cake structure
- 1 3/4 cups granulated sugar – for sweetness and moisture
- 1 tablespoon baking powder – for lift and tenderness
- 1 teaspoon salt – enhances all flavors
- 5 large eggs – for structure and richness
- 1/2 cup buttermilk – for moisture and tender crumb
- 1 cup sour cream – adds incredible moisture and a slight tang
- 1 cup vegetable oil – keeps the cake moist and tender
- 1/2 cup lemon juice – freshly squeezed for authentic lemon flavor
- 2 teaspoons vanilla extract – for a touch of warmth and depth
- 3 tablespoons lemon zest – amplifies the fresh lemon aroma and taste
Lemon Curd
- 4 large egg yolks – for richness and thickening without extra eggy flavor
- 2 large eggs – for structure and emulsification in the curd
- 1 cup granulated sugar – to balance the tartness
- 3/4 cup lemon juice – freshly squeezed, the star of the curd
- 1 tablespoon lemon zest – for intense lemon aroma
Lemon Buttercream
- 2 1/2 cups unsalted butter – slightly cold, for best whipping consistency
- 7 1/2 cups powdered sugar – sifted, may need up to 9 cups for desired thickness so have more on hand if needed
- 2 large lemons – zested, for vibrant lemon flavor
- 2-3 tablespoons lemon juice – freshly squeezed, adjust to taste
- pinch salt – to balance sweetness
- 1-3 tablespoons heavy cream – for a light, fluffy consistency
Equipment
-
Ateco cake stand – or any sturdy cake stand for assembly and presentation
-
Three 8-inch Round Cake Pans – for even baking of the cake layers and crust
-
Stand Mixer or Hand Mixer – essential for whipping cake batter and buttercream to perfection
-
Small Saucepan – for cooking the lemon curd
-
Fine Mesh Strainer – to ensure a silky smooth lemon curd
-
Piping Bag and Round Tip (optional) – for creating a neat buttercream dam and decorative border
Instructions
Shortbread Crust
-
Preheat your oven to 350º F (175ºC). To prepare your three 8-inch round cake pans, generously spray each with a high-quality nonstick baking spray, then line the bottom of each pan with a circle of parchment paper. This meticulous preparation ensures your shortbread crusts and cake layers release easily after baking.
-
In a medium-sized mixing bowl, combine the granulated sugar, all-purpose flour, and a pinch of salt. Using either two forks or a sturdy pastry cutter, carefully cut in the cold, cubed unsalted butter until the mixture resembles coarse crumbs with no butter pieces larger than the size of a small pea. This ensures a tender and flaky crust. Divide this crumbly mixture evenly among your three prepared cake pans. Using the bottom of a clean glass or your clean hands, firmly and evenly press the mixture into the bottom of each pan to form a compact crust.
-
Bake for 11-13 minutes, or until the edges are beautifully golden brown and the centers are just starting to acquire a light golden color. Keep an eye on them to prevent over-baking.
-
Remove the pans from the oven to cool slightly on a wire rack, but keep the oven at 350º F (175ºC) to bake the cake layers immediately after.
Lemon Cake
-
In a medium bowl, thoroughly whisk together the all-purpose flour, granulated sugar, baking powder, and salt until all dry ingredients are uniformly combined. Set this dry mixture aside.
-
In the bowl of a stand mixer fitted with a paddle attachment (or using a large bowl and a hand mixer), beat the eggs, buttermilk, sour cream, vegetable oil, fresh lemon juice, vanilla extract, and lemon zest until the mixture is smooth and uniform in consistency. With the mixer on low speed, carefully add about half of the dry ingredients and mix for approximately 30 seconds, until it’s mostly combined. Then, add the remaining dry ingredients and mix just until no dry streaks of flour remain. Be careful not to overmix the batter, as this can lead to a tough cake.
-
Divide the lemon cake batter evenly between your three cake pans, pouring it gently on top of the slightly cooled shortbread crusts. Bake for 30-40 minutes, or until a wooden toothpick inserted into the center of a cake layer comes out with only a few moist crumbs clinging to it. (Gentle reminder that cake pans and ovens are all different, so be sure to pay close attention to when your cakes are done baking. It may take shorter or longer than the time listed.)
-
Remove the pans from the oven. Allow them to cool in their pans for about 10-15 minutes. When they have cooled enough to handle, carefully flip the cakes out of the pans and onto a wire cooling rack to cool completely. Once fully cooled, using a serrated knife or a dedicated cake leveler, cut the domed top off of each layer. This will ensure your cake is flat and even when assembled, creating a professional presentation.
-
If making the cakes ahead of time, once completely cooled, wrap each individual layer tightly in plastic wrap and freeze for up to four weeks. Let the frozen cakes sit at room temperature for one hour before unwrapping and assembling the cake.
Lemon Curd
-
In a small saucepan over medium heat, combine all the lemon curd ingredients: egg yolks, whole eggs, granulated sugar, fresh lemon juice, and lemon zest. Mix continuously with a whisk while cooking until the mixture has thickened enough to generously coat the back of a spoon. This active stirring is crucial to prevent the eggs from scrambling.
-
Once thickened, immediately pour the curd through a fine mesh strainer into a clean storage container to ensure it is perfectly smooth and silky, removing any small bits of cooked egg or zest. Place plastic wrap directly onto the top surface of the curd to prevent a film-like skin from forming as it cools. Cool completely at room temperature, then store in the refrigerator. This curd can be made 3-4 days in advance and stored in the fridge until it’s time to assemble the cake, making your baking day smoother.
Lemon Buttercream
-
In the bowl of a stand mixer fitted with a paddle attachment, beat the slightly cold unsalted butter, a pinch of salt, and finely grated lemon zest until the mixture is beautifully smooth, light in texture, and pale in color (about 3-5 minutes). Sift the first 3 cups of powdered sugar into the butter mixture and mix well on low speed, gradually increasing to medium, scraping the sides of the bowl as needed to ensure complete incorporation and a smooth frosting base.
-
Add 2 tablespoons of fresh lemon juice and the remaining powdered sugar to the bowl. Beat for another 2-3 minutes on medium-high speed until the buttercream is wonderfully light, airy, and fluffy.
-
Finally, add 1 tablespoon of heavy cream and beat for about a minute until fully incorporated and the desired consistency is achieved. If the frosting is too thick to spread easily at room temperature, add more heavy cream, one teaspoon at a time, until it reaches your preferred consistency.
-
The frosting can be made a few days in advance and stored in an airtight container in the refrigerator. A few hours before cake assembly, set the frosting out at room temperature to soften. Once softened, beat it in a stand mixer until it is smooth and easily spreadable again.
Assembly
-
Place a small dollop of buttercream in the center of your cake board or serving stand; this acts as an adhesive to prevent the cake from sliding. Carefully place the first cooled cake layer onto the board, ensuring the shortbread crust side is facing down.
-
Spread a thin, even layer of lemon buttercream evenly over the entire top surface of this first cake layer using an offset spatula.
-
Pipe a sturdy rim of buttercream around the top edge of the cake layer to create a dam. This dam is crucial for containing the lemon curd (make sure the buttercream is slightly colder than room temperature to hold its shape well; see notes section for more details on this). Inside this buttercream dam, carefully spoon 1/2 to 2/3 cup of the chilled lemon curd. Be sure to not overfill the cake, as excess curd will seep out when you add the next layer, making the cake unstable and difficult to finish icing smoothly.
-
Repeat steps 1 and 2 with the second layer of cake, carefully placing the second cake layer on top of the first layer and aligning it.
-
Place the third and final cake layer on top. Apply a thin, even layer of lemon buttercream all over the entire cake, including the sides and top; this is your “crumb coat.” This layer traps any loose crumbs, creating a smooth surface for your final frosting. Refrigerate or freeze the cake for a few minutes (10-15 minutes), until the buttercream crumb coat is cold and no longer soft to the touch.
-
Once the crumb coat is set, apply the final, thicker layer of frosting evenly around the entire cake. Smooth the frosting with an offset spatula or bench scraper. For a beautiful finish, we used extra frosting to create a twisted rope border around the top edge of the cake and filled the exposed center with additional lemon curd. Feel free to add any additional decoration as desired, such as fresh lemon slices or edible flowers, to personalize your masterpiece.
Notes
Assembly Tip for Buttercream: If your buttercream is too warm, decorating the cake will be significantly more difficult. A warm buttercream will be too soft to pipe cleanly, and the buttercream dam won’t hold the lemon curd in when another layer is placed on top, leading to a messy cake. I’ve found that keeping my buttercream slightly colder than room temperature when I’m decorating a cake makes it the easiest to work with, providing better structure and control. If it feels too soft, chill it briefly in the fridge and then re-whip.
We use a third-party nutrition calculator to estimate the nutrition facts provided. Please keep in mind that this is an estimate, and the actual values may vary depending on ingredient brands and exact quantities used. Additionally, not all of the lemon curd or frosting may be used in the final assembly of the cake, which can affect the overall nutritional content per serving.
