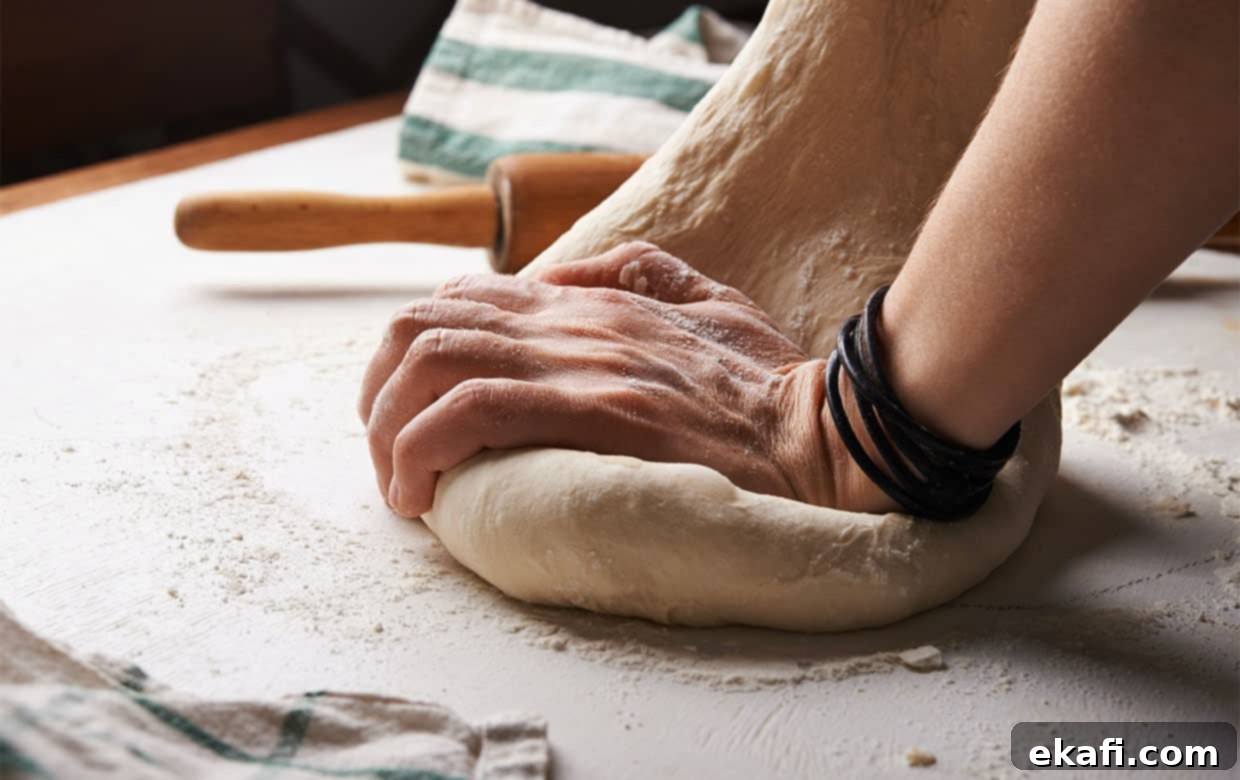
The Ultimate Homemade Pizza Dough Recipe: Easy, Foolproof, and Delicious for Your Best Pizza Night
Elevate your pizza night with our ultimate homemade pizza dough recipe! This guide will empower you to master the art of crafting a perfect pizza crust – one that’s wonderfully soft, delightfully chewy, and boasts just the right amount of crispiness. Forget soggy bases or tough textures; this foolproof recipe delivers consistent results, making it the ideal foundation for any pizza creation you can dream up.
There’s an undeniable joy in making pizza from scratch, and it all starts with exceptional dough. Whether you’re planning a fun family dinner, a cozy date night, or simply craving the freshest slice, this quick and easy pizza dough recipe is your secret weapon. It’s incredibly versatile and pairs beautifully with a wide array of toppings. We especially love using it for our Pepperoni Pizza Dip (yes, you can use the dough for this!), a vibrant Pesto Arugula Pizza, or a uniquely flavorful Blackberry Pizza. The delicious possibilities are truly endless!
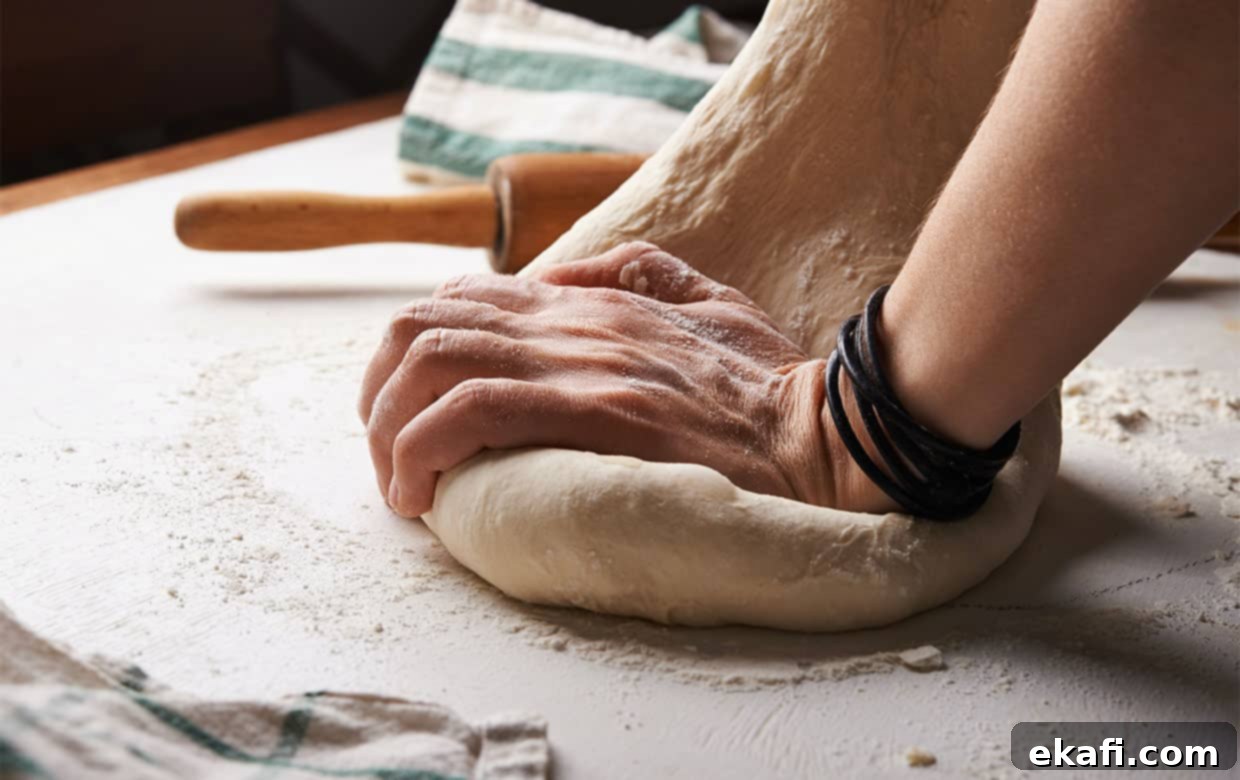
Why This Is The Best Pizza Dough Recipe You’ll Ever Make
What makes this particular homemade pizza dough stand out from the rest? It’s a combination of practical benefits and exceptional results that will make it your go-to recipe:
- Generous Yield for Multiple Pizzas. Unlike many recipes that yield only one small pizza, this recipe is designed to make enough dough for two medium-sized pizzas. This means you can easily feed a family, entertain guests, or even get three thinner crust pizzas if you prefer. No need to double the ingredients or repeat steps; you’ll have plenty of delicious dough ready for your culinary creativity. It’s perfect for making dinner for a big family an absolute breeze, ensuring everyone gets their favorite slice.
- Unbeatable Flavor and Texture. This isn’t just an easy pizza dough recipe; it’s one that delivers outstanding flavor and a superior texture. Once baked, you’ll be treated to a crust that is both tender and chewy on the inside, with a satisfyingly crisp exterior. The subtle hints of honey and the perfect balance of salt contribute to a depth of flavor that complements any topping combination. It’s truly a family favorite that will have everyone asking for seconds!
- Effortlessly Easy and Consistently Perfect. Designed with simplicity in mind, this truly is an easy pizza dough recipe. Whether you’re a beginner baker or have years of experience, the straightforward, step-by-step instructions ensure success every single time. We proudly say that this recipe has never failed us, providing perfectly risen, pliable dough consistently. Say goodbye to guesswork and hello to perfect pizza crusts with minimal effort!
Essential Ingredient Notes for Perfect Pizza Dough
Great pizza dough starts with quality ingredients. Understanding the role of each component will help you achieve the best possible results and empower you to make informed substitutions if needed.
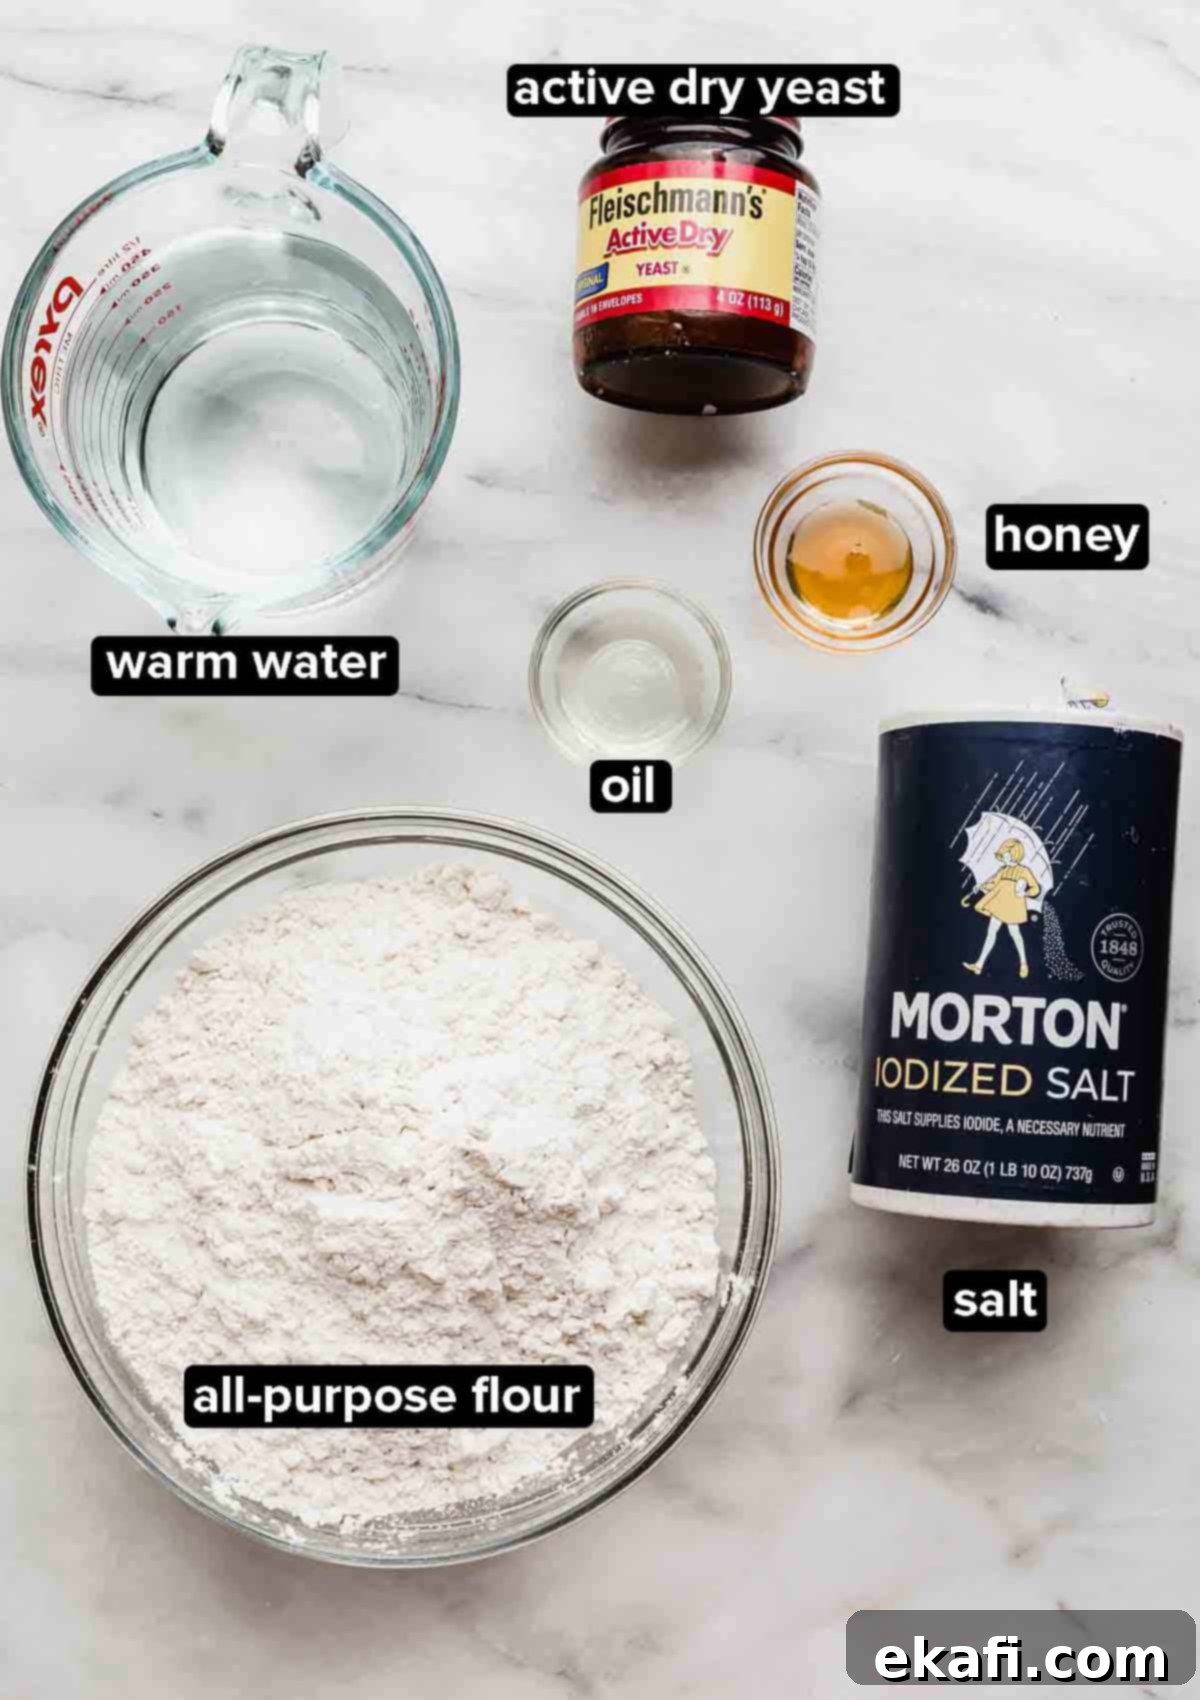
- Flour: The backbone of your dough. We primarily use all-purpose flour in this recipe for its balanced protein content (typically 10-12%), which provides a good chewiness without being too tough. You can also successfully use bread flour for an even chewier crust due to its higher protein (12-14%), or a portion of whole wheat flour for added flavor and nutrients, though this might result in a denser dough. Avoid pastry or cake flour as their low gluten content isn’t suitable for pizza dough.
- Yeast: This microscopic marvel is responsible for the magic of rise and lift in your pizza crust. We use active dry yeast, which requires activation in warm water and a bit of sugar. It consumes the sugars in the dough, producing carbon dioxide gas that gets trapped in the gluten network, causing the dough to expand and create that airy, soft texture. Ensure your yeast is fresh; old yeast won’t activate properly, leading to a flat dough.
- Honey: While not strictly essential for the pizza crust itself, a small amount of honey serves a crucial purpose: it’s food for your active dry yeast! Yeast loves a bit of sugar to “wake up” and begin its fermentation process, ensuring a robust activation and a good rise for your crust. The honey also contributes a very subtle sweetness and helps with browning. If you don’t have honey, an equal amount of granulated sugar works perfectly well.
- Salt: Far more than just a flavor enhancer, salt plays several vital roles in dough. It boosts the overall flavor of the crust, preventing it from tasting bland. Additionally, salt helps to tighten and strengthen the gluten structure, making the dough more elastic and easier to handle, and allowing it to trap more gas for a better rise. It also helps to control the yeast’s activity, preventing it from over-fermenting.
- Oil: A light layer of oil is essential for greasing the bowl in which the dough will rise. This prevents the dough from sticking, making it easy to remove once risen. Furthermore, coating the dough ball lightly with oil helps to keep its surface from drying out and forming a crust during the rising process, which can hinder an even rise. Olive oil adds a lovely Mediterranean flavor, but neutral-flavored vegetable oil or canola oil work just as effectively.
- Water: The temperature of your water is critical. Use warm water (ideally between 105-115°F or 40-46°C). Water that’s too cold won’t activate the yeast, while water that’s too hot can kill it. Aim for lukewarm, not hot. Filtered water is always a good choice if your tap water has a strong chemical taste.
Step-by-Step Instructions: Crafting Your Perfect Pizza Dough
Follow these simple steps to create a beautiful, pliable pizza dough that’s ready for your favorite toppings. A stand mixer with a dough hook makes the process even easier, but you can absolutely make this dough by hand.
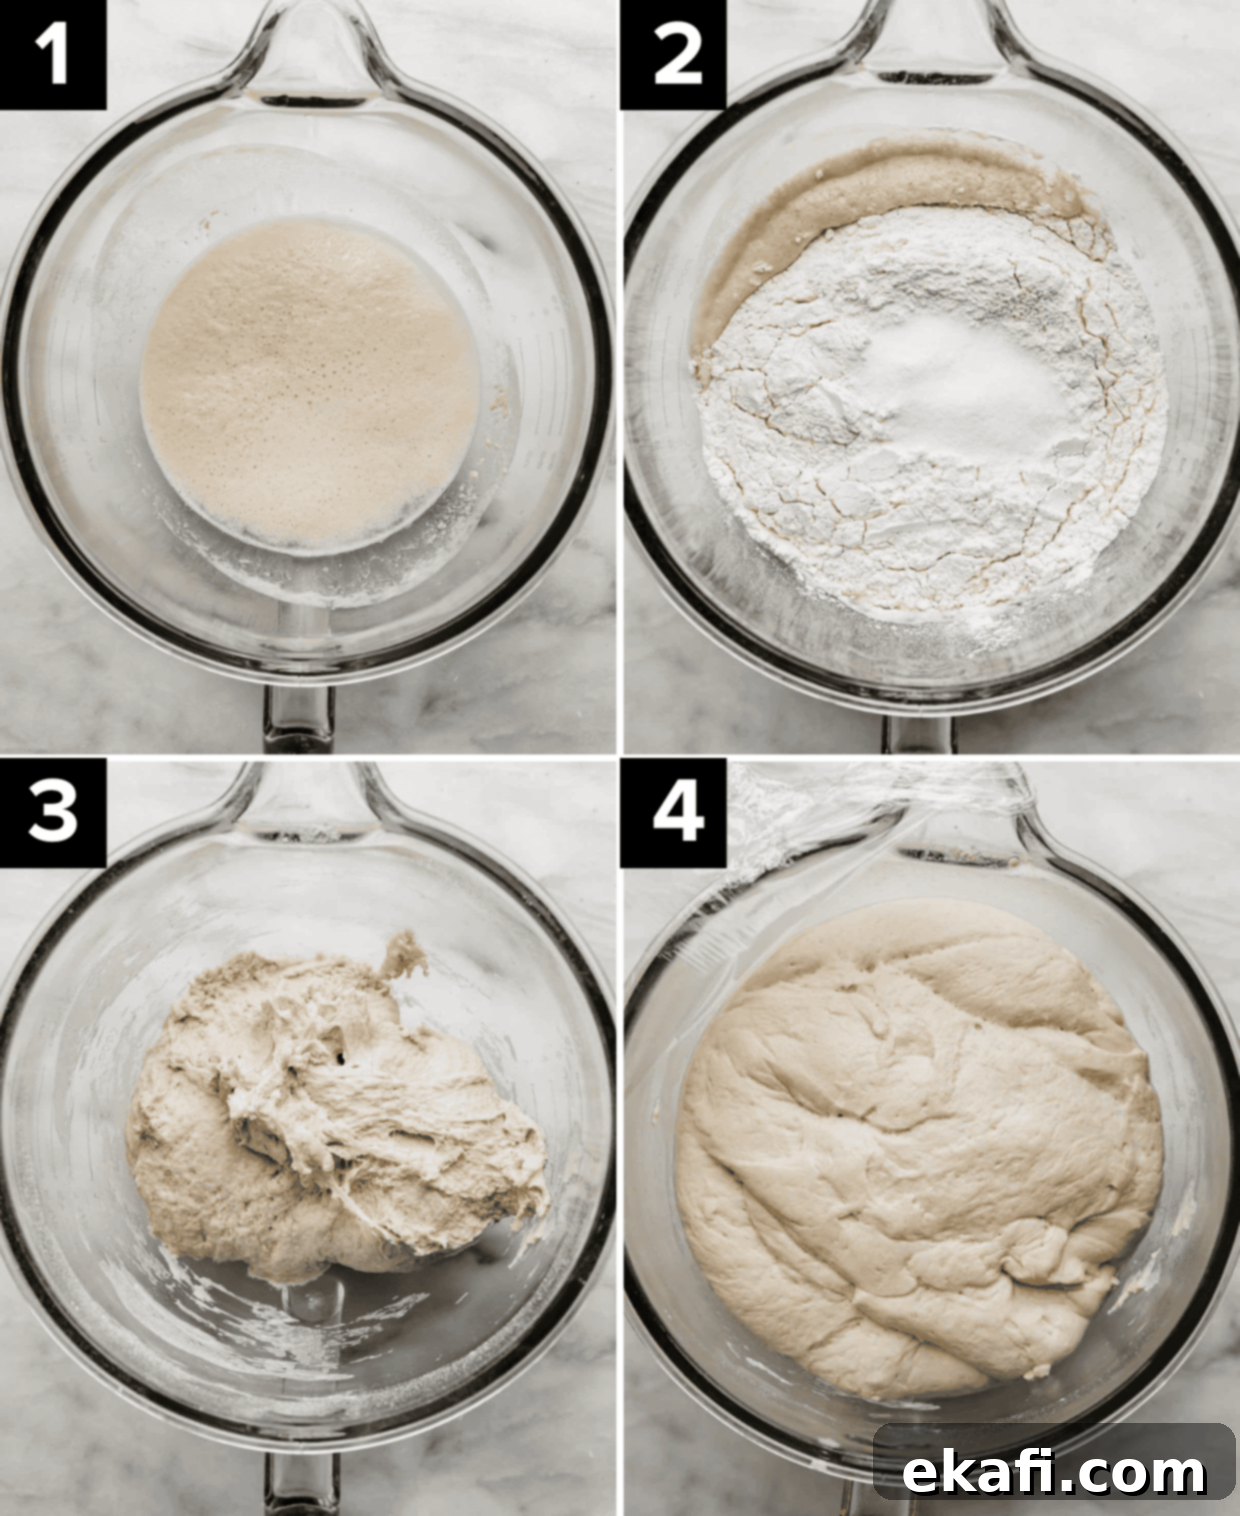
- Activate the Yeast. In the bowl of your stand mixer (or a large mixing bowl if making by hand), add 2 cups of warm water. The ideal temperature is between 105-115°F (40-46°C) – it should feel comfortably warm, not hot, to the touch. Stir in 1/2 teaspoon of honey and 1 tablespoon of active dry yeast. Give it a gentle stir and let it sit undisturbed for 10 minutes. This crucial step allows the yeast to activate; you’ll know it’s ready when the mixture becomes visibly foamy and bubbly on the surface. If it doesn’t bubble, your yeast might be old or the water temperature was off, and you should start again.
- Combine Dry Ingredients and Mix. Once your yeast is bubbly and active, add 3 cups of all-purpose flour and 1 tablespoon of salt to the bowl. Attach the dough hook to your stand mixer and mix on low speed until the flour is just incorporated, forming a shaggy dough. Then, gradually add the remaining 1 1/2 cups of flour, mixing until the dough starts to come away cleanly from the sides of the bowl. It’s perfectly normal for the dough to still stick slightly to the very bottom. If the dough seems overly sticky and doesn’t pull away from the sides, add additional flour, one tablespoon at a time, until the desired consistency is reached. The dough should be tacky but not unmanageable.
- First Rise (Bulk Fermentation). Lightly grease a large, clean bowl with about 1 teaspoon of oil (olive, vegetable, or canola oil all work). Place the ball of dough into the greased bowl, then turn it over once to ensure both sides are lightly coated with oil. This prevents the dough from drying out and sticking. Cover the bowl tightly with plastic wrap or a clean kitchen towel. Place the covered bowl in a warm, draft-free spot for 45-60 minutes, or until the dough has visibly doubled in size. A slightly warm oven (turned off, or just briefly warmed) or a sunny spot on your counter can aid this process.
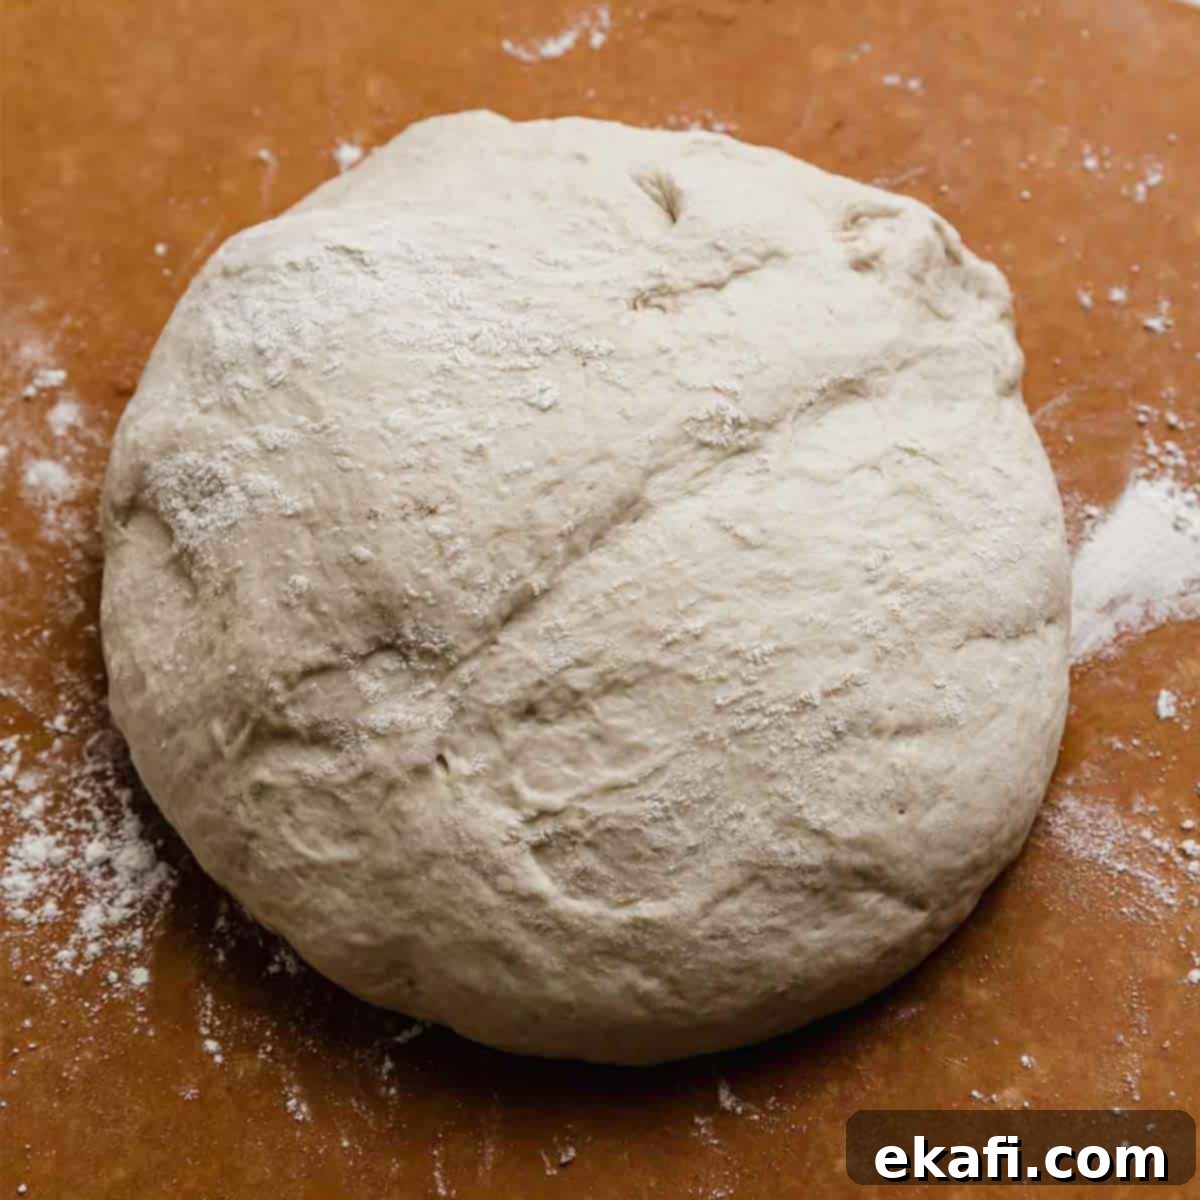
- Divide and Shape. Once the pizza dough has beautifully risen, gently transfer it to a lightly floured surface. Using a sharp knife or a dough scraper, divide the dough in half. You can now use a rolling pin or even your hands to gently stretch and roll out each half into your desired pizza shape and thickness. For a classic round pizza, start from the center and work your way outwards, rotating the dough as you go. For thin crust lovers, roll it out until it’s quite thin; for a thicker, chewier crust, leave it a bit more substantial.
- Baking Your Pizza. Once your pizza dough is rolled out, carefully transfer the flat dough to a piece of parchment paper. This makes transferring it to the oven much easier. Now, it’s time for the fun part: add your favorite pizza sauce and all your beloved toppings! Preheat your oven to a scorching 500ºF (260ºC). If you’re using a pizza stone, place it in the oven during preheating to ensure it gets piping hot. Using a pizza peel or a flat baking sheet, carefully slide the pizza (with the parchment paper underneath for easy handling) onto the preheated pizza stone or directly onto a hot baking sheet in the oven. Bake for 12-14 minutes, or until the crust is golden brown, the cheese is bubbly and melted, and the toppings are cooked through. Baking time may vary slightly depending on your oven and crust thickness. Remove from the oven, let it cool for a minute or two, slice, and enjoy your delicious homemade pizza!
Expert Tips for the Best Homemade Pizza Dough
Achieving the perfect pizza dough is an art, but these tips will guide you to consistent success:
- Yeast Activation is Key: Don’t rush the yeast activation! Make sure to let the yeast sit for the full 10 minutes (or even a few minutes longer if needed). Visible bubbling and a foamy layer are clear signs of activation, ensuring your dough will rise beautifully. If you don’t see bubbles, your yeast might be expired, or your water wasn’t the right temperature. Start fresh if this happens.
- Achieve the Right Dough Consistency: The ideal pizza dough should be tacky but not overly sticky. It should pull away from the sides of the mixing bowl (or your hands if kneading by hand) but still feel slightly moist and adhere gently to your fingers. If it’s too sticky, add flour a tablespoon at a time; if it’s too dry and crumbly, add a tiny bit of warm water.
- Adjust Flour for Your Environment: The exact amount of flour needed can differ significantly based on factors like your climate, local humidity, elevation, and even the type of flour you’re using. Always add flour gradually, especially towards the end, to prevent over-drying the dough. Trust your touch and adjust the final flour amount as needed to achieve the desired tacky-but-not-sticky consistency.
- The Importance of Oil: Using oil to lightly grease the rising bowl and to coat the dough ball is crucial. This not only prevents the dough from sticking to the bowl but also forms a protective barrier that aids in a smooth, even rise and prevents the dough’s surface from drying out and forming a hard skin, which can inhibit expansion.
- Find a Warm, Draft-Free Spot for Rising: Yeast thrives in warmth. Locate a warm, draft-free environment for your dough to rise. This could be a slightly warmed (then turned off) oven, near a sunny window, or just on your kitchen counter if your home is warm. The dough should visibly double in size within the specified 45-60 minute timeframe. If your kitchen is cool, it might take a bit longer.
- Consider a Kitchen Scale: For ultimate precision, especially with flour, consider using a kitchen scale to measure ingredients by weight rather than volume. This provides more consistent results as cup measurements can vary.
- Don’t Over-Knead or Under-Knead: Proper kneading develops the gluten, giving the dough its structure and chewiness. Under-kneading results in a weak, crumbly dough, while over-kneading can make it tough. Look for a smooth, elastic dough that passes the “windowpane test” (you can stretch a small piece thin enough to see light through it without tearing).
Looking for a fantastic homemade pizza sauce to complement this perfect crust? Try my easy and flavorful Pizza Sauce with Tomato Paste!
Make Ahead, Storing, and Freezing Homemade Pizza Dough
One of the best things about this pizza dough recipe is its flexibility. You can prepare it in advance, store it, or even freeze it for future pizza cravings!
- Make Ahead (Refrigeration): To prepare the dough ahead of time for use within a few days, follow all the steps through the first rise (Step 3). Once the dough has doubled in size, gently punch it down to release the air. Lightly coat it again with oil, wrap it tightly in plastic wrap (or place it in an airtight container), and store it in the refrigerator. The dough will keep well in the fridge for up to 3 days. When you’re ready to bake, remove the dough from the fridge and let it come to room temperature for 30-60 minutes before rolling it out.
- Freezing for Longer Storage: This pizza dough freezes beautifully! After the first rise (Step 3), divide the dough into the desired number of pizza balls (usually two for this recipe). Lightly coat each dough ball with a bit of olive oil. Place each oiled ball into an individual freezer-safe bag, ensuring you remove as much air as possible before sealing. Alternatively, you can place the oiled dough balls on a baking sheet, freeze until solid, then transfer to a larger freezer bag. Freeze for up to 3 months.
- Thawing Frozen Dough: When you’re ready to use frozen dough, plan ahead for the best results. We like Taste of Home’s directions: Transfer the frozen dough from the freezer to the refrigerator overnight (about 8-12 hours) to thaw slowly. In the morning or a few hours before baking, move the pizza dough from the fridge to the counter. Let it sit at room temperature for 30 minutes to an hour to complete thawing and relax the gluten before rolling it out. This ensures it’s pliable and easy to work with.
Common Questions About Pizza Dough
The best flour for pizza dough is generally one with a good protein content, which translates to higher gluten. All-purpose flour (typically 10%-12% protein/gluten) is an excellent and widely available choice, providing a good balance of chewiness and elasticity. Bread flour (12%-14% protein/gluten) is also a fantastic option, yielding an even chewier crust due to its stronger gluten development. Avoid low-protein flours like pastry or cake flour, as their weak gluten structure won’t give your pizza the necessary texture and rise.
Salt plays a dual role in pizza dough. Its primary function is to boost the flavor of the crust, preventing it from tasting bland or flat. As Weekend Bakery aptly puts it, “Breads will taste flat” without it. Beyond flavor, salt also strengthens the dough’s gluten structure, making it more elastic and easier to work with. This improved structure helps the dough trap more of the carbon dioxide gas produced by the yeast, resulting in a better rise and a more airy texture. Additionally, salt helps to regulate yeast activity, preventing it from fermenting too quickly.
While not absolutely necessary for the dough to rise, omitting salt will significantly impact the flavor and texture of your pizza crust. As mentioned above, salt is crucial for both taste and gluten development. Without it, the dough might be more difficult to handle, and the final crust will likely taste bland and lack the desired chewiness. For the best homemade pizza experience, we highly recommend including salt in your dough.
Yes, you absolutely can! Instant yeast is a more finely ground and fast-acting yeast that doesn’t typically require proofing (activation in warm water) before being added to dry ingredients. You can use the same amount as active dry yeast in this recipe. Simply mix it directly with your flour and salt, then proceed with adding the warm water and honey. The dough might rise a bit faster with instant yeast.
Absolutely! You can easily make this delicious pizza dough without a stand mixer. Instead of a dough hook, you’ll simply use a sturdy wooden spoon or your hands to mix and knead everything. The mixing process will take a bit longer by hand, typically 8-10 minutes of kneading on a lightly floured surface after the ingredients are combined, until the dough is smooth and elastic. It’s a great workout and very rewarding!
The most reliable indicator is visual: the dough should visibly double in size. You can also perform the “poke test”: gently press two fingers lightly into the dough about half an inch deep. If the indent remains, or springs back very slowly, the dough is ready. If it springs back quickly, it needs more time to rise. If it completely deflates, it might be over-proofed. Remember that rising time can vary due to factors like room temperature, so always go by the dough’s appearance and feel rather than strictly by the clock.
The baking time for pizza largely depends on the thickness of your crust and your oven’s temperature. For a thin crust pizza, your bake time will typically be on the shorter side, usually around 12-14 minutes at 500°F (260°C). A thicker crust, or one with a generous amount of toppings, might require a few extra minutes, perhaps 15-18 minutes, to ensure it’s cooked all the way through and the bottom is nicely browned. Always keep an eye on it and adjust as needed.
Yes, absolutely! Freezing pizza dough is a fantastic way to prepare ahead and have fresh pizza ready whenever a craving strikes. As we outlined in the “Make Ahead, Storing, and Freezing” section, simply divide the dough into individual pizza-sized balls after the first rise. Lightly coat each dough ball with olive oil, then place them in sealed freezer bags, ensuring all the air is removed. You can freeze the dough for up to 3 months. When ready to use, thaw overnight in the refrigerator, then let it come to room temperature for 30-60 minutes before rolling and baking.

More Delicious Pizza Recipes to Try
Now that you’ve mastered the ultimate pizza dough, explore other fantastic pizza creations to satisfy every craving:
- CPK California Club Pizza
- Homemade Pizza Rolls
- Authentic Margherita Pizza
- Hearty Kale Pizza
- Seasonal Pumpkin Pizza
Did you make this recipe? We’d love to hear about your experience! Leave a star rating and review below, or scroll down to the recipe card and share your feedback there. Your comments truly help other home cooks.
Stay up-to-date with our latest recipes and kitchen tips by following us on Instagram, TikTok, YouTube, Facebook, and Pinterest.
Print
SaveSaved!
Review
The Best Homemade Pizza Dough Recipe
Ingredients
- 2 cups warm water – 105-115°F (40-46°C)
- 1/2 teaspoon honey – or granulated sugar
- 1 Tablespoon active dry yeast
- 4 1/2 cups all-purpose flour – may need slightly more or less depending on your location, climate, altitude etc.
- 1 Tablespoon salt
- oil – for greasing the bowl (olive, vegetable, or canola)
Instructions
-
In the bowl of a stand mixer (or a large mixing bowl), add the warm water (105-115°F). Stir in the honey and yeast. Let it sit for 10 minutes until the yeast is visibly bubbly and foamy, indicating it has activated. If no bubbles appear, your yeast may be inactive, and you should start over.
-
Add 3 cups of flour and the salt to the activated yeast mixture. Using the dough hook attachment (or a sturdy wooden spoon/hands), mix on low speed until the flour is just combined. Gradually add the remaining 1 1/2 cups of flour. Continue mixing until the dough starts to pull away from the sides of the bowl, though it will still stick slightly to the very bottom. If the dough remains excessively sticky, add flour 1 tablespoon at a time until it reaches a tacky but manageable consistency.
-
Add about 1 teaspoon of oil (such as canola or olive oil) to a large, clean bowl. Rub the oil around to completely cover the inside of the bowl. Place the prepared pizza dough ball into the oiled bowl, then turn the dough ball over once to ensure both sides are lightly coated with oil. This prevents drying and sticking during the rise.
-
Cover the bowl tightly with plastic wrap or a clean kitchen towel. Place the dough in a warm, draft-free area to rise for 45-60 minutes, or until it has visibly doubled in size.
-
Once the dough has risen, gently transfer it to a lightly floured countertop. Divide the dough in half to make two pizzas. Using a rolling pin or your hands, roll out each dough half to your desired pizza size and thickness. (For thin crust pizzas, roll it out quite thin.)
-
When you’re ready to cook, transfer the rolled-out dough to a piece of parchment paper. Add your desired sauce and favorite toppings. Preheat your oven to 500°F (260°C). If using a pizza stone, place it in the oven during preheating. Using a pizza peel, transfer the pizza (on the parchment paper) onto a baking sheet or directly onto the hot pizza stone in the oven. Bake for 12-14 minutes, or until the crust is golden brown and cooked through, and the cheese is melted and bubbly. Enjoy your homemade pizza!
Notes
Nutrition
