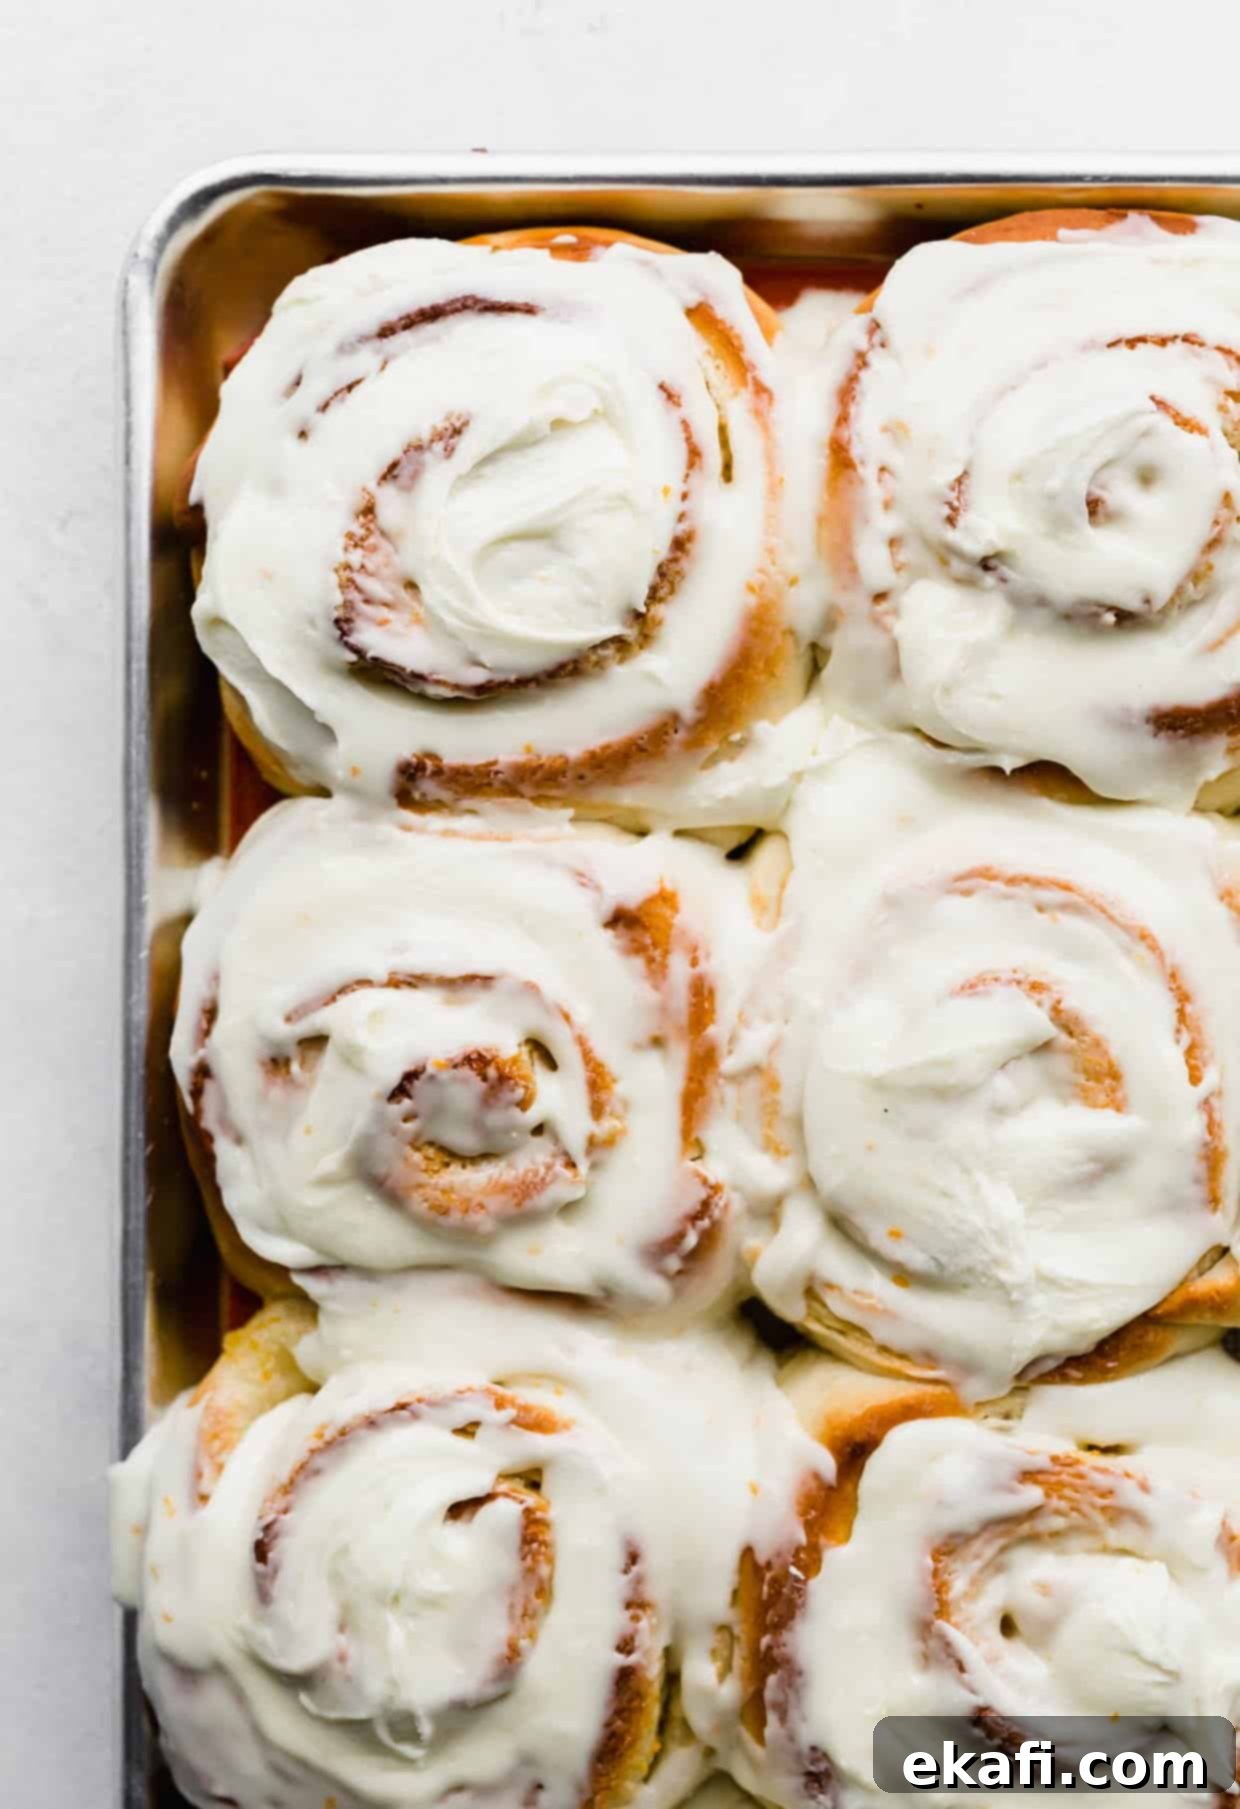
Ultimate Homemade Orange Rolls: Fluffy, Zesty, and Irresistibly Sweet
Prepare to fall in love with these incredible homemade Orange Rolls! Imagine light, pillowy dough, generously filled with a vibrant burst of fresh orange zest and juice, all crowned with a luscious, tangy orange frosting. This recipe isn’t just about making a sweet treat; it’s about creating a memorable experience. We cherish making these orange sweet rolls every year for Easter morning, and they’ve become a beloved tradition in our home. My kids eagerly anticipate them, always declaring they taste infinitely better than any store-bought alternative, especially those from popular brands like Pillsbury!
While these orange rolls are undeniably a star, my kitchen is also home to other fantastic sweet roll and bread creations that you might enjoy. If you’re a fan of comforting baked goods, you absolutely must try my large, bakery-style Cinnamon Rolls for a classic indulgence, or my Mini Cinnamon Rolls when you need a smaller, quicker bite. For a fun, interactive treat that’s perfect for sharing and pulls apart effortlessly, don’t miss our Monkey Bread, a delightful recipe that’s always a crowd-pleaser.
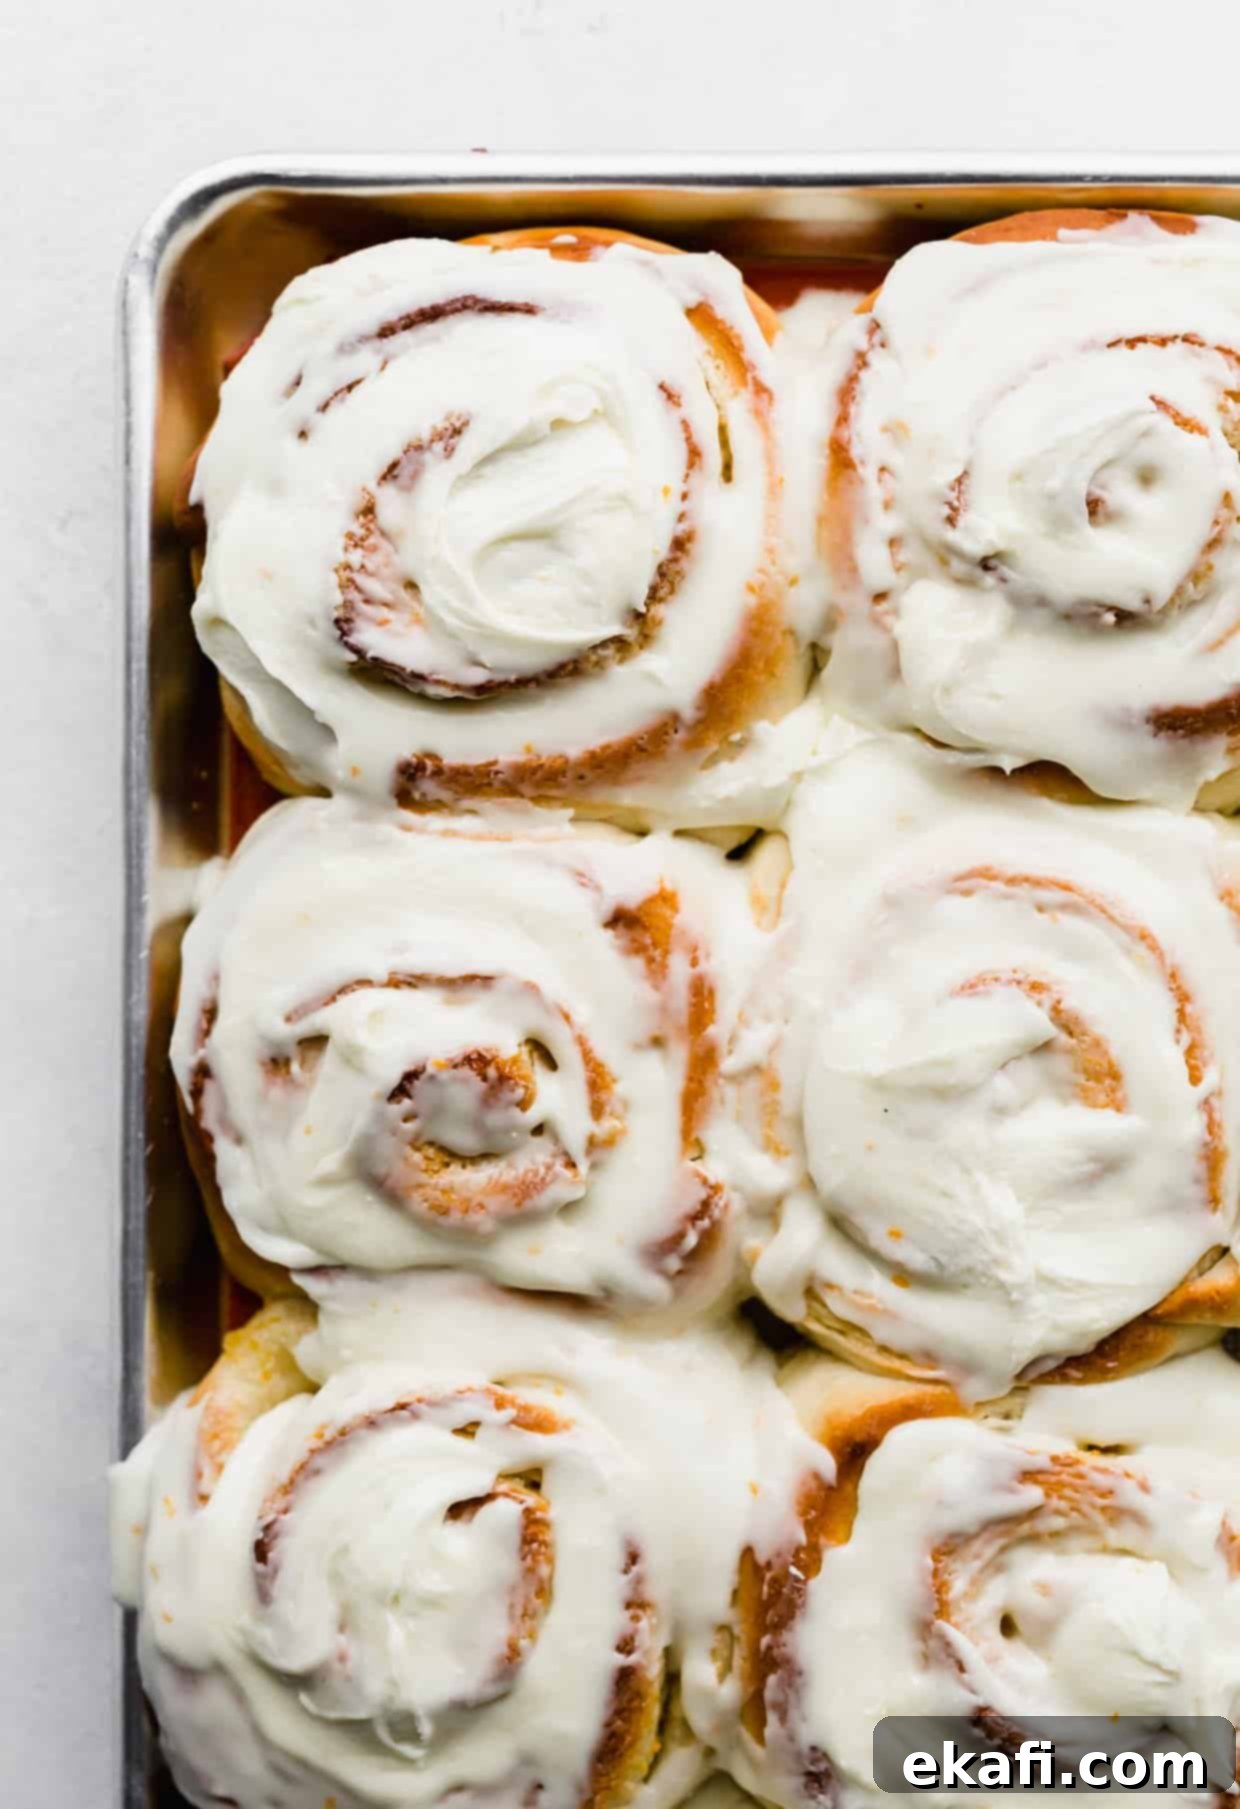
Why This Homemade Orange Rolls Recipe is a Must-Try
What makes these orange rolls stand out from the rest? It’s a harmonious combination of smart baking techniques and the freshest ingredients that yield truly exceptional results. Here’s a closer look at why these sweet rolls will become a staple in your recipe collection:
- Unbeatable Flavor and Texture, Far Superior to Store-Bought! If you’ve ever settled for canned orange rolls, prepare for a revelation. These homemade orange rolls are in a league of their own. They boast an incredibly light, airy, and fluffy texture that melts in your mouth, coupled with a vibrant, authentic citrus flavor from real orange zest and juice. This homemade touch delivers an overall freshness that mass-produced, store-bought rolls simply cannot replicate. Trust me when I say that you’ll be amazed by the difference in taste and quality. The effort to make them from scratch is minimal compared to the superior, rewarding experience you’ll gain.
- Remarkably Quick Rise Time for Yeast Doughs. Don’t let the thought of baking with yeast intimidate you or lead you to believe it’s an all-day affair. This homemade orange rolls recipe features an impressively fast total rise time of only 30 minutes! This remarkable efficiency is achieved by carefully balancing the amount of active dry yeast used (2.5 tablespoons). While that might sound substantial, rest assured that I’ve meticulously tested and re-tested this recipe repeatedly to achieve the perfect equilibrium. You get the immense benefit of a significantly shorter rise time without any overpowering yeasty flavor, ensuring a perfectly delicate and airy crumb every single time. This recipe truly offers the ideal combination of speed, convenience, and deliciousness.
- Fresh Ingredients Elevate the Experience. The true magic in these orange rolls comes from the generous use of fresh orange zest and juice. Unlike the artificial or subdued flavors often found in packaged goods, real citrus provides a bright, tangy, and intensely aromatic profile that permeates both the tender dough and the luxurious frosting. This commitment to fresh, quality ingredients is what transforms a simple sweet roll into an extraordinary culinary delight that tantalizes your taste buds with every bite.
- Perfect for Any Occasion. Whether it’s a festive Easter brunch, a cozy weekend breakfast, a special holiday gathering, or just a treat to brighten your day, these orange rolls are perfectly suited. Their inviting aroma and irresistible taste make them a favorite for families and guests alike, leaving a lasting impression.
Essential Ingredient Notes for Perfect Orange Rolls
Baking is a science, and understanding the role of each ingredient is key to achieving consistent success. Here are some detailed notes on the components of these delicious homemade orange rolls, ensuring you get it right every time:
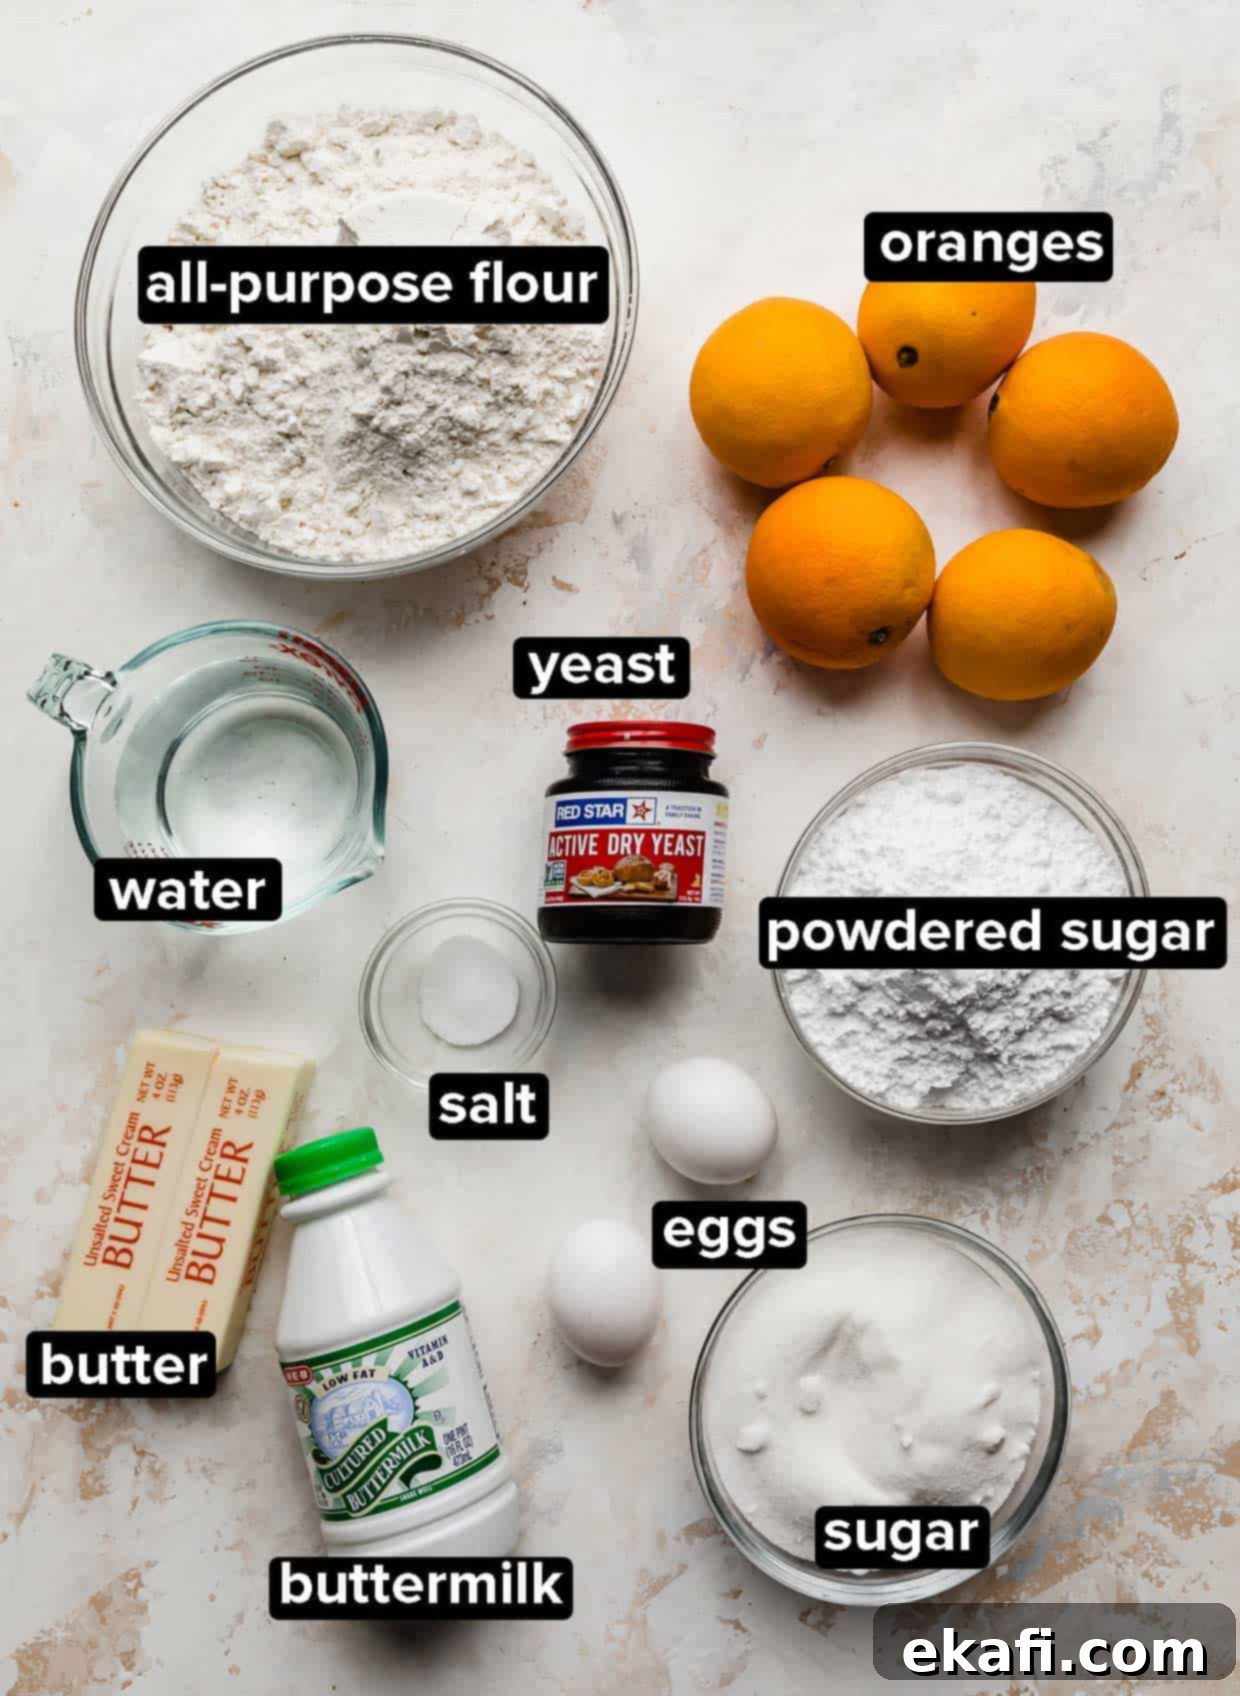
- Warm Water: The temperature of your water is absolutely critical for activating the yeast. It needs to be consistently warm, ideally between 105-115°F (40-46°C). This range feels pleasantly warm to the touch, similar to a warm bath. Water that’s too hot (above 120°F/49°C) will kill the delicate yeast organisms, preventing your dough from rising. Conversely, water that’s too cold or merely lukewarm won’t properly activate the yeast, leading to a sluggish or non-existent rise. Use a thermometer for precision if you’re unsure.
- Buttermilk: For the most tender crumb and rich flavor, always use room temperature buttermilk. Bringing it to room temperature ensures it incorporates smoothly and evenly into the dough, preventing any chilling effect on the yeast and promoting better gluten development. Buttermilk’s natural acidity contributes to a softer, more delicate roll, adding a subtle tang that complements the orange beautifully. While you can make a buttermilk substitute with milk and lemon juice/vinegar, using real buttermilk is highly recommended for superior texture and flavor.
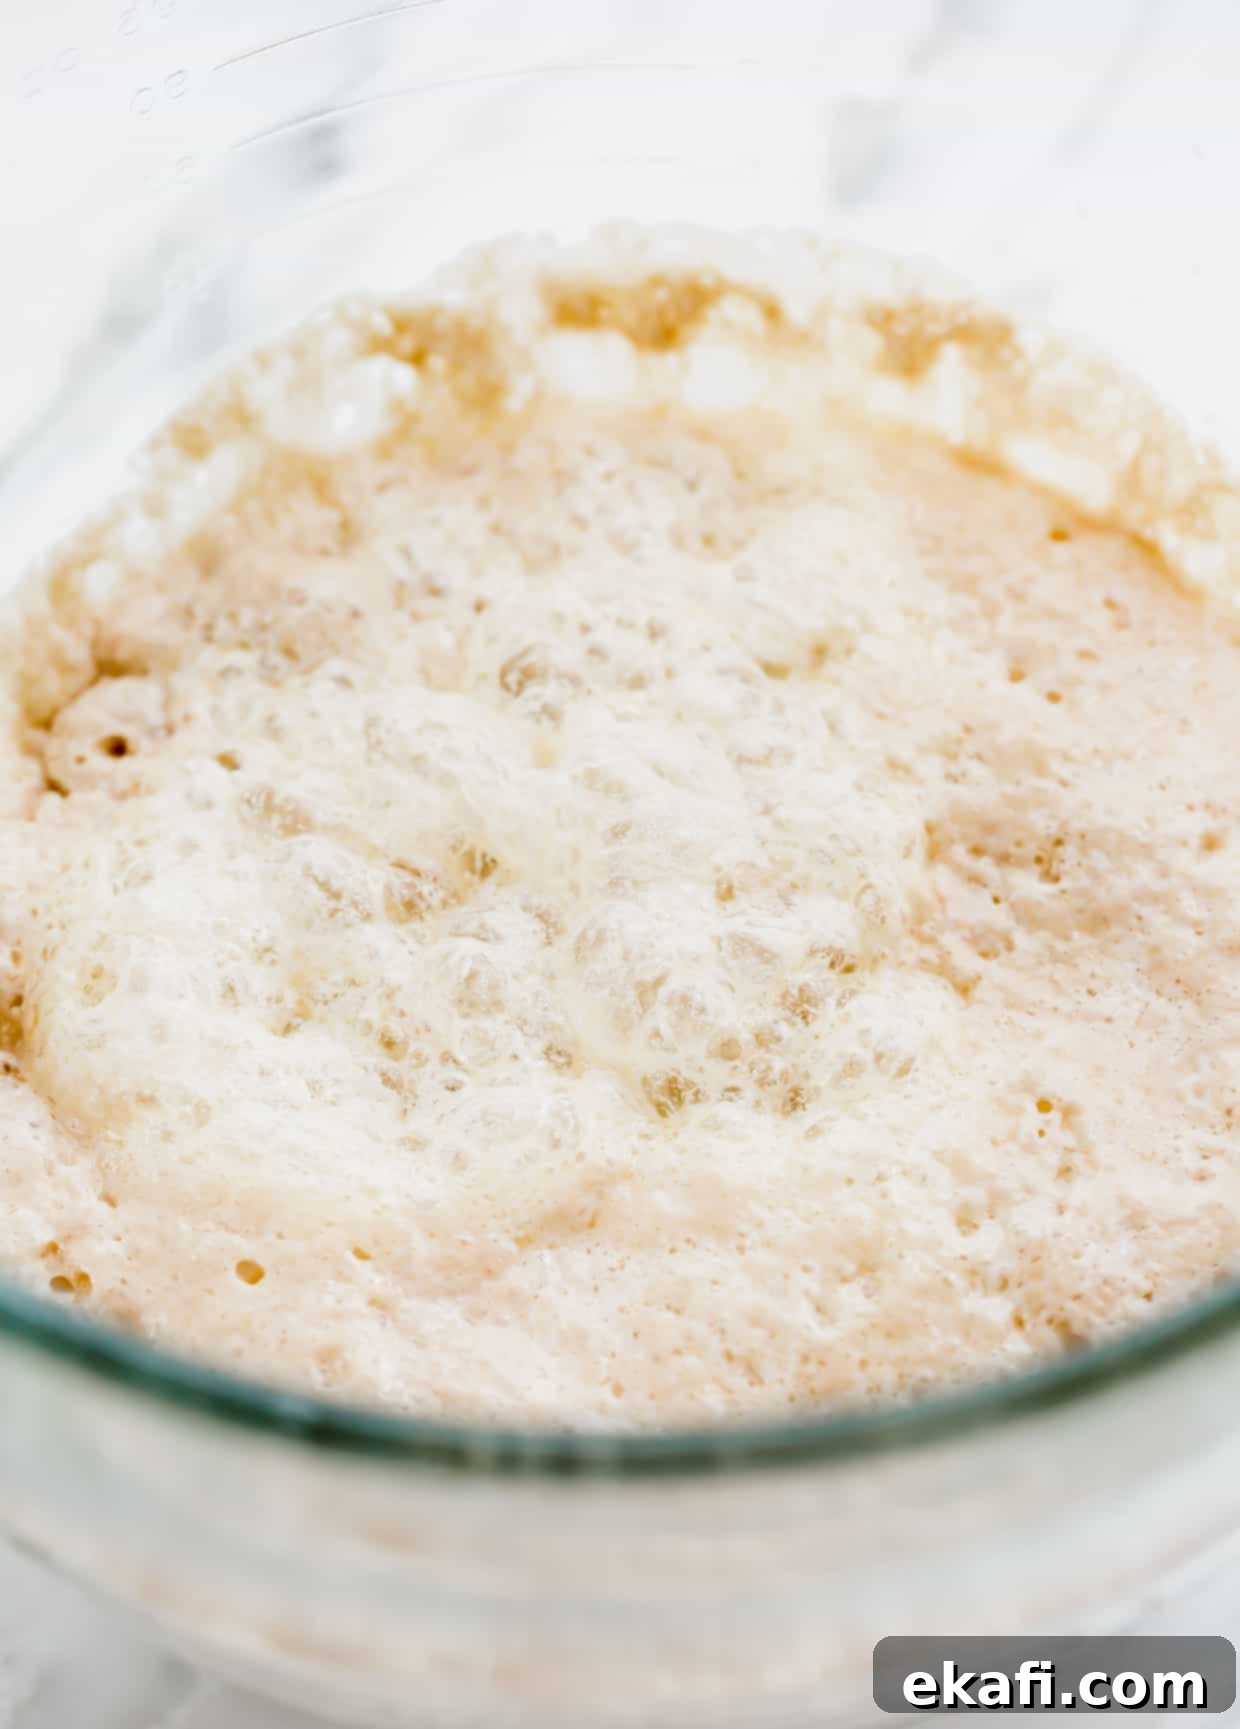
- Active Dry Yeast: It’s important to understand the type of yeast you’re using. Active dry yeast, as specified in this recipe, requires a rehydration step in warm liquid with a touch of sugar before being combined with other ingredients. This process, known as “proofing,” ensures the yeast is alive and active, ready to leaven your dough. Instant yeast, a finer grind, can typically be mixed directly with dry ingredients without prior activation. For this recipe, stick to active dry yeast and observe it become foamy and bubbly—a sign of its vitality.
- Salt: Salt is an essential flavor enhancer and plays a crucial role in regulating yeast activity and strengthening the gluten structure of your dough. However, it’s vital to avoid adding salt directly to the yeast and warm water mixture during its initial activation phase. Salt, in high concentrations, can inhibit or even kill yeast. By adding it with the flour after the yeast has proofed, you allow the yeast to get a vigorous start, ensuring a strong rise, while the salt still performs its functions effectively within the dough.
- Flour: The amount of flour required can vary slightly due to several factors, including your local climate, humidity levels, and even elevation. Start with the lower end of the recommended range (e.g., 5 cups of all-purpose flour) and add more gradually, one tablespoon at a time, as you mix the dough. The ideal consistency is when the dough pulls away from the sides of the mixing bowl but still retains a slight stickiness at the very bottom. It should feel tacky to the touch but not overly sticky or wet. This pliability is key for light and fluffy rolls.
- Butter for Filling and Frosting: The state of your butter is paramount for both the filling and the frosting! For the roll filling, it’s absolutely essential to use *softened* (room temperature) butter, never melted. Softened butter can be easily smeared onto the dough, creating a stable, creamy layer that effectively holds the orange sugar mixture in place during the rolling and baking processes. If you use melted butter, it will likely seep out of the rolls and onto your baking sheet, resulting in a greasy mess and potentially dry, burnt edges. Similarly, for the frosting, softened butter is crucial for achieving a creamy, smooth, and spreadable consistency that coats the rolls beautifully, rather than a thin, runny glaze.
- Orange Zest & Orange Juice: This dynamic duo is the heart and soul of the orange flavor in these rolls! Using both the zest (the brightly colored, fragrant outer layer of the orange peel, packed with essential oils) and the fresh juice ensures a deep, multifaceted citrus profile. The zest provides an intense aromatic burst, while the juice adds a tangy sweetness, moisture, and rounds out the flavor. Do not skip either for the most vibrant and authentic orange taste.
Essential Equipment for Homemade Orange Rolls
Having the right tools can make the baking process much smoother, more efficient, and ultimately more enjoyable. Here’s what you’ll want to have on hand to create your perfect orange rolls:
- Stand Mixer with Dough Hook: While these rolls can certainly be made by hand, a stand mixer significantly streamlines the kneading process. It ensures a well-developed, elastic dough without requiring extensive arm strength, making your job much easier.
- Large Mixing Bowls: You’ll need at least two: one for combining ingredients and another for allowing the dough to rest and rise.
- Measuring Cups and Spoons: Precision is a baker’s best friend! Accurate measurements are key for consistent results.
- Citrus Zester or Fine Grater: Essential for finely grating that aromatic orange zest without including the bitter white pith.
- Citrus Juicer: For extracting fresh orange juice, ensuring the purest citrus flavor.
- Rolling Pin: To evenly roll out your dough into a perfect rectangle.
- Parchment Paper or Silicone Baking Mat: Absolutely crucial for preventing your rolls from sticking to the baking sheet and for making cleanup a breeze.
- Large Baking Sheet: A sturdy, rimmed baking sheet (or two, if needed) to accommodate all 12 rolls with adequate space for rising and baking.
- Plastic Wrap: For covering the dough during its resting and rising periods, helping to retain moisture and create a warm environment.
- Unflavored Dental Floss, Thread, or a Sharp Serrated Knife: These are the best tools for neatly cutting the dough log into individual rolls without squishing their beautiful spirals.
- Small Bowl: For efficiently mixing the vibrant orange filling ingredients.
- Instant-Read Thermometer (Optional but Recommended): For checking the temperature of your warm water for yeast activation and the internal temperature of your baked rolls for perfect doneness.
Step-by-Step Instructions: Crafting Your Perfect Orange Rolls
Follow these detailed instructions meticulously to create truly exceptional orange sweet rolls from scratch. Remember, a little precision and patience will yield the most delicious results!
- Make the Dough. In the bowl of your stand mixer, fitted with the dough hook attachment, combine the warm water, room temperature buttermilk, granulated sugar, melted butter, and active dry yeast. Mix gently on low speed for about 30 seconds until all ingredients are just incorporated. Let this mixture sit undisturbed for 10-15 minutes. During this crucial time, the yeast should become visibly foamy and bubbly on the surface, which is your clear indication that it’s active and ready to work its magic. Once activated, add the salt, large eggs, and 5 cups of all-purpose flour. Mix on medium-low speed for approximately 8-10 minutes. Observe the dough carefully: it should gradually pull away cleanly from the sides of the bowl, but a small portion should still cling to the very base. Remember, the exact amount of flour can fluctuate, so if your dough is too sticky, add a touch more flour, one tablespoon at a time, until this desired tacky but not overly sticky consistency is achieved.
- Let the Dough Rest. After the kneading process is complete and your dough has achieved that perfect pliable consistency, gently remove it from the hook. Cover the mixing bowl tightly with plastic wrap. Allow the dough to rest at room temperature for a brief but essential 10 minutes. This short resting period is important as it allows the gluten strands to relax, making the dough much easier to roll out evenly in the next step.
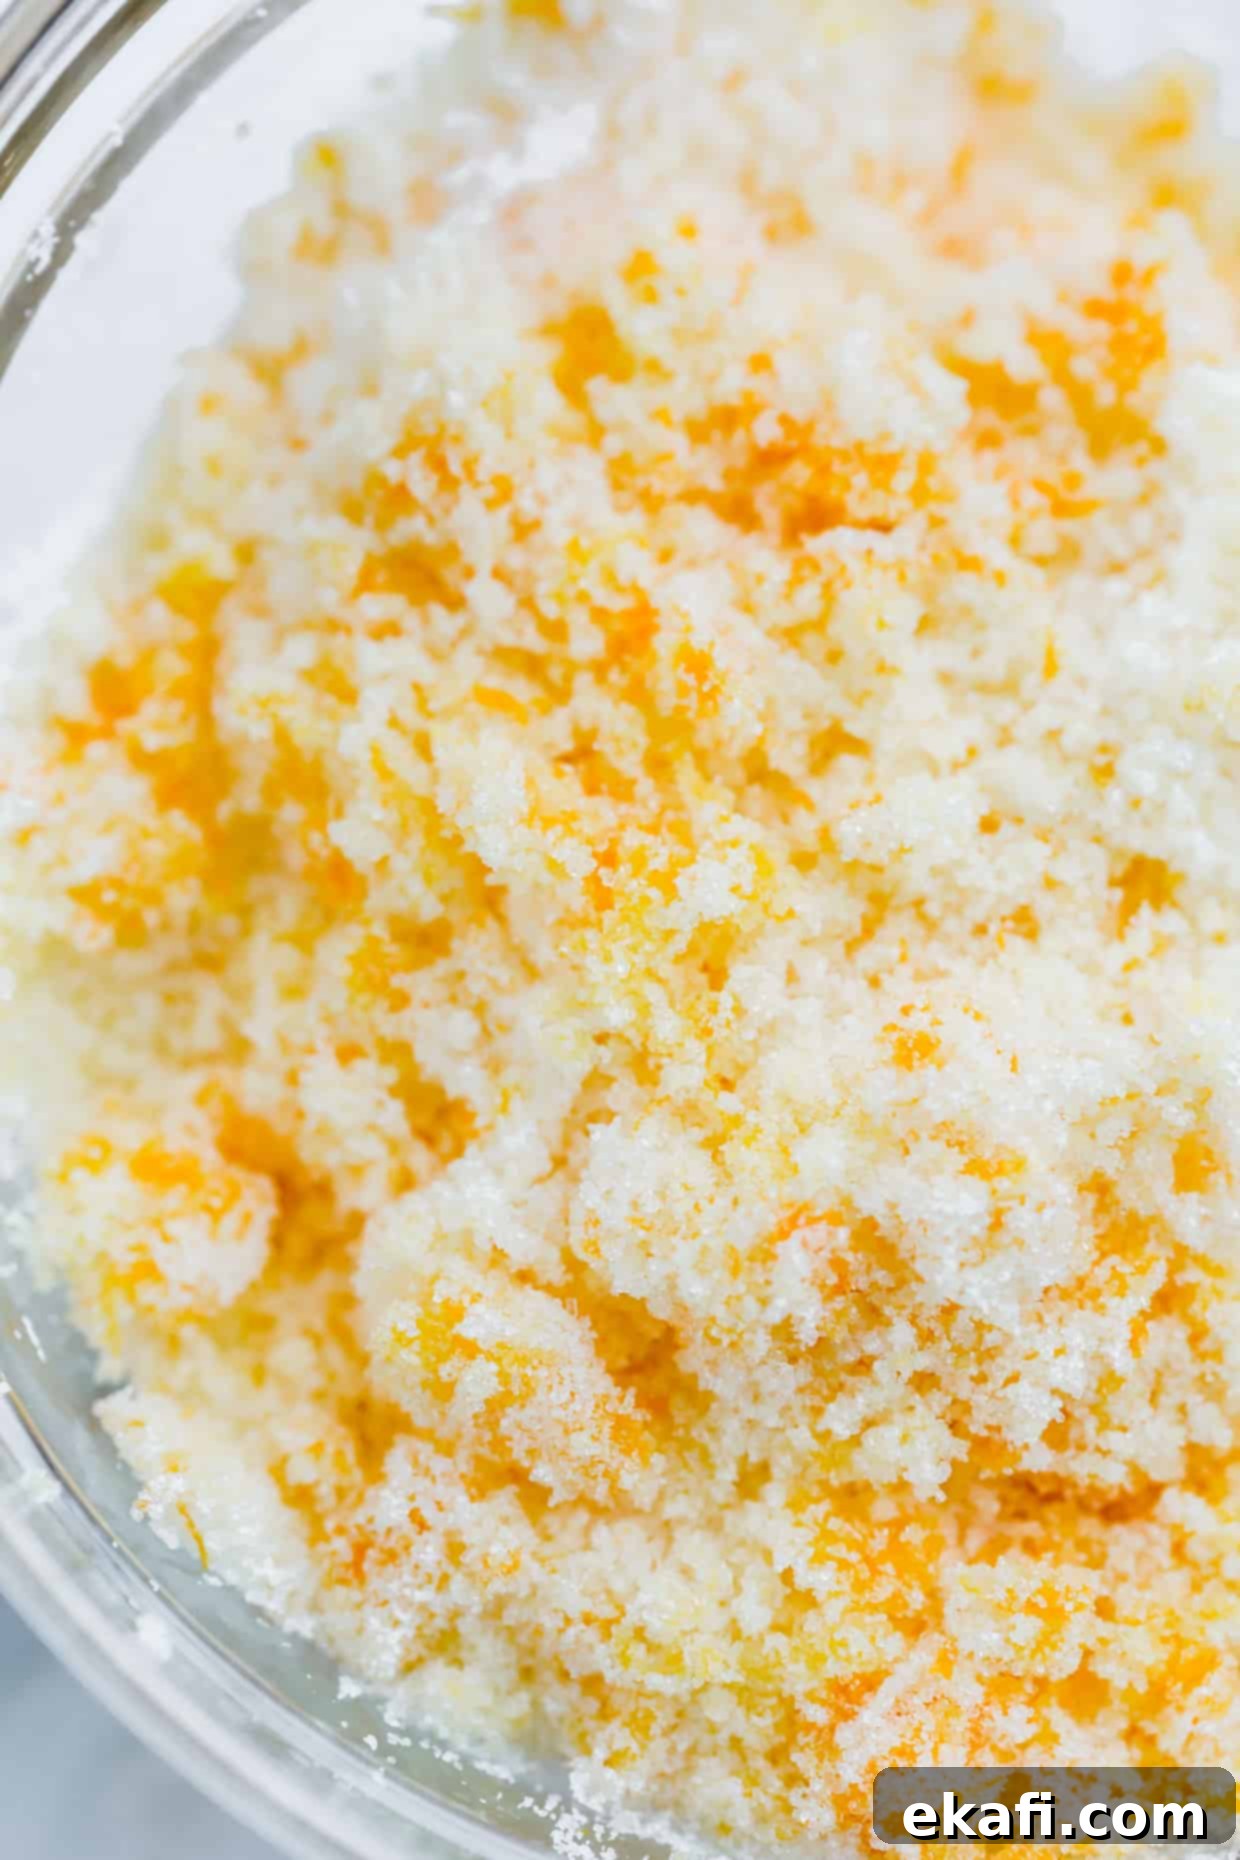
- Prepare the Orange Roll Filling. While your dough is taking its short rest, use this time efficiently to prepare the aromatic and flavorful orange filling. In a small, clean bowl, combine the granulated sugar, finely grated fresh orange zest (ensure no white pith is included for best flavor), and a tablespoon of fresh orange juice. Stir these ingredients together thoroughly with a spoon or fork until they are well combined and the sugar is infused with the vibrant citrus aroma and flavor.
- Roll Out the Dough. Lightly spray a clean countertop or a large pastry mat with a non-stick cooking spray (I highly recommend Baker’s Joy for its effectiveness and reliability). Using a rolling pin, gently and evenly roll the rested dough into a large rectangle, aiming for approximate dimensions of 14×18 inches. Strive for consistent thickness across the entire surface to ensure even baking.
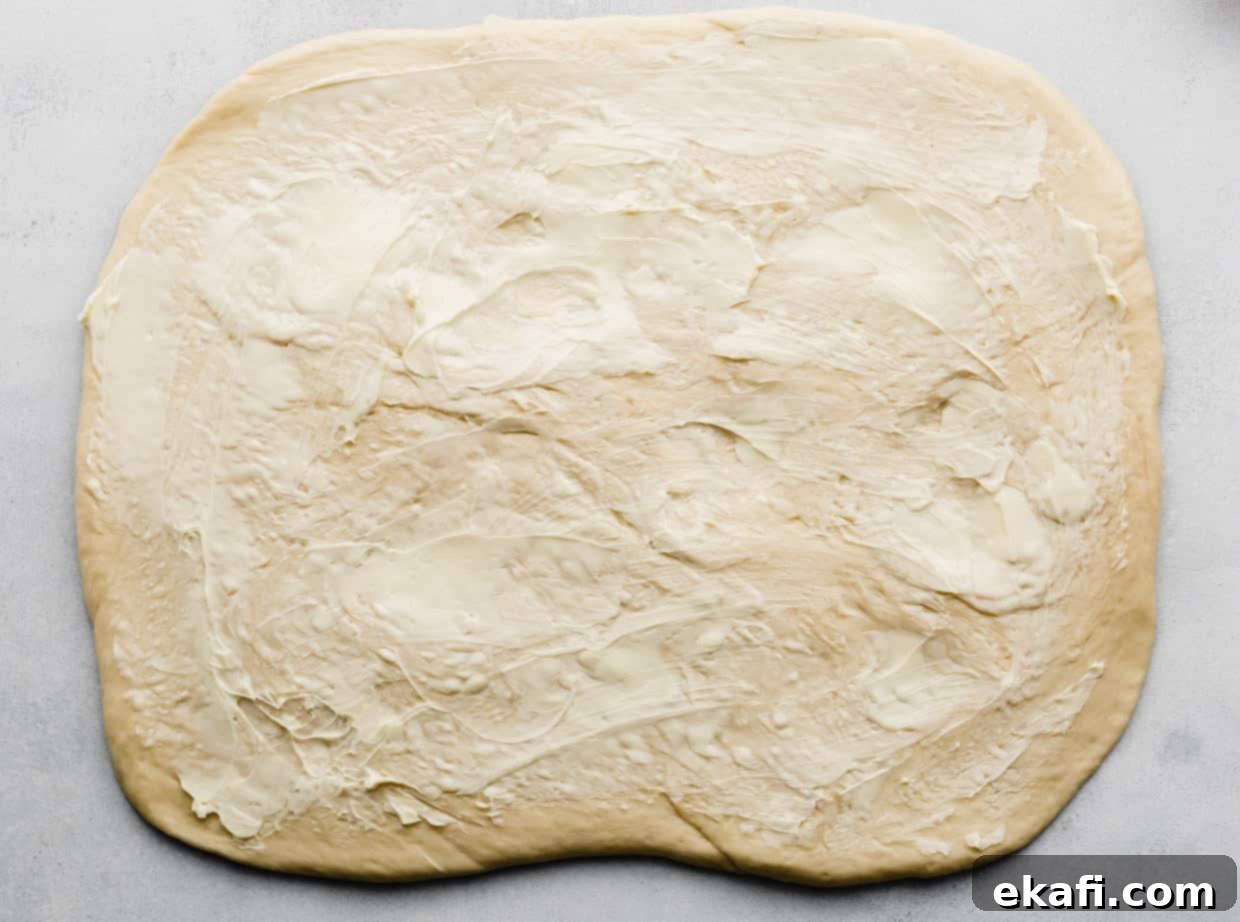
- Add the Filling. Take your 6 tablespoons of softened butter (remember, it must be softened, not melted!) and use the back of a spoon or an offset spatula to generously smear it evenly over the entire surface of the rolled-out dough, extending all the way to the edges. This buttery layer will create a sticky base for the filling and add rich flavor. Once the butter is spread, sprinkle the prepared orange sugar filling evenly over the softened butter, ensuring thorough coverage across the entire dough rectangle.

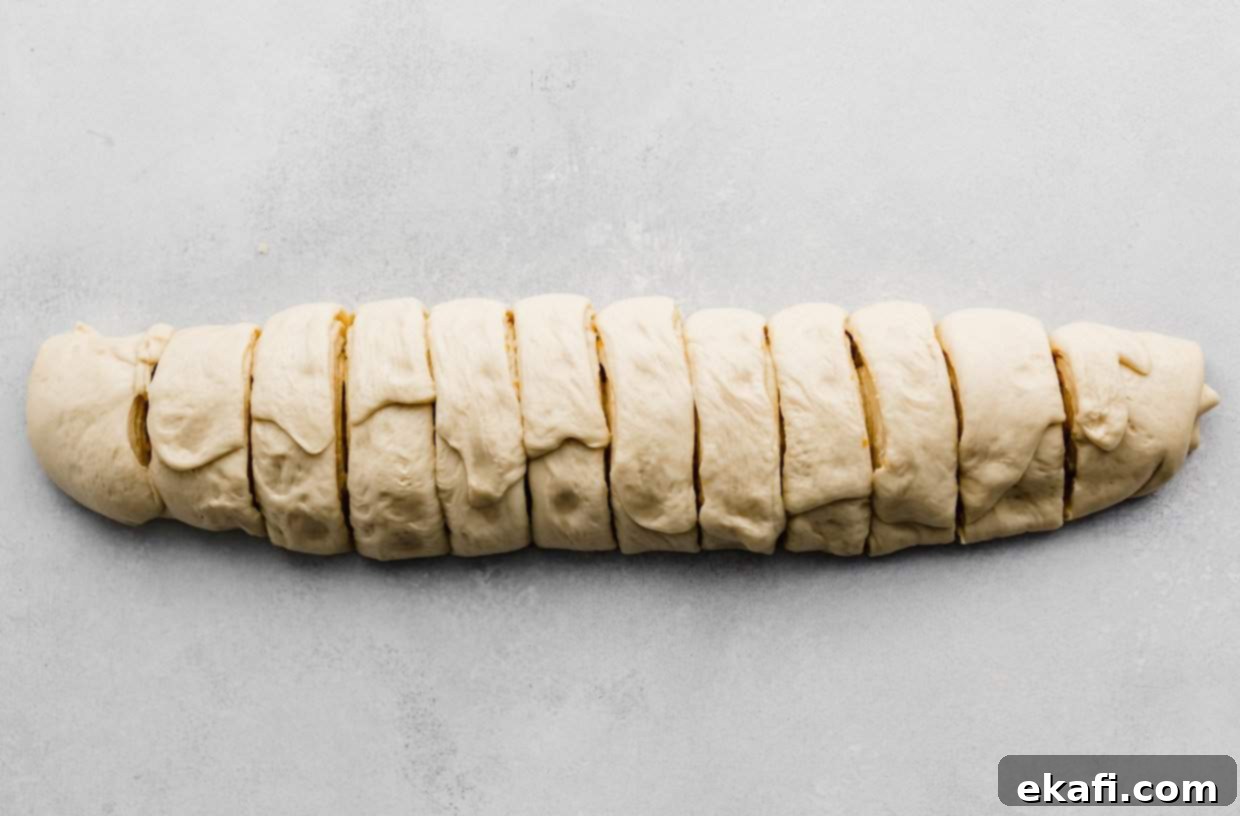
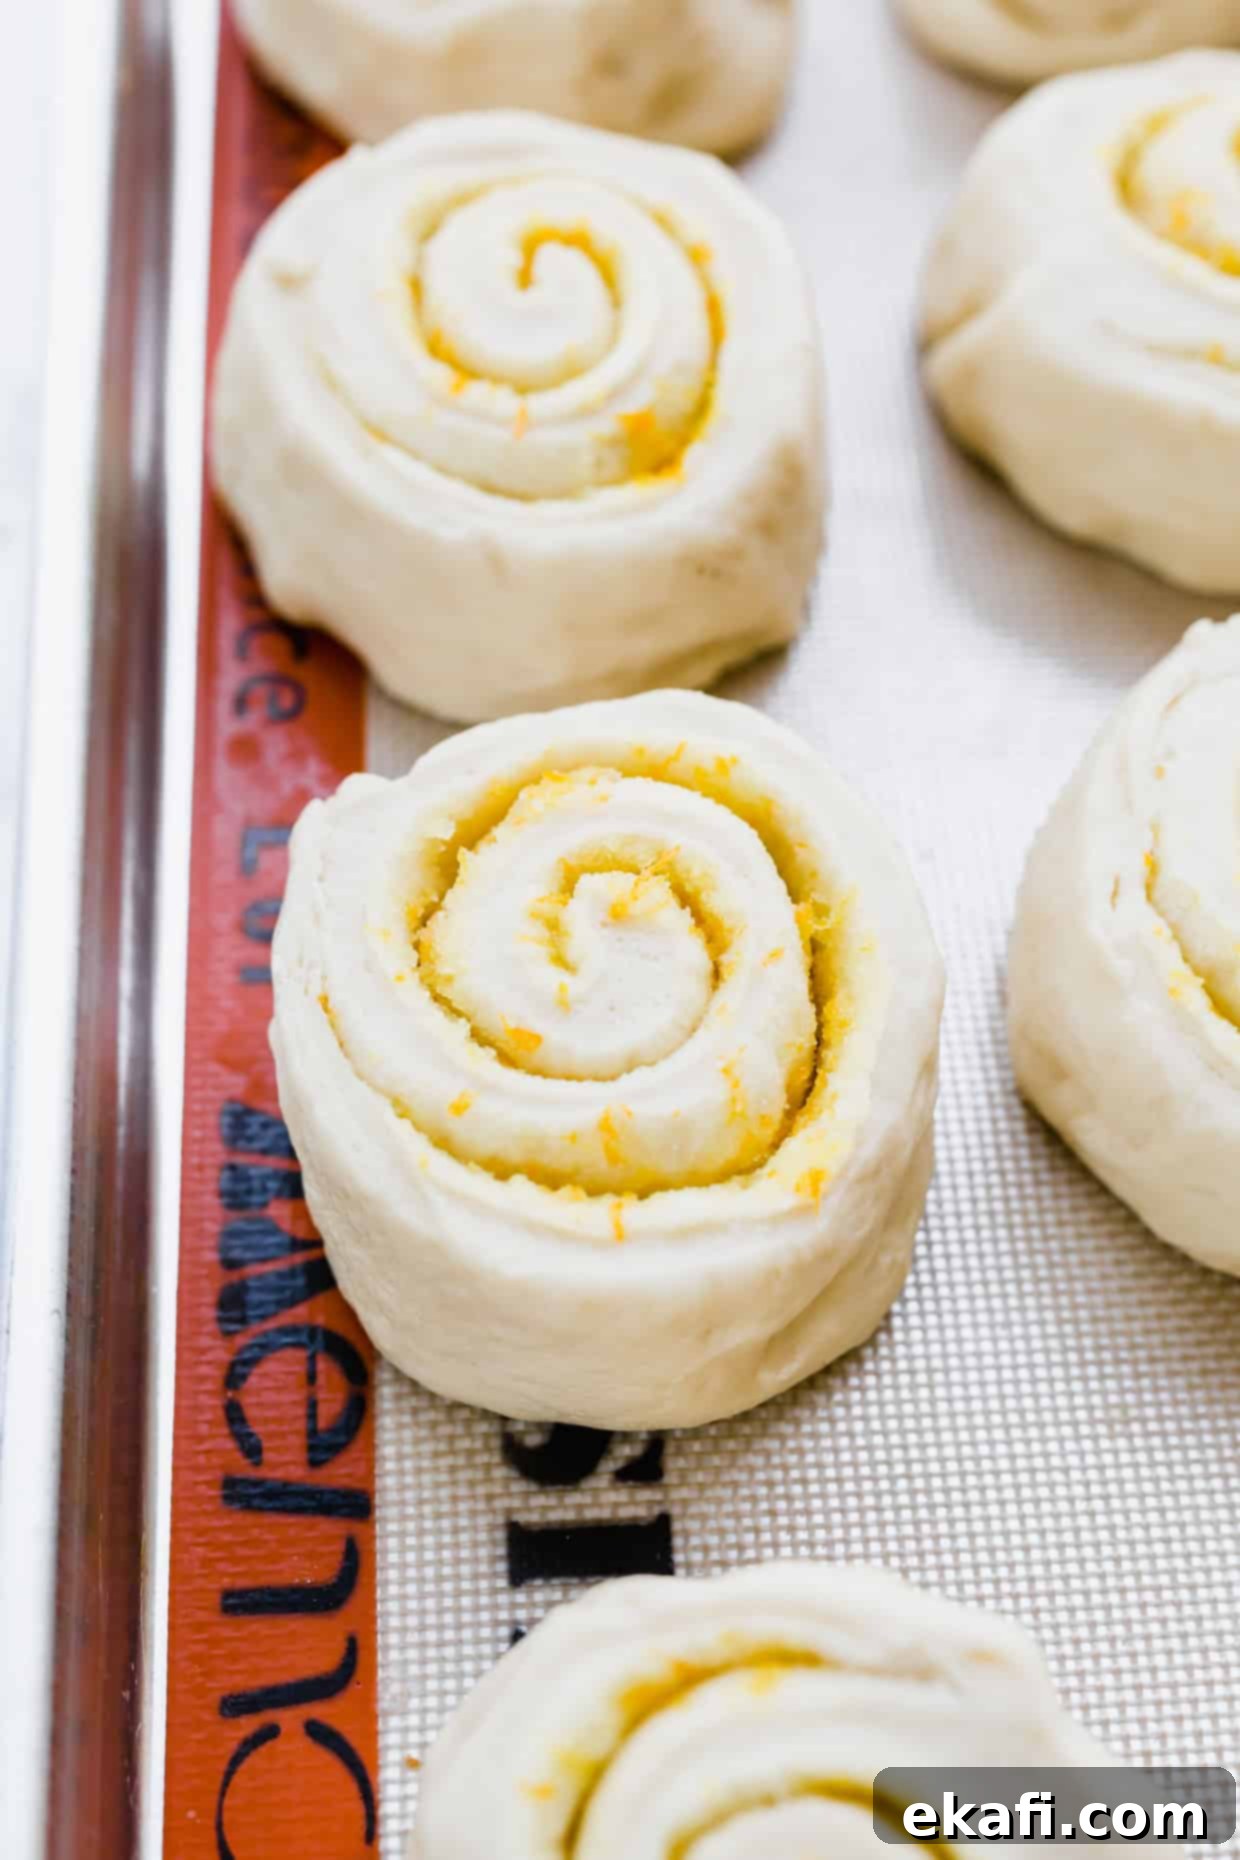
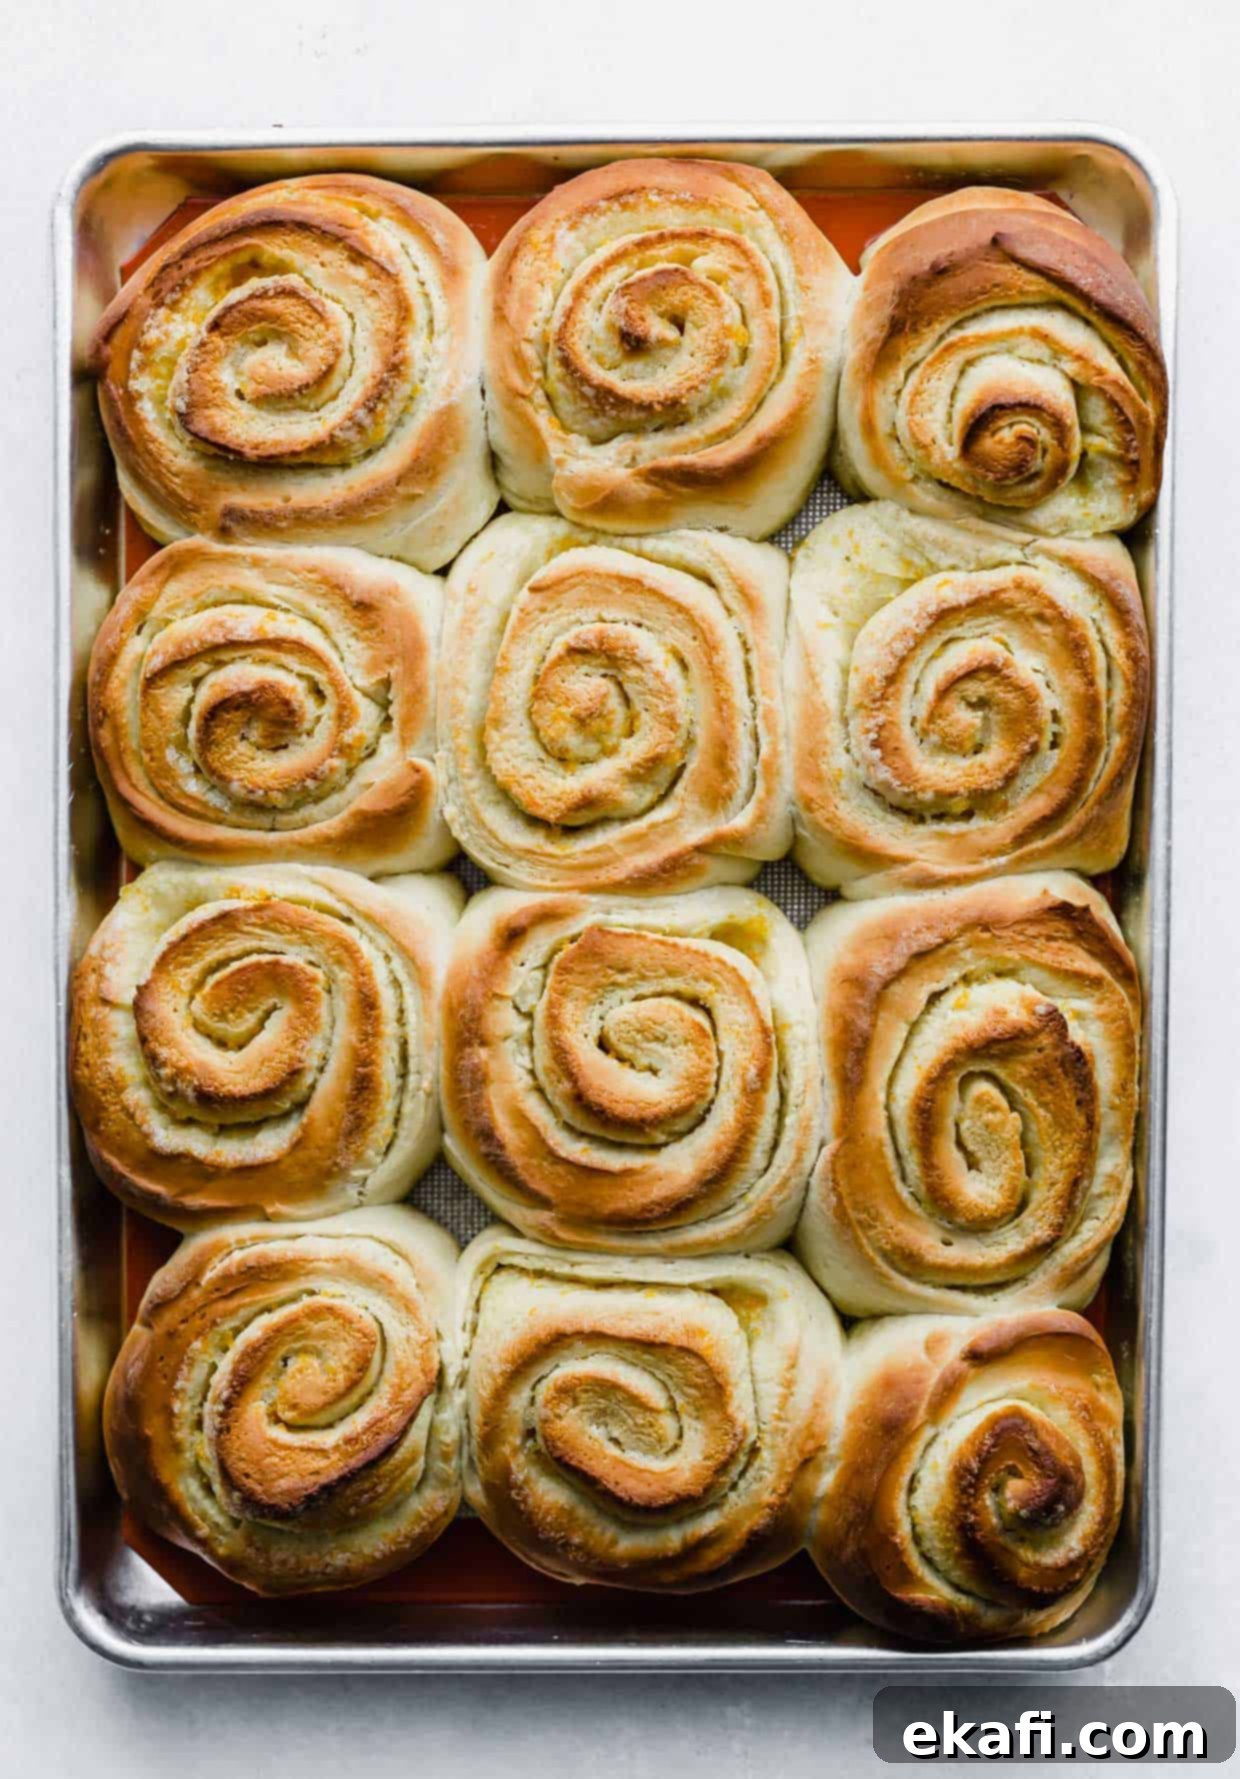
- Roll Up and Cut. Starting from one of the longer sides (the 18-inch side), carefully and tightly roll the dough into a snug log. Aim for an even, firm roll to ensure beautiful, consistent spirals in your finished rolls. The final log should measure about 18 inches in length. To cut the rolls cleanly without squishing them, use unflavored dental floss or a strong piece of thread: slide it under the log, cross the ends over the top, and pull firmly. Alternatively, a very sharp serrated knife can work, but try to use a sawing motion rather than pressing down. Cut the log into 12 equal-sized rolls. Arrange these cut rolls on your prepared parchment-lined baking sheet, typically in a 3 rolls across by 4 rolls down pattern, ensuring they have a little space (about 1/2 inch) between them to puff up.
- Let Rise. Lightly cover the orange sweet rolls on the baking sheet with plastic wrap. Place them in a warm, draft-free spot (like a slightly warm oven that’s turned off, or near a sunny window) for approximately 20 minutes. During this second and final rise, the rolls should become noticeably puffy and expand slightly, nearly touching each other. This short, effective rise is critical for achieving their signature light and airy texture.
- Bake. Preheat your oven to 400°F (200°C). Once the oven is fully preheated, carefully place the baking sheet with the risen rolls into the oven. Bake for 20-24 minutes, or until the tops are beautifully golden brown, the edges are slightly caramelized, and the rolls are cooked through to the center. To confirm doneness, an instant-read thermometer inserted into the center of a roll should register an internal temperature of 190-200°F (88-93°C).
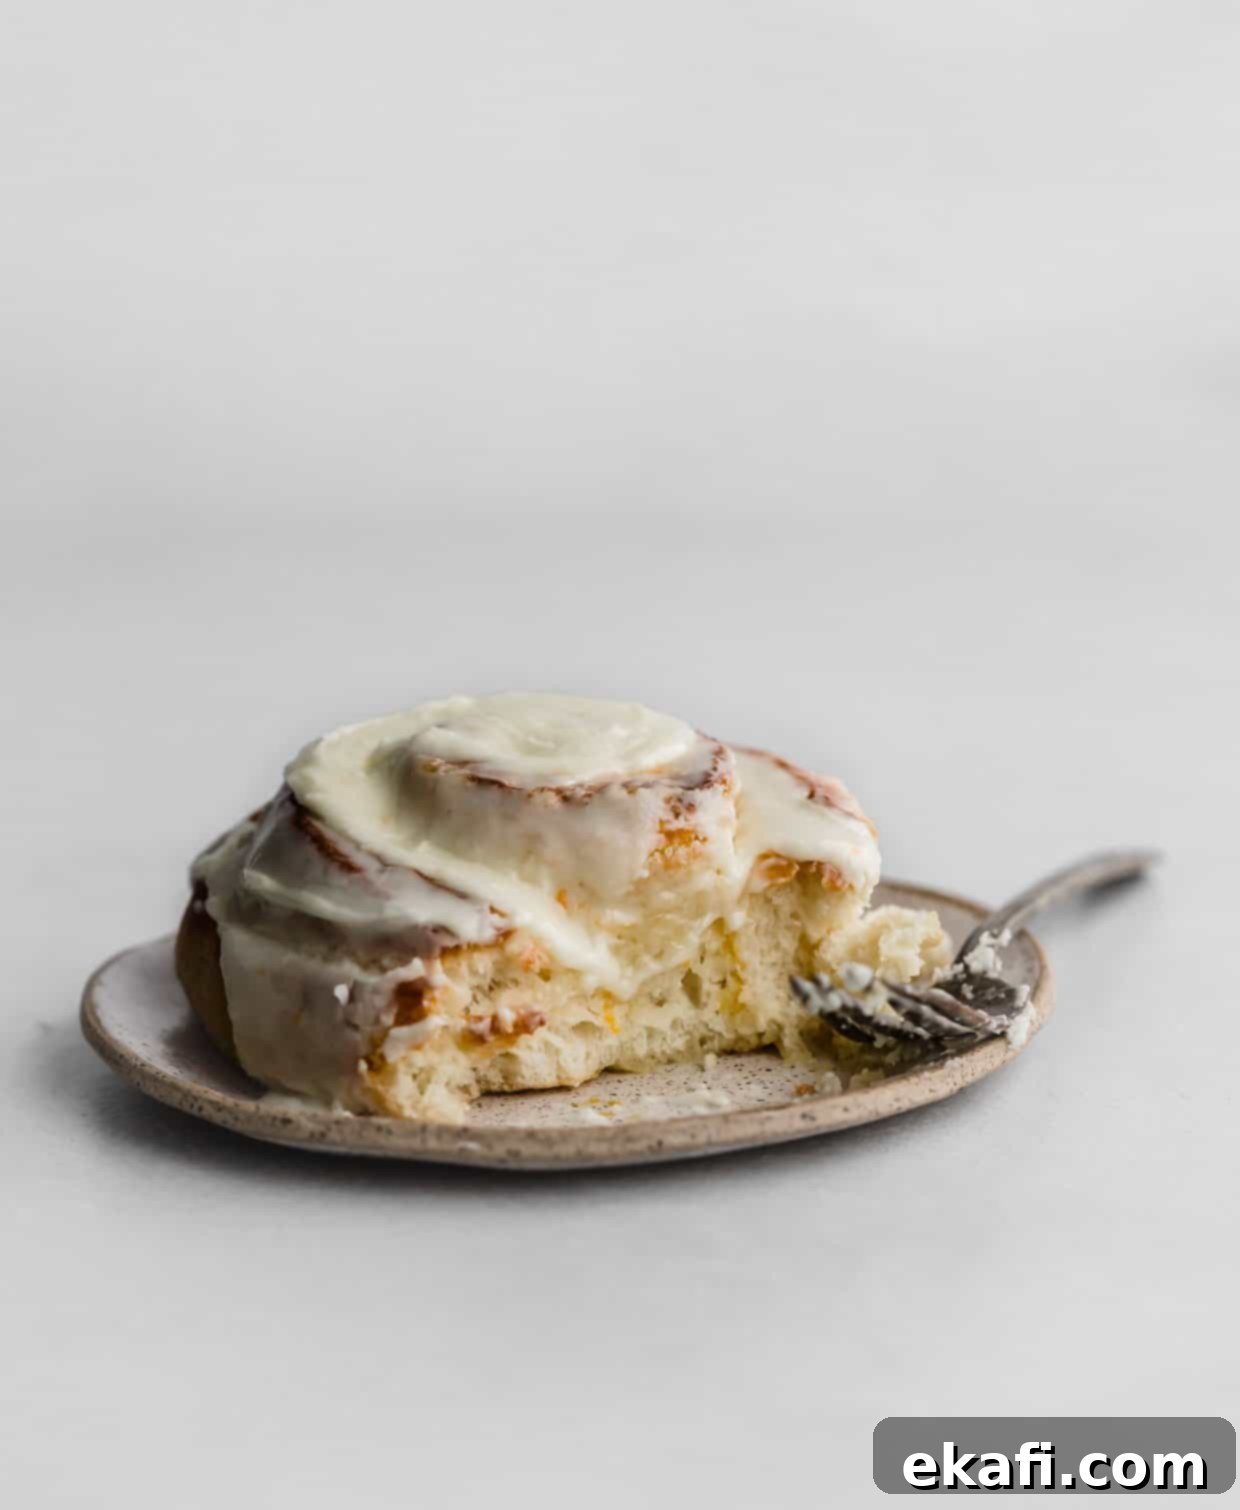
- Make the Frosting and Frost. While your rolls are happily baking and filling your kitchen with an irresistible aroma, whip up the dreamy orange cream cheese frosting. Once the rolls are out of the oven, resist the urge to frost them immediately. Allow them to cool on the baking sheet for a crucial 5-10 minutes. This slight cooling period is essential: the rolls will still be warm enough for the frosting to melt gently and seep into all the delightful nooks and crannies, but not so hot that it completely liquefies and runs off. Frost them generously while still warm and right in the pan for the ultimate gooey, frosted perfection that makes every bite truly decadent.

Expert Tips for Flawless Homemade Orange Sweet Rolls
Achieve bakery-quality results every single time with these helpful tips and tricks, designed to make your orange roll baking experience a resounding success:
- Experiment with Flour Combinations for Desired Texture: While 100% all-purpose flour yields fantastic, soft results, don’t hesitate to play around with different flour types to customize the texture. For an orange roll with a slightly chewier, more substantial crumb and an enhanced structure, consider using a blend of bread flour and all-purpose flour. For example, a 50% bread flour and 50% all-purpose flour mixture works wonderfully. I’ve successfully made this recipe using both straight all-purpose flour and various bread flour blends, and the results have always been fantastic, offering subtle but delightful variations in the final texture.
- Softened Butter is Your Best Friend for the Filling: This is a crucial tip for preventing common baking mishaps! Always, always use softened (room temperature) butter for the filling, never melted butter. Melted butter is too liquid and will inevitably seep out from the bottom of the rolls onto your baking sheet as soon as they’re placed down, leading to a greasy mess, potential burning, and unfortunately, dry rolls. Softened butter, on the other hand, creates a stable, creamy layer that effectively holds the orange sugar mixture perfectly in place within the spirals, ensuring a moist and flavorful interior.
- The Magic of Warm Frosting: To achieve that irresistibly gooey, generously frosted experience that makes orange rolls so decadent, always frost your rolls while they are warm, but not piping hot straight from the oven. The residual heat from the rolls will gently and slightly melt the creamy frosting, allowing it to lovingly seep into every spiral, nook, and cranny of the baked dough. This ensures that you get a thick, sweet, and tangy layer of frosting in every single bite, making them utterly divine and truly indulgent.
- Creative Flavor Variations: Feel free to get creative and customize this recipe to your liking! While vibrant orange is the undeniable star here, you can easily adapt this base. For a delightful alternative, swap out the orange for fresh raspberries to create raspberry sweet rolls. You could use a high-quality raspberry jam or strained fresh raspberries for the filling, and replace the orange juice in both the filling and frosting with fresh raspberry juice. Another fantastic citrus-based alternative could be lemon poppy seed rolls, using lemon zest and juice.
- Adjust Flour According to Dough Consistency: Baking is often as much about feel as it is about exact measurements. The precise amount of flour you need can subtly vary based on environmental factors like your local climate, humidity levels, and even elevation. Your goal is a dough that pulls cleanly away from the sides of the mixing bowl but still maintains a slight stickiness at the very base. It should feel tacky to the touch, but not overly sticky or difficult to handle. If your dough feels too wet after the initial 5 cups, add flour gradually, one tablespoon at a time, until this desired consistency is achieved. If it’s too dry, a tiny bit of extra buttermilk or water can help bring it back to life.
Make Ahead, Storing, and Freezing Your Orange Rolls
These orange rolls are undoubtedly at their absolute best when enjoyed warm and fresh from the oven. However, with a few simple tricks, you can easily enjoy them later or prepare them in advance for ultimate convenience, ensuring a delicious treat whenever the craving strikes.
- Standard Storage: Once your baked and frosted orange rolls have completely cooled down to room temperature, store them in an airtight container or a sealed plastic bag. They will maintain their delicious freshness at room temperature for up to 2 days. For extended shelf life, especially in warmer climates, you can keep them in the refrigerator for up to 4 days.
- Reheating for Freshness: To bring your stored orange rolls back to their warm, soft, and gooey glory, simply pop an individual roll into the microwave for a few seconds (typically 15-30 seconds, depending on your microwave’s wattage). This gentle warming will soften the dough and melt the frosting just perfectly, making them taste almost as good as they did straight from the oven!
- Freezing Baked Orange Rolls: To effectively freeze your orange rolls, first ensure they are completely cooled after baking. For best results, individually wrap each roll tightly in plastic wrap, followed by a layer of aluminum foil, to prevent freezer burn. Then, place the wrapped rolls in an airtight freezer-safe container or a heavy-duty Ziplock bag. They can be stored in the freezer for up to 1 month. For thawing, transfer them to the refrigerator overnight. You can then gently warm them in the microwave or a low oven (around 275°F/135°C for 10-15 minutes) before serving for that freshly baked experience.
- Making Ahead (Overnight Rise): If you dream of waking up to fresh, warm orange rolls without the early morning hustle, this make-ahead method is your perfect solution! Prepare the recipe all the way up to the second rise (after the rolls are cut and placed onto the baking sheet). Instead of letting them rise at room temperature, cover the baking sheet tightly with plastic wrap, ensuring it’s well-sealed, and store them in the refrigerator overnight (for 8-12 hours). The cold temperature will significantly slow down the yeast activity, allowing for a long, slow, cold proof that develops more flavor. In the morning, remove the rolls from the fridge and let them sit at room temperature for about 30-60 minutes to take the chill off and complete their final gentle rise. Then, uncover and bake as directed. This method ensures a truly fresh taste with minimal morning effort.
Frequently Asked Questions About Homemade Orange Rolls
Orange rolls are a wonderfully bright and tangy variation of the classic sweet roll, similar in concept to a cinnamon roll. They are essentially like a cinnamon rolls recipe but with a vibrant, refreshing citrus flavor profile. Instead of cinnamon, the tender dough is generously filled with a mixture of sugar, fresh orange zest, and orange juice, and then crowned with a luscious, orange-infused cream cheese frosting. This substitution creates a unique and irresistible sweet treat that’s perfect for breakfast, brunch, or dessert.
This is one of my absolute favorite baking hacks that makes a huge difference! I highly recommend using cooking spray on your countertop or pastry mat when rolling out dough, rather than dusting with flour. Flour tends to absorb into the dough as you work it, which can actually dry it out and make your final baked product tougher and less tender. Additionally, cooking spray often prevents sticking more effectively than flour. Whenever I use cooking spray to roll out dough, I find that the dough never sticks, and it remains perfectly pliable, moist, and easy to handle. It’s truly an amazing trick that yields superior results!
Absolutely, you can! These homemade orange rolls freeze beautifully after they’ve been baked and cooled. Please refer to my comprehensive “Make Ahead, Storing, and Freezing” section above for detailed, step-by-step instructions on how to properly freeze baked rolls for optimal results and how to thaw them perfectly. While I personally haven’t extensively tested freezing the raw dough for this specific recipe, you could certainly experiment if you’d like. If you decide to try it, I’d suggest freezing them after they are filled, rolled, and cut into individual portions. Wrap each roll individually and tightly in plastic wrap, then store them in an airtight freezer-safe container. To bake, let them thaw overnight in the refrigerator, place them on a baking pan, and allow them to rise at room temperature (about 1-2 hours) before baking. In theory, this method should work, but please note it’s an untested variation for this particular recipe. If you decide to give it a shot, I’d love to hear how it turns out!
Yes, absolutely! While a stand mixer with a dough hook attachment makes the kneading process significantly easier, faster, and more convenient, you can certainly make this orange roll dough entirely by hand if you prefer or if you don’t have access to a mixer. It will simply require a bit more manual effort and time to achieve the desired elasticity and smooth, pliable consistency. Be prepared for a good arm workout, and ensure you knead the dough thoroughly for at least 15-20 minutes by hand until it is smooth, elastic, and passes the windowpane test (where a small piece can be stretched thinly enough to see light through it without tearing).
While these homemade orange rolls are specifically designed to be quite large and bake wonderfully when spaced on a standard baking sheet, you could certainly adapt them for a muffin tin if that’s your preference. If you choose to use a muffin tin, I would highly recommend cutting the rolls into smaller, more compact pieces to ensure they fit properly within the muffin cups and bake through evenly. This adaptation will likely yield more individual rolls than the recipe’s stated 12 servings. Please note that if you make them smaller, the bake time would need to be adjusted accordingly; smaller rolls will bake faster, so start checking for doneness a few minutes earlier than the recipe specifies to prevent overbaking.
Several factors can prevent your dough from rising properly. The most common culprit is inactive or dead yeast. Always ensure your warm water is within the ideal temperature range of 105-115°F (40-46°C) – water that’s too hot will kill the yeast, while water that’s too cold won’t activate it sufficiently. Double-check that your yeast is fresh and not expired. Additionally, ensure you’re letting the dough rise in a warm, draft-free environment, as cold temperatures can significantly slow down or completely halt yeast activity. Finally, avoid adding salt directly to the yeast during its initial activation phase, as salt can inhibit yeast. Adding a small amount of sugar to the yeast/water mixture helps to “feed” the yeast and promotes vigorous activity.
For an extra burst of vibrant citrusy goodness, don’t shy away from adding a little extra orange zest (perhaps an additional teaspoon or two) directly into the dough itself during the kneading process. You can also brush the warm, freshly baked rolls with a simple orange syrup (made by gently simmering a quarter cup of orange juice with a tablespoon of sugar until slightly reduced) before applying the frosting. This adds another layer of moisture and intense orange flavor that will truly delight your taste buds.
More Sweet Breads and Rolls You’ll Love
If you’ve thoroughly enjoyed baking and devouring these incredible orange rolls, you’re in for a treat with these other delightful sweet bread and roll recipes from our cherished collection. Expand your baking repertoire and find your next favorite!
- Flaky Brioche Recipe – Indulge in this rich, buttery, and incredibly tender French bread, perfect for a luxurious breakfast, brunch, or even as a base for sweet or savory dishes. Its delicate, flaky layers are simply irresistible.
- Easy Lemon Poppy Seed Bread – A bright, zesty, and delightfully moist quick bread that’s bursting with fresh lemon flavor and a pleasant crunch from poppy seeds. It’s a true crowd-pleaser for any time of day.
- Easy Banana Bread Recipe – A timeless classic comfort food, this banana bread is renowned for its incredible moisture, rich banana flavor, and simple preparation. Perfect for using up ripe bananas and making a heartwarming treat.
- Buttermilk Blueberry Muffins – Discover these tender, fluffy muffins that are generously studded with juicy blueberries. The addition of buttermilk ensures a wonderfully soft texture and a subtle tang that perfectly complements the sweet fruit.
Did you make this delightful homemade orange rolls recipe? We’d absolutely love to hear about your experience, your thoughts, and how they turned out in your kitchen! Please leave a star rating and a detailed review right here on the blog post, or simply scroll down below the recipe card to share your feedback. Your insights help us immensely and are a valuable resource for other aspiring bakers!
Stay connected and always up-to-date with all our latest recipes, behind-the-scenes glimpses, and kitchen adventures by following us on Instagram, TikTok, Facebook, and Pinterest. Don’t forget to tag us @saltandbaker if you share your beautiful culinary creations – we can’t wait to see what you’re making!

Print
SaveSaved!
Review
Homemade Orange Sweet Rolls
Ingredients
Dough
- 1 cup warm water
- 3/4 cup buttermilk, room temp
- 1/2 cup granulated sugar
- 1/4 cup melted butter
- 2 large eggs
- 2 1/2 tablespoons active dry yeast
- 1 1/2 teaspoons salt
- 5-6 cups all-purpose flour – The final amount may vary slightly depending on your climate and elevation. (See notes for details).
Filling
- 6 tablespoons unsalted butter, softened
- 1 1/4 cup granulated sugar
- 2 tablespoons fresh orange zest – from about 1 large orange
- 1 tablespoon fresh orange juice
Orange Cream Cheese Frosting
- 6 tablespoons unsalted butter, softened
- 4 tablespoons fresh orange juice – add more as needed to reach desired consistency
- 1/4 teaspoon orange zest
- 3 1/2 – 4 cups powdered sugar (confectioners’ sugar)
Instructions
-
In the bowl of a stand mixer fitted with the dough hook, combine the warm water, room temperature buttermilk, granulated sugar, melted butter, and active dry yeast. Mix gently until just combined. Let this mixture sit for 15 minutes until the yeast is foamy and bubbly. Then, add the salt, eggs, and all-purpose flour (start with 5 cups). Mix on medium-low speed for 8-10 minutes until the dough pulls away from the sides of the bowl but still sticks slightly to the very base. Add more flour one tablespoon at a time if needed until tacky, not overly sticky. Cover the bowl with plastic wrap and allow the dough to rest for 10 minutes.
-
While the dough is resting, prepare the orange filling. In a small bowl, combine the 1 1/4 cup granulated sugar, 2 tablespoons orange zest, and 1 tablespoon fresh orange juice. Stir well until thoroughly combined.
-
Preheat your oven to 400°F (200°C). Line a large baking sheet with a silicone baking mat or parchment paper, or spray it generously with cooking spray. Lightly spray your clean countertop or pastry mat with cooking spray (like Baker’s Joy). Roll the rested dough into a large 14×18-inch rectangle, aiming for an even thickness.
-
Using the back of a spoon or an offset spatula, smear the 6 tablespoons of softened butter evenly over the entire surface of the dough, extending to the edges. Then, sprinkle the prepared orange sugar filling evenly over the butter.
-
Starting with the long side, carefully and tightly roll the dough into a log so that the resulting log measures approximately 18 inches in length. Using unflavored dental floss, thread, or a sharp serrated knife, cut the log into 12 equal-sized rolls. Place the rolls onto the prepared baking sheet, typically 3 rolls across and 4 rolls down, leaving a little space between each. Lightly cover the orange sweet rolls with plastic wrap and set them in a warm, draft-free place to rise for 20 minutes, or until slightly puffy.
-
Bake for 20-24 minutes in the preheated oven or until golden brown on top and cooked throughout.
Orange Cream Cheese Frosting
-
While the rolls are baking or cooling slightly, prepare the frosting. In the bowl of a stand mixer with the paddle attachment, or using a handheld electric mixer, beat the 6 tablespoons of softened butter until smooth and creamy. Gradually add the 3 1/2 – 4 cups of powdered sugar, 1/4 teaspoon orange zest, and 4 tablespoons of fresh orange juice. Beat on low speed until combined, then increase to medium-high and beat until the frosting is smooth, light, and fluffy. If the frosting is too thick, add more orange juice one teaspoon at a time until it reaches a perfect spreadable consistency.
-
When the orange rolls are finished baking, remove them from the oven. Allow them to cool on the baking sheet for approximately 5-10 minutes. This allows them to set slightly while still retaining enough warmth for the frosting to melt beautifully. Generously frost the rolls while they are still warm and in the pan, ensuring the frosting seeps into every crevice for maximum deliciousness.
-
These orange rolls are best enjoyed warm and fresh, ideally on the day they are baked. However, you can store any leftovers in an airtight container at room temperature for up to 2 days, or in the refrigerator for up to 4 days. Reheat gently in the microwave for a fresh-baked experience.
Notes
Don’t be afraid to experiment with your flour! For a heartier, slightly chewier orange roll, try using a blend of bread flour and all-purpose flour. I’ve successfully made this recipe using 100% all-purpose flour, as well as a 50% bread flour and 50% all-purpose flour mix, achieving excellent results each time.
For storing, place cooled orange rolls in an airtight container or bag. They will stay fresh at room temperature for up to 2 days or in the refrigerator for up to 4 days. Gently warm in the microwave for a fresh-baked feel.
Nutrition
