Ultimate S’mores Layer Cake: Indulge in Campfire Flavors Indoors
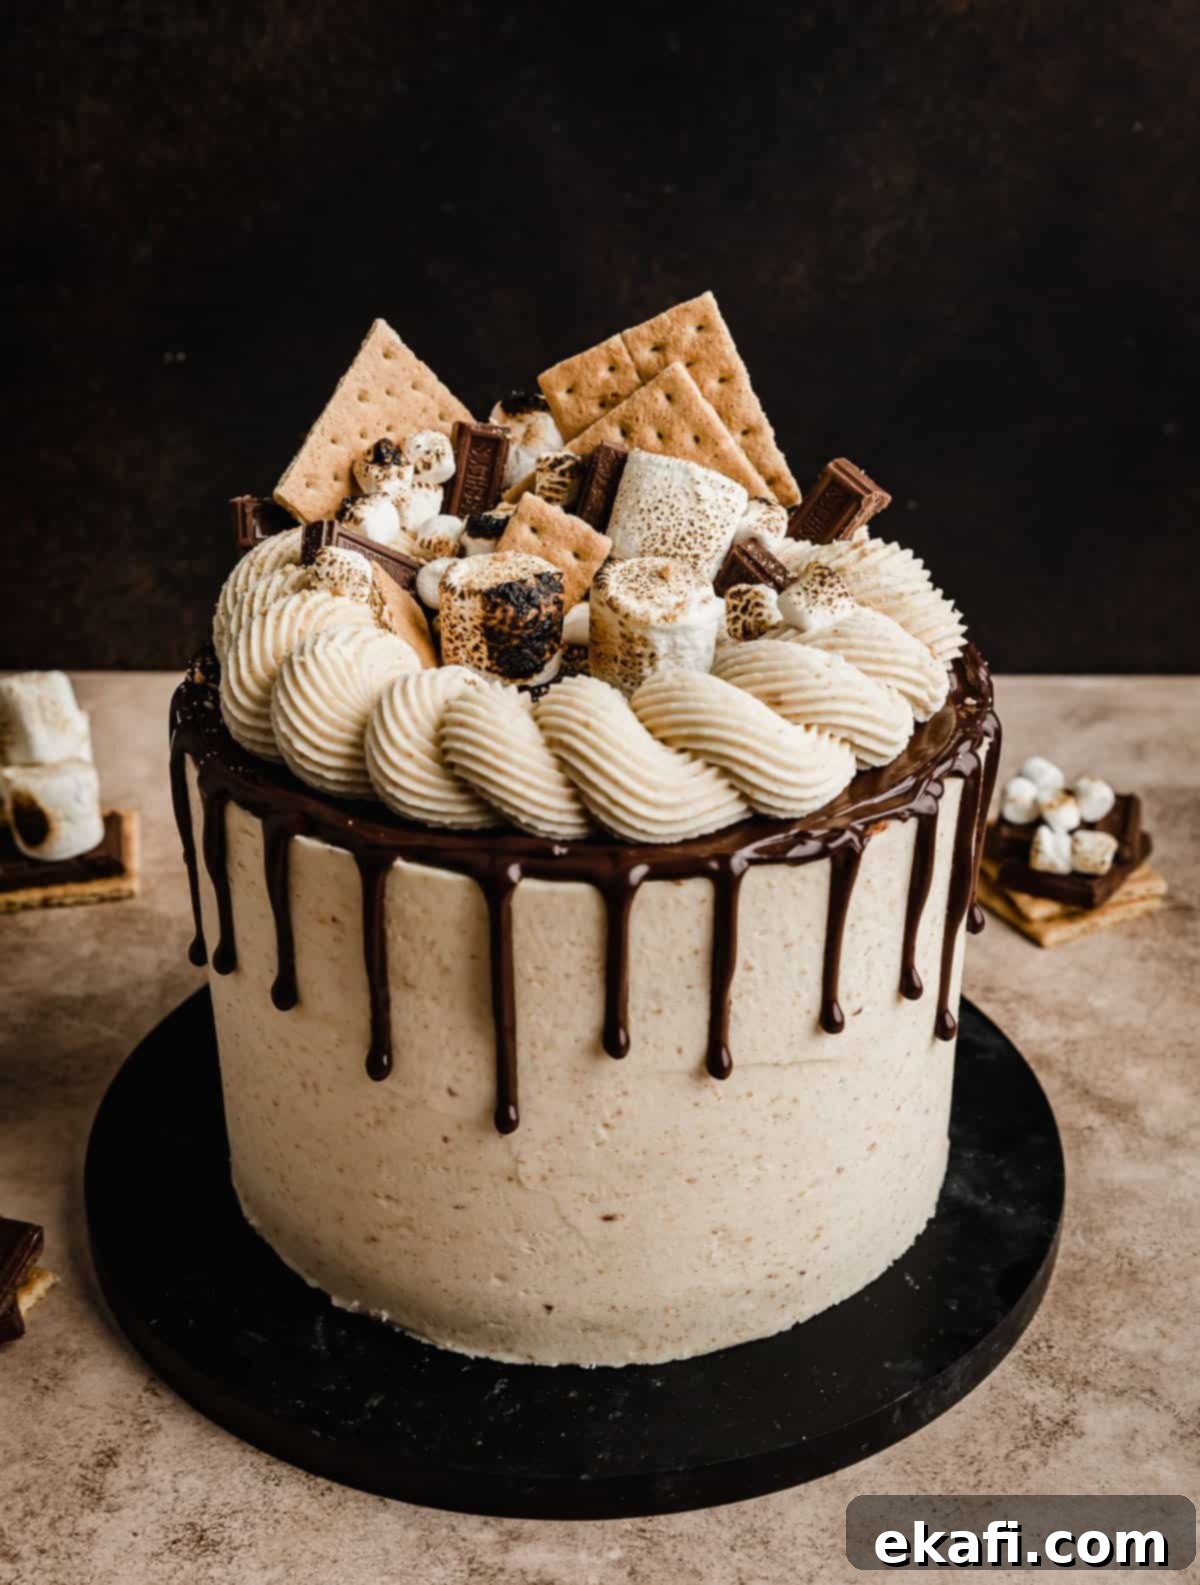
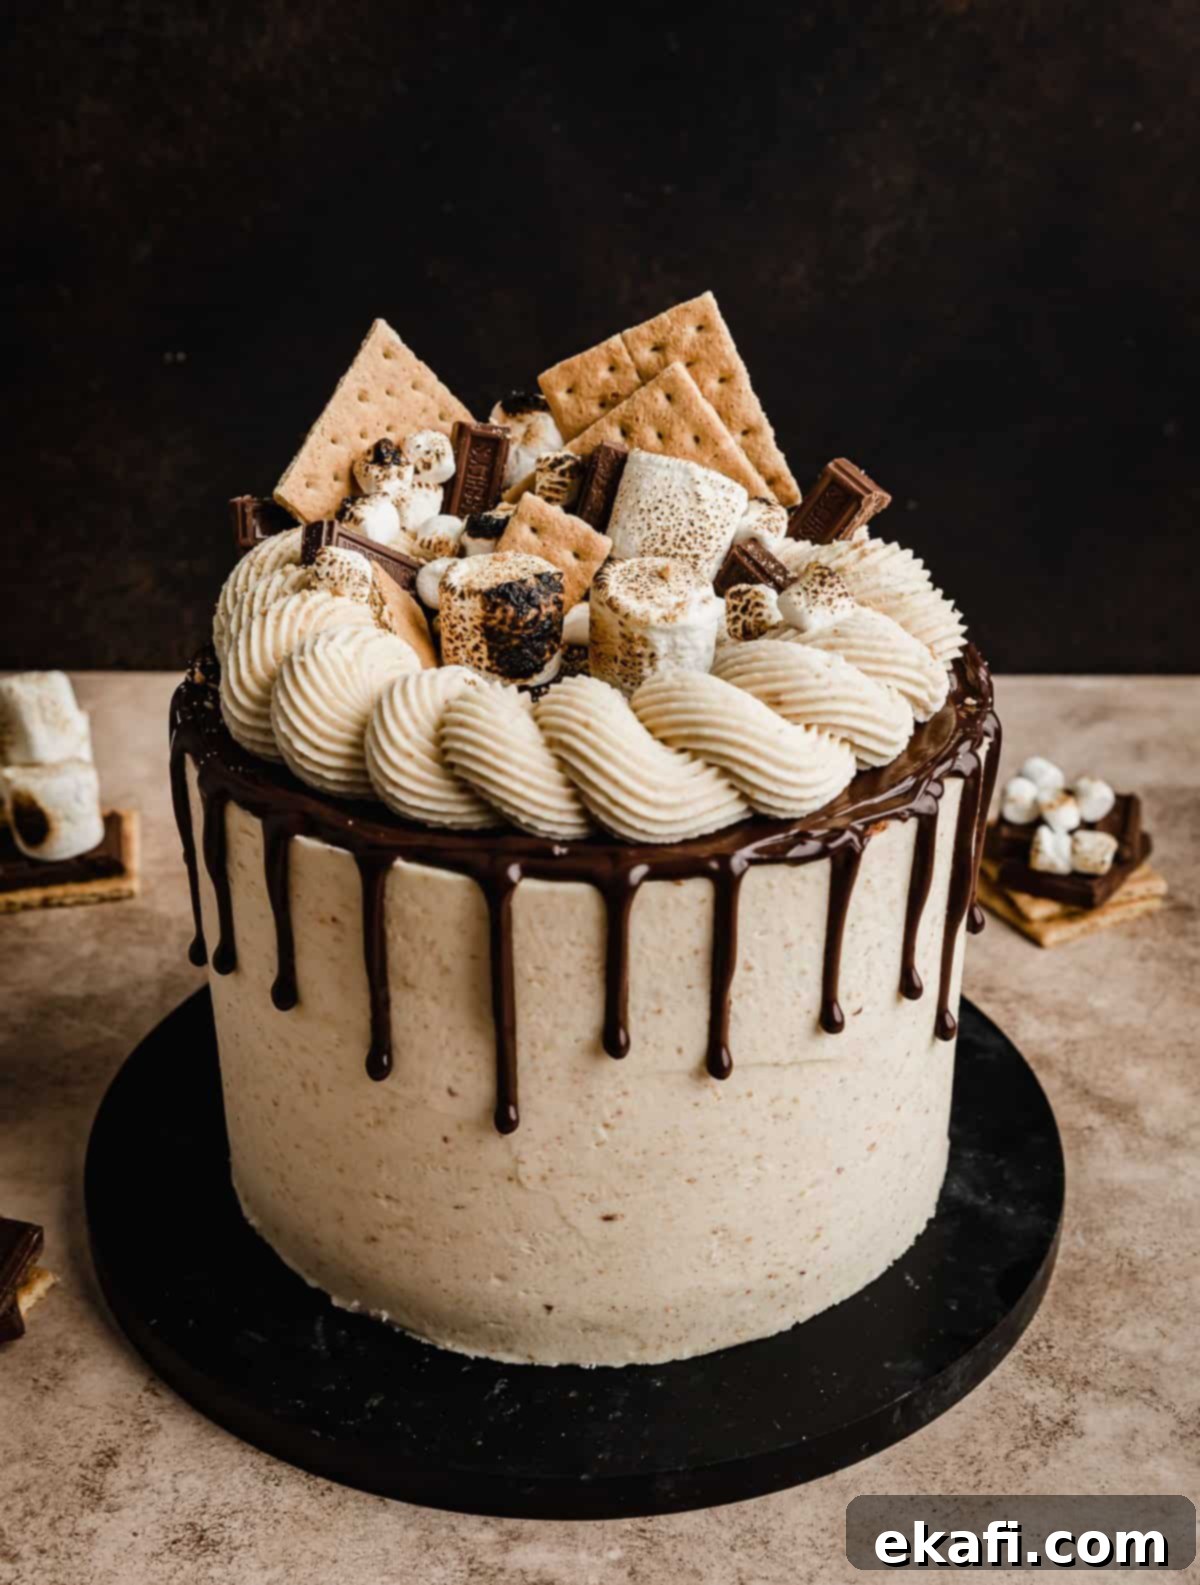
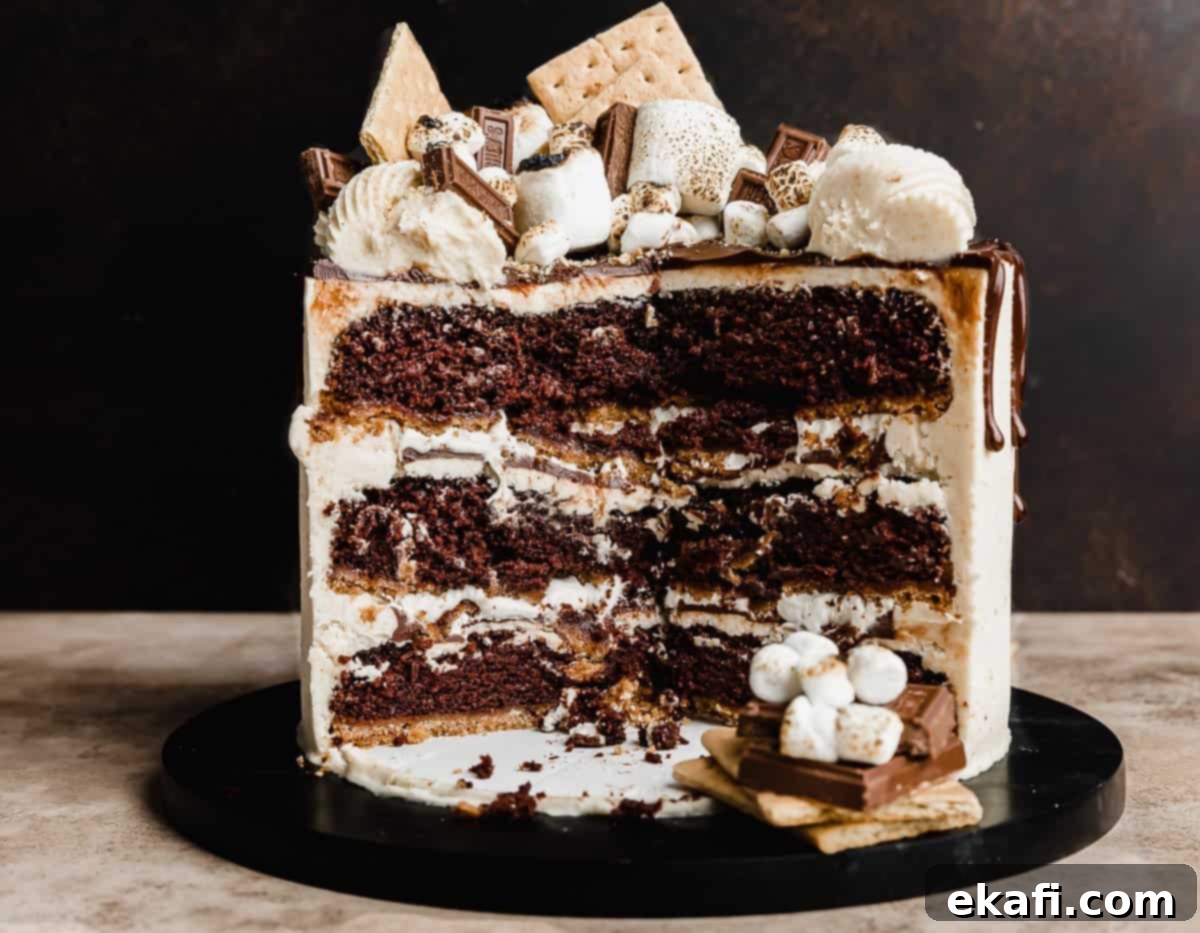
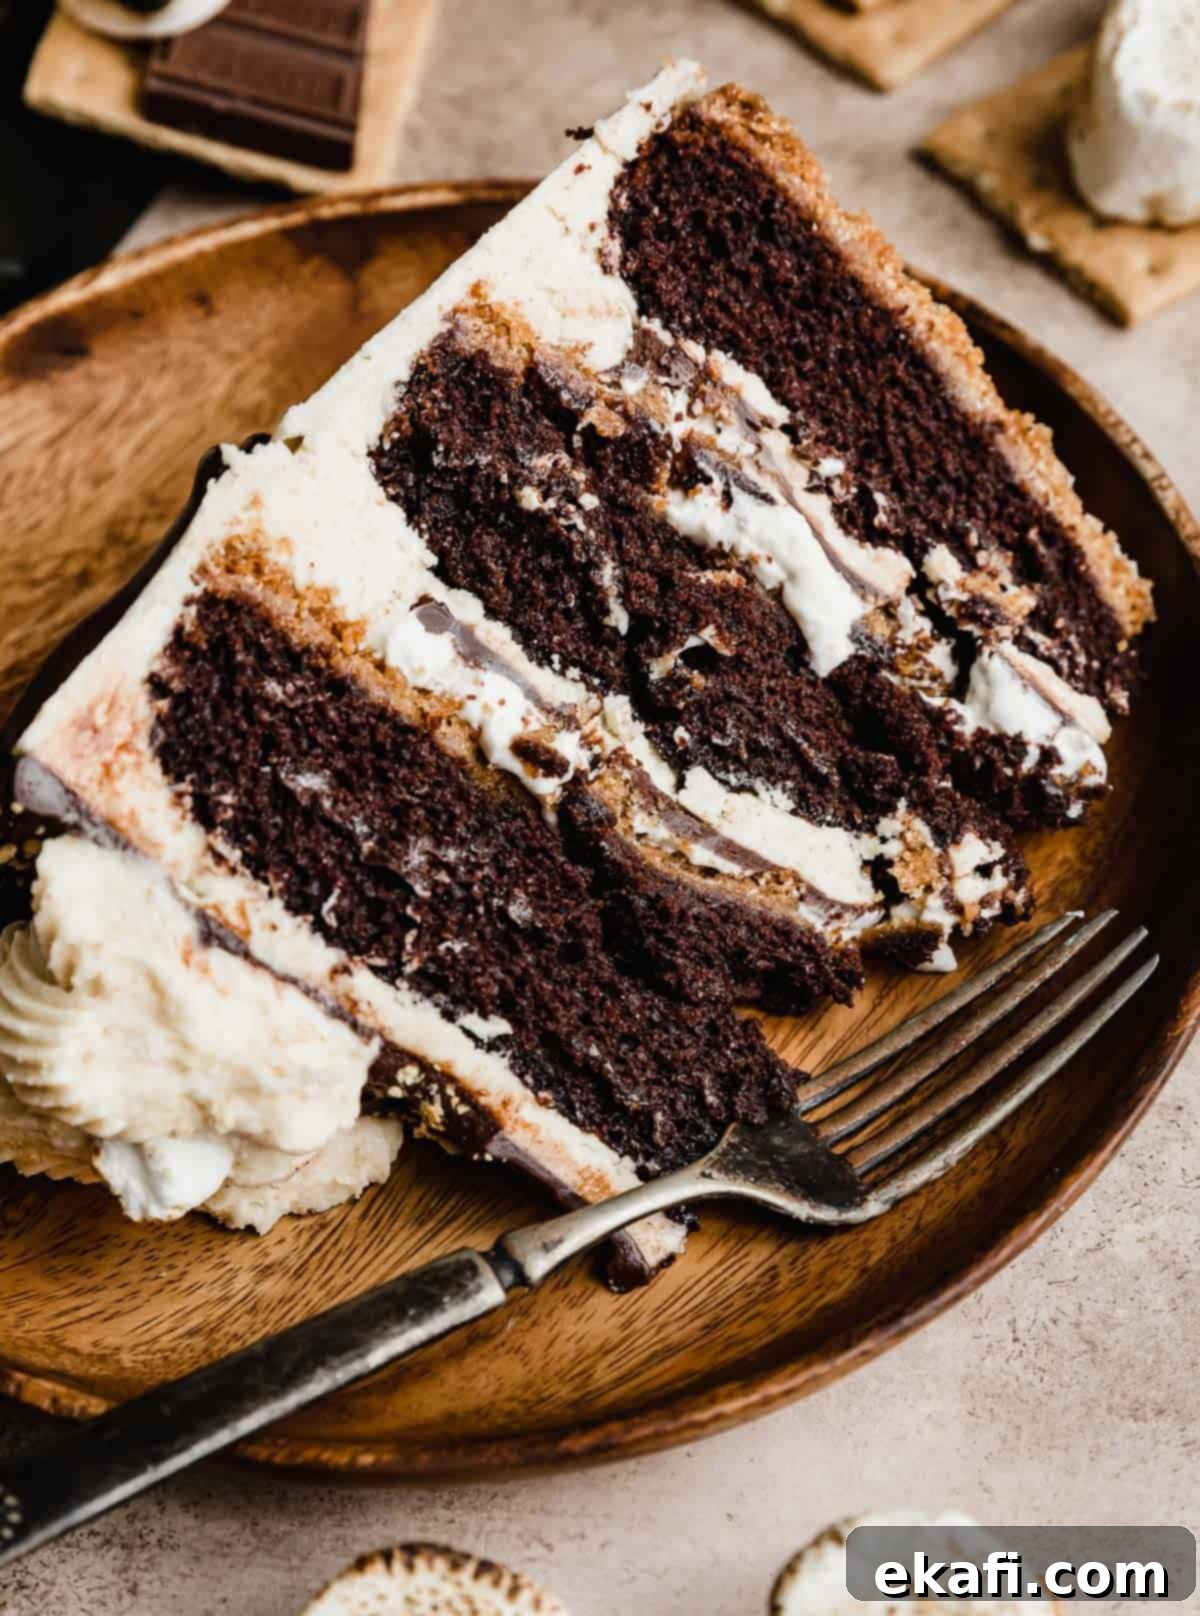
Prepare to embark on a truly unforgettable dessert adventure with this extraordinary S’mores Layer Cake. Imagine a perfectly moist, rich chocolate cake resting on a sweet, buttery graham cracker crust. Now, picture decadent layers of smooth chocolate ganache and fluffy, toasted marshmallow whipped cream, all encased in a luscious graham cracker marshmallow buttercream, finished with an elegant chocolate ganache drip. This isn’t just a cake; it’s a meticulously crafted masterpiece that brings every beloved element of a crackling campfire s’more into a sophisticated, shareable treat. Get ready to experience the nostalgic flavors of summer nights, no campfire required!
As a devoted admirer of classic campfire s’mores, I’ve always sought creative ways to enjoy their magic year-round, regardless of the weather. Whether it’s a quick fix like S’mores in the Microwave, the convenience of Oven S’mores, or a fun twist like Reese’s S’mores Dip, these treats perfectly satisfy those sudden cravings. My passion for s’mores has also inspired other delightful variations, including S’mores Cookies, S’mores Brownies, and S’mores Rice Krispies. If you can’t tell, I simply adore s’mores, and this cake is the pinnacle of that adoration!
Why This S’mores Cake Recipe is a Must-Try
This isn’t just another cake; it’s a culinary experience designed to capture the essence of s’mores in every bite. Here’s why this recipe stands out as the ultimate choice for your next decadent dessert:
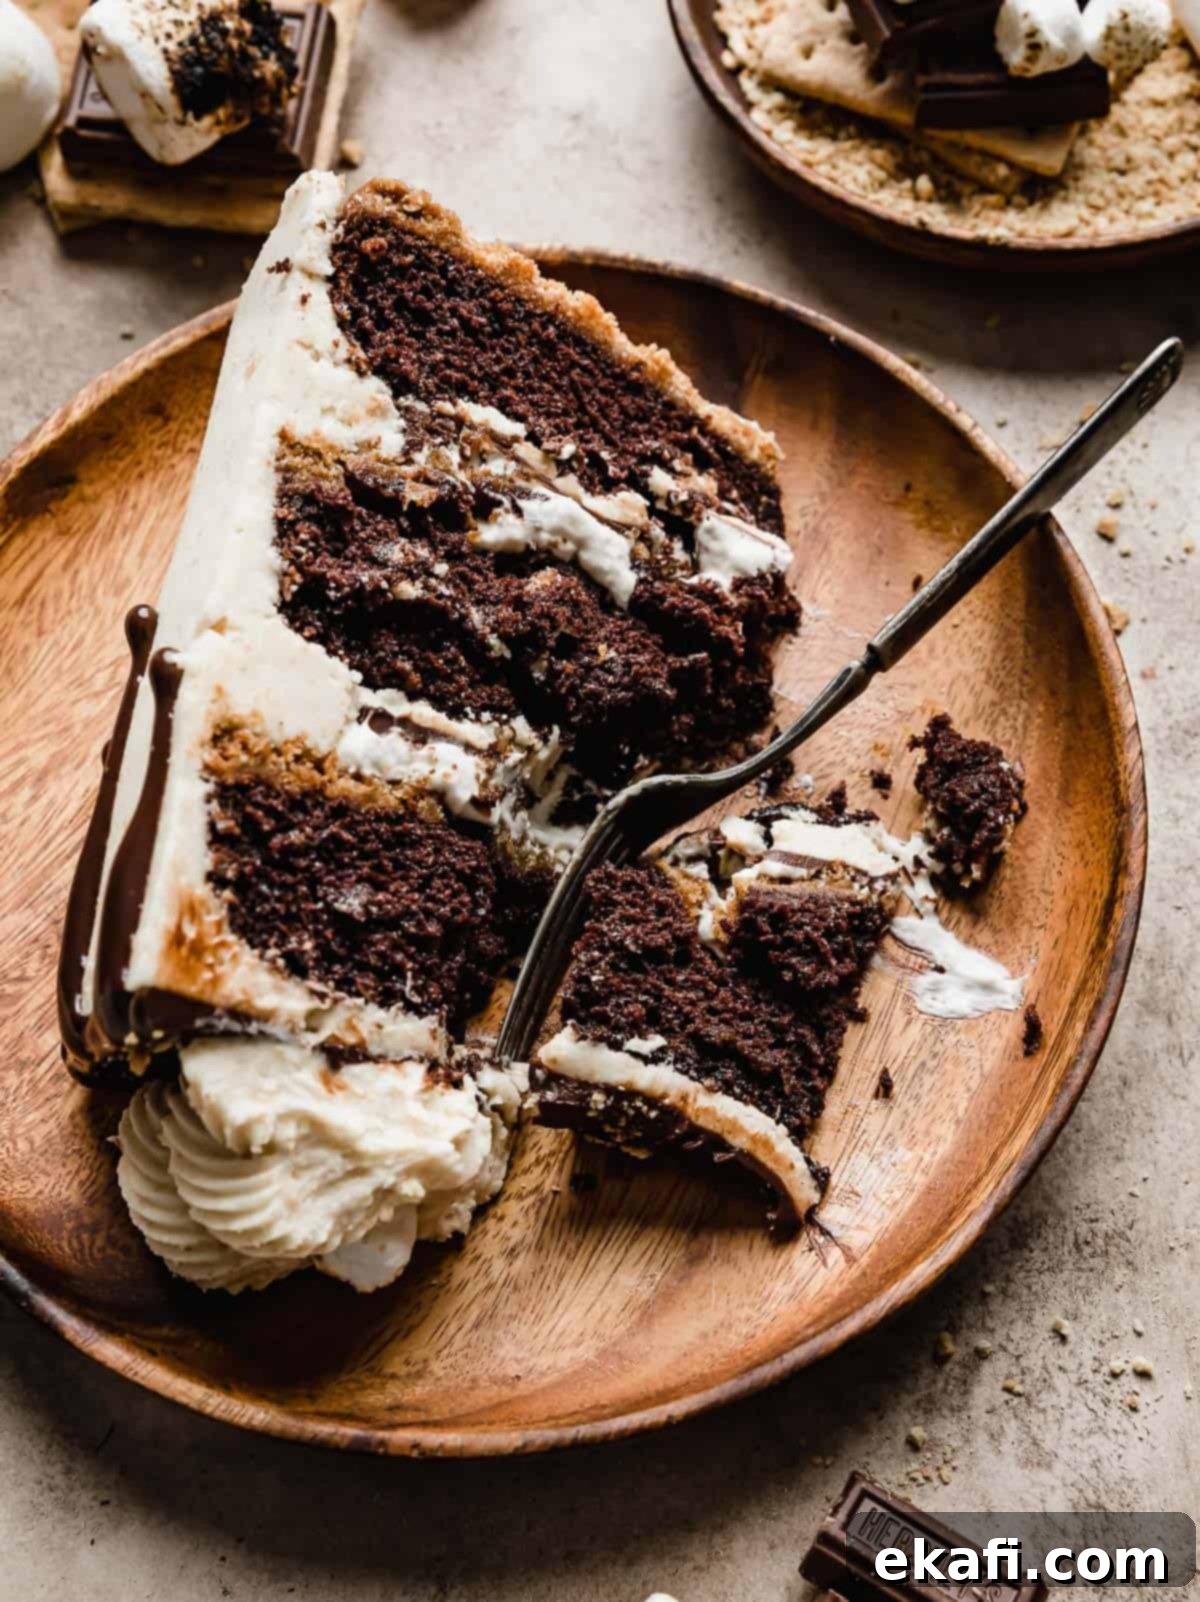
- Every S’mores Component, Amplified. What makes a s’more? Chocolate, graham crackers, and marshmallows. This recipe ensures each of these iconic elements is not only present but thoughtfully integrated into the cake, often in multiple forms! You’ll find a crisp graham cracker crust providing a sturdy base, while graham cracker crumbs are also folded into the buttercream for an extra textual and flavor punch. Rich chocolate ganache forms a luxurious filling, and the chocolate cake itself delivers deep cocoa notes. As for marshmallows, you get fluffy toasted marshmallow whipped cream as a filling and delightful toasted marshmallow pieces swirled into the buttercream. This dual approach guarantees that when you take a bite, you’ll immediately exclaim, “Yep, that’s pure s’mores magic!” (Just like my husband did!).
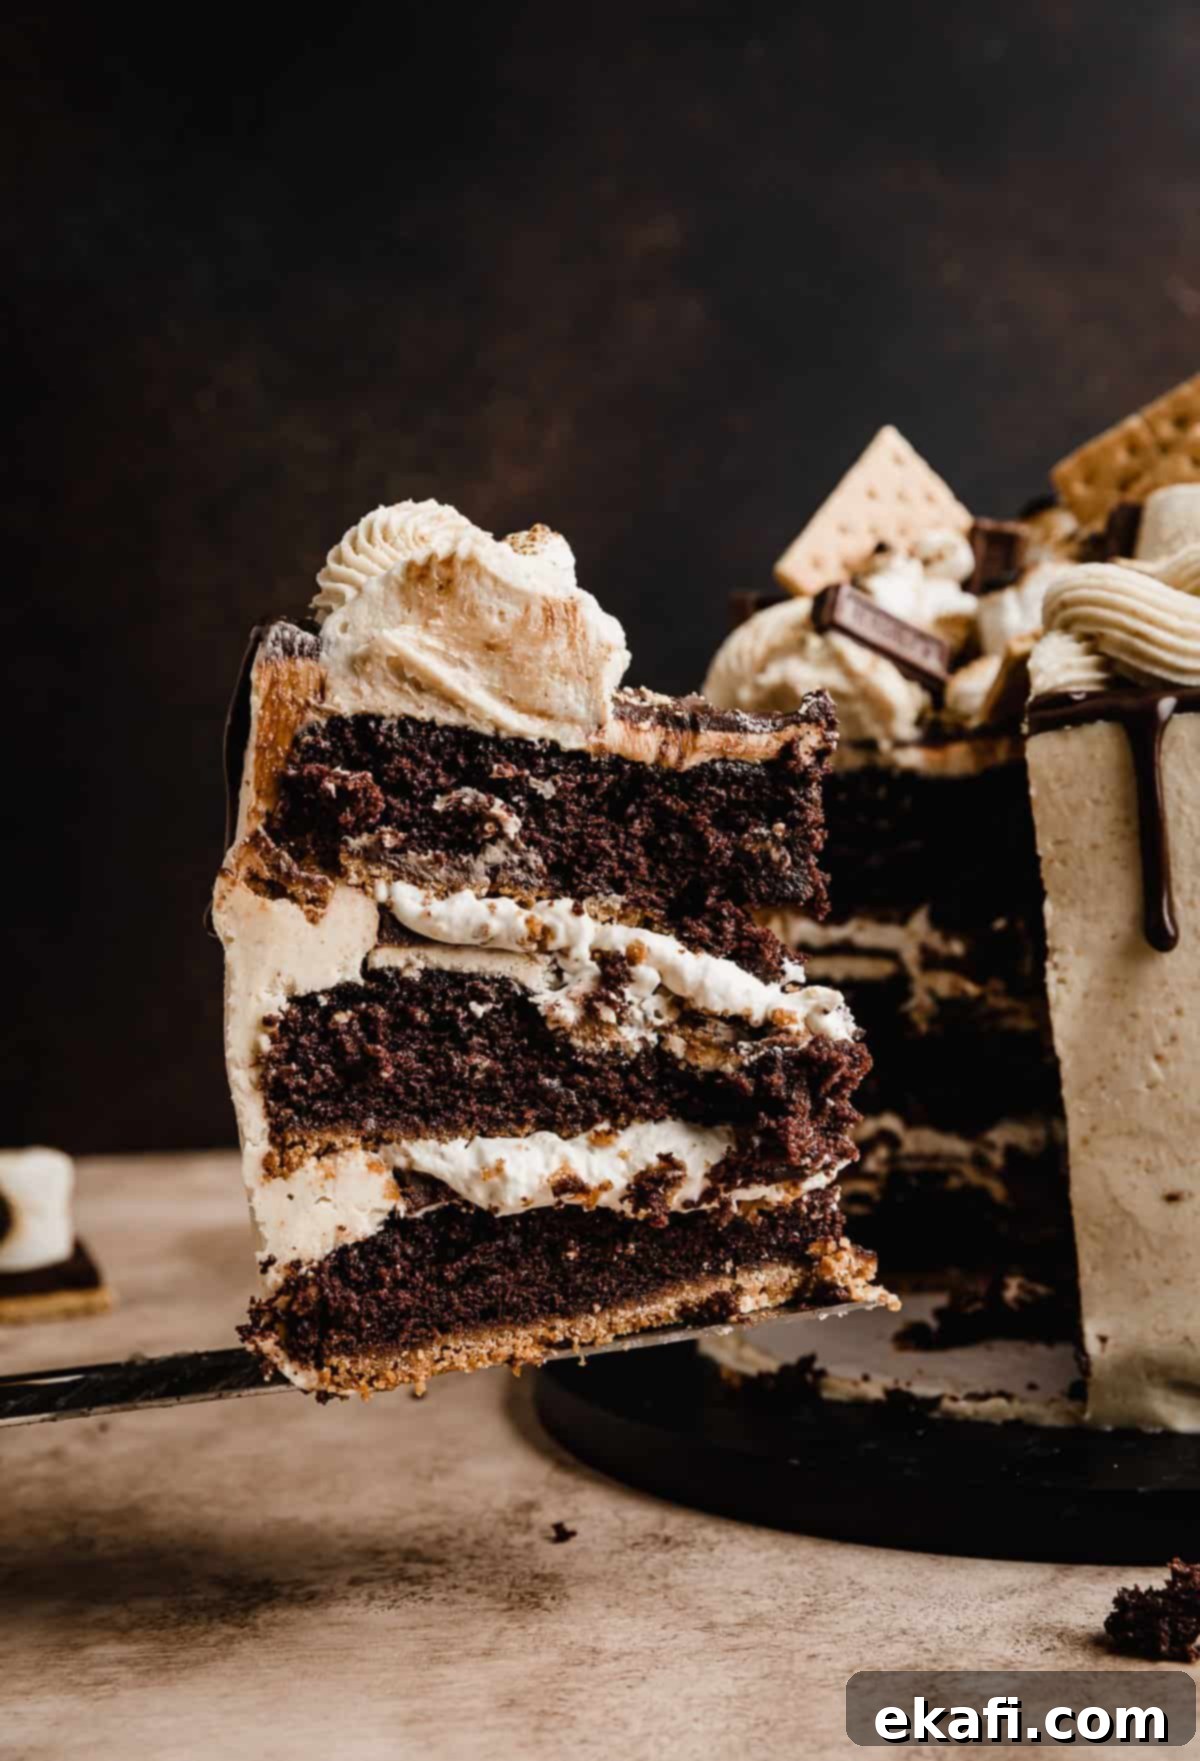
- Unquestionably Indulgent and Decadent. Prepare for an explosion of textures and flavors. We’re talking about tender, incredibly moist layers of chocolate cake that practically melt in your mouth. Beneath them lies a sweet and substantial graham cracker crust, offering a delightful crunch. Between each cake layer, a silky smooth chocolate ganache provides a rich, intense chocolate hit, complemented by the airy, sweet, and slightly smoky toasted marshmallow whipped cream. The entire cake is enveloped in a unique buttercream featuring both toasted marshmallow pieces and fine graham cracker crumbs, adding an unparalleled depth of flavor. Finally, a glossy chocolate ganache drip cascades down the sides, topped with classic s’mores garnishes like extra graham cracker squares, more toasted marshmallows, and chocolate pieces. This cake is a true showstopper, designed for supreme indulgence.
- Bring the Campfire Experience Indoors, Anytime. Craving that beloved campfire taste but can’t get outdoors? This delicious s’mores cake is your perfect solution! Whether it’s the dead of winter, a rainy summer day, or you simply prefer to avoid insects and smoky clothes, this cake allows you to enjoy the nostalgic flavors of s’mores from the comfort of your home. It’s ideal for parties, special occasions, or just because you deserve a truly exceptional treat. Say goodbye to unpredictable weather and hello to consistent s’mores bliss!
Key Ingredient Insights for Your S’mores Cake
Crafting the perfect s’mores cake relies on understanding how each ingredient contributes to the overall flavor and texture. Here’s a detailed look at the key components:
- Graham Cracker Crumbs: These are essential for both the sturdy, sweet crust and for adding that signature graham flavor and subtle texture to the buttercream. You’ll need approximately 20 full graham cracker sheets for the base and another 9 full sheets for the toasted marshmallow frosting. Ensure they are finely crushed for the best results, especially for the buttercream.
- Unsalted Butter: Melted unsalted butter is crucial for binding the graham cracker crust. Using unsalted butter allows you to control the exact amount of salt in the recipe. For the buttercream, your butter should be slightly soft but still cool to the touch – this provides the ideal consistency for a fluffy, stable frosting. If you opt for salted butter, remember to adjust or omit any additional salt specified in the crust and buttercream.
- Unsweetened Cocoa Powder: Also known as natural cocoa powder, this is key for achieving the deep chocolate flavor in our cake layers. It’s lighter in color than Dutch-processed cocoa but provides a rich, pure chocolate taste. To learn more about selecting the best cocoa for your baking, check out our comprehensive guide on Best Cocoa Powders for Baking.
- Buttermilk: This acidic ingredient plays a vital role in creating a light, tender, and beautifully risen chocolate cake. Its acidity reacts with baking soda, enhancing the cake’s leavening. Moreover, buttermilk contributes significantly to the cake’s moist texture, preventing it from drying out.
- Vegetable Oil: Unlike butter, vegetable oil keeps cakes incredibly moist and tender over time. It ensures a consistently soft crumb, making this s’mores cake a delight even days after baking.
- Hot Water: This ingredient is essential for “blooming” the cocoa powder. Adding hot liquid to cocoa powder intensifies its chocolate flavor, making it richer and more profound. It’s a simple step that yields a noticeable difference in the cake’s chocolatey depth.
- Marshmallows: You’ll need both large marshmallows for toasting in the whipped cream and mini marshmallows for the buttercream. The act of toasting the marshmallows is non-negotiable, as it develops that iconic smoky, caramelized flavor found in traditional s’mores, elevating the cake’s authenticity.
- Powdered Sugar: Also known as confectioners’ sugar, this is crucial for the silky-smooth texture of the buttercream frosting. Always sift your powdered sugar to prevent lumps and ensure the creamiest, most spreadable frosting.
- Heavy Cream: This versatile ingredient serves multiple purposes. In the buttercream, it’s used to achieve the desired fluffy, light consistency. For the filling, heavy cream is whipped into a glorious toasted marshmallow whipped cream, adding an airy, sweet layer between the chocolate cake tiers.
Detailed Step-by-Step Instructions to Bake Your S’mores Cake
Crafting this multi-layered s’mores cake is a delightful baking project. Follow these detailed steps for a perfect result:
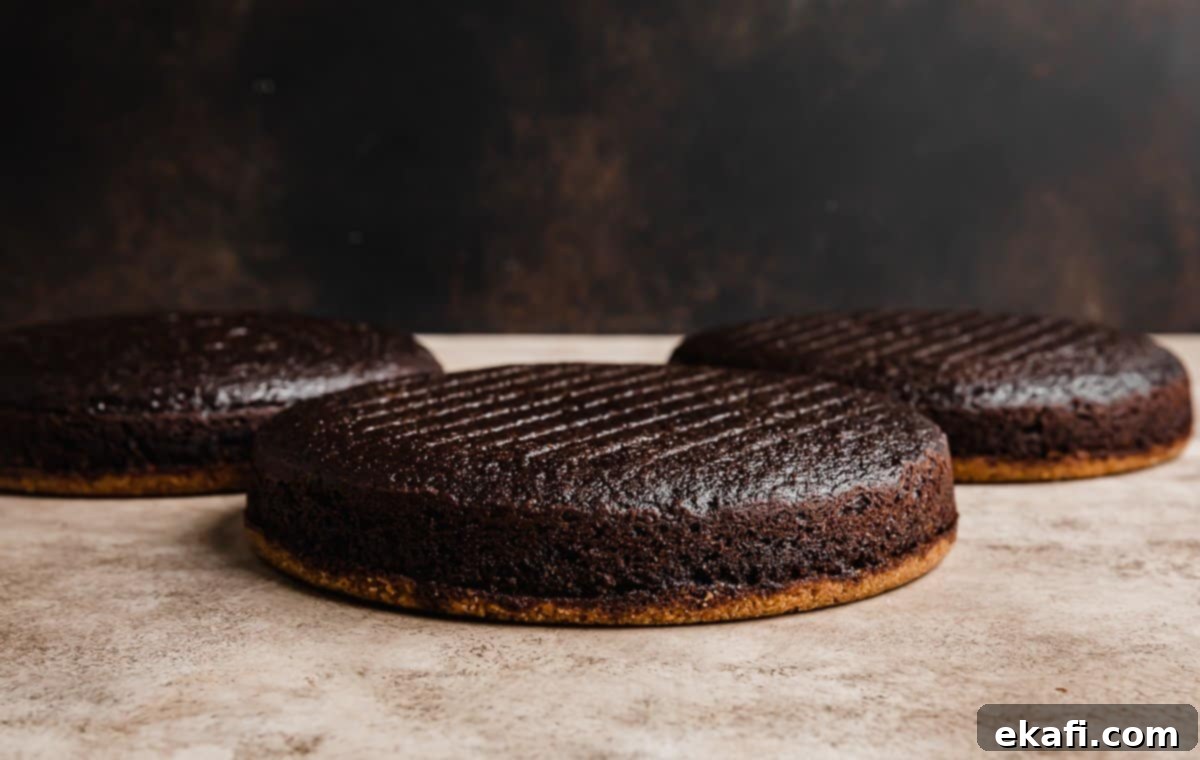
- Prepare the Graham Cracker Crust. Begin by preheating your oven to 325°F (160°C). In a large mixing bowl, combine the finely crushed graham cracker crumbs, melted butter, granulated sugar, and salt. Stir these ingredients thoroughly until they are well combined and resemble wet sand. Prepare three 8-inch round cake pans by spraying them generously with nonstick cooking spray. Line the bottoms of each pan with a circle of parchment paper, and then spray again for extra assurance. Divide the graham cracker mixture evenly among the three prepared pans, then press it firmly and evenly into the bottom of each pan to create a compact crust. Bake the crusts for just 4 minutes. Remove them from the oven and let them cool completely while you prepare the cake batter.
- Bake the Moist Chocolate Cake Layers. In a medium bowl, whisk together all the dry ingredients for the chocolate cake: all-purpose flour, granulated sugar, unsweetened cocoa powder, baking soda, baking powder, and salt. Set this aside. In the bowl of a stand mixer fitted with the paddle attachment, combine the room-temperature eggs, buttermilk, vegetable oil, and vanilla extract. Mix until these wet ingredients are thoroughly combined. Gradually add the dry ingredients to the wet ingredients in the stand mixer, mixing on low speed until just incorporated. Finally, carefully pour in the hot water and mix until the batter is smooth and well combined, being careful not to overmix. Divide the chocolate cake batter evenly among the three cooled cake pans, pouring it directly on top of the graham cracker crusts. Bake at 325°F (160°C) for 23-27 minutes, or until a wooden toothpick inserted into the center comes out with a few moist crumbs attached, but no wet batter. Over-baking will result in a dry cake, so watch carefully!
- Cool the Cake Layers Properly. Once baked, remove the cake pans from the oven. Allow the cake layers to cool in their pans for precisely 10 minutes. This crucial resting period helps the cakes set and prevents them from sticking. After 10 minutes, carefully invert the cakes onto a wire cooling rack. Gently peel off the parchment paper from the bottoms and allow the cake layers to cool completely to room temperature. This step is essential before assembling to prevent melting of the fillings and frosting.
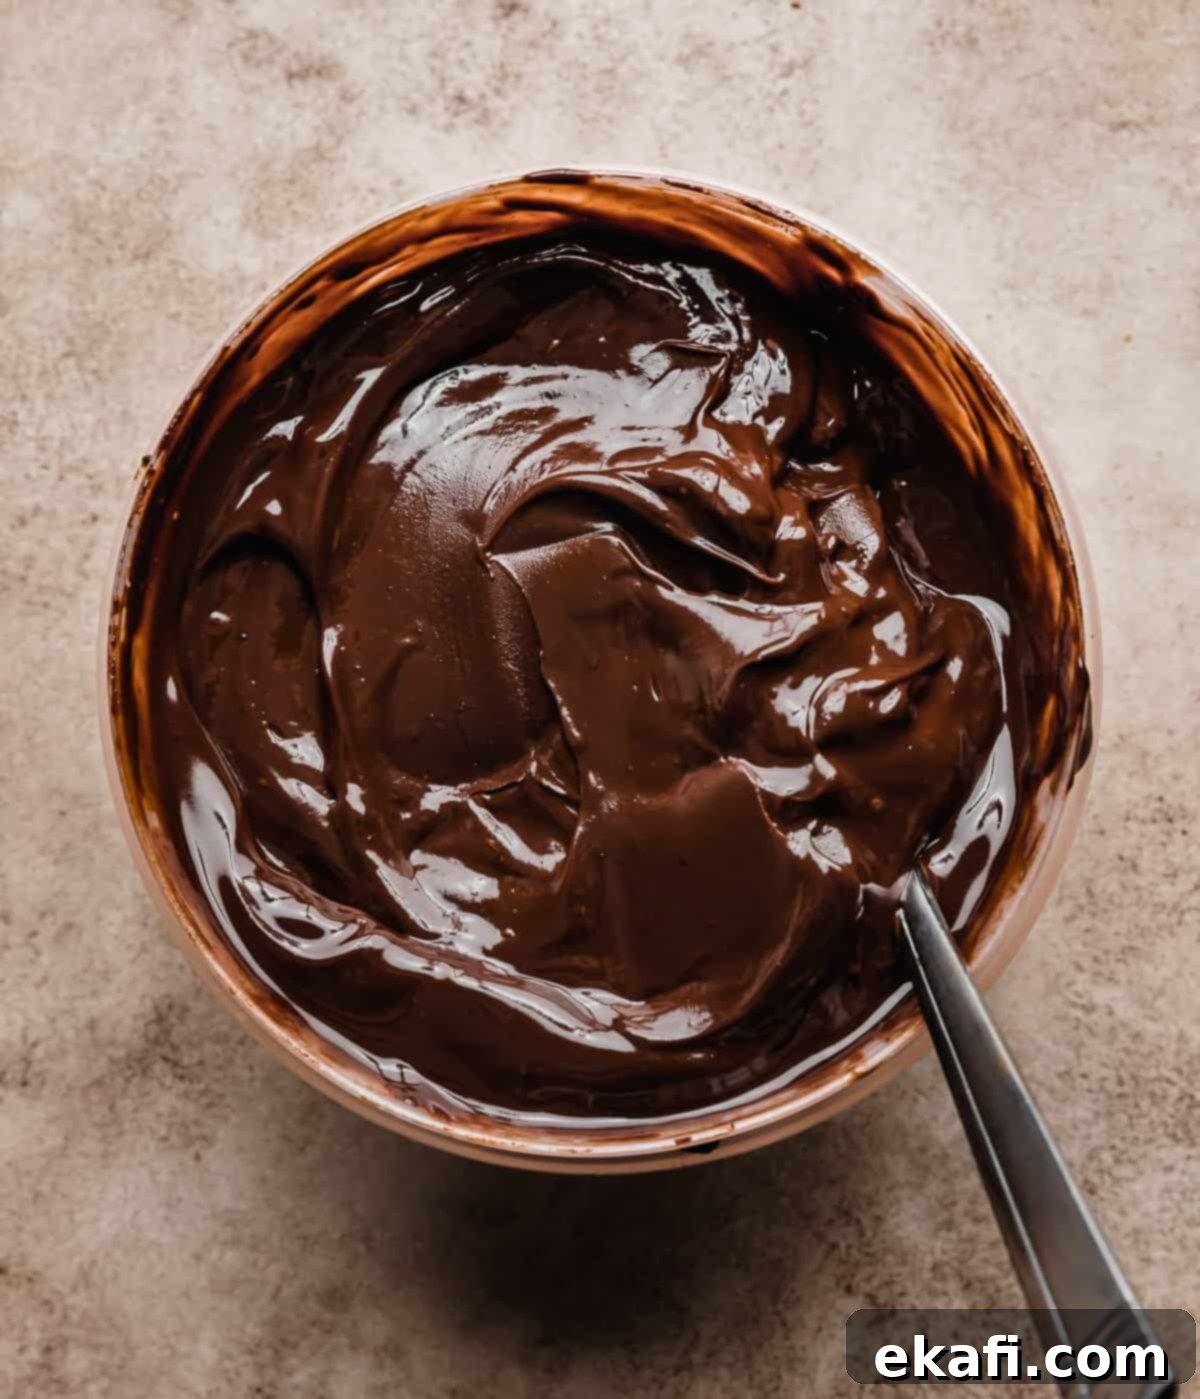
- Prepare the Silky Chocolate Ganache. Place your semisweet chocolate chips in a heat-proof bowl. In a separate microwave-safe bowl or small saucepan, heat the heavy cream until it is hot and steaming, but not boiling. Pour the hot cream directly over the chocolate chips. Let the mixture sit undisturbed for 2 minutes to allow the chocolate to melt. After 2 minutes, whisk gently from the center outwards until the ganache is completely smooth and glossy. This ganache will be used as a luscious filling between the cake layers and also for the elegant drip on the exterior of the finished cake.
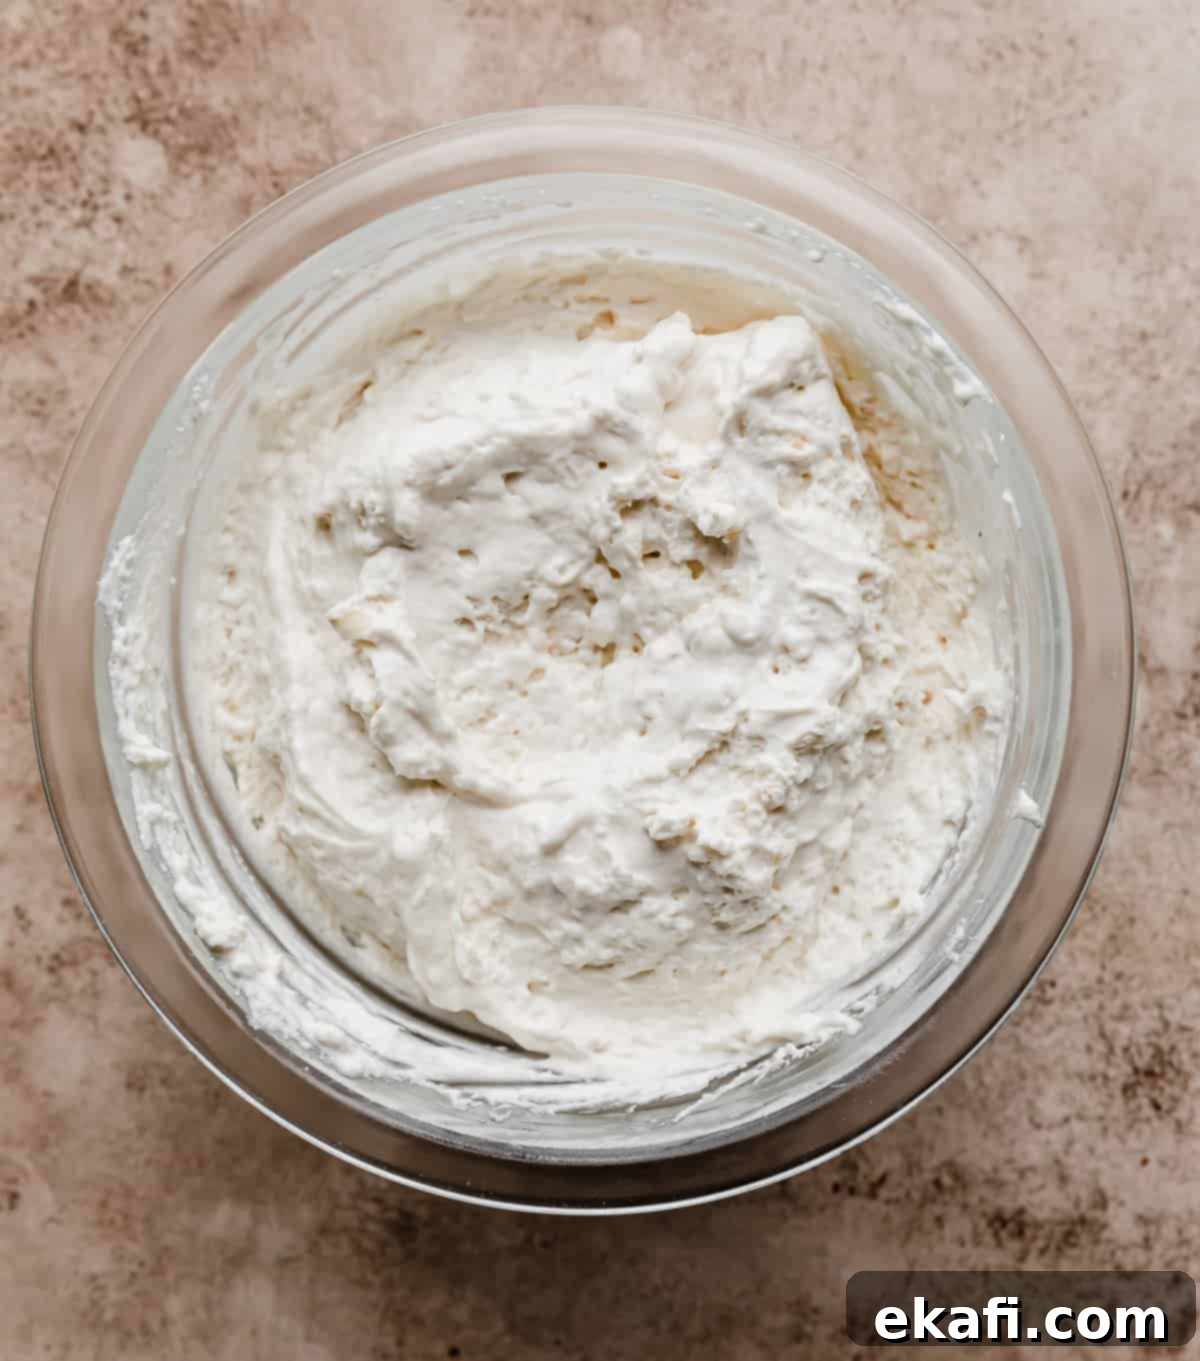
- Create the Toasted Marshmallow Whipped Cream. First, prepare your marshmallows for toasting. Arrange the large marshmallows on a baking sheet that has been lightly sprayed with nonstick cooking spray. Place the baking sheet under the broiler in your oven. Broil for 1-2 minutes, watching them very closely, as marshmallows can burn quickly. You’re looking for a beautiful golden-brown, toasted appearance. Once toasted, immediately transfer the warm, toasted marshmallows and 2 teaspoons of heavy cream to a heat-proof bowl. Mix well until the marshmallows have completely smoothed into the cream. Set this mixture aside to cool slightly. In a separate, chilled bowl, beat the remaining heavy cream until stiff peaks form. Once the marshmallow mixture has cooled enough that it won’t melt the whipped cream, gently fold it into the whipped cream until just combined. Store this delightful filling in the fridge until you are ready to assemble the cake to maintain its fluffy texture.
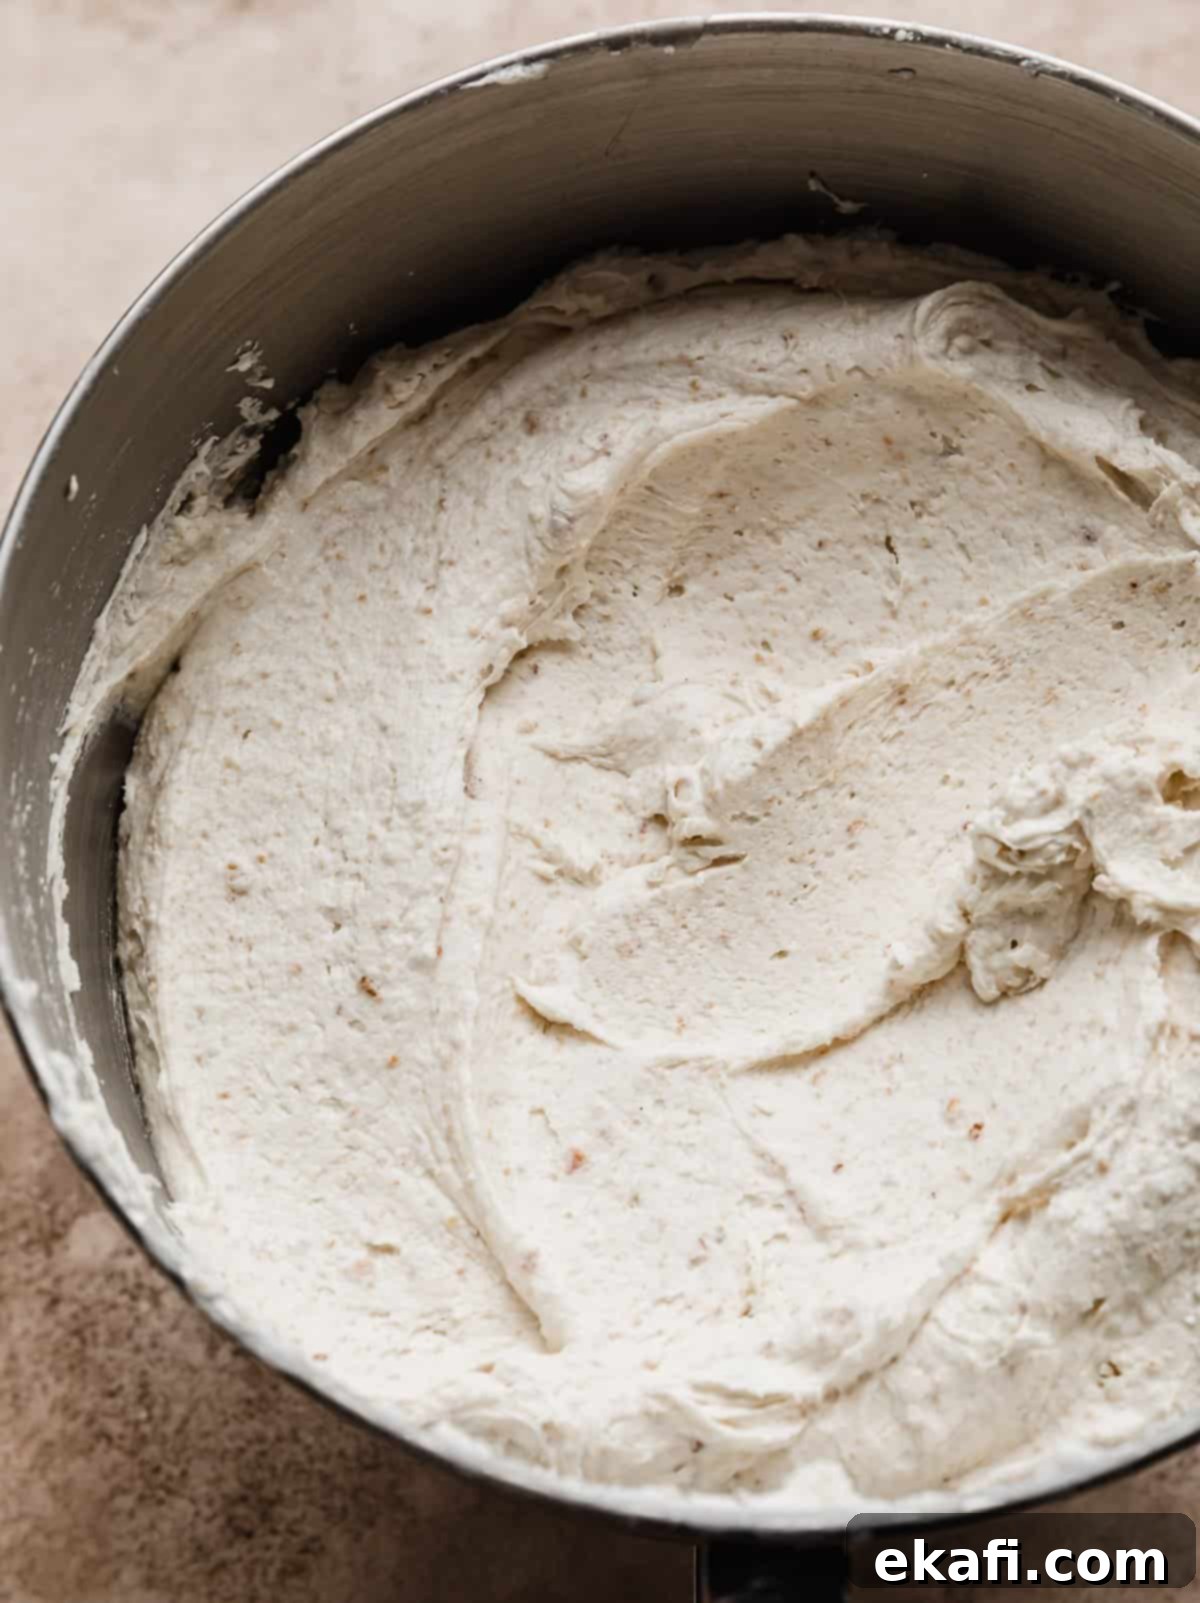
- Whip Up the Toasted Marshmallow Graham Cracker Buttercream. First, toast your mini marshmallows using the same broiler method described in step 5, watching them diligently until golden brown. Let them cool slightly. In the bowl of a stand mixer fitted with a paddle attachment, beat the slightly soft but still cold unsalted butter until it is light in color and incredibly smooth. Add the fine graham cracker crumbs, a pinch of salt (if using unsalted butter), and the slightly cooled toasted marshmallows. Beat the mixture until it becomes completely homogenous, ensuring the marshmallows break down and are evenly distributed. Add the vanilla extract and, while the mixer is on low speed, gradually add the powdered sugar, alternating with small splashes of heavy cream. Once all ingredients are added, increase the speed to high and beat the buttercream for a full 3 minutes. This final beating incorporates air, making the frosting wonderfully light and fluffy.
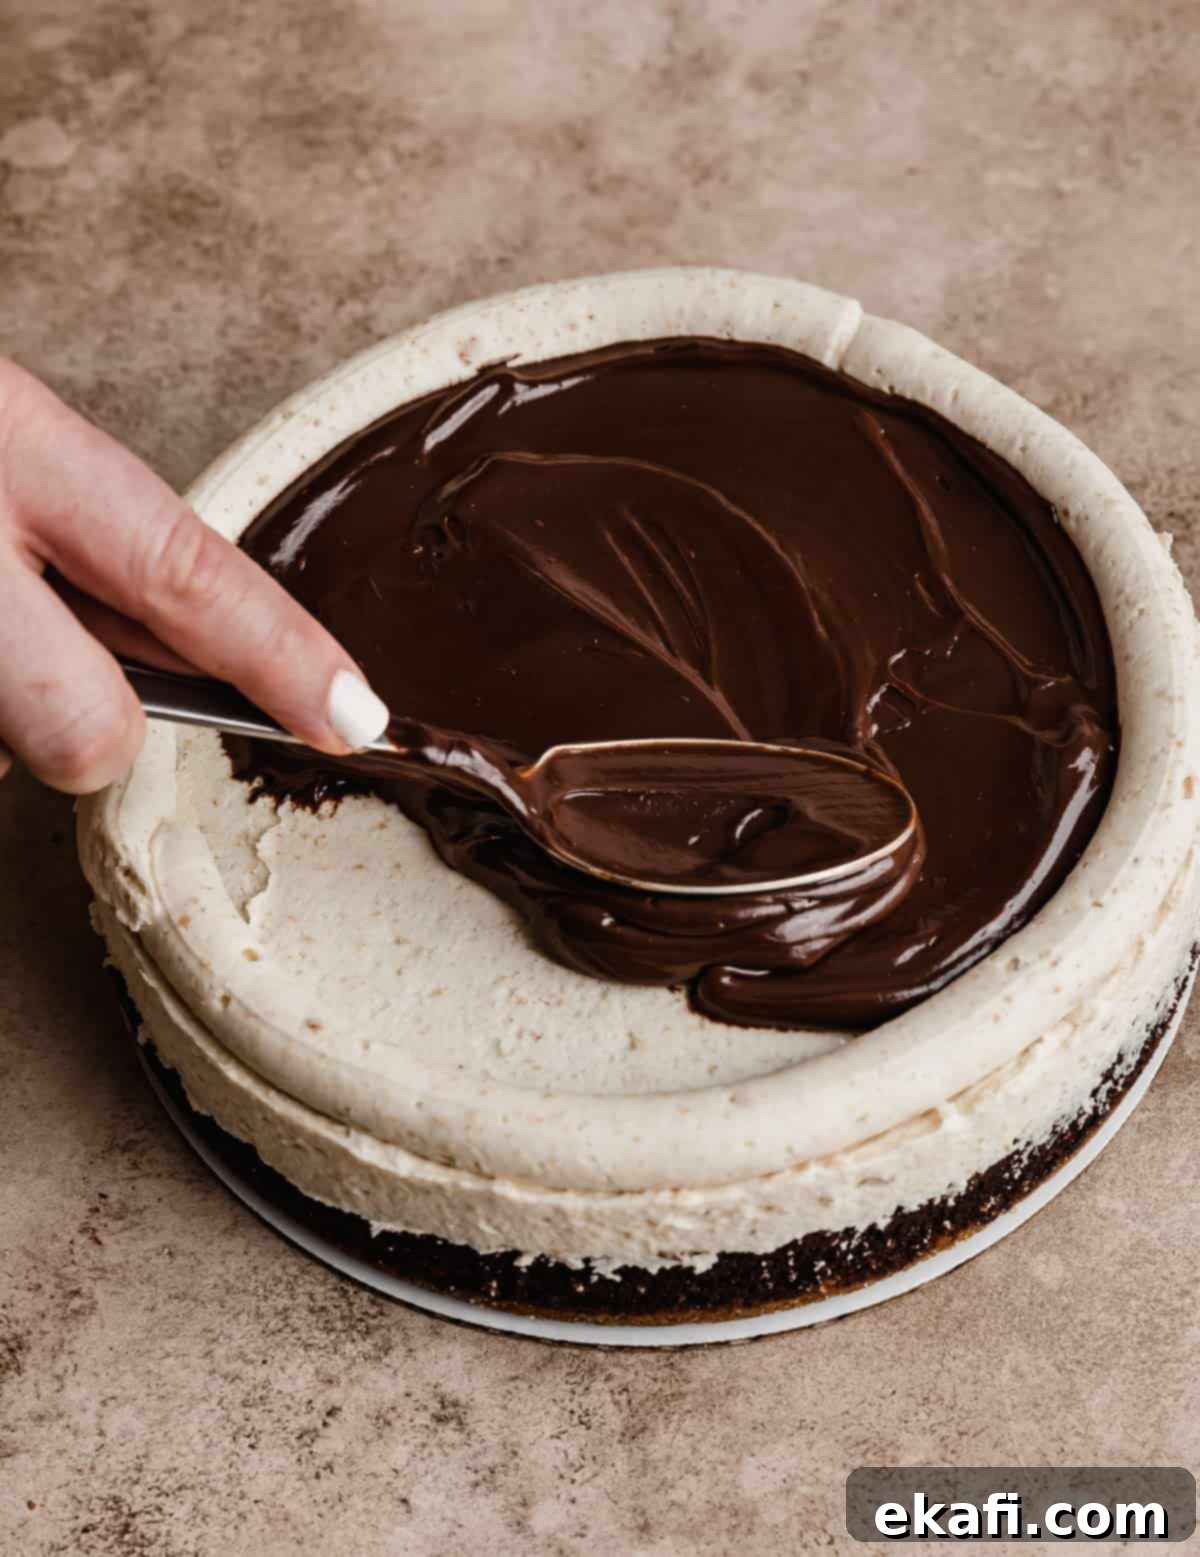
- Assemble Your Magnificent S’mores Cake. To begin assembly, place your first chocolate cake layer, graham cracker crust side down, onto your serving plate or cake board. Spread a thin, even layer of the toasted marshmallow graham cracker buttercream over the top surface of this cake layer. Using a piping bag with a round tip, pipe a sturdy dam (a ring) of buttercream around the circumference of the cake layer. This dam will act as a barrier to hold in the softer fillings. Inside this buttercream dam, spread a generous layer of the chocolate ganache. Then, carefully fill the remaining space within the dam with the toasted marshmallow whipped cream. Ensure you don’t overfill, as this can cause instability. Gently place the second cake layer on top, again with the crust side down. Repeat the process: apply a thin layer of buttercream, pipe a dam, spread ganache, and fill with toasted marshmallow whipped cream.
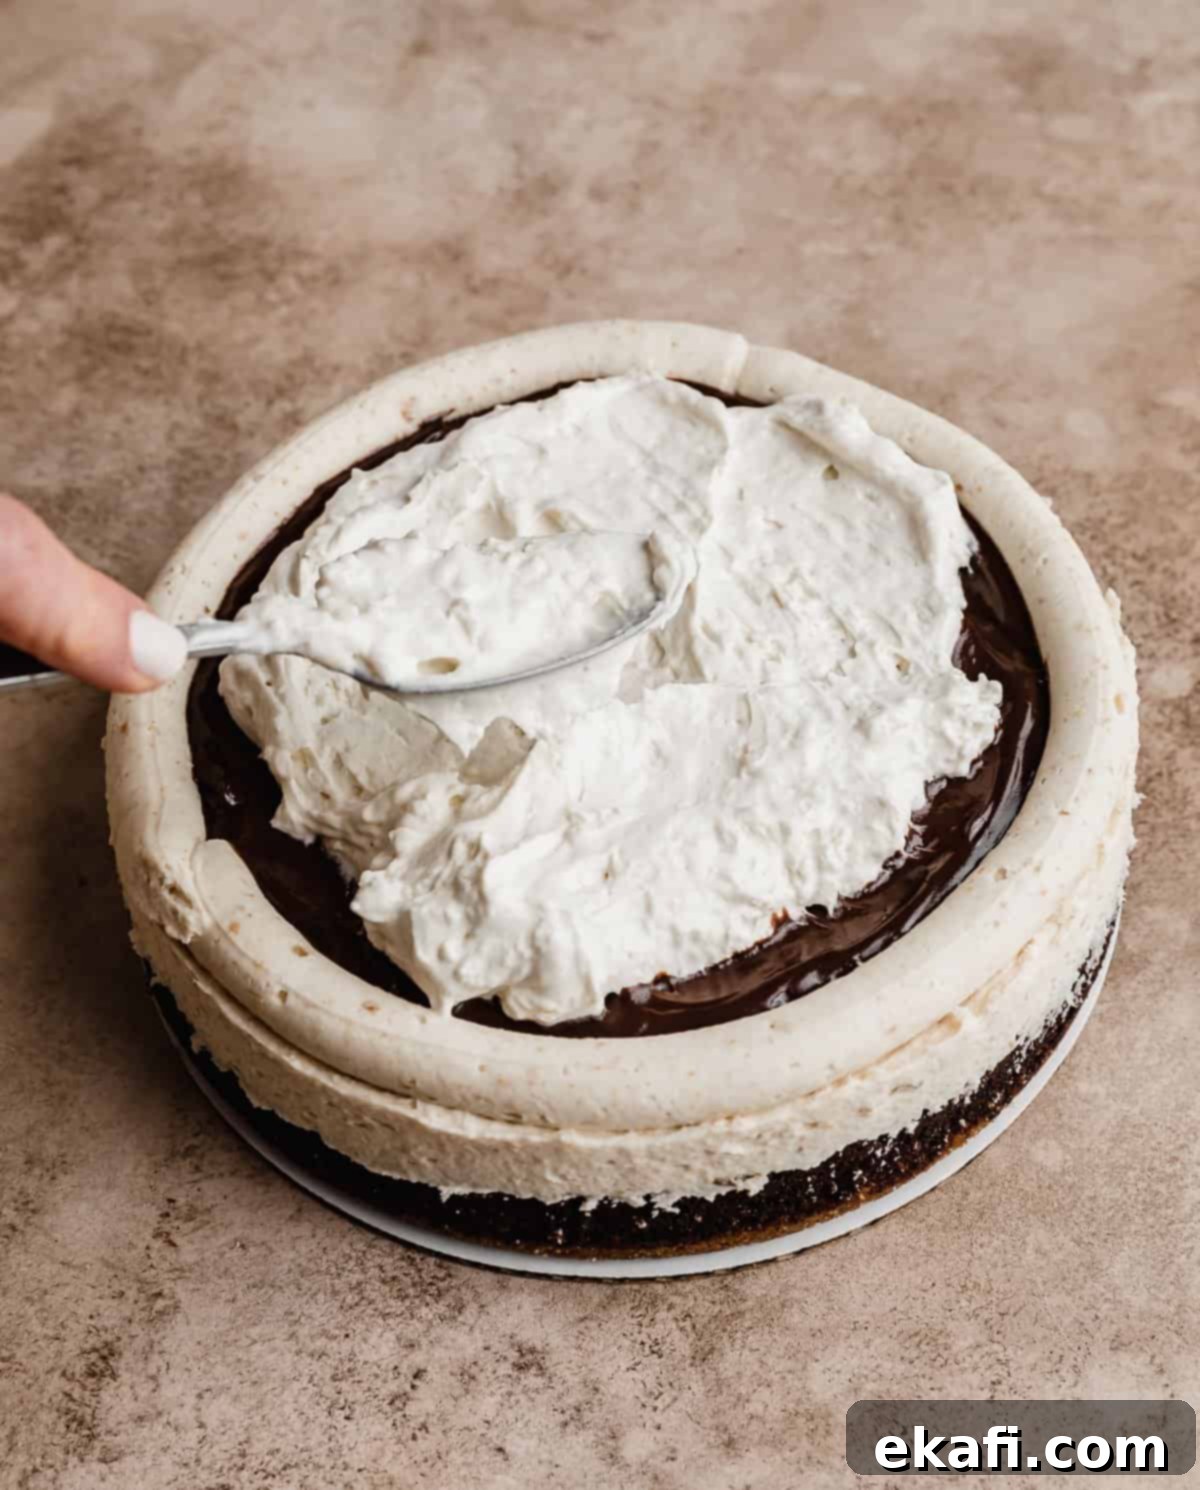
- Apply the Crumb Coat. Once all layers are stacked, apply a very thin, even layer of the toasted marshmallow graham cracker buttercream over the entire cake – top and sides. This is known as the “crumb coat,” and its purpose is to trap any loose crumbs, creating a smooth surface for your final layer of frosting. Once crumb-coated, place the cake in the refrigerator or freezer for 10-15 minutes, or until the buttercream is firm and cold to the touch. This step is crucial for a clean, professional finish.
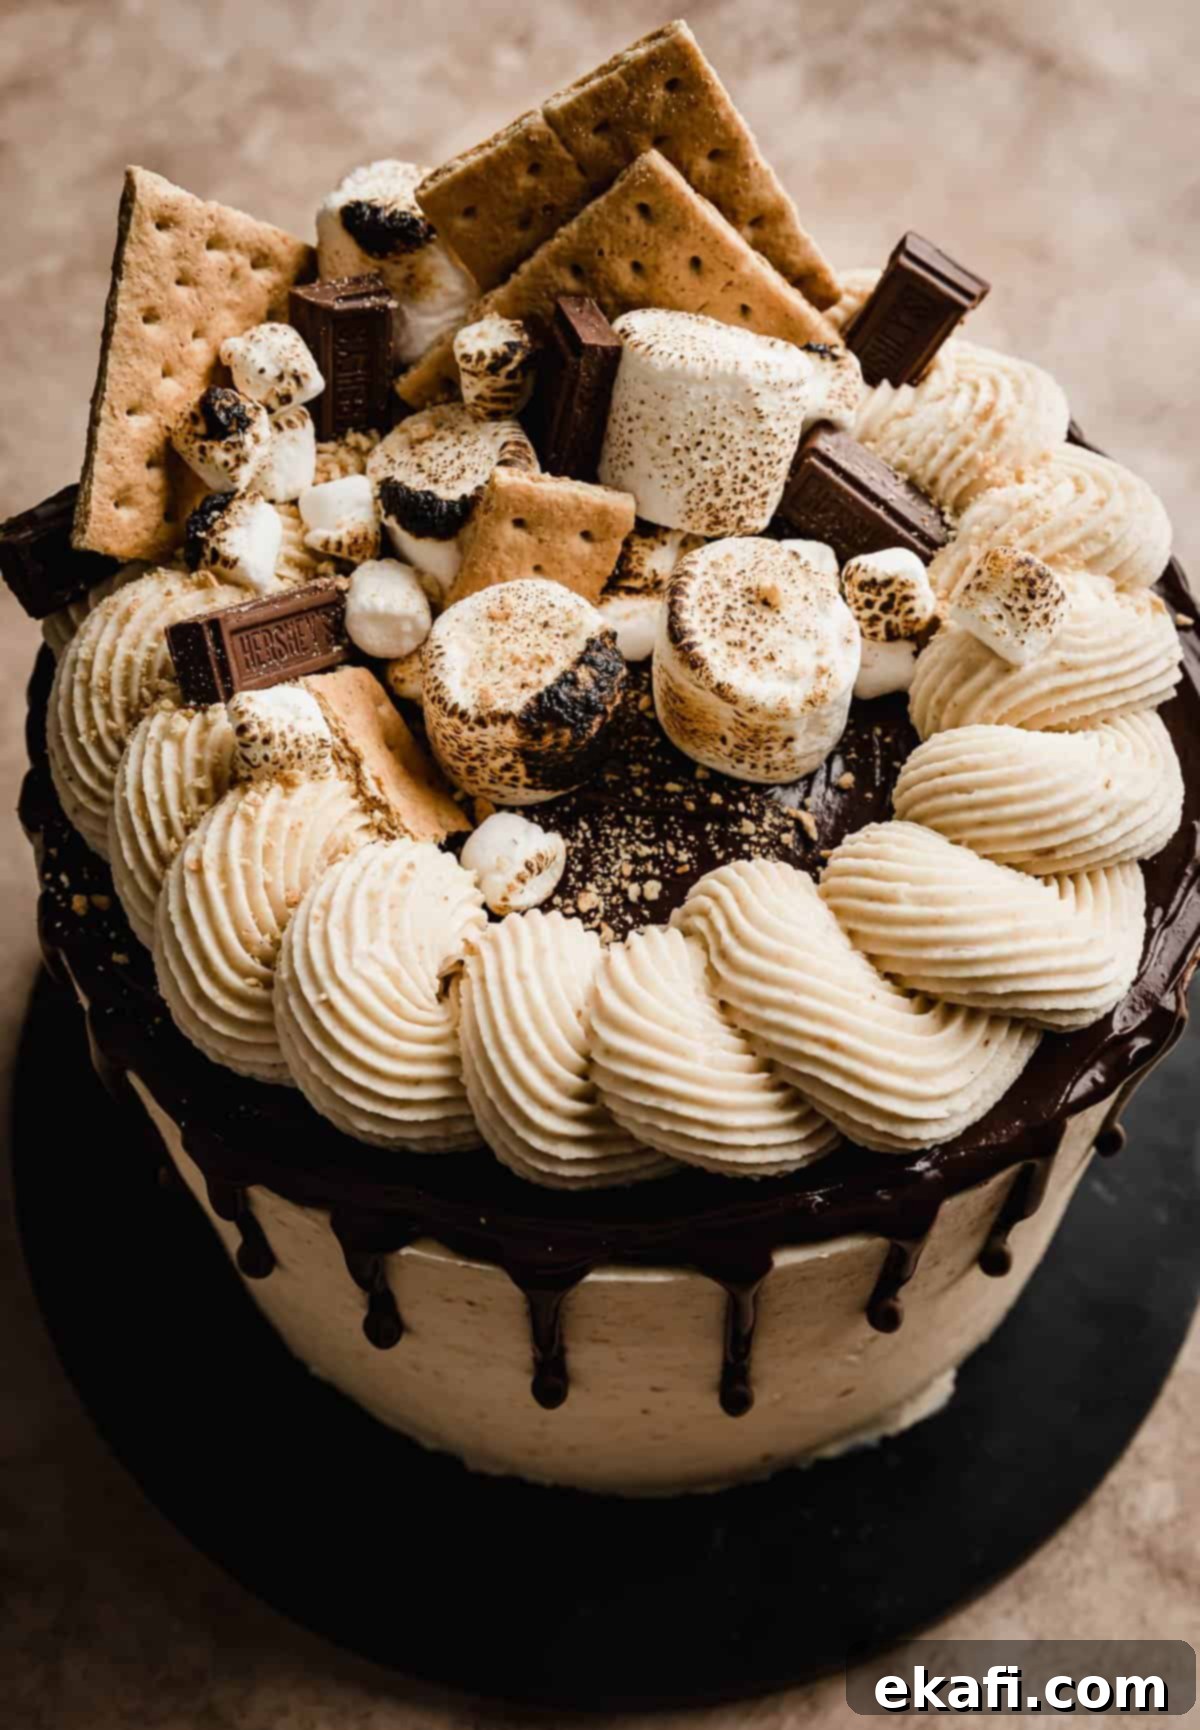
- Final Frosting and Decoration. Remove the chilled cake from the fridge or freezer. Apply the remaining buttercream evenly around the entire cake, smoothing the sides and top with an offset spatula or bench scraper. Next, gently warm any remaining chocolate ganache until it reaches a perfect drip consistency (you may need to add a tablespoon or two of heavy cream). Test the drip consistency on the side of a glass cup first to ensure it flows nicely without running too quickly. Carefully spoon or pipe the ganache around the top edge of the cake, allowing it to drip attractively down the sides. Then, spread the remaining ganache evenly across the top of the cake to create a smooth, shiny chocolate covering. Use any leftover buttercream for decorative piping on top, if desired. For the ultimate s’mores presentation, generously adorn the top of your cake with extra graham cracker squares, additional toasted marshmallows (mini and large), and classic Hershey’s chocolate pieces. Now, slice into your magnificent creation and enjoy!
Expert Tips for S’mores Cake Perfection
Achieving a bakery-worthy s’mores cake is within your reach with these helpful tips:
- Ganache Consistency is Key: For the perfect chocolate drip, your ganache needs to be just right. If it’s too thick, it won’t drip beautifully; if it’s too thin, it will run off the cake too quickly. You might need to add an extra tablespoon or two of heavy cream to thin it down, or let it cool slightly to thicken. Always do a test drip on a glass cup before applying to the actual cake to ensure it drips adequately without falling off entirely.
- Avoid Overfilling Your Cake Layers: When adding the ganache and toasted marshmallow whipped cream fillings between layers, exercise caution. Overfilling can cause the fillings to seep out when subsequent layers are added, making your cake unstable and incredibly difficult to frost smoothly. Aim for a generous but controlled amount.
- Finely Ground Graham Cracker Crumbs: For the smoothest and most consistent texture in your graham cracker buttercream, use a food processor to grind your graham crackers into very fine crumbs. Large chunks can make the frosting lumpy and hard to spread or pipe.
- Managing Toasted Marshmallow Mixtures: Both the marshmallow whipped cream and the marshmallow buttercream require the marshmallows to become homogenous. For the whipped cream, the toasted marshmallows will still be warm when combined with a small amount of heavy cream. Stir vigorously until they smooth out. It’s crucial to let this mixture cool slightly *before* folding it into the whipped cream to prevent the whipped cream from melting and losing its airy texture. When incorporating toasted marshmallows into the buttercream, the beating action of the stand mixer will break them down and integrate them seamlessly into the mixture, resulting in a smooth, spreadable, and pipable frosting with delightful toasted flavor notes. We are aiming for incorporated flavor, not melted marshmallows in the traditional sense, but a smooth, combined consistency.
- Precise Cake Baking: Do not overbake your chocolate cake layers! The key to a moist chocolate s’mores cake is knowing when it’s perfectly done. Insert a toothpick into the center of a cake layer; it should come out with a few moist crumbs attached, but no wet batter. If the toothpick is completely clean, your cake might be slightly overdone. If there’s wet batter, the centers will likely sink.
- Decorating with Ganache and Toasted Marshmallows: An offset spatula is an excellent tool for gently spreading the chocolate ganache evenly over the top of the cake. For an extra touch of s’mores authenticity, decorate the top with additional toasted marshmallows. If you use a kitchen torch for further toasting on the finished cake, be extremely careful not to melt the frosting underneath. A quick, light pass is all you need.
Make Ahead, Storing, and Freezing Your S’mores Cake
Planning ahead makes baking this magnificent cake much easier. Here’s how to prepare and store its various components:
- Toasted Marshmallow Buttercream Frosting: This buttercream can be prepared up to 3-4 days in advance. Store it in an airtight container in the refrigerator. When you’re ready to use it, remove it from the fridge and let it sit at room temperature for 4-5 hours (or until soft) before re-whipping it in your stand mixer on low speed for a few minutes until it’s light and spreadable again. If it seems too stiff, you can add a tablespoon of heavy cream.
- Toasted Marshmallow Whipped Cream: This delicate filling is best made closer to assembly, but it can be prepared 1-2 days ahead and stored in an airtight container in the fridge. If you have any leftovers after assembly (or simply want more of this delicious treat!), it makes a fantastic dip for graham crackers or fruit.
- Chocolate S’mores Cake Layers: If you’re not assembling the cake immediately, allow the baked and cooled chocolate cake layers to cool completely. Once cool, individually double-wrap each layer tightly in plastic wrap. Store them on a flat surface in the refrigerator for up to 1-2 days. For longer storage, I highly recommend freezing them. Wrap them again in aluminum foil over the plastic wrap to prevent freezer burn, and freeze for up to 2-3 months. Thaw frozen layers in the refrigerator overnight before assembling.
- Assembled S’mores Cake: A fully assembled and frosted s’mores cake can be stored loosely covered in the refrigerator for up to 3-4 days. For best flavor and texture, bring it to room temperature for about 30-60 minutes before serving. You can also freeze individual slices or the whole cake (if well wrapped) for up to a month, though the texture of the whipped cream might change slightly upon thawing.
For even more comprehensive guidance on storing and freezing various types of cakes, including detailed instructions on how to freeze cake layers, buttercream, and even fully decorated cakes, be sure to consult my dedicated How to Store and Freeze Cakes guide!
S’mores Cake Recipe FAQs
An ultimate s’mores cake recipe is a multi-layered dessert that meticulously incorporates all the delightful elements of your favorite campfire treat – s’mores – into cake form. This particular s’mores cake recipe takes it a step further by featuring each core s’mores element (chocolate, graham crackers, marshmallows) not just once, but twice within its various components, ensuring an authentic and intense flavor experience in every bite!
Absolutely, you can! Baking s’mores in the oven is a fantastic way to enjoy them indoors, especially when a campfire isn’t an option. It’s a simple and quick method that yields perfectly melted chocolate and toasted marshmallows. For detailed instructions on how to achieve this, explore my dedicated Oven S’mores Recipe!
While marshmallow fluff or cream might seem like convenient alternatives, I highly advise against substituting them for traditional marshmallows in this s’mores cake recipe. The unique and rich flavor profile of this cake comes directly from the process of *toasting* the marshmallows in the oven. This toasting creates a distinctive caramelized, slightly smoky taste that is central to the authentic campfire s’mores experience. Marshmallow fluff or cream simply won’t provide that depth of flavor. Furthermore, this recipe is carefully developed around the consistency and properties of melted, toasted marshmallows, and the thinner consistency of fluff would significantly alter the texture and stability of both the whipped cream filling and the buttercream frosting, potentially leading to a less satisfying result.
Explore More Decadent Cake Recipes
If you’ve fallen in love with the artistry of layered cakes and crave more sweet delights, be sure to check out some of our other fantastic cake creations:
- Scotcheroo Cake: A nostalgic dessert inspired by the classic no-bake bar, featuring a peanut butter crispy rice treat base topped with butterscotch and chocolate.
- Cookie Dough Cake: Indulge your inner child with layers of moist vanilla cake, edible cookie dough filling, and a fluffy cookie dough buttercream.
- Twix Cake: Experience the magic of your favorite candy bar in cake form, complete with shortbread layers, caramel filling, and chocolate ganache.
- Key Lime Pie Cake: A refreshing and zesty cake featuring bright key lime flavors, perfect for a taste of the tropics.
- Carrot Cake with Pineapple and Pecans: A timeless classic, this moist and flavorful carrot cake is packed with pineapple and pecans, topped with a rich cream cheese frosting.
Did you make this recipe? We’d absolutely love to hear about your experience! Leave a star rating and review right here on the blog post, or scroll down below the recipe card to share your feedback. Your insights are invaluable!
Stay up-to-date with all our latest recipes and baking adventures by following us on Instagram, TikTok, Facebook, and Pinterest. Don’t miss out on more delicious inspiration!
Print
SaveSaved!
Review
S’mores Cake
Ingredients
Graham Cracker Crust
- 2 2/3 cups graham cracker crumbs – about 20 full graham cracker sheets
- 10 tablespoons butter – melted, if using salted butter omit the 1/4 tsp salt in the crust
- 1/2 cup granulated sugar
- 1/4 teaspoon salt
Chocolate Cake
- 2 1/4 cups all-purpose flour
- 2 cups granulated sugar
- 3/4 cups unsweetened cocoa powder
- 2 teaspoons baking soda
- 1/2 teaspoon baking powder
- 1 teaspoon salt
- 3 large eggs – room temperature
- 1 cup buttermilk – room temperature
- 1 cup vegetable oil
- 2 teaspoons vanilla extract
- 1 cup hot water
Chocolate Ganache
- 1 cup semisweet chocolate chips
- 2/3 cup heavy cream
Toasted Marshmallow Whipped Cream
- 9 large marshmallows – toasted
- 3/4 cup + 2 teaspoons heavy cream – divided
- 3 tablespoons powdered sugar
- 1/2 teaspoon vanilla extract
Toasted Marshmallow Graham Cracker Buttercream
- 3 cups unsalted butter – slightly soft but still cold
- 6 cups mini marshmallows – toasted
- 1 1/4 cup graham cracker crumbs – about 9 full sheets of graham crackers
- 7 cups powdered sugar
- 1/4 cup heavy cream
- 2 teaspoons vanilla extract
- pinch salt
Equipment
-
Ateco cake stand
-
8″ inch round cake pans
-
Kitchen Aid stand mixer
Instructions
Graham Cracker Crust
-
Preheat the oven to 325°F. Spray three 8-inch round cake pans with nonstick cooking spray. Line the bottoms with parchment paper.
-
To a large bowl add the graham cracker crumbs, melted butter, sugar, and salt. Mix to combine.
-
Press 1/3 of the graham cracker mixture into each cake pan. Firmly pressing to create a crust at the bottom of the pan. Bake for 4 minutes. Remove and let cool while preparing the cake batter.
Chocolate Cake
-
In a medium bowl, whisk the flour, sugar, cocoa, baking soda, baking powder, and salt.
-
In the bowl of a stand mixer fitted with a paddle attachment mix the eggs, buttermilk, vegetable oil, and vanilla until combined.
-
Add the dry ingredients to the stand mixer and mix until combined. Pour in the hot water and mix on medium speed until combined.
-
Divide batter evenly between the cake pans (pouring directly on top of the crusts) and bake for 23-27 minutes or until a toothpick comes out with a few moist crumbs but no wet batter.
-
Remove cakes from the oven and allow to cool for 10 minutes. Remove from the cake pans and allow cakes to cool on a cooling rack until completely cool.
Chocolate Ganache
-
Heat the cream in the microwave until hot and pour over the chocolate chips. Let sit for 2 minutes, then stir until smooth. You will use this for the filling between the cake layers, and the remaining ganache will be used for a drip around the exterior of the cake once frosted.
-
You may need to add a tablespoon or two of cream to get the ganache to a good drip consistency. When ready to add to the outside of the cake, I like to do a test drip on a glass cup to make sure it will drip down enough but not too much.
Toasted Marshmallow Whipped Cream
-
Toast the marshmallows by placing the marshmallows on a cookie sheet that has been sprayed with nonstick spray.
-
Turn oven to broil and put the cookie sheet of marshmallows in the oven. The marshmallows will get toasted really quickly (less than two minutes in my oven), so watch them closely!
-
In a heat-safe bowl, add the freshly toasted marshmallows and 2 teaspoons of heavy cream and mix until the mixture is smooth. Set aside.
-
In a separate bowl, beat the heavy cream until stiff peaks form.
-
Gently fold the marshmallow mixture into the whipped cream and store in the refrigerator until ready to use.
Toasted Marshmallow Graham Cracker Buttercream
-
Toast the marshmallows by placing the marshmallows on a cookie sheet that has been sprayed with nonstick spray.
-
Turn oven to broil and put the cookie sheet of marshmallows in the oven. The marshmallows will get toasted really quickly (less than two minutes in my oven), so watch them closely! Set aside to cool slightly.
-
In the bowl of a stand mixer fitted with a paddle attachment, beat the butter until it’s light and very smooth.
-
Add the graham cracker crumbs, salt, and toasted marshmallows and beat until the mixture is homogenous.
-
Add the vanilla and slowly add the powdered sugar and heavy cream. Once all the ingredients have been added, beat the buttercream on high speed for 3 minutes. This can be made ahead of time and stored in the refrigerator. It will need to sit at room temperature for 4-5 hours after refrigeration to become soft and spreadable again.
Assembly
-
Place a cake layer, graham cracker crust down, onto a cake board and cover with a thin layer of buttercream.
-
Create a buttercream dam by piping a ring of buttercream around the top edge of the cake layer. Spread a layer of chocolate ganache across the bottom of the dam, and then fill the rest of the space with the toasted marshmallow whipped cream. Be sure to not overfill the cake as it will seep out when you add the next layer and make the cake unstable and difficult to finish icing.
-
Place the second cake layer on top of the buttercream ring, graham cracker crust side DOWN, cover with a thin layer of buttercream and repeat step 2.
-
Place the third cake layer on top and crumb coat the entire cake in a thin layer of buttercream. Refrigerate or freeze for 10-15 minutes, until the buttercream is cold and no longer soft.
-
Add the final layer of frosting around the entire cake.
-
Add the chocolate ganache drip and decorate as desired.
Notes
Nutrition
