Perfect Homemade Flaky Brioche Recipe: Achieve Buttery, Layered Perfection
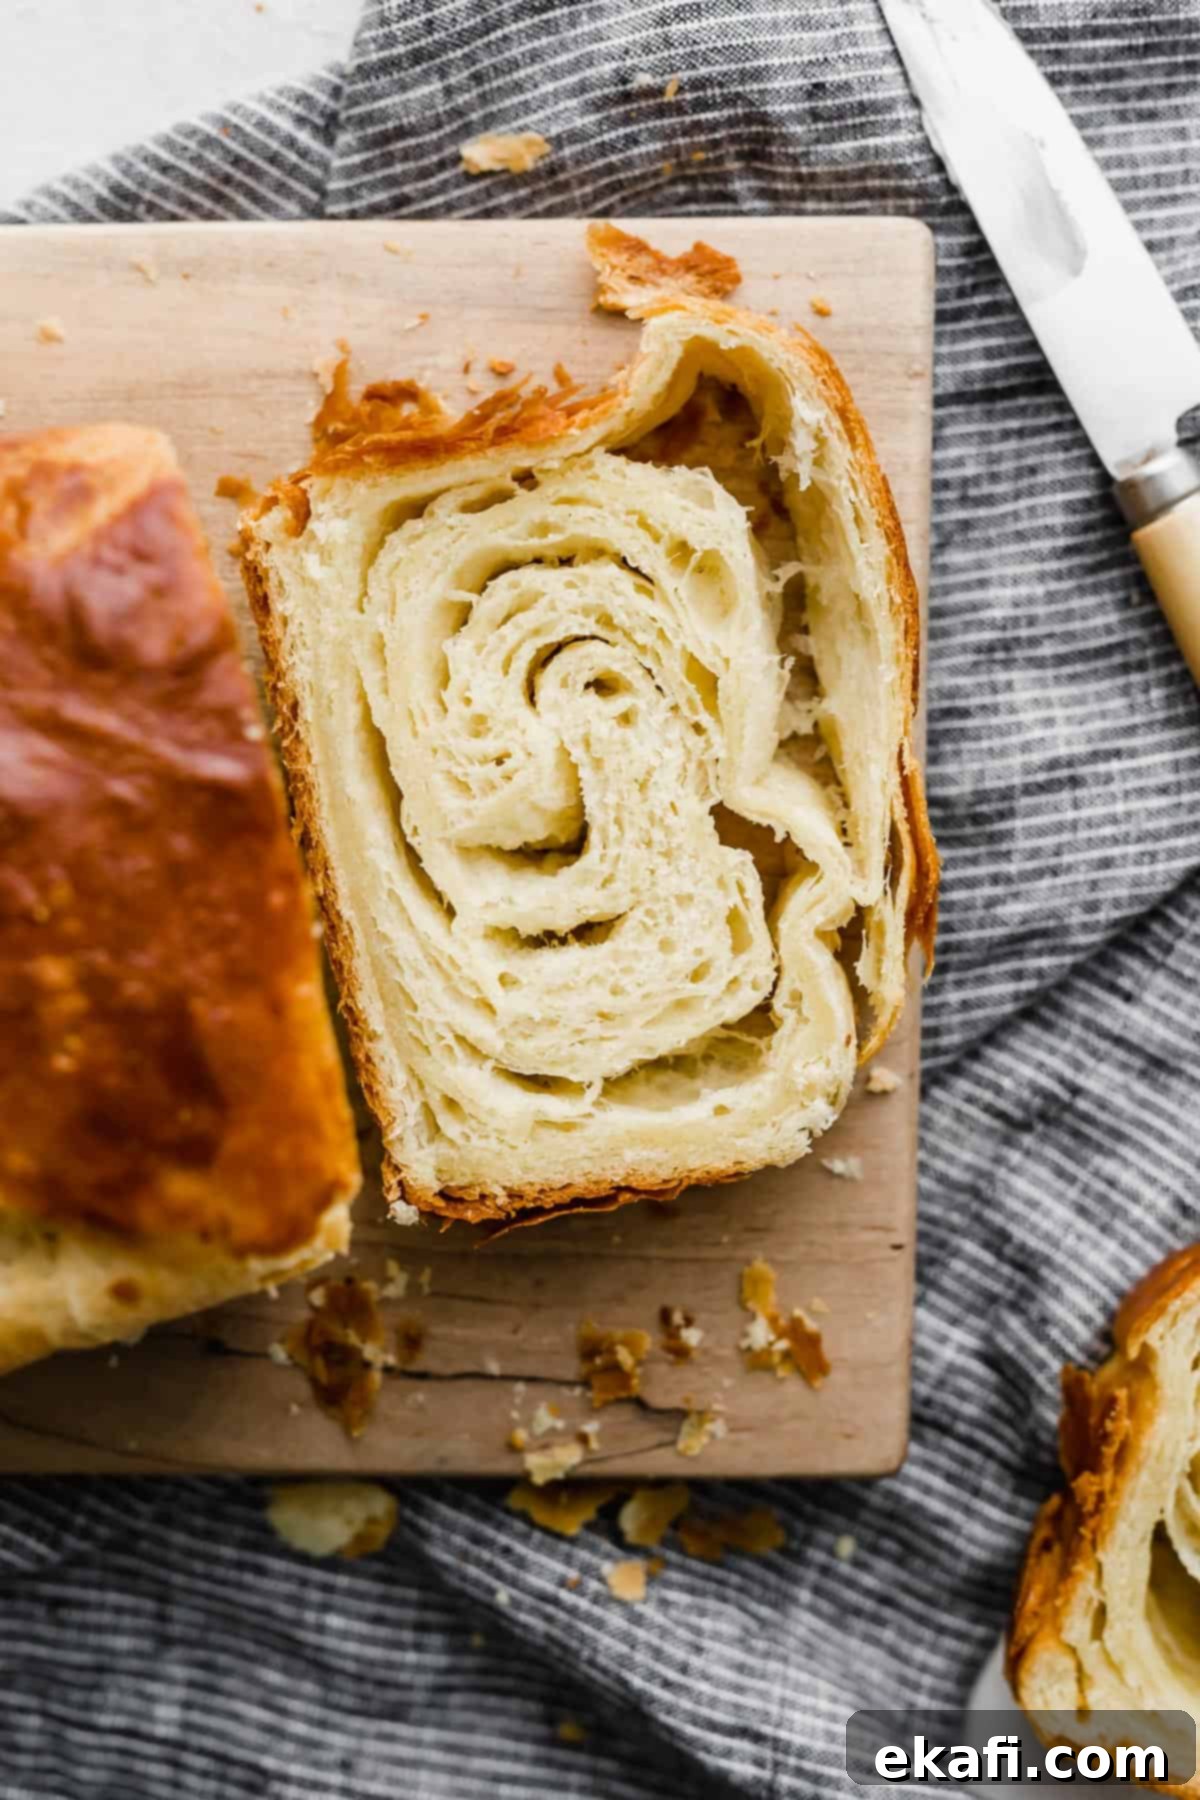
Prepare to elevate your baking game with this incredible Flaky Brioche Recipe! This isn’t just any bread; it’s a buttery, soft, and meticulously laminated masterpiece designed to yield an abundance of delicate, melt-in-your-mouth layers. If you’re a connoisseur of rich, flaky, butter-laden pastries, then this recipe is tailor-made for you. Our brioche promises a light, airy, and truly satisfying texture, and with our detailed step-by-step guide, achieving that coveted perfect lamination is far easier than you might imagine.
Looking to explore more delightful flaky pastry creations? Our Kouign-Amann recipe offers similarly precise instructions to help you craft those exquisite, caramelized rolls with consistent deliciousness every single time!
Why This Flaky Brioche Recipe Works So Well
Crafting exquisite brioche can seem daunting, but this recipe is designed to demystify the process and guide you to success. Here’s why our flaky brioche recipe stands out:
- Abundant Visual Guidance for Every Step: We understand that seeing is believing, especially when it comes to intricate baking techniques like lamination. That’s why this recipe is packed with helpful photos that visually walk you through each critical stage. You’ll see exactly what your dough should look like, how to perform each fold, and what to expect along the way, making even the most complex steps feel entirely manageable. This visual aid is truly instrumental in transforming what might seem like a challenging process into an enjoyable and successful baking adventure.
- Simplified Step-by-Step Instructions: The concept of bread lamination, vital for flaky pastries, can indeed be intimidating. However, we’ve broken down every step into clear, concise, and easy-to-follow instructions. We’ll guide you through each part of the process with such detail and simplicity that you’ll feel confident and empowered. Forget the guesswork; this recipe ensures a smooth journey from start to finish, allowing you to master flaky brioche with ease.
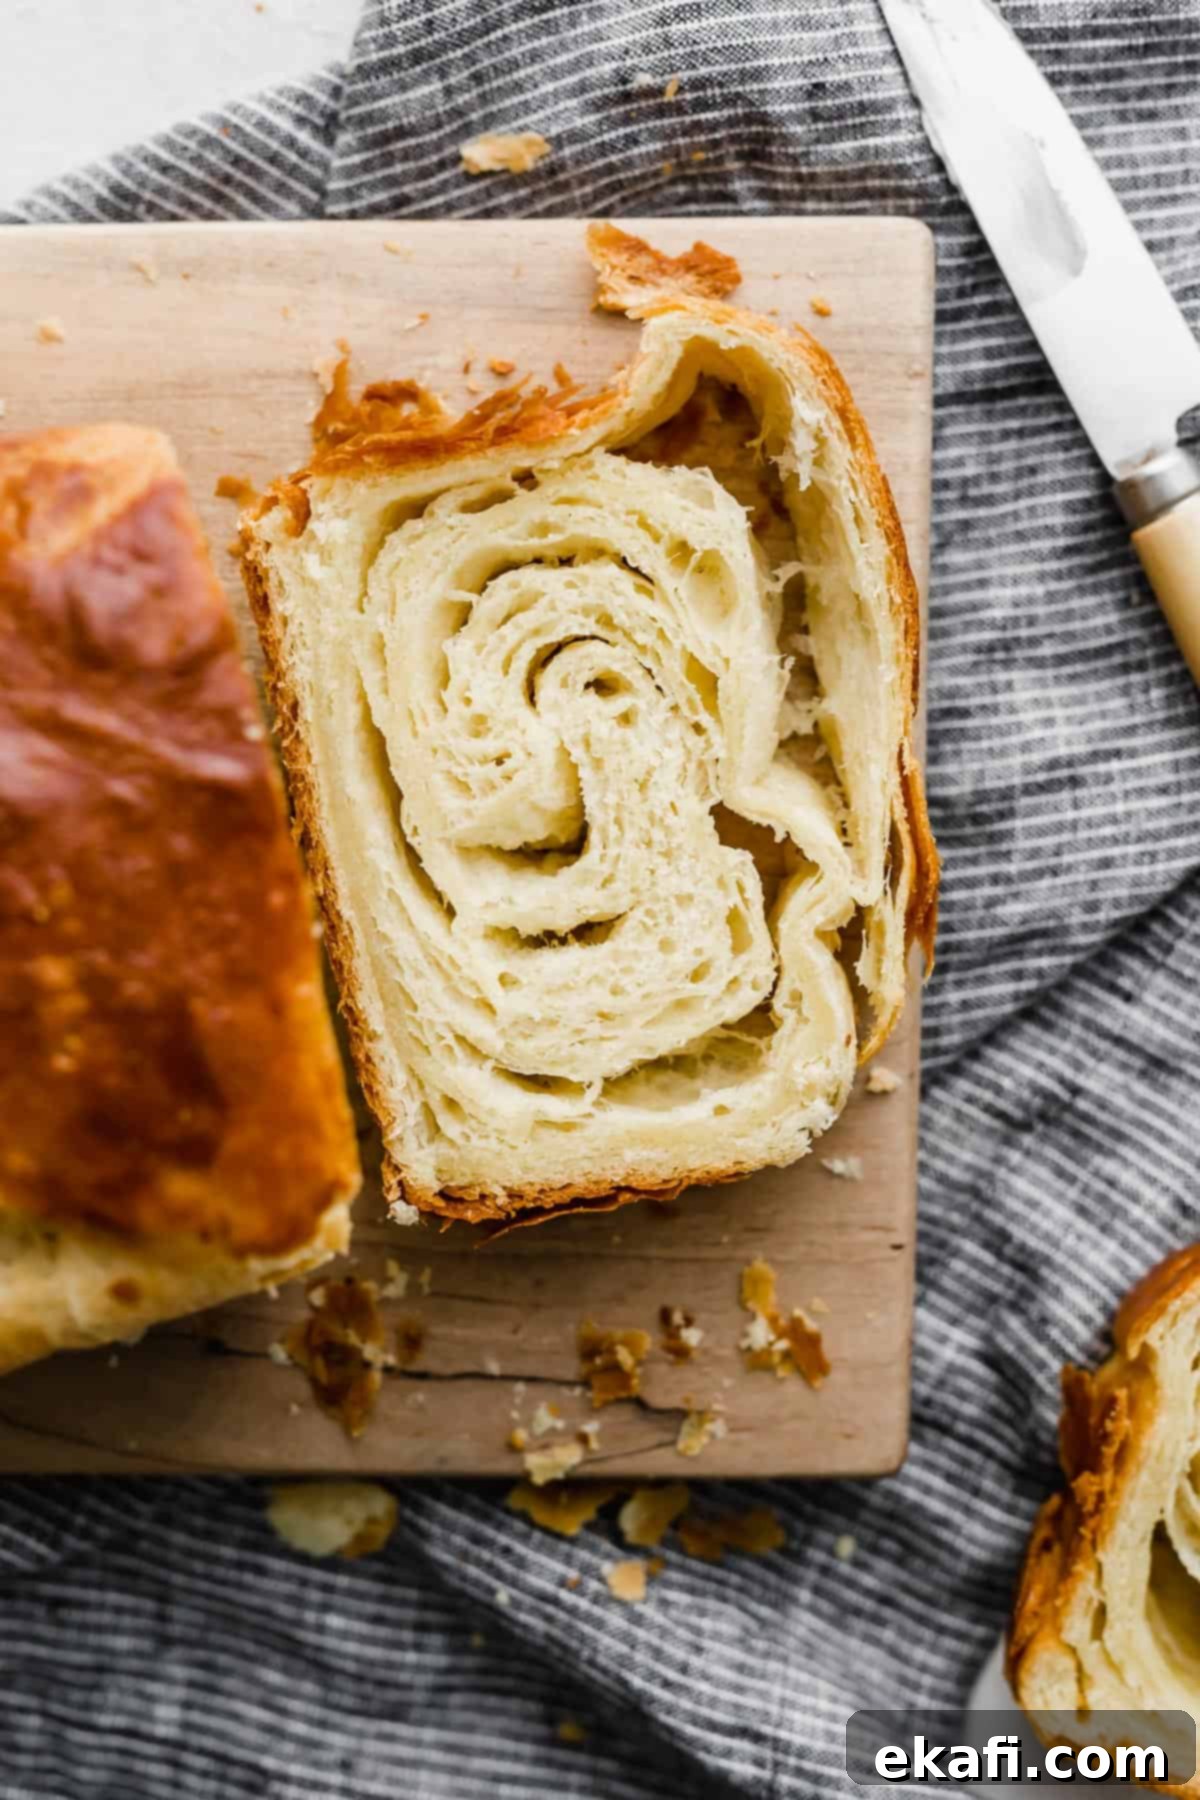
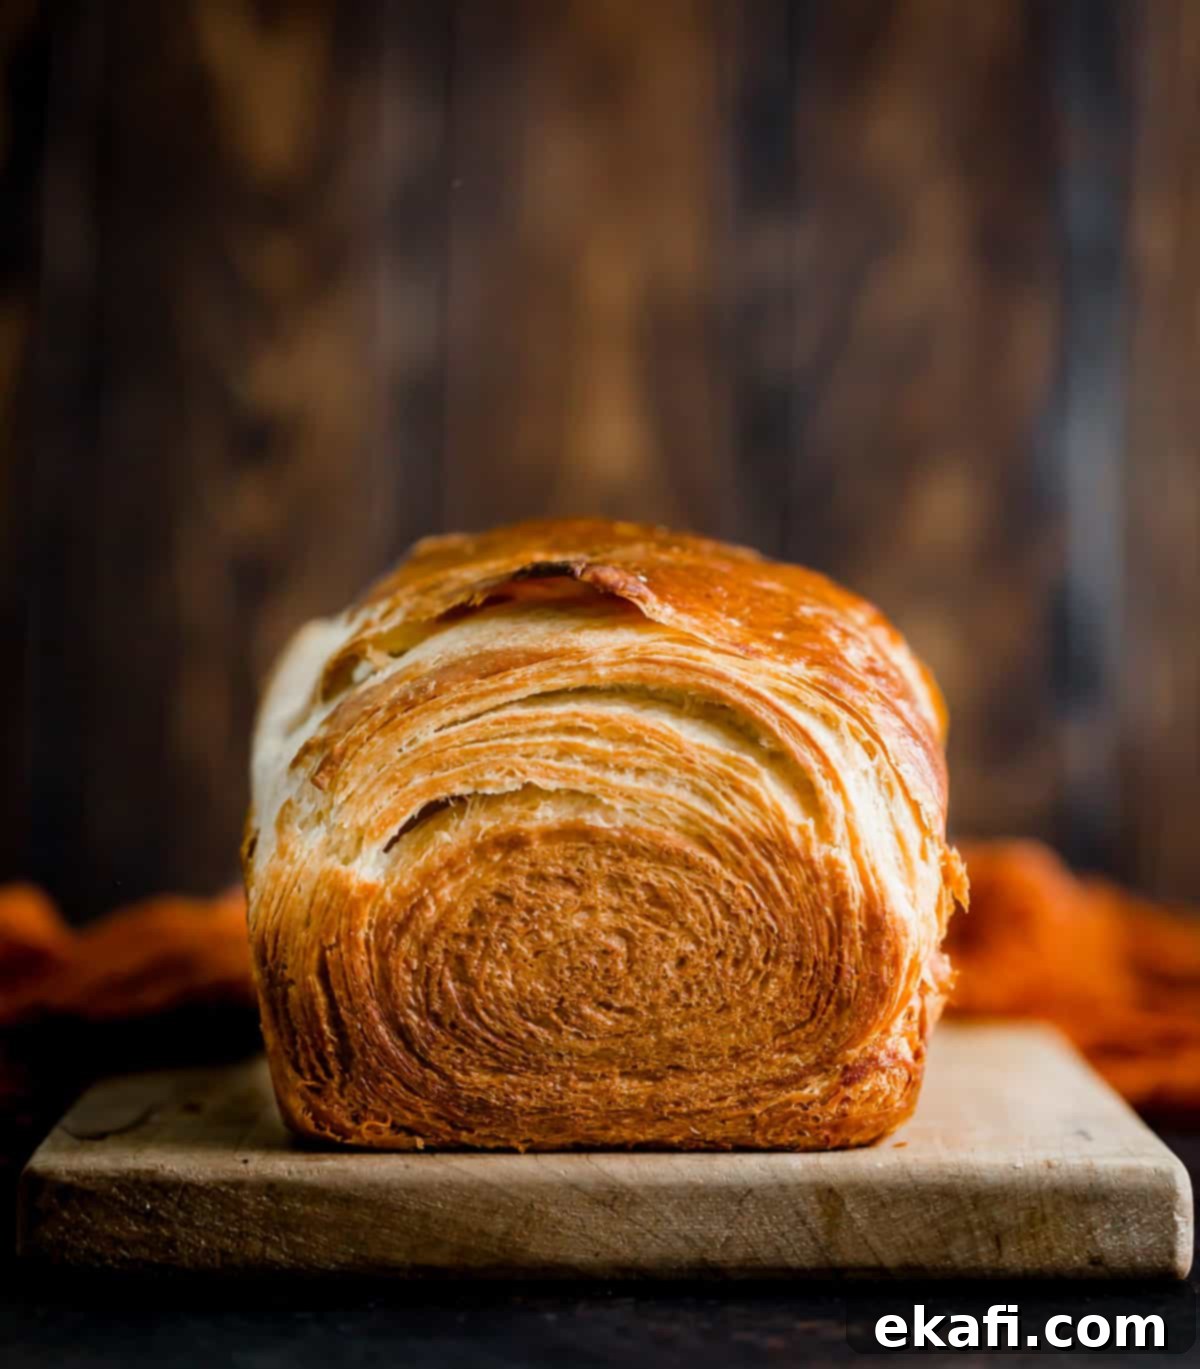
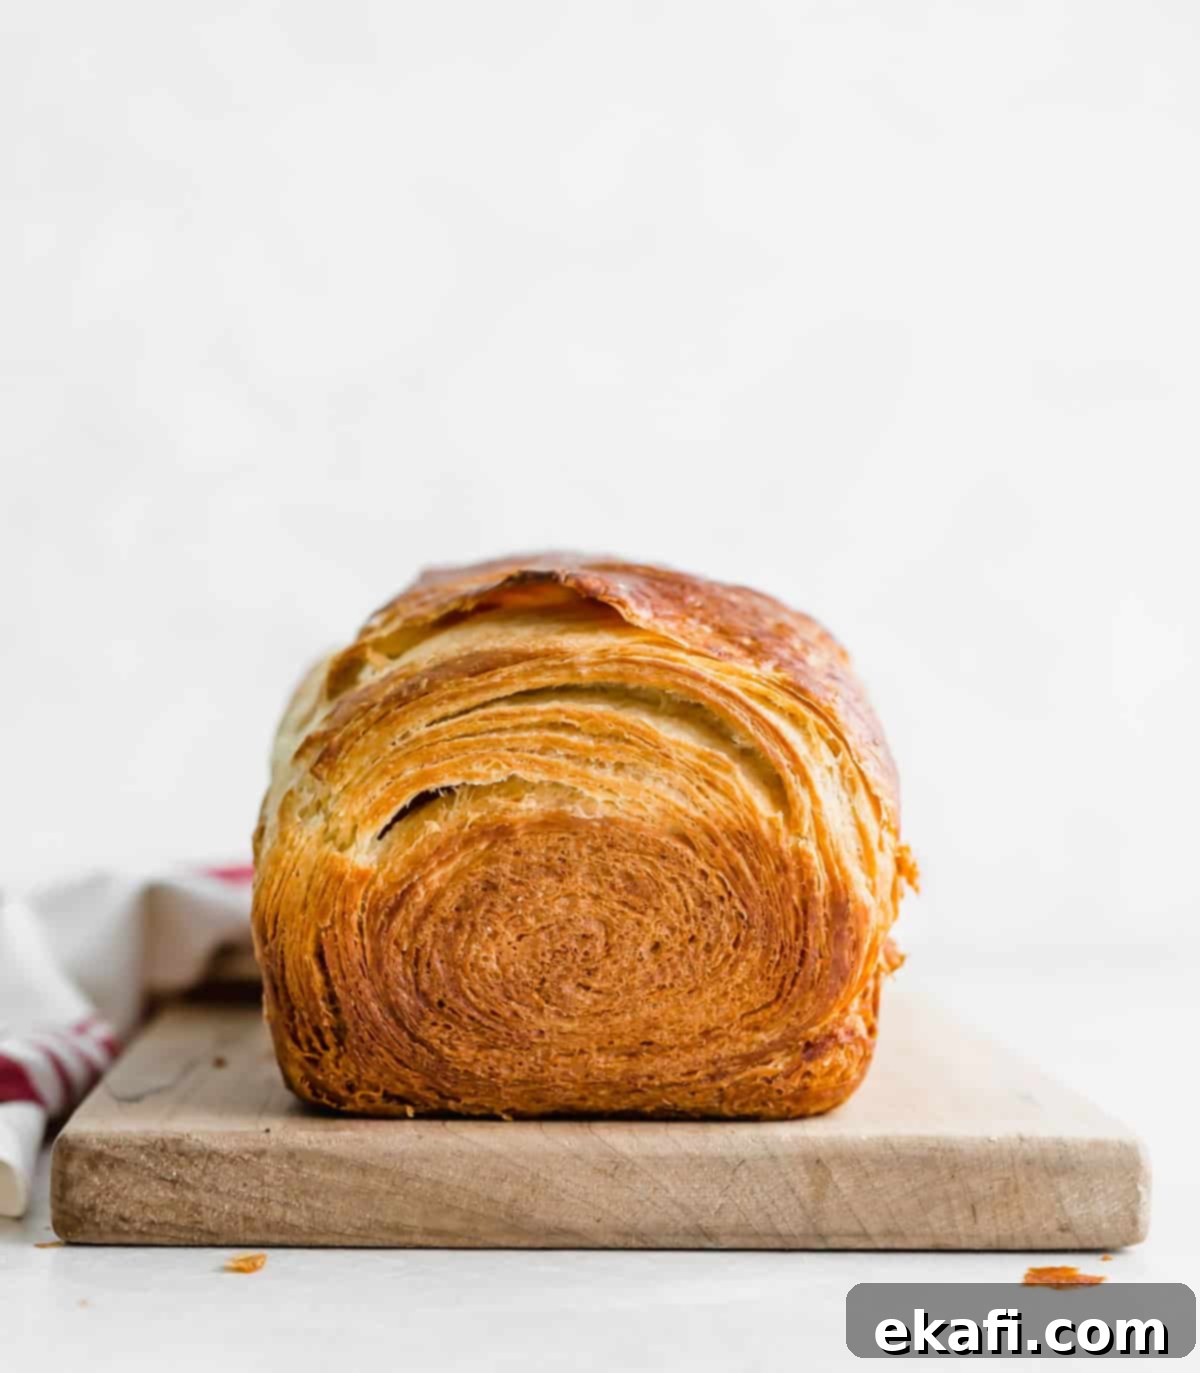
- Unrivaled Abundance of Delicious, Flaky Layers: The true magic of this brioche bread recipe lies in its spectacular texture. Thanks to our precise lamination process, each loaf boasts an incredible amount of distinct, buttery, and utterly delicious flaky layers. This technique is an absolute game-changer, not only imparting that visually stunning appearance but also creating an unparalleled light and airy texture that will impress every palate.
- Rich, Irresistible Butter Flavor: Beyond its remarkable texture, this flaky bread delivers an intensely yummy, buttery flavor that is characteristic of premium brioche. The careful incorporation of butter throughout the dough not only contributes to its delicate structure but also infuses every bite with a luxurious richness that will leave you craving more. It’s a flavor profile that truly defines indulgence and comfort.
Essential Ingredient Notes for Your Flaky Brioche
The quality and preparation of your ingredients are paramount to the success of this flaky brioche. Here’s a closer look at what you’ll need and why each component is vital:
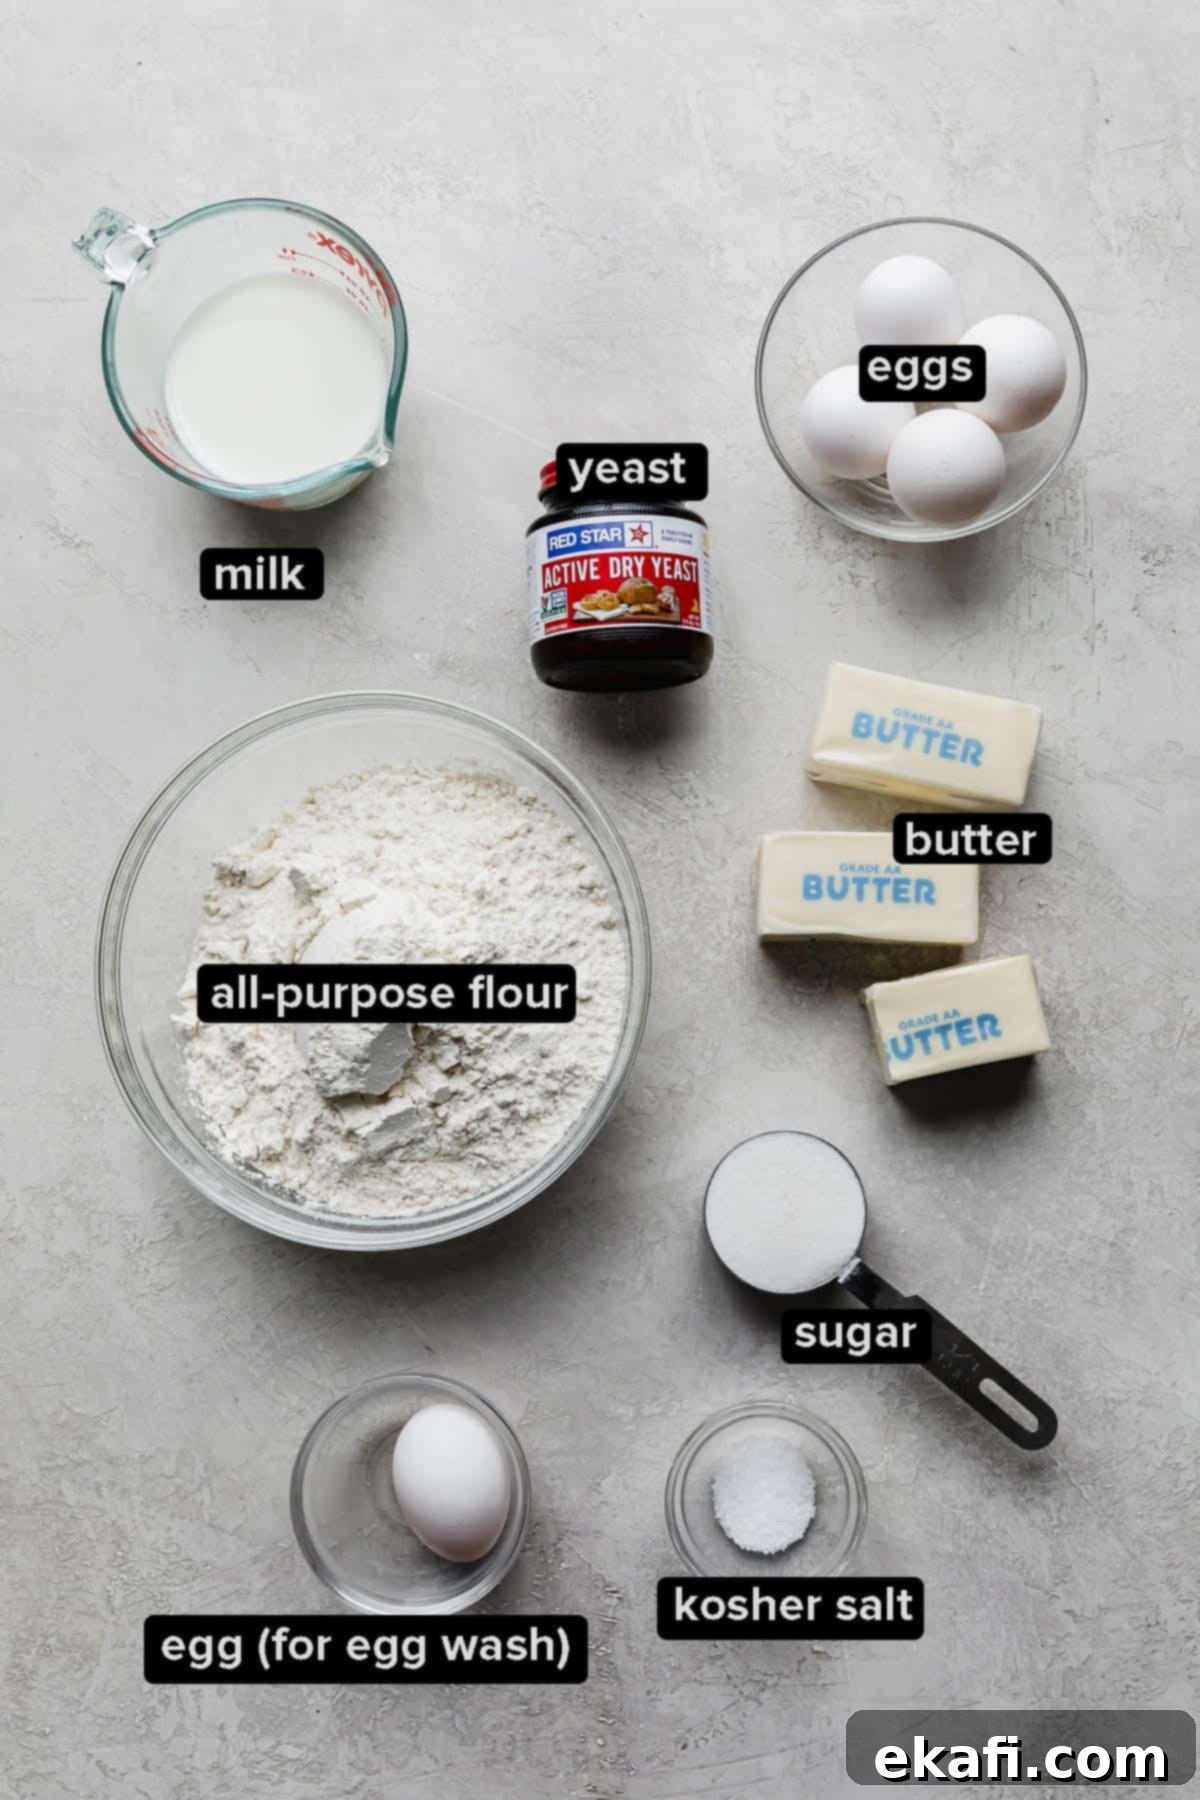
- Warm Milk: This isn’t just for mixing; the warmth of the milk is crucial for activating the yeast. Ensure it’s comfortably warm to the touch (around 105-115°F or 40-46°C) – too hot and it will kill the yeast, too cold and it won’t activate properly.
- Yeast (Active or Instant): Both active dry and instant yeast work beautifully in this recipe. Active dry yeast typically needs to be proofed (activated in warm liquid), while instant yeast can often be mixed directly with the dry ingredients. However, we’ll proof it here for consistency and to ensure it’s active.
- Granulated Sugar: Beyond providing the delightful sweetness that defines this rich brioche, sugar also plays a vital role in feeding the yeast, helping the dough to rise beautifully. It contributes to the golden-brown color of the crust as well.
- Eggs: Eggs are a cornerstone of brioche, lending the dough its characteristic richness, tender crumb, and beautiful golden hue. They contribute to the dough’s silky smooth texture and structure, making it that iconic, almost cake-like pastry bread. Using high-quality eggs will enhance both flavor and color.
- Unsalted Butter: You’ll need butter at two different temperatures for distinct stages of the recipe.
- 6 tablespoons room temperature unsalted butter: This butter is incorporated into the dough itself, enriching it and contributing to its tender texture. Room temperature butter creamed into the dough provides a smoother, more emulsified mixture.
- 1 cup slightly chilled unsalted butter: This is the star of the lamination process. It needs to be firm enough to be handled and folded into layers without melting too quickly, but not so hard that it tears the dough. Slightly chilled butter offers the perfect balance for creating those distinct, flaky layers.
- All-Purpose Flour: The backbone of our brioche dough, providing the necessary structure. Using a good quality all-purpose flour will give you the best results.
- Kosher Salt: Salt is essential for flavor balance, enhancing the sweetness and richness of the brioche. It also helps to control yeast activity, preventing the dough from over-proofing too quickly.
- Extra Egg for Egg Wash: A simple egg wash (one whisked egg) is brushed over the loaves just before baking. This step is critical for achieving that gorgeous, shiny, golden-brown crust that makes brioche so visually appealing and adds another layer of subtle flavor.
Detailed Step-by-Step Instructions for Flaky Brioche
Part 1: Making the Enriched Brioche Dough
The foundation of our flaky brioche is a rich, buttery dough. Follow these steps carefully to ensure the perfect consistency:
- Activate the Yeast: In the bowl of your stand mixer, combine the active dry yeast with the warm milk. Stir gently and allow this mixture to sit undisturbed for about 10 minutes. This period is crucial for the yeast to “bloom” – you should see a foamy layer forming on the surface, indicating that your yeast is alive and active. If it doesn’t foam, your milk might have been too hot or too cold, or your yeast may be old.
- Incorporate Dry Ingredients: Once your yeast is visibly foamy, add the all-purpose flour, kosher salt, and granulated sugar to the mixer bowl. Attach the dough hook and begin mixing on low speed until the ingredients are just combined. At this initial stage, the mixture will appear quite crumbly and may not resemble a cohesive dough, which is perfectly normal.
- Add the Eggs for Richness: Next, crack in the four eggs. Continue mixing with the dough hook for approximately 6 minutes, or until the dough transforms from a crumbly mess into a smooth, elastic mass that begins to pull away from the sides of the bowl. Patience here is key; the eggs gradually hydrate the flour and develop the gluten.
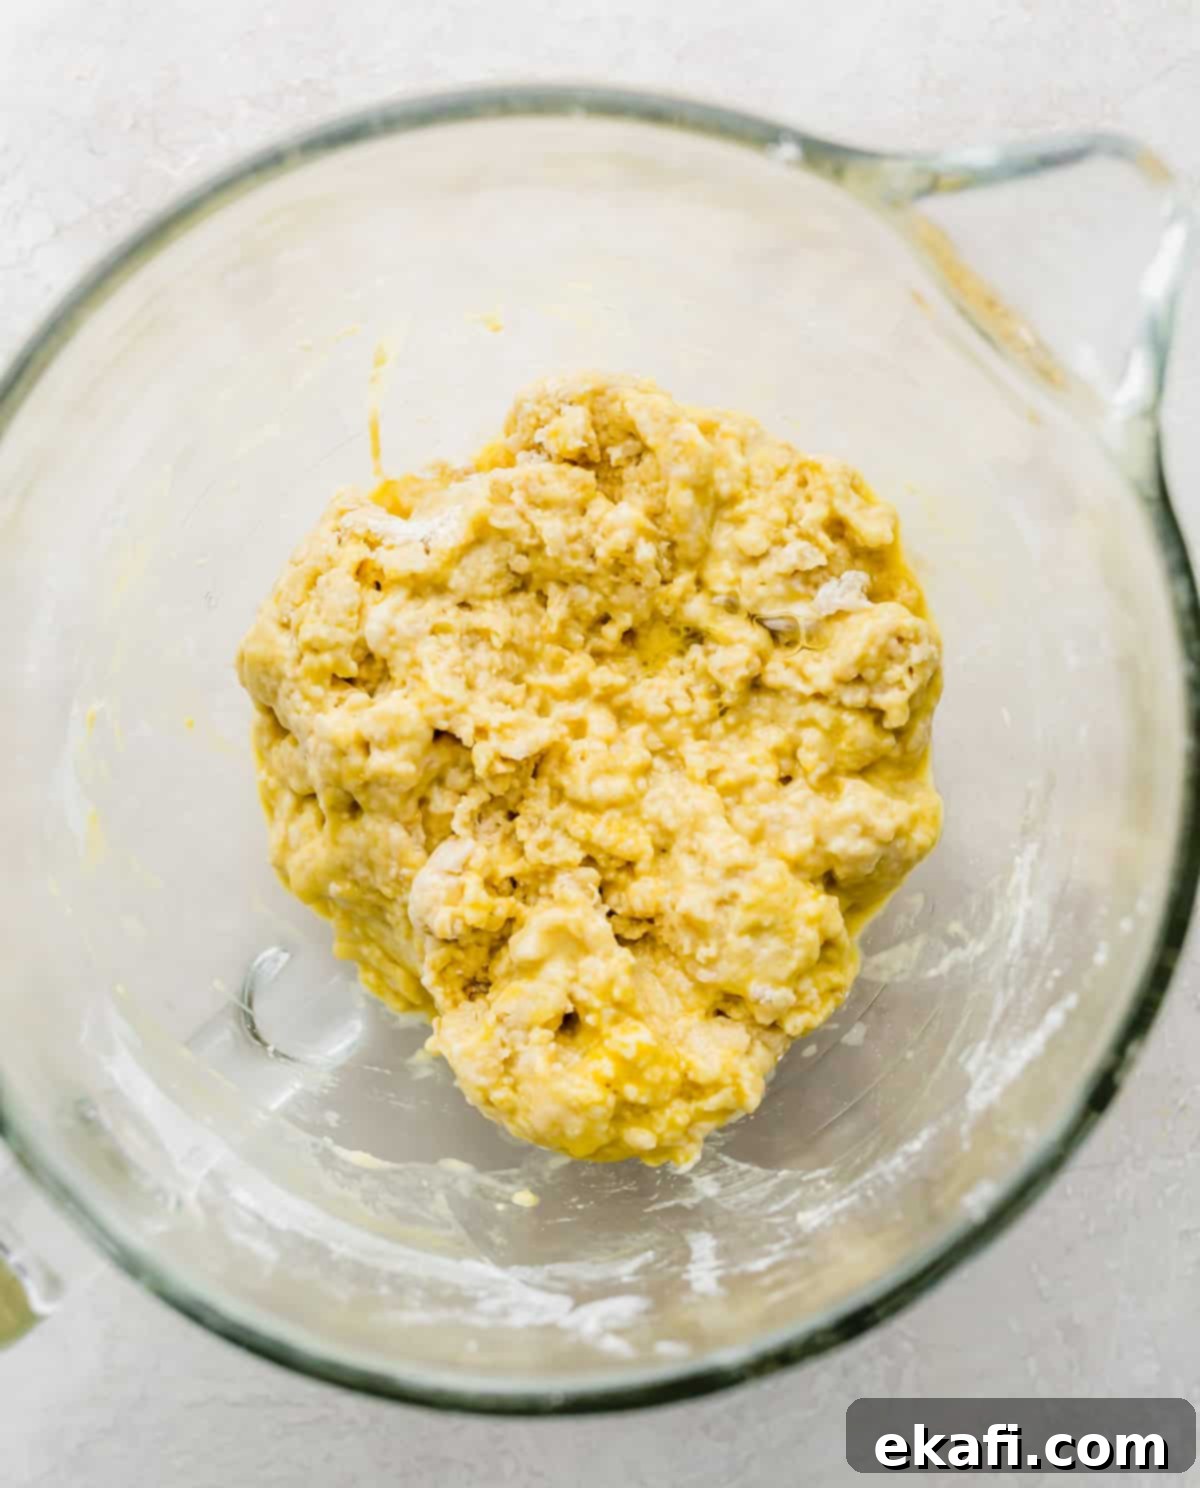
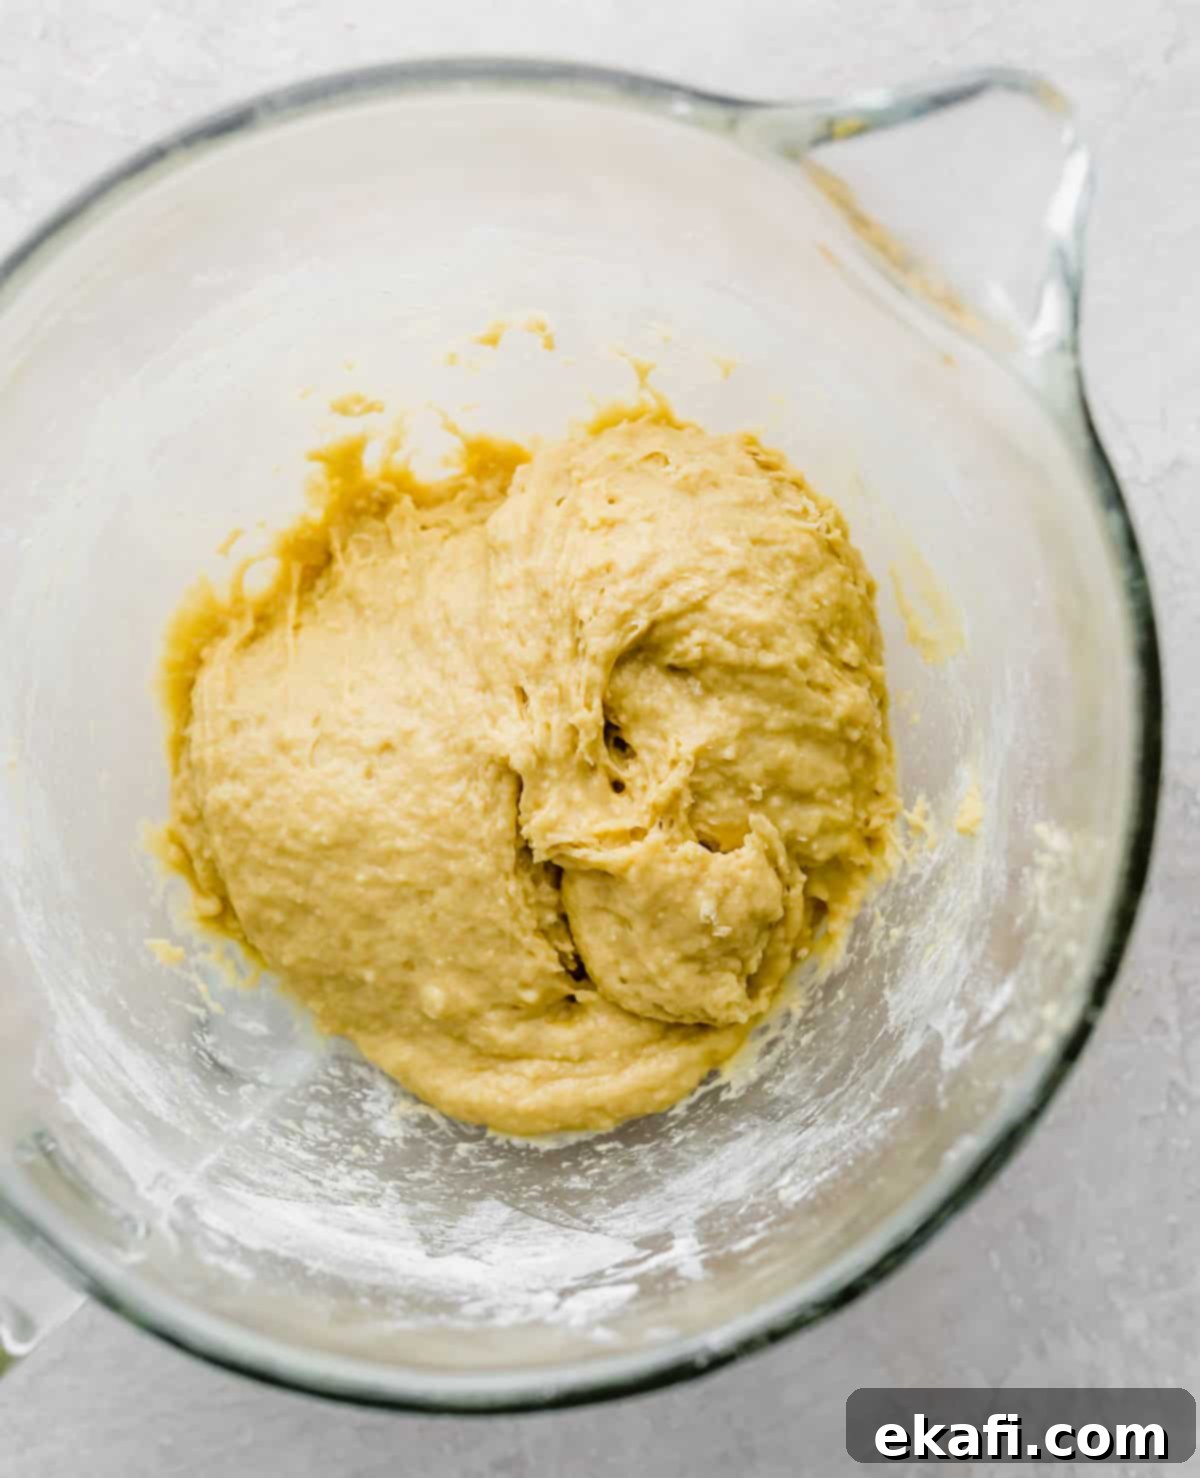
- Gradually Add Room Temperature Butter: Once the eggs are fully incorporated and the dough is smooth, it’s time to add the room temperature unsalted butter. Add the butter one tablespoon at a time, allowing each addition to fully incorporate before adding the next. This slow incorporation is crucial for developing the rich, silky texture of brioche. Continue mixing for an additional 3 minutes, or until the dough becomes incredibly smooth, shiny, and elastic.
Troubleshooting Sticky Dough: At this stage, your dough should be smooth but still a bit sticky. It should pull away cleanly from the sides of the mixing bowl, but the very bottom tip should still adhere slightly to the bottom. If your dough is overly sticky and doesn’t show signs of pulling away, you can add 1 tablespoon of flour at a time, mixing on low speed, until you reach the desired consistency. Be careful not to add too much flour, as this can result in a tough brioche.
- Form into a Ball, Wrap, and Refrigerate: Lightly flour your work surface and turn the dough out. Gently knead the dough a few times to form it into a smooth, compact ball. Wrap the dough tightly in plastic wrap, ensuring it’s completely sealed to prevent a skin from forming. Refrigerate the dough for at least 1 hour. Chilling the dough helps to firm up the butter within it, making it easier to handle and prepare for the lamination process.
Part 2: Preparing the Butter for Lamination
The success of flaky brioche hinges on properly prepared butter for lamination. This butter layer is what creates all those magnificent flaky layers.
- Soften the Slightly Chilled Butter: While your dough is chilling in the refrigerator, take out the 1 cup of slightly chilled unsalted butter. Place it in the bowl of a stand mixer fitted with the paddle attachment. Beat the butter on medium-low speed for about 1-2 minutes until it breaks up and becomes smooth and pliable. It should be soft enough to spread but still cool enough to hold its shape. Over-softening will make it difficult to work with.
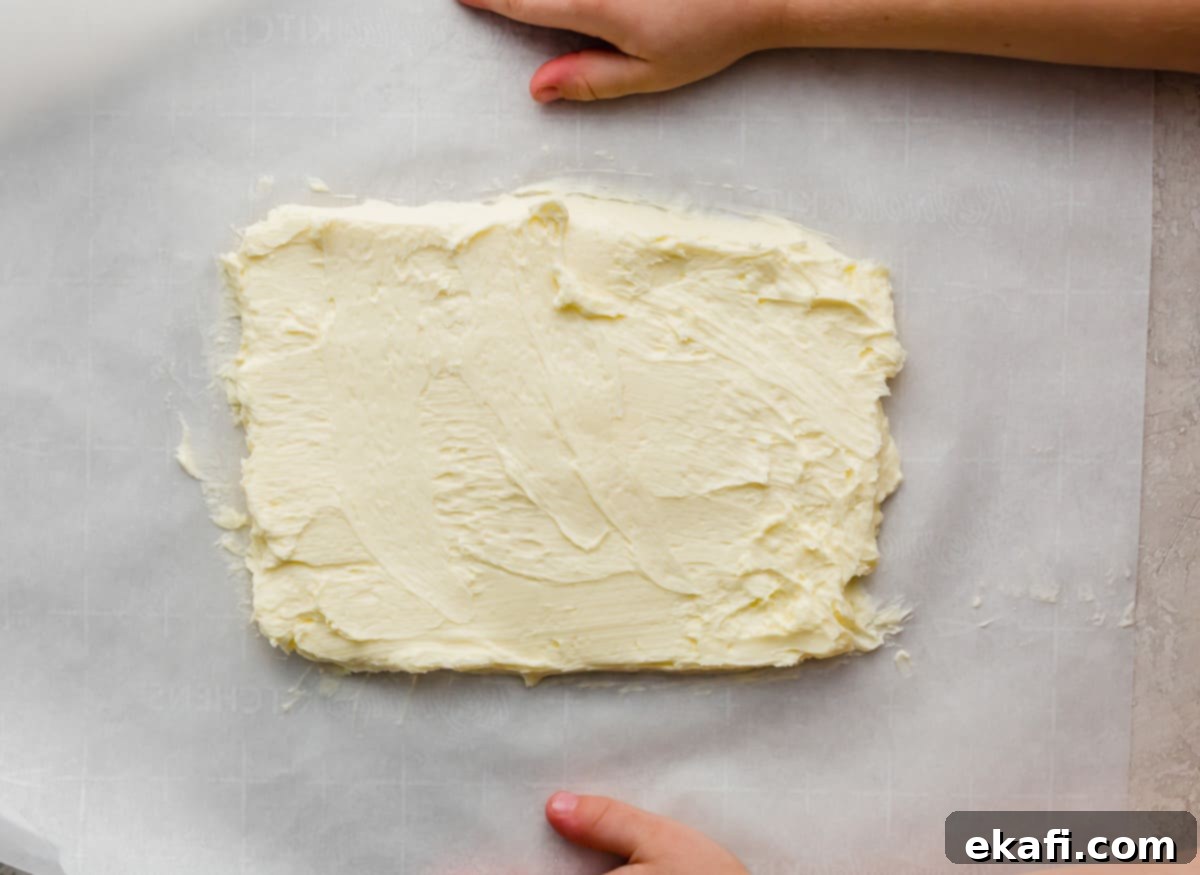
- Shape the Butter into a Rectangle: Lay a piece of parchment paper on your work surface. Scoop the softened butter onto the center of the parchment. Using a spatula or your hands, carefully shape the butter into a precise 5×8-inch rectangle. Fold the sides of the parchment paper over the butter to fully enclose it, creating a neat package. This ensures the butter stays in shape. Refrigerate this butter package for about 20 minutes to chill and firm up. It needs to be cold enough to prevent it from oozing out of the dough but still flexible enough to spread evenly.
Part 3: Mastering the Brioche Bread Lamination Process
Lamination is where the magic happens, creating those countless flaky layers. This process requires a bit of precision and patience, but the results are incredibly rewarding.
- Shape the Dough to Enclose Butter: Remove your chilled brioche dough from the refrigerator. On a lightly floured work surface, roll the dough out evenly into a large 7×18-inch rectangle. Unwrap your chilled butter rectangle and carefully place it on the bottom half of the rolled-out dough, leaving a 1-inch border on three of its four sides (the two long sides and the bottom short side). This border is important for sealing the butter within the dough.
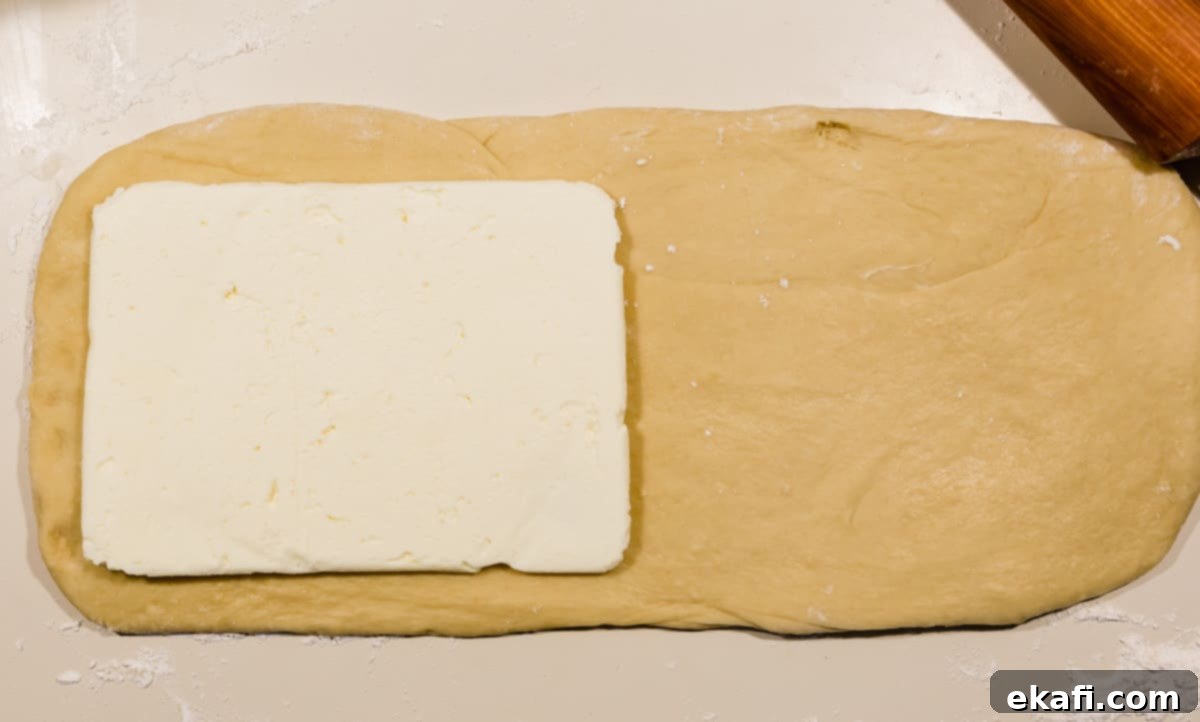
- Enclose and Seal the Butter: Carefully fold the top half of the dough down over the butter, completely covering it. Gently pinch the edges of the dough together on all three sides (the two long sides and the top short side where the dough meets) to create a tight seal, ensuring no butter escapes during rolling. Then, gently tuck any overhanging dough edges underneath to form a neat, secure package. This completely encloses the butter within the dough.
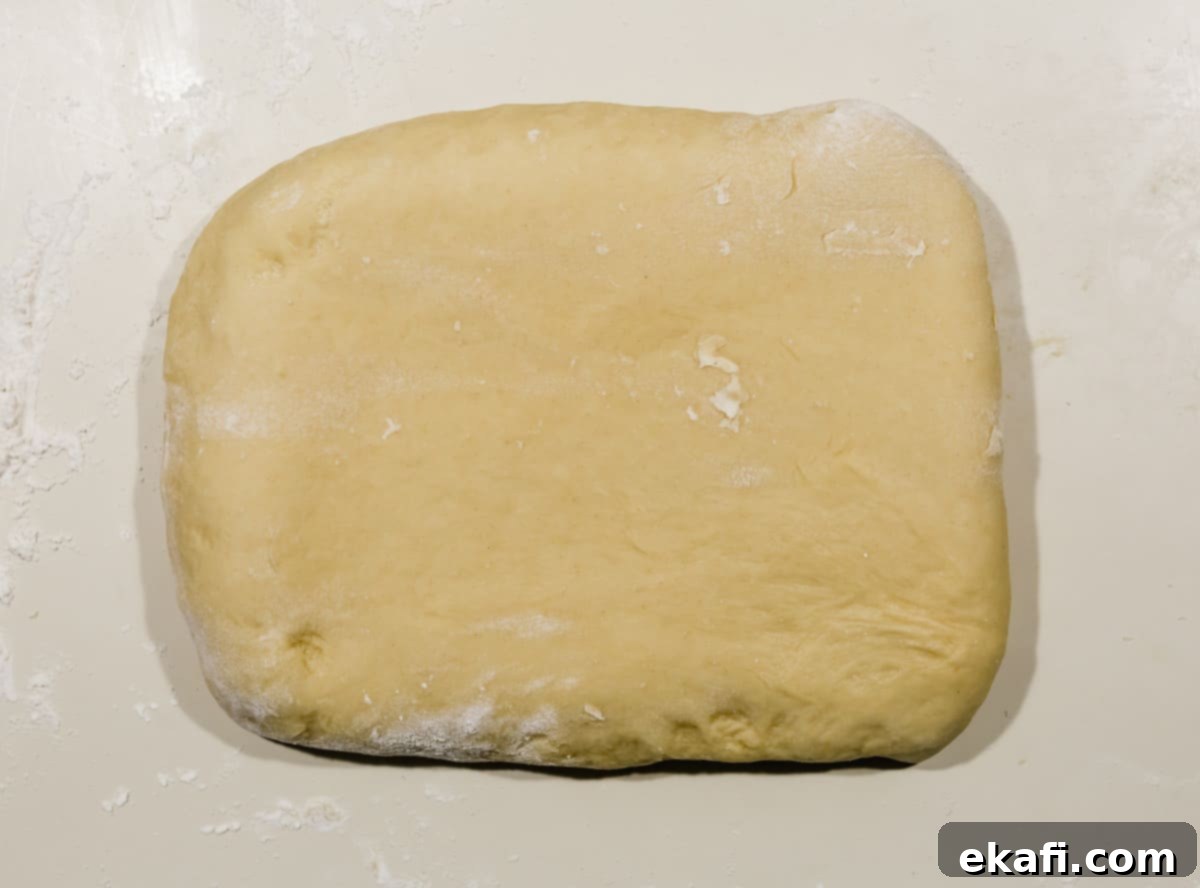
- First Turn: Roll and Fold (Business Letter Fold): Gently roll the sealed dough package into another 7×18-inch rectangle, working carefully to maintain an even thickness and avoid tearing the dough or pushing butter through. Once rolled, perform your first “turn” by folding the top third of the dough down towards the center.
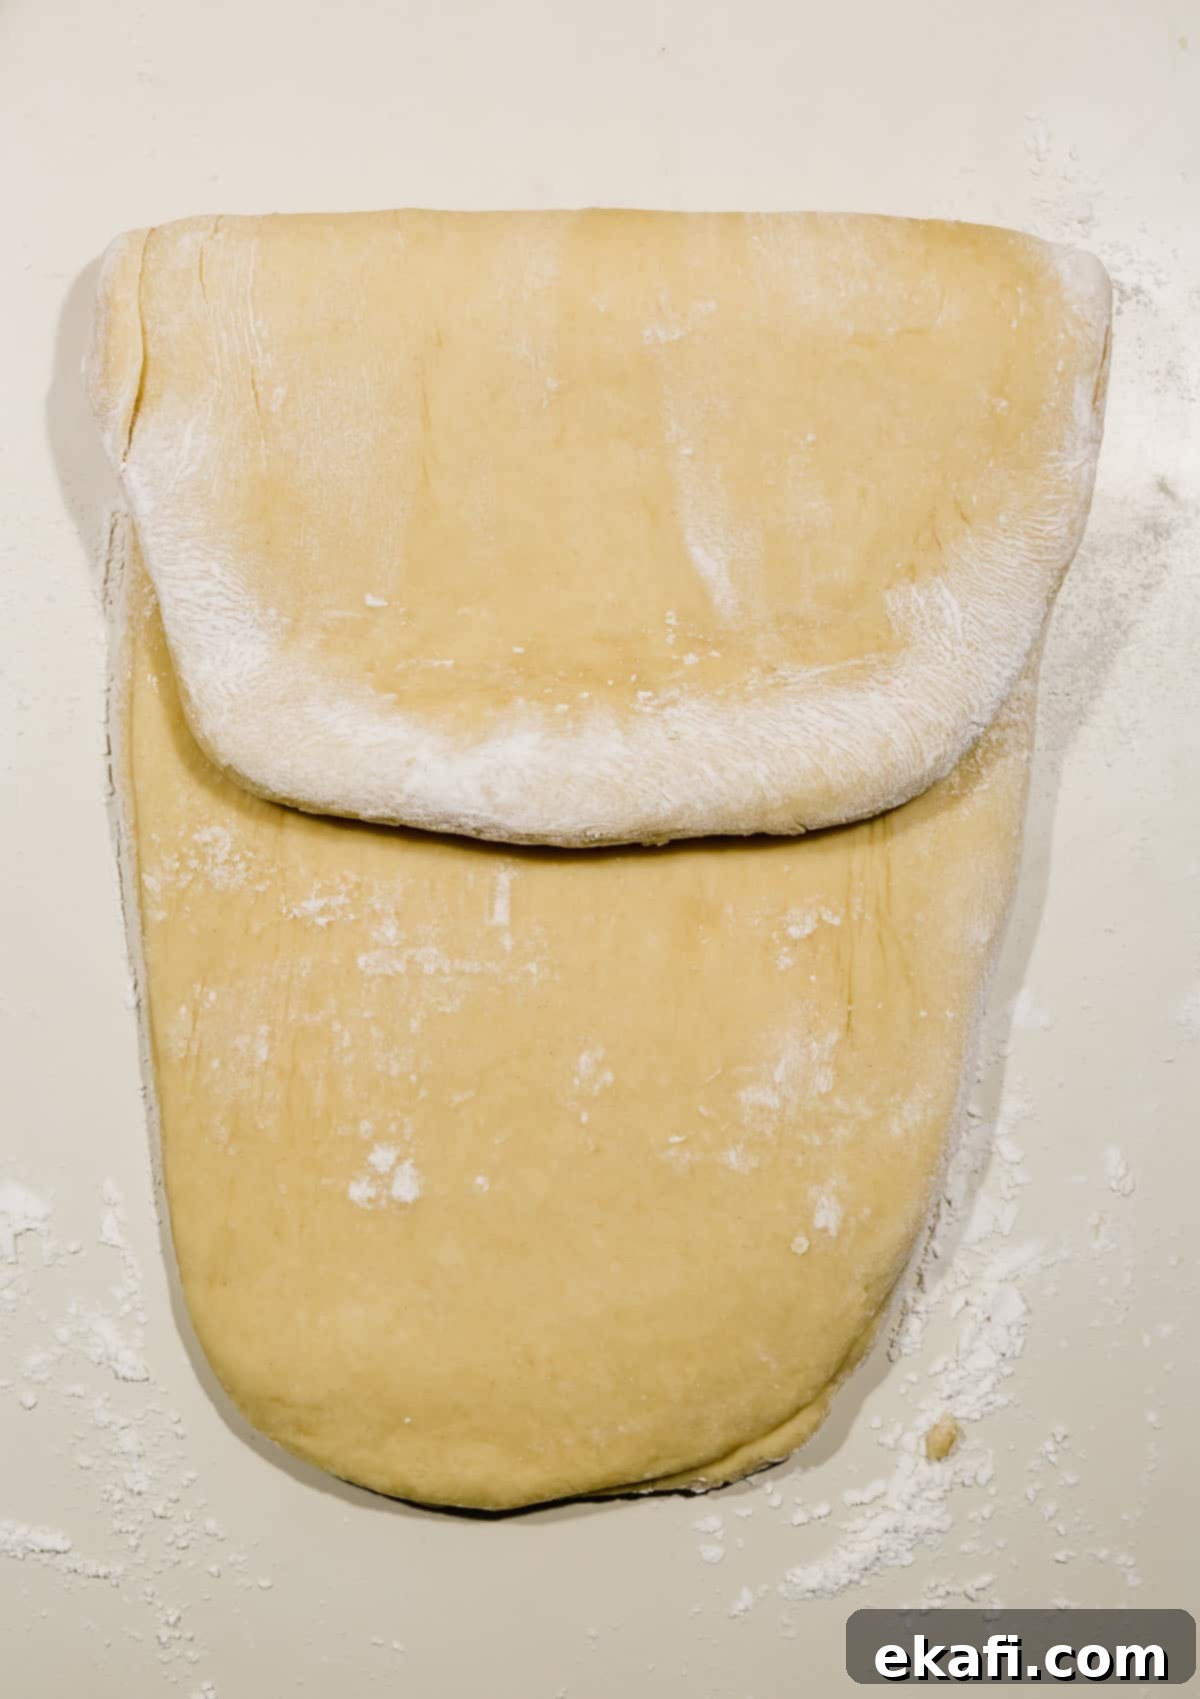
- Complete the First Turn: Then, fold the bottom third of the dough up on top of the previously folded section. This is known as a “business letter fold.” Congratulations, you have completed 1 turn! Each turn effectively doubles the number of butter and dough layers, contributing to the ultimate flakiness.
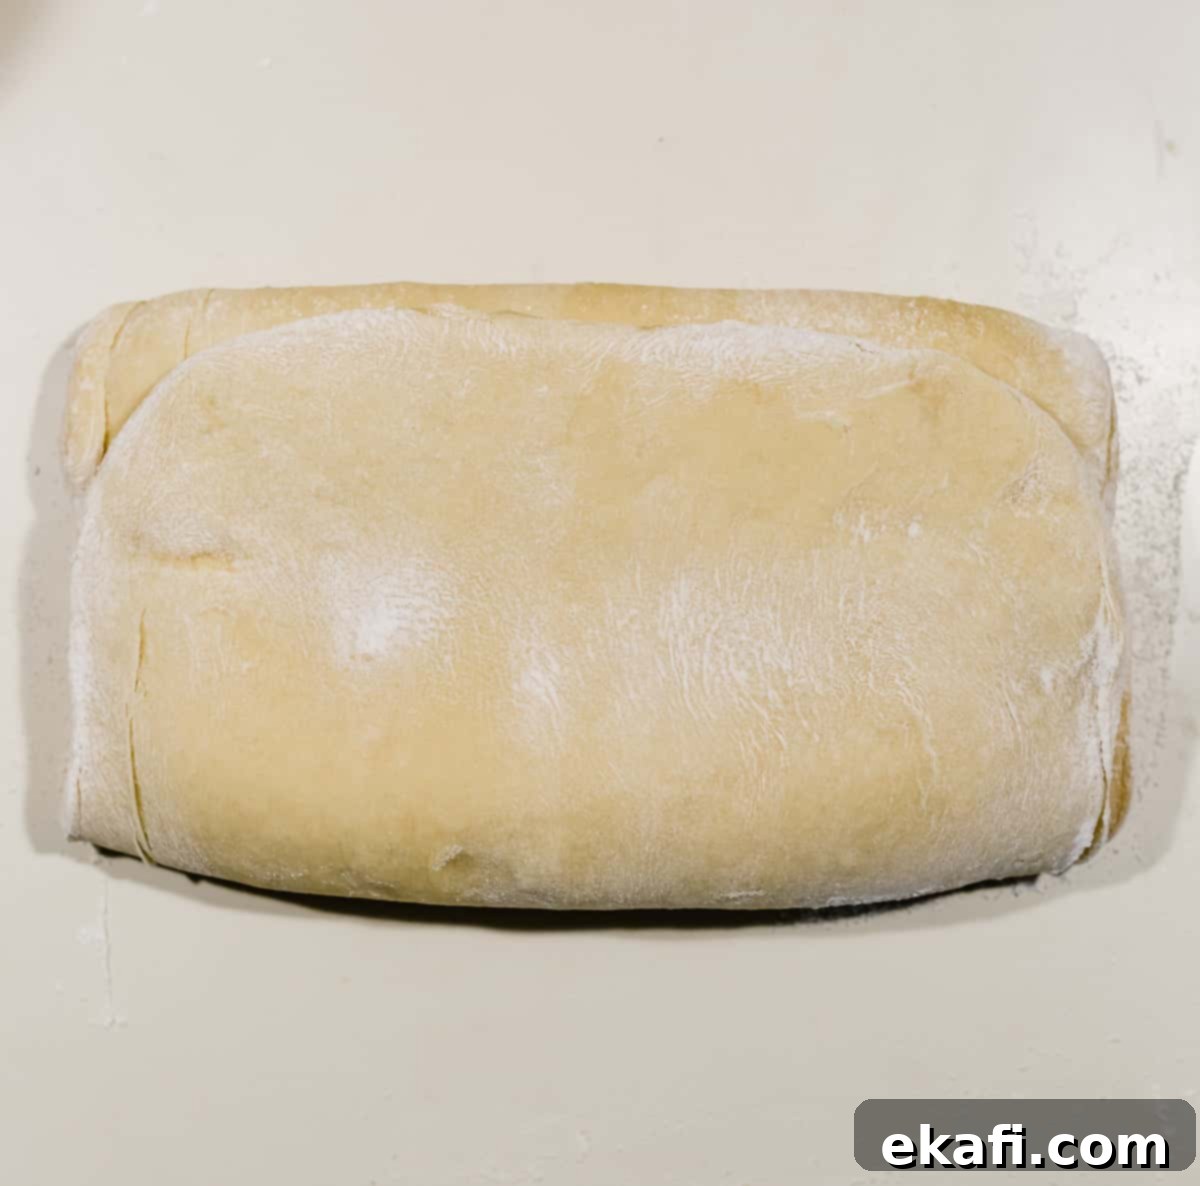
- Second Turn: Rotate and Roll: Gently rotate the folded dough package 90 degrees. This ensures that the layers are developed evenly. Lightly flour your work surface again, if necessary, and roll the dough out once more into a 7×18-inch rectangle. Always handle the dough gently to avoid disrupting the butter layers.
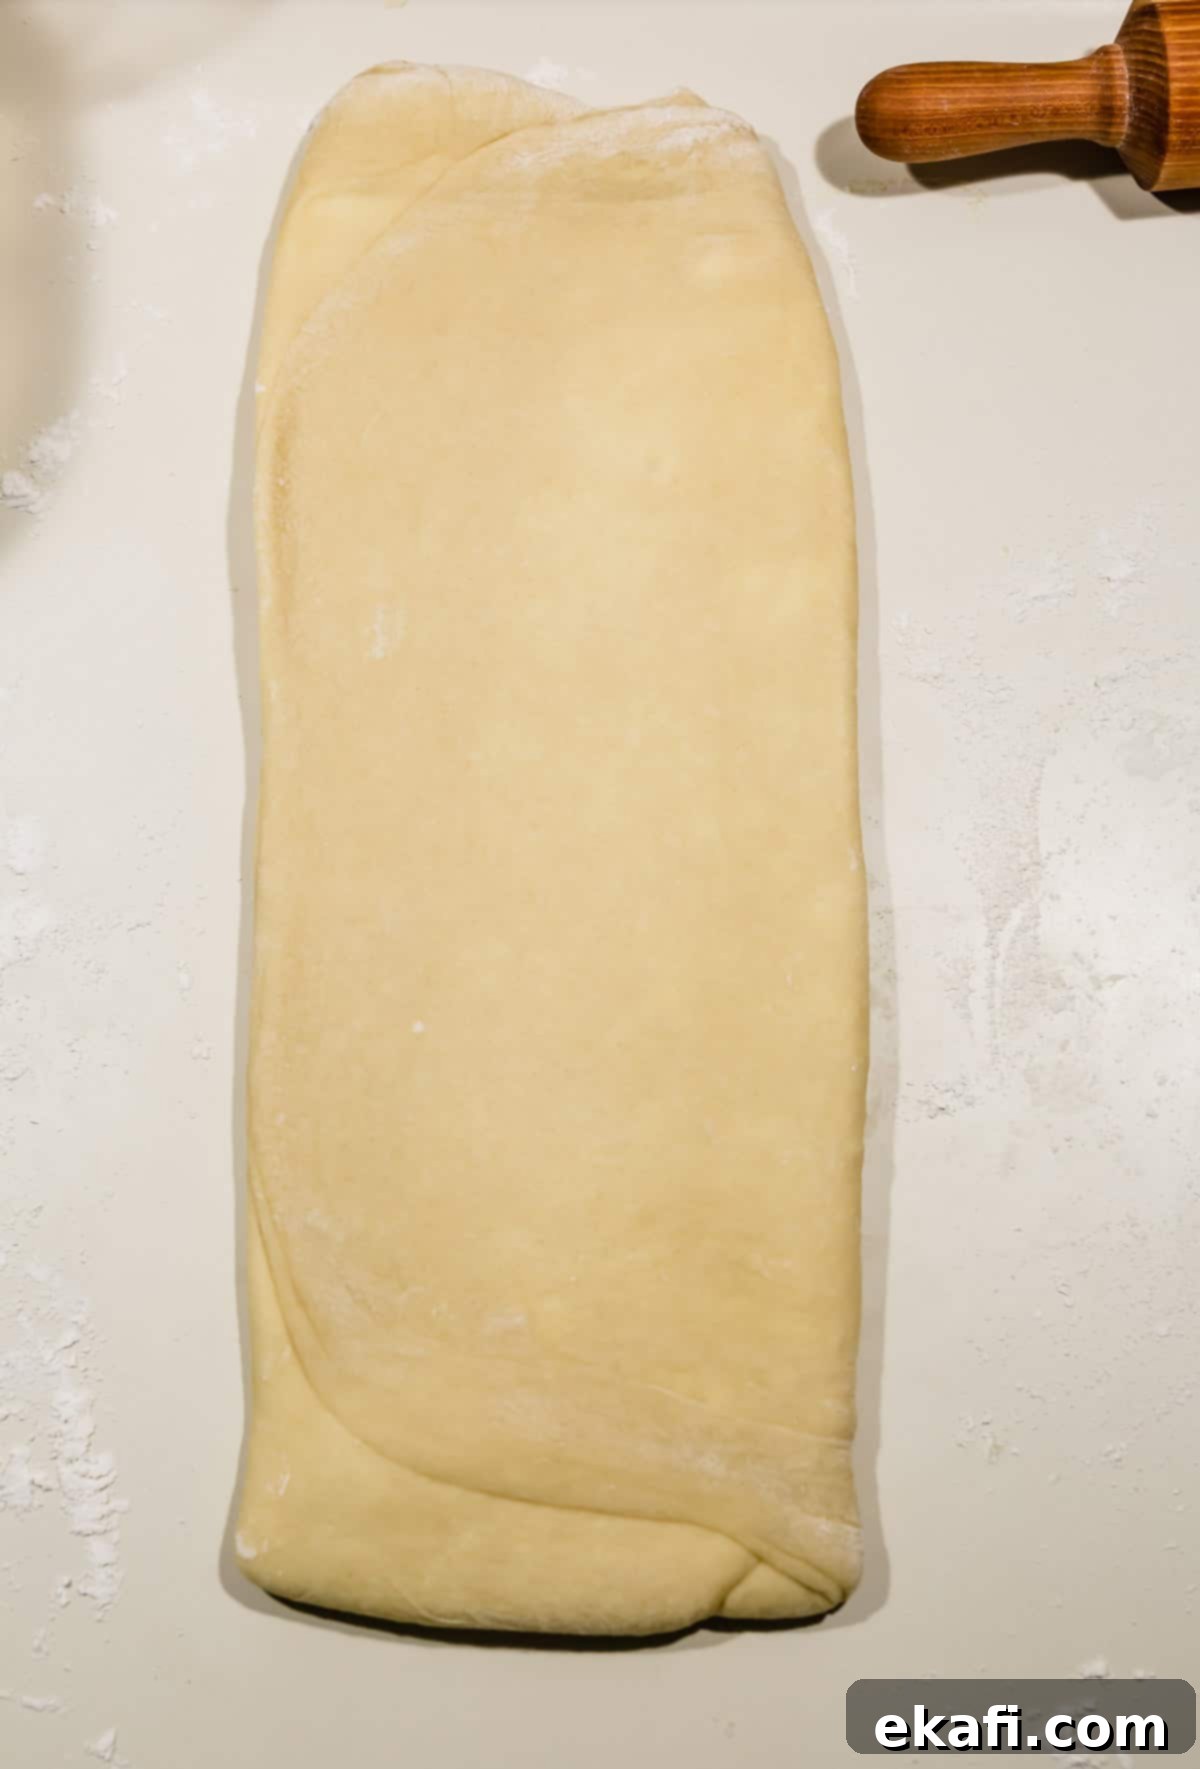
- Fold Down for Second Turn: Similar to before, fold the top third of the now-rotated and rolled dough down towards the center. This builds upon the layers created in the previous turn.
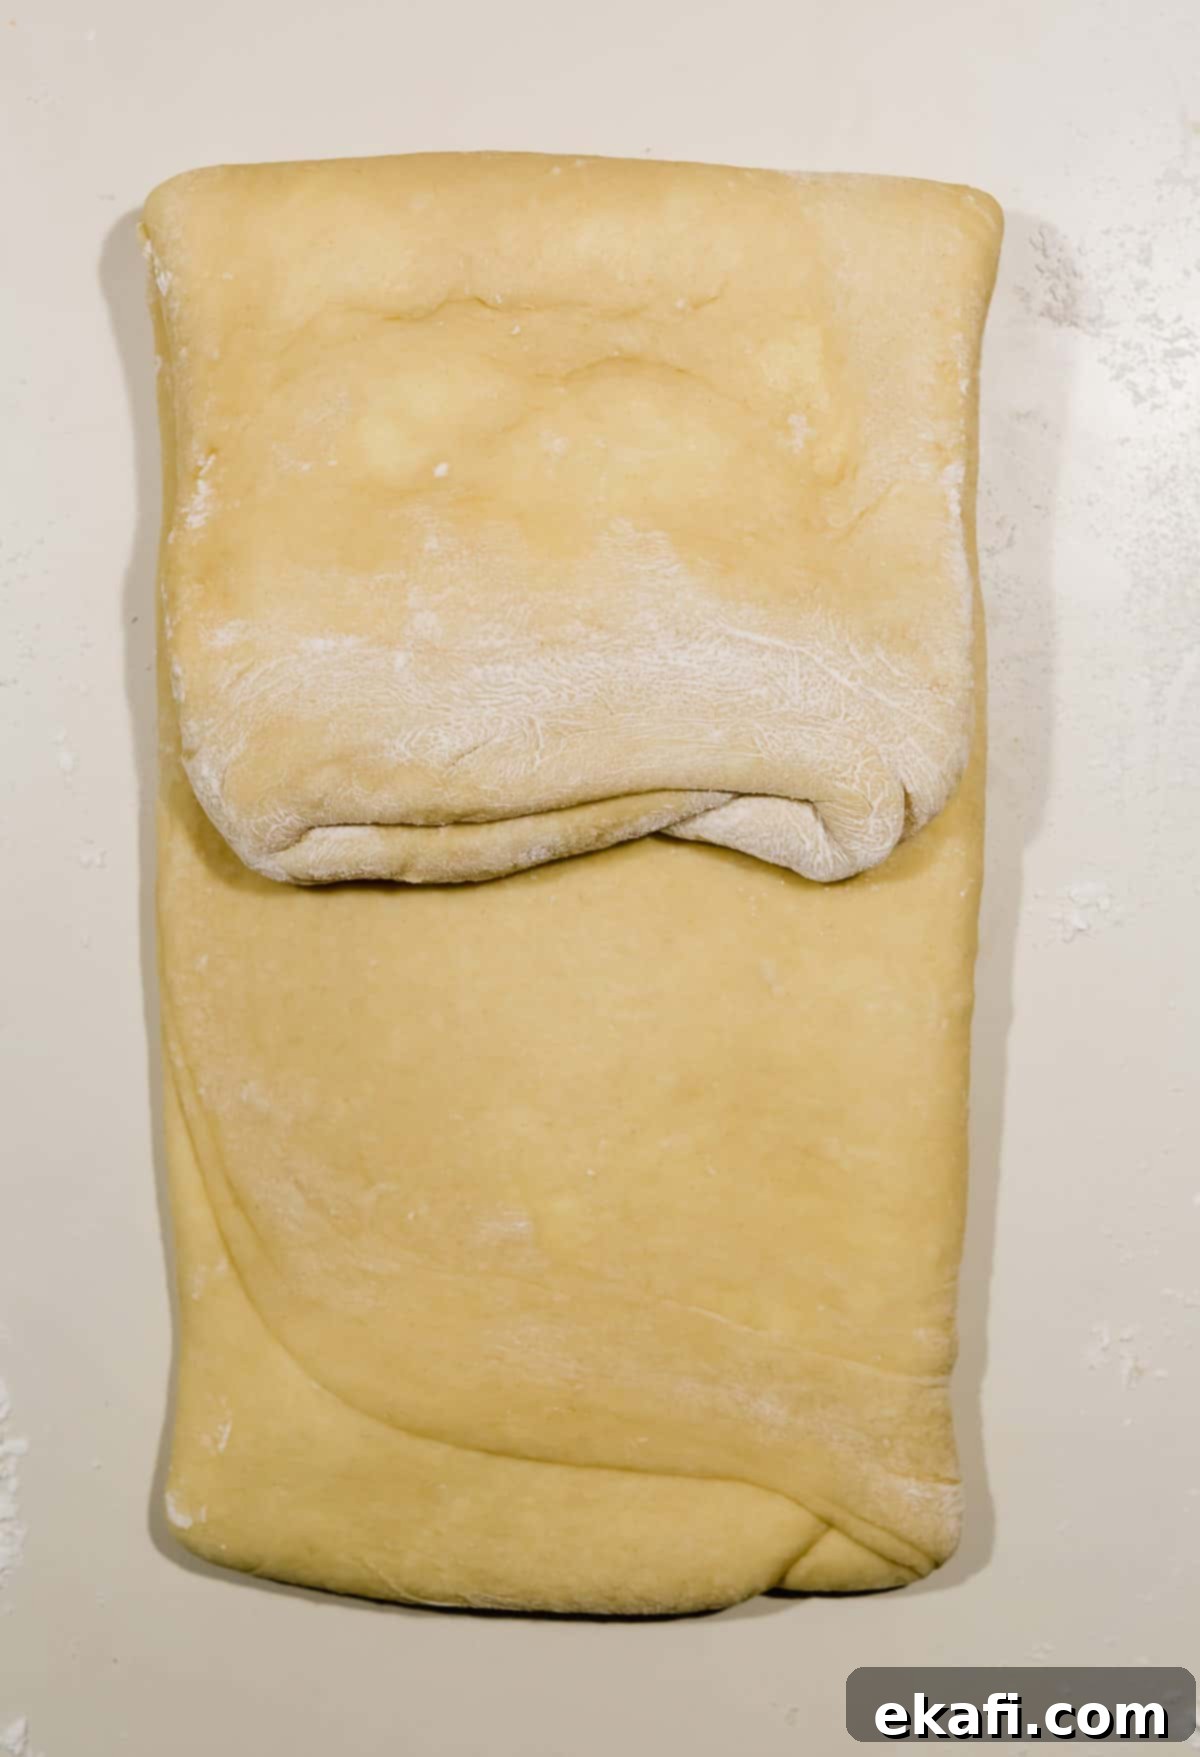
- Complete the Second Turn: Then, bring the bottom third of the dough up on top of the folded section, completing your second business letter fold. This significantly increases the number of butter and dough layers, giving your brioche its signature flakiness.
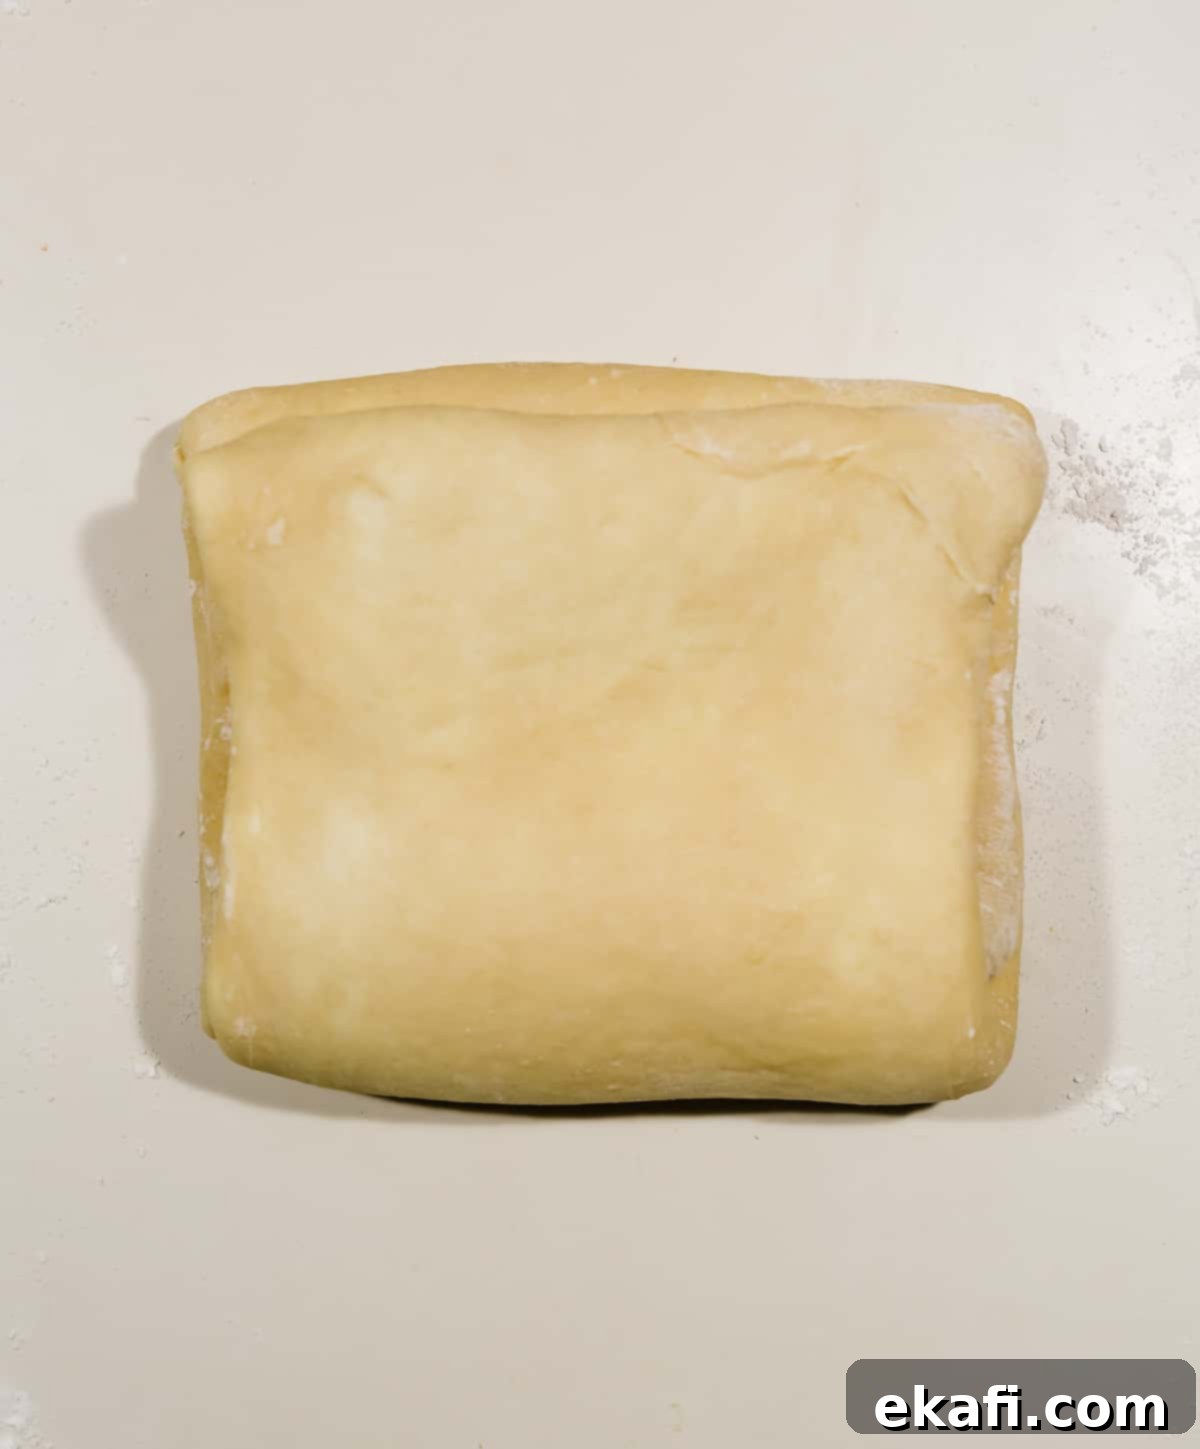
- Wrap and Chill: Wrap the folded dough package tightly in plastic wrap. Refrigerate it for 20-25 minutes, or for a quicker chill, place it in the freezer for 12-15 minutes. Chilling is essential between turns to relax the gluten in the dough and firm up the butter, preventing it from melting or tearing through the layers during the next roll.
- Third Turn: Roll and Fold Again: Remove the dough from the fridge or freezer. On a lightly floured surface, roll the dough once more into a 7×18-inch rectangle. Perform another business letter fold: fold the top third of the dough down towards the center, then fold the bottom third on top.
- Fourth Turn, Final Chill: Rotate the dough package 90 degrees again. Lightly flour your surface and roll the dough into a 7×18-inch rectangle for the final time. Complete the final business letter fold: fold the top third of the dough down towards the center, then fold the bottom third on top. This completes all four turns of lamination, creating numerous buttery layers. Wrap the dough envelope securely in plastic wrap and refrigerate for at least 1 hour, or preferably overnight. This final chill is crucial for the gluten to fully relax and the butter to set, making the dough perfectly manageable for shaping and baking.
Part 4: Shaping and Baking Your Flaky Brioche Bread
After the meticulous lamination process, it’s time to shape your dough and transform it into beautiful golden loaves.
- Prepare the Loaf Pans: When you’re ready to bake, generously brush the interior of two standard 9×5-inch loaf pans with softened butter. This ensures easy release and contributes to a lovely golden crust.
- Shape the Dough for Baking: Remove the well-chilled dough from the refrigerator. On a lightly floured work surface, roll the dough out into a 12×18-inch rectangle. Carefully and tightly roll the dough (much like you would a cinnamon roll) into a log, ensuring it’s as compact as possible. This tight roll helps create a beautiful spiraled crumb structure when baked. Once you reach the end, pinch the seam firmly to seal the log.
- Cut and Place in Pans for Final Rise: This recipe yields two delicious loaves. Cut the dough log in half, so you have two 9-inch long logs. Place each dough log, seam side down, into your prepared loaf pans. Cover the pans loosely with plastic wrap or a clean kitchen towel and allow the dough to rise in a warm, draft-free place for 45 minutes to 1 hour, or until they have visibly doubled in size. This final rise is essential for a light and airy brioche.
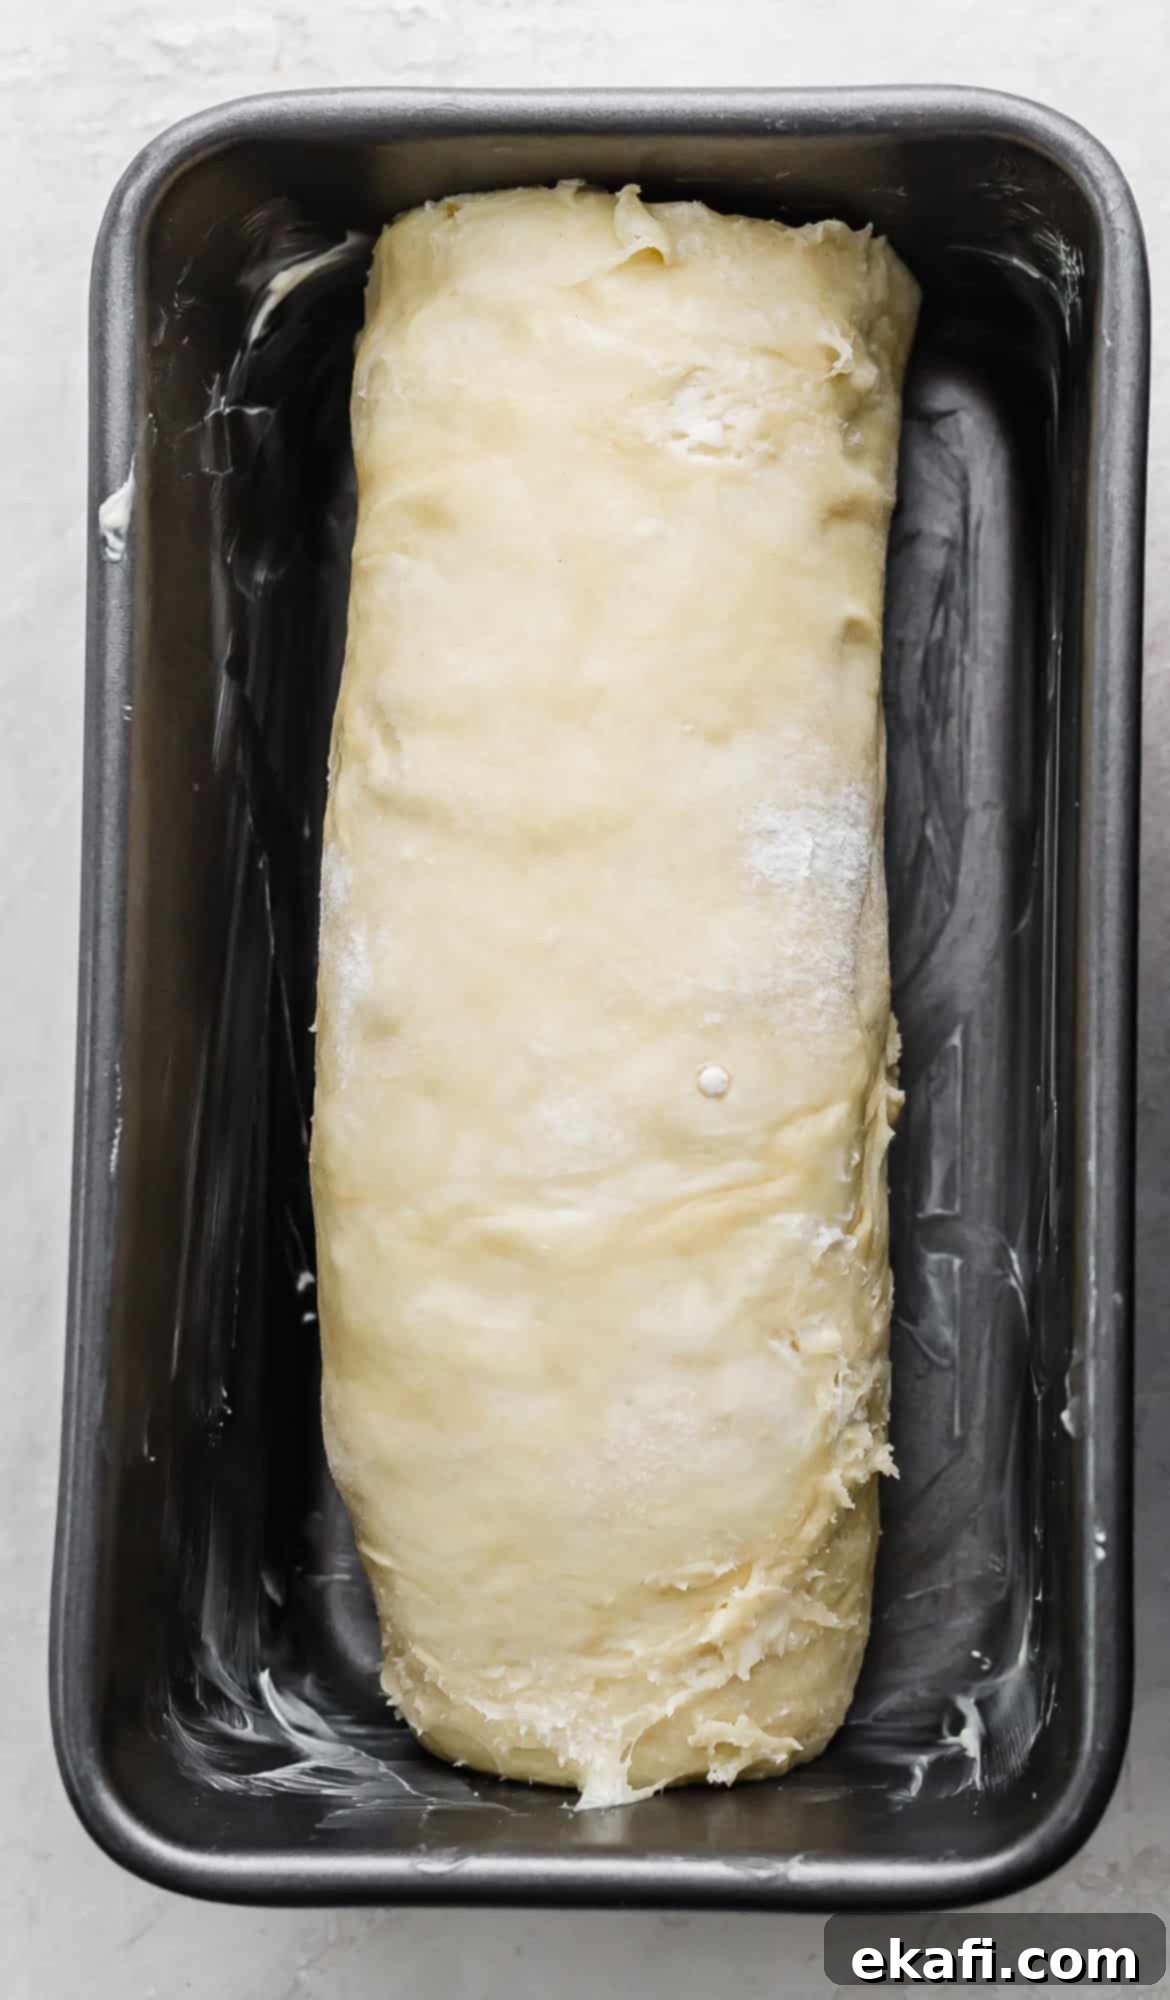
- Preheat Oven and Apply Egg Wash: Once the loaves have risen and are nearly doubled, preheat your oven to 350°F (175°C). In a small bowl, whisk one extra egg until thoroughly combined. Just before placing the loaves into the hot oven, gently brush the whisked egg evenly over the tops of each brioche loaf. This egg wash is what gives brioche its signature rich, deep golden-brown and glossy crust.
- Bake and Cool: Carefully place the pans into the preheated oven. Bake for 35-37 minutes, or until the loaves achieve a beautiful golden-brown color and sound hollow when tapped on the bottom. An internal temperature of 190-200°F (88-93°C) also indicates doneness. Remove the loaves from the oven and let them cool in their pans for 5-10 minutes. This allows them to set slightly before you invert them onto a wire rack to continue cooling completely. Serve your exquisite flaky brioche warm for the ultimate experience, or enjoy it cooled.
Expert Recipe Tips for Flawless Flaky Brioche
Achieving bakery-quality flaky brioche at home is absolutely possible with a few key insights and techniques. Here are some expert tips to guide you:
- Yeast Versatility: This recipe accommodates both active dry and instant yeast, as they are largely interchangeable in this context. While active dry yeast traditionally requires proofing, and instant yeast can be mixed directly with dry ingredients, I still recommend proofing instant yeast in warm milk for 10 minutes. It’s a reliable habit that confirms your yeast is active and provides a small head start to the fermentation process, ensuring a good rise.
- Initial Dough Appearance is Normal: When you first add the eggs to the flour, salt, and sugar mixture, the dough will often appear quite dry and crumbly. Don’t be alarmed or tempted to add more liquid prematurely. Continue mixing as directed; with proper kneading time, the gluten will develop, and the dough will gradually transform into a smooth, cohesive, and elastic mass. Trust the process!
- Visual Cues for Lamination: The lamination process is the heart of flaky brioche. Refer frequently to the step-by-step photos provided within this guide. These visuals are designed to show you exactly what the dough and butter should look like at each stage, from enclosing the butter to completing each fold. Understanding these visual cues will significantly boost your confidence and accuracy, making the process of creating beautiful layers much less intimidating and genuinely enjoyable. Witnessing the transformation from a simple dough to a magnificently layered pastry is one of the most exciting parts of homemade brioche!
- Flour Measurement Precision: Accurate flour measurement is critical. Too much flour can result in a dry, tough brioche, while too little can make the dough too sticky to handle, especially during lamination. Ideally, weigh your flour using a kitchen scale for the most precise results. If measuring by volume, spoon the flour into your measuring cup and then level it off, rather than scooping directly from the bag, which can compact the flour.
- Temperature Control is Key: Throughout the lamination process, maintaining a cool temperature for both the dough and the butter is paramount. If the butter gets too warm, it will melt into the dough instead of creating distinct layers. If your kitchen is warm, work quickly or chill the dough more frequently for shorter periods (e.g., 10-15 minutes in the freezer). This helps the butter stay firm and prevents it from tearing through the dough.
- Understand Nutritional Information: Please note that the nutritional information provided is typically based on one serving, and this recipe yields two loaves. If you need the nutritional breakdown per slice, you will need to perform some additional calculations based on how many slices you get from each loaf.
Make Ahead, Storing, and Freezing Your Brioche
Brioche is a wonderful pastry that can be enjoyed fresh or stored for later. Here’s how to manage it:
- Storing Baked Loaves: To maintain its delicious softness and freshness, store your baked brioche loaves in an airtight container or a heavy-duty Ziplock bag at room temperature for 3-4 days. If you need to keep it longer, transfer it to the refrigerator, where it will stay fresh for up to 7 days. Ensure it’s well-sealed to prevent it from drying out.
- Freezing Baked Loaves: For longer storage, brioche freezes exceptionally well. Allow the baked loaves to cool completely to room temperature. Then, wrap each loaf tightly in plastic wrap, followed by a layer of aluminum foil, and place them in a freezer-safe Ziplock bag. This double-wrapping protects against freezer burn. The loaves can be stored in the freezer for 1-2 months. To enjoy, simply remove from the freezer and let thaw overnight in the refrigerator, or on the counter for a few hours. You can gently rewarm slices in the oven or toaster for a “freshly baked” feel.
- Freezing Brioche Dough: While I typically prefer to bake brioche immediately to savor its fresh goodness, freezing the dough is certainly an option. Based on research and best practices for enriched doughs, you can freeze the brioche dough after its first rise (the one after the butter is incorporated and before lamination). Wrap the dough very tightly in plastic wrap, then place it in an airtight freezer-safe container or a Ziplock bag, removing as much air as possible. It should keep well in the freezer for up to 2 weeks. To use, transfer the frozen dough to the refrigerator and let it thaw overnight. Once thawed, remove it from the fridge, unwrap, and proceed with the lamination process as directed in the instructions, then allow it to rise again before baking. While I haven’t personally tested this recipe with frozen dough, the principles generally apply to brioche.
Frequently Asked Questions About Flaky Brioche
Brioche is a classic French bread, often described as a pastry-like bread, distinguished by its high content of butter and eggs. This generous use of fat makes it incredibly rich, tender, and gives it a distinctive soft, airy crumb. It typically has a slightly sweet flavor profile and bakes up with a beautiful, deep golden-brown crust, making it a luxurious treat for breakfast, brunch, or any time of day.
While I haven’t personally tried freezing this specific brioche dough recipe, it is generally possible to freeze brioche dough. The most common recommendation is to freeze it after the first rise (after the butter is fully incorporated into the dough but before the lamination process begins). Ensure the dough is tightly wrapped in plastic wrap, then placed in a freezer-safe bag or container to prevent freezer burn. When you’re ready to use it, thaw the dough overnight in the refrigerator, then let it come to room temperature and proceed with the lamination and subsequent rising and baking steps as outlined in the recipe.
Absolutely! To make a delicious cinnamon brioche, follow the lamination process as instructed. During one of the rolling steps (typically after the first or second turn, when the butter is already encased), sprinkle a generous amount of cinnamon-sugar mixture evenly over the rolled-out dough before you perform the next fold. This will create beautiful, fragrant cinnamon swirls within your flaky brioche layers. Adjust the amount of cinnamon and sugar to your preference.
I haven’t tested this specific brioche recipe using a sourdough starter as a direct substitute for commercial yeast. Sourdough requires different hydration levels and proofing times, and the high fat content of brioche can also impact sourdough fermentation. Therefore, I cannot definitively say if it would work without significant modifications to the recipe. If you decide to experiment with a sourdough starter, please reach out and let me know your results and any adjustments you made – I’d be very interested to hear about your experience!
Given the specific and meticulous lamination process involved in this recipe to achieve the flaky layers, simply cutting the finished brioche loaf dough into roll-sized pieces might not yield the desired flaky rolls. For true flaky brioche rolls, you would typically need to adapt the lamination process to suit individual roll shapes, or at least cut and shape the dough after the lamination but before the final rise in a way that preserves the integrity of the layers in each roll. If you’re looking for a brioche roll, it might be better to find a recipe specifically designed for rolls, or be prepared for some experimentation with this recipe’s shaping.
Due to the brioche dough’s initial stickiness and the extensive mixing and kneading required, I highly recommend using a stand mixer with a dough hook attachment. Hand beaters or hand mixers typically have less powerful motors and are not designed to handle the dense, sticky nature of enriched doughs like brioche, especially during the long kneading phases. Stand mixers, or specialized bread mixers like a Bosch, are equipped with robust motors that can manage the resistance of the dough without overheating or stalling, making the process much easier and ensuring proper gluten development.
Bread lamination, as used in this brioche recipe, is a traditional baking technique where a block of cold butter is repeatedly folded and rolled into a dough. This creates numerous alternating layers of dough and butter. When the laminated dough is baked, the butter melts and creates steam, which then separates the dough layers, resulting in a remarkably airy, light, and exceptionally flaky texture. It’s the secret behind the iconic flakiness of croissants, puff pastry, and of course, our delicious flaky brioche.
More Delicious Bread & Pastry Recipes You’ll Love
If you enjoyed making this flaky brioche, you might love exploring these other delightful baking projects from our kitchen:
- Irresistible Homemade Cinnamon Rolls
- Soft & Chewy Homemade Pretzels
- Easy and Flavorful Naan Bread Recipe
- The Ultimate Monkey Bread Recipe
Did you make this flaky brioche recipe? We’d absolutely love to hear about your experience! Click here to leave a rating and a review directly on the blog post, or simply scroll down to the recipe card and share your thoughts there.
Stay connected and get inspired by following us on Instagram, Facebook, and Pinterest for more delicious recipes and baking tips!

Print
SaveSaved!
Review
Flaky Brioche Recipe
Ingredients
- 2/3 cup warm milk
- 2 1/4 teaspoon yeast – active or instant
- 1/3 cup granulated sugar
- 4 eggs
- 3 3/4 – 4 cups all purpose flour
- 1 teaspoon kosher salt
- 6 tablespoons unsalted butter – at room temperature
- 1 cup unsalted butter – slightly chilled
- 1 egg – for the egg wash
Equipment
-
9×5 bread pan
-
Kitchen Aid stand mixer
Instructions
Make the Dough
-
In the bowl of a stand mixer combine the yeast and warm milk. Let sit for 10 minutes until yeast is foamy and activated. Add in the flour, salt, and sugar. With the dough hook, stir to combine. Add in 4 eggs*, and mix until dough is smooth about 6 minutes.
-
Add the room temperature butter, 1 tablespoon at a time, mixing well after each addition. Continue mixing for 3 minutes, or until the dough is smooth and shiny. If your dough is still really sticky add 1 T of flour at a time. The dough should pull away from the sides of the mixing bowl, and the very bottom of the dough will still be stuck to the bottom of the bowl.
-
Turn the dough out onto a lightly floured work surface. Knead the dough into a ball. Wrap it in plastic wrap and refrigerate the dough for 1 hour.
Prepare the butter and layering
-
In the bowl of your stand mixer fitted with the paddle attachment, beat the cold butter until it’s broken up but smooth, about 1-2 minutes.
-
Place a piece of parchment paper on a work surface. Scoop the butter onto the parchment and shape the butter into a 5×8 inch rectangle. Refrigerate until the butter is chilled about 20 minutes.
-
On a lightly floured work surface roll the dough out to a 7×18 inch rectangle. Place the chilled butter on the bottom half of the dough leaving a 1 inch border on 3 of the 4 sides. Fold the top half of the dough over the butter to cover, then pinch the edges to seal. Tuck the overhanging dough edges under to form a neat looking tucked package.
-
Roll the dough into a 7 x 18 inch rectangle. Fold the top third of the dough down towards the center, then fold the bottom third on top, like a business letter. This completes 1 turn.
-
Rotate the dough package 90 degrees. Roll the dough into a 7 x 18 inch rectangle. Rold the top third of dough down towards the center, then fold the bottom third on top, like a business letter. Wrap the dough envelope in plastic wrap and refrigerate for 25 minutes or freeze for 12-15 minutes.
-
Remove from fridge or freezer. Roll the dough into a 7 x 18 inch rectangle. Fold the top third of the dough down towards the center, then fold the bottom third on top, like a business letter.
-
Rotate the dough package 90 degrees. Roll the dough into a 7 x 18 inch rectangle. fold the top third of dough down towards the center, then fold the bottom third on top, like a business letter. Wrap the dough envelope in plastic wrap and freeze for 12-15 minutes or refrigerate for at least 1 hour or up to overnight.
Bake the Brioche
-
When ready to bake, brush two standard 9×5 inch loaf pans with butter.
-
Remove the chilled dough and roll the dough into a 12 x 18 inch rectangle. Roll the dough into a log, trying to keep it tight as you go. When you reach the edge, pinch the edges to seal.
-
Cut the dough log in half (so that you have 2, 9 inch logs in length) and place seam side down in prepared pans. Cover and let rise for 45 minutes to 1 hour.
-
When ready to bake, preheat oven to 350°F. Whisk 1 egg in a small bowl. Brush the egg over the tops of the bread loaves.
-
Bake until loaves are lightly golden, about 35-37 minutes. Let the loaves cool in the pans for 5 minutes and then turn them out onto a wire rack to continue cooling.
-
Serve warm or cold.
Notes
Store the loaves in an airtight container or Ziplock bag (to stay soft) at room temperature for 3-4 days or in the fridge for up to 7 days.
To freeze the baked loaves, let them cool completely then wrap the loaves in plastic wrap and store in a Ziplock bag. The loaves should keep in the freezer for 1-2 months. Remove from the freezer and let thaw overnight in the fridge.
Recipe adapted from Martha Stewart
Nutritional information is based on 1 serving; you’ll notice there are 2 loaves in the “servings” area. If you want to know the nutritional info per slice, you’ll have to do some math.
Nutrition
This recipe was originally published on December 19, 2019. It was comprehensively updated and republished on February 22, 2022, to include additional detailed information, enhanced step-by-step instructions, and new photos for an even better baking experience.
